

Academic Authors: Jatinder Kaur, Ayushi Jain, Anuj Gupta, Simran Singh
Creative Directors: Bhavna Tripathi, Mangal Singh Rana, Satish
Book Production: Rakesh Kumar Singh, Sakshi Gupta
Project Lead: Jatinder Kaur
VP, Learning: Abhishek Bhatnagar
All products and brand names used in this book are trademarks, registered trademarks or trade names of their respective owners.
© Uolo EdTech Private Limited
First published 2025
This book is sold subject to the condition that it shall not by way of trade or otherwise, be lent, resold, hired out, or otherwise circulated without the publisher’s prior written consent in any form of binding or cover other than that in which it is published and without a similar condition including this condition being imposed on the subsequent purchaser and without limiting the rights under copyright reserved above, no part of this publication may be reproduced, stored in or introduced into a retrieval system, or transmitted in any form or by any means, electronic, mechanical, photocopying, recording or otherwise, without the prior written permission of both the copyright owner and the above-mentioned publisher of this book.
Book Title: Hexa Computer Science 3
ISBN: 978-81-979297-6-2
Published by Uolo EdTech Private Limited
Corporate Office Address:
85, Sector 44, Gurugram, Haryana 122003
CIN: U74999DL2017PTC322986
Illustrations and images: www.shutterstock.com, www.stock.adobe.com and www.freepik.com
All suggested use of the internet should be under adult supervision.
In today’s rapidly evolving digital landscape, computer science has become an essential field of study, shaping the world around us in countless ways. From the smartphones in our pockets to the vast networks that connect people across the globe, computer science drives innovation and progress in nearly every aspect of modern life. In today’s fast-paced digital world, understanding the basics of computer science is as important as learning to read, write, or solve maths problems.
Recognising this imperative, the National Education Policy (NEP) 2020 has strongly recommended the integration of coding skills, computational thinking, critical analysis, and problem-solving abilities into the curriculum.
Inspired by these insights, Uolo has introduced a comprehensive program, Hexa, for grades 1 to 8, to empower young minds with the knowledge and skills they need to thrive in the digital age. From the basics of how computers function to the tools that shape our digital landscape, this series opens the door to a world of endless possibilities. This series will build a strong foundation, helping shape the next generation of digital citizens and innovators. It aims to demystify the world of computer science, making it accessible and engaging for young learners, while preparing them for future academic and professional pursuits in the field.
We believe that learning computer science should be an engaging and accessible experience for all children. This series takes a project-based approach, allowing students to learn by way of concurrently applying acquired knowledge and skills. As they progress through the course, they will build strong foundations in computational thinking, coding basics, and digital literacy. Our program focuses on three key areas:
1. Computer Science Fundamentals: Core concepts are introduced step by step, ensuring a solid grasp of how computers function, and how information is processed and stored.
2. Latest Computer Tools: Various computer tools relevant to today’s world are included, equipping students with the confidence to thrive in the digital age.
3. Introduction to Coding: The series offers an introductory look into coding, preparing students for more advanced learning in the future.
To broaden the learning process, we have included informational annexures on Artificial Intelligence (AI) and its related fields, offering students an early insight into the groundbreaking technologies that are shaping our world. These sections aim to inspire curiosity and encourage a deeper exploration of computer science.
Our mission is to make computer science approachable and exciting for young learners. By providing early exposure, we aim not only to teach about computers but also to cultivate skills that will benefit students in their future endeavours.
We invite you to embark on this exciting journey with us through the world of computer science. Let us empower the next generation with the skills and the knowledge they need to thrive in a digital world.
The National Education Policy (NEP) 2020 outlines essential skills, values, dispositions, and learning approaches necessary for students to thrive in the 21st century. This textbook identifies and incorporates these elements throughout its content, activities, and exercises. Referred to as “NEP Tags”, they are defined as follows:

INTEGRATED


CRITICAL THINKING

Art Integration
Bringing creativity and fun into learning by combining music, drama, and art with other subjects
Sports Integration
Using games and sports in daily life to enrich computer-related activities
Holistic & Integrated Learning
Cross-curricular linkages to make the learning experience more holistic, joyful and meaningful
Critical Thinking
Coding opportunities to apply higher-order skills like algorithmic and computational thinking, and problem-solving

SDG
Hands-on Activity
Step-by-step activities to enable learners put theoretical knowledge into practice
Sustainable Development Goals
Applied computer science activities related to real-world issues and sustainable development

SEL Social Emotional Learning
Developing the skills to understand and manage emotions, build positive relationships with others and make responsible choices

An Internet Service Provider, or ISP, is a company that provides you access to the internet, often for a fees. Some examples of ISPs are BSNL, Airtel, Jio, and Excitel.
To draw a circle, press and hold down Did You Know?


Communication media helps us connect to the internet. Let us see some of their types.
DSL stands for Digital Subscriber Line. It is a type of communication media that uses your telephone line to transmit data.
Project-based Learning: A project-based learning approach employed to foster an engaging and interactive learning experience


Cable is a type of communication media that uses the existing cable television wires to connect your computer to the internet.
NEP Tags: To show alignment with NEP skills and values
Fibre optic cable is a type of communication media that uses light rays to connect your computer to the internet. Fibre optic cables are much faster than copper or cable wires. In fibre cables, the data travels in the form of light. Nothing in the universe travels faster than light. So, the internet through fibre optic cables is often the fastest type of internet connection available.

Chapter Checkup
Discuss: A multi-faceted probing question, related to the concept, that arouses curiosity

the Triangle shape.

Now think of the fan speed knob, or regulator, on the switchboard. It changes the speed at which the fan spins, instead of just switching it on or off. We can have the fan spin at the fastest speed, reduce it to a slower speed, then much slower, and finally switch it off. We can do more things with the regulator than the switch. That is how analog signal works.
Find out which type of internet connection your house or school has.
3. After selecting it, go to the main drawing area.
e I hold all the blocks for a block category.
A Fill in the blanks.
Did You Know: Interesting facts related to the topic
India has the second-largest internet user base in the world, with over 70 crore users.
3
Think and Tell
Can you think of more examples of analog and digital signals?
Hints menu bar untitled backdrop blocks create
An Internet Service Provider, or ISP, is a company that provides you access to the internet, often for a fees. Some examples of ISPs are BSNL, Airtel, Jio, and Excitel.
Do It Yourself: Short exercises between the chapter to pause and assess comprehension

1 In Scratch, we use colourful to create our own games, stories, and drawing.
2 To create a project in Scratch, you need to click
4. Hold the left mouse button, move the pointer and then release the button. You will see that a triangle has been drawn. In the same way, we can draw many shapes in Paint.
Communication media helps us connect to the internet. Let us see some of their types.
3 By default, the name of the Scratch project is .
1. DSL
Think and Tell: Analysis, reflection, and text-to-self connection based prompts for discussion in class
4 The purple bar at the top of the Scratch editor is called the
DSL stands for Digital Subscriber Line. It is a type of communication media that uses your telephone line to transmit data.
2. Cable
5 The background of the stage is called the .
F Apply your learning.
AI Annexures: To offer a basic understanding of specific domains of Artificial Intelligence
Cable is a type of communication media that uses the existing cable television wires to connect your computer to the internet.
e I hold all the blocks for a block category.
3. Fibre
A Fill in the blanks.

Hints menu bar untitled backdrop blocks create
Chapter Checkup: Chapter-end practice exercises aligned to different levels of Bloom’s Taxonomy
Artificial Intelligence, or AI, helps computers think. It can learn like people do.It learns new things all the time. AI is very smart. It will keep changing and getting
1 In Scratch, we use colourful to create our own games, stories, and drawing.
Apply Your Learning: Intellectually stimulating questions designed for higher order thinking and analysis
AI
Test Papers: Designed to evaluate understanding of core concepts and application of skills
A. Fill in the blanks.
2 To create a project in Scratch, you need to click
1 Nia is making a Scratch project where she needs to move the dog from left to right. Which block should she use?
Fibre optic cable is a type of communication media that uses light rays to connect your computer to the internet. Fibre optic cables are much faster than copper or cable wires. In fibre cables, the data travels in the form of light. Nothing in the universe travels faster than light. So, the internet through fibre optic cables is often the fastest type of internet connection available.
e I hold all the blocks for a block category. A Fill in the blanks.
3 By default, the name of the Scratch project is
4 The purple bar at the top of the Scratch editor is called the
Hints menu bar untitled backdrop blocks create
5 The background of the stage is called the F Apply your learning.
AI can help in schools with learning.
Chapter 4 • Browsing the Internet
1 In Scratch, we use colourful to create our own games, stories, and drawing.
Find out which type of internet connection your house or school has.
1 Nia is making a Scratch project where she needs to move the dog from left to right. Which block should she use? Chapter Checkup
2 To create a project in Scratch, you need to click
3 By default, the name of the Scratch project is
4 The purple bar at the top of the Scratch editor is called the

AI can play games with you.
Test Paper (Based on Chapters 1 to 4)
5 The background of the stage is called the F Apply your learning.
1 Nia is making a Scratch project where she needs to move the dog from left to right. Which block should she use?

1 In Scratch, the blocks you put together in the script area are called a
A. Fill in the blanks.

2 The is the background of the stage.
1 In Scratch, the blocks you put together in the script area are called a
2 The is the background of the stage. Test Paper (Based on Chapters 1 to 4)
•
•
•
•
•
•
•
•
•
•
•
•
•
•
•
•
•
•
•
•
•
•
•
•
In today’s world, computers have become a very important part of our lives. We see them at home, school, hospitals, etc. It helps us do many things, like play games, write letters, and do the homework. They are used for processing and storing information, solving problems, etc.
In schools, computers are used to teach students about different subjects. In businesses, computers are used to calculate profit and loss. In homes, computers are used for entertainment, like playing games and watching films.
Computers can be classified into different categories based on their size, speed, storage capacity, and cost.
Microcomputers are small computers that are used by individuals. They are called personal computers (PCs). They are used in homes, schools, offices, shops, and banks.
They can be used for different things, such as playing games, writing documents, and doing research.
Microcomputers are available in different forms.
1. Desktops: They have different parts, such as a monitor, the CPU, a keyboard, and a mouse. All these parts are connected to work together.
2. Laptops: These are small computers with a variety of screen sizes. You can keep them on your lap. They run on batteries, and you can carry them around.
3. Tablet: Tablets are smaller than laptops but bigger than phones. They have touch screens instead of keyboards or mouse.
4. Smartphones: Smartphones are tiny computers that you can hold in your hand. They can do a lot of things, like calling your friends, sending messages, playing games, taking pictures, and showing you the maps to find the places.
The first personal computer was called the Altair 8800. It came out in 1975 and was made of circuit boards. Did You Know?
These computers are bigger and faster, but they are more expensive than microcomputers. They are used by multiple people at once in places like banks and universities. Today, they are often called small or mid-size servers, like the PDP-8, HP 2100, Honeywell 316, and TI-990.
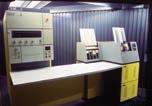
These computers are very powerful, large in size, and efficient. They are very expensive. They are used in large organisations like banks and airports. Many people can use them at the same time.
Some examples are the IBM Z series, PDP-10, and System Z10.
Supercomputers are the largest and fastest of all types of computers. They are used in large organisations for tasks such as weather forecasting and rocket launching.
PARAM 8000 was India’s first supercomputer, introduced in 1991. Discuss!

Are supercomputers only used by big companies?
Computer hardware refers to the physical parts of a computer that you can touch or feel. Examples of computer hardware includes a monitor, keyboard, mouse, CPU, printer, speakers, etc. Let us learn about the hardware devices in detail.
A monitor looks like a TV screen. It shows you all the things that you do on the computer, such as playing games, drawing, or writing stories. A monitor is also known as a VDU (Visual Display Unit).
There are three types of monitors.
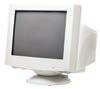
1. Cathode Ray Tube (CRT) Monitor: CRT monitors are big in size and have a curved display. They consume a large amount of power.
2. Liquid Crystal Display (LCD) Monitor: The LCD has a flat screen. LCD monitors are more energy-efficient than CRT monitors.
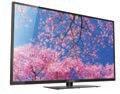
3. Light Emitting Diode (LED) Monitor: The LED monitors are thinner and lighter in weight as compared to CRT monitors. LED monitors consume less power than LCD monitors.
Central Processing Unit (CPU) is a processing device. A computer transfers information through the CPU. It is the brain of the computer that manages all the calculations and programs. The CPU chip lies inside the computer cabinet.
The CPU has three main parts. Let us learn about them.


1. Memory Unit (MU): It stores data and instructions given to a computer.
2. Control Unit (CU): It controls and manages all the parts of a computer.
3. Arithmetic Logic Unit (ALU): It performs all the mathematical calculations, like addition, subtraction, multiplication, division, as well as logical operations.
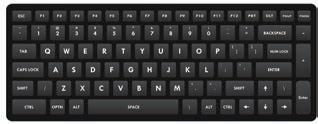
A computer keyboard is an input device that allows us to enter letters, numbers, and other symbols (these are called special characters) into a computer. It is used to type data and instructions into the computer. A standard keyboard typically has 104 keys.
A mouse is an input device used for pointing objects. It is used to point, click, and move various objects on the screen.
A touchscreen is a display device that allows us to interact with a computer by touching the screen. Devices like tablets and smartphones have a touchscreen. You can work on a touchscreen using your finger tips.
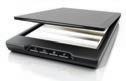
A scanner is an input device that scans text or pictures printed on paper and converts the information into a digital copy.
A printer is an output device that makes copies of text or pictures from a computer onto a paper. This paper copy is called a hard copy.


Did You Know?
In around 1440, the goldsmith Johannes Gutenberg invented the movable-type printing press, which started the printing revolution.
A speaker is an output device. It is used for listening to music and other sounds played by the computer.
A light pen is an input device. It is also known as a pointing device. It looks like a normal pen. It is used to draw and write anything on the screen. Whatever you draw or write, it will be displayed on the screen.
A joystick, also known as an input and pointing device, is used for playing games.
A microphone is an input device that records your voice and various sounds into a computer. It also allows you to talk with your family and friends over the internet.
A CD is a storage device. It is a removable disc that is round, flat, and shiny. It can store a limited amount of data.
A pen drive is very small in size, which makes it portable. It can store and transfer information from one computer to another.
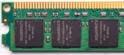
RAM stands for Random Access Memory. It stores the information temporarily on a computer. It allows the computer to run programs and access data quickly.
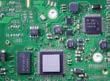
The motherboard is the backbone of a computer system. It provides the physical structure and electrical connections that allow the other components to work together.


A hard disk is a device that can store large amounts of data and information used by computers. A hard disk is present inside the CPU cabinet. Nowadays, external hard disks are also available.
Do you want to know more about how the CPU works?
Scan here to find out!
Do It Yourself 1A

1 Which of the following is used to point, click, and move across various on-screen objects?
2 Which of the following stores the information temporarily on a computer?

There are two types of software:


Software is the part of a computer that cannot be touched. Software is a set of instructions or programs given to the computer to do some work.
System software controls the overall working of a computer. It manages all the input and output operations of the computer.
For example, the operating system is a part of the system software that makes a computer run.
Do you want to know how operating systems work in computers? Scan here to find out!
The software that helps you to do specific tasks is known as application software. Examples: Paint, Google Chrome, and Microsoft Office.
Think

Let us now learn about the IPO cycle. Is software used only on computers?
These three processes are completed by every computer: Input–Process–Output.
The data and instructions that you enter using an input device, like a keyboard or a mouse, into a computer are called input. You can enter numbers, words, or pictures as input.
After entering data and instructions into a computer, the CPU works on the input to provide you with meaningful information. This is called processing.
The meaningful information that you get after processing is known as the output.
Let us understand the Input-Process-Output (IPO) cycle using a real-life example: making pancakes.
Here are the steps to cook pancakes:
Mix flour, sugar, salt, and milk together
Pour the batter on the pan and cook on both sides
Serve pancakes with any toppings
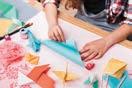
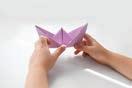
1 Identify the Input, Process, and Output in the procedure of making a boat.
2 Match the following.
Column A Column B
Input Answer = 18
Output = 7 + 5 + 6
Add the given numbers: 7, 5, 6 Do It Yourself 1B
Process
A. Fill in the blanks.
1 refers to the parts of a computer system that can be touched or felt.
2 The final step in the IPO cycle is known as .
3 A is an output device that makes copies of text or pictures from a computer onto a paper.
4 A joystick is an device used for playing games.
5 The is the brain of a computer.
B. Tick () the correct option.
1 What is a set of programs called?
a Software
c Pen drive
2 Which of the following are types of monitors?
a CRT
c LED
b Information
d Joystick
b LCD
d All of these
3 Which device allows you to hear music and sounds on a computer?
a Screen
c Mouse
b Microphones
d Speakers
4 Which type of software is responsible for managing computer input and output?
a System software
c Hardware
b Application software
d Internet browser
5 What type of computer is commonly found in homes, schools, and offices?
a Mainframe computer
c Microcomputer
C. Who am I?
1 I am a part of the CPU that performs all the mathematical calculations.
b Minicomputer
d Supercomputer
2 I am a device that prints what is on a computer screen onto paper.
3 I am a small hand-held device that you use to point and click on a computer screen.
4 I am a type of screen that you can touch to interact with a computer or a device.
5 I record your voice and various other sounds on a computer.
D. Write T for True and F for False.
1 A mouse is not a pointing device.
2 RAM stores the information temporarily on a computer.
3 Light pens are used for listening to the music and sound from the computer.
4 A monitor is also called a VDU (Visual Display Unit).
5 A scanner scans the text printed on paper and converts it into a digital copy.
E. Answer the following questions.
1 What is RAM?
2 Name the different types of monitors.
3 What is a CPU?
4 Give an example of the Input–Process–Output cycle.
5 Define software. What are its types?
F. Apply your learning.
1 Rahul wants to play a game on his computer. What type of input device can he use for this?
2 Sakshi is typing a school essay on her computer. Which hardware device is she using for the input?
3 Rohit is using a microphone for a video call. What type of hardware device is the microphone, and what is its primary function?
4 Suhani’s mother is operating a device using her finger tips. Name the device.
5 Shivam wants to send a soft copy of the assignment questions to his school friend. But he has those questions written in the school diary. Name the device he must use to create a soft copy of the document.
Students, you must have gone to the library and seen that it is the librarian who issues books to you. The librarian is like the manager of the library. He/she organises books, helps people find what they need, and makes sure everything runs smoothly.
Similarly, a computer has a special program known as the operating system that manages various tasks, helps us search for files and apps, and makes sure that the computer runs smoothly.
The operating system manages computer hardware and software. It provides an interface to the users through which they communicate with the computer. It handles tasks like managing devices, allocating memory, managing programs, and many more.

A user interface is a bridge between you and the computer system. Let us say you want to play music on your computer. How would you do it?
You will give instructions to the computer by pressing the mouse buttons or pressing the keys on the keyboard to play music. The icons and buttons you click using the mouse are a part of the user interface.
Did You Know?
The first operating system was created in the 1950s.
Think and Tell
Which other devices do you think have an OS?
There are two types of user interfaces:
1. Character User Interface (CUI): It involves typing text-based commands using the keyboard to interact with a computer.
2. Graphical User Interface (GUI): It is a visual way for users to interact with a computer by using pictures like menus, icons, and buttons. These interfaces are much easier to use than CUI interfaces. Windows is an example of a GUI. Let us learn about the differences between CUI and GUI.
CUI stands for Character User Interface. GUI stands for Graphical User interface. It works on text-based commands.It works on icons and buttons. No text commands are needed. It works fast. It works slowly. It is difficult to use. It is easy to use and very user-friendly.
Examples: DOS (Disk Operating System), Unix Shell, and Terminal.
Examples: Windows, macOS.
1 Write C for CUI and G for GUI in the boxes. Do It Yourself 2A
2 Write two examples of GUI and CUI.
GUI: CUI:
Windows 10 is a popular operating system. It was developed by Microsoft Corporation and released on July 29, 2015. It is mainly built to be used in computers and laptops.
Let us learn about some of the features of Windows 10.
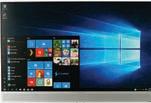
1. Windows 10 provides a Graphical User Interface (GUI).
2. It makes the interaction between the computer and the user easy.
3. It allows us to perform many tasks at the same time. For example, you can play music on the computer while playing a game.
4. It allows us to give all the commands to the computer by clicking on the images and the menu.
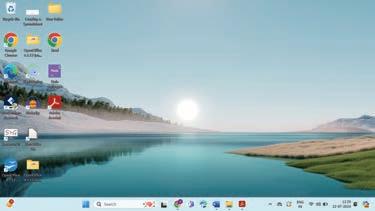
After switching on the computer, the screen that is visible, is called the desktop. The desktop is a collection of various components.
Let us learn about these components.
The small graphical symbols or images that represent files, apps, or folders are called icons. We will learn more about files in the next chapter.


The taskbar is present at the bottom of the screen. It allows you to manage the programs that you are using. It has the following components:
Start Button: It is located at the bottom left of the desktop screen. When we click on the Start button, the Start Menu opens. The Start Menu shows all the apps present on your computer.
Search Bar: It is a text box that is located on the taskbar at the bottom of the desktop. It is used to search for files, apps, and settings on your computer.
Task View Button: It shows you a list of all the programs and windows that you have opened.
Notification Area: The notification area is present on the right side of the taskbar. It shows icons for programs and notifications. It also shows the date and time on the computer.


We can perform different types of operations on the desktop, like arranging icons, opening apps, sorting icons, etc. Let us learn about these operations.
Steps to open an application in Windows 10:
1. Click on the Start button. The Start menu will open. Start Button

2. Click on the application that you want to open from the Start menu.
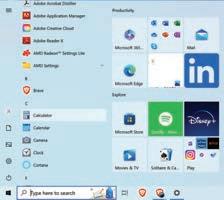
3. The application will open on the screen.
Can you give an example of an icon you might see on your desktop? Think and Tell
As you arrange the things on your study table to make it neat and clean, you can also do the same with icons on the desktop. Let us learn how to arrange icons on the desktop.
Steps to arrange desktop icons:
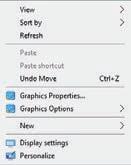
1. Right-click on an empty area on the desktop.
2. Click on the View option, then click on the Auto arrange icons option on the list.
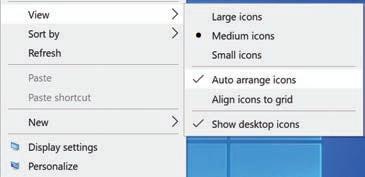
This will arrange all the icons in an organised way.
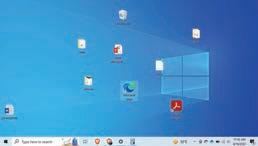
Before applying Auto arrange
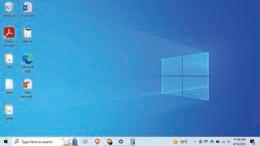
After applying Auto arrange
Discuss!
What is the purpose of the search button on the taskbar?
Sorting icons means arranging them in a specific order. Steps to sort the icons:
1. Right-click on an empty space on your desktop. A list will pop up.
2. Click on the Sort by option.
3. Choose how you want to sort your icons. Your icons will be sorted.
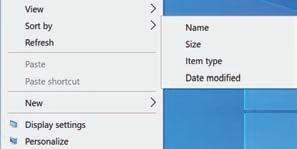
Here are some options of how you can sort your icons:
Sort by Name
This will sort your icons alphabetically.
Sort by Size
This will sort your icons by their file size, from smallest to largest.
Sort by Item Type
This will sort your icons by their file type, such as .exe, .jpg, or .mp3.
Sort by Date Modified
This will sort your icons by the date they were last modified, from most recently modified to least recently modified.
Windows 10 comes with a built-in feature called Windows Spotlight that changes your background every day. Scan here to learn more!
The desktop has an image behind all the elements. This image is called the background image or wallpaper.
Let us learn how we can change the wallpaper.
1. Right-click on the desktop.
2. Select the Personalize option.
3. Select the Background option.
4. Choose a picture or browse for other options.
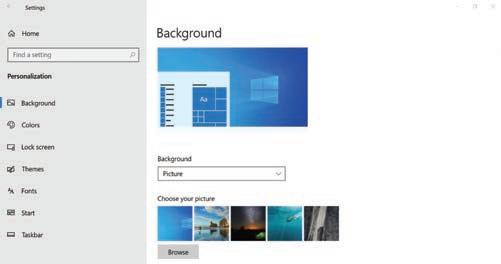
The picture will be set as your desktop background instantly.
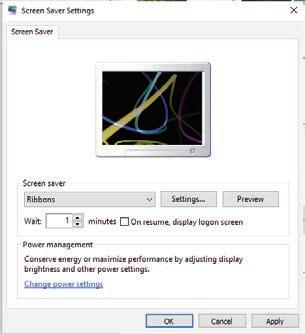
The screen saver is an image which pops up on the computer screen whenever a computer is left idle for a certain period of time.
Steps to change a screen saver:
1. Right-click on the desktop.
2. Choose the Personalize option.
3. Click on the Screen Saver Settings.
4. Choose a screensaver from the Screen saver options.
5. Click Apply and then OK to save your changes.
Do It Yourself 2B
Match the following.
Column A Column B


To search on the computer
To see the notifications
To change the desktop background
To view the list of programs opened
Windows 11 is a GUI-based operating system developed by Microsoft. It makes the interaction between the computer and the user easy, just like Windows 10. Let us learn more about it.
Some of the key features of Windows 11 are:
New User Interface: Windows 11 has a fresh and new look. It is more user friendly. The Start menu is in the middle of the task bar.
Virtual Desktops: Windows 11 has the feature of multiple desktops to help keep our work organised.
Snap Layouts: This feature let us easily arrange and organise open windows on our screen. We can see multiple things at once.
Microsoft Teams: This app is built into Windows 11. It lets you talk and chat with friends and family.
Security: Windows 11 has strong security features to protect our computer from viruses and other threats.
Windows 11 comes with various components that make it a powerful and user-friendly operating system.
Follow the given steps to open an application.
1. Click on the Start button.
Start Button: In Windows 11, the Start button is located in the centre of the taskbar by default, making it easy to access. When you click on it, a new Start menu opens.
Start Menu: The Start menu is divided into two sections: the Pinned and Recommended section and a search bar at the top.
• Pinned Apps: The upper part of the Start menu shows pinned apps, allowing you to access the most-used applications quickly.
• Recommended Apps: Below the pinned apps, there is a “Recommended” section that shows recently used files and apps, making it easier to resume tasks.
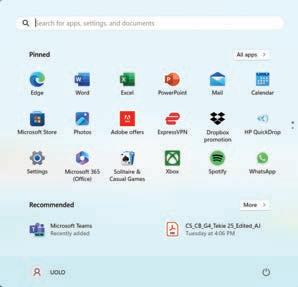
2. Click on the application that you want to open from the Start menu. If you don’t find it in the Pinned or Recommended section, you can click on “All apps” or use the search bar to find it.
3. The application will open on the screen.
A. Fill in the blanks.
1 An operating system is a that makes sure that the computer runs smoothly.
2 An is a bridge between you and the computer system.
3 The bar at the bottom of the screen is called the .
4 are images on the desktop that represent apps, files, or folders.
5 The bar allows you to search for files and programs on the computer.
B. Tick () the correct option.
1 Which sorting option sorts your icons by the date they were last modified?
a Size
b Date modified
c Type d Name
2 What does the Notification Area on the taskbar show?
a Notifications to see
c Start button
3 What does the Start Menu contain?
a All apps present on the computer
b Games to play
d Music playlists
b Only calculator
c Start button only d Wallpapers
4 What does the taskbar in Windows 10 help you do?
a Control the computer’s temperature b Arrange icons on the desktop
c Manage the programs you are using
5 How do you open the screen saver settings?
d Change the desktop wallpaper
a Right-click on the desktop and select the Personalize option.
b Right-click on the desktop and select the Screen Saver option.
c Right-click on the desktop and select the View option.
d None of the above.
C. Who am I?
1 Match the columns:
I find a file, program, or setting on your computer.
I change the date and time on your computer.
I open the Start Menu.

I am a popular operating system. 2024

D. Write T for True and F for False.
1 A user interface is a bridge between a user and the computer.
2 Changing the wallpaper is the same as changing the screensaver on the desktop.
3 The Search bar is used to find files, programs, settings, etc., on the computer.
4 The taskbar is at the bottom of the desktop screen.
E. Answer the following questions.
1 Define operating system.
2 What is a taskbar?
3 Write the names of the different types of interfaces.
4 Write any one feature of Windows 10.
F. Apply your learning.
1 Mia wants to change the wallpaper on her desktop. Name the option she should select after right-clicking on the desktop.
2 Rachit left his computer idle while he was on a call. When he returns, he sees an image pops up on the computer screen. What is this image called?
3 Aastha wants to arrange her desktop icons in alphabetical order. How can she do it?
Look at this box. It has so many toys in it. There is a teddy bear, a toy drum, and a toy car in it.
Each toy has a name. So, if anyone asks you for the teddy bear, you can easily find it in the box.
In the same way, our computer has many files in it and each file has a name.
A file is a collection of information.
It is stored on a computer. Files can hold text, pictures, songs, videos, and much more.
Just like we keep our toys in the toy box. We can keep our files on our computer using folders.
A folder is a container that can store files.

Folders can be used to organise files and make them easier to find. They act as holders where you can group similar files together.
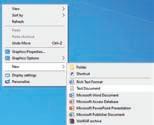
We can type text in a text file. Let us learn how to create a text file. Steps to create a file:
1. Right-click on the desktop.
2. Position the mouse pointer over the New option.
3. Click on the Text Document option. A new text file will be created with a default name New Text Document

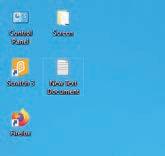
An icon is an image on the computer screen that represents a file or a folder.
A file can be stored in a folder on the computer. Let us learn how to create a folder.
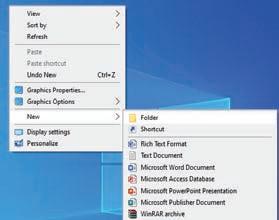
Steps to create a folder:
1. Right-click on the desktop.
2. Place the mouse pointer over the New option.
3. Click on the Folder option. A new folder will be created with a default name New Folder.
Do you think it is possible to create a folder inside another folder?
1 Write T for True and F for False.
a A file stores information.
b A file acts as a container for the folders.
c We can right-click on the desktop to create a new folder.
2 Number the following steps to create a folder on the desktop.
Give it a name. Click on the Folder option. Position the mouse pointer over the New option. Right-click on the desktop.
We learnt how to create a file. Now, let us learn how to open the file we have created.
Steps to open a file:
1. Go to the desktop.
2. Double-click on the file icon to open it.
Another way to open a file:
1. Right-click on the file.
2. Select the Open option.
There is yet another way to open a file:
1. Select the file using the left mouse button.
2. Now, press the Enter key on the keyboard. The file will open.
Double-click on the file

Right-click on the file
Now, that we have opened the text file, let us type something in the file.
Steps to type:
1. Click on the white area. A blinking black line will appear. It is called the cursor. This is where we can type.

2. Use the keyboard to type text here.

Once we have completed typing, we can save the file. If we save the file, the text we typed will be saved, even if we turn off the computer. We can open the file later and see our document again.
Steps to save a new file:
1. Click on the File menu.
2. Click on the Save option.
Click on the File menu.
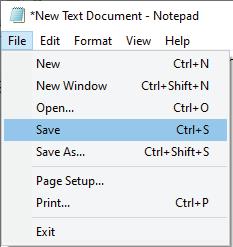
Click on the Save option.
3. The Save As dialog box will open.
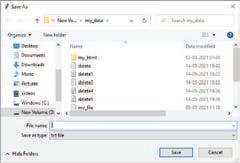
4. Type the desired name and click on the Save button. Your information will be saved in the file.
A. Fill in the blanks.
Hints folders computer save information files
1 A file is a collection of .
2 can hold text, pictures, songs, videos, and much more.
3 are containers which can store files.
4 A file is a collection of information that is stored on a .
5 You should a file after typing so that you can open it later.
B. Tick () the correct option.
1 What is the blinking black line that appears on the white area called?
a Cursor b Mouse pointer
c Folder d Icon
2 How are files organised on a computer?
a In tiffin boxes b Inside folders
c In the trash bin d In a file
3 What is a folder on a computer?
a A type of file b A container for files
c A computer program d A type of icon
4 Which of the following is an image on the computer screen that represents a file or a folder?
a Cursor b Icon
c Data
5 Why do we save a file?
a To show colourful images
c To delete the file
d Mouse Pointer
b To use the file later
d To remove the file
C. Who am I?
1 I store a collection of information.
2 I am a menu used to save a file.
3 I am a blinking black line on a text file where you can type.
4 I am used to type text in a text file.
5 I help you keep what you write in your file even after you switch off the computer.
D. Write T for True and F for False.
1 Folders are the blinking black lines where we can type.
2 Icons on the computer screen can represent only files.
3 Saving a file is important if you don’t want to lose your work.
4 Folders are the containers for the files.
5 You can type your name into a file without opening it.
E. Answer the following questions.
1 What is a file?
2 What is a folder?
3 What is an icon?
4 Write any one way to open a file.
5 Why do we save a file?
F. Apply your learning.
1 Archit has created a new file to write a story. The file appears as an image on the desktop. What is this image called?
2 Riya wants to keep all the vacation pictures at one place on the computer. How can she do it?
3 Sree wants to type her name and address on the computer. Which type of file should she create?
4 Anish has saved a file on the computer ’s desktop. How can he open it again?
Imagine it is your birthday, and your grandparents live in another country. They can’t visit you, so they surprise you with a video call where they sing a birthday song for you.
What helped you connect the video call with your grandparents?
The internet helped you connect to the video call. Our phone or laptop is connected to the internet, which allows us to video call another person.
Two or more computers connected to each other form a computer network.
The internet is a network that connects computers all over the world. We use the internet to:
1. Share information with others.
2. Learn new things.
3. Be in touch with our family and friends.
What are some other things that you can do on the internet?
The internet is very useful if we use it correctly. Let us learn more about the advantages of the internet:
1. The internet makes tasks quick and easy.
2. The internet helps us talk to faraway friends and family.
3. The internet allows us to learn about new things.

4. The internet allows us to watch films and cartoons, listen to songs, play games, and read books.
5. The internet helps us shop online to buy clothes, toys, books, food, etc.
6. The internet allows us to do money-related tasks, like transfer money, book tickets, etc.
Everything has a good side and a bad side if we do not use it responsibly. Let us learn more about the disadvantages of the internet.
1. There are bad people on the internet who can attack our phones or computers. They can get our personal data or photos if we do not use the internet responsibly.
2. People send unwanted messages or emails over the internet. Many times, these messages can be mean and hurtful.


3. When we spend a lot of time on the internet, it can distract us from our important tasks like homework, exercise, cleaning our room, etc.
4. When we are too involved with the screen while using the internet, it affects our health.
The basic terminologies we should know while using the internet are:
S. No.
Basic Terms
Description
1. Web page A web page is a simple document that can be displayed over the internet using a browser.
2. Website
A website is a collection of web pages that contain information about a related topic.


3. Web browser
Mozilla Firefox Safari
Google Chrome Opera
Microsoft Edge
4. Search engine
Google Yahoo Bing
5. Email
6. URL

More! How does the internet work? Scan here to find out!
A web browser allows us to view the information present on websites and web pages. Some popular web browsers include Google Chrome, Mozilla Firefox, Safari, Opera, and Microsoft Edge.
A search engine can search for the information required by the user over the internet. Some of the most popular search engines are Google, Yahoo, Bing, etc.
Email stands for electronic mail. Email is a way to send messages to people over the internet.
All the websites have a web address. A web address helps us open a website in the browser.
This web address is known as URL (Uniform Resource Locator).
Archie was the first search engine, and it was created by Alan Emtage in 1990. Did You Know?
1 Match the following.
Definitions
Two or more computers that are connected to each other.
The network spread across the world.
A collection of web pages.
It helps us view the information present on websites and web pages.
Terms
Internet
Website
Web Browser
Computer Network
2 Read the following sentences. Mark the advantages of computers with A and the disadvantages of computers with D.
a The internet helps us share information with others.
b There are bad people on the internet who try to steal our personal data and pictures.
c People sometimes send mean and hurtful messages or emails over the internet.
d We can talk to faraway friends and family using the internet.
To visit a website or a web page, you need to know its web address, or the URL. Let us say we want to open the web page with the web address “www.uolo.com”.
To open the web page, follow these steps:
1. Open a web browser. Here, we will use Google Chrome.
2. Type “www.uolo.com” in the address bar at the top of the browser window.

URL Address Bar
3. Press the Enter key on the keyboard. The website will open. Website
Being a good digital citizen means using the internet carefully. It means being aware of the risks of online activity and taking steps to protect yourself and others.

Follow the rules given below to be a good digital citizen:
1. Treat people with respect over the internet.
2. Use kind words.
3. Do not write bad things about others.
Do you want to know how we can be safe online? Scan here to find out!
4. Sometimes people say rude things online. This is called cyberbullying. If it happens to you, let your parents or teachers know about it immediately.
5. If you end up opening a wrong website by mistake, close it immediately.
Mark the good online behaviours with G and the bad behaviours with B.
Be kind and respectful.
A. Fill in the blanks.
Do not share password with others.
Spend unlimited time on the internet.
1 A is a group of two computers connected to each other.
2 URL stands for .
3 is a worldwide network of computers which allows the sharing of information.
4 A can search for information required by the user.
5 If people say rude things online, it is called . Argue with people online.
B. Tick () the correct option.
1 Using the internet, we can:
a Video call our relatives
c Shop online
b Send an email
d All of these
2 What are the responsibilities of a good digital citizen?
a Sharing passwords
c Being kind and respectful online
b Arguing with online friends
d Disrespecting people online
3 Which of the following is personal information that you should NOT share online?
a Your favourite colour
c Your favourite game
4 What does U stand for in URL?
a Universal
c Uniform
5 What is an email used for?
a Playing online games
c Online shopping
C. Who am I?
b Your house address
d Your favourite food
b Unique
d Unusual
b Sending electronic message
d Clicking pictures
1 I am a type of network that helps us talk to faraway friends and family using video calls.
2 I am a place in the web browser where you type a URL.
3 I am a type of address that helps open a website.
4 I am a good person who takes steps to protect myself and others.
5 I am the act of saying rude things over the internet.
D. Write T for True and F for False.
1 The internet helps us shop online to buy clothes, toys, books, etc.
2 Google is a search engine.
3 Email is a way to call other people over the internet.
4 Microsoft Edge is a web browser.
5 You should tell your parents if someone bullies you online.
E. Answer the following questions.
1 Why do we use email?
2 Write the names of any two popular search engines.
3 What happens when we spend a lot of time on the internet?
4 What is URL?
5 What should you do if you end up opening a wrong website by mistake?
1 Chirag is playing online games with friends on a website. What helped him play games online?
2 Sandhya shared her school’s name with a stranger over the internet. Was it a good thing to do? Give your reason.
3 Sree wants to look up information for a school project. What can help her find the information?
4 Sheetal wants to know about space and planets. She found the web addresses of a few websites. What should she use to open the websites?
5 Simran is using the internet the whole day. What should you suggest to her?
The lotus is the national flower of India. It is a beautiful flower that grows in ponds and lakes. It symbolises purity and strength.
Let us colour this picture of lotus. Just like you draw and colour beautiful things around you on paper, you can also draw these things on a computer, using a program called MS Paint.
MS Paint, a short form for Microsoft Paint, is like a colouring book on the computer, where you can draw and colour pictures using different tools and colours.
It allows users to create and edit simple drawings, digital art, and images using various tools like brushes, shapes, and colour palettes.
Let us learn how to open Paint on the computer.
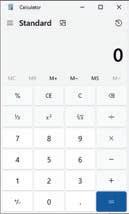
1. Click on the Search bar.

Dan McCabe created this colouring book on the computer called MS Paint. Did You Know?
Type here to search
2. Type paint.
3. Click on the Paint app.
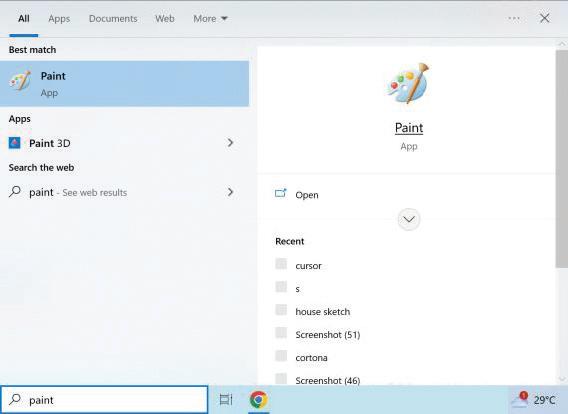
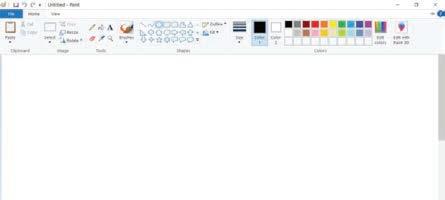
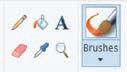
4. After clicking, the Paint window will open, as shown in the image.
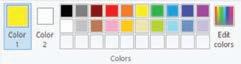
Let us learn about the components of the Paint window that help you create paintings.
1. Title Bar: It shows the name of your drawing.
2. File Tab: It has options for creating a drawing, saving a drawing, opening a drawing, and more.
3. Quick Access Toolbar: It is a group of tools that helps to perform common tasks like saving a drawing.
4. Drawing Area: It is the space where you create drawings.
5. Ribbon: This has two tabs: Home and View. Each tab has many tools that are arranged into different groups. A group is a set of related commands.
Complete the words.
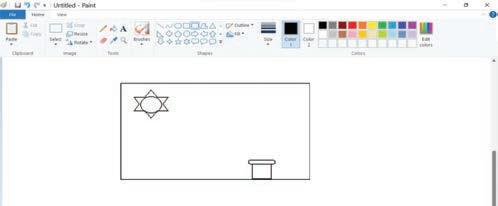
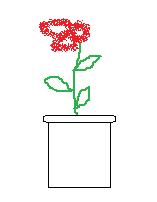
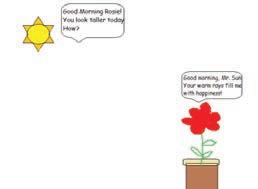
Let us create a comic strip between two characters, the sun and a flower, using various shapes to tell a story in a fun way.
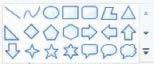
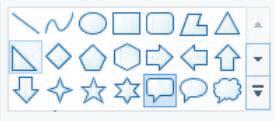
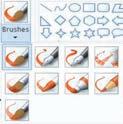
The Shapes group help us draw different types of shapes in our paintings, like circles, squares, lines, etc.
Here, we will use some shapes like rectangles, circles, and squares to create a comic strip. All shapes are present in the Shapes group of the Home tab.
Steps to use the Shapes group to draw a comic strip:
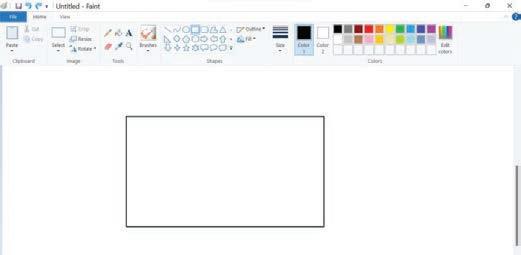
1. Open Paint.
2. Click on the Rectangle from the Shapes group.
3. Drag the mouse pointer on the drawing area to draw a rectangle.

4. Click on the Oval in the Shapes group.
5. Drag the mouse pointer on the Drawing area and draw a circle, as shown in the image below.
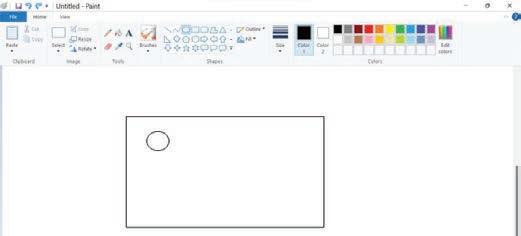
6. Click on the Six-point star shape in the Shapes group.
7. Draw a star over the circle shape so that it looks like sun rays.
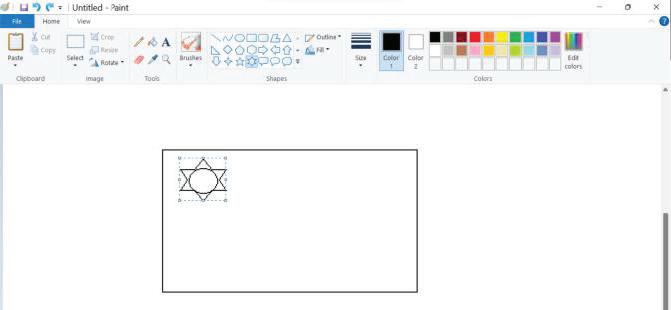
8. Draw a square using the Rectangle shape. Hold down the shift key while dragging out a rectangle.
9. Click on the Rounded rectangle shape.
10. Draw a rounded rectangle at the top of the square drawn so that it looks like a flower pot.
A callout is a shape that is used to write a message. Let us write some messages in the callouts.
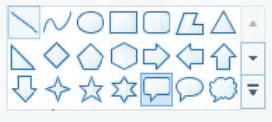
There are three types of callouts: Rounded rectangular callout, Oval callout, and Cloud callout. They are also present in the Shapes group.
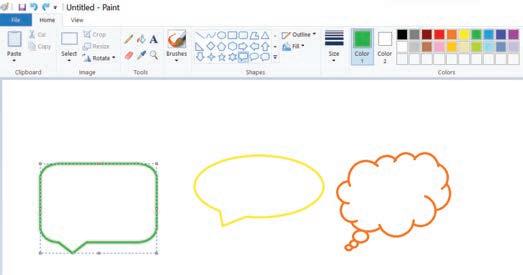
callout
callout
Rounded rectangular callout
Let us add a message box on the comic strip using callouts. Steps to add a callout:
1. Click on the Rounded rectangular callout from the Shapes group.
2. Drag it over the area where you want to draw a callout.
Let us learn about some more tools in MS Paint.
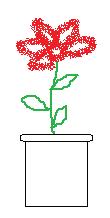
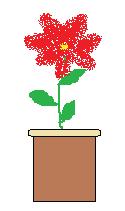
We already drew the sun and a flower pot. Now, let us draw the stem and leaves of the flower in our comic strip with the help of the Pencil tool.
The Pencil tool is used to draw freehand drawings in Paint.
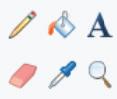
The Pencil tool is present in the Tools group of the Home tab. Let us learn how to use the Pencil tool in Paint.
Steps to use the Pencil tool:
1. Click on the Pencil tool in the Tools group.
Pencil

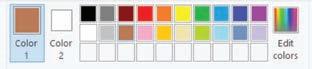
2. Select any colour from the Colors group.
3. Move the Pencil to the drawing area.
4. Start drawing the stem and leaves by dragging the mouse.

As we have completed our drawing, let us now learn how to add text to a callout.
You added a callout in the comic strip. Now, you want to write some text in the message box. You can do this with the help of the Text tool present in the Tools group.
The Text tool helps us add text to our drawing.
Steps to add text:
1. Click on the Text tool in the Tools group.

2. Click in the callout where you want to add the text.
3. Type your message. For example: “Good Morning, Rosie! You look taller today. How?”
Good Morning, Rosie! You look taller today. How?
Think and Tell
Can we add text in the blank drawing area?
While drawing, you sometimes make mistakes that you want to erase. You can do it with the help of the Eraser tool present in the Tools group.
The Eraser tool helps us erase a mistake.
Steps to use the Eraser tool:
1. Click on the Eraser tool from the Tools group.
2. Drag it on to the part of your drawing which you want to erase.


Before Erasing After Erasing

Do you want to know how we can change the colour of the eraser in Paint? Scan here to find out!
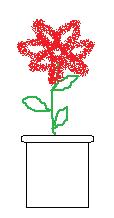
The Brushes group provides various brush tools for freehand drawing and painting in Paint. Brushes help us apply various strokes and effects on the drawing area.
There are 9 types of brushes in Paint. A few examples of brushes are Airbrush, Crayon, Marker, Natural pencil, and Oil brush.
Airbrush Tool
Now, we want to draw a petal in the flower pot using the Airbrush tool.
An Airbrush is a tool that gives the effect of spray paint. It is used for spraying and drawing with the colours.
Steps to use the Airbrush:
Brushes Airbrush
1. Click on the Brushes tool.
2. Select Airbrush from the list of brushes.

3. Drag it where you want to paint.
You can also colour your drawing. Let us see how we can do it.
4. Add a message for the flower in the callout, following the same steps as you did for the sun.
Good Morning, Mr Sun! Your warm rays fill me with happiness!
To change the brush size, hold down the Ctrl key and press the plus (+) or minus (–) keys on your keyboard. Did You Know?
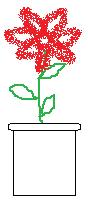
After drawing the sun and the flower and adding text to the callouts, you can fill the drawing with colours to make it look beautiful. You can use the Fill with color tool present in the Tools group for this purpose.
The Fill with color tool is used to fill colours in your drawing.
Steps to use the Fill with color tool:
1. Click on the Fill with color tool in the Tools group.
2. Choose any colour from the Colors group.
Fill with color

3. Bring the pointer inside the petal of your flower and click. The colour will be filled inside the petals.
4. Also, fill the leaves and flower pot with colour.
We can choose more colours from the Edit colors icon in the Colors group. Did You Know?
The Color picker tool is used to select colours from existing drawings and fill other parts of the drawing with the same colour.
Steps to use the Color picker tool:
1. Click on the Color picker tool in the Tools group.

Color picker
2. Click on the drawing from which you want to pick the colour. For example, click on the surface of the flower pot.
Good Morning, Rosie! You look taller today. How? Good Morning, Mr Sun! Your warm rays fill me with happiness!
3. Click in the area where you want to fill the picked up colour. Here, we have filled the picked up colour in the background.

Good Morning, Rosie! You look taller today. How? Good Morning, Mr Sun! Your warm rays fill me with happiness!
Do you want to create a custom brush in Paint? Scan here to find out!
1 What are the names of the tools in the images?


2 Match the following.


A. Fill in the blanks.
1 The space where you create drawings in Paint is called the .
2 Rectangle, Circle, Rounded Rectangle are different types of .
3 To add text to a callout in Paint, you can use the tool.
4 The Eraser tool is used to mistakes in your drawings.
5 The Fill with color tool is used to fill in your drawing.
B. Tick () the correct option.
1 Paint is a tool for:
a Searching
c Drawing
b Recording voice
d Sending message
2 Which one of the following tools in Paint will you use to draw a flower?
a Pencil
c Eraser
b Rectangle
d Text
3 Which one of the following tools in Paint is used for spraying and drawing with colours?
a Pencil
c Airbrush
b Star
d Eraser
4 Which one of the following tools is used to select colours from existing drawings and fill other parts of the drawing with the same colour?
a Color picker
c Fill with color
5 What can you create with Paint?
a Mountains
c Digital arts
C. Who am I?
b Pencil
d Eraser
b Flowers
d All of these
1 I am a set of related commands in the Paint window.
2 I am the part of the Paint window that shows the name of your drawing.
3 I am a shape used to write messages in a drawing.
4 I am used to fill colours in your drawings to make them look beautiful.
5 I am a group in Paint that contains 9 types of brushes.
D. Write T for True and F for False.
1 MS Paint stands for Microsoft Paint.
2 The Quick Access Toolbar of Paint shows your drawing.
3 The Pencil is a tool in Paint that can be used to draw lines, circles, and curves.
4 The Brushes tool in Paint helps us correct mistakes in our drawings.
5 The Color picker tool is used to select colours from the Colors group.
E. Answer the following questions.
1 What is Paint?
2 Write the names of the three types of callouts present in Paint.
3 What is the use of Brushes in Paint?
4 Define the Quick Access Toolbar.
5 How are shapes useful in Paint?
F. Apply your learning.
1 Riya wants to draw stars and the moon on her computer. Which program can help her do that?
2 Sakshi made a mistake while drawing in Paint. What tool should she use to resolve her problem?
3 Rinku wants to choose a colour from her existing drawing and use it to fill another part of her drawing. Which tool should she use?
4 Archi wants to write "Home Sweet Home" on the drawing of a house she drew. Which tool will help her write text in the drawing?
5 Atul wants to create a pattern of circles on his Paint canvas. Which tool will help him create the shape?
All of you do your homework in your notebooks, correct?
So far, you have been writing your homework in your notebooks. But if you have to do it on a computer, how will you do it? You will use a word processor.
A word processor is a software program that allows you to create, edit, and format text documents.
While using a computer to do your homework, you write in documents. Like a notebook, a document can also have multiple pages.
So each document is like your notebook, where you can write text, draw images, etc.
There are many word processors, like Microsoft Word, WordPerfect, Google Docs, etc.
In this chapter, you will learn about the basics of Google Docs.
Google Docs is a free online word processor. All you need to have is an internet connection to be able to use Google Docs anywhere and anytime. In Google Docs, you can also share your documents with other people. When you share a document, multiple people can work on it in real time.
Google Docs has some special features that make it really useful: 1. It allows us to type words, sentences, and stories in a document.
2. It allows us to change the font, colour, and size of text.
3. It allows us to add pictures to make our stories come to life.
4. It allows us to share our stories with friends and work on them together.
5. It automatically saves our work, so we don’t have to worry about losing it.
What are the different things that you can add in your documents?
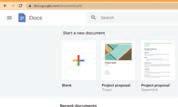
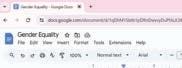
Before you can write anything in a document, you need to create it. To create a document on Google Docs, you need a web browser. After opening the web browser, follow the steps given below:
1. Type docs.google.com in the address bar of the web browser and press the Enter key.

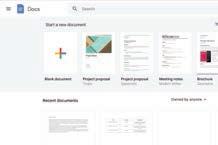
2. Click on the Blank icon under Start a new document. It will open a blank document with an Untitled document name.
Before using Google Docs, we first have to understand the components of Google Docs.
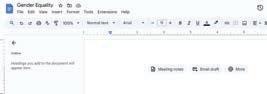
The image below highlights the various components of the Google Docs window:
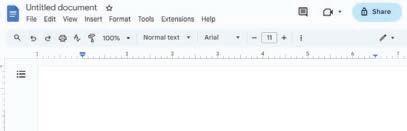
1 Document TitleIt is a name for the document that uniquely identifies the document.
2 Menu Bar It holds “File”, “Edit”, “View”, and other menus. Each menu performs a different action.
3 Quick Access Toolbar The bar that holds tools for quick and easy access.
4 Document WorkspaceThe area where you type.
5 Share It helps you share the document with others.
In Google Docs, you can see the changes made by other people from different computers when working together on a document. Did You Know?
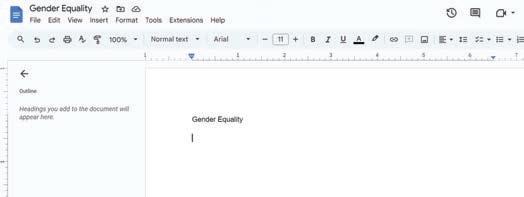
Once the document is created, you have to give it a meaningful name to identify it. By default, the name of the document is Untitled document. The steps to name a document are as follows:
1. Click on the Untitled document written on the top left corner of the document.
2. Press the Delete key and type the new name for the document in it.
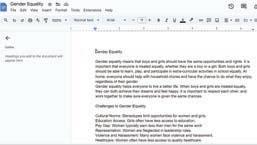
Our empty document on Gender Equality is ready. Now, let us add text to it.
A Google Docs document can contain up to 1.02 million characters. Did You Know?

After giving a name to the document, it is time to type text into it.
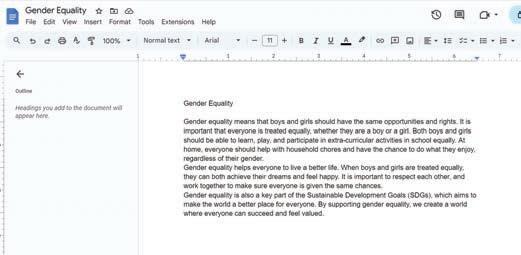
Let us write a paragraph on the topic: Gender Equality
1. Click on the page to place the cursor.
2. Type Gender Equality.
3. Press the Enter key to go to the next line.
4. Type the next text that you want to type. In our case, we have typed the following text:


When you are done with writing the document, it is important to save the work on your computer. But in Google Docs, you do not need to keep track of saving your file because it has the Autosave feature with it.
Autosave is a feature of Google Docs that automatically saves an open document or file.
Let us see how Autosave works in Google Docs.
1. Look at the Saving option (as shown in the picture) on the top of your document, it shows that Google is saving your file.
2. Once Google saves your document, a picture of the cloud (as shown in the picture) appears. This shows that your document is saved.
3. Once your document is saved, you can close this document by clicking ‘X’ on the tab. This button is the Close button.
Think and Tell
Do you think Autosave will work if your computer is not connected to the internet?
1 Unscramble the following words.
a asve b mane c Ordw d eilf e shrae
2 Circle the odd word.
a word chair table almirah
b mouse Google keyboard monitor
c pen pencil docs crayon
d word document file pencil
e save close share air
If you have closed the document but want to work on the same document again, follow these steps:
1. Type “docs.google.com” in the address bar of the web browser. This will take you to the Google Docs screen.
2. You may find your document in Recent documents.
3. If you do not find your document there, type the name of the document in the Search bar.

4. It will show you the document. Click on it to open.

Discuss three features which you can apply to your documents if you are working on Google Docs.
Sometimes, you might need to open a document while you are already working on another one.
Here are the steps to do that:
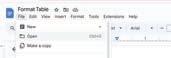
1. Click on the File menu.
2. Select the Open option.
3. Click on the document which you want to open.
4. Click on the Open button.
5. The selected document will open in a new tab.
2 Match the columns.
Column A Column B Google Chrome Docs
Autosave
Blank document Saved


A. Fill in the blanks. Hints autosave uniquely word processor quick access edit
1 Word processor is a computer program that helps you to create and a document.
2 Google Docs is a . 3 feature saves the document automatically.
4 The name of the document helps you identify the document . 5 tool bar holds tools for quick and easy access.
B. Tick () the correct option.
1 Which of the following is a feature of Google Docs?
a Can type stories
c Can share stories
b Can edit stories
d All of these
2 The symbol of the cloud with a tick mark shows that the:
a Document is saved
c Document is lost
b Document is closed
d Document is shared
3 In a document tab, ‘X’ sign is used to:
a Save the document
c Close the document
4 ‘Share’ option will help you:
b Open the document
d Share the document
a Share the document with friends b Save the document
c Copy the document
d Move the document
5 Which of the following is a step to open a closed document?
a Click on the File Menu > Click on the New Option
b Click on the File Menu > Click on the Open Option
c Click on the File Menu > Click on Docs
d Click on the File Menu > Click on the Share option
C. Who am I?
1 I am a bar to search for your document if you can’t find it in your recent documents.
2 I hold menus like “File”, “Edit”, “View”, etc.
3 I am a button in Google Docs that you click to save your document.
4 I will help you to show your document to your friend even if you are not together.
5 I am a place where you can type words into your document.
D. Write T for True and F for False.
1 Google Docs is a paid online word processor.
2 By default, the name of the document is Untitled document.
3 To save a document in Google Docs, the step is File > Save.
4 To close a document in Google Docs, the step is File > Close.
5 The file must be opened before you start writing in it.
E. Answer the following questions.
1 Write any two features of Google Docs.
2 What does autosave mean?
3 Write down the steps to open a new document.
4 What will happen if you do not save your document?
5 How can you close a document? F. Apply your learning.
1 Ram has created many documents in Google Docs, but he is unable to find them. What should he do?
2 Amit is working on a document in Google Docs and is worried about losing it. How can he save it?
3 Ritu wants to begin working on a new document. What should be her first step?
4 Raju wants to uniquely identify his document. What should he do?
Being hygienic means keeping ourselves clean and healthy. Just like washing our hands with soap keeps germs away, wearing clean clothes is another way to stay clean. Dirty clothes can collect sweat and germs, so washing them regularly helps keep our skin free of germs and itch.
Here are the steps to wash clothes:
1 Gather all the clothes you want to wash.
2 Sort your clothes by colour. Keep dark-coloured clothes in one pile and white or light-coloured clothes in another pile.
3 Check the pockets for tissues, candy wrappers, and other items, and take them out.
4 Put your clothes in the washing machine, one pile at a time.
5 Ask your mother to add detergent, close the lid, set the timer, and start the machine.
6 The machine will fill with water, wash your clothes clean, and spin them to let the extra water out.
7 Once the washing is finished, take your clothes out of the machine and hang them for drying.
These steps are the instructions we follow to wash the clothes.
Just like how we use instructions to do something step-by-step, we need to tell computers how to do something step-by-step too.
But computers do not understand our language, so we need to use a special language that they can understand. We call that language coding.
Coding is a way of giving instructions to tell a computer what to do.
We will be using block-based coding to make computers do things for us.
Block-based coding is the language in which we use colourful code blocks to tell computers what to do.
You must have drawn things on a computer earlier, right?
15
But did you know that you can use block-based coding to make computers draw shapes and drawings for you?
We are going to use a block-based coding platform called Scratch 3.0 to create code for drawing and shapes.
Scratch 3.0 is a free and simple platform where we use colourful blocks to create our own games, stories, and drawings.
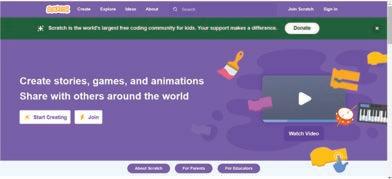
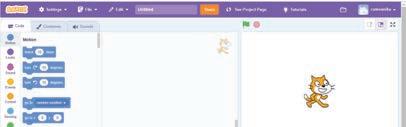
Now, let us learn to create a blank project.
1 Click Create.
Scratch Cat is the official mascot of Scratch because cats are curious and playful animals, just like the children who use Scratch. Did You Know?
2 The Scratch editor opens. By default, the name of a Scratch project is shown as Untitled.
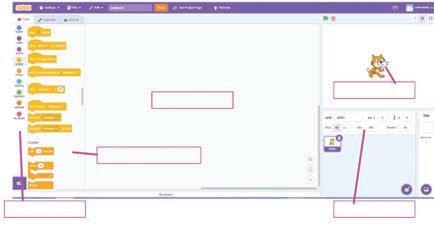
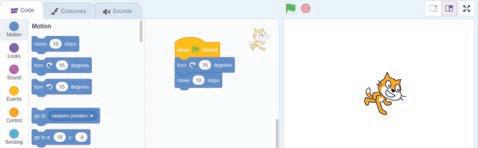
The Scratch editor holds all the components needed to create and run a Scratch project.
The components of the Scratch editor are:
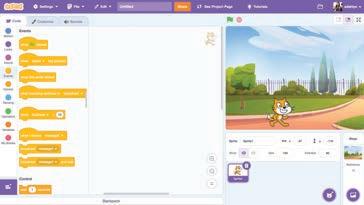

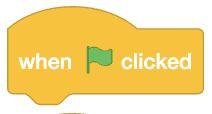
1 Menu bar: The purple bar at the top of the Scratch editor is called the Menu bar.
The main parts of the menu bar are:
a File and Edit menus: These let us create, save, and open a project.
b Project name: This space shows the name of your project.
2 Sprite: A sprite can be a character or an object in a Scratch project.
3 Tabs: There are three tabs in the Scratch editor:


a Code: This tab has various code blocks to make the sprite move and do things.
b Costumes: This tab opens the Costumes editor where we can change how a sprite looks.
c Sounds: This tab opens the Sound editor to add and make changes to the sound effects of the sprite and to the backdrop.
4 Blocks panel: This panel has nine colour-coded categories of blocks:


We can even add more categories using the Add Extension button.
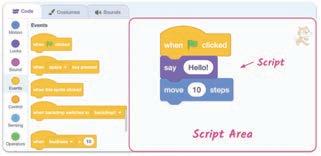
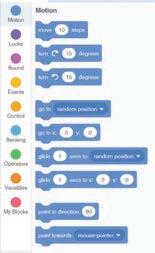
5 Blocks palette: This is the area where you can see all the blocks for a selected block category. The figure shows the various blocks of Motion block category.
6 Scripts area: The scripts area is next to the Blocks palette. This is where you drag the blocks to make your sprite do something. It is also called Coding area.

7 Stage: The stage is where you can see sprites in action.
8 Backdrop Stage
9 Backdrop: It is the background of the stage. You can add backdrops from the Scratch library or from your computer.
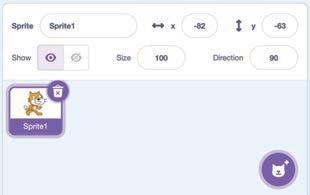
Sprites pane: The Sprites pane is below the stage. This pane shows all the details of sprites, like their name, position, and size.
10 Backdrops pane: It is below the stage and next to the Sprites pane. You can use it to add, upload, edit, or delete backdrops.

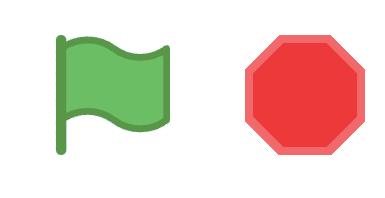
11 Go button and Stop button: The green flag is the Go button. You click it to run the script. The red button is the Stop button. You click it to stop the running script.

Identify and label the components based on the clues given below.
a I am a character in your project.
b I show you the options to change the name, size, and location of a character.
c I hold colour-coded categories of blocks.
d I am the area where you drag and join the blocks.
e I hold all the blocks for a block category.
Open Scratch.
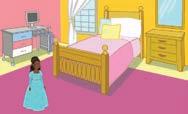
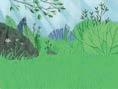
Go to the Backdrops pane. Click on Choose a Backdrop option and select Blue Sky.
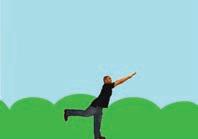
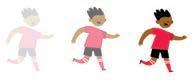
Now, go to the sprites pane. Click on Choose a Sprite option and select the Amon sprite.
The stage will look like the figure below.
A Fill in the blanks.
1 In Scratch, we use colourful to create our own games, stories, and drawing.
2 To create a project in Scratch, you need to click .
3 By default, the name of the Scratch project is .
4 The purple bar at the top of the Scratch editor is called the .
5 The background of the stage is called the . B Tick () the correct option.
1 What is the name of the area where you can see all the details of sprites? a Stage b Sprites pane c Blocks palette d Scripts area

2 What do you use to stop your running scripts? a c d


3 The tab is used to .

a open the Sound editor b listen to songs
c close the Sound editor d open the Costumes editor

4 Which of the following option has the icon?
a File menu b Edit menu
c Stage d Costumes tab

5 Which of the following options has this icon?
a Sprites pane b Stage
c Backdrops pane d All of these
C Who am I?


D Write T for True and F for False.
Sprite
Scripts Area
Costumes Tab Go button and Stop button
Sounds Tab
1 The default project name in Scratch is Project1.
2 You can add and make changes to the sound effects of your sprite and backdrop in the Sound editor.
3 The Go button is used to stop the running project.
4 Events are one of the categories of blocks.
5 The colour of the Go button is green.
E Answer the following questions.
1 What is block-based coding?
2 What is the use of the Costumes tab?
3 What is the role of the Sounds tab?
4 What is a Script?
5 Describe the Go and Stop buttons.
F Apply your learning.
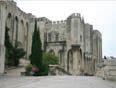
1 Rahul wants to make a project related to mountains in Scratch. Which background should he use?

2 What is a script in a project?


b


d None of these
3 Sheena wants to change the appearance of the sprite. What should she use?


4 Ritu wants to change the name of the sprite. Where should she go?


5 Arun wants to change the backdrop of the Stage. Which option should he choose?


Colour the fruits correctly in the given picture.
Just like each fruit has its own natural colour, each Scratch block category too is represented by its assigned colour. This makes it easy to find the blocks you need when you are creating a project.
Scratch blocks are grouped into categories based on what they do. For example, the Motion blocks are used to control the movement of sprites, whereas the Looks blocks are used to change the appearance of sprites. Let us learn more about the Scratch blocks.

blocks are used to control the movement of the sprites. They are blue in colour.

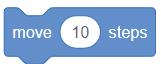
For example, the block makes this sprite move 10 steps towards the right.
Let us learn about some of the Motion blocks.


Moves the sprite forward the specified number of steps. Turns the sprite clockwise to the specified value. Turns the sprite anti-clockwise to the specified value. Moves the sprite to the specified x and y positions.

blocks are used to control how a sprite looks. They are purple in colour.
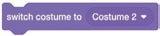
For example, the block will change the butterfly sprite’s costume from its current costume 1 to Costume 2.
Let us learn about some of the Looks blocks.
Blocks


Costume 1 Costume 2
Description
Makes the sprite say the specified text.
Makes the sprite say the specified text for the specified number of seconds.
Makes the sprite think of the specified text.
Makes the sprite think of the specified text for the specified number of seconds. Shows the sprite.
Hides the sprite.
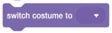
Changes the costume of the sprite to the specified one.
What is the difference between the Motion and Looks blocks?

blocks are used to tell a computer when to run a script to make things happen. They are yellow in colour.
An event is something that makes an action happen.
For example, the girl feeling hungry is an event; eating food is the action.
Let us learn about some of the Events blocks.
Blocks

Description
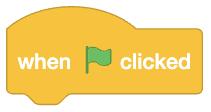
Runs the script when the green flag (the Go button) is clicked.
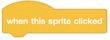
Runs the script when the sprite is clicked.
blocks are used to control the sound. They are pink in colour.
For example, the bell will play a sound when you use a sound block.
Let us learn about some of the Sound blocks.
Blocks


Description
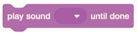
Plays a sound and pauses the script until it finishes. Plays a sound without pausing the script.
Stops all playing sounds.
blocks are used to control the scripts. They are orange in colour.
For example, to make a sprite move towards the right 3 times, we need a repeat block from the Control blocks category.
Let us learn about some more blocks from the Control blocks category.


Pauses the script for the specified number of seconds.
Repeats the instructions inside it a specified number of times.
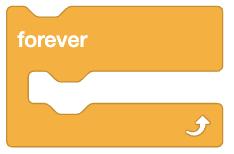
Repeats the instructions inside it forever, unless the Stop button is clicked.
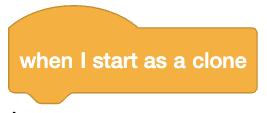
Runs the script for the clone (the copy of a sprite) when it is created.
Creates a clone of the specified sprite.
Deletes a clone.
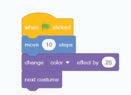
Let us create our first script to move and turn a sprite by using some of these blocks.
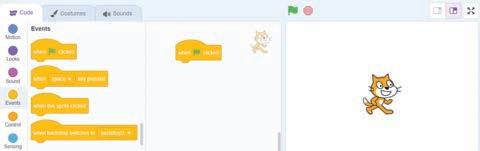
1 Click the Events category.
2 Drag the block in the scripts area.
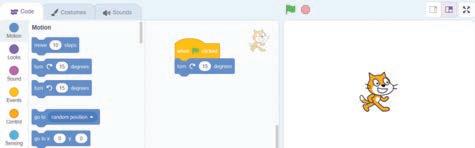
3 Click the Motion category.

4 Drag the block to below the block, as shown in the image below.
5 Drag the block to the scripts area just below the block, as shown in the image below.
6 Click the Go button to run the script. The Sprite turns 15 degrees clockwise and then moves forward 10 steps each time you click the button.
We can also change the values in the and blocks to turn by specified degrees and move a specified number of steps at once.
Scratch is available in more than 40 languages, so kids from all over the world can code in their language! Did You Know?
1 We have different colours of butterflies here. Write the names of the blocks that are represented by the same colours as the butterflies.
2 Match the columns.
Column A


A Fill in the blanks.
Column B
Plays a sound and pauses the script until it finishes.
Turns the sprite clockwise to the specified value.
Repeats the instructions inside the block specified number of times.
Runs the script when the green flag (the Go button) is clicked.
Pauses the script for the specified time.
1 are grouped into categories based on what they do.
2 blocks are orange in colour.
3 The block moves the sprite to the specified x and y position.
4 The block runs the script when the is clicked.

5 The block pauses the script for the specified number of seconds.
1 Which block is used to move a sprite?
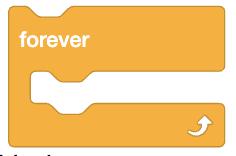


2 Which block is used to make a sprite turn clockwise?


3 Which block is used to run a script when the sprite is clicked?
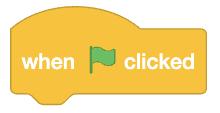


4 Which block can pause a script for the specified number of seconds?

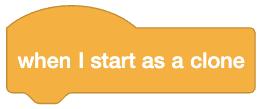

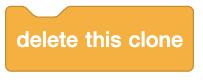
5 Which block can repeat a script the specified number of times?


C Who am I?

1 I change the costume of a sprite to a specified one.
2 I delete a clone of a sprite.
3 I repeat the instructions inside me forever.
8 • Scratch Blocks
4 I stop all playing sounds.
5 I run the script for a clone when it is created.
D Write T for True and F for False.
1 The Motion blocks in Scratch are used to control the appearance of sprites.
2 Events blocks are used to tell a computer when to run a script.
3 Sound blocks can make a 'hitting' sound when a ball hits a sprite.
4 Each Scratch block stands for a different instruction.
5 You can use a Control block to delete a sprite from your project.
E Answer the following questions.
1 What is an event?
2 What is the purpose of the Looks blocks in Scratch?
3 What is the use of the say block? Where can we find this block in Scratch?
4 Which category of Scratch blocks controls sound, and what is the colour of these blocks?
5 What is the purpose of the think for seconds block?
1 Nia is making a Scratch project where she needs to move the dog from left to right. Which block should she use?
2 Simran wants to turn her pufferfish clockwise, as shown in the picture. Which blocks can she use?
3 Ria has a Giga sprite in her project with two different looks, as shown in the picture. Which block must she use to change the look of the Giga sprite?
4 Rohit has made a project and wants to add sound to it. Which block can he use?
5 Priya wants to make the frog sprite move forward 3 times. Which blocks should she use?
Unscramble the following words to find the names of the Scratch blocks.
tniooM
nsvEet
unoSd
ornolCt
oklso
Now that you have completed the activity and revised the Scratch blocks, let us create our first Scratch project to draw a line.
When a new Scratch project gets created, it comes with a default name 'Untitled' and a default cat sprite 'Sprite1'.
To change the default name, click it and replace it with the new name 'Drawing a Line'.

Now, let us recall what a Sprite is.
A Sprite is a character or an object that you can move around on the stage and make this object do things.
Follow the given steps to delete the default Cat sprite.
1 Select the sprite to be deleted in the Sprites pane. The button appears.


2 Click the button to delete the sprite.
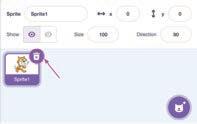
In Scratch, you can choose to add a sprite from the Sprites pane in four ways:
1 Choose a Sprite: To choose a sprite from the Scratch Sprite Library.
2 Paint: To create a sprite using Paint editor.
3 Surprise: To add a random sprite.
4 Upload Sprite: To upload a sprite from your computer.
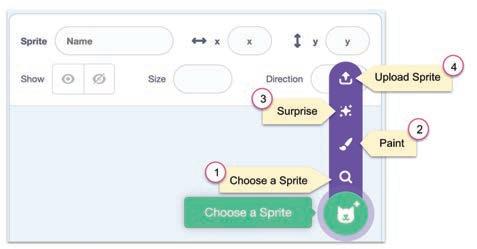
Now, let us add our first sprite, the Magic Wand , from the Sprite Library into our project.
Steps to add a sprite from Sprite Library:
1 Click the Choose a Sprite option in the Sprites pane. The Sprite Library opens.
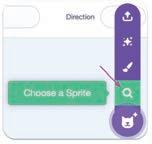
2 Type 'Magic wand' in the search bar and then click the Magic Wand sprite.
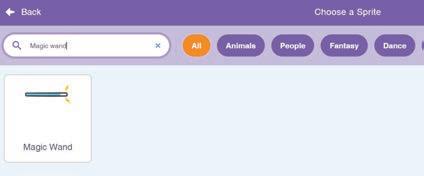
The Magic Wand sprite is added to the stage and is also visible in the Sprites pane.
3 Set the Size of the Magic Wand sprite to 40.
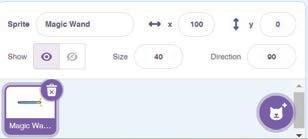
Let us now learn to position our Magic Wand sprite.
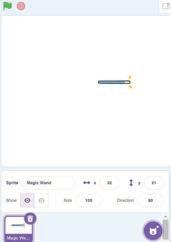
A position is a place on the stage where you want a sprite to go.
A position on the Scratch stage is made up of two values: x and y.
The x value tells the horizontal (left to right) position of the sprite.
The y value tells the vertical (top to down) position of the sprite.
To set the position of a sprite, you can use the block.
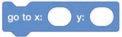
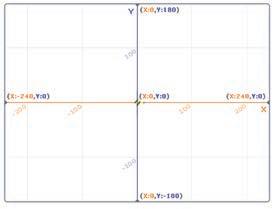

This block makes the sprite go to the position specified by the values of x and y.
Let us make the Magic Wand sprite go to the centre of the stage when the green flag is clicked.
1 Select the Magic Wand sprite in the Sprites pane.
2 Click the Events category in the block panel.
3 Drag the block in the scripts area.

4 Click the Motion category.

6 Set the value of x and y to 0.
5 Drag the block to under the block in the scripts area.
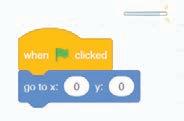
Click the Go button to run your project.
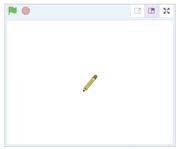

Now, we need to move the Magic Wand sprite to draw a line.
To move a sprite, you can use the block.

Let us move the Magic Wand sprite 100 steps forward to draw a line.
1 Select the Magic Wand sprite in the Sprites pane.
2 Click the Motion category in the block panel.
3 Drag the block to under the block in the scripts area.
4 Set the value of steps to 100.
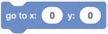
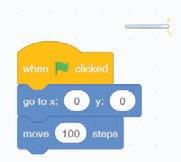
Click the Go button to run your project.
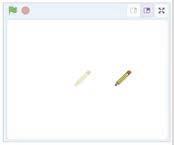


Did the Magic Wand sprite draw a line when moved forward by 100 steps? No.
To make the Magic Wand sprite draw a line, you need to use the Pen extension.
Pen Extension
The Pen Extension in Scratch allows sprites to draw on the stage. The Pen blocks are green in colour. They are used to create simple drawings such as lines, shapes, and patterns or more complex drawings such as pictures and animations.
To use the Pen extension, you must first add it to your Scratch project.
Adding the Pen Extension
Steps to add the pen extension:
1 Click the purple Add Extension button in the bottom left corner of the Scratch Editor window.
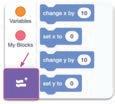
2 The Extension Library opens up. Click the Pen extension.
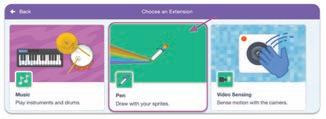
The Pen extension is added to the Blocks panel.
Let us learn about some of the Pen blocks.


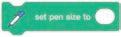
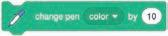

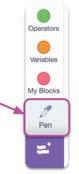
Tells the sprite to start drawing on the stage.
Tells the sprite to stop drawing on the stage.
Sets the colour of the pen.
Sets the thickness of the pen.
Makes your pen lighter or darker.
Clears all pen marks on the stage.
Now, let us use Pen blocks to make the Magic Wand sprite draw a line.
Steps to make the Magic Wand sprite draw a line:


0 0
1 Drag the block between the block and the block (before the Magic Wand sprite starts moving).


2 Drag the block under the block (once the Magic Wand sprite stops moving).
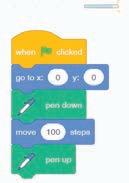
Click the Go button to run your project.
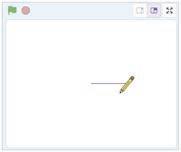
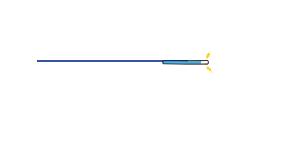
What happens when you run your project again?
Nothing changes.
What should happen?
The older drawing should be removed.
To remove the older drawing, we can use the block.

Steps to erase the old drawing when the green flag is clicked:
1 Click the Pen category in the blocks panel.

block.

2 Drag the block between the block and the
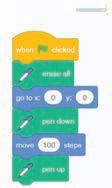
Click the Go button to run your project.
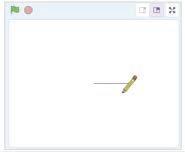
Did the old drawing get removed or not?
No.
The problem is that the new drawing is created so quickly that we cannot see the gap between the old drawing and the new drawing.

To solve the problem, we can use the block. It adds a delay between the erasing of the old drawing and creation of the new drawing.
Let us add a delay of 1 second between erasing of the old drawing and creation of the new drawing.
Steps to add a delay of 1 second:
1 Click Control in the blocks panel.

2 Drag the block between the 0 0 block and the block.

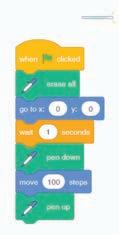
Click the Go button to run your project.
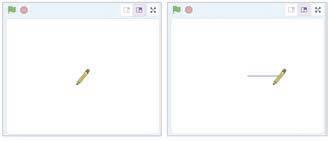
The project 'Drawing a Line' is complete. Now, let us learn how to save a project in Scratch.
1 Click the File menu in the Menu bar.
2 Click Save to your computer.
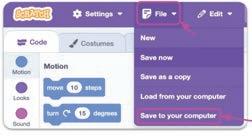
What happens when you click the green flag in a Scratch project that does not have any code attached to it?
1 Identify the missing code block in the given script.
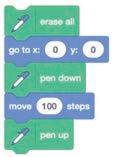


2 What does the block do?
a Tells the sprite to stop drawing
b Tells the sprite to start drawing
c Changes the colour of the sprite’s pen
d None of these
A Fill in the blanks.
Hints pen up draw pen down erase all sprite
1 A is a character or object that you can move on the stage and make it do things.
2 To start drawing a line, you need to use the block.
3 The Pen extension allows sprites to on the stage.
4 To stop drawing a line, you need to use the block.
5 To erase all pen marks on a screen, you need to use the block.
B Tick () the correct option.
1 What extension do you need to make the sprite draw?
a Video b Pen c Music d Text
2 What block can be used to add delay?


3 Which block can be used to set the colour of the sprite’s pen?


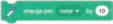
4 What does the block do?

a Turns the pen feature off inside a sprite
b Stops drawing
c Starts drawing
d Changes the pen colour
C Who am I?
What I Do?
Performs different actions on stage.
Makes your pen lighter or darker.
Moves the sprite to the specified x and y values.
Clears all pen marks on the screen.
Sets the colour of the sprite’s pen.
D Write T for True and F for False.
Who Am I?


1 The set pen colour to block sets the thickness of the pen.
2 The erase all block adds delay to the script.
3 The x value tells the vertical (top to down) position of the sprite.
4 To change the default name, click it and replace it with the new name.
5 To save a Scratch project, you should click the File menu and then select Save to your computer.
E Answer the following questions.
1 What is a sprite?
2 Write any two ways to add a sprite to your project.
3 What is the use of the pen blocks?
4 What is the difference between the pen down and pen up blocks?
5 Which block is used to move a sprite to a specific position, and where can we find it?
F Apply your learning.
1 Nikhil added a bear sprite to his Scratch project. Can you tell where will the sprite be visible now?

2 What code block can Pihu use to make a sprite move by 300 steps?


3 Imagine the girl sprite is 200 steps away from the boy sprite. Write down the script to make the ball reach the girl when the green flag is clicked.

A. Fill in the blanks.
1 The is the backbone of a computer system.
2 The operating system manages computer and .
3 A is a collection of web pages that contain information about a related topic.
4 can be used to organise files and make it easier to find them.
B. Tick () the correct option.
1 Which device allows you to hear music and sounds from a computer?
a Screen
c Mouse
b Microphones
d Speakers
2 Which sorting option sorts your icons by the date they were last modified?
a Size
c Type
b Date modified
d Name
3 What is the blinking black line that appears on the white area called?
a Cursor
c Folder
C. Write T for True and F for False.
1 There are two main components of the CPU.
b File
d Icon
2 The Search bar is used to find files, programs, settings, etc., on the computer.
3 Email is a way to send messages to people over the internet.
4 A file is a collection of folders.
D. Answer the following questions.
1 What is processing?
2 What are icons?
3 Write any two advantages of internet.
E. Apply your learning.
1 Sejal’s mother is controlling a device by using her finger tips instead of a mouse or keyboard. Name the device which she is using.
2 Ayushi wants to search for the “Calculator” application on her computer. How can she do it?
3 Neha shared her personal information with a stranger over the internet. Was it a good thing to do? Give your reason.
A. Fill in the blanks.
Test Paper 2 (Based on Chapters 5 to 9)
1 The shows the name of your drawing.
2 The is the background of the stage.
3 block changes the costume of the sprite to the specified one.
4 To draw a line, you must use the extension in Scratch.
B. Tick () the correct option.
1 In a document tab, `X' sign is used to:
a Save the document b Open the document
c Close the document d Share the document
2 Which one of the following tools in Paint will you use to draw a freehand drawing?
a Pencil b Rectangle
c Eraser d Text
3 is used to add a random sprite.
a Choose a sprite b Paint
c Surprise d Upload sprite
4 A on the Scratch stage is made up of two values: x and y.
a Position b Object
c Sprite Library d Add extension
c. Write T for True and F for False.
1 The Blocks panel contains nine colour-coded categories of blocks.
2 Autosave is a feature of Google Docs that automatically saves an open document or file.
3 The [go to x: () y: ()] block is found in the Looks category.
4 A callout is a shape that is used to write a message.
D. Answer the following questions.
1 Define coding.
2 What is the use of the Color picker tool?
3 Define word processor.
4 What are pen blocks?
E. Apply your learning.
1 Ashi wants to write “Welcome to the dreamland” on the drawing she drew. Which tool will help her write text in the drawing?
2 Akshit has a goblin sprite in his project with two different looks, as shown in the picture. Which block can he use to change the current look of the goblin to the other one?
3 Pragati wants to change the default sprite on the stage but forgets the steps to delete a sprite. Help her by writing the steps to do so.
Artificial intelligence or AI, is all around us. It helps us in many ways every day. Let us see some uses of AI in daily life.

Voice Assistant: When you use your phone to talk to a voice assistant, that’s AI. It can answer questions and play music for you.

Maps: AI can help you find your way if you use maps on a phone or tablet. It shows the best route to get to places.
Smart TV: When you watch TV, AI can suggest shows you might like. It learns what you enjoy and gives you good choices.
Games: When you play games, AI makes the characters in the game smart. They know what to do and how to play along with you.
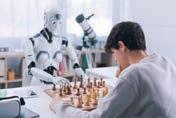
Smart Home: AI is also in smart home devices. These devices can turn lights on and off or adjust the temperature. They listen to your commands and make your home more comfortable.
Education: AI can help you learn new things. Some apps use AI to help you practice math or reading. Other apps use AI to help answer your questions.
Shopping: When you shop online, AI helps you find what you need. It can show you pictures of toys or clothes you might like. Some robots in stores use AI to help you find what you are looking for.

Medical: AI help doctors by treating the sick people and analysing diseases.
Safety: Some AI systems can spot dangerous situations and alert us to be careful. It helps keep us safe while we use technology.
Language Translation: When you talk to your friends online, AI can help translate different languages. It makes it easier to understand and chat with people from around the world.
AI in Future: In the future, AI will help us even more. It might help with homework, make cooking easier, and even help keep us safe.


Uolo has introduced a comprehensive program, Hexa, for grades 1 to 8, to empower young minds with the knowledge and the skills they need to thrive in the digital age. From the basics of how computers function to the tools that shape our digital landscape, this series opens the door to a world of endless possibilities. This series will build a strong foundation, helping shape the next generation of digital citizens and innovators. It aims to demystify the world of computer science, making it accessible and engaging for young learners, while preparing them for future academic and professional pursuits in the field.
• AI Annexures: To offer a basic understanding of specific domains of Artificial Intelligence.
• Discuss: A multi-faceted probing question, related to the concept, that arouses curiosity.
• Think and Tell: Analysis, reflection, and text-to-self connection based prompts for discussion in class.
• Did You Know? Interesting facts related to the application of a concept.
• Do It Yourself: Short exercises between the chapter to pause and assess comprehension.
• Chapter Checkup: Chapter-end practice exercises aligned to different levels of Bloom's Taxonomy.
Uolo partners with K-12 schools to bring technology-based learning programs. We believe pedagogy and technology must come together to deliver scalable learning experiences that generate measurable outcomes. Uolo is trusted by over 15,000+ schools across India, South East Asia, and the Middle East.