
Teacher Manual 2
NEP 2020 based | ICSE compliant | Technology powered

2
COMPUTER SCIENCE Teacher Manual
ICSE

Uolo’s Tekie program offers a coding-focused curriculum for grades 1 to 8, preparing students for the technology-driven world. We present a carefully crafted Teacher Manual to assist teachers in delivering effective and engaging lessons to students. Rather than prescribing teaching methods, the manual provides examples and demonstrates how and why teachers can apply these examples in their classes.
The Teacher Manual includes a suggested implementation plan to help teachers navigate the curriculum better throughout the academic year. Within the academic year, the Tekie program prescribes the following types of chapters and sessions:
Familiarisation: this period builds familiarity with the Tekie program and the digital platform.
Theory: these periods are dedicated to the Computer Science Theory chapters. These topics are mostly delivered in the classroom.
Tools: these periods are dedicated to the Computer Tools chapters. These topics involve almost equal numbers of classroom and computer labs sessions.
Coding: these periods are dedicated to the Coding chapters. These topics have more computer lab sessions.
Additional Hands-on Time: these are additional computer lab periods that teachers can use to revise topics or dedicate for completion of projects.
Revision: these are additional classroom periods that teachers can use to revise topics or cover syllabus backlogs.
Each chapter in this manual is structured to provide a comprehensive lesson plan. The chapters are divided into multiple sessions, each following the Warm up, Engage, Build, and Sum up (WEBS) strategy. The Warm up phase sets the stage for learning by connecting to prior knowledge and building curiosity. The Engage phase captures the students’ attention and motivates them to participate actively. In the Build phase, questions from various sections are discussed to build the understanding of the students. Finally, the Sum up phase reinforces learning through easy-to-recall activities and questions. Time duration for each section has been suggested based on the requirements of the students. Additionally, an answer key for every chapter is provided to assist teachers in assessing their students’ understanding and guiding their learning effectively.
Lastly, we understand that the Indian education landscape is quite diverse. To suit the needs of all types of schools, we have built-in extra higher-order chapters in the content books. These extra chapters are clearly marked in the table of contents of this manual. We suggest that the teacher completes the main chapters first and then move to higher-order optional chapters only if there is sufficient time left in the academic year and learners are ready for more challenging content.
We hope that this teacher manual will empower teachers to use the curriculum effectively, support the learning of all students thoroughly, create learning opportunities and design interactive learning environments that cater to the students’ needs and interests.
Conji becomes familiar with the world of gadgets and computers when he starts teaching some spells to Mel. Mel casts the wrong spell, and the keys of the keyboard go missing. So, Conji teaches him about the reverse spells. Elder Wizard tells them that Lord Ero is trying to steal the computer mouse to cause trouble. They get to know that computers are important to Avora, and they must hide all its parts in the Memory Palace so that Muses can protect them. Instead, Muses play with the order of the files and disturb them. They learn how to sort them. Elder Wizard announces an art contest in Avora. They learn to draw in MS Paint, and the trio is declared the winner. Suddenly, Avora becomes colourless as Lord Ero casts a spell. They use magic and MS Paint to bring the colours back.
● Elder Robot and Elder Wizard are talking to Mel and Conji.
● Elder Wizard asks Mel to take Conji to the Computer Lab and show him the world of gadgets.
● Conji asks Mel about computers, as he is not aware of computers.
● Mel tells Conji that a computer is an electronic device that stores information and shows him a computer.
● Conji is surprised to see a computer and asks Mel to tell him more about it.
This chapter is divided into the following classroom sessions
At the end of the session, the students will be able to:
● describe a device, an electronic device, and a computer.
● tell the uses of computers.
Keyword
● Computer: A computer is an electronic device that helps us do many things.
Ask the students about different devices around them.
Discuss a few electronic devices with the students, and then tell them about computers and its uses.
Group discussion
Think and Tell
Action Plan
Conclude the concepts Assign homework
5 mins
Warm Up
● Ask the students about different devices around them.
● Tell them about electronic devices.
● Now, build the concept by introducing them to computers.
Engage
Explain the following concepts:
Learning Outcomes Explanation
Describe a device, an electronic device, and a computer.
15 mins
Tell the students that the devices are things that help us to do specific tasks. Then tell them about electronic devices and computers, as given on page 4.
Tell the uses of computers. Tell them that a computer is used for playing games, watching videos, etc., by giving examples, as given on page 4.
● What are the uses of computers?
Correct Responses: playing games, watching videos, etc.
● Can you draw a picture using a computer?
Possible Responses: Yes/No
Correct Response: Yes. You can draw a picture on a computer.
● What are the different activities that you can perform on a computer?
Possible Responses: play, learn, and share our things.
● What are the uses of computers?
Possible Responses: finding information, listening to music, etc.
● Conduct a group discussion in the class on the topic “Is a smartphone like a computer?” given in the Discuss section on page 4.
Possible Response: A smartphone is like a handheld computer that is easy to carry and is portable.
● Ask the students to answer to the question “What are some things you like to do on a computer?” asked in the Think and Tell section on page 4.
Possible Responses: drawing pictures, playing games, etc.
● Conclude the session by summarising that a computer is an electronic device that helps us do many things. The computer, then, becomes our electronic friend and is used for playing games, watching videos, drawing pictures, listening to music, and finding information.
● Assign the following from the Chapter Checkup given at the end of the chapter as homework.
C. Who Am I?: Questions 1 and 2
D. Write T for True and F for False: Questions 1, 3, and 4
E. Answer the Following: Question 1
F. Apply Your Learning: Question 1
At the end of the session, the students will be able to:
● tell the advantages of computers.
Ask the students what a computer is and its uses.
Ask them what can be the possible advantages of a computer.
Tell them that a computer can do many things for us, then discuss the advantages of a computer.
Think and Tell Conclude the concepts
Assign homework
mins
● Ask the students what a computer is and its uses.
5 mins
● Ask them what can be the possible advantages of a computer. Tell them computers help us know about new things.
Explain the following concepts:
Learning Outcome Explanation
Tell the advantages of computers.
15 mins
Tell the students that a computer can do many things for us, as given on page 5.
● Tell me about any one advantage of a computer.
Possible Responses: We can share information and talk to each other using a computer. / It can store a large amount of data, like pictures, music, videos, and games. (Answers may vary)
● Name one way a computer helps us with entertainment.
Possible Responses: watching cartoons, playing games, etc.
● Ask the students to answer the question “Is doing many things on a computer at the same time an advantage?” in the Think and Tell section on page 5.
Possible Responses: Yes/No
Correct Response: Yes, it is an advantage since it saves our time.
3 mins
● Conclude the session by summarising that a computer can do many things for us. It is used to store a large amount of data, play games, watch cartoons, and share information.
● Assign the following from the Chapter Checkup given at the end of the chapter as homework.
A. Fill in the Blanks: Question 5
E. Answer the Following: Question 3
At the end of the session, the students will be able to:
● tell the disadvantages of computers.
Based on the topics they have learnt, ask the students what can be the possible disadvantages of a computer.
Tell them that the computers are very useful but they also have some disadvantages. Thereafter, discuss the disadvantages of a computer.
mins
Group discussion Conclude the concepts
Assign homework
mins 3 mins
5 mins
● Based on the topics they have learnt, ask the students what can be the possible disadvantages of a computer.
● Ask the students if they know that using a computer for a long time can make their eyes weak.
Engage
Explain the following concepts:
15 mins
Tell the disadvantages of computers. Tell the students that computers are very useful but they also have some disadvantages, as given on page 6.
● Read aloud the questions provided in the Do It Yourself 1A section and encourage the students to solve them. Instruct them to write the answers in their book.
Correct Responses:
1. a. Connectivity b. Health Problems c. Information
d. Security Problems e. Entertainment
2. a. D b. A c. A d. A
Build
7 mins
● Conduct a group discussion in the class on the topic ‘Consequences of using a computer for a long time’.
Possible Response: Using a computer for a long time can cause many health problems, such as headaches, strain on our eyes, etc.
3 mins
● Conclude the session by summarising that the computers are very useful, but they also have some disadvantages, such as causing health, security, and environmental problems.
● Assign the following from the Chapter Checkup given at the end of the chapter, as homework.
A. Fill in the Blanks: Question 1
E. Answer the Following: Questions 4 and 5
F. Apply Your Learning: Question 3
At the end of the session, the students will be able to:
● describe the places where computers are used.
Ask the students where they have seen the computers.
Discuss the places where computers are used.
Group discussion Conclude the concepts
Assign homework
5 mins 15 mins 7 mins 3 mins
Action Plan
Warm Up
● Ask the students where they have seen the computers.
● Now, build the concept by discussing any one place where computers are used.
Engage
Explain the following concepts:
Learning Outcome Explanation
5 mins
15 mins
Describe the places where computers are used. Tell the students that in today’s world, computers are used everywhere, such as in schools, banks, hospitals, etc., as given on page 7.
● Read aloud the questions in the Do It Yourself 1B section and encourage the students to solve them. Instruct them to write the answers in their book.
Correct Responses:
1.
a. Banks: To let us take money out from our account.
b. Schools: To help us learn new things.
2. Option c
● Conduct a group discussion in the class on the topic “How can computers help us in doing our homework and creating projects?” given in the Discuss section on page 8.
Possible Response: Computers allow finding information quickly, and the projects look neat when done on a computer.
3 mins
● Conclude the session by summarising that in today’s world, computers are everywhere, and they help us in many places. In banks, they help us take out money and send money to others, etc. In school, computers help us learn new things. In hospitals, computers help make medical reports. At airports and stations, they help us book tickets. In stores and offices, computers help make orders and bills.
● Assign the following from the Chapter Checkup given at the end of the chapter, as homework.
A. Fill in the Blanks: Question 2
B. Tick the Correct Option: Questions 2, 3, and 4
C. Who Am I?: Questions 3 and 4
D. Write T for True and F for False: Question 2
E. Answer the Following: Question 2
F. Apply Your Learning: Questions 4 and 5
At the end of the session, the students will be able to:
● tell the steps to start a computer.
Ask the students if they have ever turned on a TV.
Discuss the various steps to start a computer.
Group discussion Conclude the concepts
Assign homework 5 mins
mins 7 mins 3 mins 5 mins
Action Plan
Warm Up
● Ask the students whether they have turned on a TV or any other electronic device.
● Now, build the concept by telling the students if they know the steps to start a computer.
Engage
Explain the following concepts:
Learning Outcome Explanation
Tell the steps to start a computer.
15 mins
Tell the students about the various steps in starting a computer, as given on pages 8 and 9.
● Read aloud Question 1 provided in the Do It Yourself 1C section and encourage the students to solve them. Instruct them to write the answers in their book.
Correct Response: 5 > 1 > 4 > 3 > 2
● In which step you should press the ON button on the monitor?
Possible Responses: Step 1, Step 2, Step 3, Step 4, or Step 5.
Correct Response: Step 4
Build 7 mins
● Conduct a group discussion in the class on the topic ‘Can we start a laptop the same way as we start a computer?’.
Possible Responses: Yes/No
Correct Response: No. Starting a laptop is a bit different from starting a desktop computer with separate components. With a laptop: we press the power button on the laptop itself. There is no need for a separate main power button, UPS switch or CPU switch, as laptops are self-contained units.
3 mins
● Conclude the session by summarising that to start a computer, we need to follow these steps: Switch on the main power button > Press the ON button on the UPS > Press the ON button on the CPU > Press the ON button on the monitor > Wait for the computer to start. Once your computer is ‘Awake’, you can use it.
● Assign the following from the Chapter Checkup given at the end of the chapter as homework.
A. Fill in the Blanks: Question 3
B. Tick the Correct Option: Question 1
D. Write T for True and F for False: Question 5
F. Apply Your Learning: Question 2
At the end of the session, the students will be able to:
● shut down a computer.
Ask students whether they can turn off a computer directly by pressing the power button, just like a TV.
Discuss the various steps to shut down a computer.
Group discussion Conclude the concepts Assign homework
Action Plan
Warm Up
● Ask the students whether they can turn off a computer directly by pressing the power button, just like a TV.
● Now, build the concept by discussing the steps to shut down a computer.
Engage
Explain the following concepts:
Learning Outcome Explanation
Shut down a computer. Tell the students about the various steps involved in shutting down a computer, as given on page 9.
15 mins
● Read aloud Question 2 provided in the Do It Yourself 1C section and encourage the students to solve them. Instruct them to write the answers in their book.
Correct Responses: 1 > 2 > 6 > 4 > 3 > 5
● In which step you should click on the power button?
Possible Responses: Step 1, Step 2, Step 3, or Step 4.
Correct Response: Step 3
● Conduct a group discussion in the class on the topic ‘What are the electronic devices that can be shut down?’.
Possible Responses: Discuss different things around us, like televisions, lamps, toys, mobile phones, etc.
3 mins
● Conclude the session by summarising the following steps to turn off a computer: First, click on the Start button. Then, find the Power button at the bottom left-hand side of the menu that pops up. Click on Shut down.
● Assign the following from the Chapter Checkup given at the end of the chapter as homework.
A. Fill in the Blanks: Question 4
C. Who Am I?: Question 5
Conji becomes familiar with the world of gadgets and computers while he teaches some spells to Mel. Mel casts an incorrect spell and the keys of the keyboard disappear. So, Conji teaches him about the reverse spells. Elder Wizard tells them that Lord Ero is trying to steal the computer mouse to cause trouble. They learn that computers are important for Avora and they have to hide all their parts in the Memory Palace so that Muses can protect them. Instead, Muses play with the order of the files and disturb them. They learn how to sort them. Elder Wizard announces an art contest in Avora. They learn to draw in MS Paint, and the trio wins the contest. Suddenly, Avora loses its colours as Lord Ero casts a spell. They use magic and MS Paint to restore the colours.
● After understanding computers, Mel and Conji enter the magical room.
● Conji teaches some magic spells to Mel. Meanwhile, Elder Wizard appear in the room using magic.
● Mel is surprised to see this trick and asks, “How do you remember all the spells?”.
● Conji tells her that they look for the spells in the magic books, which are stored in the Wizard Library.
● Mel relates this to how they use storage devices, but Conji is unaware of storage devices and asks Mel about them.
● Mel tells him that to understand storage devices, he should first know the different parts of a computer.
● Elder Wizard asks Mel to tell Conji about the parts of a computer.
This chapter is divided into the following classroom sessions
1.
At the end of the session, the students will be able to:
● define the different input devices.
● identify different input devices.
● explain the uses of different input devices.
Keywords
● Device: A device is a tool that helps us do a specific task.
● Input devices: Input devices help us tell a computer what to do. Input devices provide ways to ‘talk’ to the computer.
Ask the students what a device is.
Ask the students if they have observed different devices of the computer.
Discuss what input devices are and explain different input devices, such as the keyboard, mouse, and microphone. Tell them the uses of each device.
● Ask the students what a device is.
Action Plan
Think and Tell Conclude the concepts
Assign homework
● Ask the students if they have observed different devices of the computer.
● Now, build the concept by discussing what input devices are.
Explain the following concepts:
Learning Outcomes
Define the different input devices.
Explanation
Tell the students that input devices help us tell a computer what to do, as given on page 21.
Identify different input devices.
Explain the uses of different input devices.
Tell them about different input devices, such as a keyboard, mouse, and microphone, as given on pages 21 and 22.
Explain to them the uses of the keyboard, mouse, and microphone as given on pages 21 and 22.
● Read aloud the questions provided in the Do It Yourself 2A section and encourage the students to solve them. Instruct them to write the answers in their book.
Correct Responses: 1. T 2. T 3. T 4. T 5. F
● What are the uses of a mouse?
Correct Responses: Selecting items, clicking on items to open them, etc.
● Which device is used to record your voice?
Possible Responses: Keyboard/Mouse/Microphone
Correct Response: Microphone
Build
7 mins
● Ask the students to give the answer to the question “Can you name a few devices in the classroom?” asked in the Think and Tell section on page 21.
Possible Responses: Computer, laptop, projector, etc.
Sum Up
3 mins
● Conclude the session by summarising that there are three types of devices in a computer: the input devices, the output devices, and the storage devices. The input devices, such as a keyboard, a mouse, or a microphone, enable us to communicate with a computer. The keyboard allows us to type, the mouse allows us to point and click, and the microphone enables us to use our voice to tell the computer what to do.
● Assign the following from the Chapter Checkup given at the end of the chapter as homework.
A. Fill in the Blanks: Questions 2 and 5
B. Tick the Correct Option: Questions 1 and 5
D. Write T for True and F for False: Questions 2, 3, 4, and 5
E. Answer the Following: Question 1
F. Apply Your Learning: Question 2
At the end of the session, the students will be able to:
● define output devices.
● identify different output devices.
● explain the uses of different output devices.
Keyword
● Output devices: Output devices show the results of what we want from the computer.
Ask the students to think about how the computer shows the results of commands given by the input devices.
Discuss what output devices are and explain different output devices, such as the monitor, printer, speakers, and headphones. Tell them the uses of each device.
Group discussion
Conclude the concepts
Assign homework
Action Plan
5 mins
Warm Up
Ask the students to think about how the computer shows the results of commands given by the input devices.
Now, build the concept by discussing what output devices are.
Engage
Explain the following concepts:
Learning Outcomes
15 mins
Explanation
Define output devices. Tell the students that output devices show the results of what we want from the computer, as given on page 23.
Identify different output devices.
Tell them about different output devices, such as monitors, printers, speakers and headphones, as given on pages 23 and 24.
Explain the uses of different output devices.
Explain to them the uses of monitor, printer, speakers, and headphones, as given on pages 23 and 24.
● Read aloud the questions provided in the Do It Yourself 2B section and encourage the students to solve them. Instruct them to write the answers in their book.
Correct Responses: 1. Monitor 2. Speaker 3. Keyboard 4. Mouse (From top to bottom)
● Name the device that shows you the result of your input.
Possible Responses: Monitor/Printer/Keyboard/Mouse
Correct Response: Monitor
● Which device is used when more than one person wants to hear the sound and music?
Possible Responses: Microphone/Headphones/Speaker
Correct Response: Speaker
Build
7 mins
● Conduct a group discussion in the class on the topic ‘Difference between Input and Output Devices’.
Correct Response: Input devices help us to tell a computer what to do. Whereas output devices show the results of what we want from the computer.
3 mins
Sum Up
● Conclude the session by summarising that computers show us things with output devices. The monitor helps us see text, videos, images, and what we are doing on our computer. A printer is used to print pictures and text on paper. Speakers are used when more than one person wants to hear the sounds and music, while headphones are just for one person.
● Assign the following from the Chapter Checkup given at the end of the chapter as homework.
A. Fill in the Blanks: Questions 1 and 3
B. Tick the Correct Option: Question 3
C. Who Am I?: Questions 1, 3, and 5
D. Answer the Following: Questions 2 and 4
E. Apply Your Learning: Question 3
At the end of the session, the students will be able to:
● define storage devices.
● identify different storage devices.
● explain the uses of different storage devices.
Keyword
● Storage devices: The devices used to store information on the computer are known as storage devices.
Ask the students how they store their clothes and toys.
Discuss what storage devices are and explain to the students the different storage devices, such as the hard disk, CD/DVD, and pen drive. Tell them the uses of each device.
Action Plan
Group discussion Conclude the concepts
Assign homework
5 mins
● Ask the students how they store their clothes and toys.
● Now, build the concept by discussing how, similarly, we can store our school projects, songs, and games on computers.
15 mins
Engage
Explain the following concepts:
Explanation
Define storage devices. Tell the students that a computer is used to store information on the computer, like our favourite songs, school projects, films, and games. Then introduce them to storage devices, as given on page 24.
Identify different storage devices.
Explain the uses of different storage devices.
Discuss different storage devices, such as the hard disk, CD/DVD, and pen drives, as given on pages 24 and 25.
Explain to them the uses of hard disk, CD/DVD, and pen drives, as given on pages 24 and 25.
Ask the following questions to the students to check their understanding:
● Name the devices that are round in shape.
Possible Responses: Monitor/Printer/Keyboard/Mouse/CD/DVD
Correct Responses: CD and DVD
● Which storage device is also known as a flash drive?
Possible Responses: Microphone/Speaker/Pen drive/Hard disk/CD
Correct Response: Pen drive
● Which device looks like a box?
Correct Response: Hard disk
● What is the full form of a CD?
Correct Response: Compact Disc
Build
7 mins
● Conduct a group discussion in the class on the topic ‘How is a hard disk different from a pen drive?’.
Possible Responses: A hard disk is larger and is not as portable as a pen drive whereas pen drives are small and can easily fit in a pocket.
3 mins
● Conclude the session by summarising that on a computer, we can save things like our favourite songs, school projects, films, and games. This is called data. This data is kept safe on storage devices. A hard disk is like a big box inside the computer that keeps everything safe. CDs and DVDs are round discs that also store things. Pen drives store lots of files and can be carried around easily.
● Assign the following from the Chapter Checkup given at the end of the chapter as homework.
A. Fill in the Blanks: Question 4
B. Tick the Correct Option: Questions 2 and 4
C. Who Am I?: Questions 2 and 4
E. Answer the Following: Question 3
F. Apply Your Learning: Question 1
At the end of the session, the students will be able to:
● explain the IPO cycle.
Ask the students if they have ever grown plants, then discuss how a seed grows into a healthy plant.
Engage Build Sum Up
Discuss the IPO cycle with the students. Group discussion
Conclude the concepts
Assign homework
mins
Action Plan
5 mins
● Ask the students if they have ever grown plants, then discuss how a seed grows into a healthy plant.
● Now, build the concept by discussing how, similarly, a computer works by telling them about the IPO cycle.
15 mins
Engage
Explain the following concepts:
Learning Outcome Explanation
Explain the IPO cycle. Tell the students that a computer works in three phases—input, process, and output, often referred to as the IPO cycle. Explain to them using relevant examples, as given on pages 26 and 27.
● Read aloud the questions provided in the Do It Yourself 2C section and encourage the students to solve them. Instruct them to write the answers in their book.
Correct Responses:
1. a. I b. P c. O
2. a. O b. I c. P
7 mins
Build
● Conduct a group discussion in the class on the topic “Can you think of another example for the IPO cycle” given in the Discuss section on page 27.
Possible Responses:
Input—Water, Ice Tray, and Refrigerator
Process—Freezing of Water
Output—Ice
Sum Up
3 mins
● Conclude the session by summarising that computers function through an (IPO) cycle—Input, Process, and Output. The input is what we provide to the computer, such as information or commands. The process is what the computer does with this input, like performing calculations. The output is what the computer gives us back, like displaying information on the screen, printing a document, etc.
● Assign the following from the Chapter Checkup given at the end of the chapter as homework.
D. Write T for True and F for False: Question 1
E. Answer the Following: Question 5
F. Apply Your Learning: Questions 4 and 5
Conji becomes familiar with the world of gadgets and computers while he teaches some spells to Mel. Mel casts a wrong spell, and the keys of the keyboard go missing. So, Conji teaches him about the reverse spells. Elder Wizard tells them that Lord Ero is trying to steal the computer mouse to cause trouble. They get to know that computers are important for Avora, and they have to hide all their parts in the Memory Palace so that Muses can protect them. Instead, Muses play with the order of the files and disturb them. They learn how to sort them. Elder Wizard announces an art contest in Avora. They learn to draw in MS Paint, and the trio is declared the winners. Suddenly, Avora becomes colourless as Lord Ero casts a spell. They use magic and MS Paint to bring the colours back.
● Conji and Mel walk towards the Computer Lab to see the parts of a computer.
● Curious Mel asks Conji to teach her magic. So, she asks Conji to increase the size of the computer keys.
● Conji tells her to use the “JUMBO RUMBO!” spell.
● Accidentally, due to overexcitement, Mel uses the spell incorrectly. She spells it “JUMBO MUMBO!”.
● After her spell, all the keys of the keyboard go missing, and Mel gets scared.
● But, Conji knows reverse spells too. So, he uses “JUMBO MUMBO REVERSIO!” to get back all the keys.
● Surprisingly, all the keys appears, but by looking at them, Conji becomes confused.
● He asked Mel to explain the keys on the keyboard.
This chapter is divided into the following classroom sessions
1. Alphabet and Number Keys
2. Special Keys
3. Combination Keys
At the end of the session, the students will be able to:
● describe what keys are.
● describe and show alphabet keys on the keyboard.
● describe and show number keys on the keyboard.
Keywords
● Alphabet keys: The alphabet keys are the keys with letters on them.
● Number keys: The number keys are the keys with numbers on them.
Warm Up Engage
Ask the students to look at the picture of the keyboard as given on page 38 and call out the names one by one, written inside each square.
Build Sum Up
Describe the keys. Also, explain the number and the alphabet keys. Group discussion
Conclude the concepts
Assign homework
Action Plan
5 mins
Warm Up
● Ask the students to look at the picture of the keyboard as given on page 38 and call out the names one by one, written inside each square.
● Now, build the concept that the keyboard is an input device. It has lots of buttons, called keys, on it.
15 mins
Engage
Explain the following concepts:
Learning Outcomes
Describe what keys are.
Explanation
Discuss with the students that the keyboard is an input device. It has lots of buttons, called keys, on it. It helps us type letters, numbers, and symbols on the computer, as given on page 37.
Describe and show alphabet keys on the keyboard.
Describe and show number keys on the keyboard.
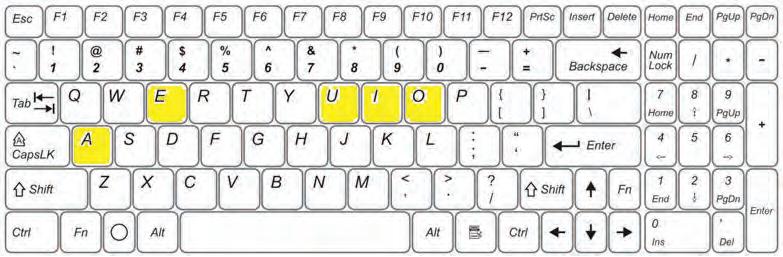
Tell the students that the alphabet keys are the keys with letters on them. There are 26 alphabet keys, one for each letter in the English language, as given on page 37.
Explain to them that the number keys are the keys with numbers on them. There are 10 number keys, from 0 to 9, as given on pages 37 and 38.
● Read aloud the questions provided in the Do It Yourself 3A section and encourage the students to solve the questions. Instruct the students to write the answers in their book.
Correct Responses:
1.
Alphabet Key

7 mins
● Conduct a group discussion in the class on the topic ‘How many alphabet keys and number keys do we have?’.
Possible Responses: 25, 30, 45
Correct Response: We have 26 alphabet keys and 10 number keys on the keyboard.
3 mins
● Conclude the session by summarising that the keyboard is an input device. It has lots of buttons, called keys, on it. It helps us type letters, numbers, and symbols on the computer. The alphabet keys are the keys with letters on them. There are 26 alphabet keys, one for each letter in the English language. The number keys are the keys with numbers on them. There are 10 number keys, from 0 to 9.
● Assign the following questions from the Chapter Checkup given at the end of the chapter as homework.
A. Fill in the Blanks: Questions 1 and 2
B. Tick the Correct Option: Question 1
D. Write T for True and F for False: Questions 1, 2, 3, and 4
F. Apply Your Learning: Question 4
At the end of the session, the students will be able to:
● describe special keys.
● discuss about the Backspace key.
● explain the Delete key.
● discuss the Punctuation keys.
● explain the Spacebar key.
● describe the Caps Lock key.
● discuss the Enter key.
● explain Arrow keys.
Keywords
● Backspace key: The backspace key helps us remove the text or objects before the cursor.
● Delete key: The delete key also helps us to remove text or objects but when they are after the cursor.
● Punctuation keys: Punctuation keys are used to add punctuation symbols.
● Spacebar: The spacebar is the largest key on the keyboard that adds space between two words.
● Caps Lock key: Caps Lock key is used to type letters in capital.
● Enter key: The Enter key is used to move the cursor to a new line while typing.
Ask the students to check the keyboard as given on page 38 and calculate how many keys do we have in total.
● Arrow keys: The arrow keys are used to move the cursor in the direction of the arrow. 5 mins
Action Plan
● Ask the students to check the keyboard as given on page 38 and calculate how many keys do we have in total.
● Now, tell them that the keyboard has a total of 104 keys.
Explain the following concepts:
Describe special keys. Tell the students that special keys are used to do particular tasks, as given on page 39.
Discuss about the Backspace key.
Explain to them that the backspace key helps us remove the texts or objects before the cursor, as given on page 39.
Explain the Delete key. Discuss with them that the delete key helps us to remove text or objects, but only when they are after the cursor, as given on page 39.
Discuss the Punctuation keys.
Explain the Spacebar key.
Describe the Caps Lock key.
Elaborate on punctuation keys as they are used to add punctuation symbols, as given on page 40.
Describe how the spacebar key adds a space between two words, as given on page 40.
Explain to them that the caps lock key is used to type letters in capital, as given on page 40.
Discuss the Enter key. Tell them that the enter key is used to move the cursor to a new line while typing, as given on page 41.
Explain Arrow keys. Elaborate on arrow keys and explain that they are used to move the cursor in the direction of the arrow, as given on page 41.
● Read aloud the questions provided in the Do It Yourself 3B section and encourage the students to solve the questions. Instruct the students to write the answers in their book
Correct Responses:
1. a. Caps Lock b. Spacebar
2. b. Shift
Build
● Conduct a group discussion in the class on the topic ‘How many special keys do we have?’.
Possible Responses: 7, 8, 9
Correct Response: We have 7 special keys on the keyboard.
7 mins
● Conclude the session by summarising that we use 7 special keys on the keyboard, such as the Backspace key, Delete key, Punctuation keys, Spacebar, Caps Lock key, and Enter key.
● Assign the following questions from the Chapter Checkup given at the end of the chapter as homework.
A. Fill in the Blanks: Questions 3, 4, and 5
B. Tick the Correct Option: Questions 2 and 3
C. Who Am I?: Questions 1, 2, 3, and 4
D. Write T for True and F for False: Question 5
E. Answer the Following: Questions 1, 2, 3, and 4
F. Apply Your Learning: Questions 1 and 5
Learning Outcomes
At the end of the session, the students will be able to:
● describe the combination keys.
● discuss symbol keys.
Keywords
● Combination keys: The combination keys are the keys when two or more keys are pressed together.
● Symbol keys: Symbol keys are the keys where symbols are written above the numbers.
Ask the students how they can type the symbols.
Describe the combination keys. Explain the symbol keys. Group discussion Conclude the concepts
Assign homework
Action Plan
Warm Up
● Ask the students how they can type symbols.
● Now, build the concept that symbol keys are used to type symbols.
Engage
Explain the following concepts: Learning Outcomes
5 mins
15 mins
Describe the combination keys. Tell the students that the combination keys are the keys when two or more keys are pressed together, as given on page 41.
Discuss symbol keys.
Explain to the students that the symbol keys are the keys where symbols are written above the numbers, as given on pages 41 and 42.
● Read aloud the question provided in the Do It Yourself 3B section and encourage the students to solve the questions. Instruct the students to write the answers in their book.
Correct Responses: 3.
Key Yes No ! ? & ; , Build 7 mins
● Conduct a group discussion in the class on the topic ’How many symbol keys do we have?’.
Correct Response: 9 Sum Up
● Conclude the session by summarising that the combination keys are the keys when two or more keys are pressed together. The symbol keys are the keys where symbols are written above the numbers.
● Assign the following questions from the Chapter Checkup given at the end of the chapter as homework.
B. Tick the Correct Option: Questions 4 and 5
E. Answer the Following: Question 5
F. Apply Your Learning: Questions 2 and 3
Conji is familiarised with the world of gadgets and computers when he starts teaching some spells to Mel. Mel casts a wrong spell, and the keys of the keyboard go missing. So, Conji teaches him about the reverse spells. Elder Wizard tells them that Lord Ero is trying to steal the computer mouse to cause trouble. They get to know that computers are important for Avora and they have to hide all its parts in the Memory Palace so that Muses can protect it. Instead, Muses play with the order of the files and disturb it. They learn how to sort them. Elder Wizard announces an art contest in Avora. They learn to draw in MS Paint and the trio is declared as the winners. Suddenly, Avora becomes colourless as Lord Ero casts a spell. They use magic and MS Paint to bring the colours back.
● Mel, Conji, and Eva discover Lord Ero’s plan to steal the computer mouse in the Computer Lab.
● They decide to seek help from Elder Wizard to prevent Lord Ero from causing any trouble in Avora.
● The group aims to save all the computer devices to protect Avora’s future from Lord Ero’s mischief.
● Conji suggests using magic, while Mel considers locking the mouse in the Computer Lab and giving the keys to Elder Robot.
● Concerned about Lord Ero using magic to open the lab, they decide to ask Elder Wizard for a special spell to hide the mouse.
● The trio heads to Elder Wizard, trusting that Lord Ero cannot alter the spells used by Elder Wizard.
● Conji and Eva think about why a mouse is important to Lord Ero.
● Elder Wizard tells Mel to explain about the mouse to Conji and Eva.
This chapter is divided into the following classroom and lab sessions
1. Understanding the Mouse
2. Holding a Mouse
3. Mouse Pointers and Using the Mouse
4. Tiny Tech Game
At the end of the session, the students will be able to:
● describe a mouse and its parts.
Keyword
● Pointer: When you move the mouse, an arrow also moves on the computer screen. This arrow is called the pointer.
Ask the students to name the main parts of a computer.
Tell the students about the mouse and its parts. Also, tell them about the mouse pointer.
Think and Tell
Action Plan
Conclude the concepts
Assign homework
5 mins
● Ask the students to name the main parts of a computer. Then, build the concept by describing a mouse.
Engage
Explain the following concepts:
Learning Outcome
Describe a mouse and its parts.
15 mins
Explanation
Explain to the students that a mouse is used to operate many things on the computer and it has three parts—a left button, a right button, and a scroll wheel. Also, tell them about the mouse pointer, as given on page 52.
● Read aloud the questions provided in the Do It Yourself 4A section and encourage the students to solve the questions. Instruct the students to write the answers in their book.
Correct Response:
7 mins
Build
● Ask the students to answer the question “Is the mouse an input device?“ asked in the Think and Tell section given on page 52.
Possible Responses: Yes, the mouse is an input device.
3 mins
● Conclude the session by summarising that the mouse is used to perform any action on the computer screen. When you move the mouse, an arrow also moves on the computer screen. This arrow is called the pointer. A mouse has three parts: a left button, a right button, and a scroll wheel.
● Assign the following questions from the Chapter Checkup given at the end of the chapter as homework.
A. Fill in the Blanks: Question 1
C. Who Am I?: Question 1
D. Write T for True and F for False: Questions 2 and 3
E. Answer the Following: Question 1
At the end of the session, the students will be able to:
● hold a mouse.
Can you think of the things in our daily lives where holding them in the right way is important?
Tell the students how to hold a mouse properly. Group discussion Conclude the concepts
Assign homework
Warm Up Action Plan
● Can you think of things in our daily lives where holding them in the right way is important?
5 mins
15 mins
Engage
Explain the following concepts:
Learning Outcome Explanation
Hold a mouse. Tell the students that to hold a mouse properly, you need to put your hand on top of it as given on page 53.
● Ask the following questions to the students to check their understanding: Name the parts of the below figure:
Correct Responses:
Index Finger
Left Button
Thumb
Build
Right Button
Middle Finger
Other Two Fingers
7 mins
● Conduct a group discussion in the class among the students based on the topic “Does the mouse work when it is in the air? Why or why not?” provided in the Discuss section as mentioned on page 53.
Possible Responses: No, a computer mouse doesn’t work in the air because it needs a surface to move on. The mouse has a special sensor underneath that senses movement when it’s on a flat surface like a desk or a mouse pad.
3 mins
● Conclude the session by summarising that to hold a mouse properly, place your index finger on the left button and your middle finger on the right button. Your thumb and the other two fingers should rest on the sides of the mouse. This grip ensures comfortable and effective control of the mouse.
● Assign the following questions from the Chapter Checkup given at the end of the chapter as homework.
F. Apply Your Learning: Question 1
Additional Questions
Q1. Where should your index finger be on a mouse while holding it?
Q2. Where should your middle finger be on a mouse while holding it?
Learning Outcomes
At the end of the session, the students will be able to:
● describe a mouse pointer.
● explain different actions using a mouse.
Keyword
● Mouse pointer: The mouse pointer is the little arrow on the monitor that moves when we move the mouse.
Warm Up Engage Build Sum Up
What do you notice on the computer screen when you move the mouse around?
Describe to the students about the mouse pointer. Also, explain different actions using a mouse. Group discussion Conclude the concepts
Assign homework
Action Plan
5 mins
Warm Up
● What do you notice on the computer screen when you move the mouse around? 15 mins
Engage
Explain the following concepts:
Describe a mouse pointer.
Explain different actions using a mouse.
Tell the students that the mouse pointer is the little arrow on the monitor that moves when we move the mouse as given on page 54.
Explain to the students that the mouse can perform three functions which include clicking, scrolling and drag & drop, as given on pages 54 and 55.
● Read aloud the questions provided in the Do It Yourself 4B section and encourage the students to solve the questions. Instruct the students to write the answers in their book.
1
Correct Responses:
1. Do It Yourself 4B
Match the following.
Left-click
Keep holding the left button to do this.
Right-click Place an object at a new place on the monitor.
Drag Open a list of options.
Drop Select an item.
2. a. False b. True c. True
Build
7 mins
● Conduct a group discussion in the class among the students based on the topic ‘How do you make the mouse move on the computer screen?’
Possible Response: I slide it on the table! Or I move it with my hand!
3 mins
● Conclude the session by summarising that the mouse pointer is the little arrow on the monitor that moves when we move the mouse. To use a mouse effectively, left-click to select items and rightclick for a list of choices. Scrolling involves moving the scroll wheel up and down to navigate pages on the monitor. Double-clicking the left button quickly opens the selected item. Drag and drop files by selecting them with a left-click, holding the left mouse button, moving the mouse, and releasing the button to place the file where the pointer is.
● Assign the following questions from the Chapter Checkup given at the end of the chapter as homework.
A. Fill in the Blanks: Questions 2, 3, 4, and 5
B. Tick the Correct Option: Questions 1, 2, 3, 4, and 5
C. Who Am I?: Questions 2, 3, 4, and 5
D. Write T for True and F for False: Questions 4 and 5
E. Answer the Following: Questions 2, 3, and 4
F. Apply Your Learning: Questions 2, 3, and 4
At the end of the session, the students will be able to:
● perform various actions using a mouse by playing fun-based interactive games.
Let the students watch the video or the learning slides related to the topic on the digital panel.
Demonstrate to the students how to play the game for which the link is provided on the panel.
Attempt the activity on the Assignment page
Conclude the concepts
Action Plan
Warm Up
● Instruct the students to go to Tekie’s Digital platform and open a Lab session on Tiny Tech Game.
● Show the Learning slides one by one and discuss the concepts shown on the slides in the panel.
Engage
● Demonstrate to the students how to play the game for which the link is provided on the panel.
● Ask the questions provided on the slides one by one to assess the students’ understanding. Discuss the answers to the questions with the students. If necessary, ask additional relevant questions.
Build 7 mins
● Instruct the students to attempt the assignment by clicking on the Assignment tab.
● Explain the activity to the students.
Sum Up 3 mins
● Conclude the chapter by summarising that we have to play the game of Emoji Match by dragging the mouse to draw the lines between the connecting emoji-pairs.
Conji becomes familiar with the world of gadgets and computers while he teaches some spells to Mel. Mel casts a wrong spell and the keys of the keyboard disappear. So, Conji teaches him about the reverse spells. Elder Wizard tells them that Lord Ero is trying to steal the computer mouse to cause trouble. They learn that computers are important for Avora and they have to hide all their parts in the Memory Palace so that Muses can protect them. Instead, Muses play with the order of the files and disturb it. They learn how to sort them. Elder Wizard announces an art contest in Avora. They learn to draw in MS Paint, and the trio wins the contest. Suddenly, Avora loses its colour as Lord Ero casts a spell. They use magic and MS Paint to restore the colours.
● Muses open the computer where they see some items on the desktop.
● Muses drag the items and press enter on them. Suddenly, a video starts playing, and they enjoy watching it.
● Elder Robot, Mel, and Conji enter the Memory Palace and find Muses watching something on the computer screen.
● Mel tells Elder Robot that the muses opened a file but do not know what a file is.
● Elder Robot looks at the computer screen and sees Muses moving and opening files on the desktop.
● He decides to teach Muses how to open and write in a file.
● Mr Time enters the Memory Palace and tells Elder Robot to teach Muses how to save a file.
● Muses feels sorry for their curiosity and assures them that they have not deleted anything.
● Mr Time tells Muses not to worry.
● Conji is also curious to learn about all the new words that he has not heard before.
● Mel encourages Muses and Conji to focus on learning about files. 5
This chapter is divided into the following classroom sessions
1. Introduction to File
2. Opening a File
3. Typing in a File and Saving a File
At the end of the session, the students will be able to:
● describe the concept of a file.
● create a file.
Keyword
● File: It is a collection of data. It has information stored in it.
Establish a connection between the topic and the students by asking them if they can name some items on the desktop of a computer.
Explain to the students what a file is. Also, explain to them the different types of files by showing them the images.
Then, discuss how to create a new file.
Action Plan
Group discussion
Conclude the concepts
Assign homework
5 mins
Warm Up
● Tell the students to write the names of the items that they see on the desktop of a computer in their notebooks.
● Then, establish a connection of the concept of files to these items.
Engage
Explain the following concepts: Learning Outcomes
Describe the concept of a file.
15 mins
Describe that a file is a collection of data with the help of an example, as given on page 65. Also, discuss the different types of files.
Create a file. Describe the steps that are used for creating a file (Microsoft Word Document), as given on page 65.
● Read aloud the questions provided in the Do It Yourself 5A section and encourage students to solve them. Instruct them to write the answers in their book.
Correct Responses:
1. a. An image; c. Your favourite song; d. A story
2. The correct order of the number of steps to create a word file is: 3 2 1.
Build
7 mins
● Conduct a group discussion in the class among the students based on the topic “How can we create a new Microsoft Excel Worksheet?” provided in the Discuss section, as mentioned on page 65.
Possible Responses:
1. Right-click on the desktop. A list will appear.
2. Position the cursor over the New option. A drop-down will appear.
3. Click on the Microsoft Excel Worksheet option. The icon of the file appears on the desktop.
3 mins
● Conclude the session by summarising that files are used for storing different types of data, such as images, songs, videos, etc. Also, revise the steps to create a file.
● Assign the following questions from the Chapter Checkup given at the end of the chapter as homework.
A. Fill in the Blanks: Questions 1, 2, and 3
B. Tick the Correct Option: Questions 1, 2, and 3
C. Who Am I?: Questions 1, 2, and 4
D. Write T for True and F for False: Questions 3 and 5
E. Answer the Following: Questions 1 and 2
F. Apply Your Learning: Question 1
At the end of the session, the students will be able to:
● open a file.
Ask students if they can name some types of files.
Explain to the students how to open a file. Also, tell them the different methods to open a file.
Action Plan
Group discussion Conclude the concepts
Assign homework
5 mins
Warm Up
● Tell the students to write the names of the types of files, such as text, paint, etc., that they see on a computer in their notebooks.
● You can help them name the file types.
● Then, establish a connection of the concept to open a file.
Engage
Explain the following concepts:
Learning Outcome Explanation
15 mins
Open a file. Explain the different methods to open a file to the students, such as double-clicking the file, selecting the file and pressing the Enter key, or by right-clicking it and selecting the Open option, as given on pages 66 and 67.
● What is the first thing you do if you want to work on a story or drawing saved on the computer?
Correct Response: Open the file where your story or drawing is saved.
7 mins
● Conduct a group discussion in the class among the students based on the topic “Which way of opening a file do you find the quickest?“ provided in the Discuss section, as mentioned on page 67. Possible Response: The quickest method to open a file is to select the file, and press the Enter key to open it.
3 mins
● Conclude the session by summarising that there are various methods to open a file. You can open a file by double-clicking it, selecting it and pressing the Enter key, or by right-clicking the file and selecting the Open option from the menu.
● Assign the following questions from the Chapter Checkup given at the end of the chapter as homework.
A. Fill in the Blanks: Question 4
B. Tick the Correct Option: Question 4
D. Write T for True and F for False: Question 2
F. Apply Your Learning: Question 5
Learning Outcomes
At the end of the session, the students will be able to:
● type in a file.
● save a file.
Ask the students which device is used to type on a computer?
mins
Warm Up
Explain to the students how to type in a file. Also, tell them how to save in a file.
mins
Action Plan
Group discussion
Conclude the concepts
Assign homework
5 mins
● Ask the students which device is used to type on a computer.
● Now, build the concept by telling them how to type in the text using keyboard.
Engage
Explain the following concepts:
Learning Outcomes Explanation
15 mins
Type in a file. Discuss the various steps to type in a file, such as clicking on the white area in a Word document and typing at the place of the cursor with the students, as given on page 68.
Save a file. Discuss the importance of saving a file that helps us keep the text that we have written. Explain that it also saves our work from getting deleted by accident. Then, discuss the steps for saving a file, as given on pages 69 and 70.
● Read aloud the questions provided in the Do It Yourself 5B section and encourage the students to solve the questions. Instruct the students to write the answers in their book.
Correct Responses:
1. F 2. T 3. T 4. F
Build
7 mins
● Conduct a group discussion in the class among the students based on the topic ‘Why is it important to save the file on a computer?’
Possible Response: Saving a file on a computer is important because it saves our work from accidental deletion.
3 mins
● Conclude the session by summarising that the various steps to type in a file are clicking on the white area in a Word document and typing at the place of the cursor. Also, revise the importance of saving a file and the steps to save a file.
● Assign the following questions from the Chapter Checkup given at the end of the chapter as homework.
B. Who Am I?: Question 3
D. Write T for True and F for False: Questions 1 and 4
E. Answer the Following: Questions 3 and 4
F. Apply Your Learning: Questions 2, 3, and 4
Conji is familiarised with the world of gadgets and computers when he starts teaching some spells to Mel. Mel casts a wrong spell, and the keys of the keyboard go missing. So, Conji teaches him about the reverse spells. Elder Wizard tells them that Lord Ero is trying to steal the computer mouse to cause trouble. They learn that computers are important to Avora, and they must hide all their parts in the Memory Palace so that the Muses can protect them. Instead, the Muses play with the order of the files and disturb it. They learn how to sort them. Elder Wizard announces an art contest in Avora. They learn to draw in MS Paint, and the trio is declared the winner. Suddenly, Avora becomes colourless as Lord Ero casts a spell. They use magic and MS Paint to bring the colours back.
● Elder Wizard announces an art contest in Avora.
● The winning participant will get one hour to play games on a computer in the school’s computer lab.
● Conji asks Eva what she is planning to draw. Eva says she will draw a flower.
● Mel asks Conji how he will draw and colour the flower.
● Conji answers this by saying that he will use a pencil to draw on paper.
● Eva says that they can use different crayons to colour.
● Mel asks both of them how they will save the drawing. Mel asks, what if Lord Ero steals his drawing in the contest?
● They both get worried and think, what shall they do now?
● Mel suggests that they can use MS Paint to draw and save their drawings.
● Conji asks what MS Paint is and how they can use it, while Eva asks how they can save their drawings using MS Paint.
This chapter is divided into the following classroom and lab sessions
1. Introduction to MS Paint
2. Using Shapes Tool-I
3. Using Shapes Tool-II
4. Using Shapes Tool-III
5. Saving and Opening a Drawing
At the end of the session, the students will be able to:
● describe what MS Paint is.
● start MS Paint.
Keywords
● explain different parts of MS Paint.
● draw a line and a curve using the shapes tool.
● MS Paint: MS Paint lets us draw and colour on the computer.
● Shape: A shape is a figure that is made of lines or curves.
Warm Up Engage
Ask the students to draw their favourite fruit on a paper using a pencil.
Discuss what MS Paint is. Explain to them how they can start using Paint. Also, get them familiar with different parts of a Paint window. Also, tell them how to draw a line and curve using the Shapes tool.
Action Plan
Build Sum Up
Group discussion
Conclude the concepts
Assign homework
5 mins
Warm Up
● Ask the students to draw their favourite fruit on a paper using a pencil.
● Now, build the concept by introducing them to MS Paint.
Engage
Explain the following concepts:
Learning Outcomes
15 mins
Explanation
Describe what MS Paint is. Tell the students that as we draw on paper using pencil and colours, we can also draw on the computer, as given on page 80.
Start MS Paint.
Explain different parts of MS Paint.
Explain the steps to start MS Paint to the students, as given on page 80.
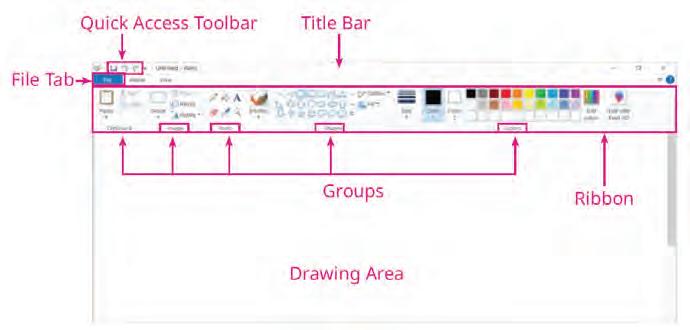
Tell the students about different parts of the MS Paint window, such as the title bar, drawing area, ribbon, etc., as given on page 81.
Draw a line and a curve using the Shapes tool.
Tell the students that the Shapes tool is used to draw many shapes easily. Also tell them the steps to draw a line and a curve, as given on pages 82 to 85.
● Read aloud the question provided in Do It Yourself 6A and encourage the students to solve the question. Instruct the students to write the answers in their book.
Correct Response:
● Name the space where you draw in MS Paint.
Correct Response: Drawing area
● Which bar shows the name of your MS Paint file?
Build
● Conduct a group discussion in the class among the students on the topic, ‘My Favourite Drawing in MS Paint’.
Possible Responses: hut, robot, etc.
Sum Up
3 mins
● Conclude the session by summarising that MS Paint lets us draw and colour on the computer. Tell the steps to start MS Paint. Tell them about different parts of MS Paint such as the title bar, tabs, ribbon, drawing area, etc. Also, instruct them on how to draw a line and a curve.
● Assign the following questions from the Chapter Checkup given at the end of the chapter as homework.
Correct Response: Title bar A.
At the end of the session, the students will be able to:
● describe what MS Paint is.
● start MS Paint.
● explain different parts of MS Paint.
● draw a line and a curve using the Shapes tool.
Keywords
● MS Paint: MS Paint lets us draw and colour on the computer.
● Shape: A shape is a figure that is made of lines or curves.
Let the students watch the video or the learning slides related to the topic on the digital panel.
Discuss what MS Paint is. Demonstrate to them how they can start using Paint. Also, get them familiar with different parts of a Paint window. Also, tell them how to draw a line and curve using the Shapes tool.
Attempt the activity on the Assignment page
Action Plan
Conclude the concepts
Assign homework
5 mins
Warm Up
● Instruct the students to go to Tekie’s Digital platform and open a Lab session on Using Shapes Tool-I.
● Show the Learning slides one by one and discuss the concepts shown on the slides in the panel.
Explain the following concepts:
Describe what MS Paint is. Tell the students that as we draw on paper using pencil and colours, we can also draw on the computer, as given on page 80.
Start MS Paint.
Explain different parts of MS Paint.
Draw a line and a curve using the Shapes tool.
Demonstrate the steps to start MS Paint to the students, as given on page 80.
Tell the students about different parts of the MS Paint window, such as the title bar, drawing area, ribbon, etc., as given on page 81.
Tell the students that the Shapes tool is used to draw many shapes easily. Demonstrate to them the steps to draw a line and a curve, as given on pages 82 to 85.
● Ask the questions provided on the slides one by one to assess the students' understanding. Discuss the answers to the questions with the students. If necessary, ask additional relevant questions.
7 mins
Build
● Instruct the students to attempt the assignment by clicking on the Assignment tab.
● Explain the activity to the students.
3 mins
● Conclude the session by summarising that MS Paint lets us draw and colour on the computer. Tell the steps to start MS Paint. Tell them about different parts of MS Paint, such as the title bar, tabs, ribbon, drawing area, etc. Also, instruct them on how to draw a line and a curve.
● Assign the additional activity given on the panel to the students as homework.
At the end of the session, the students will be able to:
● draw a rectangle.
● draw a circle.
● draw a polygon.
Ask the students to give examples of some objects that are rectangular in shape.
Discuss that, similar to lines and curves, we can also draw a rectangle, a circle, and a polygon using the Shapes tool.
Group discussion Conclude the concepts
Assign homework
mins 3 mins
Action Plan
● Ask the students to give examples of some objects that are rectangular.
● Now, build the concept by discussing the rectangle, circle, and polygon shapes.
Engage
Explain the following concepts:
Learning Outcomes Explanation
5 mins
15 mins
Draw a rectangle. Tell the students various steps to draw a rectangle, as given on pages 85 and 86.
Draw a circle. Tell the students various steps to draw a circle, as given on pages 86 and 87.
Draw a polygon. Tell the students various steps to draw a polygon, as given on pages 87 and 88.
● Read aloud the questions provided in the Do It Yourself 6B and 6C sections and encourage the students to solve the questions. Instruct the students to write the answers in their book.
Correct Responses:
Do It Yourself 6B
Q1. Shapes
Circle Line Tool names
Triangle Curve
Do It Yourself 6C
Build
7 mins
● Conduct a group discussion in the class among students based on the topic, “What things can you draw using the shapes we learnt?” provided in the Discuss section, as given on page 88.
Possible Responses: house, tree, car, etc.
Sum Up 3 mins
● Conclude the session by summarising the steps to draw a rectangle, circle, and polygon shapes. Revise the concept of a polygon: a polygon is a shape with many sides. A triangle is a polygon with three sides. A square is a polygon with four sides.
● Assign the following questions from the Chapter Checkup given at the end of the chapter as homework.
A. Fill in the Blanks: Question 4
B. Tick the Correct Option: Question 2
C. Who Am I?: Questions 3 and 4
D. Write T for True and F for False: Question 1
F. Apply Your Learning: Question 2
At the end of the session, the students will be able to:
● draw a rectangle.
● draw a circle.
● draw a polygon.
Let the students watch the video or the learning slides related to the topic on the digital panel. Discuss that, similar to lines and curves, we can also draw a rectangle, a circle, and a polygon using the Shapes tool.
Attempt the activity on the Assignment page
Conclude the concepts
Assign homework
5 mins
● Instruct the students to go to Tekie’s Digital platform and open a Lab session on Using Shapes Tool-III
● Show the Learning slides one by one and discuss the concepts shown on the slides in the panel.
15 mins
Engage
Explain the following concepts:
Learning Outcomes
Explanation
Draw a rectangle. Demonstrate to the students various steps to draw a rectangle, as given on pages 85 and 86.
Draw a circle. Demonstrate to the students various steps to draw a circle, as given on pages 86 and 87.
Draw a polygon. Demonstrate to the students various steps to draw a polygon, as given on pages 87 and 88.
● Ask the questions provided on the slides one by one to assess the students’ understanding. Discuss the answers to the questions with the students. If necessary, ask additional relevant questions.
7 mins
Build
● Instruct the students to attempt the assignment by clicking on the Assignment tab.
● Explain the activity to the students.
3 mins
● Conclude the session by summarising the steps to draw a rectangle, circle, and polygon shapes. Revise the concept of a polygon: a polygon is a shape with many sides. A triangle is a polygon with three sides. A square is a polygon with four sides. We can draw any shape with the Polygon tool in MS Paint.
● Assign the additional activity given on the panel to the students as homework.
At the end of the session, the students will be able to:
● save a drawing.
Tell the students the importance of saving something.
● open a drawing.
Explain the concept of why we need to save our work and also explain that sometimes we need to open our saved file to make changes to it.
Action Plan
Warm Up
● Explain to the students that we need to save our work so that it can be seen again later. 15 mins
Engage
Explain the following concepts:
Learning Outcomes
Explanation
Save a drawing. Tell the students the importance of saving a drawing, and then tell them the steps to save a drawing, as given on pages 89 and 90.
Open a drawing. Tell the students the various steps to open a saved drawing, as given on pages 90 and 91.
● Ask the following questions to the students to check their understanding:
1. To save an MS Paint file, click on the tab and then select the option.
2. To open a saved file in MS Paint, click on the File tab, and then select the file, and finally, select the option.
Correct Responses: 1. File, Save as 2. Open
● Conduct a group discussion in the class among the students on the topic, ‘By what name should we save our drawing?’.
Possible Responses: our name, favourite animal, superhero, etc.
Correct Response: We should give the file a name that reflects the content of the drawing.
3 mins
● Conclude the session by summarising that it is important to save a drawing, revise the steps to save a drawing and open a drawing.
● Assign the following questions from the Chapter Checkup given at the end of the chapter as homework.
A. Fill in the Blanks: Question 5
C. Who Am I?: Question 5
D. Write T for True and F for False: Questions 2 and 4
E. Answer the Following: Questions 4 and 5
F. Apply Your Learning: Question 3
Conji is familiarised with the world of gadgets and computers when he starts teaching some spells to Mel. Mel casts a wrong spell, and the keys of the keyboard go missing. So, Conji teaches him about the reverse spells. Elder Wizard tells them that Lord Ero is trying to steal the computer mouse to cause trouble. They get to know that computers are important to Avora, and they have to hide all its parts in the Memory Palace so that Muses could protect it. Instead, Muses play with the order of the files and disturb it. They learn how to sort them. Elder Wizard announces an art contest in Avora. They learn to draw in MS Paint, and the trio is declared as the winners. Suddenly, Avora becomes colourless as Lord Ero casts a spell. They use magic and MS Paint to bring the colours back.
● Avora becomes colourless because of Lord Ero’s magic spell.
● Mel, Eva, and Conji are playing games when this happens.
● They go to the council room to ask the Elders for help.
● Ms Idea has a plan to use a computer to bring back colours.
● Elder Robot says computer actions can change things in Avora.
● Elder Wizard tells them Lord Ero’s spell won’t work inside the Memory Palace.
● They decide to use MS Paint, a computer program, to colour Avora.
● Eva wants to use crayons, but they chose MS Paint instead.
● Ms Idea will teach them how to use MS Paint for colouring.
This chapter is divided into the following classroom and lab sessions
1. Colouring a Shape-I
2. Colouring a Shape-II
3. More Tools in MS Paint-I
4. More Tools in MS Paint-II
At the end of the session, the students will be able to:
● use MS Paint to fill colours in shapes.
● use the Outline option to choose a colour for the border of a shape.
● use the Fill option to fill colour in a shape.
● Outline option: The outline option allows us to draw the border of a shape.
● Fill option: Fill option allows us to fill colour in a shape.
● Shapes tool: Shapes tool allows us to draw different shapes.
Ask the students to draw a star shape on their notebooks and then colour the shape.
Explain the Shapes tool to the students. Also, get them familiar with the Outline option and Fill option.
Explain the steps to colour the outline and fill inside the selected shape.
Group discussion
Conclude the concepts
Assign homework
Action Plan
● Ask the students to draw a star shape on their notebooks and then colour inside the shape. Relate the concept that they can use a pencil to draw and crayons to fill colour in a shape drawn on their notebooks. Similarly, they can draw and colour in MS Paint, using various tools.
15 mins
Explain the following concepts:
Use MS Paint to fill colours in shapes.
Use the Outline option to choose a colour for the border of a shape.
Use the Fill option to fill colour in a shape.
Explanation
Tell the students that we can add different colours in different shapes. Explain how to use the Fill option to fill colours in a shape to students as given on page 99.
Tell the students that colouring the border of a shape makes it stand out against the background or other elements in the drawing. Explain the outline option and steps to colour the outline of shape to students as given on page 99.
Tell the students that filling shapes with colours helps children better understand and recognise different shapes. Explain the Fill option and steps to fill colour inside a shape to students as given on page 99.
● Read aloud the questions provided in the Do It Yourself 7A section and encourage the students to solve the questions. Instruct the students to write the answers in their book.
Possible Response: Let the students use their creativity to colour the given picture.
Build
7 mins
● Conduct a group discussion in the class among students based on the topic provided in the Discuss section as mentioned on page 101.
Possible Responses:
Rectangles or squares are typically used to draw windows. A rectangle is the most common shape used for doors. A triangle is often used to represent the roof of a house.
3 mins
Sum Up
● Conclude the session by summarising the steps to colour the outline and fill colour inside the shape to make it bright and fun!
● Assign the following questions from the Chapter Checkup given at the end of the chapter as homework.
A. Fill in the Blanks: Question 1
B. Tick the Correct Option: Questions 1 and 3
C. Who Am I?: Questions 1 and 2
D. Write T for True and F for False: Questions 1 and 2
E. Answer the Following: Questions 1 and 5
F. Apply Your Learning: Question 1
At the end of the session, the students will be able to:
● use MS Paint to fill colours in shapes.
● use the Outline option to choose a colour for the border of a shape.
● use the Fill option to fill colour in a shape.
● Outline option: The outline option allows us to draw the border of a shape.
● Fill option: Fill option allows us to fill colour in a shape.
● Shapes tool: Shapes tool allows us to draw different shapes.
Let the students watch the video or the learning slides related to the topic on the digital panel.
Demonstrate to the students how to select a shape from the Shapes group. Also, get them familiar with the Outline option and Fill option. Explain the steps to colour the outline and fill colour in the selected shape.
Attempt the activity on the Assignment page
Conclude the concepts
Assign homework
Action Plan
● Instruct the students to go to Tekie’s Digital platform and open a Lab session on Colouring a Shape-II.
● Show the Learning slides one by one and discuss the concepts shown on the slides in the panel.
10 mins
Engage
Explain the following concepts:
Use MS Paint to fill colours in shapes.
Explanation
Explain to the students that we can add different colours in different shapes. Demonstrate how to fill colour in a shape to the students as given on page 99. Use the outline option to choose a colour for the border of a shape.
Use the Fill option to fill colour in a shape.
Explain to the students that colouring the border of a shape makes it stand out against the background or other elements in the drawing. Demonstrate how to use the Outline option and steps to colour the outline of the shape to students as given on page 99.
Explain to the students that filling shapes with colours helps children better understand and recognise different shapes. Demonstrate how to use the Fill option and steps to fill colour in a shape to students as given on page 99.
● Ask the questions provided on the slides one by one to assess the students’ understanding. Discuss the answers to the questions with the students. If necessary, ask additional relevant questions.
12 mins
Build
● Instruct the students to attempt the assignment by clicking on the Assignment tab.
● Explain the activity to the students.
3 mins
● Conclude the session by summarising the steps to colour the outline and fill colour in a shape to make it bright and fun.
● Assign the additional activity given on the panel to the students as homework.
At the end of the session, the students will be able to:
● use Fill tool and Text tool in MS Paint.
● use Eraser, Colour Picker, and Brushes tools in MS Paint.
Keywords
● Fill tool: The Fill tool is used to fill colour in your drawings to make them bright and beautiful.
● Text tool: The Text tool lets you add letters and numbers to your drawings.
● Eraser tool: The Eraser tool is used to erase things you do not want in your drawing.
● Colour picker: The Colour Picker tool allows you to pick the colour of an object without going into the colour section.
● Brushes: Brushes help you to make different lines, shapes, and textures, just like real paint brushes.
Ask the students whether they want to make their drawings bright and beautiful, just like painting and drawing on paper.
Explain Fill, Text, Eraser, Colour Picker, and Brushes tools in MS Paint.
Explain the steps to use the tools to make the drawings bright and beautiful.
Group discussion
Conclude the concepts
Assign homework
5 mins
● Ask the students whether they want to make their drawings bright and beautiful, just like painting and drawing on paper.
● Now, build the concept of tools in MS Paint used for making the drawings interesting.
Engage
Explain the following concepts:
Use Fill tool and Text tool in MS Paint.
Use Eraser, Colour Picker, and Brushes tools in MS Paint.
15 mins
Tell the students that the Fill tool fills colour into your drawings and Text tool lets you add letters and numbers to your drawings. Explain the steps to fill the colour and use the Text tool to the students as given on page 103.
Tell the students that the Eraser tool is used to remove mistakes in our drawings. The Colour picker tool allows us to pick the colour of an object and the brushes are used to make different lines, shapes, and textures, just like real paint brushes. Explain the steps to use the Eraser tool, Colour picker, and Brushes to the students as given on page 104.
● Read aloud the question provided in the Do It Yourself 7B section and encourage the students to solve the questions. Instruct the students to write the answers in their book.
Correct Responses:
1. a. F b. T c. T d. F
Build
7 mins
● Conduct a group discussion in the class among students based on the topic what do the students like the most about MS Paint and why?
Possible Response: MS Paint is easy, fun, and let us be creative as we want.
Sum Up
3 mins
● Conclude the session by summarising that in MS Paint, we can use the Fill tool to make our pictures colourful, use the Text tool to put letters and numbers, use the Eraser tool to fix mistakes, use the Colour picker to pick the colour of an object without going into the colour section, and brushes to make different lines, shapes, and textures, just like real paint brushes.
● Assign the following questions from the Chapter Checkup given at the end of the chapter as homework.
A. Fill in the Blanks: Questions 2, 3, and 4
B. Tick the Correct Option: Questions 2, 4, and 5
C. Who Am I?: Questions 3, 4, and 5
D. Write T for True and F for False: Questions 3, 4, and 5
E. Answer the Following: Questions 2, 3, and 4
F. Apply Your Learning: Questions 2, 3, and 4
At the end of the session, the students will be able to:
● use the Fill tool and the Text tool in MS Paint.
● use the Eraser, the Colour Picker, and the Brushes tools in MS Paint.
Keywords
● Fill tool: The Fill tool is used to fill colour in your drawings to make them bright and beautiful.
● Text tool: The Text tool lets you add letters and numbers to our drawings.
● Eraser tool: The Eraser tool is used to erase things you don’t want in your drawing.
● Colour picker: The Colour Picker tool allows you to pick the colour of an object without going into the colour section.
● Brushes: Brushes help you to make different lines, shapes, and textures, just like real paint brushes.
Let the students watch the video or the learning slides related to the topic on the digital panel.
Discuss various tools in MS Paint. Demonstrate to the students the steps to use Fill tool, Text tool, Eraser tool, Colour picker tool, and Brushes.
Attempt the activity on the Assignment page
Conclude the concepts
Assign homework
● Instruct the students to go to Tekie’s Digital platform and open a Lab session on More Tools in MS Paint-II
● Show the Learning slides one by one and discuss the concepts shown on the slides in the panel.
10 mins
Explain the following concepts:
Use the Fill tool and the Text tool in MS Paint.
Use the Eraser, the Colour Picker, and the Brushes tools in MS Paint.
Demonstrate to the students the steps to use the Fill tool and Text tool as given on page 103.
Demonstrate to the students the steps to use Eraser, Colour picker and Brushes as given on page 104.
● Ask the questions provided on the slides one by one to assess the students’ understanding. Discuss the answers to the questions with the students. If necessary, ask additional relevant questions.
12 mins
Build
● Instruct the students to attempt the assignment by clicking on the Assignment tab.
● Explain the activity to the students.
3 mins
● Conclude the session by summarising that in MS Paint, you can use Fill tool to make our pictures colourful, use Text tool to put letters and numbers, use Eraser tool to fix mistakes, use Colour picker to pick the colour of an object without going into the colour section, and brushes to make different lines, shapes, and textures, just like real paint brushes.
● Assign the additional activity given on the panel to the students as homework.
Conji is familiarised with the world of gadgets and computers when he starts teaching some spells to Mel. Mel casts a wrong spell and the keys of the keyboard go missing. So, Conji teaches him about the reverse spells. Elder Wizard tells them that Lord Ero is trying to steal the computer mouse to cause trouble. They get to know that computers are important for Avora and they have to hide all its parts in the Memory Palace so that Muses can protect it. Instead, Muses play with the order of the files and disturb it. They learn how to sort them. Elder Wizard announces an art contest in Avora. They learn to draw in MS Paint and the trio is declared as the winners. Suddenly, Avora becomes colourless as Lord Ero casts a spell. They use magic and MS Paint to bring the colours back.
This chapter is divided into the following classroom and lab sessions
1. Introduction to Robots and High-tech Robots in Our World
2. AI Game
At the end of the session, the students will be able to:
● describe robots.
● explain how robots work.
● describe different high-tech robots in our world.
Keyword
● Robot: A robot is a machine that can do things on its own.
Have you ever seen a robot in a movie or a cartoon?
If you had a robot toy that moves, what do you think makes it move?
Tell the students about the robots and how they work. Also, describe to them about various high-tech robots in the world.
Action Plan
Group discussion
Conclude the concepts
Assign homework
Warm Up
● Have you ever seen a robot in a movie or a cartoon?
● If you had a robot toy that moves, what do you think makes it move?
Engage
Explain the following concepts:
Learning Outcomes Explanation
15 mins
Describe robots. Tell the students that a robot is a machine that can do things on its own, as given on page 112.
Explain how robots work. Describe to the students that robots can do all the smart things using AI, which stands for artificial intelligence, as given on page 112.
Describe different high-tech robots in our world.
Tell the students about different high-tech robots, which include Sparko, Roomba, Sophia, as given on page 113.
● Ask the following questions to the students to check their understanding:
1. Do you think robots are helpful? Why or why not?
Correct Response: I think robots are helpful because they can clean our houses and help us with chores.
2. Name 3 different types of robots.
Correct Responses: Sophia, Sparko and Roomba
● Conduct a group discussion in the class among the students based on the topic “Is a torch a robot?” provided in the Discuss section as mentioned on Page 112.
Possible Responses: No, a torch is not considered a robot. A torch is a simple handheld device that emits light powered by batteries.
● Conclude the session by summarising that a robot is a machine that can do things on its own and it can do all these smart things using AI, which is Artificial Intelligence. With AI they are able to understand and think. Also, they are able to learn. Some of the different high-tech robots in our world are Sparko which was the first robotic dog, Romba, a robotic vacuum cleaner and Sophia, the first human like robot.
● Assign the following questions from the Chapter Checkup given at the end of the chapter as homework.
A. Fill in the Blanks: Questions 1, 2, 3, 4, and 5
B. Who Am I?: Questions 1, 2, and 3
C. Write T for True or F for False: Questions 1, 2, and 3
At the end of the session, the students will be able to:
● play the AI game.
Let the students watch the video or the learning slides related to the topic on the digital panel.
Demonstrate to the students how to play the game for which the link is provided on the panel.
Action Plan
Attempt the activity on the Assignment page
Conclude the concepts
5 mins
Warm Up
Instruct the students to go to Tekie’s Digital platform and open a Lab session on AI Game
Show the Learning slides one by one and discuss the concepts shown on the slides in the panel.
10 mins
Engage
● Demonstrate to the students how to play the game for which the link is provided on the panel.
● Ask the questions provided on the slides one by one to assess the students' understanding. Discuss the answers to the questions with the students. If necessary, ask additional relevant questions.
12 mins
Build
● Instruct the students to attempt the assignment by clicking on the Assignment tab.
● Explain the activity to the students.
Sum Up
3 mins
● Conclude the session by summarising that when you combine a picture with a style it will give you a merged picture.
This
1. Introduction to Coding
2. Sequence
3. Algorithm
4. Tour to Puzzle Code Studio
At the end of the session, the students will be able to:
● describe what coding is.
● explain block-based coding.
● tell about Code.org.
● describe commands.
Keywords
● Coding: A coding language is used to talk to a computer.
● Block-based coding: Block-based coding is a way to tell a computer what to do by joining colourful blocks together.
● Command: A command is an instruction that tells a computer what to do.
Let the students watch the video or the learning slides related to the topic on the digital panel. Explain to them what coding is; tell them about block-based coding; introduce them to Code.org; and tell them what commands are. Attempt the
5 mins
● Instruct the students to go to Tekie’s Digital platform and open a Lab session on Introduction to Coding
● Show the Learning slides one by one and discuss the concepts shown on the slides in the panel.
Explain the following concepts:
15 mins
Describe what coding is. Introduce the students to the coding language, as given on page 1.
Explain block-based coding.
Explain the concept of block-based coding to the students, as given on page 2.
Tell about Code.org. Tell the students that Code.org is a fun coding platform where you can learn to use colourful blocks, as given on page 2.
Describe commands. Describe the concept of commands to the students, as given on page 2.
● Ask the questions provided on the slides one by one to assess the students’ understanding. Discuss the answers to the questions with the students. If necessary, ask additional relevant questions.
7 mins
Build
● Instruct the students to attempt the assignment by clicking on the Assignment tab.
● Explain the activity to the students.
3 mins
● Conclude the session by summarising that a computer needs us to talk to it in a language called coding language. Block-based coding uses colourful blocks to tell the computer what to do. Code. org is a fun place where we’ll use these blocks to make characters move, play games, and tell stories. Commands are like instructions for the computer. We’ll use code blocks as commands to make the computer do different things.
● Assign the additional activity given on the panel to the students as homework.
● Assign the following questions from the Chapter Checkup given at the end of the chapter as homework.
A.
At the end of the session, the students will be able to:
● describe what a task is.
● follow a sequence.
Keywords
● Task: A task is a piece of work that needs to be done.
● Sequence: A sequence is when we do things step by step in an order.
Let the students watch the video or the learning slides related to the topic on the digital panel.
mins
Discuss the concept of sequence by giving a real-life example.
mins
Attempt the activity on the Assignment page
Conclude the concepts Assign homework
mins 3 mins
5 mins
Instruct the students to go to Tekie’s Digital platform and open a Lab session on Sequence. Show the Learning slides one by one and discuss the concepts shown on the slides in the panel.
15 mins
Engage
Explain the following concepts:
Learning Outcomes Explanation
Describe what a task is. Give any task to the students to accomplish, and then describe to them what a task is, as given on page 3.
Follow a sequence.
Ask the students how they follow the steps to brush their teeth daily. Then relate the concept of giving instructions to the computer to perform some tasks. Tell them about fixed and flexible sequences, as given on pages 3 to 5.
● Read aloud the questions provided in the Do It Yourself 1A section as given on page 5 and the Do It Yourself 1B section as given on page 8 to encourage the students to solve the questions. Instruct the students to write the answers in their book.
Correct Responses:
Do It Yourself 1A
1. B. Cover the seed with soil
2. B. Dirty teeth
Do It Yourself 1B
3. 4 > 3 > 1 > 2
4. a and c
● Ask the questions provided on the slides one by one to assess the students’ understanding. Discuss the answers to the questions with the students. If necessary, ask additional relevant questions.
7 mins
● Instruct the students to attempt the assignment by clicking on the Assignment tab.
● Explain the activity to the students.
3 mins
● Conclude the session by summarising that every day, we do lots of tasks, like brushing our teeth or playing with toys. A task is something that needs to be done. When we do things step-by-step in order, it’s called a sequence. Sometimes, there’s only one way to do a task; it’s a fixed sequence. Other times, there can be many ways to do a task, and that’s called a flexible sequence.
● Assign the additional activity given on the panel to the students as homework.
● Assign the following questions from the Chapter Checkup given at the end of the chapter as homework.
A. Fill in the Blanks: Questions 3 and 4
C. Who Am I?: Question 3
D. Write T for True and F for False: Questions 2, 3, and 4
E. Answer the Following: Questions 2 and 3
At the end of the session, the students will be able to:
● describe an algorithm.
Keyword
● Algorithm: The set of steps, in an order, to solve a problem is called an algorithm.
Let the students watch the video or the learning slides related to the topic on the digital panel.
Discuss the concept of algorithm by giving a real-life example. Attempt the activity on the Assignment page
Conclude the concepts
Assign homework
5 mins 15 mins 7 mins 3 mins
Action Plan
Warm Up
● Instruct the students to go to Tekie’s Digital platform and open a Lab session on Algorithm
5 mins
● Show the Learning slides one by one and discuss the concepts shown on the slides in the panel.
15 mins
Engage
Explain the following concepts:
Learning Outcome Explanation
Describe an algorithm. Explain to the students that the set of steps in order to solve a problem is called an algorithm, as given on pages 6 and 7.
● Ask the questions provided on the slides one by one to assess the students’ understanding. Discuss the answers to the questions with the students. If necessary, ask additional relevant questions.
● Instruct the students to attempt the assignment by clicking on the Assignment tab.
● Explain the activity to the students.
3 mins
● Conclude the session by summarising that a problem is like a puzzle that needs solving, and there can be more than one way to solve it. Each way has steps to follow, called an algorithm.
● Assign the additional activity given on the panel to the students as homework.
● Assign the following questions from the Chapter Checkup given at the end of the chapter as homework.
B. Tick the Correct Option: Questions 2 and 4
C. Who Am I?: Questions 1 and 2
E. Answer the Following: Question 5
At the end of the session, the students will be able to:
● run Puzzle Code Studio and solve the puzzles.
Let the students watch the video or the learning slides related to the topic on the digital panel.
Discuss the concept by explaining all four important parts of the Puzzle Code Studio.
Attempt the activity on the Assignment page
Action Plan
Conclude the concepts
Assign homework
5 mins
Warm Up
● Instruct the students to go to Tekie’s Digital platform and open a Lab session on Tour to Puzzle Code Studio
● Show the Learning slides one by one and discuss the concepts shown on the slides in the panel.
Engage
Explain the following concepts:
Learning Outcome Explanation
Run Puzzle Code Studio and solve the puzzles.
15 mins
Explain to the students that the Puzzle Code Studio on Code.org is the playground where we code to solve the given puzzles. There are four main parts of the Puzzle Code studio, as given on pages 8 and 9.
● Ask the questions provided on the slides one by one to assess the students’ understanding. Discuss the answers to the questions with the students. If necessary, ask additional relevant questions.
● Instruct the students to attempt the assignment by clicking on the Assignment tab.
● Explain the activity to the students.
3 mins
● Conclude the session by summarising that Puzzle Code Studio is the coding playground on Code.org. It has four important parts: the Play Area where things happen, the Toolbox with all the code blocks for giving commands, the Workspace where we drag and connect the blocks to make things work, and Instructions that give us hints about what to do next.
● Assign the additional activity given on the panel to the students as homework.
● Assign the following questions from the Chapter Checkup given at the end of the chapter as homework.
A. Fill in the Blanks: Question 5
B. Tick the Correct Option: Questions 3 and 5
D. Write T for True and F for False: Question 5
E. Answer the Following: Question 4
F. Apply Your Learning: Questions 1, 2, 3, 4, and 5
This chapter is divided into the following lab sessions
1. Introduction to Sprite and Sprite Lab
2. Creating a Scene-I
3. Creating a Scene-II
4. Adding a Behaviour
At the end of the session, the students will be able to:
● describe elements required to create a story.
● explain what a sprite is.
● describe what a sprite lab is, and what its three parts are.
Keywords
● Sprite: A character in coding is called a Sprite.
● Sprite lab: A Sprite Lab is where we can create our own stories and games.
Let the students watch the video or the learning slides related to the topic on the digital panel.
Describe to the students the elements required to create a story. Explain what a sprite and sprite lab is. Also, explain the three parts of the sprite lab.
Attempt the activity on the Assignment page
Conclude the concepts
Assign homework
5 mins
● Instruct the students to go to Tekie’s Digital platform and open a Lab session on Introduction to Sprite and Sprite Lab.
● Show the Learning slides one by one and discuss the concepts shown on the slides in the panel.
15 mins
Explain the following concepts:
Describe elements required to make a story.
Describe to students that a story is made up of various elements, such as characters, problems, settings, and events, as given on page 15.
Explain what a sprite is. Explain to them that a character in coding is called a sprite. The astronaut will be the main sprite in our story, as given on pages 15 and 16.
Describe what a sprite lab is, and what its three parts are.
Describe to the students that a Sprite Lab is where we can create our own stories and games. Tell them about its three parts: Play Area, Toolbox, and Workspace, as given on pages 16 and 17.
● Read aloud the questions provided in the Do It Yourself 2A section to encourage the students to solve the questions. Instruct the students to write the answers in their book.
Correct Responses:
1.


● Ask the questions provided on the slides one by one to assess the students’ understanding. Discuss the answers to the questions with the students. If necessary, ask additional relevant questions.
7 mins
● Instruct the students to attempt the assignment by clicking on the Assignment tab.
● Explain the activity to the students.
Sum Up
3 mins
● Conclude the session by summarising that a story is made up of various elements such as characters, problems, settings, and events. A character in coding is called a sprite. We can create our own stories and games in Sprite Lab. Its three parts are Play Area, Toolbox, and Workspace.
● Assign the additional activity given on the panel to the students as homework.
● Assign the following questions from the Chapter Checkup given at the end of the chapter as homework.
A. Fill in the Blanks: Questions 1 and 2
B. Tick the Correct Option: Question 1
E. Answer the Following: Question 1
At the end of the session, the students will be able to:
● make scenes for the exciting journey of the astronaut in Sprite Lab.
Let the students watch the video or the learning slides related to the topic on the digital panel.
Demonstrate to the students how to create a scene in Sprite Lab. Attempt the activity on the Assignment page
Conclude the concepts
Assign homework
5 mins
Instruct the students to go to Tekie’s Digital platform and open a Lab session on Creating a Scene-I
Show the Learning slides one by one and discuss the concepts shown on the slides in the panel.
Engage
Explain the following concepts:
Learning Outcome Explanation
Make scenes for the exciting journey of the astronaut in Sprite Lab.
15 mins
Demonstrate to the students how to make scenes for the exciting journey of the astronaut in Sprite Lab. Tell them that we will have two scenes: one for the start of the story and another for reaching Mars. Also, tell them the algorithm to set up the first scene, as given on pages 17 and 18.
● Ask the questions provided on the slides one by one to assess the students’ understanding. Discuss the answers to the questions with the students. If necessary, ask additional relevant questions.
7 mins
● Instruct the students to attempt the assignment by clicking on the Assignment tab.
● Explain the activity to the students.
3 mins
● Conclude the session by summarising the steps of the algorithm to make scenes for the exciting journey of the astronaut in Sprite Lab.
● Assign the additional activity given on the panel to the students as homework.
● Assign the following questions from the Chapter Checkup given at the end of the chapter as homework.
A. Fill in the Blanks: Questions 3 and 4
B. Tick the Correct Option: Question 5
D. Write T for True and F for False: Questions 1, 4, and 5
At the end of the session, the students will be able to:
● follow the algorithm to code the first scene.
Let the students watch the video or the learning slides related to the topic on the digital panel.
Demonstrate to the students the steps to code the first scene.
Attempt the activity on the Assignment page
Conclude the concepts
Assign homework
5 mins
Instruct the students to go to Tekie’s Digital platform and open a Lab session on Creating a Scene–II
Show the Learning slides one by one and discuss the concepts shown on the slides in the panel.
15 mins
Engage
Explain the following concepts:
Learning Outcome
Follow the algorithm to code the first scene.
Explanation
Demonstrate the steps to code the first scene as per the algorithm by dragging and dropping various code blocks from the Toolbox to the Workspace, as given on pages 18 to 22.
● Ask the questions provided on the slides one by one to assess the students’ understanding. Discuss the answers to the questions with the students. If necessary, ask additional relevant questions.
7 mins
● Instruct the students to attempt the assignment by clicking on the Assignment tab.
● Explain the activity to the students.
3 mins
● Conclude the session by summarising the steps to follow the algorithm to code the first scene.
● Assign the additional activity given on the panel to the students as homework.
● Assign the following questions from the Chapter Checkup given at the end of the chapter as homework.
B. Tick the Correct Option: Questions 2, 3, and 4
C. Who Am I?: Questions 1, 2, and 5
D. Write T for True and F for False: Question 2
E. Answer the Following: Questions 3 and 4
F. Apply Your Learning: Questions 1, 2, 3, and 4
At the end of the session, the students will be able to:
● add behaviour to a sprite.
Let the students watch the video or the learning slides related to the topic on the digital panel.
Demonstrate to the students how to add behaviour to a sprite.
Action Plan
Attempt the activity on the Assignment page
Conclude the concepts
Assign homework
mins
5 mins
Warm Up
Instruct the students to go to Tekie’s Digital platform and open a Lab session on Adding Behaviour.
Show the Learning slides one by one and discuss the concepts shown on the slides in the panel.
Engage
Explain the following concepts:
Learning Outcome Explanation
Add behaviour to a sprite.
15 mins
Demonstrate to the students the steps to add behaviour to a sprite by dragging the code blocks from the Behaviours section in the Toolbox and dropping them into the Workspace. Tell them how to make the astronaut sprite move to the right to reach the rocket, as given on pages 23 and 24.
● Ask the questions provided on the slides one by one to assess the students’ understanding. Discuss the answers to the questions with the students. If necessary, ask additional relevant questions.
7 mins
● Instruct the students to attempt the assignment by clicking on the Assignment tab.
● Explain the activity to the students.
● Conclude the session by summarising the steps to add behaviour to a sprite.
● Assign the additional activity given on the panel to the students as homework.
3 mins
● Assign the following questions from the Chapter Checkup given at the end of the chapter as homework.
A. Fill in the Blanks: Question 5
C. Who Am I?: Questions 3 and 4
D. Write T for True and F for False: Question 3
E. Answer the Following: Questions 2 and 5
This chapter is divided into the following lab sessions
1. Events and Actions
At the end of the session, the students will be able to:
● explain what events and actions are using real-life examples.
● explain what events and actions mean in coding.
Keywords
● Event: An event tells you when an action will happen.
● Costume: A costume sets the appearance of a sprite.
Let the students watch the video or the learning slides related to the topic on the digital panel.
Explain to the students what events and actions are using real-life examples; also explain to them what events and actions are in coding.
2. Setting up the Second Scene-I 5 mins
Attempt the activity on the Assignment page
Conclude the concepts
Assign homework
● Instruct the students to go to Tekie’s Digital platform and open a Lab session on Events and Actions
● Show the Learning slides one by one and discuss the concepts shown on the slides in the panel.
Explain the following concepts:
Explain what events and actions are using real-life examples.
Explain what events and actions mean in coding.
Tell the students that an event tells you when an action will happen. For example, being hungry is an event, and eating food is an action, as given on page 32.
Explain that in coding, an event tells you when an action will happen, and an action is something that happens as a result of the event. For example, in the scene where an astronaut reaches the planet Mars when it touches the rocket, touching the rocket is the event and reaching the planet Mars is the action, as given on pages 33 and 34.
● Read aloud the questions provided in the Do It Yourself 3A section to encourage the students to solve the questions. Instruct the students to write the answers in their book.
Correct Responses:
● Ask the questions provided on the slides one by one to assess the students’ understanding. Discuss the answers to the questions with the students. If necessary, ask additional relevant questions.
7 mins
Build
● Instruct the students to attempt the assignment by clicking on the Assignment tab.
● Explain the activity to the students.
● Conclude the session by summarising that an event tells you when an action will happen. Events are important in coding too. For example, in a car game, clicking the arrows to make the car go to the left or right is the event. The car moving to the left or right is the action.
● Assign the additional activity given on the panel to the students as homework.
● Assign the following questions from the Chapter Checkup given at the end of the chapter as homework.
A. Fill in the Blanks: Questions 1 and 2
B. Tick the Correct Option: Questions 1, 2, and 3
D. Write T for True and F for False: Questions 1, 3, and 4
E. Answer the Following: Questions 1 and 2
F. Apply Your Learning: Questions 4 and 5
At the end of the session, the students will be able to:
● set an event and action scene using code blocks.
Let the students watch the video or the learning slides related to the topic on the digital panel.
Demonstrate to the students how to set an event and action scene using code blocks.
Attempt the activity on the Assignment page
Conclude the concepts Assign homework
mins 3 mins
5 mins
Instruct the students to go to Tekie’s Digital platform and open a Lab session on Setting up the Second Scene-I
Show the Learning Slides one by one and discuss the concepts shown on the slides in the panel.
Engage
Explain the following concepts:
Learning Outcome Explanation
Set an event and action scene using code blocks.
15 mins
Demonstrate to the students how to set a scene of an astronaut reaching the planet Mars when it touches the rocket, using different code blocks, as given on pages 35 and 36.
● Ask the questions provided on the slides one by one to assess the students’ understanding. Discuss the answers to the questions with the students. If necessary, ask additional relevant questions.
7 mins
● Instruct the students to attempt the assignment by clicking on the Assignment tab.
● Explain the activity to the students.
Sum Up
3 mins
● Conclude the session by summarising the steps to set a scene of an astronaut reaching the planet Mars when it touches the rocket using various code blocks.
● Assign the additional activity given on the panel to the students as homework.
● Assign the following questions from the Chapter Checkup given at the end of the chapter as homework.
A. Fill in the Blanks: Questions 3, 4, and 5
B. Tick the Correct Option: Questions 4 and 5
C. Match the Following: Question 1
D. Write T for True and F for False: Questions 2 and 5
E. Answer the Following: Questions 3, 4, and 5
F. Apply Your Learning: Questions 1, 2, and 3 Build
This chapter is divided into the following classroom and lab sessions
1. Concept of Loops and Repeat Loop
2. Continuing with Project
At the end of the session, the students will be able to:
● describe a loop.
● define a repeat loop.
Keywords
● Loop: A loop is an action of doing something, again and again, until the task is complete.
● Repeat loop: A repeat loop is used when we want to repeat the task a certain number of times.
Ask the students to stand up and sit for five times.
Describe a loop to the students. Discuss a repeat loop with them. Group discussion Conclude the concepts Assign homework
● Ask the students to play an instruction game where they will be standing and sitting for five times.
● Now, relate the concept that if they sit and stand again and again, then it is called a loop.
Explain the following concepts:
Learning Outcomes
Explanation
Describe a loop. Discuss with the students that a loop is an action of doing something again and again until the task is complete, as given on page 44.
Define a repeat loop. Tell the students that a repeat loop is used when we want to repeat the task a certain number of times, as given on page 45.
● Ask the following questions to the students to check their understanding:
1. When we want to repeat a task a certain number of times, then it is called?
Possible Response: Repeat Loop
2. What is called an action of doing something again and again?
Possible Response: Loop
Build 7 mins
● Conduct a group discussion in the class among students based on the topic ‘Examples of loop’.
Possible Responses: Writing a sentence for three times, bouncing the ball, skipping for 5 minutes, etc.
3 mins
Sum Up
● Conclude the session by summarising that a loop is an action of doing something again and again until the task is complete. Also, summarise that when we repeat something for a specific number of times it is called a repeat loop.
● Assign the following questions from the Chapter Checkup given at the end of the chapter as homework.
A. Fill in the Blanks: Questions 1, 2, 3, and 4
B. Tick the Correct Option: Question 1
E. Answer the Following: Questions 1, 2, 3, and 4
F. Apply Your Learning: Questions 1, 2, 3, and 4
Learning Outcomes
At the end of the session, the students will be able to:
● Add a background to the project.
● Add the people to the Mars background.
Keyword
● Random location: It is not a fixed place.
Let the students watch the video or the learning slides related to the topic on the digital panel.
Describe loop to the students. Discuss repeat loop with them.
Action Plan
Attempt the activity on the Assignment page
Conclude the concepts
Assign homework
5 mins
Warm Up
Instruct the students to go to Tekie’s Digital platform and open a Lab session on Continuing with Project
Show the Learning slides one by one and discuss the concepts shown on the slides in the panel.
8 mins
Engage
Explain the following concepts:
Learning Outcomes
Add a background to the project.
Add the people to the Mars background.
Explanation
Demonstrate to the students how to set the background in the project using the set background to block, as given on pages 46 to 48.
Show them how to add people on the Mars background at a random location by using the random location block, as given on pages 48 to 49.
● Read aloud the question provided in the Do It Yourself 4A section and encourage the students to solve the questions. Instruct the students to solve the answers in their book.
Possible Response: 2
● Which block helps us to move at a random location?
Possible Response: random location block
● Which block will help Reema repeatedly cycle around for four times?
Possible Response: repeat loop block
Build
● Instruct the students to attempt the assignment by clicking on the Assignment tab.
● Explain the activity to the students.
Sum Up
14 mins
3 mins
● Conclude the session by summarising how to set the background in the project, using the set background to block. Also, tell them how to use the random location block.
● Assign the following questions from the Chapter Checkup given at the end of the chapter as homework.
A. Fill in the Blanks: Question 5
B. Tick the Correct Option: Questions 2, 3, and 4
C. Who Am I?: Questions 1, 2, and 3
D. Write T for True or F for False: Questions 1 and 2
This chapter is divided into the following lab sessions
1. Concept of Debugging-I
2. Concept of Debugging-II
At the end of the session, the students will be able to:
● describe bugs and debugging.
Keywords
● Bug: A mistake in the code is called a bug.
● Debugging: Finding and fixing bugs is called debugging.
Warm Up Engage Build Sum Up
Let the students watch the video or the learning slides related to the topic on the digital panel.
Discuss about bugs with the students. Also, explain about debugging to them.
Attempt the activity on the Assignment page
Action Plan
Conclude the concepts
Assign homework
Warm Up
● Instruct the students to go to Tekie’s Digital platform and open a Lab session on Concept of Debugging-I
● Show the Learning slides one by one and discuss the concepts shown on the slides in the panel.
Explain the following concepts:
Describe bugs and debugging.
Discuss bugs and debugging with the help of the activity, as given on page 55.
● Ask the questions provided on the slides one by one to assess the student’s understanding. Discuss the answers to the questions with the students. If necessary, ask additional relevant questions.
● Instruct the students to attempt the assignment by clicking on the Assignment tab.
● Explain the activity to the students.
● Conclude the session by summarising that if we have any mistake in the code, then it is called a bug, whereas finding and fixing these bugs is called debugging.
● Assign the following questions from the Chapter Checkup given at the end of the chapter as homework.
A. Fill in the Blanks: Questions 1, 2, and 3
B. Tick the Correct Option: Questions 1, 4, and 5
C. Who Am I?: Questions 1, 2, and 3
D. Write T for True and F for False: Questions 1, 2, 3, and 4
E. Answer the Following: Question 1
At the end of the session, the students will be able to:
● debug any code.
Let the students watch the video or the learning slides related to the topic on the digital panel.
Discuss the activity given in the book. Attempt the activity on the Assignment page
Conclude the concepts
Assign homework 5 mins 8 mins 14 mins 3 mins
Action Plan
5 mins
Warm Up
Instruct the students to go to Tekie’s Digital platform and open a Lab session on Concept of Debugging-II
Show the Learning slides one by one and discuss the concepts shown on the slides in the panel.
8 mins
Engage
Explain the following concepts:
Learning Outcome Explanation
Debug any code. Describe to the students how to find and fix the bugs with the help of the activity given on page 56.
● Ask the questions provided on the slides one by one to assess the student’s understanding. Discuss the answers to the questions with the students. If necessary, ask additional relevant questions.
● Read aloud the questions provided in the Do It Yourself 5A section and encourage the students to solve the questions. Instruct the students to solve the answers in their book.
Possible Responses:
1. There is no set background block.
2. 1, 2, 4, 3
● Instruct the students to attempt the assignment by clicking on the Assignment tab.
● Explain the activity to the students.
● Conclude the session by summarising that we can correct the code by debugging it.
3 mins
● Assign the following questions from the Chapter Checkup given at the end of the chapter as homework.
B. Tick the Correct Option: Questions 2 and 3
E. Answer the Following: Question 2
F. Apply Your Learning: Questions 1, 2, 3, and 4
Chapter Checkup
A. Fill in the Blanks.
1. security problems
B. Tick () the Correct Option. 1.
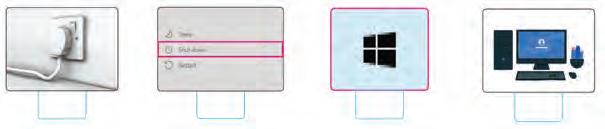
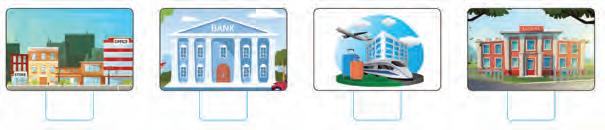
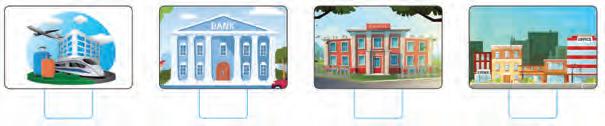
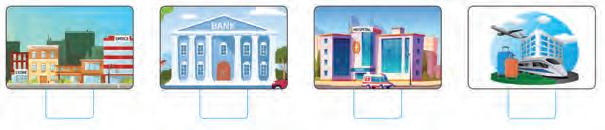
C. Who Am I?
D. Write
1.
for
E. Answer the Following.
1. A computer is an electronic device that helps us do many things.
2. Computers are used in:
Shops and offices.
3. Some advantages of computers are: Storage, Connectivity, Information, Calculation, and Entertainment.
4. Some disadvantages of computers are: Health Problems, Security Problems, and Environmental Harm.
5. Sometimes using computers is not good for us as it can cause health problems like headaches and weak eye sight.
F. Apply Your Learning.
1. Some uses of a computer are:
Finding Information
2. To start a computer:
● Switch on the main power button.
● Press the ON button on the UPS.
● Press the ON button on the CPU.
● Press the ON button on the monitor.
● Wait for the computer to start.
3. Some disadvantages of computers are: Health Problems, Security Problems, and Environmental Harm.
4. He should use a computer to book train tickets.
5. Computers are used in:
a. Banks: To help us send money to other accounts.
b. Schools: To help us learn new things.
c. Hospitals: To prepare and print medical reports.
d. Airports and stations: To help us in booking tickets.
e. Shops and offices: To keep a record of the number of items in shops.
A. Fill in the Blanks.
1. Speakers 2. input 3. monitor 4. pen drive 5. keyboard
B. Tick () the Correct Option.
1. c. Keyboard
2. b. Hard Disk
3. a. Printer
4. a. Pen Drive
5. c. Mouse
C. Who Am I?
1. Headphones 2. DVD 3. Speaker 4. Hard Disk 5. Monitor
D. Write T for True and F for False.
1. T 2. T 3. F 4. T 5. F
E. Answer the Following.
1. Input devices help us to tell a computer what to do. Input devices provide ways to ‘talk’ to the computer.
2. Output devices show the results of what we want from the computer.
3. We need storage devices to store data in the computer, like our favourite songs, our school projects, films, and games.
4. Speakers Headphones
Speakers are used when more than one person wants to hear the sounds and music. They are meant for only one person to listen to sounds and music, without disturbing others. They are usually bigger. They are smaller in size.
5. The IPO (Input, Process, and Output) cycle tells us how a device works. Input is what we give to the computer, Process is what the computer does with the input, and the Output is what the computer gives us back.
Two examples of the IPO cycle are:
Example 1: Washing Machine
Input: We put dirty clothes in the washing machine.
Process: The washing machine washes the clothes.
Answer Key
Output: We get clean clothes.
Example 2: Growing a Plant
Input: The plant takes in water, sunlight, and air.
Process: The plant grows.
Output: The plant gives flowers and fruits.
F. Apply Your Learning.
1. Dad should use a pen drive to save his photos because a pen drive is a small stick-like device that can be carried around easily.
2. Riya must use a keyboard to type a letter on the computer.
3. Aarav is using a monitor to watch the film, speakers or headphones to hear the sounds of the film, and a mouse to make selections, such as to play or pause the film.
4. Yes, making a sandwich follows an IPO cycle.
Input: Toaster, bread, and cheese to make a sandwich
Process: Place cheese between bread slices and toast it in a toaster.
Output: A sandwich is made.
5. Input: Keep a glass of water in the refrigerator.
Process: Lowering the temperature of water until it freezes.
Output: Ice in the glass.
Chapter Checkup
A. Fill in the Blanks.
1. alphabet 2. numbers 3. backspace 4. capital 5. line
B. Tick () the Correct Option.
1. c. Typing words
2. d. Spacebar
3. b. Moving the cursor in different directions
4. d. Shift key
5. a. Press the Shift key and that number key together.
C. Who Am I?
1. Enter key
2. Backspace key
3. Caps Lock key
4. Spacebar key
D. Write T for True and F for False.
1. T 2. F 3. F 4. T 5. T
E. Answer the Following.
1. The spacebar is used to add a space between two words.
2. The Caps Lock key is used to type letters in capital.
3. The Delete key helps us remove text or objects, but only when they are after the cursor.
4. Examples of special keys are the Backspace, Delete, Punctuation, Spacebar, Caps Lock, Enter, and the Arrow keys.
5. When we press two or more keys together, they become combination keys. For example, we can type symbols by pressing and holding the Shift key and then a number key.
F. Apply Your Learning.
1. Riya must use the Caps Lock key to type her name in capital letters.
2. To add the exclamation mark (!), Raj should press the Shift key and ‘1’ number key together.
3. Alex should press the Shift key and the ‘/’ key together to add a question mark at the end of the sentence.
4. The letters on the keyboard are in a different order than the book because the keys are arranged in such a way that they make typing letters easier.
5. Emma must use the arrow keys to move the character of the game on the screen.
Chapter Checkup
A. Fill in the Blanks.
1. Mouse 2. Pointer 3. Left button 4. Right button 5. Scroll wheel
B. Tick () the Correct Option.
1. Left button 2. Double click 3. Scroll 4. Index finger
C. Who Am I?
1. Mouse 2. Pointer 3. Scroll wheel 4. Right button 5. Left button
D. Write T for True and F for False.
1. F 2. T 3. F 4. T 5. T
E. Answer the Following.
1. a. It helps control the pointer on the monitor. b. It helps you click on things you want to open or use on the computer.
2. With one left-click, we can select an item and by clicking the left button two times very quickly we can do a double-click.
3. Left-clicking an item selects and opens it on the monitor and right-clicking on an item brings up a menu with a list of options for the selected item.
4. Moving the mouse without leaving the left mouse button is called dragging. When you release the left button, you will see the file is placed where the pointer is. This is called dropping. This way of moving the file is called drag and drop.
F. Apply Your Learning.
1. Aarna can drag and drop the item.
2. The arrow is called a pointer.
3. Scroll wheel is used for lowering down the page.
4. The left button on the mouse is used to open items on the page.
Chapter Checkup
A. Fill in the Blanks.
1. Files 2. videos 3. New 4. double-click
B. Tick () the Correct Option.
1. d. An Item 2. b. type something in it 3. c. Right-click and choose New → File
4. b. Right-click and choose Open
C. Who Am I?
1. File 2. List 3. Cursor 4. Save option
D. Write T for True and F for False.
1. F 2. T 3. T 4. T 5. F
E. Answer the Following.
1. A file is a collection of data. It can be named. It has information stored in it.
2. A file can store text, image, video, audio, or even a game type.
3. We should always save our files. It helps us keep the text that we have written. It also saves our work from getting deleted by accident.
4. A blinking line in Word file is called the cursor.
F. Apply Your Learning.
1. We call it a Word file.
2. a. Click on the File option.
b. Click on the Save As option.
c. Choose where to save it.
d. Give a name to the file.
e. Click on the Save button.
3. Tara must have not saved her file after doing her work.
4. Tim can open a Word file and start typing her name at the place where the cursor is blinking.
5. He can right-click on the file and select the Open option to open it again.
Chapter Checkup
A. Fill in the Blanks.
1. Start 2. Title Bar 3. Drawing Area 4. Polygon 5. File, Save as B. Tick () the Correct Option.
1. a.

2. d.
C. Who Am I?
1. MS Paint 2. Ribbon 3. Shapes 4. Ctrl 5. Save as
D. Write T for True and F for False.
1. T 2. T 3. F 4. F 5. F
E. Answer the Following.
1. MS Paint is a drawing app on the computer.
2. To start MS Paint, click on the Search Bar, and then type Paint in the Search Bar. Then, click on the Paint icon to open the application.
3. Title bar, tabs, ribbon, drawing area, colours
4. To save a MS Paint file, click on the File tab and then select the Save as option. Then, write the name of the file in the File name box and click on the Save button.
5. To open a saved file in MS Paint, click on the File tab, then select the file, and finally, select the Open option.
F. Apply Your Learning.
1. MS Paint 2. Circle 3. Save the file
Chapter Checkup
A. Fill in the Blanks.
1. Outline 2. Colour picker 3. Eraser 4. Text
B. Tick () the Correct Option.
1. d. 2. c. Draw with different line styles 3. b. Fills the shape with a colour
4. a. 5. b. Removes mistakes from the drawing
C. Who Am I?
1. Shapes tool 2. Fill with colour 3. Text tool 4. Colour picker 5. Eraser
D. Write T for True and F for False.
1. T 2. T 3. F 4. F 5. T
E. Answer the Following.
1. We can use the Fill tool to make our shapes colourful.
2. The Eraser tool is used to fix mistakes in our drawings.
3. With the Colour picker tool, we can choose a particular colour for drawing.
4. The Text tool allows us to write words.
5. We need to colour our drawing because it looks more attractive and real.
F. Apply Your Learning.
1. The Fill color Tool is used to add colours to the picture.
2. Sahiba can use the Eraser tool.
3. Simran can use the Text tool to write the text.
4. Nikhil can select the same colour by using the Colour picker tool.
Chapter Checkup
A. Fill in the Blanks.
1. ARTIFICIAL 2. INTELLIGENCE 3. ROBOT 4. SMART 5. MACHINE
B. Who Am I?
1. Artificial Intelligence 2. Sparko 3. Sophia
C. Write T for True and F for False.
1. T 2. F 3. F
Chapter-1 Introduction to Coding
Chapter Checkup
A. Fill in the Blanks.
1. Coding 2. Command 3. Sequence 4. Flexible 5. Play area
B. Tick () the Correct Option.
1. b. Coding lets us talk to computers. 2. c. Algorithm 3. c. Play area
Answer Key

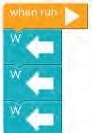
C. Who Am I?
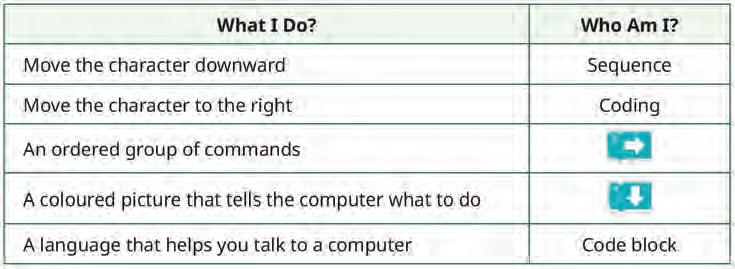
D. Write T for True and F for False.
1. F 2. F 3. T 4. F 5. T
E. Answer the Following.
1. A command is an instruction that tells a computer what to do.
2. A sequence can be a:
Fixed sequence: There is only one way to do the task.
Flexible sequence: There can be more than one way to do the task.
3.
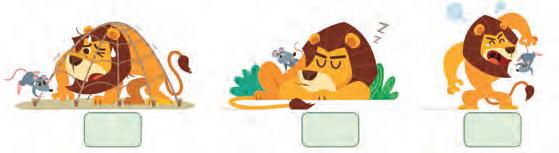
F. Apply Your Learning.
Chapter Checkup
A. Fill in the Blanks.
1. Four 2. Sprite 3. Location 4. Size 5. Behaviour
B. Tick () the Correct Option.
1. b. 2 2. c.


Choose the correct sequence of how we set up the first scene.
5. b.
C. Who Am I?
D. Write T for True and F for False.
1. F 2. T 3. T 4. F 5. F
E. Answer the Following.
3 Which of the following options will show this sprite in the Play Area? a b
1. Location Icon 2. Set Size block 3. Moving east block 4. Sprite begins (Behaviour) block 5. Sprite
and name the highlighted parts in the given pictures.
1. Character that helps in creating a scene is known as a sprite.
2. The Run button helps to run the code.
3. a.
5. b. Right b side will the sprite move with the given code?
4 Which of the following options will be shown for the given code?

sprite move with the given code?
b Right Learning. blocks in the given space to see this in the Play Area.
11/29/2023 1:42:28 PM
the Play Area.
F. Apply Your Learning.
3 Name the missing part in the set block to get the change shown in the purple rabbit.
1. a. Set background to
c Both actions and events will happen at the same time.
b. Make new
2. set background to block
d Actions and events are both independent.
3. Size
4. c.
2 Choose the correct action for the given event. a b c d
Event
c Both actions and events will happen at the same time.
Chapter Checkup
30 CO24CB0202_P1.indd 30 11/29/2023 1:42:31 PM
A. Fill in the Blanks.
d Actions and events are both independent.
1. Event 2. Action
3 If you press the ON button on the TV remote, what will be the action of this event?
3. when touches 4. Costume 5. change costume
B. Tick () the Correct Option.
2 Choose the correct action for the given event.
1. a. An event tells you when an action will happen.
2. a.
a Your TV will turn on.
a b c d
b Your TV will not turn on.
c It will change the channel.
d It will increase the volume.
3. a. Our TV will turn on.
4. a.
Event
a Your TV will turn on.
4 When will the astronaut change his costume? a b c d
b Your TV will not turn on.
3 If you press the ON button on the TV remote, what will be the action of this event?
d. When the astronaut touches the rocket
c It will change the channel.
d It will increase the volume.
5 When will the background change in the story?
4 When will the astronaut change his costume?
a At the start
b At anytime
c Not at all
c. Match the Following

E Answer the Following.
1 What is an event?
2 What is an action?
Stop Moving Right Right

D. Write T for True and F for False.
D Write T for True and F for False.
1.
E. Answer the Following.
1 An event always comes after an action.
1. An event tells you when an action will happen.
2. An action will happen after an event is done.
3 What will happen if you use this block? a b
3. a.
2 You cannot change the behaviour of a sprite.
Chapter 3
The ringing of a doorbell is an action.
Opening the door when a doorbell rings is an example of an action.
The “moving east” block stops the behaviour of a sprite.
if
F
2
1

3
4
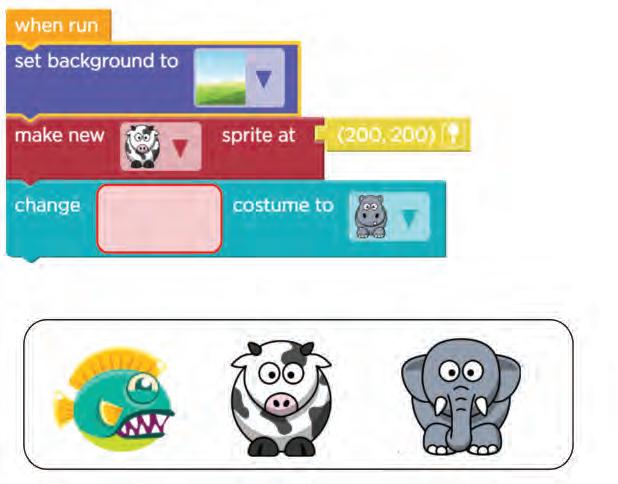
3.
5
times.
5 Look at the following pictures and name them as Events or Actions.
4 Using a repeat loop, your code will become .
5.
5 A location is not a fixed place.
B Tick () the Correct Option.
1 Which block is used to do a task a certain number of times?
3 The repeat loop is used when we want to repeat a task a number of times.
4 Using a repeat loop, your code will become .
5 A location is not a fixed place.
B Tick () the Correct Option.
1 Which block is used to do a task a certain number of times?
Which option makes the germ sprites appear, as shown in the given picture?
Chapter Checkup
2 Which code will show the given picture in the Play Area?
A. Fill in the Blanks.
1. Loop 2. Stop 3. Certain 4. Shorter 5. Random
B. Tick () the Correct Option.
1. c.
2.
2 Which code will show the given picture in the Play Area?

3 Which is the correct picture of the Play Area for the given code?
I can set or change the background as you want.
3 Which is the correct picture of the Play Area for the given code?
germ sprites appear, as shown in the given picture?
I can do a task, again and again, for a certain number of times.
I can place a sprite anywhere in the Play Area. A
C.
Am
E Answer the Following.
Chapter Checkup
I can set or change the background as you want.
1 How can you make your code shorter?
A Fill in the Blanks.
I can do a task, again and again, for a certain number of times.

Hints debugging check bugs
I can place a sprite anywhere in the Play Area.
2 What is a loop?
1 are the mistakes in the code.
D. Write T for True and F for False.
52
1. F 2. T
2 Finding and fixing the bugs is called
E. Answer the Following.
3 It is good to your code often and fix the bugs.
1. Using a repeat loop, your code will become shorter.
B Tick () the Correct Option.
2. A loop is an action of doing something, again and again, until the task is complete.
3 Which of the following are real-life examples of a loop?
3.
1 Which of these is NOT a part of debugging?
a Finding b Fixing c Placing
4. Reading a book is not an example of a loop because we do not read the same page again.
Chapter 4 • Loops
F. Apply Your Learning.
1. 4 2. 3 3. 3 4. 3
53 CO24CB0204_P1.indd 53 11/29/2023 1:52:13 PM
3. b. code show in the Play Area? b
Chapter Checkup
A. Fill in the Blanks.
1. Bugs 2. Debugging 3. Check
B. Tick () the Correct Option.
1. c. Placing
2. c.
2 Find the correct sequence of steps that will make the bear reach its den. Start End a b c d
58 CO24CB0205_P1.indd 58 11/28/2023 6:38:22 PM
a code can cause it to not work.
b problem c fault you do with a bug?
b Keep it
a bug b problem c fault
D Write T for True and F for False.
5 What should you do with a bug?
4. a. Bug
D Write T for True and F for False.
a Fix it b Keep it
5. a. Fix it
1 I am bug in the code.
C. Who Am I?
C Who Am I?
1 I am bug in the code.
2 Finding and fixing the mistakes is called debugging.
What I Do?
Who Am I?
2 Finding and fixing the mistakes is called debugging.
3 A mistake in the code is a bug.
I do not let your code work.
3 A mistake in the code is a bug.
4 Debugging is finding and keeping the mistakes in the code.
E Answer the Following.
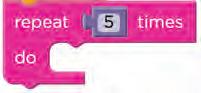
4 Debugging is finding and keeping the mistakes in the code.
I do a task again and again. Bug I do a task a certain number of times. Loop
E Answer the Following.
D. Write T for True and F for False.
1. F 2. T 3. T 4. F
1 Circle the odd one out.
E. Answer the Following.
1. a.
a
1 Circle the odd one out. a b
6:38:22 PM
11/28/2023
b.
b
2 This picture shows what the Play Area looks like when the code runs. Find if there is any mistake in the code. If yes, then circle it.
2.


2 This picture shows what the Play Area looks like when the code runs. Find if there is any mistake in the code. If yes, then circle it.


1. F Apply Your Learning.
1 Observe the picture and find out what is wrong with the code?
F. Apply Your Learning.
3 Observe the picture and the code. Then, circle the mistake in the code.
2. Sprite is missing
3.
2 Observe the code and then the picture. Name the missing item in the given picture.
4. These are the correct steps
1 → 2 → 4 → 3
4 Number the blocks in the correct order to fix the code.
This teacher manual has been designed to implement Tekie, the storytelling-based Coding and Computer Science program. The manual consists of lesson plans within each chapter that teachers transact within classrooms and computer labs. Each lesson is based on a research-based ‘WEBS’ framework that simplifies pedagogical practices for teachers and enables them to deliver effectively.
• Sharp Lesson Planning: Each lesson plan focuses on specific sub-learning outcomes within a chapter and are designed for delivery within the stipulated class or lab time.
• Real-life and Application-based Questions: Additional questions that link Computer Science to real-life contexts and assist teachers to develop learners’ conceptual understanding and application skills.
• Support and Detailed Solutions: In-depth solutions for in-class and post-class activities to reinforce learning.
Uolo partners with K-12 schools to bring technology-based learning programs. We believe pedagogy and technology must come together to deliver scalable learning experiences that generate measurable outcomes. Uolo is trusted by over 10,000 schools across India, South East Asia, and the Middle East.

hello@uolo.com