29 minute read
Raw wool spinning
MS. SABA SHAIKH
INTERN AT TEXTILE VALUE CHAIN
Advertisement
RAW WOOL SPINNING
Highlight of the article
The current widespread use and demand for wool is so great that there is little doubt that wool will continue to maintain its position of importance in the fabric industry. Only a major innovation that encompasses the many attributes of wool—including it warmth, durability, and value—could threaten the prominence of this natural fiber.
Today, wool is a global industry, with Australia, Argentina, the United States, and New Zealand serving as the major suppliers of raw wool. While the United States is the largest consumer of wool fabric, Australia is the leading supplier. Australian wool accounts for approximately one-fourth of the world’s production.
What for centuries was a small home-based craft has grown into a major industry. The annual global output is now estimated at 5.5 billion pounds. Though cotton is the number one plant used for fabrics and the number one fiber overall, the number one source for animal fiber is still wool.
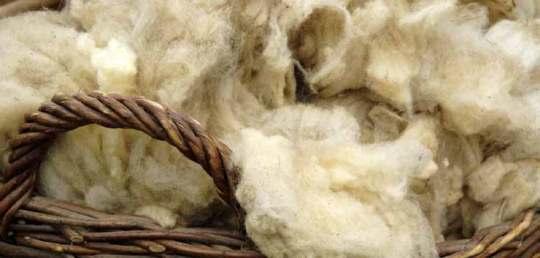
Wool comes from sheep which are generally shorn once a year (some breeds are shorn twice a year, and there’s some sheep that shed their hair naturally like other animals). Important wool characteristics are: cron - that’s one thousandths of a millimeter) wools are generally crimpier than coarse wools have very greasy fleeces) fibre (as for most breeds) or whether the sheep is double-coated, i.e. has a fine undercoat and coarse outer hair. That is the case for some “primitive” breeds like Soay, Heidschnucken or Ouessant.
These characteristics are more important than the breed. The breed allows to draw general conclusions as to wool quality (Merino is generally short and fine, English Leicester is coarse and long). But in the end it’s the quality of the individual fleece that counts. Especially in the case of meat breeds the quality varies a lot from one animal to the next. First class wool can be found on meat sheep – it’s just the matter of
Mohair
diameter (nowadays mostly measured in mi
crimp (the “zig-zagging” of one fibre) - fine
amount of grease (Merino and its crossbreeds
average fibre length (in cm or inch)
colour
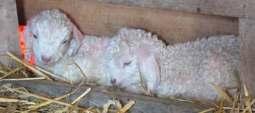
whether the fleece consists of one kind of pick and chooses! Mohair is the hair from the Angora goat. Mohair is very glossy, very strong, has practically no crimp (it’s supposed to form locks in the fleece), very smooth and very long - even though Angora goats are shorn twice a year. As the fibres are so slippery, they are pretty difficult to spin, in spite of the nice length. Mohair is also heavier than wool. It is therefore recommended to blend Mohair with wool to get a more light-weight garment and fibres that are easier to spin.
Spinning in the Grease: “In the grease” simply means greasy wool, or raw wool. Wool that has been freshly shorn off the sheep. When you feel this wool it can feel oily or even sticky. The substance that makes it feel that way is called lanolin.
What is the purpose of Lanolin?
lip balms, creams, salves, and lotions. The purpose of lanolin is to protect sheep’s skin and wool against the elements in nature. Lanolin can account for up to 25% of the weight of a greasy fleece, depending on the breed of sheep. Some sheep produce more lanolin in their wool than others. Merino and other fine wool breeds often are more “lanoliny” than primitive or long wool breeds of sheep.
Another useful property of lanolin is that it makes fiber water resistant, which helps keep you warmer when wearing wool in the rain.
Just as the lanolin keeps the sheep from getting too chilled by wet, cold, fiber - it does the same for knit outerwear. This is one of the reasons that many spinners will choose to spin their wool “in the grease”.
Lanolin feels good to spin:
Some spinners simply love the feel of raw wool and prefer to spin it in the grease and then wash the yarn after it has been spun. This is just a matter of preference. Beginners should try spinning a yarn straight from the fleece to experience it. They should try comparing the difference between a yarn that they have spun from already washed fleece, and one they spun in the grease from that same fleece and washed afterwards.
Many spinners find that, since they will be soaking their hand-spun yarn to set the twist after spinning anyway, washing out the lanolin during this twistsetting step saves them time. When choosing a wool for spinning in the grease, find one that has been coated. This means the sheep wore a light coat while growing the wool, which has kept most of the hay and vegetable matter from getting into their fleece. A greasy fleece that is full of vegetable matter will result in a greasy yarn full of vegetable matter.
Only use clean wool on the fiber processing equipment
This is an easy way to make sure the equipment stays clean. Washing a drum carder from lanolin is nearly impossible, so most of the time when spinning “in the grease” spinning will be done directly from the locks unless the spinner owned a specific set of combs or hand cards that they use only for raw wool. Spinning wool in the grease will not damage the spinning wheel.
Scouring raw wool
If the wool is very greasy, spinners can scour it (soak it in very very hot water without soap) to remove some of the grease while still keeping the water resistant qualities of the yarn. It is the addition of soap to the wash that removes a majority of the lanolin.
So, if spinners decide that they really don’t like the feel of the greasy yarn once it has been spun, they wash it gently in hot very soapy water and are able to remove nearly all the lanolin.
Many handspinners never work with raw fleece, and that’s perfectly okay. But there’s something magical about processing even a few ounces of unwashed wool—you connect to the fiber and the art of handspinning in a special way. These are just a few of the benefits: 1. Learn about spinning from an actual sheep. If you process its entire fleece, helps to understand which of its parts work best for hand-spinning. 2. Better understand how different fiber preparations require different hand-spinning techniques: drafting methods, amount and angle of twist, and finishing can all change. 3. Gain almost total control over the materials. We make many decisions when we work with commercial fiber, but with raw wool, we make ALL the decisions. 4. Realize how long it took our foremothers to make any kind of wool clothing before the Industrial Revolution. Many fiber prep tasks require little skill, so small children and unmarried women (spinsters) contributed to the household by preparing fiber for hand-spinning.
Benefits of working with the Raw Fleece:
5. Hands become baby–soft from the lanolin!
Preparing Wool for Hand-spinning
The enormous price difference between raw wool off the sheep and a ball of wool in the shop is caused by all the work that goes into the ball of wool. On the sheep wool is rather a nuisance, which is why there are several attempts to breed sheep that have good meat but shed their hair naturally, thus avoiding shearing.
Most spinners don’t have anything to do with shearing, even though it would be a good idea to be present. Then we could make sure that the ground is clean, maybe tactfully point out to the shearer that he should avoid second cuts and pick out the best wool. But let’s suppose that we are in front of a mountain of raw wool. Then the next steps are:
1. Sorting the wool, possibly teasing it
2. Washing
3. Drying
4. Possibly teasing (again)
5. Carding or combing
Only now can the wool be spun without problems. You can take shortcuts - for example, when the weather is warm you can spin clean, freshly shorn and not too greasy wool directly off the sheep, without further preparation. But every well-executed step in the preparation process saves time for the next step. Meaning, well-sorted wool is quicker to wash, well-teased wool is easier to card, and so on.
Dyeing (optional) can take place before washing (for irregular colour effects), after washing, after carding/combing, after spinning or even after knitting - depending on your schedule and desire and the
1. Sorting
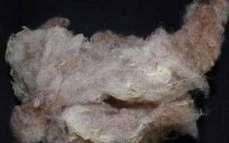
You need to remove (and save for mulching your garden): all the mucky bits, short hair (second cuts), felted bits and as far as possible all foreign matter (straw, hay, bugs...)
2. Washing
The method depends on the season, local conditions, the kind of wool and your demands. In any case you need to avoid:
Abrupt changes in water temperature
Rubbing or too vigorously stirring the wool
Those two actions would result in felting.
I have a very easy method for wool that is not too greasy (i.e. breeds without Merino influence) - unfortunately it does not work in winter:
1. Fill a (black) bucket with rain water (rain water is soft which is good for wool)
2. Put wool into the bucket till it is comfortably full (don’t overfill)
3. Put bucket into the sun and wait
4. After some time (depending on your schedule) pour out water (good fertilizer!) and repeat procedure with clean water until the wool looks clean (or the water pours off clear) This washing method can take days, but actual work is some ten minutes per bucket. This is a good method for large amounts of wool in summer, when you wash for your stash. In winter or when the wool is very greasy more work is needed. You’ll only get rid of the grease with hot water and detergent (wool detergent, dish washing liquid or hair shampoo without conditioner). And now you need to be careful to avoid felting. That means, NO rubbing, only very careful stirring, always use water at the same temperature. At the end, rinse out well and maybe add a bit of vinegar to the rinse water (wool stands acids quite well but can be damaged by bases). But that is all you need to observe. Of course, you can turn washing wool into a science, add soda to the washing water and use home-made soap - but why? If the wool is not squeaky clean after washing, it doesn’t matter: For dyeing the wool will be simmered for half an hour, after spinning the yarn will be washed (or at least rinsed), after weaving or knitting the garment will be washed again - and after wearing it for the first time it won’t be clean any more anyway.
3. Teasing
Besides, an amazing amount of dirt will fall out of the wool when you tease it - no matter how clean you thought it was. The point of teasing as preparation for carding (for drum carding teasing is necessary) is to loosen the wool and spread it out so that there are no lumps left. Moreover you’ll take out all vegetable matter, beetles, second cuts - everything that’s not supposed to end up in the yarn. Spread a newspaper on your lap, hear some good music (teasing takes a long time and is not exactly intellectually demanding) and have two buckets close by: One for the teased wool, one for waste
Carding with Hand Cards
Hand cards are not too costly, easily portable and there are many different versions (shape and distance between the teeth). Their main disadvantage is that you can only card a small amount of wool at once (1 to 2 g). Advantages are that the wool need not necessarily be teased before carding. And you can make so-called “rolags”, little rolls of wool that make long-draw spinning easier and permit a true “woollen” yarn as per Mable Ross’s instructions.
Spinners have simplified carding a bit: Take one card in your left hand (teeth face up) and stroke with wool over the cards until the teeth are covered with a thin layer of wool. Then take the second card in your right hand (teeth face down) and brush it over the card in your left hand. The brushing starts at the right edge and progresses towards the left - as if you wanted to brush out long hair from bottom to top. During brushing wool fibres are transferred from the left-hand card to the right-hand card. The cards’ teeth do NOT mesh during brushing! At some point you can’t transfer any more hairs from left to right with this superficial brushing action. Then you dig the right card’s teeth into those of the left card, tilt the right card and lift it off - but without pulling one card’s teeth through the other’s! This tilting and lifting action will transfer the rest of the fibres from the left-hand card to the right-hand card.
And now for the unorthodox part: you can simply turn both cards around - the right-hand (full) card faces up, the left-hand card is teeth down. And now you brush with the left hand over the right. So both hands do equal work. After 3 to 5 card changes the wool should be ready to spin and you can take it off by lifting off the entire batt. Then you can roll it up in such a way that the fibres remain parallel to each other which will result in a smoother (semi-worsted) yarn. Or you can roll up the fibres from the end (which results in a rolag) - either with your hands or by brushing the empty card over the full one but this time so that the handles point in the same direction.
Carding with a Drum Carder cheaply on E-Bay either. The fibres must be even better prepared than for hand carding, which is why a drum carder does not save as much time as one might think. Drum carders that are of low-cost, small, light-weight, of simple and sturdy construction and maintenance-free are available in the market. Carding with them is very simple and you’ll get wool batts of approx. 14 to 30 g (0.5 to 1 oz) with fibres aligned parellel to each other.
Light-weight carders should be clamped to the table for carding. Then you either lay the carefully teased fibres onto the feed tray, hold the fibres close to the licker-in drum (the small one) and turn the large drum by means of the crank. The licker-in drum will turn as well (but slower), take up the fibres and pass it on to the large drum where the fibres will be arranged more or less length-wise. Steady cranking and adding fibres will fill the large drum. When the big drum is full you pass a long, pointy object (a doffer stick or a knitting needle) through the gap in the teeth where the ends of the carding cloth meet on the drum and lift off the fibres until they separate. Now you can carefully pull off the batt.
Carding once will not be enough in most cases. So you will have to divide the batt, thin it out by pulling, and card it again. And maybe once (or twice, or...) more... In my experience three passes through the carder are enough for fibres of one kind and colour, but for blending more passes will likely be necessary.
Every time when you want to card a different fibre you need to carefully clean both drums of the carder. This may take as much time as carding itself. Therefore I’d recommend to drumcard in one go all the washed wool you have of one kind.
Is Buying a Drum Carder Worth It?
To put it clearly: Even with a drum carder carding takes a long of time and is tedious work. Maybe not carding itself, but the teasing, which can take a lot of time if the fleece is less than perfect (badly shorn or lots of vegetable matter). And a drum carder can neither transform a bad fleece into a good one, nor magically take out foreign matter. Even if quite a lot
of dirt does fall out during carding, a lot of seeds and bits of hay will remain in the wool and you’ll have to pick out the pieces one by one.
Buying a drum carder only makes sense when you can cheaply get large amounts of raw wool (from your neighbour’s sheep, for example). Buying washed locks is not worth it - the price difference between washed locks and ready-to-spin rovings or top is not big enough. Besides, industrially washed wool is often partly felted - it may be so bad that you can’t tease the locks apart with your fingers - you’d need a picker (the next step in industrial processing). Of course, a drum carder is also great for blending bought rovings or tops - but whether you want to spend that kind of money for that purpose is your decision.
Hand Spinning Process of the Raw Wool Step 1: Material
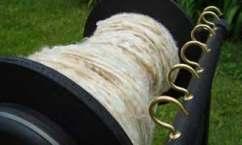
Spinners want to work with prepared sheep’s wool, known as roving, which has been washed to remove excess lanolin (grease) and carded or combed to orient all the individual fibers in the same direction. Roving can be found at any local yarn store, or from several online retailers. Try to avoid “top” for now, which is wool that has been combed to leave only the longest fibers, which makes things more difficult for the beginner, although it is delightful to spin with a little practice under your belt! Play with the roving. Break off a piece of roving about a foot long, and pull gently on either end, noticing how it stretches out and gets thinner as you pull. (You might also notice that if you pull hard enough, it will break. If this happens, don’t worry, just set aside the smaller pieces and use them later after you’ve read about joining.) Try stretching it with your hands 6 inches, 4 inches, 2 inches apart. You will notice that there is a threshold distance where the roving will no longer stretch because your hands are too close to each other. This is because this distance is less than the staple length, which is the length of the individual fibers in the roving. Keep gently stretching out the roving until it is at least twice as long as the original length.
Step 3: Fiber Management
Wrap your pre-drafted roving around your left (or not-dominant) wrist. I find it handy to have a yarn bracelet for tucking the end of the roving into. As you spin, you’ll unwind the roving from your wrist. This is essentially serving the same purpose as a distaff, although for our purposes and small amount of fiber, a wrist will do just fine.
Using a plied scrap yarn (more than one strand, which is typical of yarn) tie a piece about a foot long to the shaft of your spindle. I’ve used a halfhitch here, but any old knot will do. Bring the leader around the edge of the whorl (many spindles have a handy notch in the edge for this purpose) and under the hook at the top of the spindle shaft. Before introducing any fiber into the equation, you can give your spindle a (clockwise) spin by twirling the shaft below the whorl and letting it hang from the leader. Look how the spindle keeps going for some time before the twist in the yarn fights back and slows it down. High Tech!
Step 5: Join Fiber to Leader
Tease out a few fibers from the end of your roving and hold them together with the end of your leader using your left hand. With your other hand, give your spindle a good clockwise spin, and let it hang, keeping your left hand pinching leader and fiber together. You should notice the fiber twisting onto the leader. Let the leader build up a good amount of twist, then “park” your spindle by holding the shaft between your knees. We’re going to cheat a little and learn with training wheels first. Spinning is really just adding twist to a controlled amount of fiber, but you’d be surprised how challenging it can be to do both things at once (that is, adding twist, and controlling the amount of fiber getting said twist.) It’s kind of a pat-your-head and rub-your-tummy maneuver, so we will remove half the challenge by using the “park and draft” method. The “park and draft” is easiest to do when sitting in a chair so that you can hold the spindle between your knees, leaving both hands free for fiber-wrangling.
Bring your right hand up to meet your left, and pinch where the twist ends, freeing up your left hand to move back. The fiber between your hands is called the “drafting triangle.” The amount of fiber in the drafting triangle will determine the thickness of the finished yarn. If you want a thinner yarn, draft out the fiber in the triangle more. When you are satisfied with the thickness of the drafting triangle, release your front (right) hand, letting the twist run up into the triangle, and making yarn!
Repeat this process, moving the front hand up to the new end of the twisted section, moving your left hand back, drafting, and letting twist into the newly drafted fiber. When you want to add more twist, hold the yarn with your left hand at the bottom of the drafting triangle, where fiber turns into yarn - it is important to keep a leash on that twist. Use your free hand to spin the spindle, building up more twist, and park it again. Keep going until you have a foot or two of yarn, then go on to the next step.
Tip: If you find there is too much twist in your drafting triangle to comfortably draft, try untwisting by rolling the fiber in your right hand. You
might also find that you do not have enough twist, and it feels like your yarn could easily be pulled apart, in which case you’ll want to add more twist.
Don’t worry about how it looks at this point, worry more about how the process feels, and just let your hands do a lot of the understanding.
Step 7: Wind On Your freshly spun yarn will eventually get too long to keep adding to comfortably. Unhook the yarn and wind all but 10’ or so around the shaft of your spindle, then bring it around the whorl and into the hook again. Now continue with the “park and draft” method. Step 8: Add More Fiber you break your yarn, you’ll need to make a join. This is really just the same as when you initially joined your fiber to the leader, except that instead of a leader, you are joining to your own handspun.
Tease out a few fibers, hold them together with the fiber at then end of your handspun, and add twist until the fibers grip together. Twist is like glue for fibers, and they will magically grip onto each other. Now continue spinning as before.
Step 9: Take Off the Training Wheels When things are starting to feel easy, try spinning without parking the spindle. You can also stand up and spin, and with practice even walk and spin. You might also want to give your spindle some more serious spin by rolling it against your thigh instead of spinning it with your fingers, but make sure you are giving it the same direction of spin (which should be clockwise.) Keep spinning until you have a full spindle!
Step 10: Wind a Hank and Block
Your finished yarn needs to be removed from the spindle for washing, also called “blocking.” Blocking will set the yarn, and help it bloom a little. If
you were to be making a plied yarn, you would first twist the finished “single” (that’s the name for what you’ve just made) with one or more other singles before blocking. But since we are just making a single, we’ll plow right on ahead to making a hank.
You could invest in a niddy-noddy, which is specifically designed for winding yarn into hanks, and is fun to say, but you can also just use your forearm. Wind the yarn off of the spindle and into a series of loops around your thumb and elbow. Tie the ends together, and use scrap yarn to make one or two ties around one side of the hank, which will keep the yarn from getting tangled. Your hank will be all wonky and squiggly. Do not fret.
To block your yarn, submerse it in lukewarm water, gently squeeze out the excess water, snap it between your hands a few times (or some folks even whack it against a hard surface) and hang it for drying. I hang my hanks on doorknobs, or shower curtain hooks. Since this is a single, and has a lot of active twist, you will also want to weigh it down it to help get the kinks out. A spray bottle full of water or other liquid works nicely as a weight, since you can easily hook it onto lower half of the hank. Alternatively, if you happen to possess a yarn swift, you could stretch your hank on that to dry.
You can turn a hank of yarn into a skein by twisting it a few times, folding it in half, and pulling one end through the loop at the other end. Dying wool before or after spinning? It completely depends on the effect you’re going for. If you dye after spinning, unless you get absolutely 100% saturation of dye completely consistently through the skein, you will end up with a bit of variation. What kind of variation will depend on the method of dyeing you use - for the most solid black possible (which is tough to begin with, I hated dyeing black) you should vat dye with lots of water, let the yarn soak in the dye and only after it’s fully saturated, add the acid component so that it soaks up as evenly as possible.
What form is the fleece in right now? just loose fleece? Do you plan on processing it in some way before spinning? Carding? or are you spinning straight from the lock? If you’re going to card it, that will help a lot with fluffing the fleece back up before spinning. It will also help even out the color, since you can pull out any sections that are not as evenly dyed and distribute them evenly thoughout all the fleece. The resulting yarn will look more tweedy since there will be slight variations of shades of black blended together. This will also look more like a natural undyed black fleece, since even black fleeces have some variation to them. Dyeing the yarn after spinning will give it more of a dyed black look.
Either way, obviously minimize agitation while dyeing. For fleece and handspun yarns, you would start in cool water with the dye already dissolved, and lower the yarn/fiber into it - for an unprocessed fleece, you should use a mesh bag to minimize movement even further. Add gentle heat and the acid, but never let it get to even a simmer. Turn off the heat and insulate it well so it retains the heat as long as possible if you’ve got hot weather where you are, sit it in the sun for a day. With acid dyes, as the wool absorbs the dye, the water turns lighter and lighter, to the point of becoming completely clear if you got the wool/dye ratio right. So if this isn’t happening, do another round of heat. For the dye to strike you either need a high temp for a short amount of time (which often also results and uneven dyeing as the dye strikes the areas it hits first rather than dispersing through the fiber) or a lower temp for a long period which also result in a more even color. In your case since you don’t want to agitate your wool, you’re aiming for low and slow.
Once it’s as dark and even as you want, drain the water and rinse a few times.If you’re dyeing the fiber rather than the yarn, no need to worry too much about getting your rinse water to 100% clear - just get it fairly clean and make sure the fiber isn’t getting any lighter as rinse. You’ll be washing the yarn to set the twist after its spun anyway, you might as well finish the rinsing process then when it’s less likely to felt and get matted.
The Machine Manufacturing Process
The major steps necessary to process wool from the sheep to the fabric are: shearing, cleaning and scouring, grading and sorting, carding, spinning, weaving, and finishing.
Sheep are sheared once a year—usually in the springtime. A veteran shearer can shear up to two hundred sheep per day. The fleece recovered from a sheep can weigh between 6 and 18 pounds (2.7 and 8.1 kilograms); as much as possible, the fleece is kept in one piece. While most sheep are still sheared by hand, new technologies have been developed that use computers and sensitive, robot-controlled arms to do the clipping. Grading and sorting
Grading is the breaking up of the fleece based on overall quality. In sorting, the wool is broken up into sections of different quality fibers, from different parts of the body. The best quality of wool comes from the shoulders and sides of the sheep and is used for clothing; the lesser quality comes from the lower legs and is used to make rugs. In wool grading, high quality does not always mean high durability.
Cleaning and scouring
Wool taken directly from the sheep is called “raw” or “grease wool.” It contains sand, dirt, grease, and dried sweat (called suint); the weight of contaminants accounts for about 30 to 70 percent of the
fleece’s total weight. To remove these contaminants, the wool is scoured in a series of alkaline baths containing water, soap, and soda ash or a similar alkali. The byproducts from this process (such as lanolin) are saved and used in a variety of household products. Rollers in the scouring machines squeeze excess water from the fleece, but the fleece is not allowed to dry completely. Following this process, the wool is often treated with oil to give it increased manageability.
Carding
Next, the fibers are passed through a series of metal teeth that straighten and blend them into slivers. Carding also removes residual dirt and other matter left in the fibers. Carded wool intended for worsted yarn is put through gilling and combing, two procedures that remove short fibers and place the longer fibers parallel to each other. From there, the sleeker slivers are compacted and thinned through a process called drawing. Carded wool to be used for woolen yarn is sent directly for spinning.
Spinning
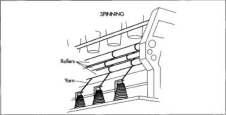
Thread is formed by spinning the fibers together to form one strand of yarn; the strand is spun with two, three, or four other strands. Since the fibers cling and stick to one another, it is fairly easy to join, extend, and spin wool into yarn. Spinning for woolen yarns is typically done on a mule spinning machine, while worsted yarns can be spun on any number of spinning machines. After the yarn is spun, it is wrapped around bobbins, cones, or commercial drums.
Weaving
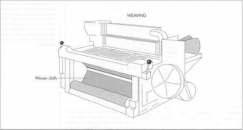
Next, the wool yarn is woven into fabric. Wool manufacturers use two basic weaves: the plain weave and the twill. Woolen yarns are made into fabric using a plain weave (rarely a twill), which produces a fabric of a somewhat looser weave and a soft surface (due to napping) with little or no luster. The napping often conceals flaws in construction.
Worsted yarns can create fine fabrics with exquisite patterns using a twill weave. The result is a more tightly woven, smooth fabric. Better constructed, worsteds are more
durable than woolens and therefore more costly.
Finishing
After weaving, both worsteds and woolens undergo a series of finishing procedures including: fulling (immersing the fabric in water to make the fibers interlock); crabbing (permanently setting the interlock); decating (shrink-proofing); and, occasionally, dyeing. Although wool fibers can be dyed before the carding process, dyeing can also be done after the wool has been woven into fabric.
By-products
The use of waste is very important to the wool industry. Attention to this aspect of the business has a direct impact on profits. These wastes are grouped into four classes:
Noils. These are the short fibers that are separated from the long wool in the combing process. Because of their excellent condition, they are equal in quality to virgin wool. They constitute one of the major sources of waste in the industry and are reused in high-quality products.
Soft waste. This is also high-quality material that falls out during the spinning and carding stages of production. This material is usually reintroduced into the process from which it came.
Hard waste. These wastes are generated by spinning, twisting, winding, and warping. This material requires much re-processing and is therefore considered to be of lesser value.
Finishing waste. This category includes a wide variety of clippings, short ends, sample runs, and defects. Since this material is so varied, it requires a great deal of sorting and cleaning to retrieve that which is usable. Consequently, this material is the lowest grade of waste.
Quality Control
In 1941, the United States Congress passed the Wool Products Labeling Act. The purpose of this act was to protect producers and consumers from the unrevealed presence of substitutes and mixtures in wool products. This law required that all products containing wool (with the exception of upholstery and floor coverings) must carry a label stating the content and percentages of the materials in the fabric.
This act also legally defined many terms that would standardized their use within the industry. Some of the key terms identified in the Act are:
Wool. Refers to new wool. Can also include new fiber reclaimed from scraps and broken threads.
Repossessed Wool. Material that is obtained from scraps and clips of new woven or felted fabrics made of previously unused wool.
Reused Wool. Wool obtained from old clothing and rags that have been used or worn.
The Future
The current widespread use and demand for wool is so great that there is little doubt that wool will continue to maintain its position of importance in the fabric industry. Only a major innovation that encompasses the many attributes ozf wool—including it warmth, durability, and value—could threaten the prominence of this natural fiber.


