
3 minute read
Art Club with Bea Garcia


RT CLUB
WHAT YOU WILL NEED: • PAPER • RULER • PENCIL • ERASER • SOMETHING TO COLOUR IN WITH (OPTIONAL)
Draw a Llanito doorway in 7 easy steps.
BY BEA GARCIA
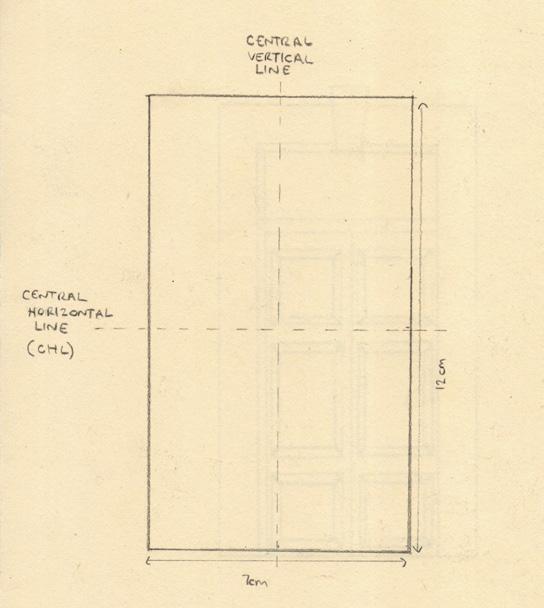
STEP 1
Start by drawing a rectangle which measures 7cm across by 12cm. Draw a dashed horizontal line halfway up the rectangle (6cm up). This is your central horizontal line (CHL).
Draw a dashed vertical line down the middle of your rectangle (3.5cm in). This is your central vertical line (CVL).
These lines show us the central part of our door.
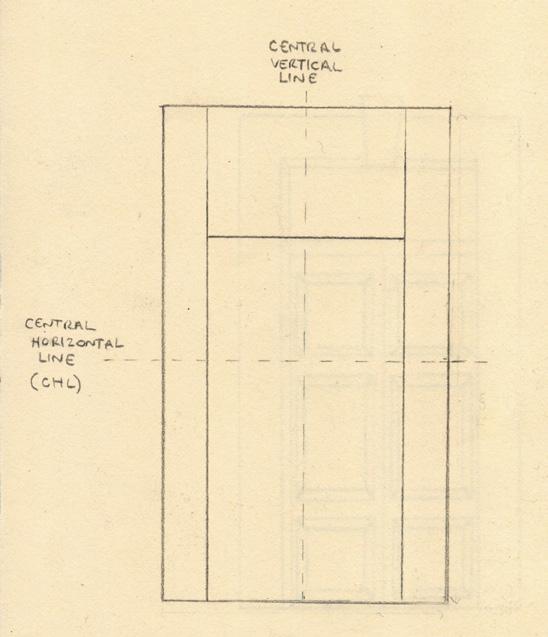
STEP 2
Draw a vertical line, 1cm in from the top left corner of your door and another 1cm vertical line in from the top right corner. This is where the wall meets our door.
Draw a horizontal line, 3cm above your CHL touching each of the new lines you have drawn. This will be where the top of your door meets the skylight.
STEP 3
Let’s draw the skylight. From the horizontal line we have drawn, draw another horizontal line, 2cm above it. Rub off the excess lines.
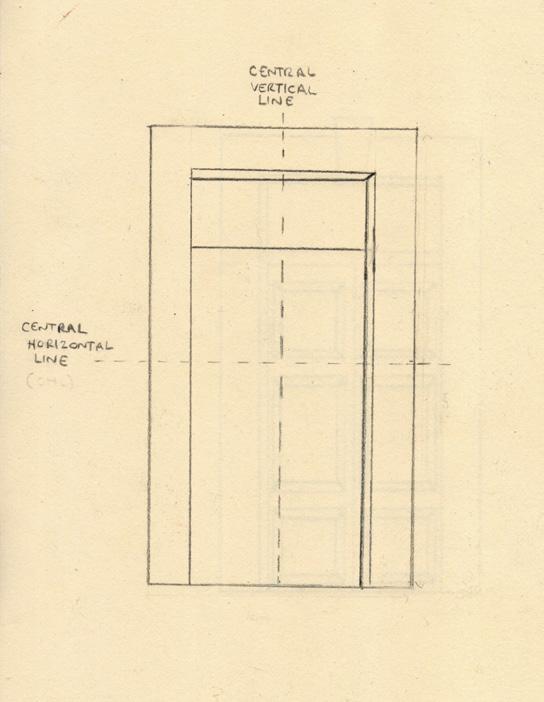
STEP 4
To make the door look 3D, draw a 0.2cm vertical line to the left of the right-hand side door, up to the top of the skylight. Where it meets the skylight, draw a 0.2cm horizontal line parallel to the top edge of your skylight.
STEP 5
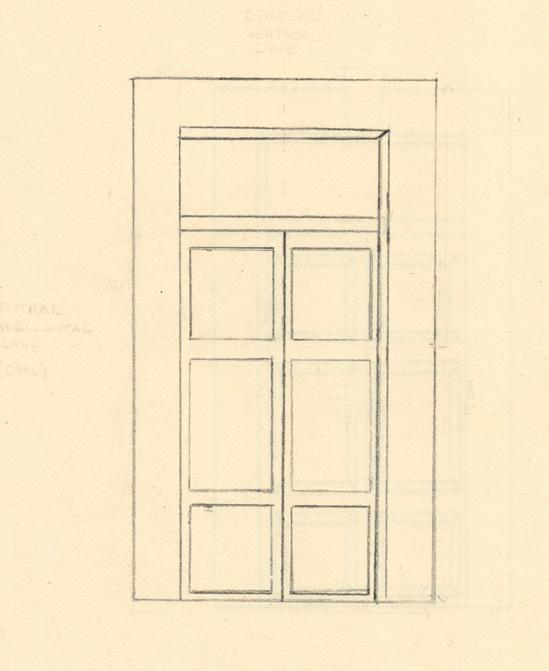
Draw a horizontal line, 0.3cm below the top of the door. This is the top section of the door where the house number will appear. Draw in the central line of the door which separates the double doors. 0.5cm below the line you have just drawn, draw a 2cm square on the left-hand side of the door leaving a bit of space between the door and the wall. Leave the same amount of space on the other side where it meets the centre of the door.
Leaving a 0.5cm space, draw another rectangle below this square, 2cm wide by 3cm down. Leaving another 0.5cm space, draw a final 2cm square below your rectangle.
Do the same for the other side of the door.
Rub off the excess lines.
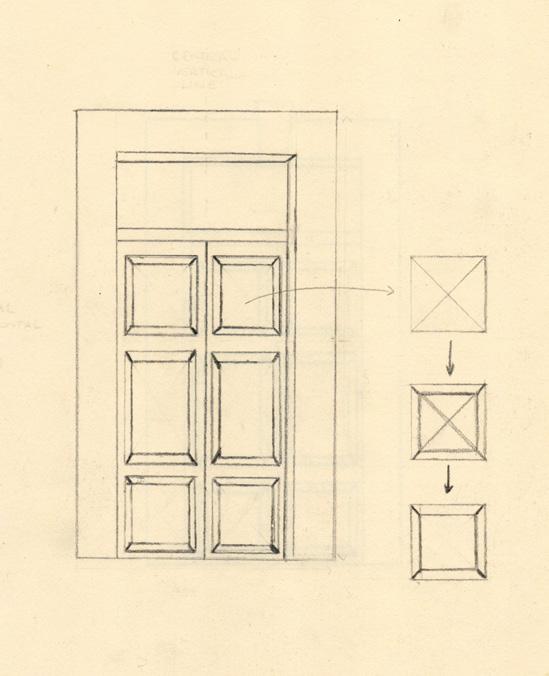
STEP 6
Let’s make these door panels look 3D!
For each panel draw 2 diagonal lines which meet in the middle of each panel. For the square panels, draw another square 0.2cm in from the perimeter of your initial square. For the rectangular panels, draw another rectangle 0.2cm in from the perimeter. Repeat for all panels. Rub off any excess lines.
STEP 7

For the final touches, we are going to add the lintel.
For the lintel: Using your CHL, draw a rectangle above your skylight which is 1cm across by 1.5cm up. From the bottom left corner measure 0.2cm into the centre of your rectangle and then draw a triangle up to the top of the rectangle. Do the same for the bottom right hand corner. The base of your lintel should now be 0.6cm. Rub off any excess lines.
Draw a line down the middle of your door to separate each of your double doors. Feel free to leave your door as a line drawing or add some colour if you like. For some final touches feel free to add a house number and a door knob.
Send in your creations to Sophie at editor@thegibraltarmagazine. com, and you could see your work printed in the magazine! What would you like to learn to draw next? Get in touch – we’d love to hear from you.


