4 minute read
Indoor Gardening
Perpetual Greens
One of my favorite things about growing edible plants indoors is that it allows you to have the food you want, when you want it. By taking control of environmental conditions like temperature, humidity and lighting, we effectively take control over the timing of our harvests. Even with a foot of snow on the ground outside, fresh produce can be picked right off the vine inside the comfort of our homes. That’s no slight against outdoor gardening, and it’s certainly not meant to force a choice between one or the other. It’s simply shining light on an opportunity created by advances in technology.
Whether you’ve joined (or are thinking about joining) the “grow your own food” movement because of concerns around food safety, security, cost, ethical issues, or just the satisfaction of being self-sufficient, indoor gardening meets each-and-every one of those criteria. There’s a prevalent, and unfortunate misconception that growing food indoors requires use of synthetic fertilizers, hydroponics and all sorts of fancy gadgets and gizmos. While that path is certainly available, the reality is that indoor food production can be quite practical, affordable, organic and not overly complex. And with just a little bit of planning, you can time your planting and harvests to coincide with your schedule.
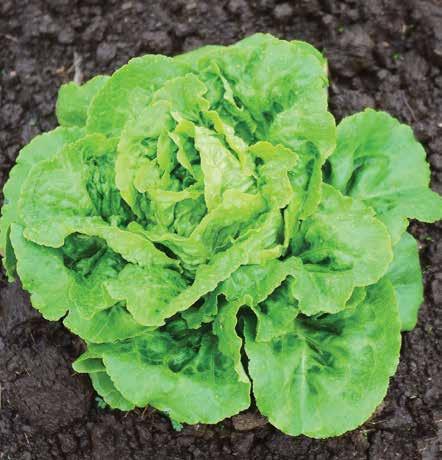
To illustrate how this can work in your own home, let’s walk through the entire process for producing loose-headed buttercrunch (bibb) lettuce so that you’re harvesting enough fresh greens for a family of 4 every single week! This is a great variety to start out with because it grows quickly and requires minimal amounts of light, space and nutrition. It’s also extremely versatile in the kitchen – use it in a salad, put a slice on your sandwich, roll it up as a wrap or even blend it into your smoothie.
I’ll preface by saying that this is not the only way to grow lettuce at home. It’s intended to be just one example of what’s achievable.
Assuming you’ve already acquired your seeds, it’s time to pick out containers. Lettuce has a fairly shallow root system and doesn’t get too large, so half-gallon square plastic pots (5.5” x 5.5” x 6”) with drain holes at the bottom would work well. For this scenario, we’ll need 18.
Fill them with a lightweight potting mix. A 1.5 cubic foot bag of soil will be enough to fill all 18 pots. If you’re using a soil that’s dense with compost and organic matter, mix in some coco coir to provide better aeration and drainage. Place them on a tray or pan to keep your space clean and collect any run-off from overwatering or soil that may fall from the containers.
Now it’s time to find the right location for your plants. The ideal temperature for growing lettuce is 60°F to 70°F and seeds will germinate best in the upper part of that range. We’ll need about 16 square feet to space the pots apart and 2 feet above them to hang a light. A 4’ x 4’ square on an unfinished basement floor or a metal rack in a storage room would do just fine. We’ll go with the basement floor.
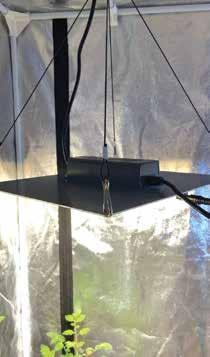
As I mentioned previously, lettuce doesn’t require much light, but it does prefer a cool, blue spectrum. T5 Fluorescent tubes or LEDs (light emitting diodes) would be ideal in this case. I prefer LEDs because of their energy efficiency and lifespan. A 100-watt LED that covers 16 square feet in the ideal color spectrum will cost about $150 and should last 5 to 10 years. Hang the light about 2 feet above the center of your 4’ x 4’ square.
Lettuce grows best with 12 hours of light and 12 hours of darkness each day. Plug your light into an outlet timer to make sure this cycle occurs consistently.
It’s time to plant! Moisten the soil in 6 of your pots and use a pen to create a shallow hole in the center of each. Drop your seeds into the holes. Within a few days, you’ll have sprouts. Pinch off the top of all but the one, best sprout in each container. Keep the soil evenly moist but not water-logged and in 4 weeks, you’ll be ready to harvest the outer leaves of your lettuce. In week 5, you’ll be able to harvest again, composting whatever plant material and roots remain in the containers after you’re done.
So, what happens in week 6? That’s where proper timing comes into play. Two weeks after you planted your first 6 containers, you planted 6 more. Two weeks after that, you planted the final six. And then after another 2 weeks, you’re planting in the containers you just finished emptying. If you continue the process of planting 6 containers every 2 weeks, you’ll be harvesting fresh buttercrunch lettuce for the whole family EVERY SINGLE WEEK all year-round!

JASON MISPAGEL Indoor Gardener
Jason Mispagel is the co-owner and operator of Year-Round Garden, a grower’s supply center serving both home and commercial customers since 2016. To contact Jason, call (816) 216-6917 or jason@year-roundgarden.com.


