
18 minute read
THE FABRICATION SERIES — PRO-STREET BRAWLER, PART ONE
TAYLOR RETURNS TO HOME BASE TO BEGIN CREATING THE NEW TWIN-TURBO CONFIGURATION FOR HIS INSANE FORD CAPRI, WHERE HE DISPLAYS ALL OF HIS TIPS AND TECHNIQUES FOR DESIGNING A CLEVER TURBO SET-UP
WORDS AND PHOTOS: TAYLOR PETERSON
Advertisement
I’ll start with the backstory on this car, as I’ ve owned it since I was 15 when it was bought as a factory four-cylinder. Over the years, it’ s had several small block Ford motor combos in it, with the most recent being a blown and injected 347ci small block Windsor running on Avgas. There was a steep learning curve involved with the EFI aspect, and after encountering numerous issues and lots of disappointment (all of which could be traced back to the ECU eventually), I decided to take a break from it. After 2.5 years I have motivated myself to resume where I left off. I put in a new Link ECU and plan to swap to E85, both of which I feel will solve my difficulties.
Somewhere along the way of rewiring it, I ended up making a whole new rear half for the chassis. I then figured the chassis can handle a lot more horsepower now, so thought I’d better convert to turbos and bump it up a notch, and get back to rewiring it later on. Once the decision was made to go twin-turbo, there was some planning involved with some key areas that
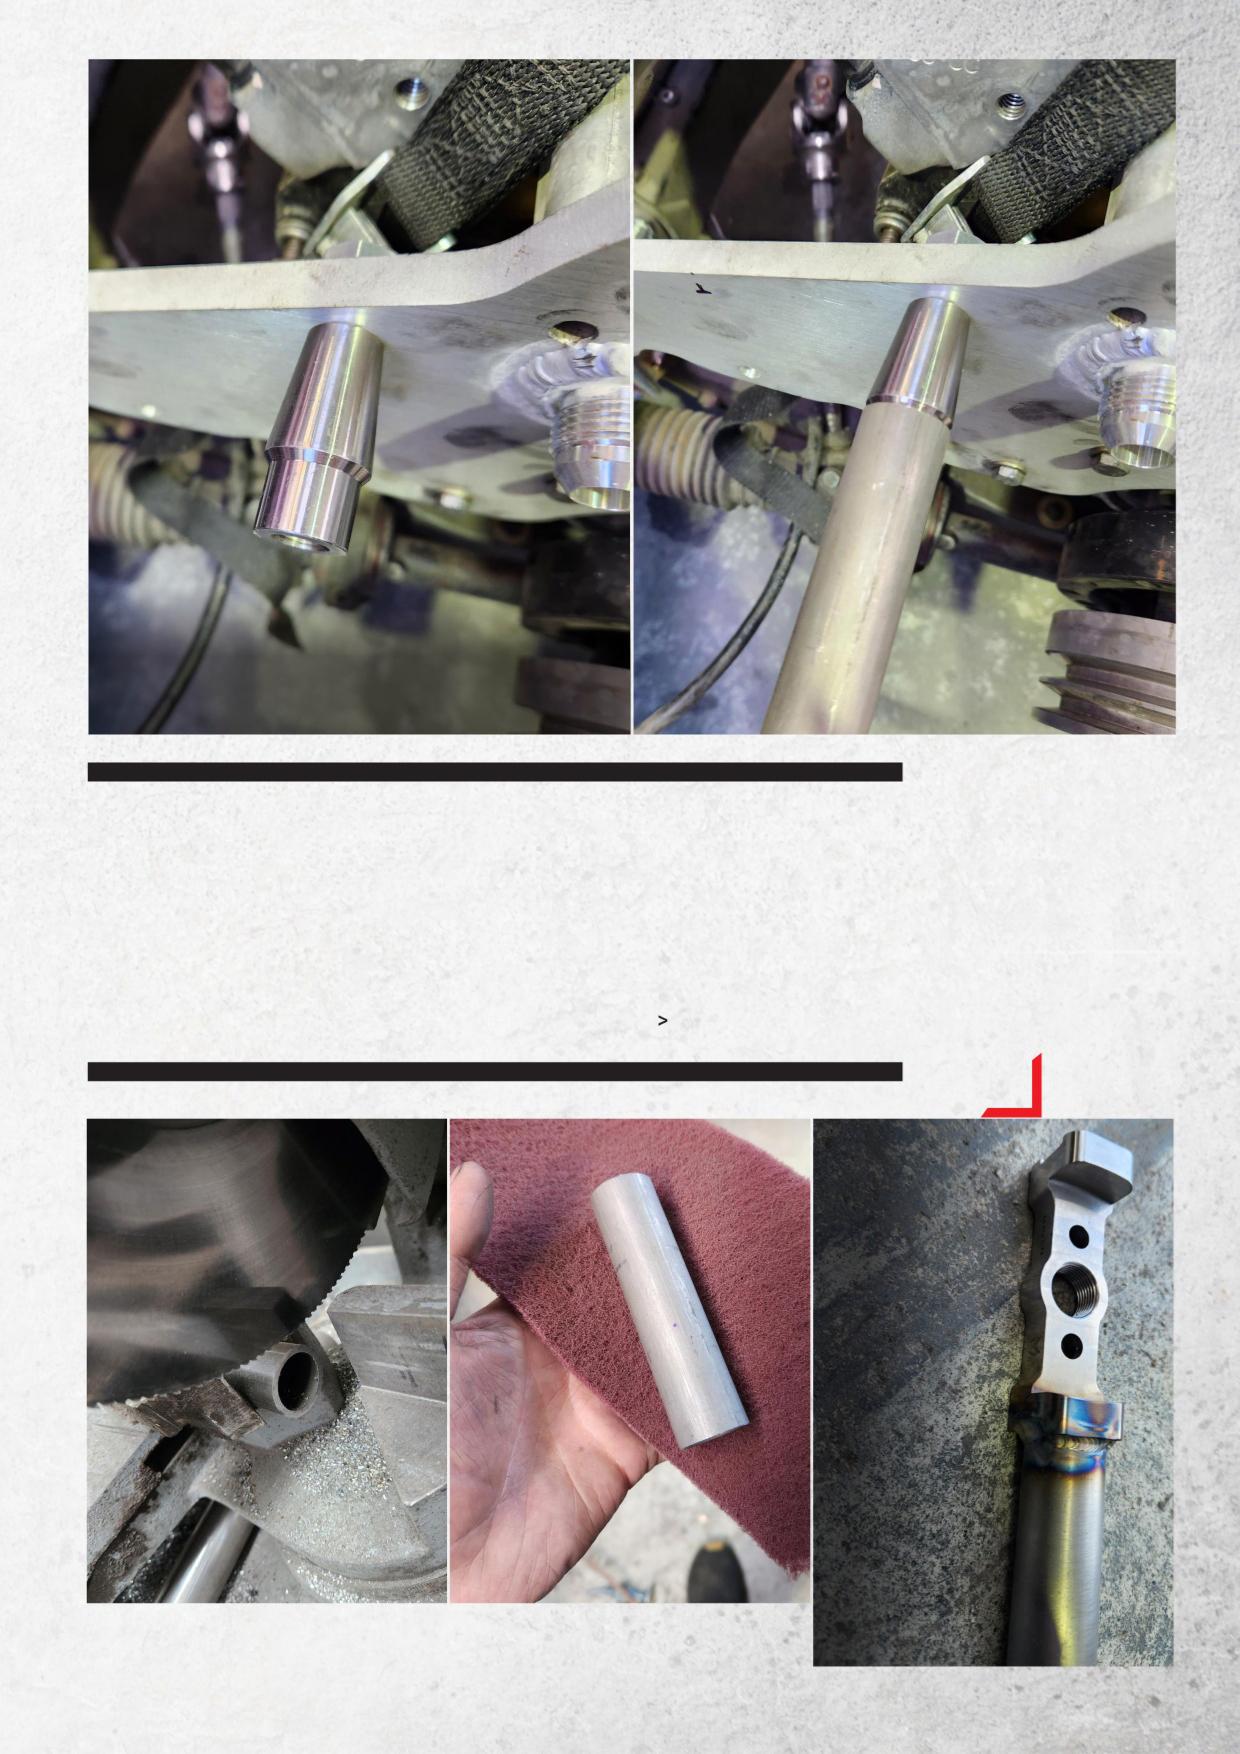
Maven Performance makes these cool mounts that bolt to the drain flange of the turbo, which is a really nice way to do it as it supports all the weight from the centre of the turbo. The Maven mounts have a recess machined on either side to accept 1-inch diameter tube
Since I’ m using 1-inch chromoly tubing for the frame, the nicest solution to bolt it to the engine plate I could think of is to use a weld-in spud. I chose a pair with ½-inch UNF thread, then marked and drilled two holes in the engine plate
Once figuring out my centre-to-centre width for the turbos, a piece of the chromoly tube to length was cold cut in the saw. Deburring the cut ends on the linisher, then red Scotch-Brite was used to clean up the tube ready for the next stage Clamping the mounts to a flat surface of the bench at the edge so I can ensure they stay straight and parallel while tacking. Using the TIG welder I’ ve welded a small tack in place using minimal filler wire so that when I weld over the tack it doesn ’t make a lump. Once tacked in three or four places, I weld around the joint with the TIG welder
I want to make minimal compromises. As it is mainly a race car, maintenance needs to be relatively easy, so things like access for checking valve lash, and changing spark plugs, were important.
Weight was another key aspect I wanted to keep in mind as I have gone to a massive effort to remove weight from the car in the rebuild so far, so the last thing I wanted was 50kg worth of headers holding up the turbos. My solution to this is to use the same material that I’d use to build naturally aspirated headers — 1.6mm wall stainless tube. Stainless is better than mild steel for turbo builds as it holds the heat better, and this makes the turbo spool up faster. I also plan to get them ceramic coated, which will help to reduce temperatures. Something I see a lot of is cars with terrible wastegate flow, which makes boost control erratic or impossible to bleed off enough pressure. So when it comes to a boost control / wastegate position, my preferred way to do turbo manifolds is ‘Promod’ style, which is where there ’ s a 90-degree bend between the collector and turbo, then you feed the wastegate off the bend in the direction of gas flow.
MY PREFERRED WAYTO DOTURBO MANIFOLDS IS‘PROMOD STYLE ’
With header design, even though a log-style manifold will make okay horsepower, there are gains to be made from running a proper longer merge, close to equal length primaries. The phrase ‘bigger is better ’ is not always the case — a primary that is too large will spool slower and simply take up more space.
To help with packaging, and to help with my love of symmetry in the engine bay, I have elected to use a pair of mirror image Aeroflow 6762 turbos. They have a V-band turbine inlet and outlet which I prefer over a flange style for ease of assembly. Once the turbos were selected, the big decision was where to put them — down low and up front was best.
I selected 1 7/8-inch stainless tube with 1.6mm wall thickness as my header primary material. There is no way the headers will be able to hold the weight of the turbos, so I will fabricate a mount frame to support both turbos. Here ’ s the progress so far. The next step involves making the stand off tubes, notching the end of it to fit perfectly using a handheld belt sander, and finishing with a file where needed. On larger tubing, I would do a rough notch with a 1mm cut-off disc first. This photo shows how the tubes should fit before TIG welding
PROTIP: When welding chromoly tube, I use 1.6mm ER70S filler wire and run a Furick #12 gas lens to keep the weld pool free from contaminants.
The frame all welded up and bolted in with a turbo sitting in place. A bonus with this frame is the added benefit of serving as a dual-purpose bracket to mount the water-toair intercooler
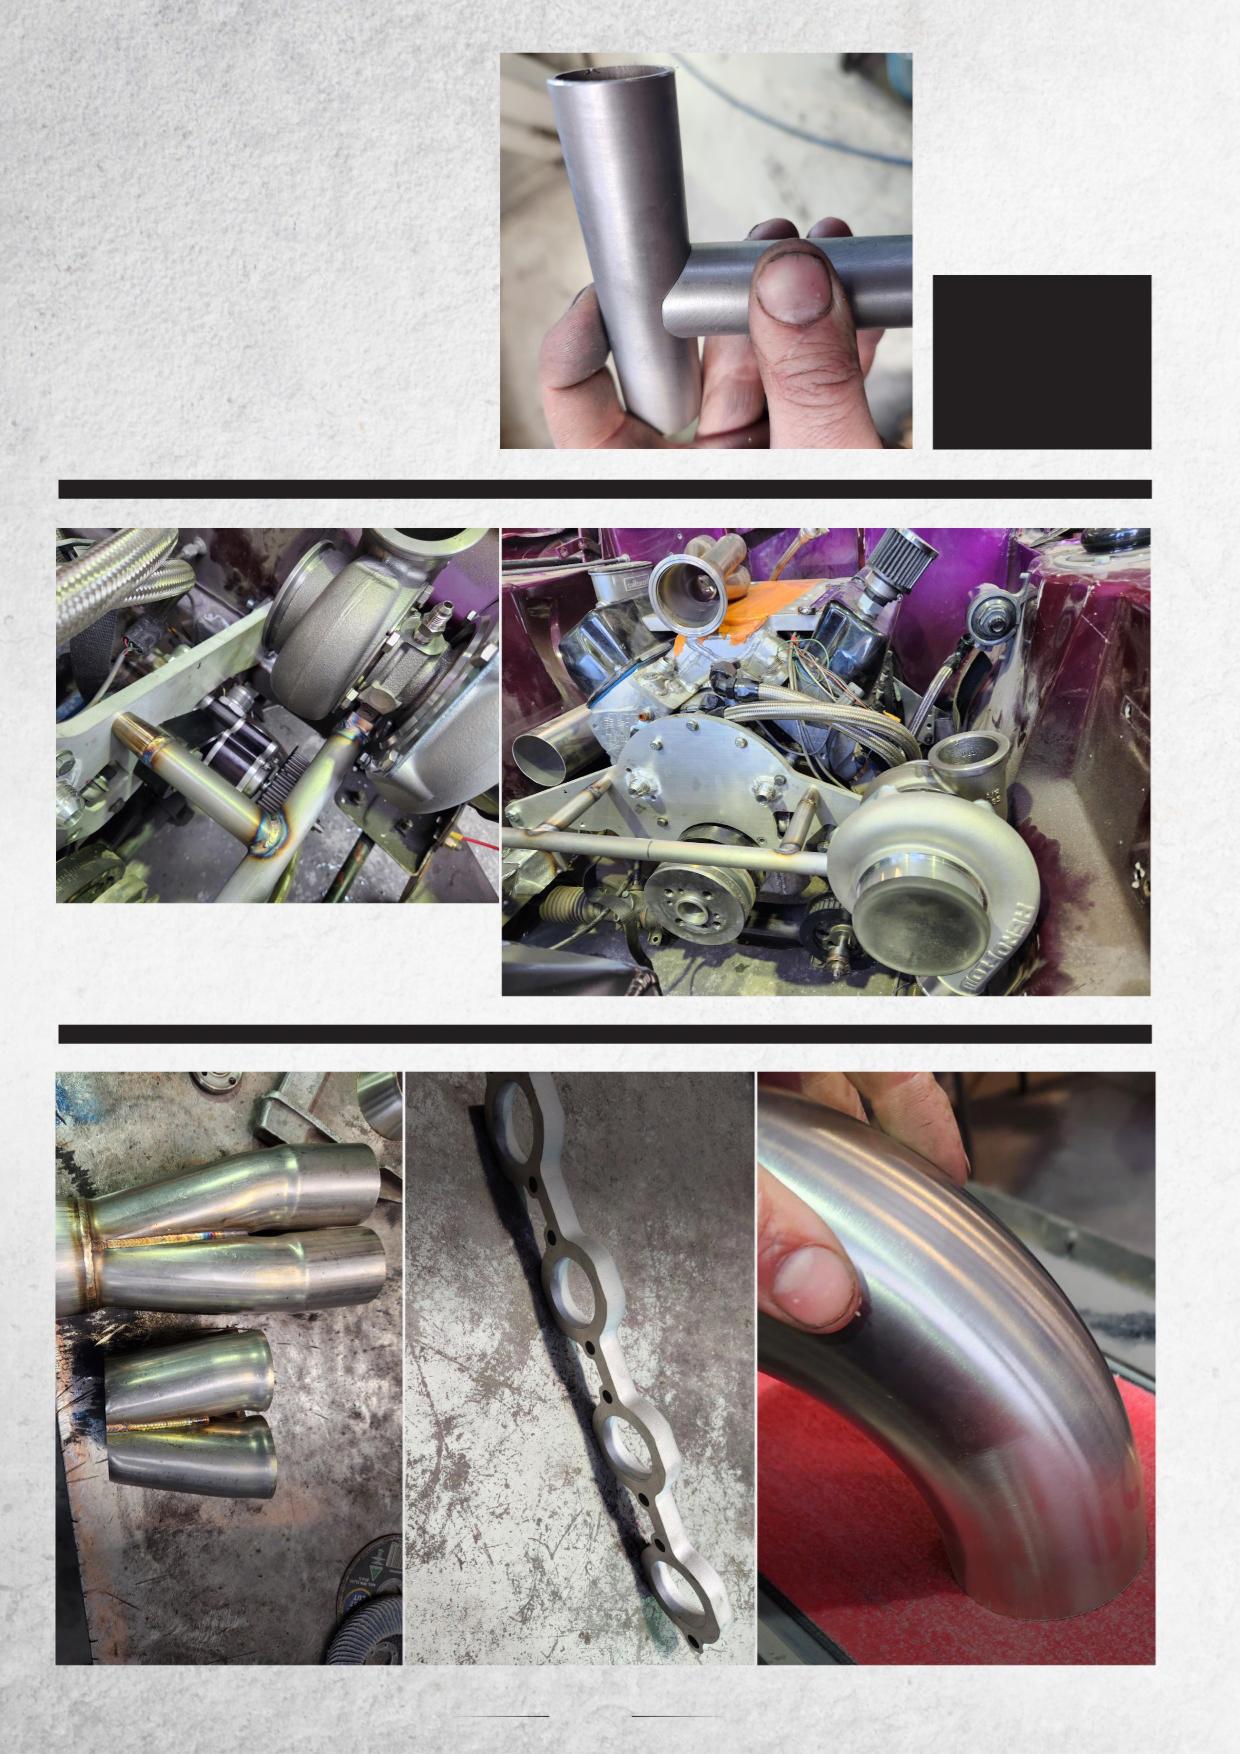
The header flange is the next part. I drew these on CAD software and got them waterjet cut locally out of 16mm stainless plate. I always make my ports 0.1mm or so bigger than the tube size I’ m using — it makes it easy at fab stage as the tube will lock in by hand
Starting the headers off by shortening an Aeroflow 4-1 collector to fit in the space that’ s left to use. This is purely to save time from making my own collectors, plus I had them left over from another project Cutting a 2.5-inch, 180-degree J-bend in half to make a 90-degree elbow, which is followed by using the big belt sander to sand the ends flat
Here you can see the reducer cone tacked between the collector and V-band to make it flow smoothly
Three of the primaries are tacked up here and you can see I’ ve used the MIG welder to tack these in place — it means you can tack easily with one hand while holding it in place. The downside is I will have to grind the tacks off before I TIG these properly. With three tubes tacked together, the header can be pulled off the car to begin building the last one on the bench
In the next instalment of the Pro Street Brawler series, we will discuss the steps involved in welding the headers together and putting the final touches to them.
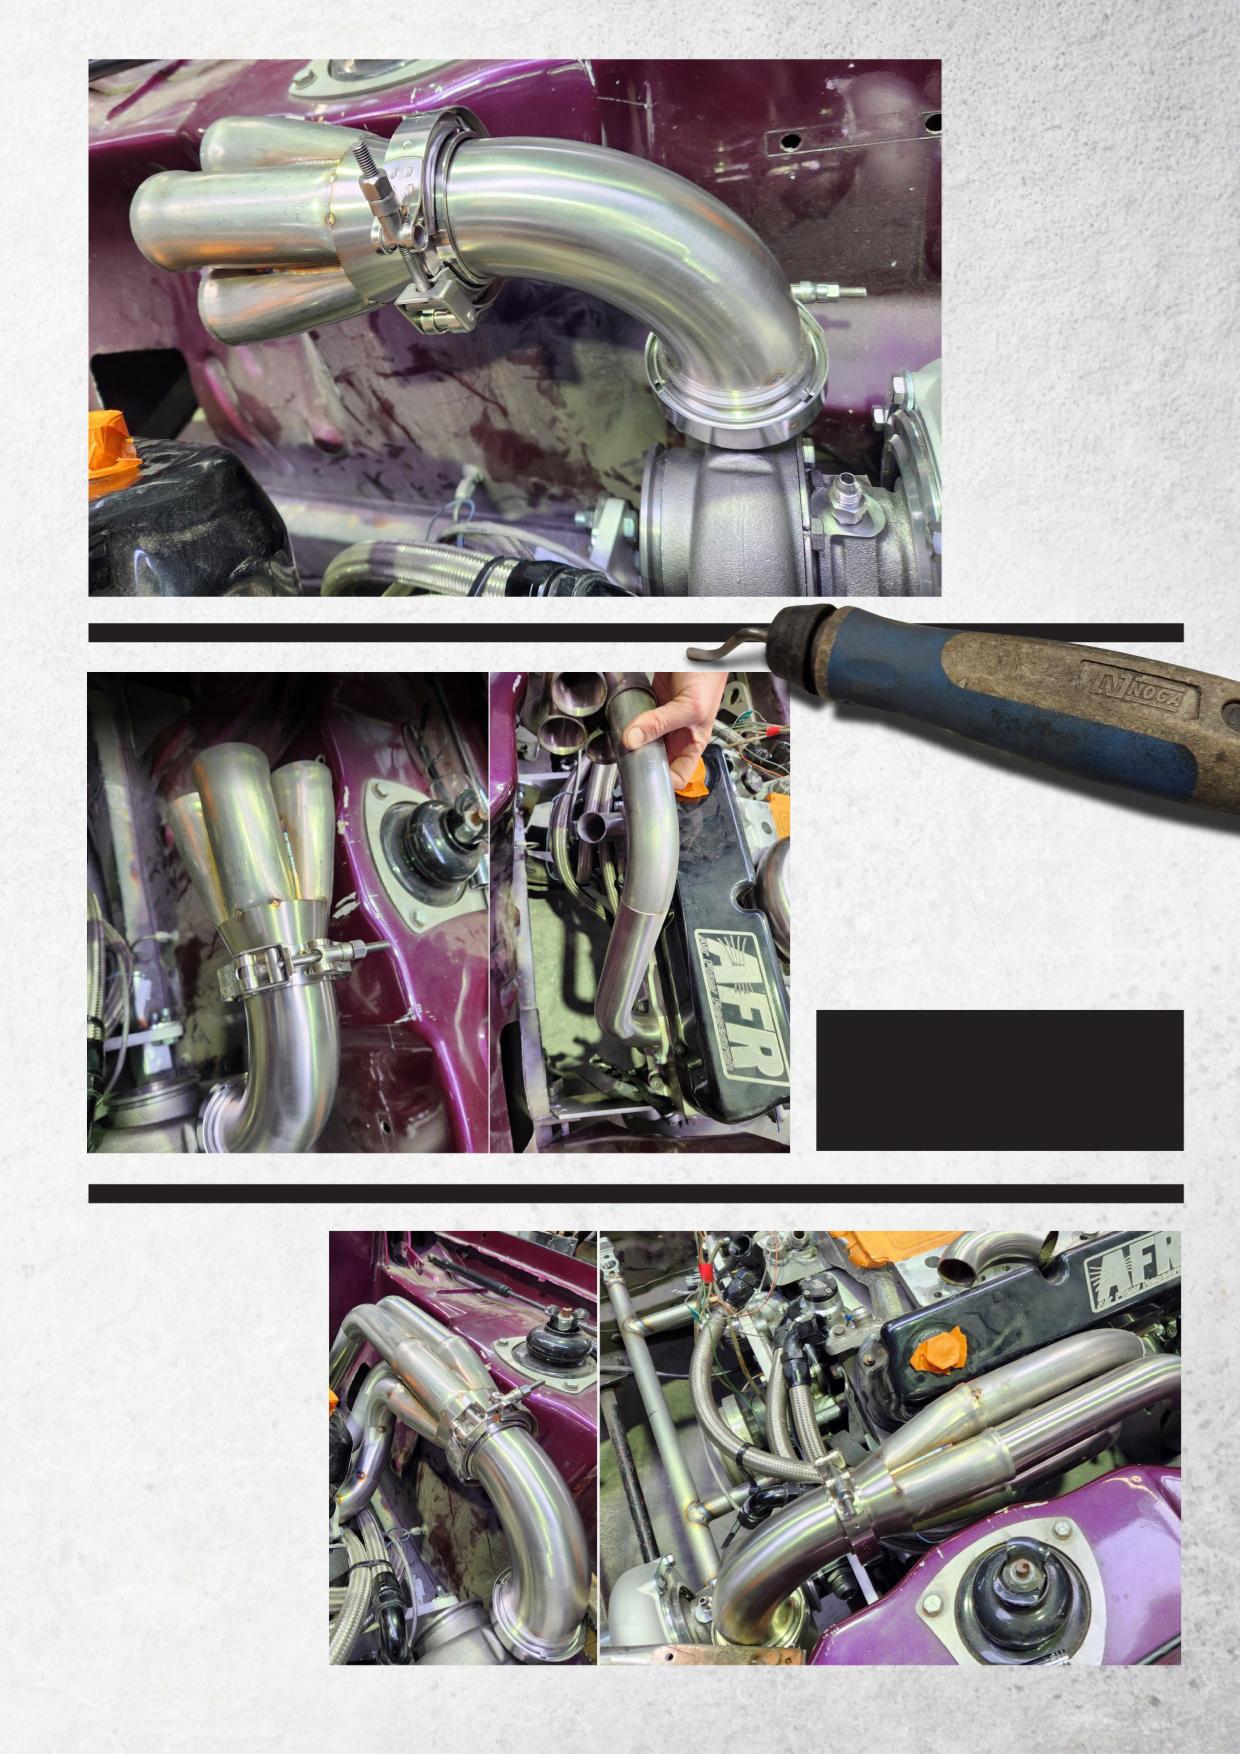
Tacking the elbow to the turbo flange and also another V-band off the collector — this extra V-band is simply to make the car easier to assemble and service. This elbow is the last part of the headers that will get welded up; reason being if they move around getting welded, the elbow can be tweaked if needed
Tool below: When prepping the tubes to tack together, always deburr inside and out to stop the weld pulling contaminants in while purge welding. I find these handheld deburring tools handy. You also want a very tight fit to help avoid the tubes pulling when welding — again the big linisher is my go-to tool to make every joint flat
Now the collector is mounted up, the first runner is cut and fitted up from the head flange. There is a fair bit of space on this car, so I start with the most visible primary to make it look nice, but usually I start with the tightest one. Using a 1mm cut-off disc on the 5-inch grinder to cut all my tubes. I’ ve found that simply eyeballing up the cut works best for me to get them square. Just remember to imagine a line from the centre of the bend radius through the tube
PROTIP: Cut a J-bend in half to use as a visual aid when planning the runners. You can hold it in place to figure out what angle you need from there. I also keep a box full of bent offcuts ,which are very handy for mock ups.
BESPOKE BARRACUDA
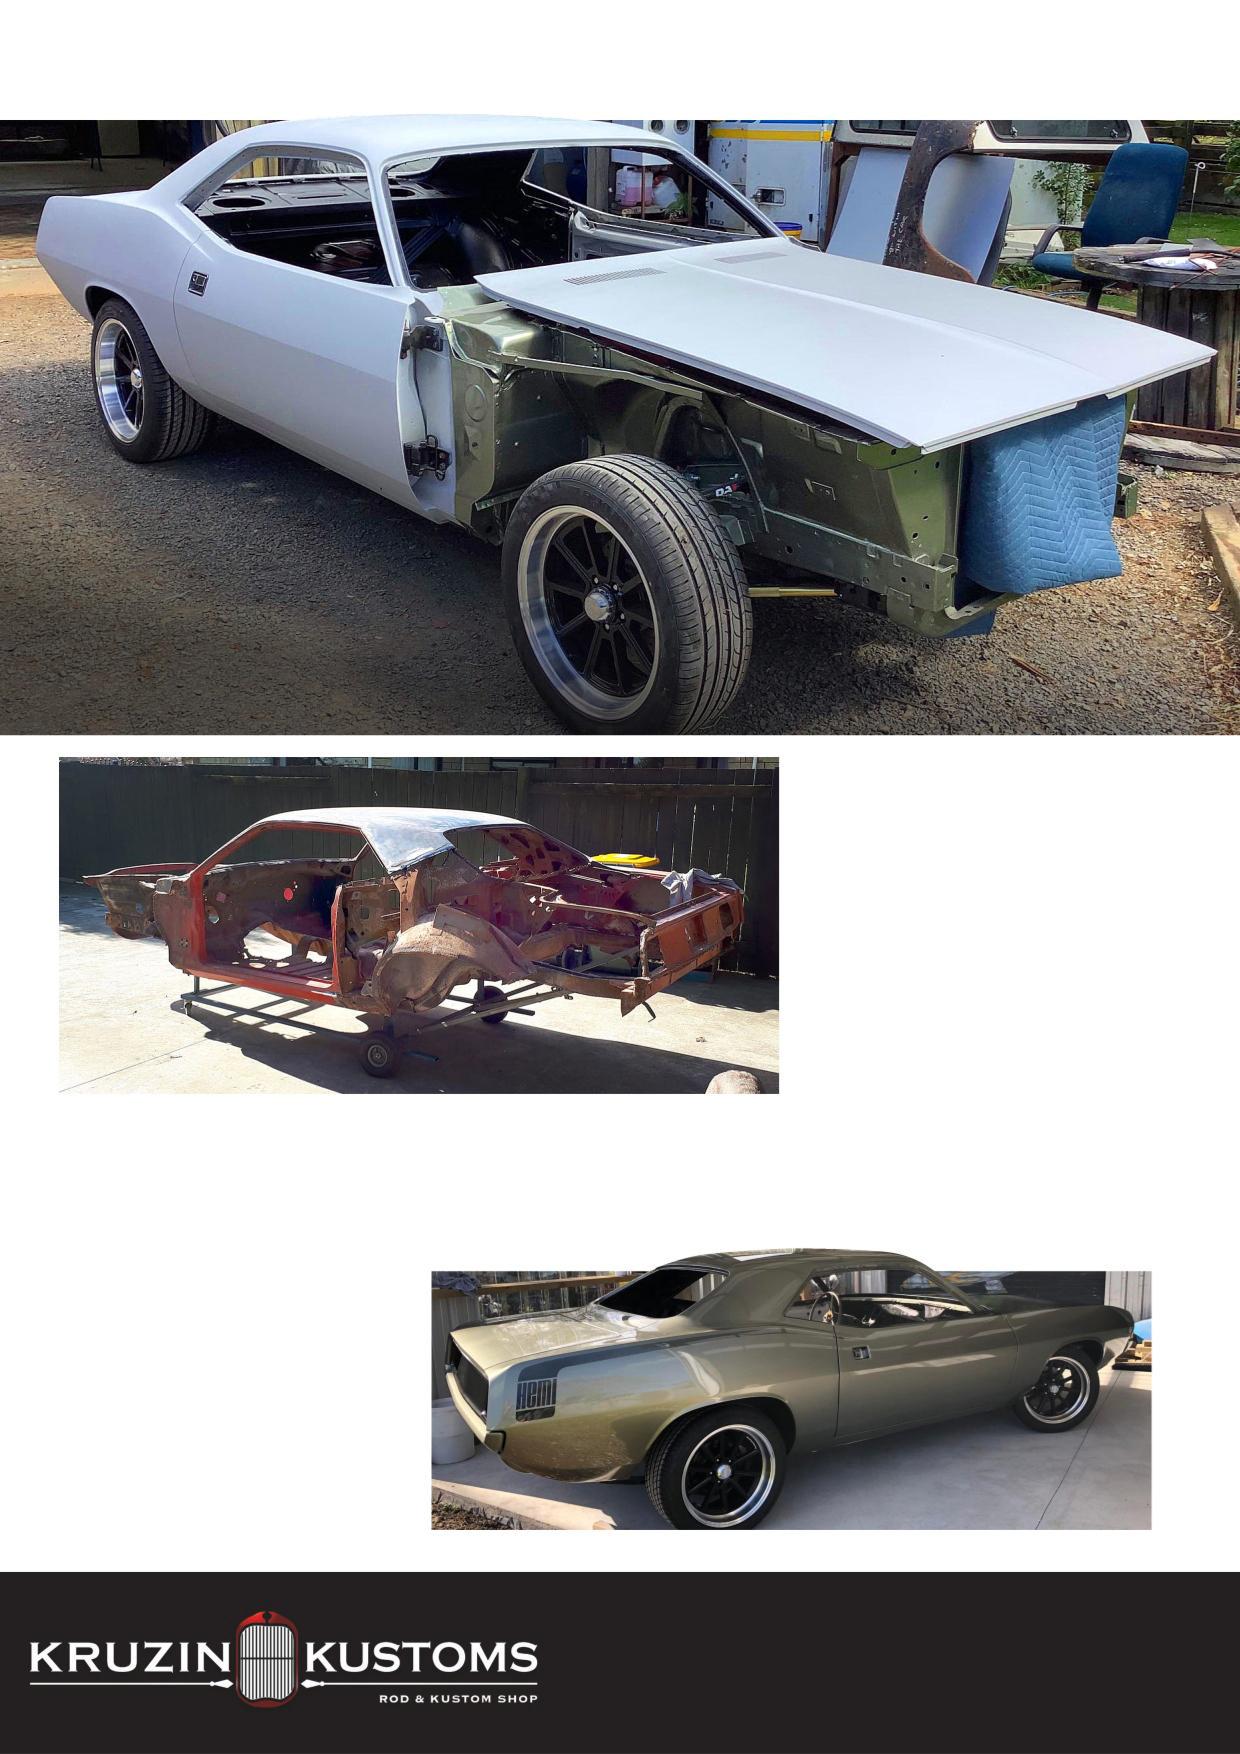
You ’ re sick of hearing it as much as we are sick of writing it, but here we are with another Covid build. But what else do we expect men with cars, sitting around, to do? This build started approximately four years ago when Ivan Booth purchased a ’70 Plymouth Barracuda. Give or take six months after the purchase, the thought entered Ivan ’ s mind of selling up, as he thought that he might have bitten off more than he could chew.
However, as mentioned, Covid hit and Ivan was left with nothing but time on his hands. Enough time that he was able to completely strip the vehicle of all its parts, mount the body on a homemade jig, and send it to the sandblasters. Once sandblasted, it unfolded that some repairs needed attention, including the rear quarter panels, boot floor, front floor, and multiple rust patches. After ordering new OE panels, Stacey Emeny from Mercury Garage was called on to stitch in all the new sheet metal, and carry out a bunch of custom fabrication work to give the Barracuda a unique look. Ivan also managed to put in his fair share of grunt work while it was in Stacey ’ s workshop.
With the fabrication completed, the car was reassembled and primed ready for Jono Vincentin to spray it in Millennium Jade, complete with an airbrushed ‘Hemi’ logo and stripe.
With so much work going into the body, it’ s no surprise the original 318 was swapped out for a Jegs crate 345ci Hemi, complete with a Holley Terminator X fuel injection system. An overhauled TorqueFlite A-727 will take control of gear changes, while the factory 8¾-inch diff is still used but with overhauled and new parts. Filling the wheel houses are Wilwood 12-inch front rotors and four-pot calipers, with overhauled drums on the rear. To complete the driveline, Ivan added QA1 Level 1 suspension, and 18x8- and 18x10-inch American Racing Draft wheels.
One of Ivan ’ s hobbies is auto upholstery, so we won ’t be surprised to see an amazing upholstery job, which will match up beautifully with the already-installed Flaming River steering column and Dakota Digital dash.
With plans to have it finished in time for Repco Beach Hop 24, we ’ re sure this won ’t be the last time you hear from us about this slick Barracuda, as it’ s got the makings of something special.
’55 BIG BOY
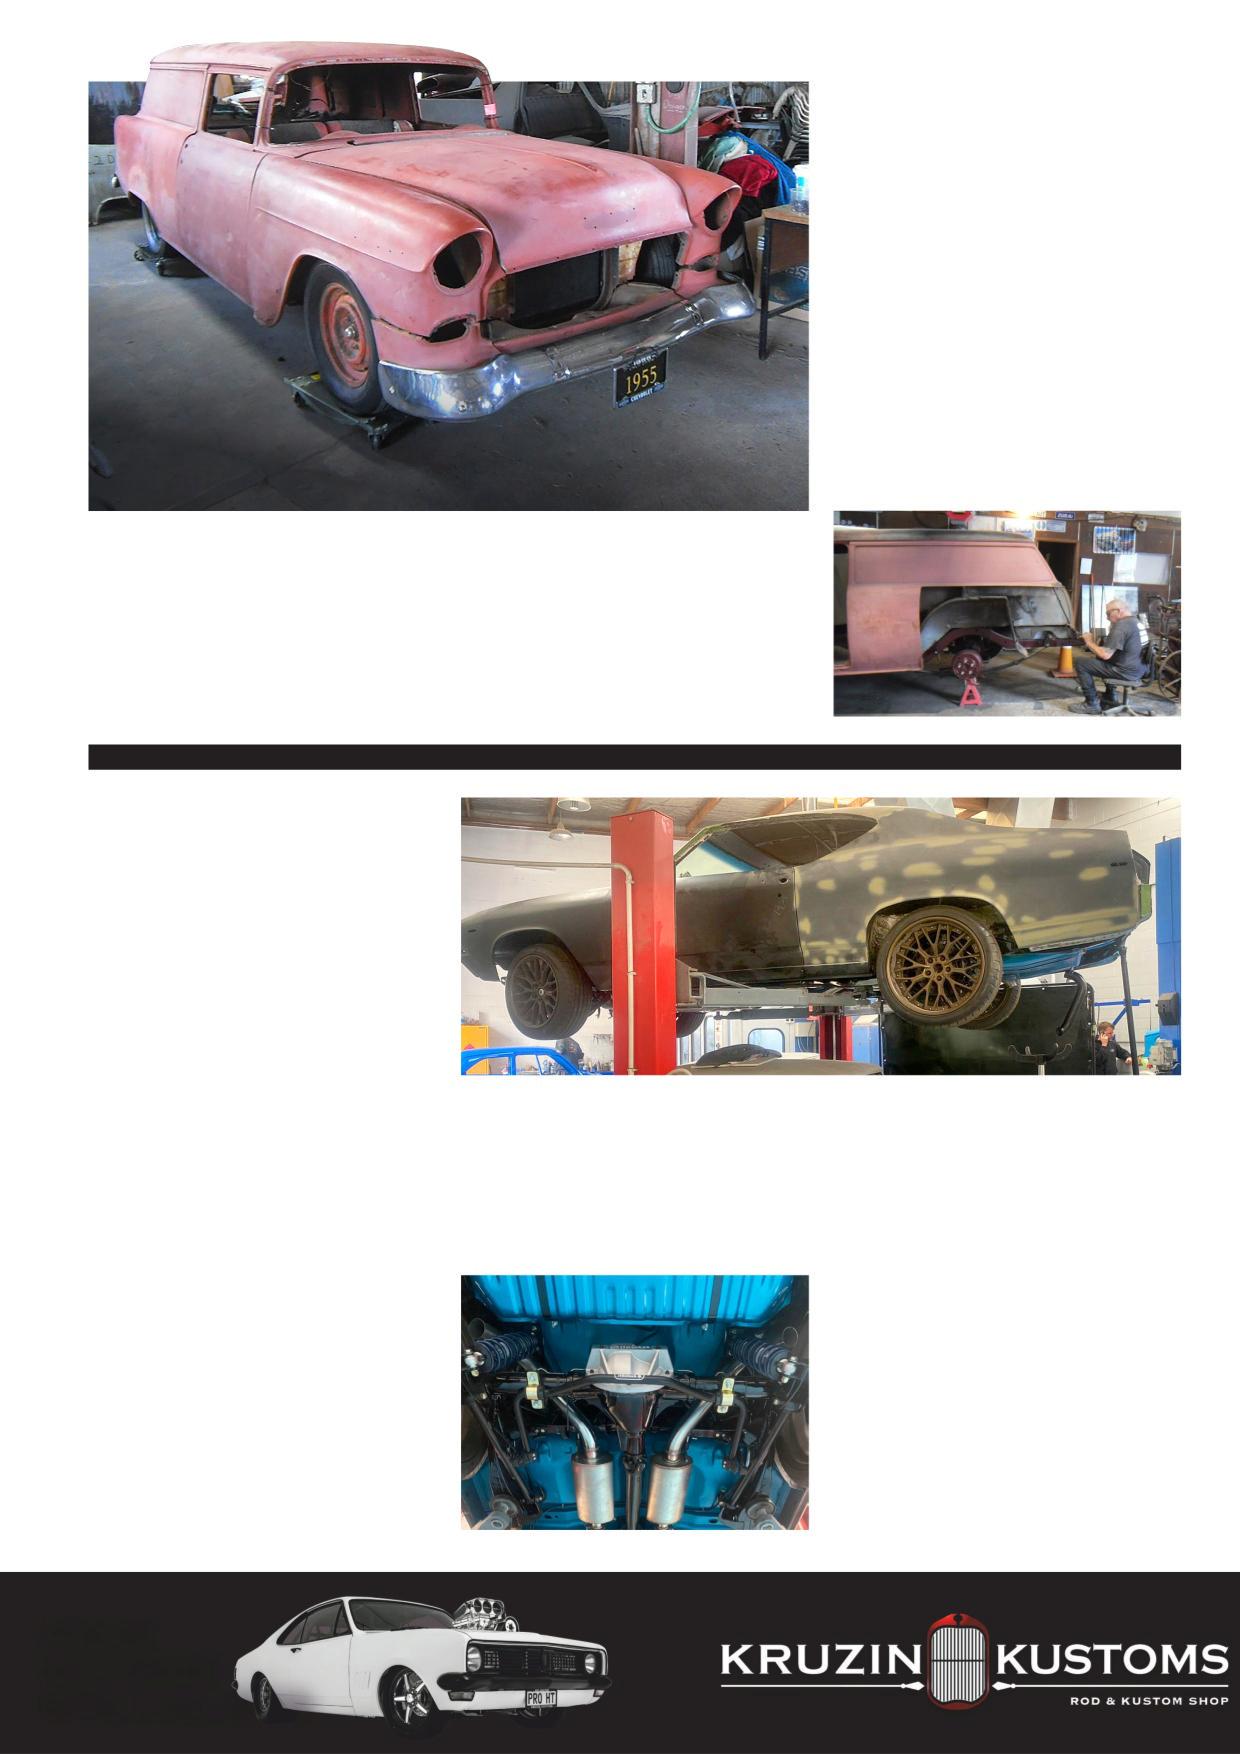
We first saw John Burndred’ s concept for his ’55 Chev El Camino in Issue No. 211, which we rendered into a wild pro-streeter dubbed ‘Pro Camino ’ . We got curious when he mentioned that he was also working on a ’55 Chev Delivery, so we reached out to him to learn more.
After relocating from Paeroa to Waihi, the build — or builds, as the case may be — was put on hold while he built a shed to house the fleet. Now that the shed is finished, he is back to work, cracking on with the ’55 Delivery.
Concentrating on getting the bodywork in shape first, John took action on the rear quarter, as it was a little untidy from a previous accident, cutting it off so it could be metal worked into the correct shape. Doing this, he realised a bit more attention was also needed on the structural areas behind it. Once John has that area sorted, the guard can be welded back on.
Getting the body on to a rotisserie is the next step in this build plan, so the metalwork can be refined and the search can begin for the colour it will end up in — currently, likely to be a deep red. Having collected a number of new parts over the years, John ’ s looking forward to getting the chance to fit them up.
While the body is off, John says he will also give the chassis and motor a bit of attention to spruce it all up before mating them back together for the final assembly. He doesn ’t see the need to repower the Delivery, as just a few years ago it was fitted with a 327ci small block and Turbo 350 trans. However, a new set of drop spindles and a Wilwood brake set-up are yet to be installed, which should give the car a nice drop in altitude and plenty of stopping power to match.
’69 PRO RIDE
The name John Gamble should spring to mind if you have a sweet spot for Chevelles or, in fact, anything loud and obnoxious. His ’66 Chevelle Malibu is well known around the country, having been imported new back in the day, and evolved ever since. That car graced our pages a few years back, and we will expect his next one — a ’69 currently in the build that’ s getting a pro-touring twist — to do the same.
Pitching the idea to his wife back in 2021 of building a pro-touring Chevelle, she gave him the green light to buy it on their 30th wedding anniversary. So, with that approval, a ’69 Chevelle was bought, with the intention of building it a little tamer than his ’66, adding some modern tech to keep it in alignment with the pro-touring theme, and it becoming a car that his daughters could enjoy too.
When building tough cars, as John does, it’ s important to have good people on hand to call. In this case, John had Kayton Coughey from Real Rides. With John entrusting the ideas and vision to Kayton, the first order of business was making sure the bodywork was sound. After being stripped back to bare metal and a few rust patch panels welded in place, the body was sealed off in primer, with the underbody became the first focus of attention.
An underbody texture coat was first applied, for protection and sound deadening, then painted in a custom Lamborghini mix, which will tie in with the body paintwork later on. With the underside completed, they got to work on ordering the new driveline. The power plant of choice was a GM L99 LS2, which was first sent to Prescott Racing for a freshen up. It was then matched up with a GM 6L80 auto transmission to keep gear changes smooth and consistent, and a built Chev 10-bolt differential was fitted to complete the package.
It’ s obvious the car still has a long way to go, but getting the desired stance was important to get right sooner rather than later. The solution was Ridetech coilovers front and rear, along with bespoke CMST forged two-piece wheels to fill the arches. Stopping power has been overhauled using the tried-and-tested Wilwood combo with 14-inch rotors matched with six-pot calipers up front, and 13-inch rotors with four-pots in the rear.
It’ s fair to say that most rides that come out of Real Rides are second to none, and we ’ re sure the team will make their mate John proud with this build when it’ s completed next year. While John says that the build is going to be tamer, with more street manners than his ’66 Chevelle and the intention that his daughters drive it more than him, the way it’ s shaping up, we ’ re sure that it’ll be hard to get him out of the hot seat!
SIXTH-GEN CAMARO BOLT-ON POWER AND SOUND
A little shift in perspective is all that’s required to unleash the low-end growl and extra power that lie dormant in LT1 and LT4 engines. To realise their full performance potential, you need to install the latest Corsa carbon-fibre cold-air intake and stainless-steel exhaust systems. The cold-air intake system redirects large volumes of icy air through the oversized dry filter and into the throttle body, while the Corsa Extreme exhausts open up the flow and sound potential, yet still retain the factory NPP valve operation for when you want to be undercover!
Now available for LT1 and LT4 V8 Camaros from 2015 to 2022. Visit xairperformance.co.nz, or call 0800 924 792 for more information.
KRUZIN CHEV DROPMEMBER
The Level 3 Back Half Dropmember for Chevrolet years 1963-1972 is a modular suspension system designed to enhance ride quality, performance, cosmetics, and strength by replacing factory components. It comes in an inboard 4-link arrangement that allows for the use of a 15-inch wide wheel. When using a 30-inch tall tyre, the ride height is approximately 4-inches, and the frame will rest on the ground when deflated (measurements are taken from the bottom of the frame rail under the cab to the ground). This kit is also useful for converting a long bed to a short one and has been designed to be used in conjunction with our Heidts IFS.
For more information, go to www.kruzinkustoms.com, visit the shop at 39 Kelvin Grove Road, Palmerston North, or call 0800 4 KUSTOMS.

VB–VL ARMRESTS BACK IN STOCK!
Rare Spares, the trusted supplier of premium Holden replacement components, is at it again. Do you need a new armrest, as the one in your VB–VL Commodore has seen better days? Rare Spares now has replacement black front left and right armrests (excluding Berlina and Calais) in stock. Part number AR1012 — $222.80 each.
Order yours online atrarespares.net.au/rsnz; pick one up in-store at 43 Shands Road Hornby, Christchurch; or give the team a buzz on 03 366 5982.
EYES IN THE SKY
The Xview Full HD 1080P XV22DVR Dual Dash Cam records wideangle 152-degree views through cameras mounted to both front and rear screens to capture the view — or the antics of other drivers. The units turn on automatically and use GPS tracking to log journeys. Footage can be viewed on smartphones via the Xview app. A G-sensor automatically saves footage in the event of an impact, and a hand gesture will also take a snapshot and save recent footage. The unit comes with adhesive mounts, power cables, and a 16GB microSD card, which continuously loops recordings over unsaved footage.
The XV22DVR dual-camera kit is available from Repco, along with the single front camera, 4K Ultra HD, and HD 1080P dash cam models. See xviewdrive.com for comparisons.
Dull trim lets all your other finishes down, so get this allin-one cleaner to restore your exterior trim and textured plastics back to their original, like-new, colour. Mothers Naturally Black Trim & Plastic Restorer also protects against further deterioration caused by the sun, smog, ozone, water, chemicals, and airborne contaminants.
Suitable for use on automotive trim, including bumpers, mouldings, and window trim — anything plastic, rubber, or vinyl. For as little as $38 including GST, it’s a no-brainer to restore the appearance of your car’s trim. Visit your local Repco to grab yours.
LARGE UNIVERSAL RADIATOR OVERFLOW TANKS
Aeroflow’s radiator overflow tanks are made to look like its best-selling AF77-1015 but are bigger and can hold more. Made by professionals and with Aeroflow’s billet three-inch cap and a capacity of 49 ounces (1450ml), they come in two finishes — highly polished, or black anodised. The tanks work with cooling systems that use recovery and ones that don’t, and include -4 ORB fittings with a 38-inch barb. Measurements: overall height — 12.24 inches (310.9mm), tank height — 9.84 inches (250mm), overall diameter: 3.46 inches (88mm). Part numbers: Polished Finish — AF77-1115, Black Finish — AF77-1115BLK.
Visit aerflowperformance.com for more information and to find your nearest distributor.
NO-SWEAT REAR BRAKING
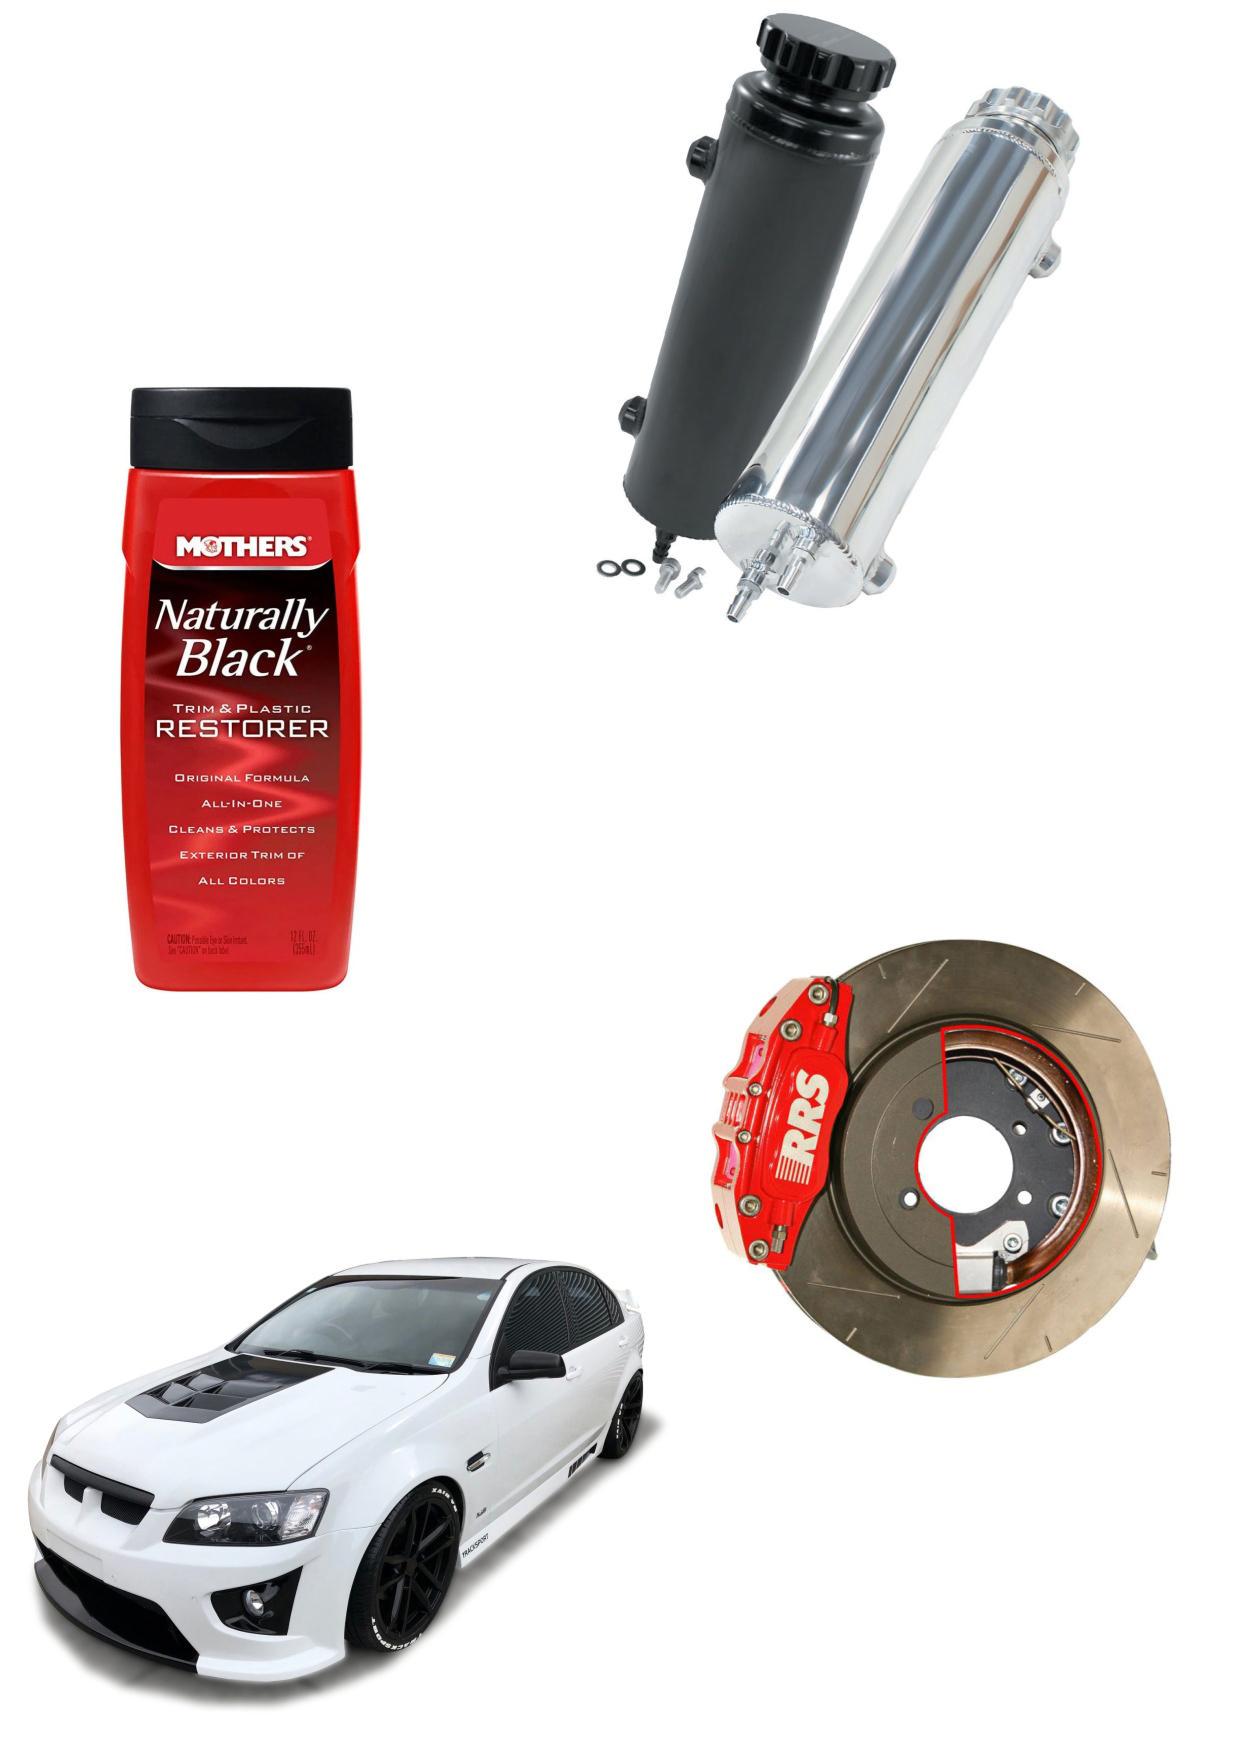
Thinking of running a trusty Ford diff in your car? Make your conversion as easy as possible with an RRS comprehensive bolt-on rear disc-brake upgrade package. The internal drum handbrake set-up will connect to original standard handbrake cables. The RRS rear brake kit combines rotors, calipers, precision laser-cut and CNC-machined parts, and stainless-steel braided brake lines complete with hardware.
To order, contact RRS Pty Ltd, your Aussie neighbour, on +61 2 9907 3755.
XAIR MR BODYKITS
To get a better-than-standard appearance for your V8 or V6 Commodore, Xair Performance Mr Bodykits products are the way to go. All of the OEM injection-moulded plastic components — including Maloo-style side skirts, front splitters, boot spoilers, and bumper extensions — are made to factory specifications.
For more details or pricing, phone Xair on 0800 924 ubbed KA792 or visit xairperformance.co.nz/body-kits-bonnets/.

@ v i l e n _ h q
y o s _ m o p a r @ f u r
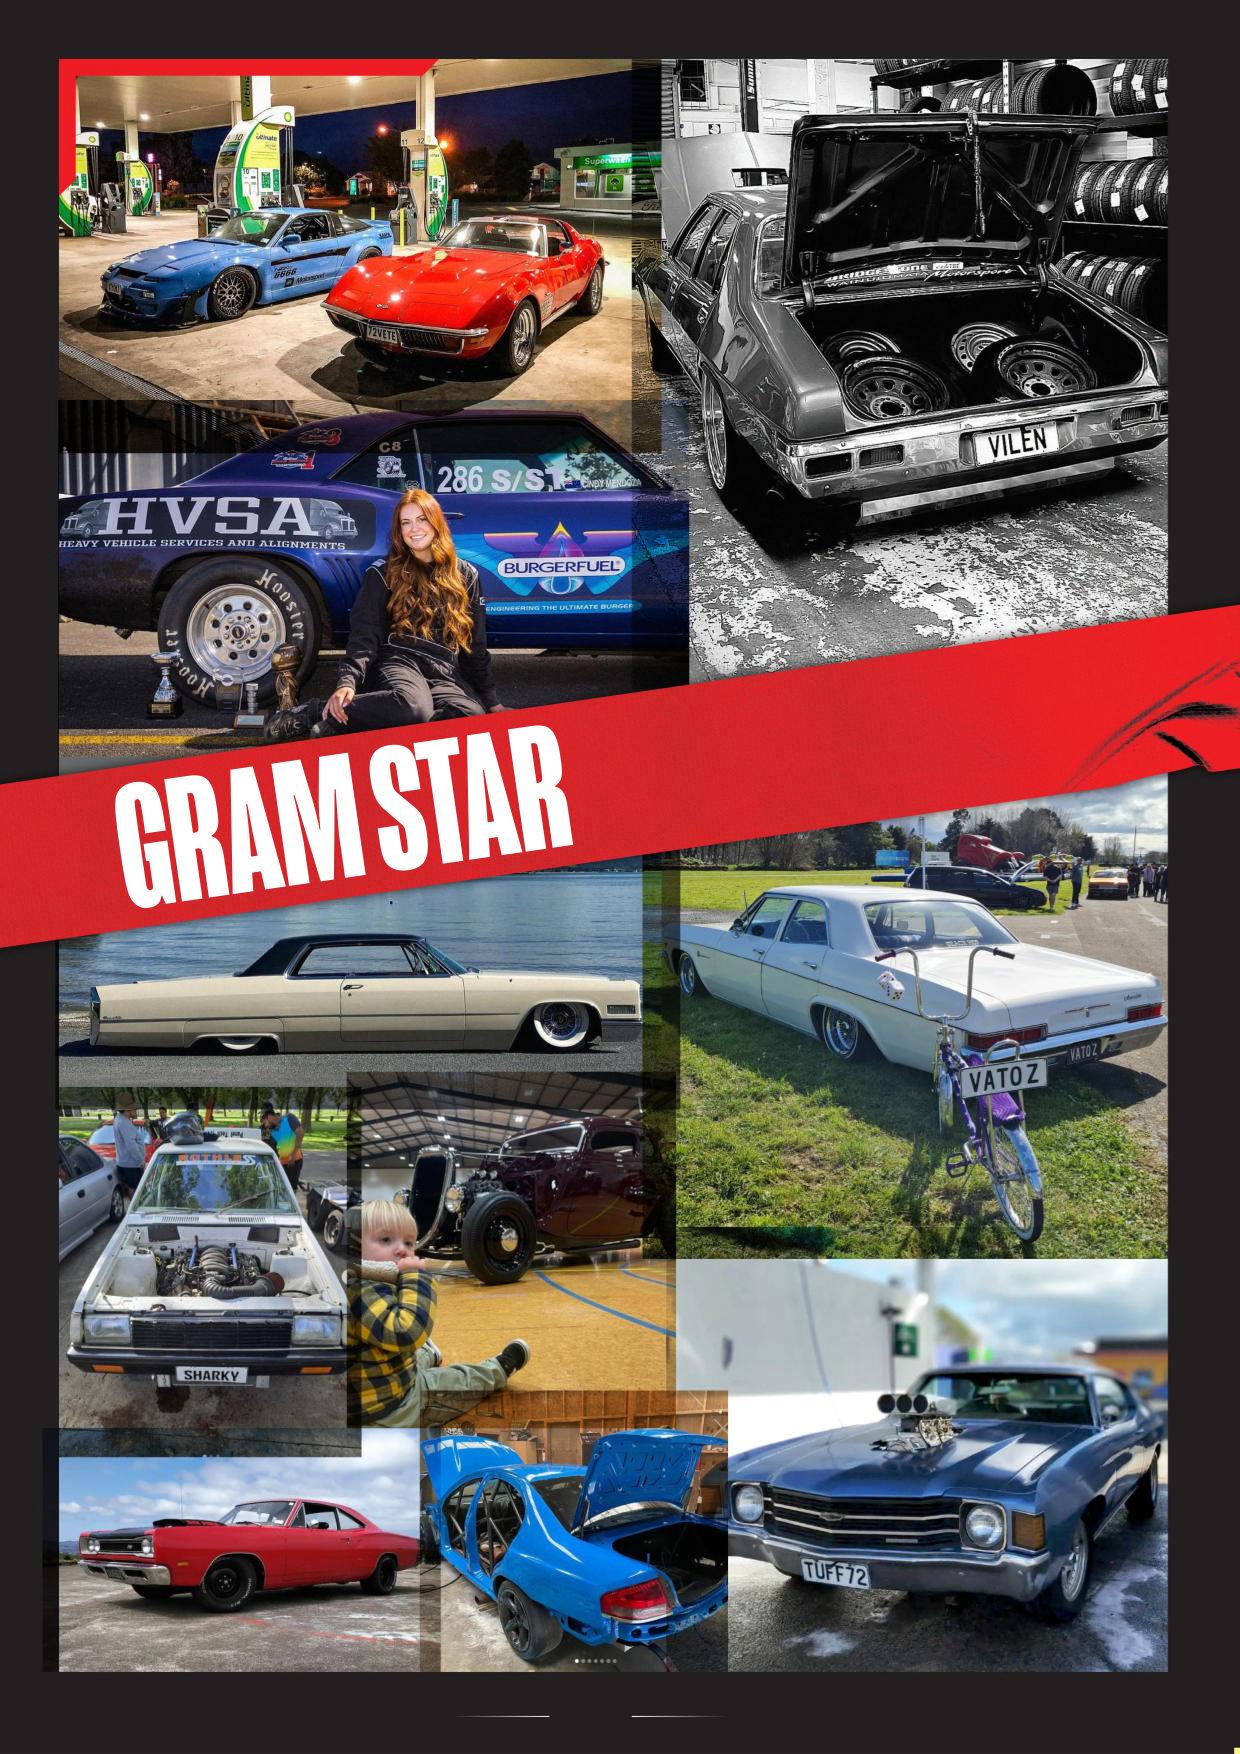
@ f r a y n e _ s p e e d _ s p o r t Do you use Instagram? Do you want more exposure for the photos you post? Upload your photos to Instagram and use the hashtag #NZV8 to tag us. In each issue, we search Instagram for your photos and print them on the pages you see here. Look it up, use it, and thrash it! We’ll keep an eye on it and pick out a selection of hashtagged posts each month to print right here.
@ j o n g i n g a
@ k r u z i n k u s t o m s n z @ t y s o n _ b r o w n i e
@ t u ff 7 2 c h e v e l l e n z


