5 minute read
MASTERING THE MUNCIE We rebuild this M22 for better strength and more versatility.


❱If you’ve ever driven a classic muscle car equipped with a four-speed manual transmission, you probably experienced the joys of commanding a Muncie transmission. While some classic 1960’s General Motors-built cars ran Borg Warner’s Super T-10 four-speed, if your vehicle featured a big-block or high-horsepower engine, a Muncie trans was probably hiding under the floorboards. With the ability to handle higher torque and horsepower, the new Super Muncie (shown here) can handle up to 600 lb-ft of vicious torque.
Named for the town where the transmission factory was located in Indiana, the Muncie came in basically three flavors, the wide-ratio M20, the close-ratio M21, and the heavy-duty M22 close-ratio transmission. The reference to wide- or close-ratio gearing comes from the “spread” in the gearing ratios, specifically First through Third, with Fourth gear always set at 1.00:1.
Advertisement
The ability to choose wide- or close-ratio gearing is appealing to many owners who like the ability to pick either high-multiplication gearing for off-the-line performance (wide ratio) or close ratio for more road-race-style usage. For drag racing, the wide ratio was often the better choice, utilizing either 2.56 or 2.52 Firstgear ratios. In contrast, close-ratio transmissions (which use a 2.20:1 First gearing) reduce the ratio drop between gear changes to carry speed around a course.
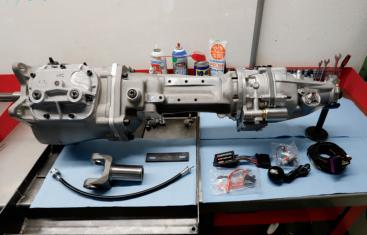
The Gear Vendors overdrive unit shown here is perfect for our application, as it gives us far better highway gearing (reduced engine rpm) and better fuel economy due to a 0.778:1 overdrive in all four gears even though it will mostly be used in Fourth gear. The Gear Vendors system is very strong and mates perfectly to the unique tailhousing Craig Wright utilized for our build. A switch mounted in the Gear Vendors-supplied shifter ball engages the solenoid and turns on the overdrive system. It’s just that simple to switch from standard 1:1 final drive gearing to 0.778:1.
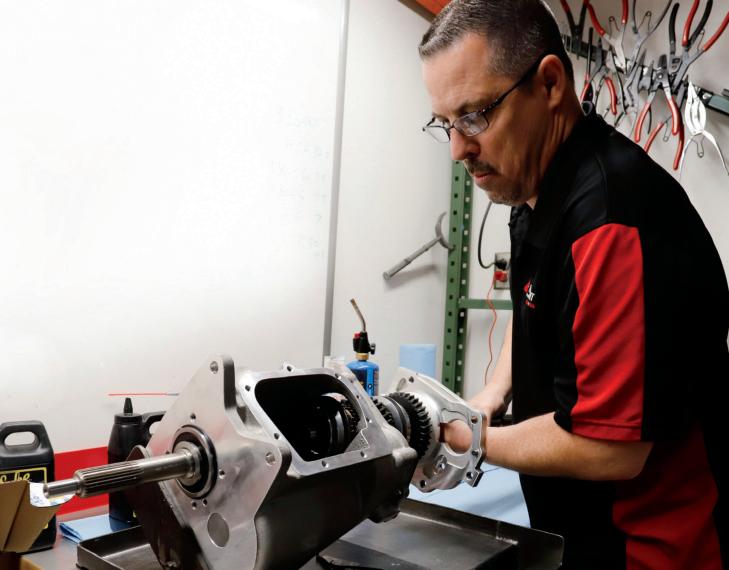
Follow along as Craig, owner of Wright Connection Speed & Gear, demonstrates what it takes to rebuild a Muncie four-speed and adapt a Gear Vendors overdrive unit to your vehicle. Muncie mastery is only moments away.
Muncie Original Ratios
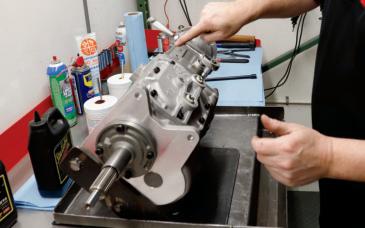
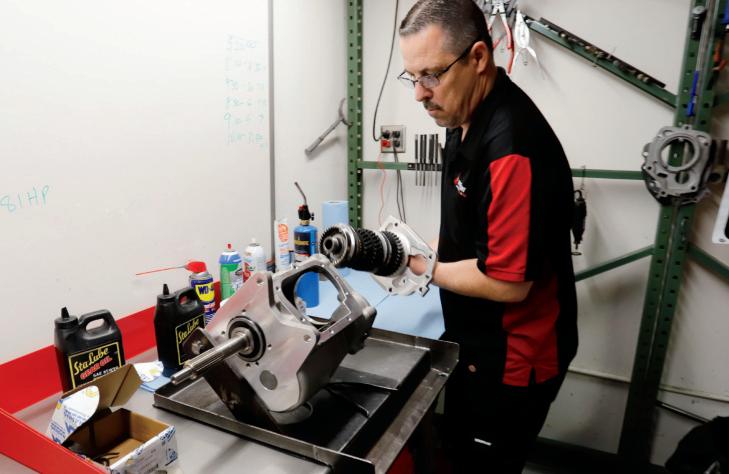
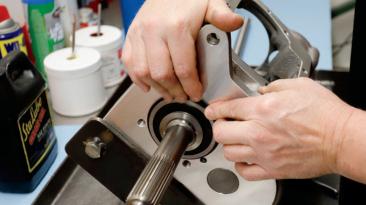
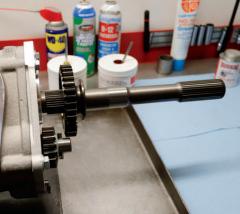
01 The master of Muncies, Craig Wright, is our tour guide on how to stuff one of these legendary transmissions with all the “right stuff” (pun intended).
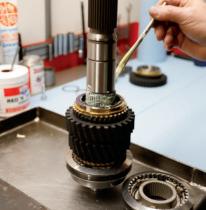
02 To help with the assembly of the mainshaft we applied assembly lube to help prep the area for the synchronizer hub and other gears and sliders yet to come. The mainshaft features an ultra-strong, 40-spline design.
03 The same prep holds true for the Second gear, synchro, and slider assembly. This gives a better view of the mainshaft assembly going together.
04 Not every step is as simple as sliding on the part. In this case, the synchronizer requires more persuasion, and a press helps to install this hub assembly. You can also do this step by carefully tapping them into position with a rubber mallet.

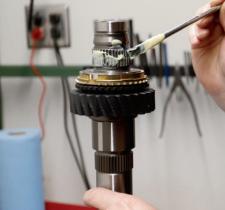
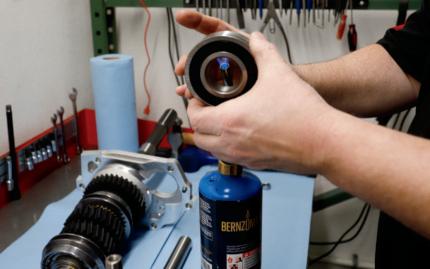
05 To facilitate the installation of the mainshaft bearing, Craig heats the mid plate at the landing point where the bearing will finally reside. Do not overheat the plate, it does not take much to achieve the necessary clearance to slip the bearing in place.
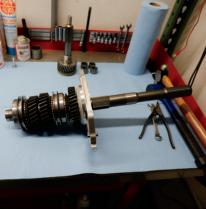
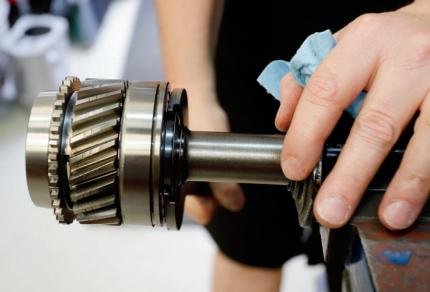
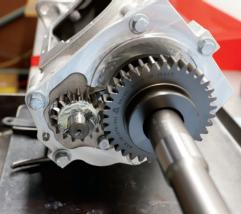
06 With the mid plate now installed, this is what the completed mainshaft assembly looks like with the gears and slider/synchronizer systems in place.
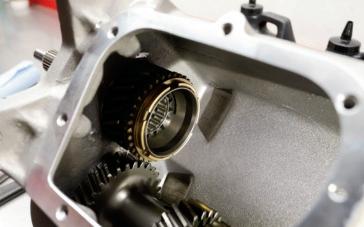
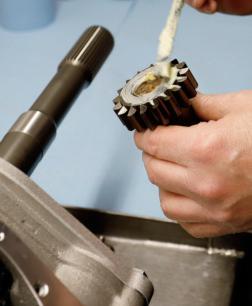
07 The cluster gear fits into the bottom of the case and is held there with a pin that runs through its center. To allow the cluster gear to ride with a minimum of friction, a series of roller bearings are slipped inside the cluster gear, held in position with heavy grease before the pin locks it in place.

08 This bearing is placed into the front of the input shaft/Fourth gear assembly. This bearing will fit into the front of the transmission case opening.
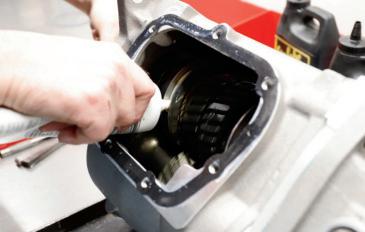
09 Prior to inserting the input shaft into the front of the case, this is what the assembly looks like with the front bearing installed. Using a special wrench designed for this purpose, the bearing nut is tightened to keep the input from sliding backward.
10 As with the previous bearing install, Craig heats the front of the transmission case, making it much easier to slide the inputshaft bearing in place.
11 After assembling the input-shaft assembly, the bearing is locked in with a snap ring.


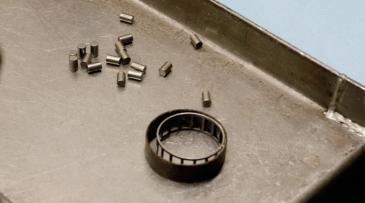
12 A pocket bearing that connects the input shaft with the mainshaft is outfitted with a series of roller bearings trapped inside a cage retainer. These small parts are shown on the table along with the cage.
13 The completed roller bearing/cage assembly fits into the back of the input shaft in this location.
14 In preparation for the connecting of the input shaft with the mainshaft, the synchronizer slider ring is moved forward so that it will help make the connection between these two key shafts.
15 The mainshaft assembly slides in from the back of the case around the cluster gear that has already been placed in the bottom of the case. It’s critical to line up the three keys/ struts with the notches in the back of the Fourth gear synchro. Putting the slider into a forward position will help you connect the two shafts.
16 We held the mainshaft assembly in place by bolting the mid plate to the back of the case. Note that all the bolts will have to be removed to attach the tailhousing. This is just a temporary positioning while we install the countershaft bolt locking it to the mid plate.
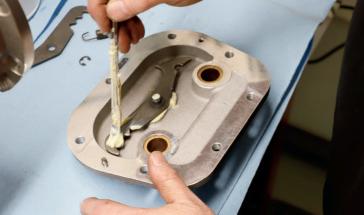
17 Craig applied assembly lube to the inside and face of the rear Reverse idler gear before pinning it in place.

18 The Reverse gear goes on the mainshaft in this location.
19 This image shows the proper engagement of the Reverse idler and Reverse gears. Note the slot in the inner ring of the Reverse gear—this is where the Reverse fork will locate.
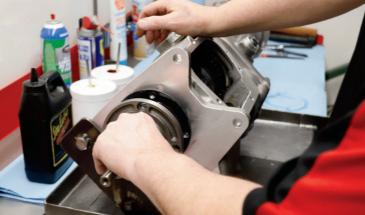
20 The tailhousing slips on in this manner. Remember that all the bolts used to hold the mid plate in position have to be removed to install the tailhousing.
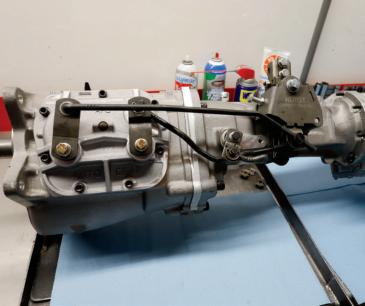
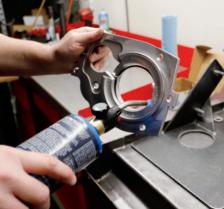
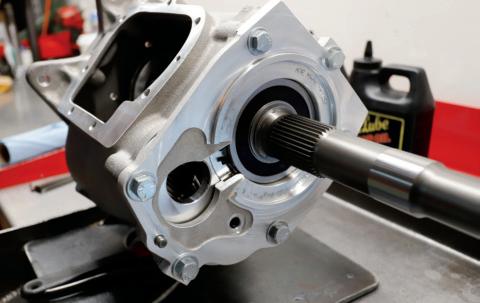
21 This M22 transmission features a tailhousing specially designed for attachment of the Gear Vendors overdrive system. Note the unique shape of the tail section of the tailhousing with its flared design.
22 The bearing retainer slips over the input shaft and seals the transmission from the front.
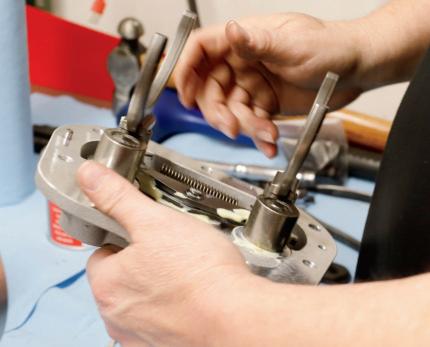

23 Fully lubricate the detent levers and side arms with assembly lube. Move the spring arms from side to side to make sure there is full movement/ lubrication with the detent for each of the gears.

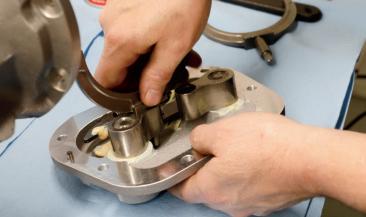
24 Insert the shift shafts followed by the shift forks.
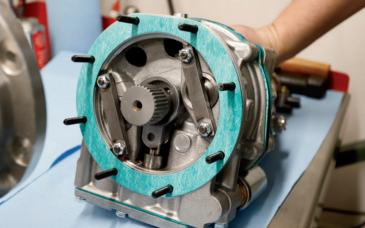
25 The finished side cover will look like this with the forks in this position.
26 Use Lubriplate 105 on the synchronizer slots. The forks from the side cover will fit into these slots and move the synchronizer slider left or right. This will determine the individual gear selection.
27 After making certain that all surfaces are clean and have no residue, the new gasket will be coated with Gasgacinch, and the side cover installed. Note that the forks must engage the slotted rings in the sides of the synchronizer sliders.
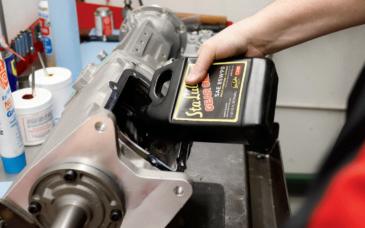
28 Craig always uses Sta-Lube 85w90 for our transmission to achieve the best lubrication and protection. This is listed as PN-SL24229 from Wright Connection Speed & Gear.
29 After getting the forks in position, align the holes in the side cover with the holes in the transmission, insert the bolts, and torque them to spec.
30 The Gear Vendors electric overdrive allows for a 0.778:1 ratio multiplication of the final drive. This means a 4.10:1 rearend gear ratio can be effectively changed to 3.19:1 gearing with the flip of a switch. In easier to understand terms, if you are driving at 65 mph and seeing rpm of 3,318, with the Gear Vendors overdrive in action, at 65 mph, you’ll see 2,581 rpm and achieve much better fuel economy.
32
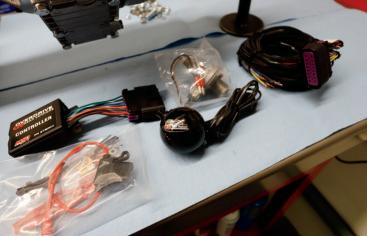
33 This picture shows the shifter ball and the controller. One of the best benefits of this system is the ability to retain the original factory or custom shifter location when desired.
34 The Hurst shifter linkage is still one of the best ways to achieve a positive, tight shifting experience from your Muncie transmission. This classic system allows for lots of adjustment, including shifter position, by swapping in a different shifter mounting plate, rods, and levers.