65 minute read
Quick Fresh Pack Dill Pickles
from KDP Book Design
by trmpadua
In this recipe, the cucumbers will need to soak for 12 hours. So start this the day before you plan to can them so they can soak overnight or start in the morning and can them in the evening. Yields 7–9 pint jars seed per pint).
Processing Times for Water Bath Canner (Raw Pack)
Advertisement
Ingredients
• 8 pounds pickling cucumbers (3-4” long) • 2 gallons water • 1 1/4 cups canning or pickling salt • 1 1/2 quarts vinegar (5% acidity) • 1/4 cup sugar • 2 quarts water • 2 Tbsp. pickling spice mix. (See recipe on page xx.) • Whole mustard seed (1-2 tsp. per pint jar) • Fresh dill (1 1/2 heads per pint) or dill seed (1 1/2 tsp. per pint jar)
Supplies
• Water bath canner • Canning jars, seals, and rings • Large pot • Canning funnel, lid lifter, and jar lifter • Ladle and bubble tool
Procedure
Start by preparing jars and getting water in the canner heating. You want the canner hot, but not boiling, when the jars full water bath canning instructions.
1. Wash cucumbers, slicing off the blossom ends. 2.
3.
4. 5.
6.
7. 8.
9.
10.
11. 12. Dissolve 3/4 cup salt in 2 gallons water. Soak cucumbers in saltwater for 12 hours. Drain. Combine vinegar, 1/2 cup salt, sugar, and 2 quarts water in pot. Place pickling spices in cheesecloth in pot. Add to the pot and bring brine to a boil. Lower heat and simmer. Drain cucumbers and pack in jars. Add mustard seed (1 tsp. per pint) and dill (1 head per pint or 1 tsp. Fill jars with brine, leaving 1/2” headspace. Remove air bubbles, wipe rims clean, and place seals and rings. Place jars in the warm canner. Process according to chart or use low-temperature process below.
are ready to be processed. See page xx for
Altitude
0-1,000 ft 1,001-6,000 ft Above 6,000 ft
Pints
10 minutes 15 minutes 20 minutes
Low-Temperature Process
This recipe is safe for low-temperature processing. Remember to use a thermometer and monitor your time carefully. (This is a different method than the water bath method above.)
Have your canner ready and half full of warm water (about 120°F to 140°F). Also, have a kettle or other pot of hot water ready. Place filled jars in the half
Use Small Cucumbers
I highly recommend you use freshly picked, small pickling cucumbers. I try for no bigger than my thumb. Anything bigger gets made into delicious relish. Or you can slice larger cucumbers and make spears, but we like small, whole pickles better. I also recommend packaging these in pints. I do not include processing times for quarts. Quarts require longer processing and tend to get mushy (at least in my experience).
Keeping it crunchy!
The blossoms on cucumbers have an enzyme that will make your pickles soft. No one likes soft, soggy pickles. As soon full canner. Now add hot water to 1” above the tops of the jars. Heat the water and maintain a temperature between 180°F to 185°F. Use your thermometer and be sure this is maintained for 30 minutes. This is longer than the time indicated in a typical water bath processing, but it is a lower heat. When 30 minutes is up, turn off the heat and
SHARON’S TIPS FOR QUICK, FRESH-PACK DILL PICKLES
remove your jars to a counter to cool. as you get your cucumbers take a small slice off the blossom end (opposite the stem). The best way is to slice the end off as you are picking!
Another tip for keeping the crunch is to use pickle crisp. This is a product you can purchase in most canning aisles. Follow the directions on the package. And if you have not read it yet check the previous article about the low temperature process. This is what saved my pickle making!
Adapted from Resource:
https://nchfp.uga.edu/how/can_06/ quick_dill_pickles.html
CANNING VEGETABLES
Canning vegetables is easy once you have learned to use a pressure canner.
Really...vegetables must be pressure canned. There is no way around it. I know I’m really hammering this home and keep repeating myself. Some of you are rolling your eyes and saying to yourself, “OK, OK, I get it!” I hope you’ll forgive my insistence on making sure that no one misses this point.
I’ll tell you now, if you want to can veggies in a water bath...search on Google. You’ll find instructions. BUT...I’ll also tell you that Google is not the best place to get safe canning advice. In fact, it can be a place to get scary canning advice that I would not touch with a 10’ pole!
Trust me on this. Pressure canning must be done right...but right doesn’t mean hard. It is this idea of a pressure canner being hard and scary that stops many people. I don’t want that to be you. I have a workshop just for those of you who may be afraid of your pressure canner. In three short video lessons, I show you visually, step-by-step, how pressure canners work and why you don’t need to be afraid.
If you are afraid of your pressure canner, go to CanningWorkshop.com Sign up and find out how easy it is.
You’ll learn how to use your pressure canner for the very first time, including:
The top 3 safety features that make pressure canning simple and easy. How to not be concerned about your pressure canner exploding. My recommendation for the first pressure canning project for beginners.
Now on to the directions for canning vegetables...with a pressure canner. :)
CANNING ASPARAGUS
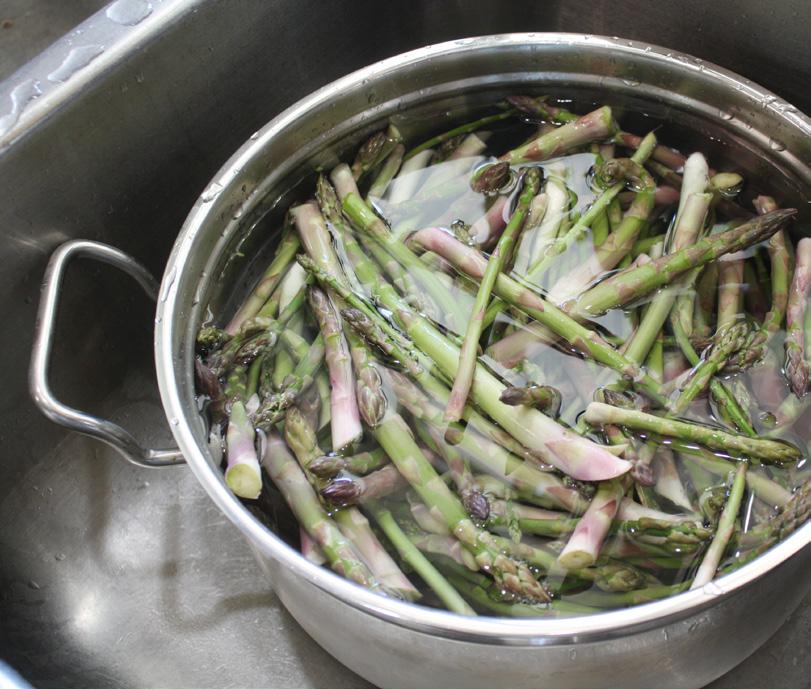
I avoided canning asparagus until a good friend brought me bags of it one year. I had lots to experiment with, so I figured I’d try canning it. It gets very soft, but you can use it for making soup if you don’t like the texture. Be sure and check the tips section for some ideas. You’ll need 16 pounds for 9 pints or 24–25 pounds for 7 quarts. For Raw Pack 1. Wash asparagus and cut to desired length. 2. Pack raw asparagus tightly into jars. 3. Add salt (1/2 tsp. per pint or 1 tsp. per quart) if desired. 4. Add boiling water to jars, leaving 1” headspace. 5. Wipe the rims clean and place on your seals and rings. 6. Place the jars in the warm canner. Proceed to fill all jars. according to the directions below.
Ingredients
• Asparagus • Canning salt (optional)
Supplies
• Pressure canner • Large pot or blancher • Canning jars, seals, and rings • Canning funnel, lid lifter, and jar lifter • Ladle and bubble tool
Procedure
Start by preparing jars and getting water in the canner heating. You want the canner hot, but not boiling, when the jars are ready to be processed. See page xx for full pressure canning instructions.
7. Process in a pressure canner • Water
For Hot Pack 1. Wash asparagus and cut to desired length. 2. Place cut asparagus in pot with water to cover and boil for 2–3 minutes. 3. Add hot asparagus loosely into jar. Don’t squish! 4. Add salt (1/2 tsp. per pint or 1 tsp. per quart) if desired. 5. Add boiling water to jar, leaving 1” headspace. 6. Wipe the rim clean and place on your seal and ring. 7. Place the jar in the warm canner. Proceed to fill all jars. 8. Process in a pressure canner according to the directions below.
Processing Instructions (Raw Pack or Hot Pack)
Process pints for 30 minutes or quarts for 40 minutes, adjusting for altitude.
Altitude
0-1,000 ft 1,001-2,000 ft 2,001-4,000 ft 4,001-6,000 ft 6,001-8,000 ft 8,001-10,000 ft
Dial Gauge
11 pounds 11 pounds 12 pounds 13 pounds 14 pounds 15 pounds
Weighted Gauge
10 pounds 15 pounds 15 pounds 15 pounds 15 pounds 15 pounds
SHARON’S TIPS FOR CANNING ASPARAGUS
How Do You Use Canned Asparagus?
Since I was not sure I’d like soft, canned asparagus, I was doing some research first. I saw comments from a couple of people: Try canning asparagus and use it to make asparagus soup! Brilliant! What I’ll do is freeze the tips and choice parts of the asparagus and can just the stem. I think it’ll work great. If the asparagus is too soft for my liking, I’ll make soup. No wasted food! If you want to can the entire spear, just use the same process as above.
What Asparagus Should You Use?
The recipe source says you should use tender, tight-tipped spears, ideally 4–6” long. But your asparagus may be much longer. What I did is cut off the tips and a portion of the stem for fresh eating and freezing, and then I cut the rest into 1–2” pieces for canning. Tender is the key here! You can use the stems for canning, but don’t waste your time on tough, woody stems. They do still need to be the edible portion of the spear.
How to Freeze Asparagus
Since I know someone will wonder, here is how to freeze the tips if you decide not to can them. I simply cut the tips and some of the stem, blanched lightly, and placed in freezer bags.
Adapted from Resource:
https://nchfp.uga.edu/how/can_04/ asparagus_spears.html
https://extension.colostate.edu/topicareas/nutrition-food-safety-health/ canning-vegetables-9-348/
CANNING BEETS
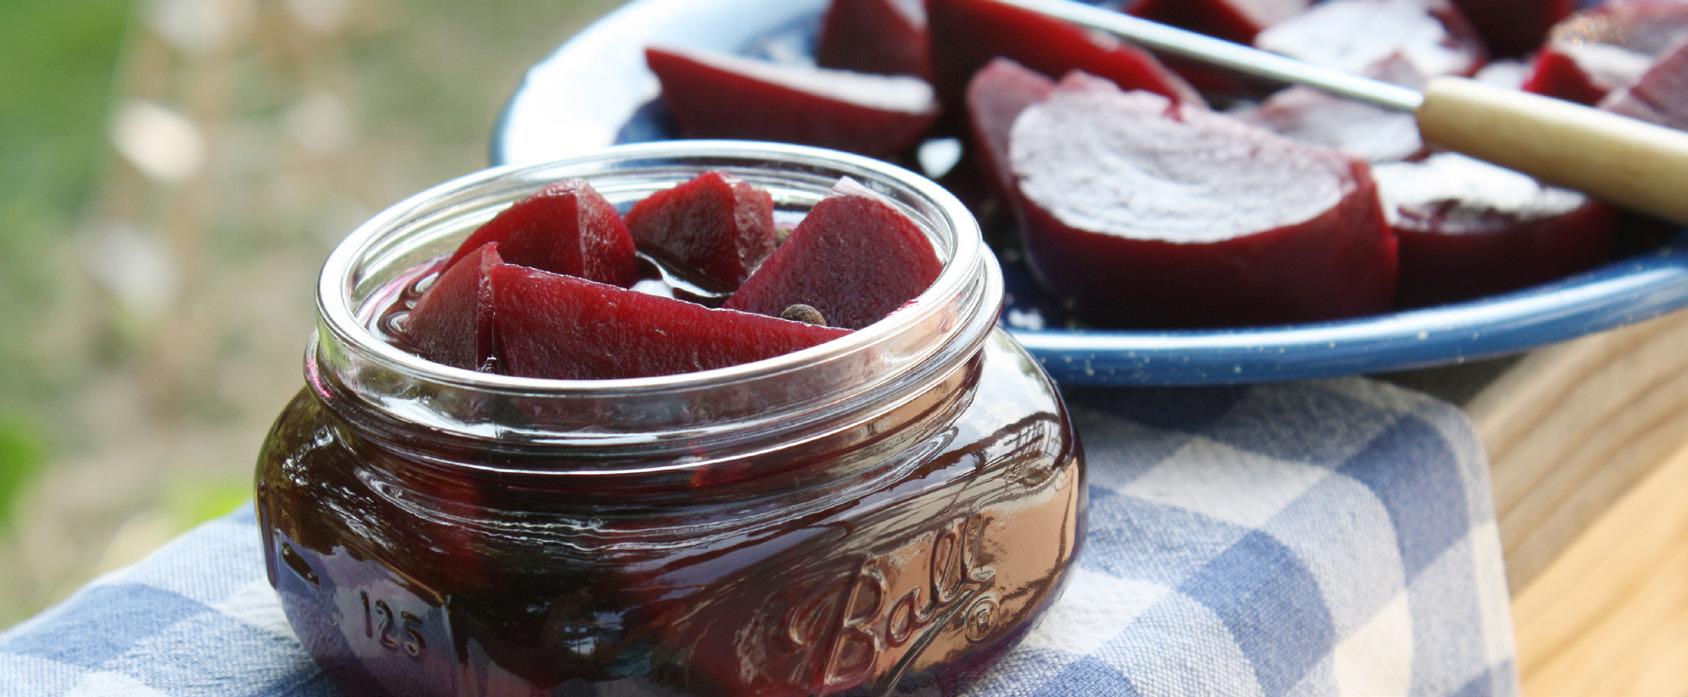
If you think you don’t like canned beets and have never had homegrown beets...try this! Seriously, homegrown beets are a totally different story than commercially canned beets. You’ll need 21 pounds of beets for 7 quart jars.
Ingredients
according to the directions below.
• Beets • Canning salt (optional) • Water
Supplies
• Pressure canner • Large pot or blancher • Canning jars, seals, and rings • Canning funnel, lid lifter, and jar lifter • Ladle and bubble tool
Procedure
Start by preparing jars and getting water in the canner heating. You want the canner hot, but not boiling, when the jars are ready to be processed. See page xx for full pressure canning instructions.
1.
2.
3.
4. 5. Wash beets, keeping taproot and 2” of stem. Boil the beets until tender, about 30–50 minutes. Transfer beets into very cold or ice water. Remove skins, stems, and taproot. Slice or chop beets, or leave smaller 6.
7.
8.
9. 10. 11. Pack into hot jar and add canning salt (1/2 tsp. for each pint, 1 tsp. for each quart). Cover with boiling water, leaving 1” headspace. Remove bubbles, wipe the rim clean and place on your seal and ring. Place the jar in the warm canner. Proceed to fill all jars. Process in a pressure canner beets whole. (See note below.)
Processing Instructions (Hot Pack)
Process pints for 30 minutes or quarts for 35 minutes, adjusting for altitude.
Altitude
0-1,000 ft 1,001-2,000 ft 2,001-4,000 ft 4,001-6,000 ft 6,001-8,000 ft 8,001-10,000 ft
Dial Gauge
11 pounds 11 pounds 12 pounds 13 pounds 14 pounds 15 pounds
Weighted Gauge
10 pounds 15 pounds 15 pounds 15 pounds 15 pounds 15 pounds
SHARON’S TIPS FOR CANNING BEETS
Various Sizes of Beets?
If you have beets of various sizes, try to sort them according to size. Cook those of a similar size together. The larger ones will take a little longer to cook, but the smaller will be overcooked if you try to do them all together. I’ll usually end up dividing the beets from my garden into two or three different batches of similar sizes.
If you have smaller sizes (1–2”), it is nice to jar these whole. Larger beets I either slice or cut into chunks.
When to Remove the Stems & Taproot
Before boiling, cut the stems of your beets to about 3”, leaving on the taproot. This will help maintain more color when you boil the beets to loosen the skins. When you’re peeling the cooked beets, cut off the tops and taproots too.
What Happened to the Color?
Don’t be surprised if your beets lose some color after processing. This is an unfortunate byproduct of home canning. Beets simply bleed off some color when processed. I’ve not discovered a good way to avoid it entirely. Overgrown beets tend to lose more color so pick them before they get too big. Not over-processing or speeding up the cooldown process and keeping your pressure at an even level will help tremendously too. Remember, commercially canned foods go through a different process entirely, so don’t expect the color to be the same...but DO expect the flavor to blow you away.
Adapted from Resource:
https://nchfp.uga.edu/how/can_04/ beets.html
https://extension.colostate.edu/topicareas/nutrition-food-safety-health/ canning-vegetables-9-348/
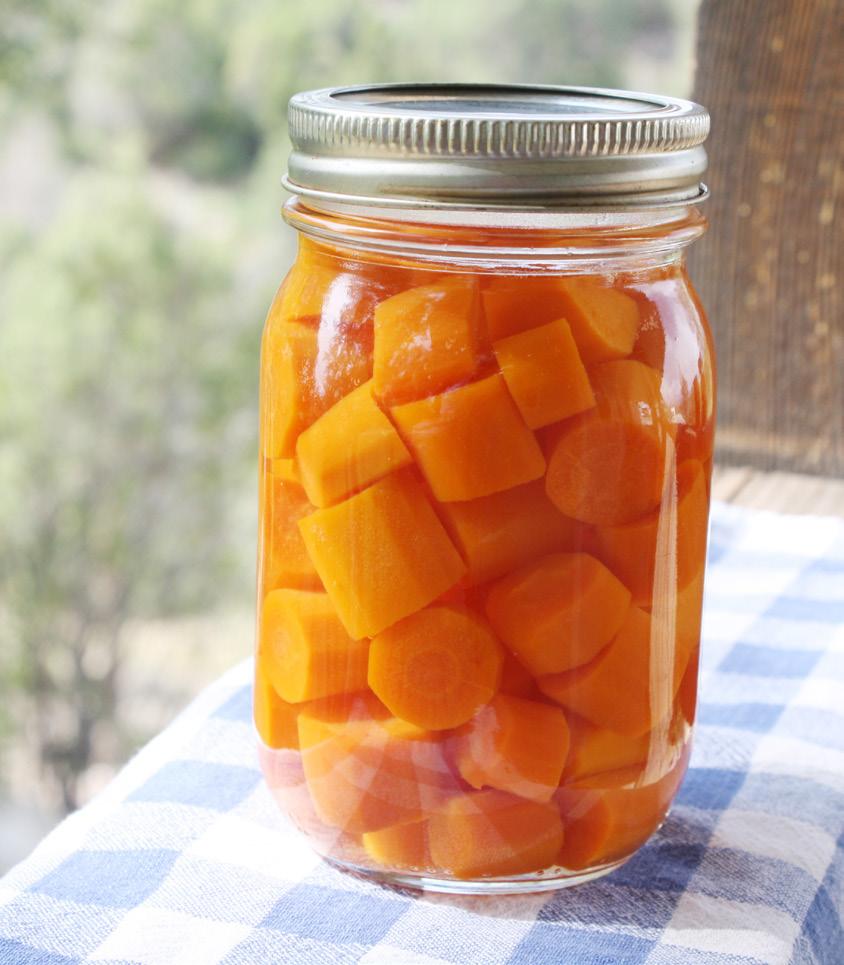
CANNING CARROTS
Canned carrots are great to have on hand, ready to add to a stew or soup. They can be simply heated with some butter and a sprinkle of cinnamon too! You’ll need approximately 18 pounds to fill 7 quart jars.

Ingredients
• Carrots • Salt (optional)
Supplies
• Pressure canner • Large pot or blancher • Canning jars, seals, and rings • Canning funnel, lid lifter, and jar lifter • Ladle and bubble tool
Procedure
Start by preparing jars and getting water in the canner heating. You want the canner hot, but not boiling, when the jars are ready to be processed. See page xx for full pressure canning instructions.
For Raw Pack 1. Wash and peel carrots, removing the tops. 2. Cut carrots into desired size. 3. Pack raw carrots tightly into hot jar. 4. Add salt if desired (1/2 tsp. per pint or 1 tsp. per quart). 5. Add boiling water to jar, leaving 1” headspace. 6. Remove bubbles, wipe the rim clean, and place on seal and ring. 7. Place jar in the warm canner. • Water
Proceed to fill all jars. 8. Process in a pressure canner according to the directions below.
For Hot Pack 1. Wash and peel carrots, removing the tops. 2. Cut carrots into desired size. 3. Place in pot, cover with water, and bring to a boil. 4. Simmer carrots gently for 5 minutes. 5. Pack carrots into hot jar. 6. Add salt if desired (1/2 tsp. per pint or 1 tsp. per quart). 7. Add boiling water to jar, leaving 1” headspace. 8. Remove bubbles, wipe the rim clean, and place on seal and ring. 9. Place the jar in the warm canner. Proceed to fill all jars. 10. Process in a pressure canner according to the directions below.
Processing Instructions (Raw Pack or Hot Pack)
Process pints for 25 minutes or quarts for 30 minutes, adjusting for altitude.
Altitude
0-1,000 ft 1,001-2,000 ft 2,001-4,000 ft 4,001-6,000 ft 6,001-8,000 ft 8,001-10,000 ft
Dial Gauge
11 pounds 11 pounds 12 pounds 13 pounds 14 pounds 15 pounds
Weighted Gauge
10 pounds 15 pounds 15 pounds 15 pounds 15 pounds 15 pounds
SHARON’S TIPS FOR CANNING CARROTS
Cutting Carrots
Carrots can be cut into jar lengths or cut crossways. Slice thicker carrots in half or quarter lengthways with small, thin carrots left whole. Using a crinkle cutter makes your jars look very professional, just for fun.
Hot or Raw Pack
Carrots can be processed either hot or raw pack. The processing is the same for both packs. With a hot pack, you can usually fit a little more in the jar, but with carrots, it doesn’t make a big difference, so you choose.
Do You Need to Peel Carrots?
Yes! You really do need to peel carrots. Carrots are grown in the ground, and there is the possibility of more bacteria on the surface. You can wash them, but that will still not remove as much as if it is peeled. These directions assume you peeled your carrots. Don’t change the process. Peel the carrots before you can them.
Adapted from Resource:
https://nchfp.uga.edu/how/can_04/ carrots_sliced.html
https://extension.colostate.edu/topicareas/nutrition-food-safety-health/ canning-vegetables-9-348/
CANNING CORN
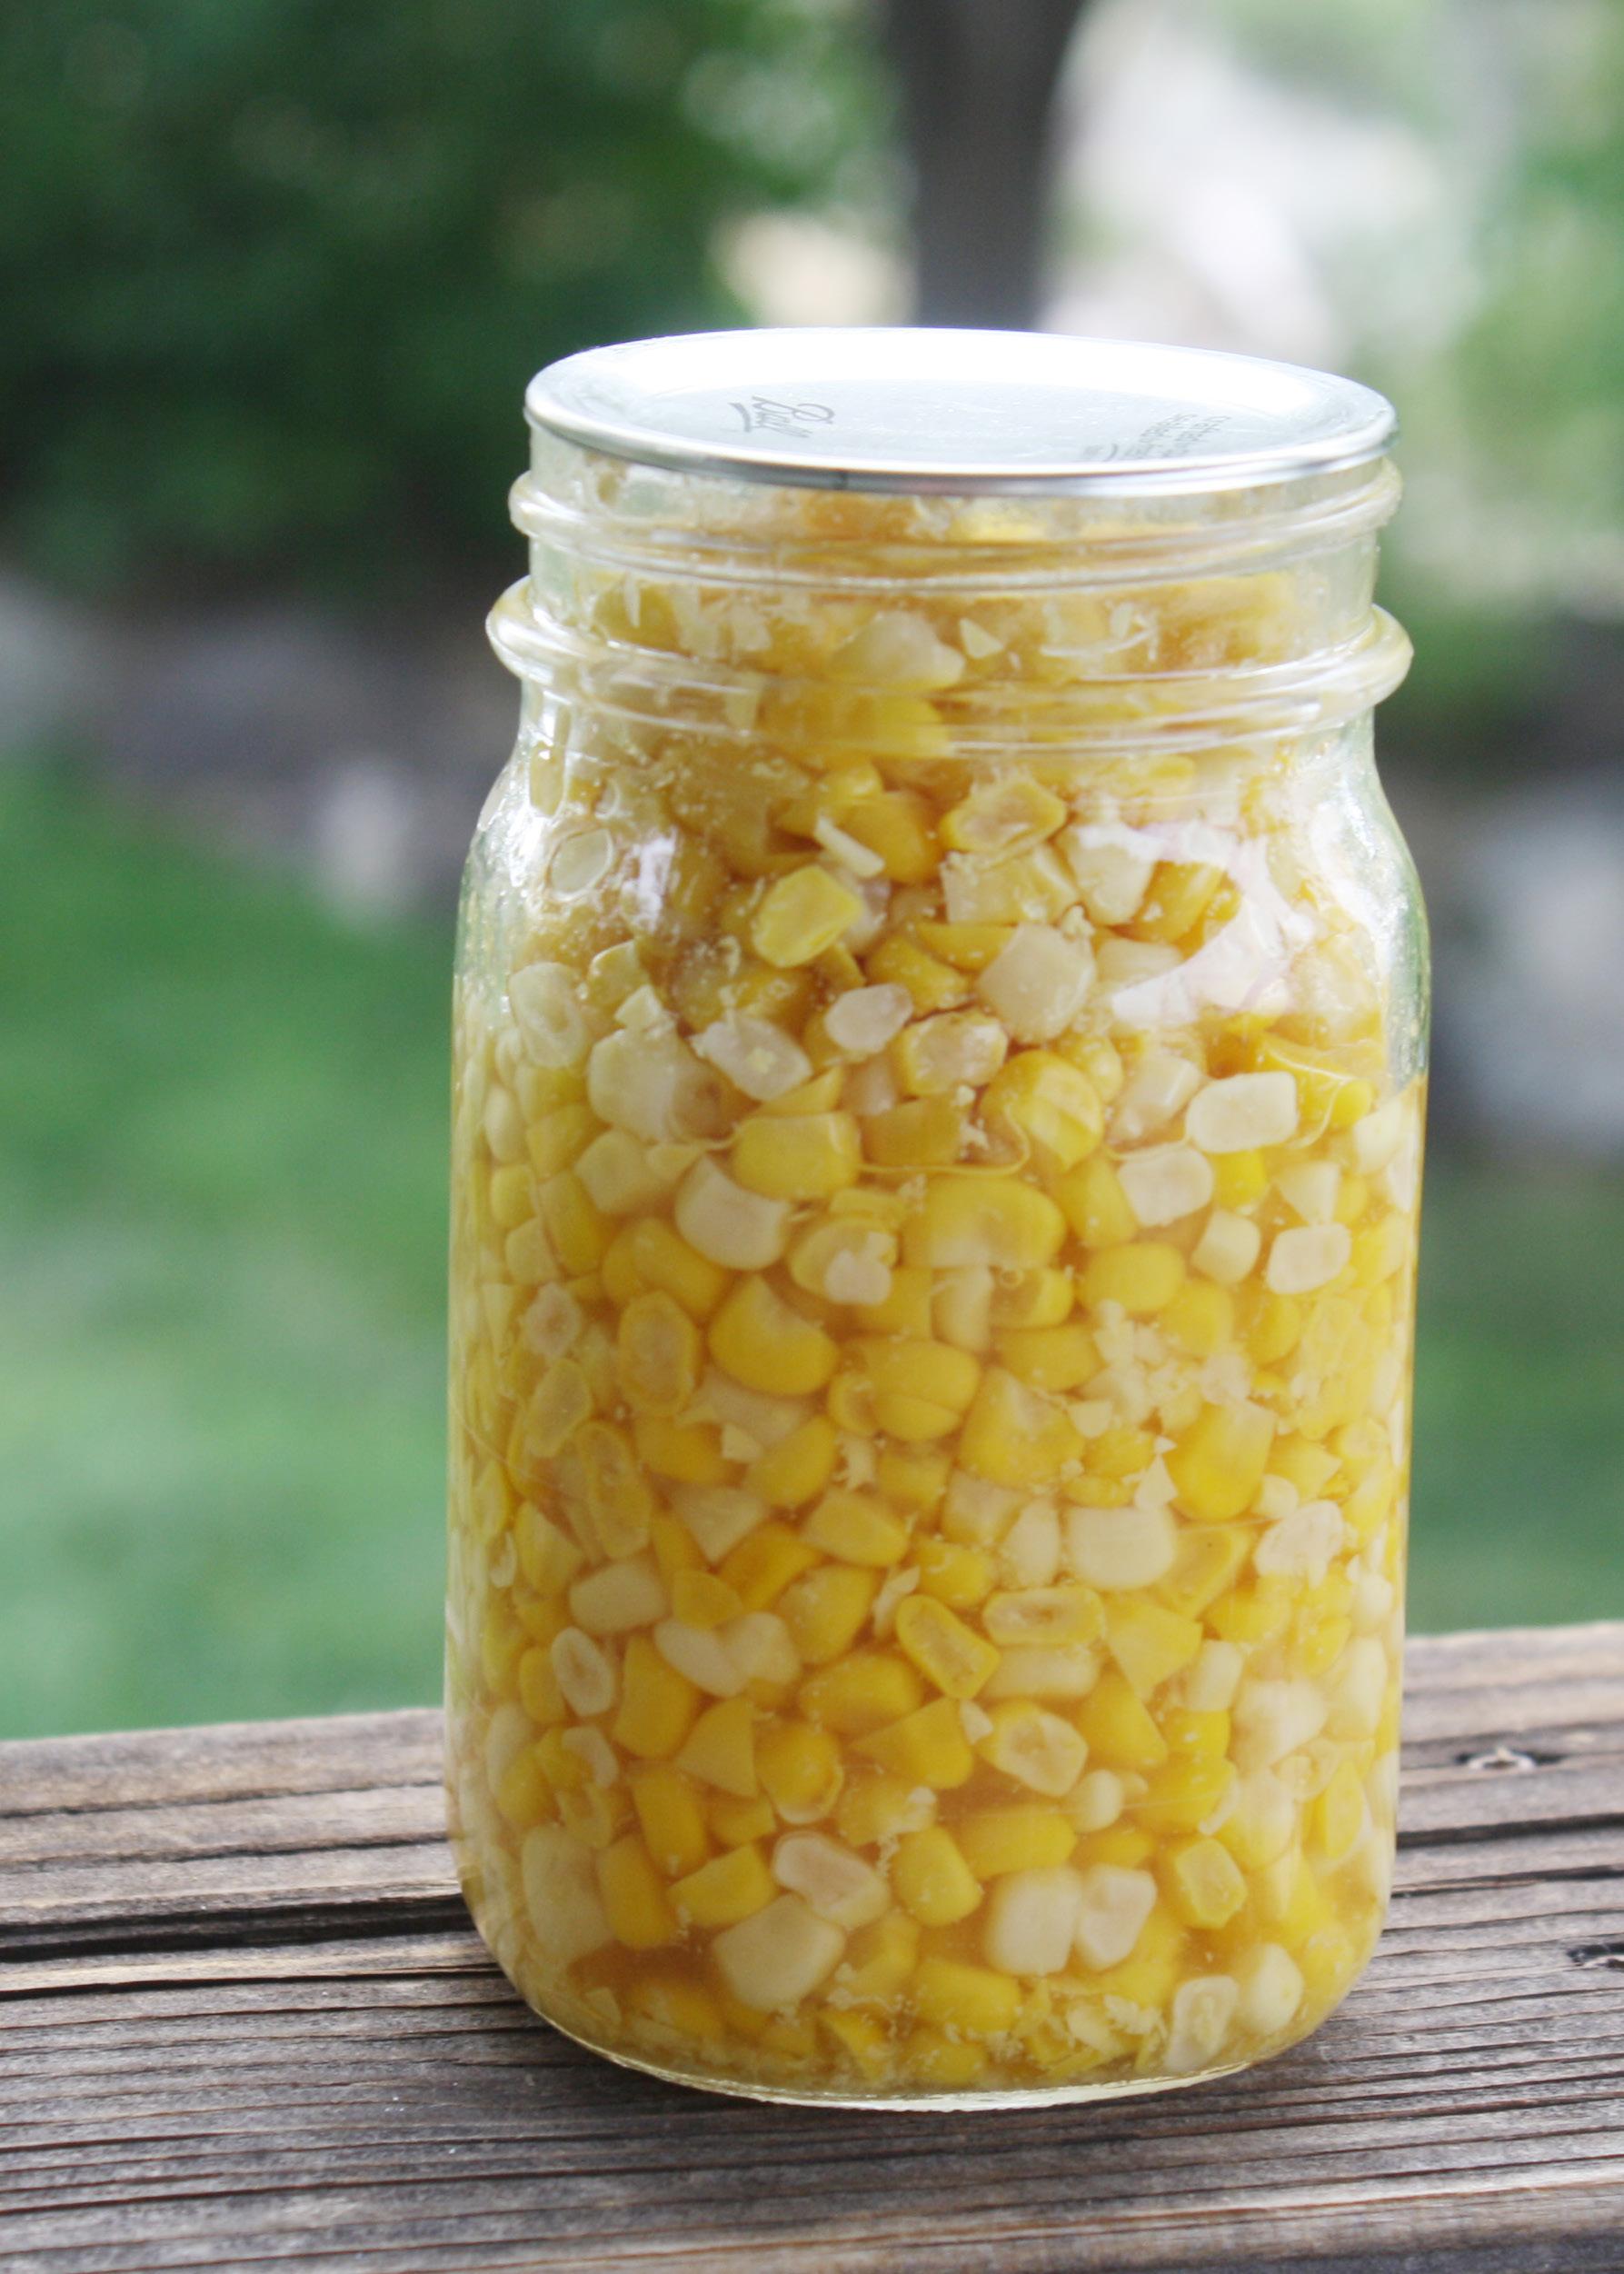
Canned corn from your own garden or a local source is much better than commercially canned corn. Remember, any variety of corn must be processed in a pressure canner. You’ll need about 31 pounds of corn (in the husk) to fill 7 quart jars.
Ingredients
or remain very close to boiling. Work
• Fresh corn • Canning salt (optional)
Supplies
• Pressure canner • Large stockpot • Kettle for boiling water • Something like a large cookie sheet or shallow pan/bucket to catch your corn kernels. (See below.) • Four boys to pick and husk corn. (Optional, but it’s a real time-saver!)
Canning jars, seals, and rings • Canning funnel, lid lifter, in the canner heating. You want the canner hot, but not boiling, when the jars
and jar lifter • Ladle and bubble tool
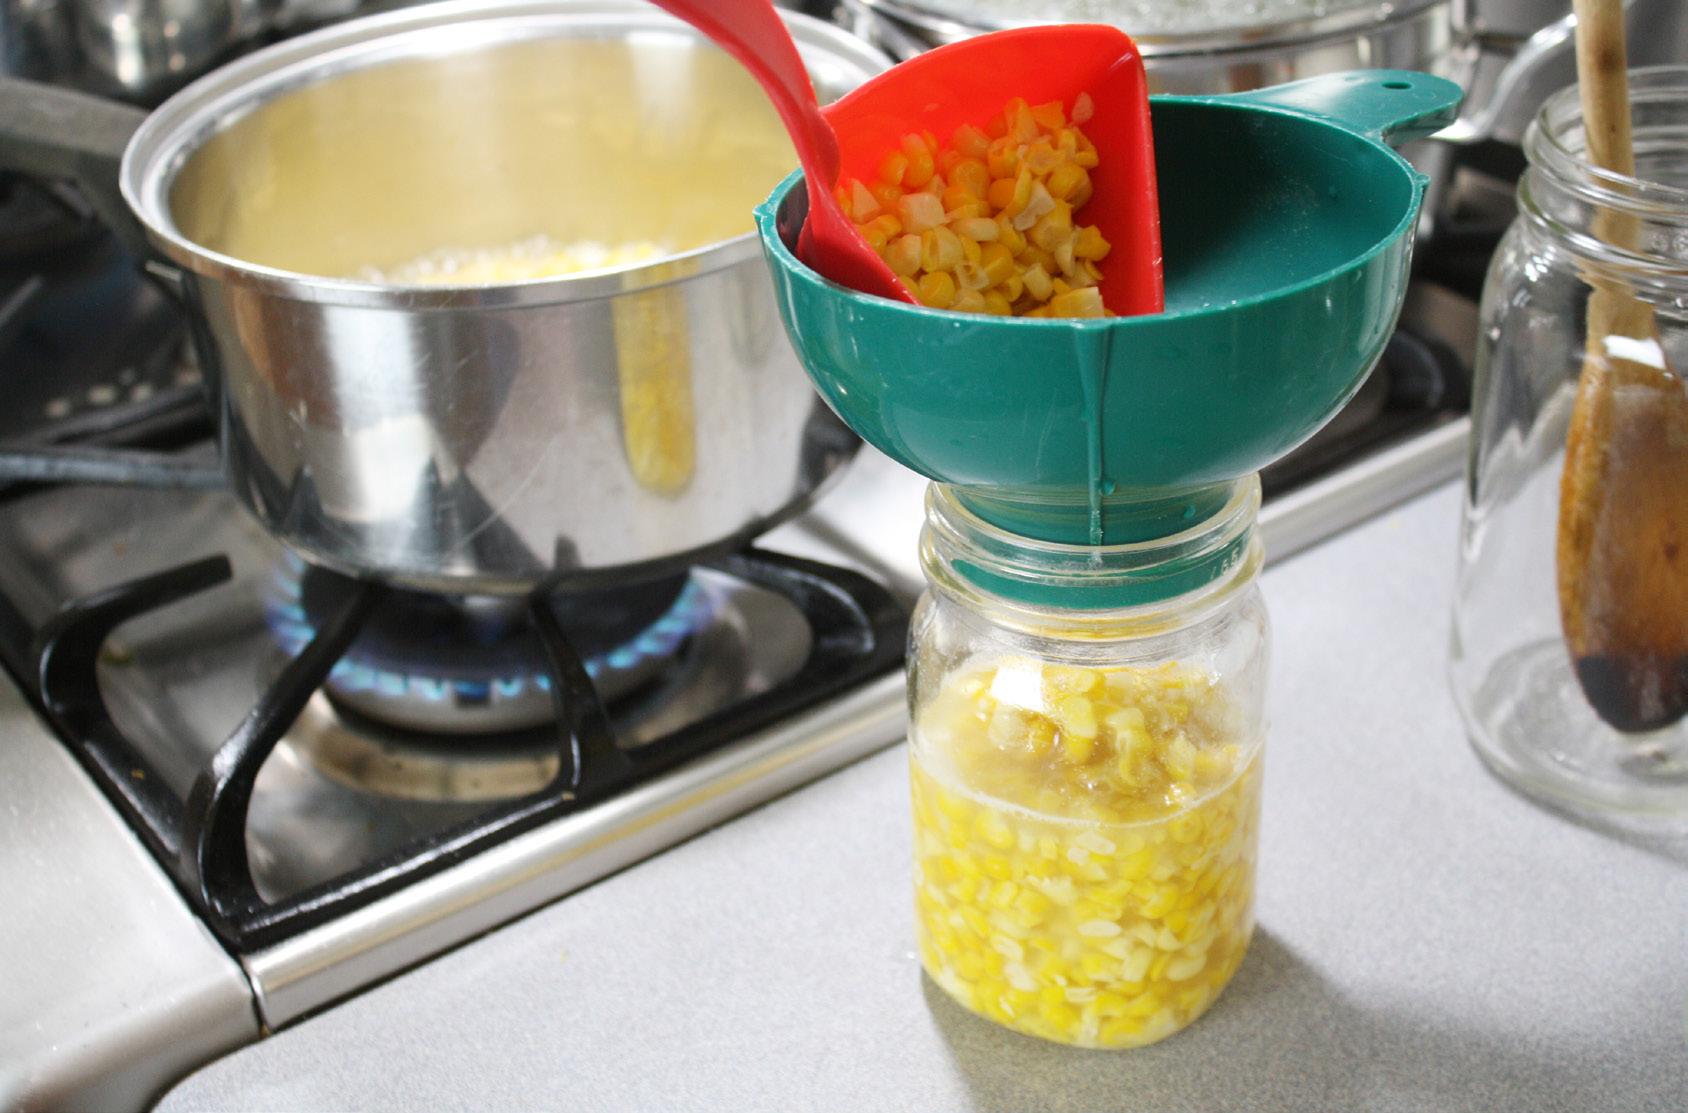
Blanching Instructions The first thing you’ll need to do is blanch the corn and remove the kernels. This being husked, start boiling water in a large stockpot. Place 3 or 4 ears of corn in boiling water for 2 minutes, and then remove with tongs. When you remove the blanched cobs, cool immediately in a sink, bucket, or large bowl of ice-cold water. We use food-grade, 5-gallon buckets we pick up at the local grocery store. Don’t try to do too many ears at once. You want the water to continue boiling your way through your ears like this until all are blanched, pausing every now and again to let your water come back to a boil if you have a lot of cobs.
Then cut the corn off the cob. Try not to cut into the cob itself. I aim for getting off about 3/4 of the kernel. See below for some options on how to do this. Collect the corn in a large pot.
Canning Procedure Start by preparing jars and getting water is a very easy process. While the corn is
are ready to be processed. See page xx for full pressure canning instructions.
For Raw Pack 1. Add salt to jar if desired (1/2 tsp. per pint or 1 tsp. per quart). 2. Pack kernels into hot jar. 3. Add clean boiling water, leaving 1” headspace. 4. Remove bubbles. 5. Wipe the rim clean and place on seal and ring.
7.
8. Place jar in the warm canner. Proceed to fill all jars. Process in a pressure canner according to the chart below. Process in a pressure canner according to the directions below.
For Hot Pack 1. Cover corn in water and bring to a low boil for 5 minutes. 2. Add salt to jars if desired (1/2 tsp. per pint or 1 tsp. per quart). 3. Pack corn into jar. 4. Cover with cooking water, leaving 1” headspace. 5. Remove bubbles. 6. Wipe the rim clean and place on seal and ring. 8. Place the jar in the warm canner. Proceed to fill all jars. Process in a pressure canner according to the chart below.
Processing Instructions (Raw Pack or Hot Pack)
Process pints for 55 minutes or quarts for 1 hour 25 minutes, adjusting for altitude.
Altitude
0-1,000 ft 1,001-2,000 ft 2,001-4,000 ft 4,001-6,000 ft 6,001-8,000 ft 8,001-10,000 ft
Dial Gauge
11 pounds 11 pounds 12 pounds 13 pounds 14 pounds 15 pounds
Weighted Gauge
10 pounds 15 pounds 15 pounds 15 pounds 15 pounds 15 pounds
SHARON’S TIPS FOR CANNING CORN
Use Fresh Corn
Corn is a vegetable that should be fresh picked and eaten soon. The same goes for canning it. Picking in the early morning provides the best and sweetest corn. Can it the same day. If you wait, it is still safe and good...but the quality definitely changes. The fresher, the better.
Tips for Cutting Corn off the Cob
We use a tool called a “corn stripper.” It is a flat blade bent around in a circle. My handy husband cut some notches in a food-grade bucket we had, and we use the bucket to catch the kernels as the corn is pushed through the blade. This is VERY handy if you have a lot of corn.
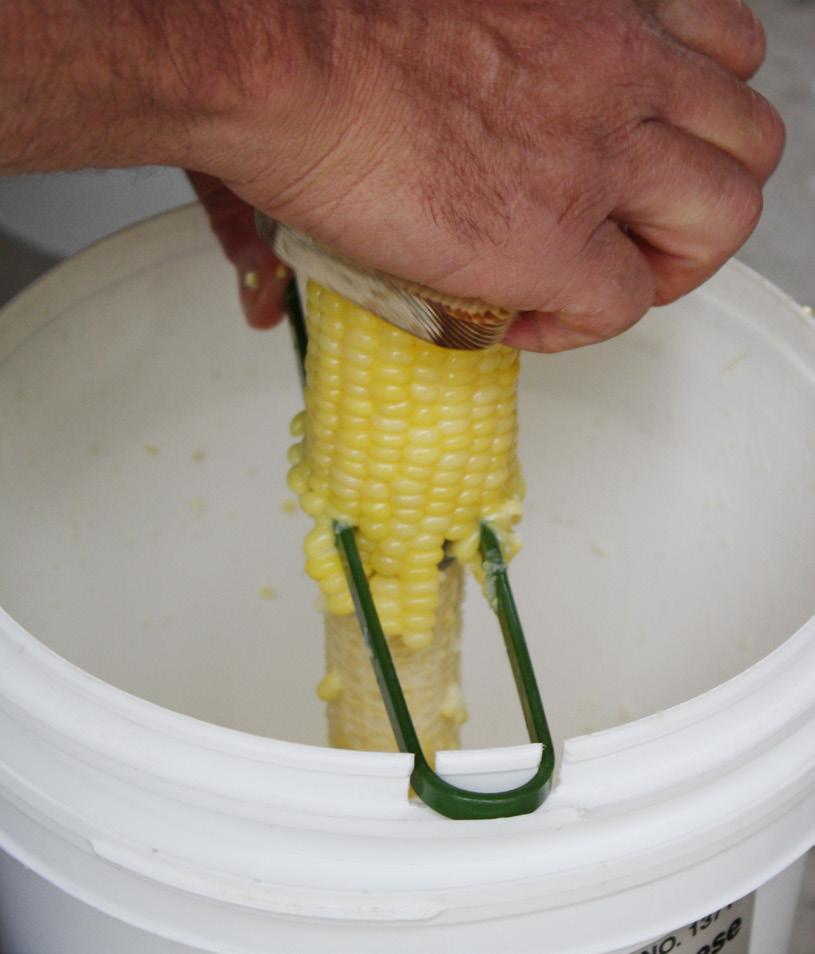
Another option is to use a large cookie sheet. Set your ear of corn on end and run a sharp knife down the sides, cutting off the kernels. Or try an electric knife. I’ve never done this, but it sounds like a great idea.
Why Did My Corn Change Color?
Don’t be surprised if your sweet corn comes out a deep golden, even slightly browned color. It is the sugar in the corn changing the color. The color change can be more pronounced if you process longer than needed.
Adapted from Resource:
https://nchfp.uga.edu/how/can_04/ corn_kernel.html
https://extension.colostate.edu/topicareas/nutrition-food-safety-health/ canning-vegetables-9-348/
CANNING DRIED BEANS
When I say “canning dried beans” in this recipe, I mean canning beans like pinto, navy, black...not green beans. The dried beans are cooked and pressure canned in liquid, not canned dry in a jar. Hope that makes it clear! You’ll need about 3/4 pound of dried beans per quart jar. Follow instructions below, you are soaking the beans before putting them in the jars.
Ingredients
• Dried beans or peas of your choice • Canning salt (optional) • Water
Supplies
• Pressure canner • Canning jars, seals, and rings • Canning funnel, lid lifter, and jar lifter • Ladle and bubble tool
Processing Instructions (Hot Pack)
Procedure
Start by preparing jars and getting water in the canner heating. You want the canner hot, but not boiling, when the jars are ready to be processed. See page xx for full pressure canning instructions.
1.
2.
3.
4. Once beans have soaked (see below), rinse beans. Put beans back in pot, covering with fresh water. Bring beans to a boil. Simmer 30 minutes. Add salt to jars (1/2 tsp. per pint 5. 6.
7.
8.
9. Fill jar with beans. Pour cooking water over beans, leaving 1” headspace. Remove bubbles, wipe the rim clean, and place on seal and ring. Place the jar in the warm canner. Proceed to fill all jars. Process in a pressure canner according to the directions below.
or 1 tsp. per quart).
Process pints for 1 hour 15 minutes or quarts for 1 hour 30 minutes, adjusting for altitude.
Altitude
0-1,000 ft 1,001-2,000 ft 2,001-4,000 ft 4,001-6,000 ft 6,001-8,000 ft 8,001-10,000 ft
Dial Gauge
11 pounds 11 pounds 12 pounds 13 pounds 14 pounds 15 pounds
Weighted Gauge
10 pounds 15 pounds 15 pounds 15 pounds 15 pounds 15 pounds
SHARON’S TIPS FOR CANNING DRIED BEANS
How to Soak Beans for Canning
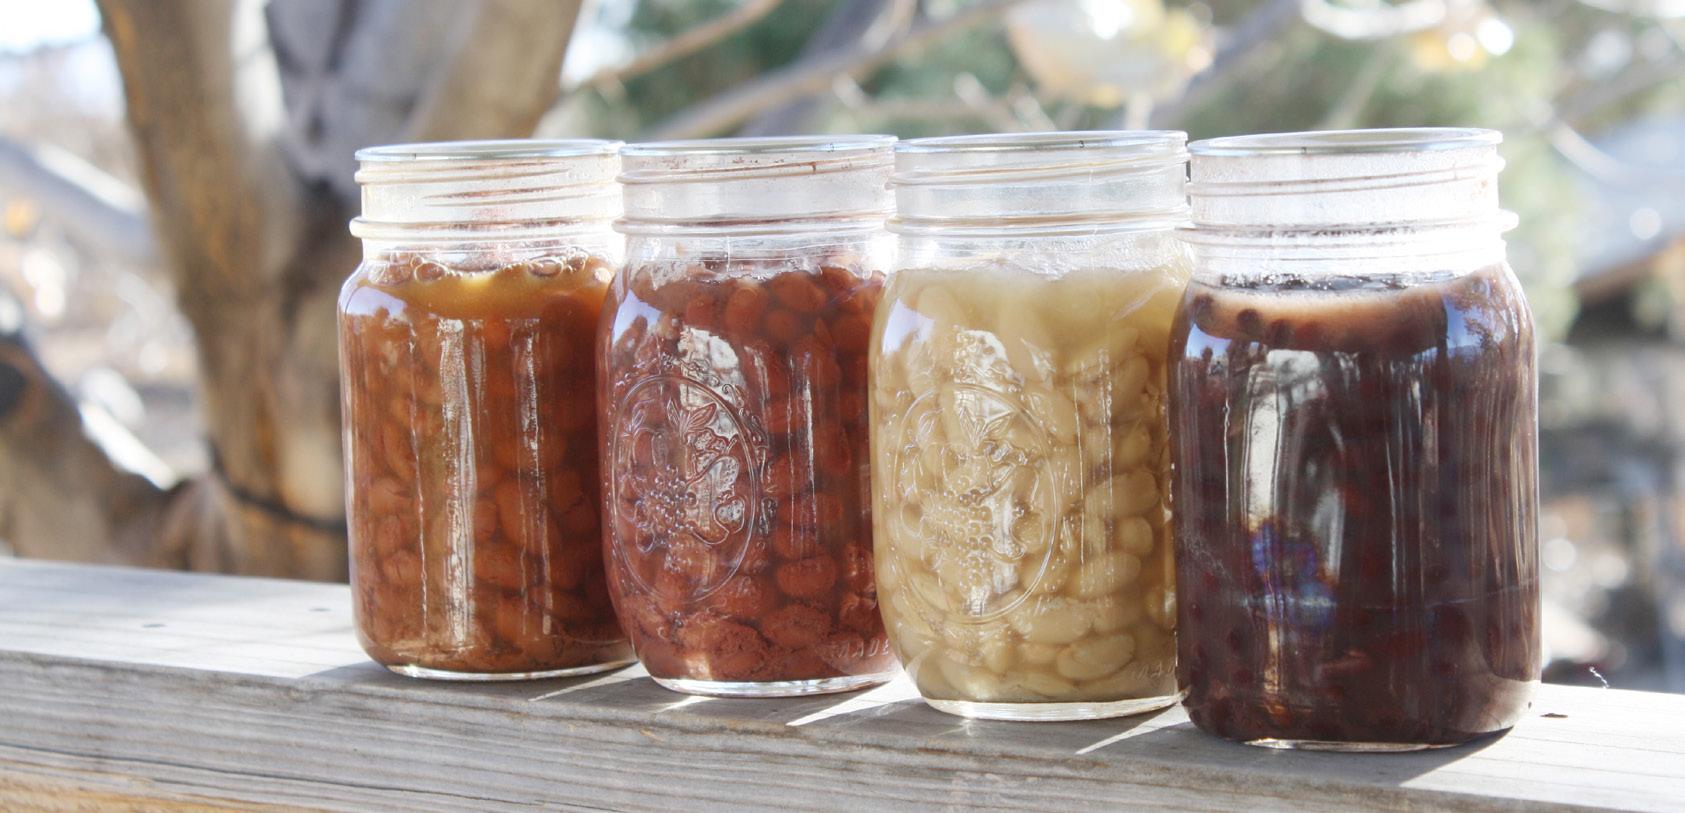
Check your beans for any small bits of rocks, dirt, or bad beans. Place dried beans in a large pot and cover with water. Adding a little acid in the form of vinegar or lemon juice is a good way to improve the nutritional value of your beans. Add about 2 Tbsp. or so. I usually just splash a dob in. How’s that for measurements? A “dob.” Soak 12 to 18 hours in a cool place. (I usually do this overnight.) Drain and rinse discarding the soak water. Then proceed with the directions above.
Quick Soak Option
If you don’t want to wait overnight, you can quickly rehydrate beans. You may cover sorted and washed beans with boiling water in a saucepan. Boil 2 minutes. Remove from heat. Soak 1 hour, and then drain and rinse, discarding the soaking water. Then proceed with the directions above.
Do You HAVE to Soak the Beans?
I get messages from folks who want to measure out dry beans directly into the jar, add water, and process them that way. It seems this is common, but I do not recommend it. All tested resources I’ve found always say to soak the beans first. Time in the canner has not been tested from the dried state. If you start with dried beans, the texture of the beans will be different. The heat must penetrate fully through the beans. Starting from dried will not be the same process. You can’t change the process and end up with the same results. My suggestion is to follow the tested canning methods: Soak and cook your beans as instructed, and then process.
Why Can Dried Beans, Anyway?
Beans are so easy to store in their dried state that it is easy to just leave them there for storage. If you are looking at long-term storage, don’t can your beans. Dry beans will store much, much longer dry vs. wet.
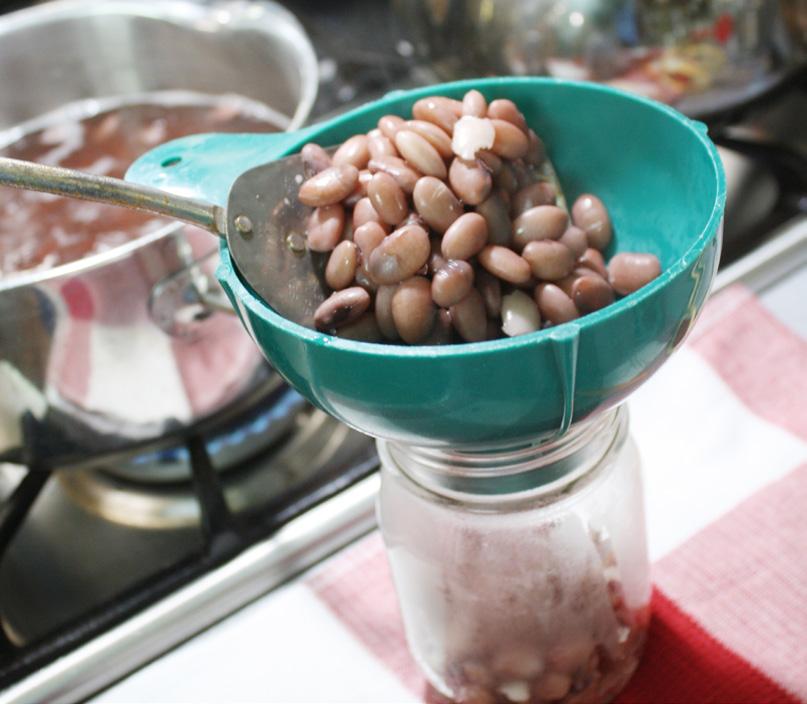
However, having precooked jars on the shelf is a great convenience food! On those days when you forget to start the beans soaking early, you’ve got canned beans on the shelf ready to go. A reader also suggested that canning beans also lets you have ready-to-eat beans without using extra water, water that may be in short supply during rough times. I thought that was a good point too!

Processing Tip
I often will prepare a couple types of beans and do a few jars of each in one canning session. They all have the same processing time.
Adapted from Resource:
https://nchfp.uga.edu/how/can_04/ carrots_sliced.html
https://extension.colostate.edu/topicareas/nutrition-food-safety-health/ canning-vegetables-9-348/

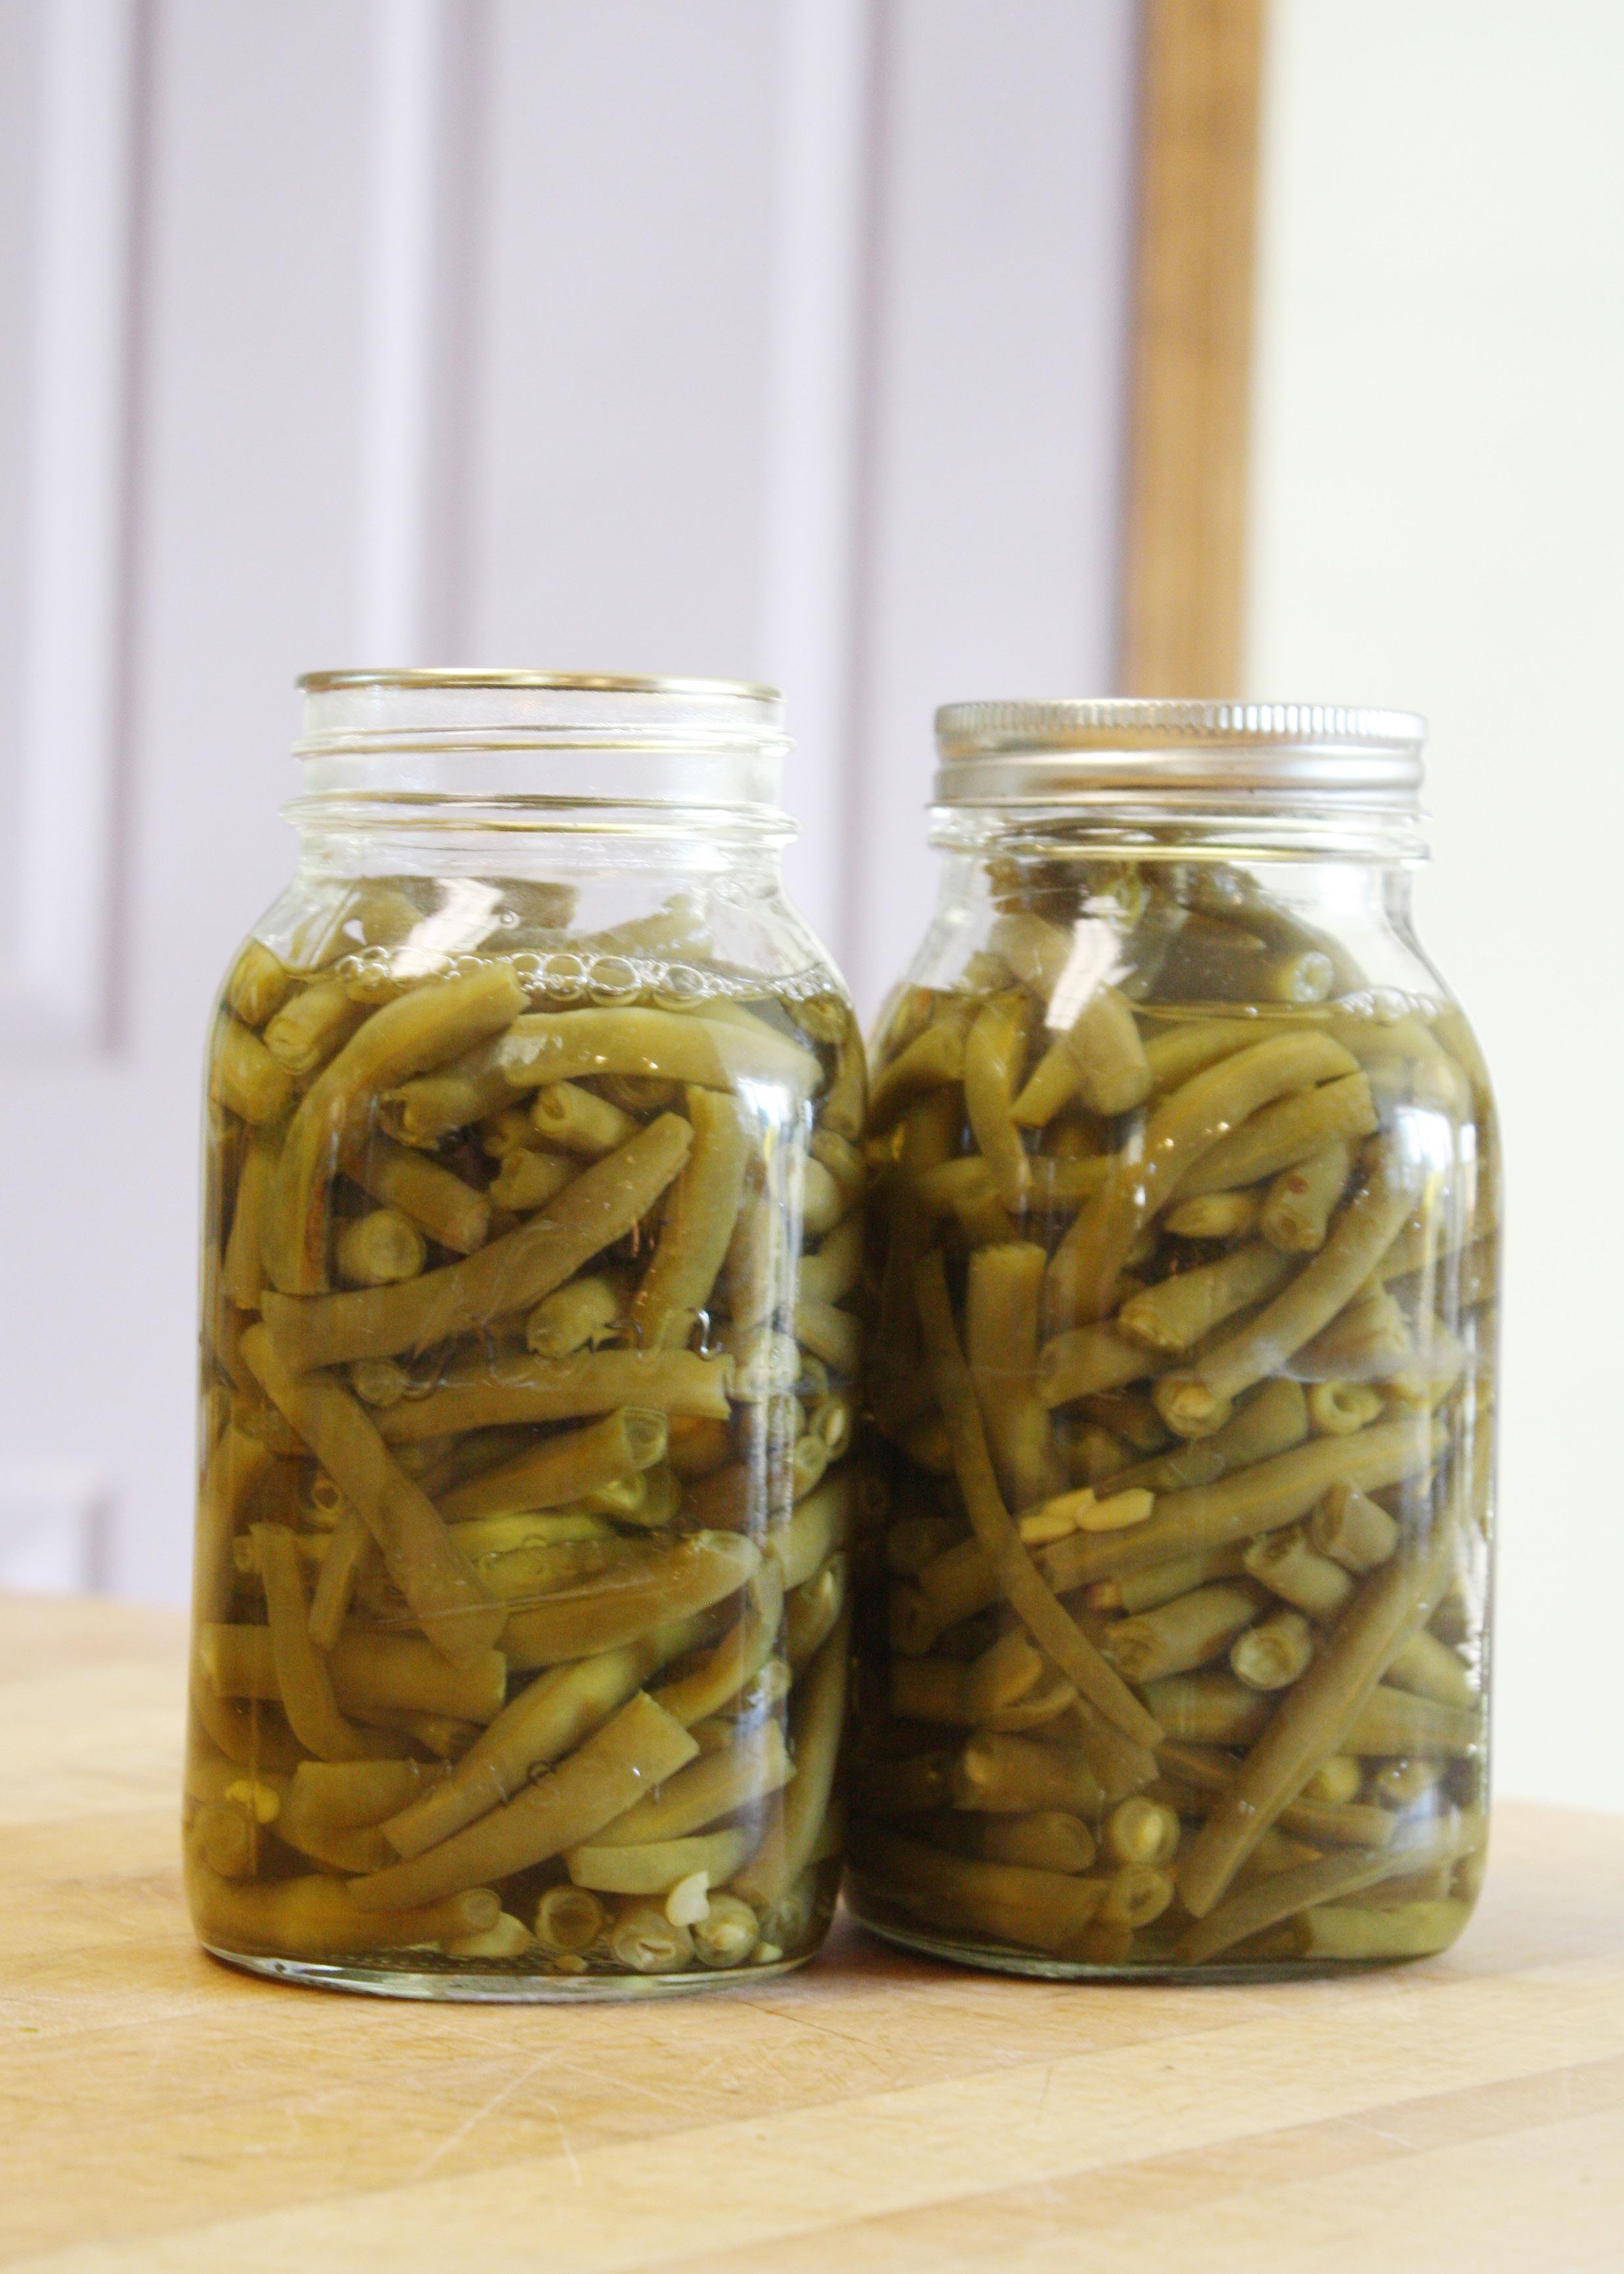
CANNING GREEN BEANS
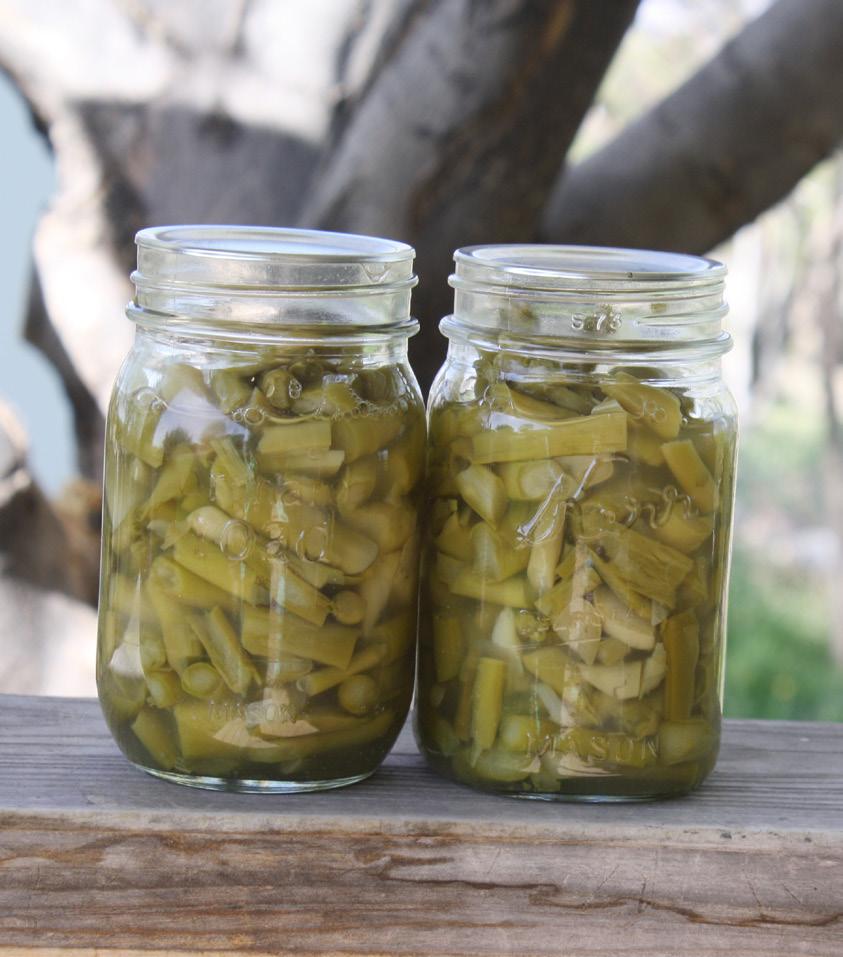
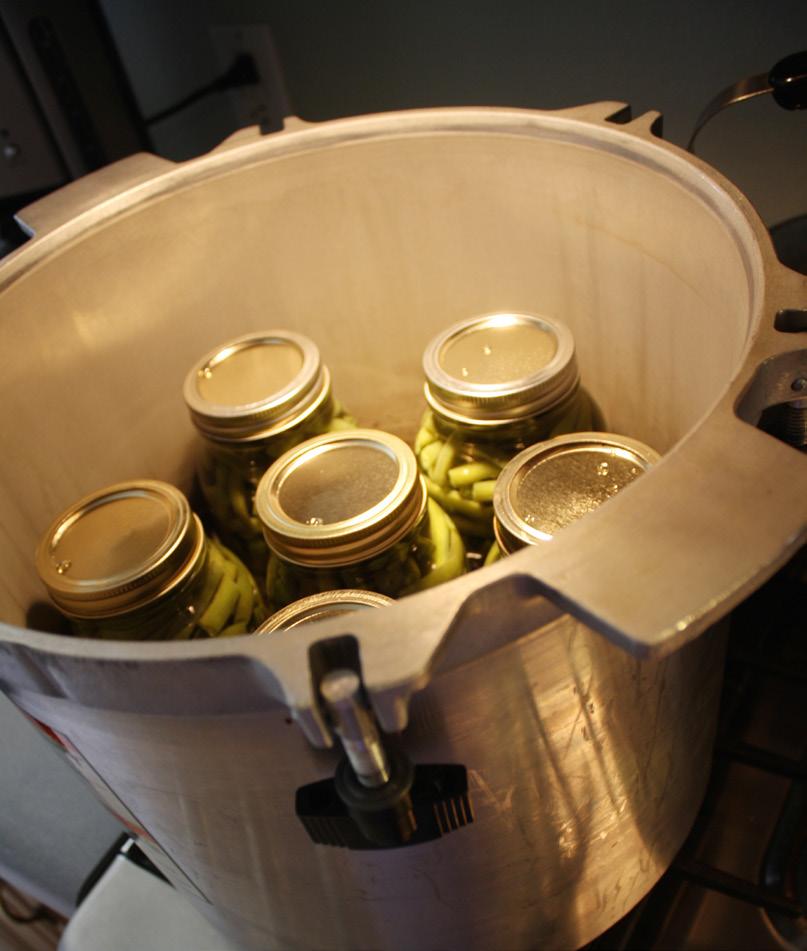
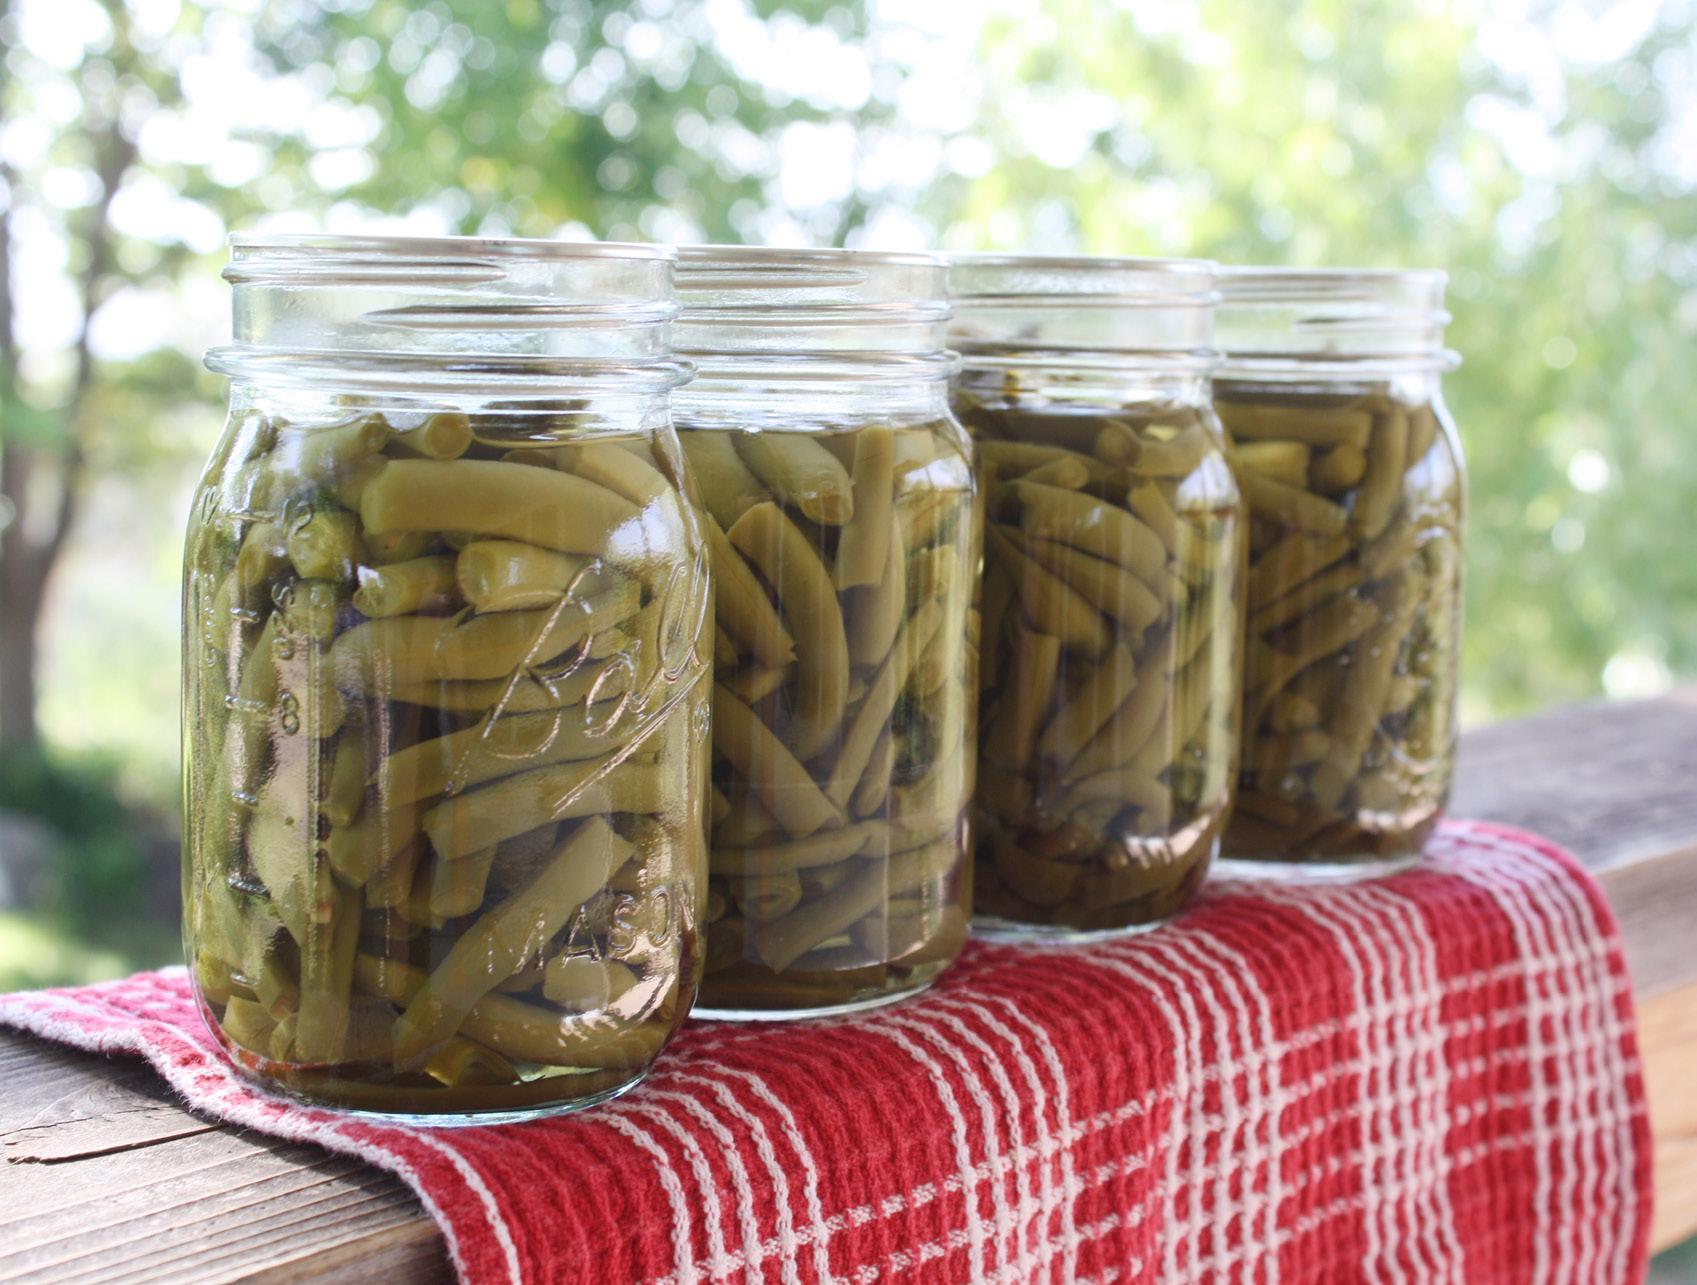
Like all vegetables, green beans are a low-acid food and will need to be processed in a pressure canner. They’re a great vegetable to start with when you’re first learning pressure canning! You’ll need about 14 pounds of beans for a canner load of 7 quarts.
Ingredients
seal and ring.
• Green beans • Canning salt (optional)
Supplies
• Pressure canner • Large pot or blancher • Canning jars, seals, and rings • Canning funnel, lid lifter, 2. Snap beans to desired size. 6. Cover with clean boiling water, leaving 1” headspace.
and jar lifter • Ladle and bubble tool
Procedure
Start by preparing jars and getting water in the canner heating. You want the canner hot, but not boiling, when the jars are ready to be processed. See page xx for full pressure canning instructions.
For Raw Pack 1. Rinse beans in cold water. 2. Snap beans to desired size. 3. Add canning salt to jars (1/2 tsp. for pints, 1 tsp. for quarts). 4. Pack beans tightly into jars. 5. Fill jar with clean boiling water, 6. 7.
8.
9. Remove bubbles. Wipe the rim clean and place on Place jar in the warm canner. Proceed to fill all jars. Process in a pressure canner according to the instructions below.
For Hot Pack 1. Rinse beans in cold water. 3. Put beans in a pot of water. Boil 5 minutes. 4. Add canning salt to jar (1/2 tsp. for pints, 1 tsp. for quarts). 5. Pack beans loosely into jar (don’t squish). leaving 1” headspace.
7. Remove bubbles, wipe the rims clean and place on seal and ring. 8. Place jar in the warm canner.
Proceed to fill all jars. 9. Process in a pressure canner according to the instructions below.
Processing Instructions (Raw Pack or Hot Pack)
Process pints for 20 minutes or quarts for 25 minutes, adjusting for altitude.
Altitude
0-1,000 ft 1,001-2,000 ft 2,001-4,000 ft 4,001-6,000 ft 6,001-8,000 ft 8,001-10,000 ft
Dial Gauge
11 pounds 11 pounds 12 pounds 13 pounds 14 pounds 15 pounds
Weighted Gauge
10 pounds 15 pounds 15 pounds 15 pounds 15 pounds 15 pounds
SHARON’S TIPS FOR CANNING GREEN BEANS
What Does “Snapping” Mean?
Snapping just means to break off the ends and break into pieces. This is where help from a friend (or teenage sons, in my case!) helps a bunch. You can leave the pieces longer, but I prefer to snap them into 2-3” pieces. They fit in the jars much more nicely.
Picking Beans in the Garden?
Green beans are another vegetable that turn out so much nicer if you can them the same day as picked. If you are picking beans from your own garden, go ahead and snack on a few beans. Fresh, raw green beans are yummy and oh, so good for you!
When we pick green beans, I always tell my boys to look for pencil size. Bigger will start getting tough, but don’t go too much smaller either. There will be some variance, but that is a good estimate. One tip is if you have some beans that get missed and end up too big, pick them anyway! Get them off the plant. The more you keep your plants picked, the more they will produce. Big beans left on the plant tell it to stop producing.
If you grow an heirloom variety, save some seeds. Towards the end of the season, I’ll choose a few plants at the end of a row and mark them off for seed collection. Let these go unpicked until the seeds in the pods are large and start to dry on the plant. Save these to plant next year.
Adapted from Resource:
https://nchfp.uga.edu/how/can_04/ beans_snap_italian.html
https://extension.colostate.edu/topicareas/nutrition-food-safety-health/ canning-vegetables-9-348/
CANNING GREENS
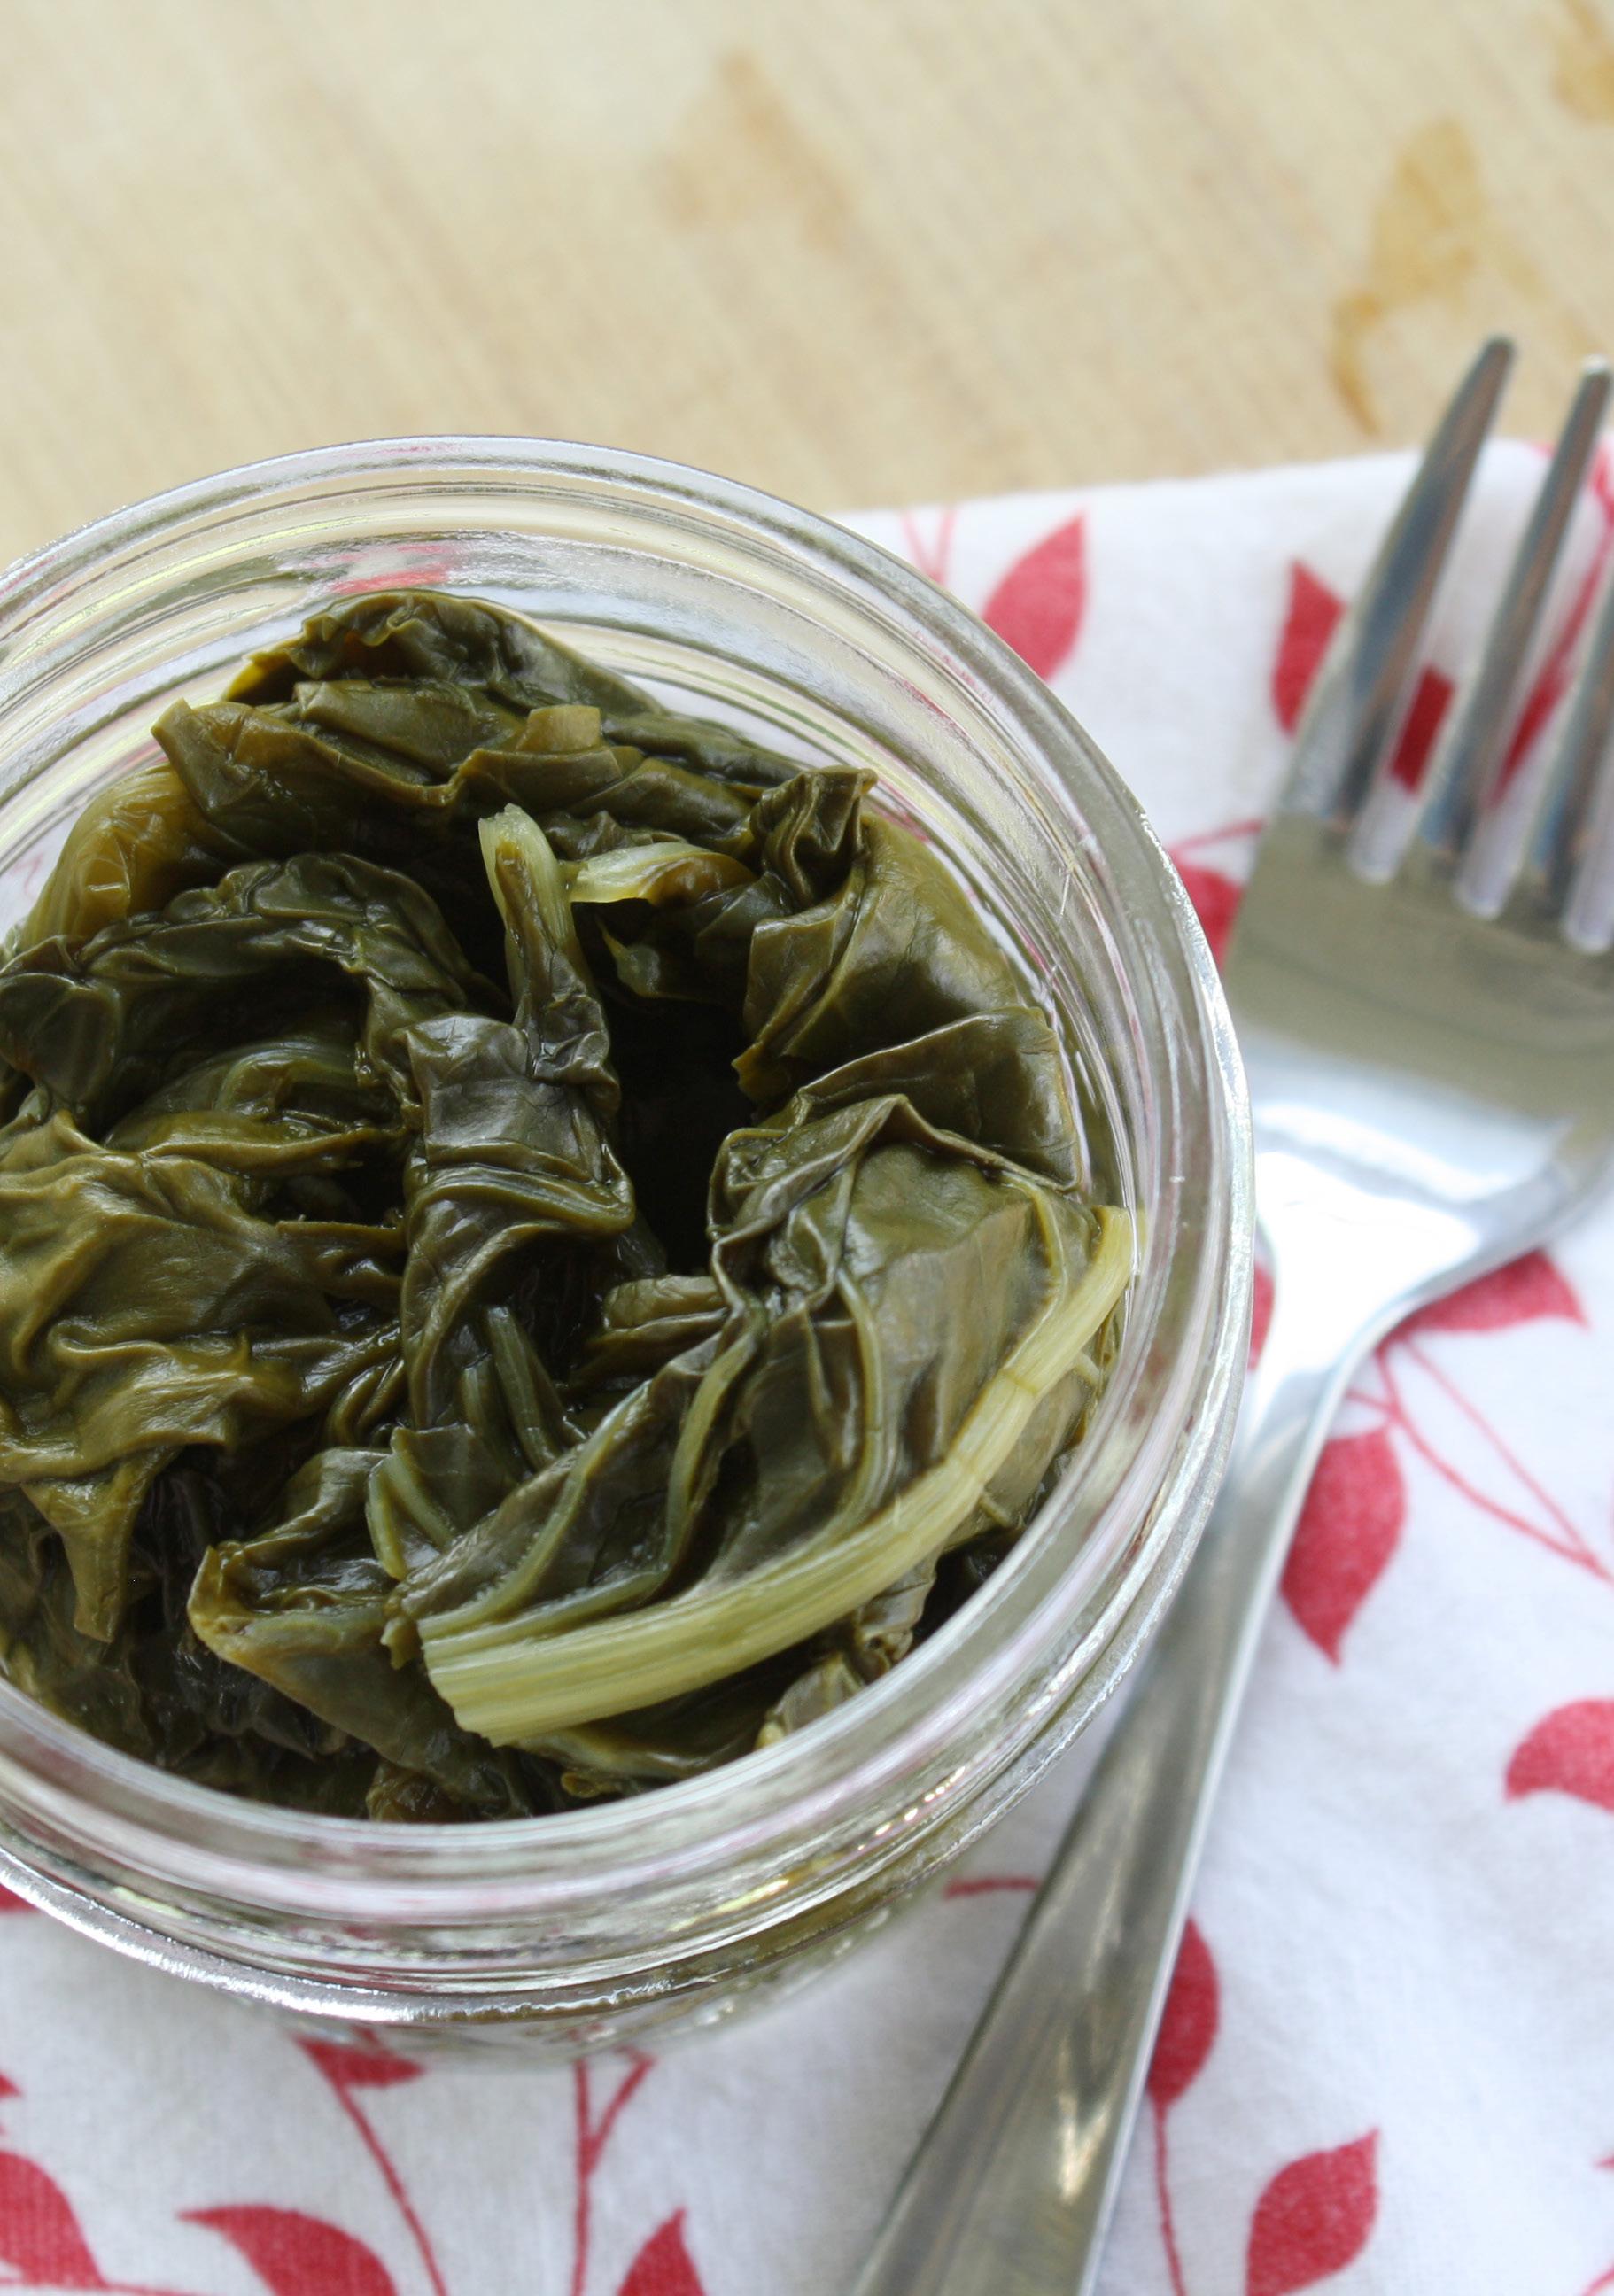
This recipe is for greens like spinach, Swiss chard, or beet greens. According to my source, you’ll need about 28 pounds of greens for 7 quart jars (or 18 pounds of greens for 9 pint jars), though I just picked a bunch and kept filling jars until they were all full!
Ingredients
leaving 1” headspace.
• Greens • Canning salt (optional) • Water
Supplies
• Pressure canner • Canning jars, seals, and rings • Canning funnel, lid lifter, and jar lifter • Ladle and bubble tool
Procedure
Start by preparing jars and getting water in the canner heating. You want the canner hot, but not boiling, when the jars are ready to be processed. See page xx for full pressure canning instructions.
1.
2.
3.
4. Wash greens well with several rinses. Blanch until just wilted. See below for more on blanching. Dip into cold water to stop cooking. Drain Pack greens into jar. Don’t 5.
6.
7.
8.
9. Add salt (1/2 tsp. per pint or 1 tsp. per quart) to jar. Cover with fresh boiling water, pack tight.
Remove bubbles, wipe the rim clean, and place on seal and ring. Place the jar in the warm canner. Proceed to fill all jars. Process in a pressure canner according to the directions below.
Processing Instructions (Hot Pack)
Process pints for 1 hour 10 minutes or quarts for 1 hour 30 minutes, adjusting for altitude.
Altitude
0-1,000 ft 1,001-2,000 ft 2,001-4,000 ft 4,001-6,000 ft 6,001-8,000 ft 8,001-10,000 ft
Dial Gauge
11 pounds 11 pounds 12 pounds 13 pounds 14 pounds 15 pounds
Weighted Gauge
10 pounds 15 pounds 15 pounds 15 pounds 15 pounds 15 pounds
SHARON’S TIPS FOR CANNING GREENS
Choosing & Washing Greens
Remember to only can the best of your greens. Pick out any wilted, dried, or insect-damaged leaves as best you can. If you have larger leaves, you may want to remove the center rib. I just tear the leaf part off the rib.
Dirt has a tendency to get in the crinkly leaves, so you will need to use several rinses of water. Rinse in small amounts, and keep rinsing until you are sure it is all clean. This will depend on your situation. Right after a heavy rainfall, your greens may have more dirt splashed up onto the leaves. If your greens are mulched well, you may not have much dirt at all!
Blanching Greens
You just need to steam blanch your greens. This means they do not need to be submerged in boiling water. You can simply heat the greens in a few inches of water with the pot covered so all of the greens are steamed. Or you can use a blancher or basket and steam the greens until just wilted. (A basket makes it easy.)
What Did I Think of Canned Greens?
I have to say that I did this project mostly because several folks asked about canning greens. I thought it would be great to have some on hand in jars. So I did a batch of Swiss chard. Swiss chard grows well here, and I always have plenty. Well, by the next spring, I had used a grand total of…one pint jar. All of the other jars were still on my shelf. I just didn’t care for it. I’ll freeze my greens from now on. BUT that is not to say that you wouldn’t love it!
Liquid Loss, Anyone?
I had a lot of liquid loss. This is something I’ve seen repeatedly with canning greens. Check page xx for more information on why liquid loss happens and how to determine if your jars are still safe to use.
Quick Tip
Greens are light and bulky when fresh. When you blanch them to pack your jars...they shrink. A lot. You’ll need a lot of greens to make this worthwhile.
Adapted from Resource:
https://nchfp.uga.edu/how/can_04/ spinach_greens.html
https://extension.colostate.edu/topicareas/nutrition-food-safety-health/ canning-vegetables-9-348/
CANNING PEPPERS
Did you plant peppers and now wonder what to do with your abundance? Canning is one option. You’ll need approximately 9 pounds of peppers to fill 9 pint jars.
Ingredients
• Sweet or hot chili peppers • Canning salt (optional)
Supplies
• Pressure canner • Large pot or blancher • Canning jars, seals, and rings • Canning funnel, lid lifter, and jar lifter • Ladle and bubble tool • Cookie sheet to blister peppers (optional) • Plastic gloves (for hot peppers)
Procedure
Start by preparing jars and getting water in the canner heating. You want the canner hot, but not boiling, when the jars are ready to be processed. See page xx for full pressure canning instructions.
1.
2. 3. Prepare peppers, removing skins by using the roasted method. (See instructions below.) Add 1/2 tsp. canning salt to each jar. Fill jar with peppers. Do not press down tightly. 4.
5. 6.
7.
8.
9. 10. Add boiling water, leaving 1” headspace. Remove bubbles. Wipe the rim clean and place on your seal and ring. Place the jar in the warm canner. Proceed to fill all jars. Process in a pressure canner according to the instructions below. Proceed to fill all jars. Process in a pressure canner according to the directions below.
Processing Instructions (Hot Pack)
Process pints or half pints (no quarts) for 35 minutes, adjusting for altitude.
Adjustments for Pressure Canner
Altitude
0-1,000 ft 1,001-2,000 ft 2,001-4,000 ft 4,001-6,000 ft 6,001-8,000 ft 8,001-10,000 ft
Dial Gauge
11 pounds 11 pounds 12 pounds 13 pounds 14 pounds 15 pounds
Weighted Gauge
10 pounds 15 pounds 15 pounds 15 pounds 15 pounds 15 pounds
SHARON’S TIPS FOR CANNING PEPPERS
How to Prepare Peppers
You can coarsely chop your peppers, leave smaller peppers whole, or if you have larger peppers, you can quarter or halve them. Remove cores and seeds. Cut off the tops and pull out the centers with your hands.
Peeling Peppers
Cut 3–4 slits through the skin of each pepper. Place peppers on a cookie sheet and roast in a hot oven (400°F) or under the broiler for 6–8 minutes, turning to roast all sides. When you see the skins brown and blister, they are done. Place peppers in a pan and cover with a damp cloth to cool. (A paper bag works great too.) This steams the peppers and makes them easier to peel.
When cool enough to handle, peel each pepper. Flatten whole peppers. Cut down one side and open up the pepper. You may also chop them or cut into rings.
Don’t Forget the Gloves!
You may already know this, but it bears repeating: If you are canning peppers that are spicy, do yourself a favor and wear plastic gloves while handling them. The oils from hot peppers will burn your skin. Once, when I was canning salsa, I only had a few peppers to chop, so I figured I’d just wash my hands quickly rather than wear gloves. Big mistake. My hands burned all night long.

General Information on Canning Peppers
These directions work for either mild sweet or hot chili peppers. Home canned peppers will not hold their crunch or texture. They will be soft and mushy. I don’t want you to be surprised by this. However, they are great for adding to many meals that benefit from the flavor addition. Do you use spicy peppers as an ingredient in meals? Casserole recipes often call for chili peppers. You can add peppers to an omelet in the morning or add them to a chicken enchilada bake.
Adapted from Resource:
https://nchfp.uga.edu/how/can_04/ peppers.html
https://extension.colostate.edu/topicareas/nutrition-food-safety-health/ canning-vegetables-9-348/
CANNING POTATOES
Canned potatoes are handy to have ready for soups or stews. Or serve as a side dish, by heating them up and adding butter and salt. Sour cream and chives would dress them up nicely. You’ll need about 20 pounds of potatoes for 7 quart jars.
Ingredients
or 1 tsp. per quart). according to the directions below.
• Potatoes • Canning salt (optional)
Supplies
• Pressure canner • Potato peeler • Large pot or blancher • Canning jars, seals, and rings • Canning funnel, lid lifter, and jar lifter • Ladle and bubble tool
Procedure
Start by preparing jars and getting water in the canner heating. You want the canner hot, but not boiling, when the jars full pressure canning instructions.
1. 2.
3. Wash and peel potatoes. Cut potatoes into 1–2” pieces, placing potatoes in water. Drain. Add water and bring to a boil. Cook small pieces 2 minutes or large pieces/whole potatoes up to 10 minutes, to heat through. (See clarification below.) 4. 5.
6.
7.
8.
9. Fill jar with hot potatoes. Add canning salt (1/2 tsp. per pint Cover hot potatoes with fresh boiling water, leaving 1” headspace. Remove bubbles, wipe the rim clean, and place on your seal and ring. Place the jar in the warm canner. Proceed to fill all jars. Process in a pressure canner are ready to be processed. See page xx for
Processing Instructions (Hot Pack)
Process pints for 35 minutes or quarts for 40 minutes, adjusting for altitude.
Adjustments for Pressure Canner
Altitude
0-1,000 ft 1,001-2,000 ft 2,001-4,000 ft 4,001-6,000 ft 6,001-8,000 ft 8,001-10,000 ft
Dial Gauge
11 pounds 11 pounds 12 pounds 13 pounds 14 pounds 15 pounds
Weighted Gauge
10 pounds 15 pounds 15 pounds 15 pounds 15 pounds 15 pounds
SHARON’S TIPS FOR CANNING POTATOES
To Peel to Not to Peel?
I am often asked if you have to peel your potatoes first. Yes, you should always peel your potatoes. Read Peeling Root Crops on page xx for more information.
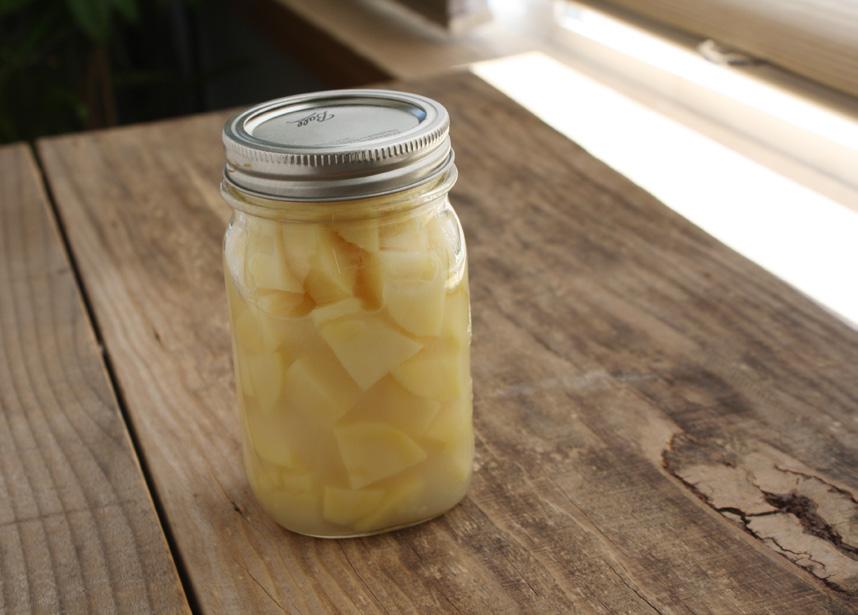
Potato Preparation Instructions
Cut potatoes into 1–2” pieces. You can cut them as small as 1/2”, but I would think they might get overcooked if that small. Pieces should be cut into approximately the same sizes to ensure even cooking.
If you are like us and have TONS of teeny tiny potatoes (my kids call them “tater tots”), you can leave them whole. Small, whole potatoes should not be bigger than about 2”. Remember they do still need to be peeled. Even the tiny ones. As you peel and cut your potatoes, place in water to avoid discoloring. Drain this water, and then add water and cook small, 1/2” pieces 2 minutes in boiling water and drain. If you have larger pieces or whole potatoes, boil up to 10 minutes and drain discarding the cooking water. You want the potatoes to be hot through, but not overcooked.
How to Reduce Starchiness
There are two things you can do to reduce starchy, cloudy potato water. When you add water to your jars, do not use the cooking water. Add clean, fresh, boiling water to reduce the amount of starch in the jars. Also, use the correct type of potato. Any potato can be canned, but some will be a better quality for canning. Large, white, baking potatoes are not the best for canning purposes. They tend to be more on the starchy side. Red or gold potatoes do much better.
Adapted from Resource:
https://nchfp.uga.edu/how/can_04/ potato_white.html
https://extension.colostate.edu/topicareas/nutrition-food-safety-health/ canning-vegetables-9-348/
CANNING PUMPKIN & WINTER SQUASH
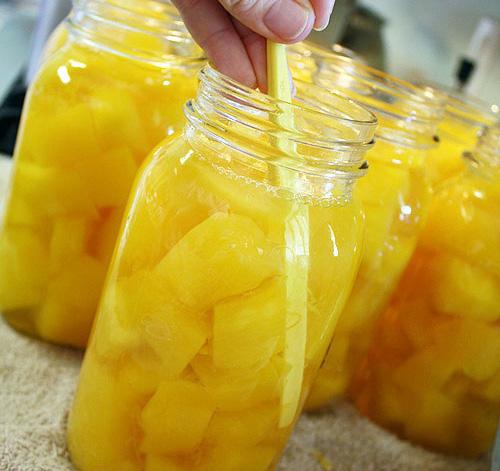
For safety issues, can pumpkin or other winter squash in cubes instead of as puree. (See details below). You’ll need about 2 1/4 pounds of pumpkin or winter squash for every quart jar. cut into 1” cubes. (see below for peeling tips) add water and bring to a boil for 2 minutes. per quart) if desired. 1” headspace. and place on your seal and ring.
Ingredients
• Pumpkin • Canning salt (optional) • Water
Processing Instructions (Hot Pack)
Supplies
• Pressure canner • Canning jars, seals, and rings • Canning funnel, lid lifter, • Ladle and bubble tool
Procedure
Start by preparing jars and getting water in the canner heating. You want the canner hot, but not boiling, when the jars are ready to be processed. See page xx for full pressure canning instructions. 1.
2.
3. 4.
5.
6.
7.
8. Seed and peel pumpkin, then Place cubes in large stockpot, Fill jar with pumpkin cubes. Add salt (1/2 tsp. per pint or 1 tsp. Fill jar with cooking water, leaving Remove bubbles, wipe the rim clean, Place the jar in the warm canner. Proceed to fill all jars. Process in a pressure canner according to the directions below.
and jar lifter
Process pints for 55 minutes or quarts for 1 hour 30 minutes, adjusting for altitude.
Adjustments for Pressure Canner
Altitude
0-1,000 ft 1,001-2,000 ft 2,001-4,000 ft 4,001-6,000 ft 6,001-8,000 ft 8,001-10,000 ft
Dial Gauge
11 pounds 11 pounds 12 pounds 13 pounds 14 pounds 15 pounds
Weighted Gauge
10 pounds 15 pounds 15 pounds 15 pounds 15 pounds 15 pounds
SHARON’S TIPS FOR CANNING PUMPKIN & WINTER SQUASH
Why Cubes & Not Puree?
The concern with canning pureed pumpkin it is that the density of the puree will be thick. The heat achieved in the pressure canner must reach all of the way to the center of your jars and food. If your pumpkin is cubed, the heat will penetrate much better. Cubed is the only way this has been tested. It is the only recommended method.
Pureeing Pumpkin when You Open the Jar
If you need a pumpkin puree, mash it up when you open the jar. You will need to drain the pumpkin very well. I’ve found even then it will be thinner than commercially canned pumpkin. It will not get thick like fresh pumpkin, but it works.
Quick Tips for Peeling and Preparing Pumpkin
Save the seeds for roasting or replanting in the spring if you have heirloom pumpkins. I tried several methods for peeling the pumpkin. A regular vegetable peeler was useless, as the rind was far too tough. I tried using a knife to peel off the rind of each half. This was awkward. I had sharp knives slipping, and I was destined to chop off a finger. I knew I had to find a better way, or I’d be there for HOURS (not to mention I’d end up fingertipless)!
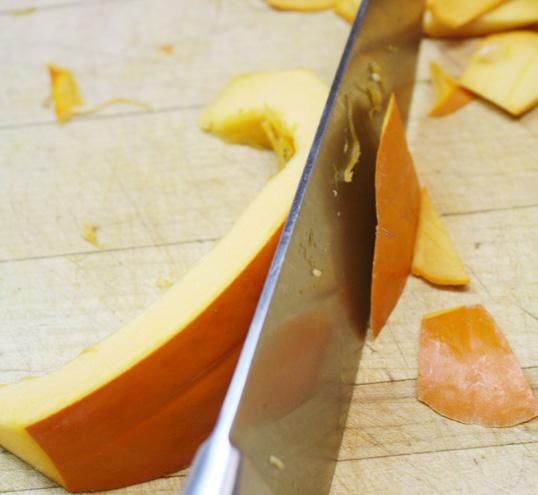
I finally cut the pumpkin into thin sections, and then I used a knife to slice off the rind. This was much more manageable. The pumpkin did not roll around on me. I was able to slice down into my butcher block, and my fingers were safe!
Adapted from Resource:
https://nchfp.uga.edu/how/can_04/ pumpkin_winter_squash.html
https://extension.colostate.edu/topicareas/nutrition-food-safety-health/ canning-vegetables-9-348/


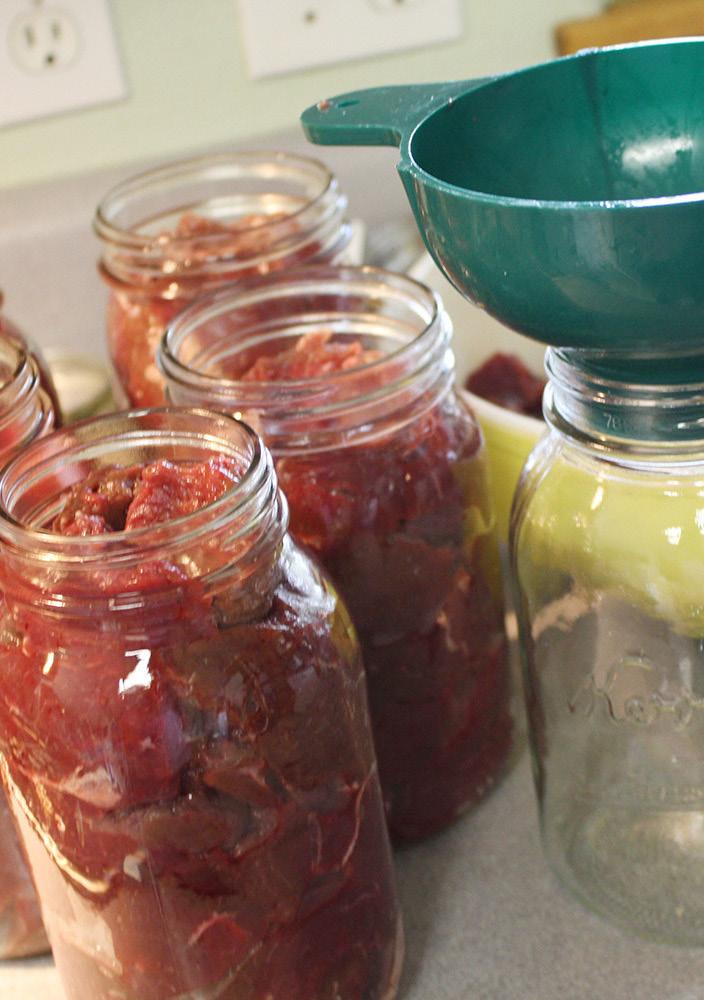
CANNING MEAT AND MEAT PRODUCTS
Meat Canning Tips
The first time I tried canning meat—I canned some venison—I could not believe it was so easy. I thought surely I was missing something. Nope, nothing missing. The jars sealed fine. The meat was great. Everybody was healthy. Life was good! I now had a new way to store all of the elk and venison my husband and sons brought home from hunting camp.
Why Can Meat?
There are many reasons you might want to consider canning meat of all types. The most obvious is that it saves on freezer space, plus you don’t have to worry about the freezer when the electricity goes off. When chicken or other meat goes on sale, you can stock up at great prices.
Something people don’t consider is the convenience factor of canning meat. It is so fast and easy to open a jar of meat to prepare a meal. You don’t have to worry about remembering to take meat out of the freezer for dinner.
Beef and venison can be canned as cubed or ground meat. Chicken and other poultry can only be canned cubed or in pieces. To my knowledge, there is no tested recommendation for canning ground chicken.
It isn’t pretty!
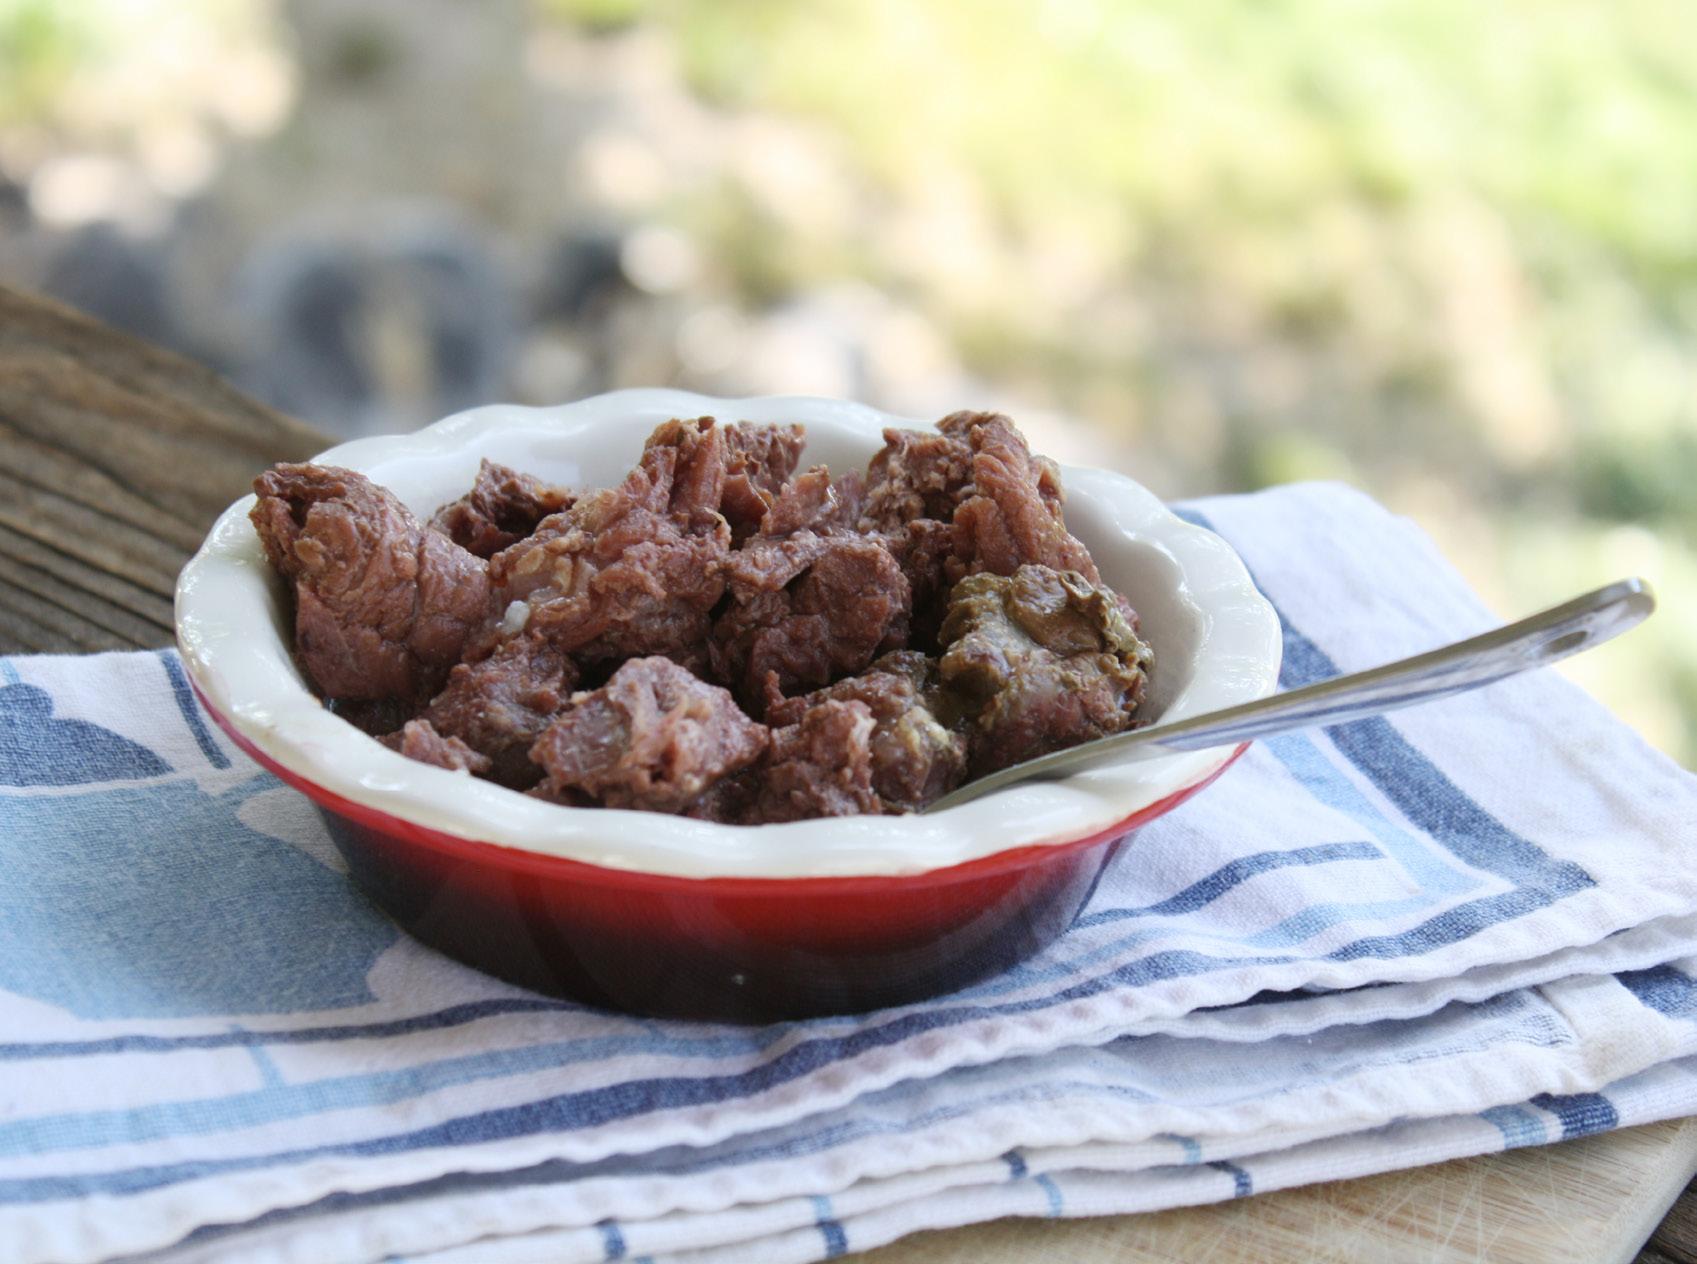
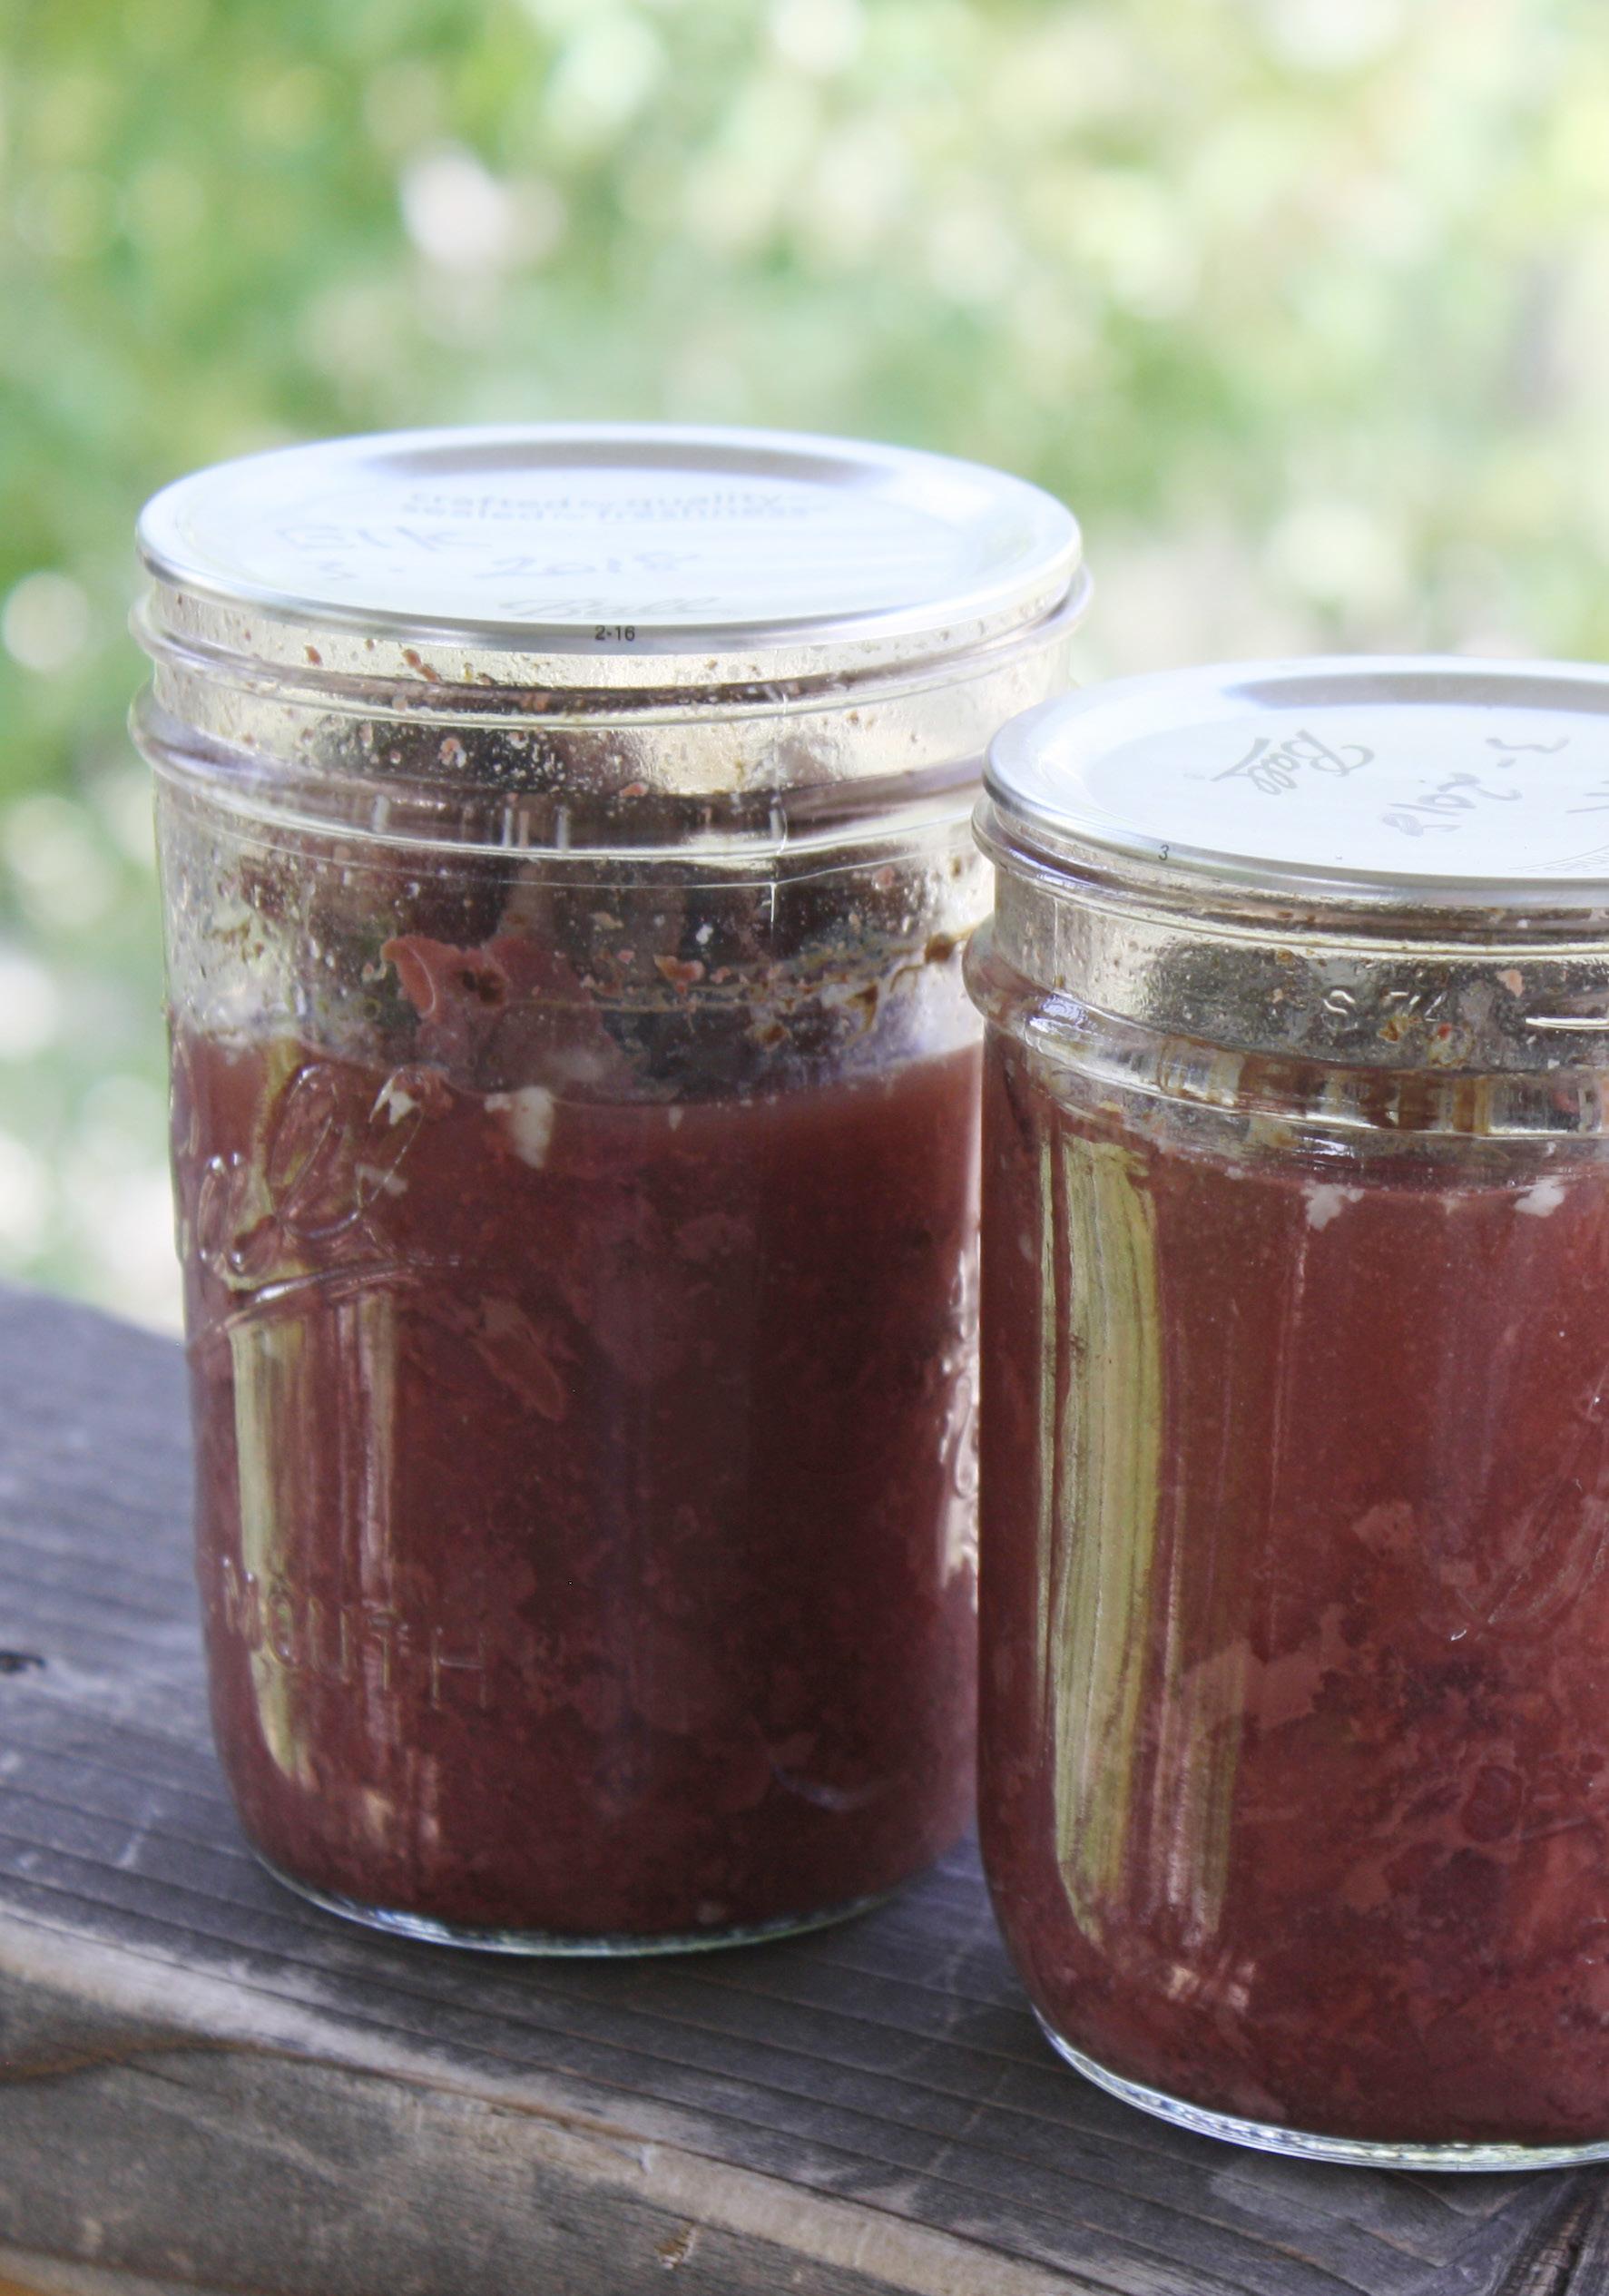
The biggest complaint I see about home canned meat is “it looks gross!” Some people really don’t like the appearance of the meat in the jars. Think about it though. It is the same as meat that you buy in cans at the store. If you purchase those little cans of tuna or chicken. That is pretty much what you are making at home. It is just more visual because of the clear jars. It is pretty difficult to get a ‘pretty’ image of meat in jars. If that bothers you then don’t look! LOL Really, you should at least give it a try.
Quick Tip
Remember, as a low-acid food, all meat must always be processed in a pressure canner.
Raw Pack or Hot Pack
When you are canning raw meat, called a “raw pack”, you do not need to add any liquid. The meat will produce its own “juice” as it processes.
If you are canning your meat when it is already browned or cooked, it is called a “hot pack.” Hot pack requires some sort of liquid be added to the jars. Tomato
juice, broth made from the meat you will pack, beef stock, or plain boiling water are all good options.
My preference is to use water and seasonings, like salt or bouillon. Occasionally, I use something else, just because I have those items on hand.
Flavorings
You can add small amounts of seasoning, onion, or garlic to approved recipes for meat. Be cautious with seasonings; they tend to get very strong in the jar. Sage is one that I’ve read gets very strong, and I’ve noticed that we don’t care for oregano when it has been canned. It gets bitter.
What About Cured Meats?
Please note: There are no tested methods for canning cured, brined, or corned meats. No canning hams, hotdogs, or other cured meats like this. It all has to do with texture differences, salt content, and processing times.
Quick Tip
“No science-based processes are available for home canning of cured, brined or corned meats.”
https://www.clemson.edu/ extension/food/canning/canningtips/55home-cured-brinedcorned-meats.html
Adding Meat to Your Recipes
Do not add meat to other canning recipes unless it is called for in that recipe. For instance, if you want to can spaghetti sauce with meat, you must use a recipe that calls for meat. Don’t just add it to any sauce recipe.
If you are canning soup, there is a little flexibility if you use the proper process for canning soup. You can find more details on the Canning Soup page xx.
REFERENCES:
https://www.clemson.edu/extension/food/canning/canning-tips/55home-cured-brined-corned-meats.html
HOMEMADE BROTH OR STOCK: WHAT’S THE DIFFERENCE?
What’s the difference between homemade chicken broth and stock? Many people (me included) use the terms “broth” and “stock” interchangeably. Some folks say they are different; some folks say they are the same.
My understanding of the difference is this...homemade stock is made from the bones or less meaty parts. The neck, back, and wings of a chicken are examples. I’ve often used the carcass from a chicken dinner or bones saved from fried chicken night. This yields a darker, richer color and flavor.
Homemade broth is made from meaty pieces. Chicken breasts, thighs, or drum sticks can all be used to make broth. The meat is boiled, then removed from the bones (save it for other uses), and then the bones are further cooked. Broth has a lighter color and flavor than stock.
Both homemade broth and stock benefit from adding vegetables during cooking. It is not required, but since I’ve started adding those veggies, my broth is so much nicer! I highly recommend giving

it a try. Simply make your broth with the vegetables and strain them out when you remove the bones and meat.
Directions for canning are the same for both chicken or beef broth. You can make your broth any way you prefer. If you already have your own method of making broth, feel free to continue to make it your own way, as long as you are not adding ingredients that are not safe for canning. In other words, do not add thickeners or noodles and do not add vegetables that are not safe for canning. Then use the canning directions included here. I’ve given directions for my method of making broth.
CANNING BROTH OR STOCK
Canning broth makes it so handy! And it is so much healthier than the salt-laden, commercial version. Save the bones from your chicken or beef roast dinner, and you can get more value for your meat purchases. The first step is making your broth, and then canning directions will follow.
Basic Broth Recipe
bones and save for other uses. (It’s great
Place bone-in meat or just bones in a stockpot. Cover with water. Bring to a boil.
Beef: Some stores will carry soup bones. You can also use bones from roasts, steaks, or other cuts of beef instead. Use about 4 pounds beef bones to 7 quarts water. Chicken or Turkey: Use pieces with the meat or just bones. Saving the carcass from a roast chicken dinner works great. Use about 6 pounds of chicken pieces to 7 quarts of water. Vegetables & Seasonings: These are optional and could include 2–3 stalks of celery and/or carrots, chopped in large chunks or 2 onions, quartered. Remove meat pieces and vegetables. colander is good for me.
Start by preparing jars and getting water in the canner heating. You want the canner hot, but not boiling, when the jars are ready to be processed. See page xx for full pressure canning instructions.
meat is cooked, about 1 hour depending on the size of your meat pieces. Use a slotted spoon or tongs to remove meat pieces. Remove the meat from the for enchiladas, casseroles, etc.)
Cut or break any large bones into shorter pieces if at all possible. Return the bones to the stockpot. Don’t be too fanatical about this step. If you are handling a thigh bone that won’t easily break, it is not a big deal. Just toss it back into the pot. The purpose is to allow the water more access to the nutritious marrow in the bones.
Simmer on low for several hours. The more you simmer, the better. 4–6 hours (or more)!
Discard. Strain broth to remove any small bones and pieces left in the broth. I have a colander that I use. You can use cheesecloth if you want a very clear broth. I don’t mind little bits, so the If you have meat pieces, simmer until
Allow the broth to cool, and then place in the fridge to cool completely. The next morning, there will be a layer of
fat floating on top. The thickness of this layer will depend on how much fat was in your meat. Remove that fat with a slotted spoon.
Now you have a nice, nutritious, homemade broth for recipes or canning projects.
Three Other Options to Cook the Bones Without a Stock Pot
Another option is to use a pressure canner/cooker at 10 pounds pressure for 1 hour. This saves a lot of time and brings out more of the nutrition from the bones. It is debatable as far as what this pressure does to the nutrition of the broth. It is still much better than that commercial broth full of salt and preservatives.
You can also use a slow cooker. If you only have a few bones, this is a great way to make broth. This is the option I go to more and more often. The broth turns out so full of gelatin from the bones that it sets up when you cool it. Super, super healthy! Place your bones in a slow cooker, cover them with water, and cook them overnight or for a full day. You can even cook them two days if you’re busy. Ask me how I know! :)
You can use an electric roaster too! Simply cook for a day and a half or so. When I tried this, I set the roaster to just under 250°F, but your roaster may be different. It should be hot enough that it’s just barely bubbling, but not so hot that the liquid splashes out.
What About Venison Stock? I don’t recommend using venison bones when making broth. According to the University of Wisconsin, “Note: Because of concerns related to Chronic Wasting Disease, it is not recommended at this time to can bone-in venison or to make broth or stock from deer bones.” I do not know how old this quote is, as there is no date on the article. But I’ve seen this mentioned in many other places as well. CWD was an issue in our area, so I made the decision that I don’t want to risk it. If you really want to make venison broth, do the research regarding Chronic Wasting Disease. It is a disease deer get that affects the spine. Not something I’d want in my stock.
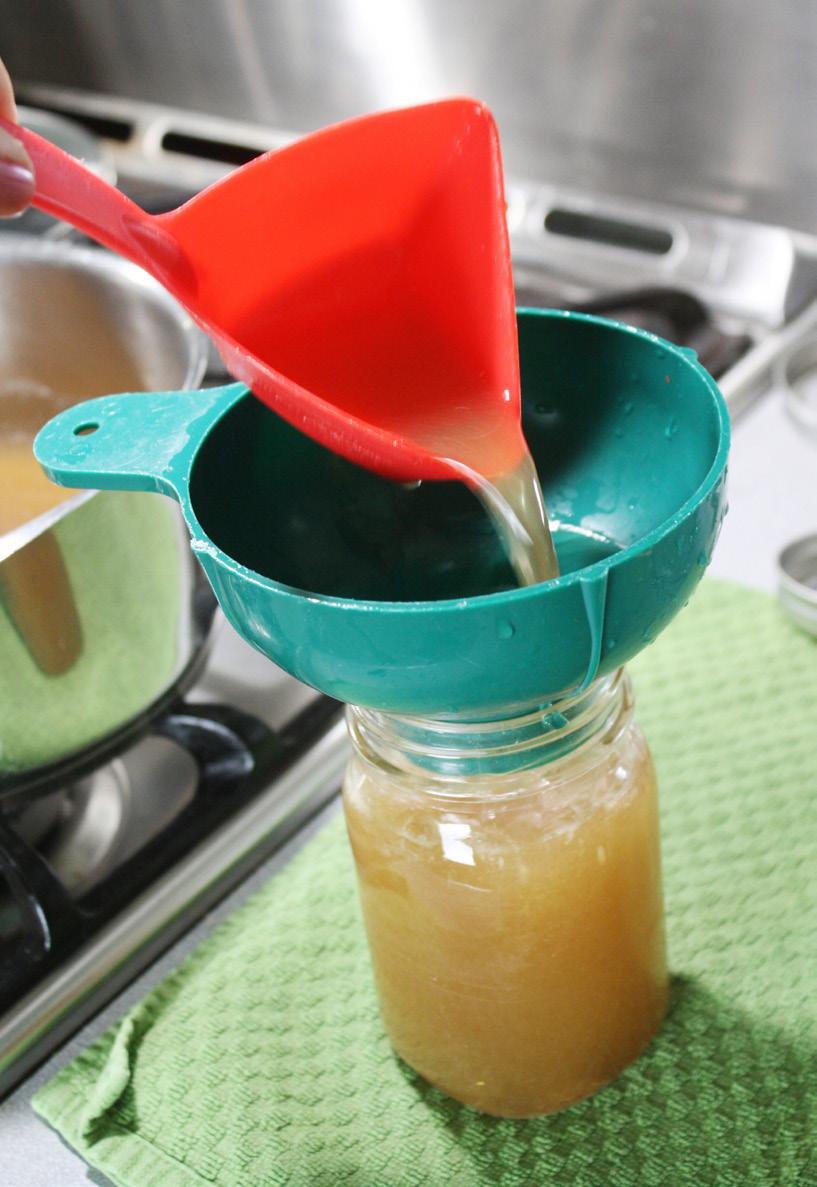
CANNING BROTH OR STOCK
For safety issues, can pumpkin or other winter squash in cubes instead of as puree. (See details below). You’ll need about 2 1/4 pounds of pumpkin or winter squash for every quart jar.
Ingredients
• Broth or stock • Canning salt (optional)
Supplies
• Pressure canner • Canning jars, seals, and rings • Canning funnel, lid lifter, and jar lifter • Ladle and bubble tool
Procedure
Start by preparing jars and getting water in the canner heating. You want the canner hot, but not boiling, when the jars are ready to be processed. See page xx for https://nchfp.uga.edu/how/can_05/
full pressure canning instructions.
1. 2.
3.
4.
5.
6. Bring broth to a boil. Pour hot broth into hot jar, leaving 1” headspace. Add salt (1 tsp. per quart or 1/2 tsp. per pint) if desired. Wipe the rim clean and place on seal and ring. Place the jar in the warm canner. Process according to directions below.
Processing Instructions (Hot Pack)
Process pints for 20 minutes or quarts for 25 minutes, adjusting for altitude.
Adjustments for Pressure Canner
Altitude
0-1,000 ft 1,001-2,000 ft 2,001-4,000 ft 4,001-6,000 ft 6,001-8,000 ft
Dial Gauge
11 pounds 11 pounds 12 pounds 13 pounds 14 pounds
Weighted Gauge
10 pounds 15 pounds 15 pounds 15 pounds 15 pounds
Adapted from Resource:
Proceed to fill all jars. stock_broth.html

REFERENCES:
https://shawano.extension.wisc.edu/healthyfamilies-communities/wild-game/
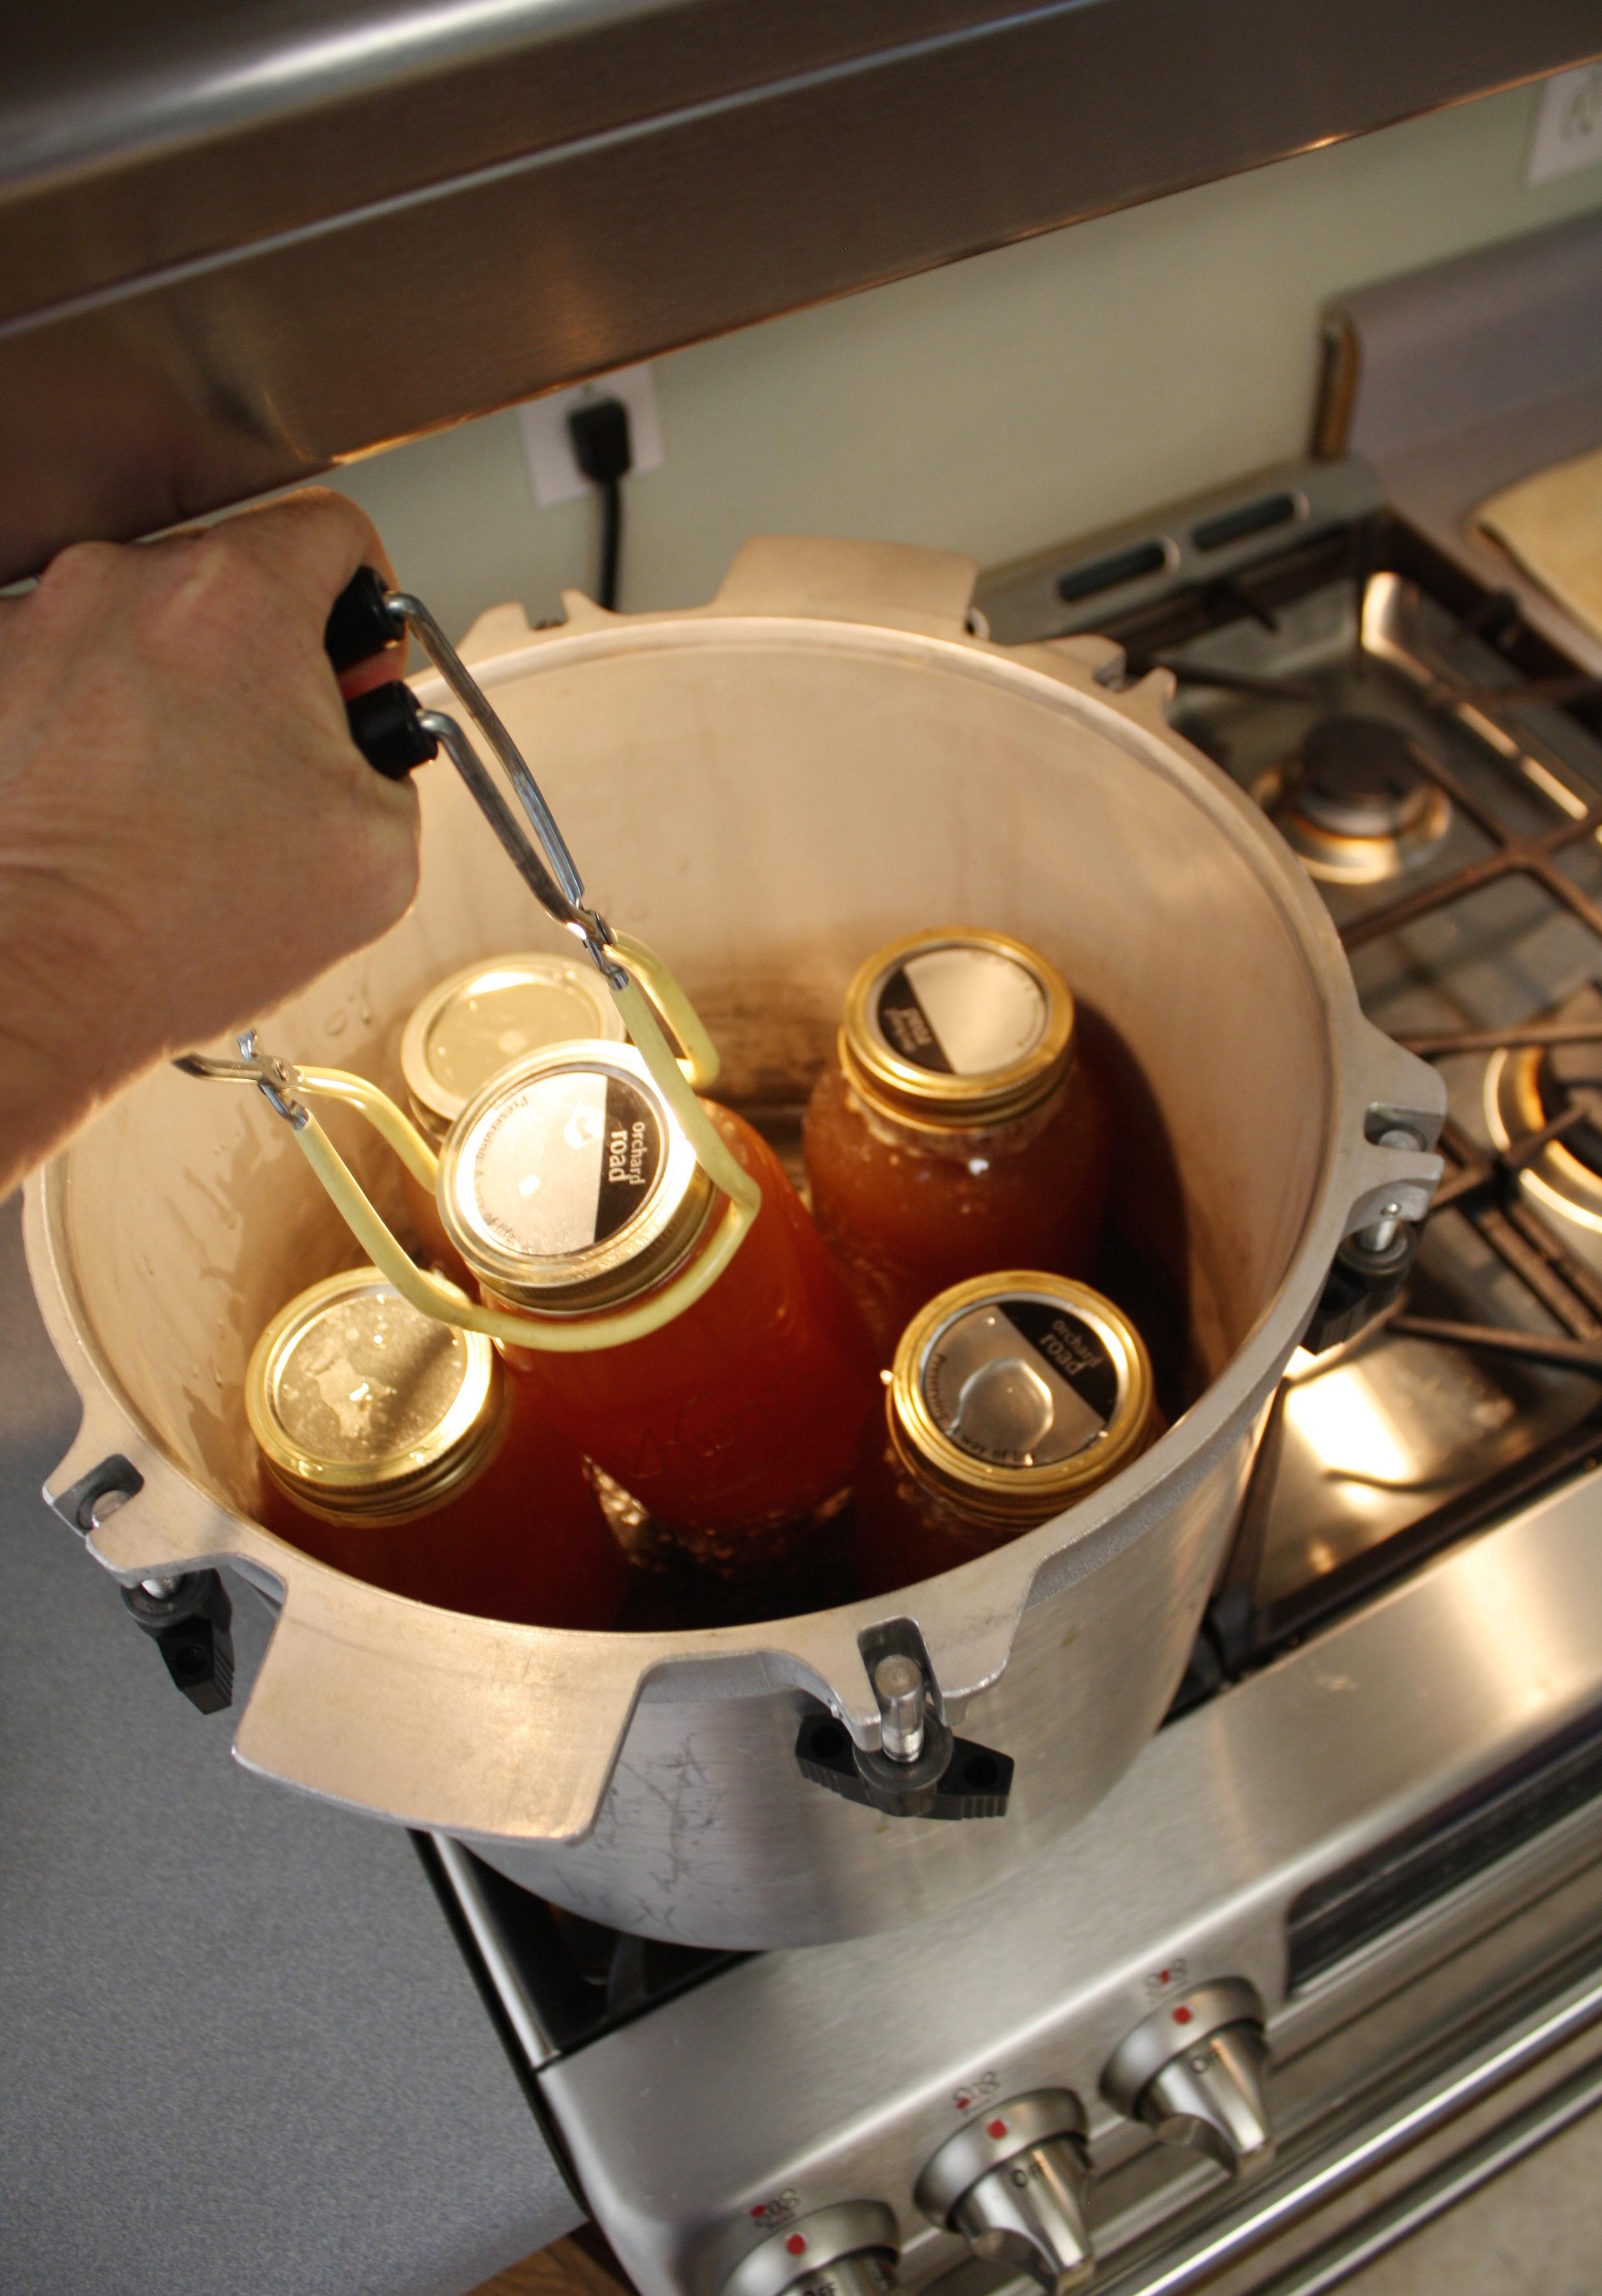
CANNING CHICKEN OR RABBIT
I’ve included both raw pack and hot pack directions, bone-in or boneless. (This recipe may be used for canning chicken or rabbit.) Pay attention to the processing time that you choose. Bone-in will be different than boneless. For Raw Pack 1. Prepare chicken. (See directions below.) 2. Pack raw chicken into hot jars, leaving 1 1/4” headspace. 3. Add salt (1 tsp. per quart or 1/2 tsp. per pint) if desired. 4. Remove bubbles, wipe the rim clean, and place on seal and ring. 5. Place the jar in the warm canner. 1. Prepare chicken.

Ingredients
• Chicken or rabbit (boneless or bone-in) • Canning salt (optional) • Water or broth
Supplies
• Pressure canner • Sharp knife or kitchen shears • Canning jars, seals, and rings • Canning funnel, lid lifter, and jar lifter • Ladle and bubble tool
Procedure
Start by preparing jars and getting water in the canner heating. You want the canner hot, but not boiling, when the jars are ready to be processed. See page xx for
Proceed to fill all jars. 6. Process according to below directions.
For Hot Pack full pressure canning instructions.
(See directions below.) 2. Simmer chicken until 2/3 cooked. 3. Pack chicken into hot jars, adding boiling water or broth. Leave 1 1/4” headspace. 4. Add salt (1 tsp. per quart or 1/2 tsp. per pint) if desired. 5. Remove bubbles, wipe the rim clean, and place on seal and ring. 6. Place the jar in the warm canner.
Proceed to fill all jars. 7. Process according to below directions.
Processing Times for Bone-In Chicken (Raw Pack or Hot Pack)
Process pints 1 hour 5 minutes or quarts 1 hour 15 minutes, adjusting for altitude.
Processing Times for Boneless Chicken (Raw Pack or Hot Pack)
Process pints 1 hour 15 minutes or quarts 1 hour 30 minutes, adjusting for altitude
Altitude
0-1,000 ft 1,001-2,000 ft 2,001-4,000 ft 4,001-6,000 ft 6,001-8,000 ft

Dial Gauge
11 pounds 11 pounds 12 pounds 13 pounds 14 pounds
Weighted Gauge
10 pounds 15 pounds 15 pounds 15 pounds 15 pounds
SHARON’S TIPS FOR CANNING CHICKEN OR RABBIT
How to Prepare Chicken for Canning If you are using freshly butchered meat:
Chicken should be chilled for 6 to 12 hours before canning. Rabbits should be soaked 1 hour in water containing 1 tablespoon of salt per quart, and then rinsed.
Separate pieces at the joints if needed. De-bone if you prefer. None of the sources I’ve checked mention skinning the chicken pieces, but I don’t care for soggy chicken skins, so I remove mine.
Boneless or Bone-In?
My preference is to do chicken breasts as boneless and leave drumsticks or thighs with the bone. I take the skins off all of these. These directions work for rabbit just the same. Separate meat at the joints.
Raw Pack or Hot Pack?
I used to do all my meat as a raw pack. However, more recently I’ve been using a hot pack method with chicken. Raw packed meat produces its own broth from the meat. Chicken doesn’t produce as much broth. So if you go raw pack, the liquid will be quite low in the jar. Hot pack chicken has a better quality, in my opinion.
Some Raw Pack Tips
Adding liquid is optional for raw pack. The Ball Book states to add liquid if desired, but the NCHFP does not add liquid to raw pack. You can use either plain water or broth. Carefully remove air bubbles from the raw pack. It tends to trap air, and you want to get as much out as you can. Also, jar rims can get pretty messy, so be sure you clean them well before adding the lids.
Canning Drumsticks?
For drumsticks, it works well to pack 3 or 4 legs with the meaty sides down. Then add 2 or 3 with the meaty sides up. This way, the drumsticks nestle together and fit the jar nicely. The number of drumsticks will vary greatly depending on the size.
Adapted from Resource:
https://nchfp.uga.edu/how/can_05/ chicken_rabbit.html
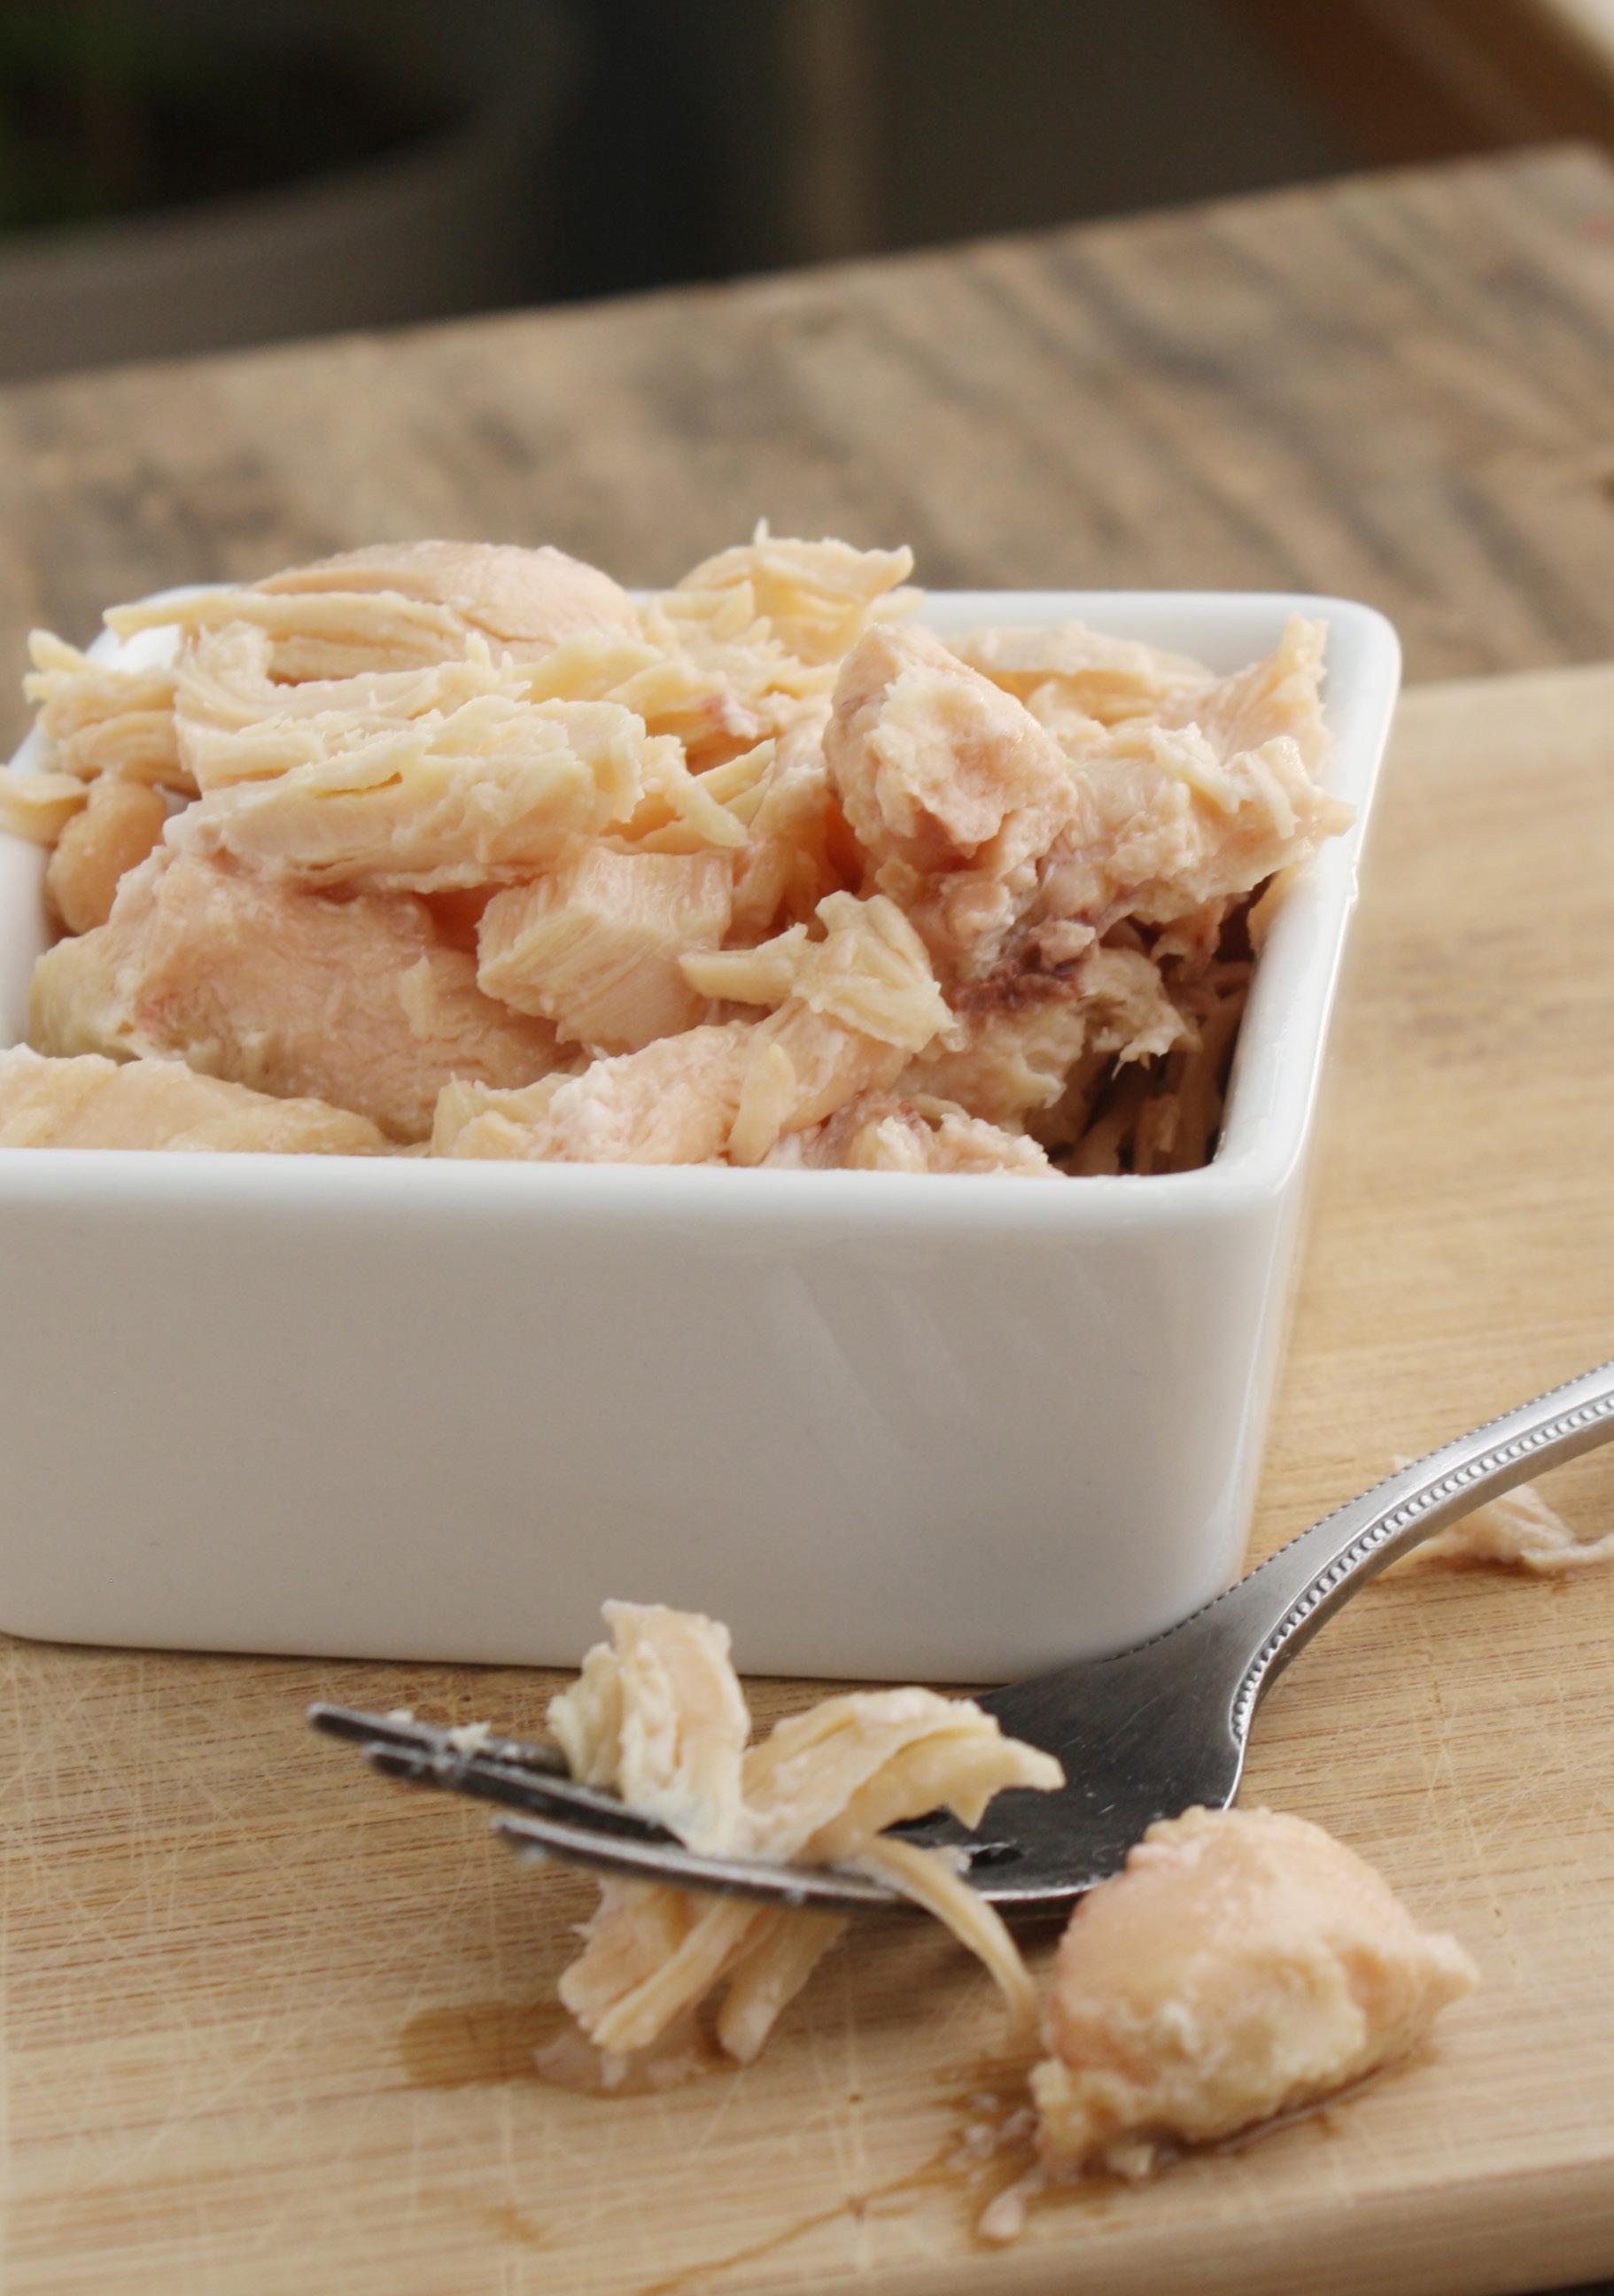
CANNING CUBED MEAT
This canned meat is great for making stews or you can add gravy and serve over mashed potatoes or hot noodles. You’ll need about 2 pounds of meat per a quart jar. These directions are for bear, beef, lamb, pork, veal, and venison.
Ingredients
below directions.
• Meat • Boiling water or broth (hot pack only) • Canning salt (Optional. Use 1/2 to 1 tsp. per pint or 1–2 tsp. per quart.)
Supplies
• Pressure canner • Canning jars, seals, and rings • Canning funnel, lid lifter, and jar lifter • Ladle and bubble tool
Procedure
Start by preparing jars and getting water in the canner heating. You want the canner hot, but not boiling, when the jars are ready to be processed. See page xx for full pressure canning instructions.
For Raw Pack 1. Prepare chicken. (See directions below.) 2. Pack raw chicken into hot jars, leaving 1 1/4” headspace. 3. Add salt (1 tsp. per quart or 1/2 4.
5.
6. Remove bubbles, wipe the rim clean, and place on seal and ring. Place the jar in the warm canner. Proceed to fill all jars. Process according to tsp. per pint) if desired.

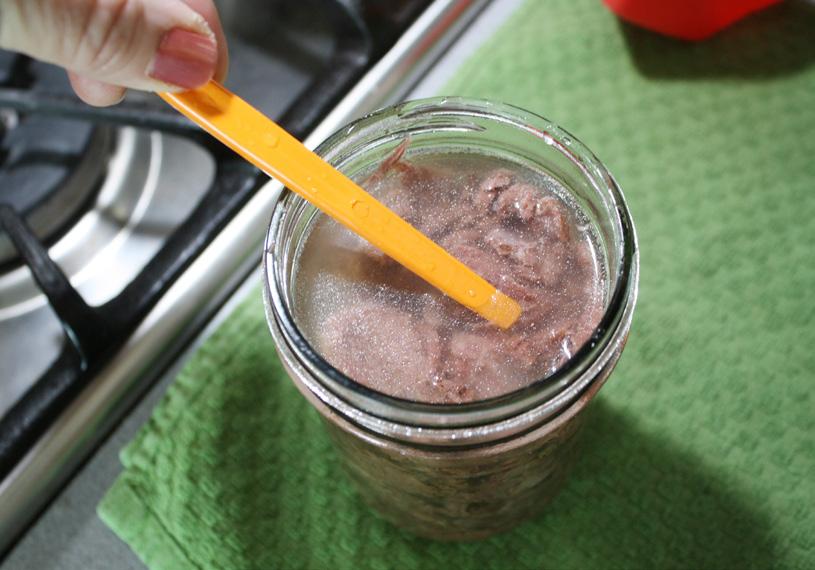
For Hot Pack 1. Trim excess fat or gristle from the meat. 2. Slice meat across the grain into 1” thick pieces. Cubes or strips are fine. 3. Add canning salt to each jar. 4. Lightly brown cubed meat. 5. Once heated through, use a slotted spoon to pack meat into hot jars. 6. Distribute meat drippings evenly into all jars. 7. Top off jar with boiling water or liquid, leaving 1” headspace. 8. Remove bubbles, wipe the rim clean, and place on seal and ring. Proceed to fill all jars. 9. Place the jars in the warm canner. 10. Process according to below directions.
Processing Instructions (Raw Pack or Hot Pack)
Process pints for 1 hour 15 minutes or quarts for 1 hour 30 minutes, adjusting for altitude.
Adjustments for Pressure Canner
Altitude
0-1,000 ft 1,001-2,000 ft 2,001-4,000 ft 4,001-6,000 ft 6,001-8,000 ft
Dial Gauge
11 pounds 11 pounds 12 pounds 13 pounds 14 pounds
Weighted Gauge
10 pounds 15 pounds 15 pounds 15 pounds 15 pounds
SHARON’S TIPS FOR CANNING CUBED MEAT
These directions are for bear, beef, lamb, pork, veal, and venison. I’ve personally only canned beef and venison. I would love to process a bear sometime! A small amount of onion or peppers is
Wide Mouth Jars
I recommend using wide mouth jars for meat, because meat tends to leave a residue on the jars. My dishwasher does not remove this residue. The wide mouth design makes cleaning up much easier.
Managing Gamey Flavors
If you are canning venison or elk, the taste of your meat will depend entirely on how you handle the meat from the time it is killed in the field. Handle it carefully. and does not require extra liquid. The
Aging and butchering is something everyone has a different opinion on so do your research.
The NCHFP makes the suggestion to soak venison in salt water prior to canning:
Adapted from Resource:
“Soak strong-flavored wild meats for 1 hour in brine water containing 1 tablespoon of edu/how/can_05/strips_cubes_chunks. html. I never do this and I have no issues with flavor. But if you are working with a tough, old bull elk, it might be helpful. You can also add bouillon to your jars if you like. Be sure it is plain bouillon. Some varieties that come in pouches are more of a soup base and may have added ingredients.
another popular addition. You can also use tomato juice instead of water with the hot pack.
Hot Pack vs. Raw Pack
Hot pack is precooked meat. It will require a liquid. Raw pack is uncooked meat will create its own juice
salt per quart. Rinse.” https://nchfp.uga.
https://nchfp.uga.edu/how/can_05/ strips_cubes_chunks.html
https://fyi.extension.wisc.edu/ safefood/2017/10/30/safe-preservingsafe-substitutions-when-canning/ ?ss_redir=1
CANNING FISH
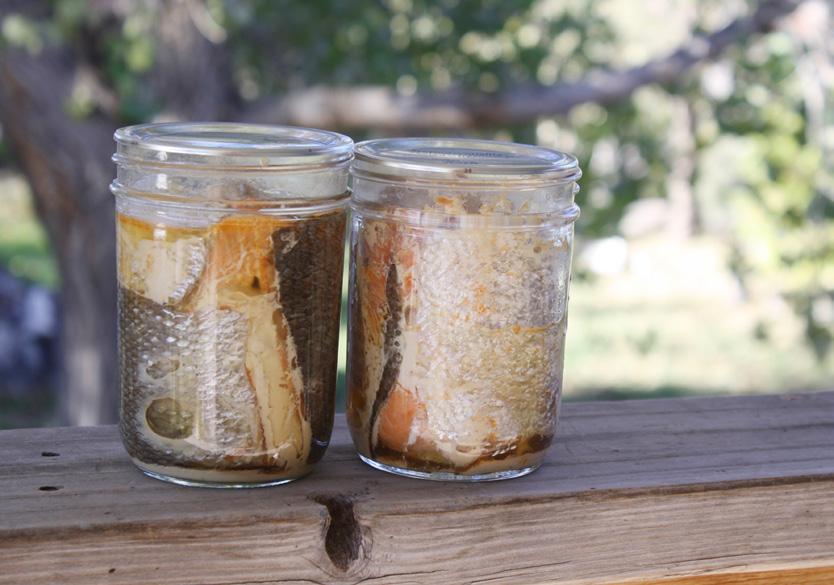
These instructions are for canning fish like salmon, blue, mackerel, trout, steelhead, and fatty fish. This is not for smoked fish or for tuna; they will have different instructions. You’ll need approximately 1 to 1 1/2 pounds of fish for every pint jar. jar-length pieces. (Optional. Use 1 cup salt to 1 gallon water.) sides next to glass and leaving 1” headspace. your seal and ring.
Ingredients
• Fish • Canning salt (optional)
Supplies
• Pressure canner • Canning jars, seals, and rings • Canning funnel, lid lifter, and jar lifter • Ladle and bubble tool
Procedure
Start by preparing jars and getting water in the canner heating. You want the canner hot, but not boiling, when the jars are ready to be processed. See page xx for full pressure canning instructions.
1. Clean fish, removing head, tail, fins, and scales. (or purchase pre2.
3.
4. 5.
6.
7.
8. Wash well and cut fish into Soak fresh fish in salty brine. Drain fish for 10 minutes. Pack fish into hot jar, putting skin Wipe the rim clean and place on cleaned fish)
Place the jar in the warm canner. Proceed to fill all jars. Process according to below directions.
Processing Instructions (Raw Pack)
Process pints or half pints only for 1 hour and 40 minutes. Adjusting for altitude according to the chart below.
Adjustments for Pressure Canner
Altitude
0-1,000 ft 1,001-2,000 ft 2,001-4,000 ft 4,001-6,000 ft 6,001-8,000 ft
Dial Gauge
11 pounds 11 pounds 12 pounds 13 pounds 14 pounds
Weighted Gauge
10 pounds 15 pounds 15 pounds 15 pounds 15 pounds
SHARON’S TIPS FOR CANNING FISH
Jar Size
These directions are for half pints or pints. I’ve found it more convenient to can in half pint jars. If you think about it, the cans of fish you buy in the store are often small. Of course, it all depends on how you use it in recipes. If you want to can fish in quart jars, there are some extra steps that must be taken. I do not cover that in this book. The National Center for Home Food Preservation or the Alaska Extension Service has these instructions.
Prepping the Fish
If you have fresh fish, you’ll need to remove the heads, tails, and scales or just purchase them already prepped. The Ball Blue Book and one extension website suggests soaking your fish in a salty brine for 1 hour. Use 1 cup of salt to 1 gallon of water. This brine firms the flesh of the fish and creates a better result. The NCHFP does not have this step, so it would be optional. If you do not brine, you can add salt to your jars, using 1 tsp. per pint or 1/2 tsp. per half pint.
Smoked Fish or Tuna
Smoked fish, tuna, or any other fatty fish needs to be processed differently than plain, raw fish. In fact, you’ll want to use a different process for smoking your fish in preparation for canning. Once again, I do not cover that in this book. The National Center for Home Food Preservation has instructions for any fatty fish like tuna or smoked fish.
How Do You Use Canned Fish?
Use home canned fish just like you would commercially canned fish: in sandwiches, salads, salmon patties, etc. Here is how I make salmon patties.
1 pint salmon 1 egg 3 Tbsp. some sort of flour 1/8 tsp. onion powder Salt and pepper to taste. Other seasonings (optional) 3 Tbsp. oil (for frying)
Drain salmon, discard skins and crumble salmon. Add other ingredients. Mix well and hand make into patties. Fry patties in oil of choice until browned. Flip over to brown the other side. Serve with a side veggie and some macaroni and cheese.
Adapted from Resource:
https://nchfp.uga.edu/how/can_05/fish. html
Ball Blue Book Guide to Preserving.
https://www.canr.msu.edu/news/ preserving_fish_through_canning
CANNING GROUND MEAT
When you are canning ground meat, you need to precook the meat so that it will remain loose in the jar. Ground meat can also be shaped into meatballs or patties for your jars. Do not just fill your jar full with ground meat. Precooked loose, meatballs or patties only please.
Ingredients
• Ground beef, pork, elk, or venison • Canning salt • Liquid to pack meat (water, broth, or tomato juice)
Supplies
• Pressure canner • Canning jars, seals, and rings • Canning funnel, lid lifter, and jar lifter for altitude.
• Ladle and bubble tool • Cutting board • Heavy skillet
Procedure
Start by preparing jars and getting water in the canner heating. You want the canner hot, but not boiling, when the jars are ready to be processed. See page xx for full pressure canning instructions.
1.
2.
3.
4. Brown meat lightly. Remove excess fat. Or shape into meatballs or patties and lightly brown. Remove excess fat. Add liquid (broth is best!) to almost Bring back to a boil. 5.
6.
7.
8.
9. Add canning salt (1 tsp. per quart or 1/2 tsp. per pint) if desired. Pack meat mixture into hot jar, leaving 1” headspace. Remove bubbles, wipe the rim clean, and place on seal and ring. Place jar in the warm canner. Proceed to fill all jars. Process according to below directions.
Processing Instructions (Hot Pack)
Process pints for 1 hour 15 minutes or quarts for 1 hour 30 minutes, adjusting cover meat.
Adjustments for Pressure Canner
Altitude
0-1,000 ft 1,001-2,000 ft 2,001-4,000 ft 4,001-6,000 ft 6,001-8,000 ft
Dial Gauge
11 pounds 11 pounds 12 pounds 13 pounds 14 pounds
Weighted Gauge
10 pounds 15 pounds 15 pounds 15 pounds 15 pounds
SHARON’S TIPS FOR CANNING GROUND MEAT
Wide Mouth Jars
I recommend using wide mouth jars for meat, because it tends to leave a residue on the jars. My dishwasher does not remove this residue. The wide mouth makes cleanup much easier.
Additions
You can add beef bouillon to your jars if you like. Be sure it is plain bouillon, as some varieties that come in pouches are more of a soup base and may have added ingredients. Onions or peppers are other popular additions. The liquid can be broth, water, or tomato juice.
Some people like to add ground pork to their venison. Personally, I’ve never done that, but it is an option. You can also shape your ground meat into patties or meatballs and can it that way. Simply shape your meat, brown it lightly, and pack it in the jars, adding liquid to the top. This does not mean packing your entire jar with raw meat. There may be density issues if it is packed completely. The meat must be precooked, whether it is loose, in meatballs, or in patties.
Adapted from Resource:
https://nchfp.uga.edu/how/can_05/ ground_chopped.html
https://fyi.extension.wisc.edu/ safefood/2017/10/30/safe-preservingsafe-substitutions-when-canning/ ?ss_redir=1
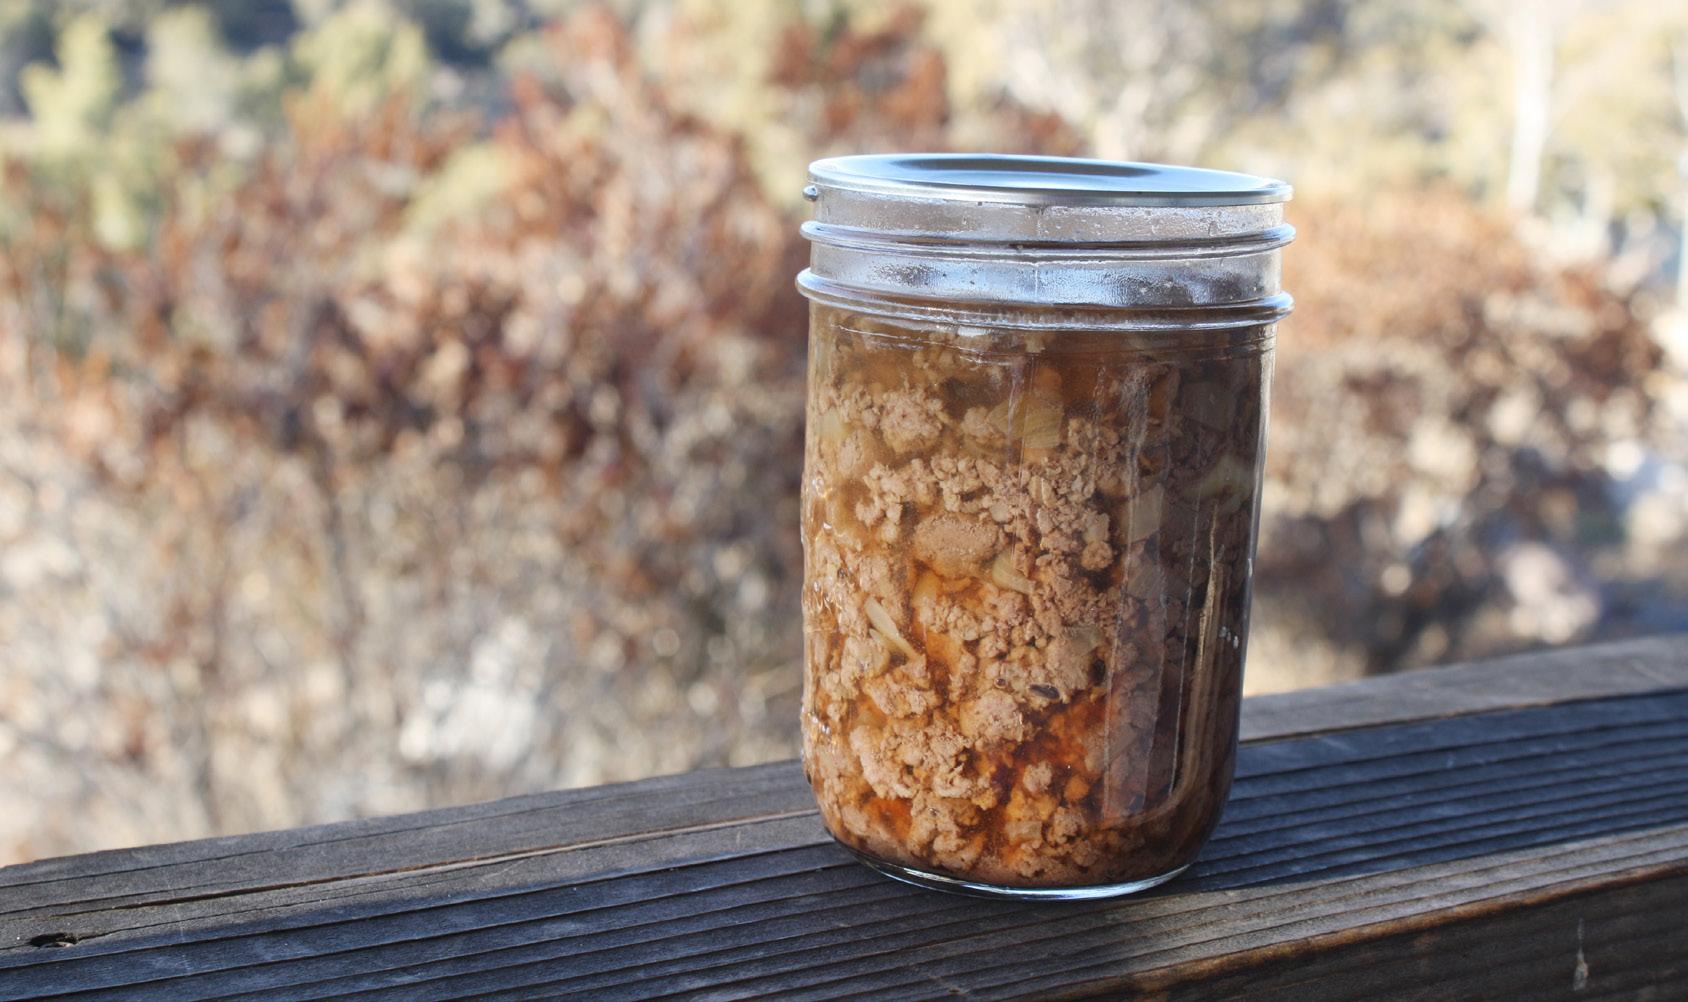
CANNING SOUP
Canning soup at home is a wonderful way to have quick lunches ready! These instructions will help you adapt your favorite soup recipe for canning purposes. Please look at the notes below to see important safety guidelines.
Ingredients
• Meats (like beef, seafood, poultry, etc.) • Vegetables & beans • Broth (like chicken broth, beef broth, canned tomatoes, water, etc.) • Spices & seasonings
Supplies
• Pressure canner • Canning jars, seals, and rings • Canning funnel, lid lifter, and jar lifter • Ladle and bubble tool
Procedure
Start by preparing jars and getting water in the canner heating. You want the canner hot, but not boiling, when the jars are ready to be processed. See page xx for full pressure canning instructions.
1.
2.
3.
4. Precook meats by covering with water or broth. Boil until tender. Remove bones. Precook vegetables according to hot pack instructions for that vegetable. Precook beans by covering with water by several inches. Boil for 2 minutes. Remove from the heat, cover, and let soak for 1 hour. Drain. Combine all solid ingredients with 5. 6.
7.
8.
9.
10. broth, tomatoes, or water. You will need at least 2 times more liquid than solid ingredients. Bring to a boil for 5 minutes. Fill jar half of the way with solid ingredients. Top off jar with broth, leaving 1” headspace. Remove bubbles, wipe the rim clean, and place on seal and ring. Place jar in the warm canner. Proceed to fill all jars. Process in a pressure canner according to the directions below.
Processing Instructions (Hot Pack)
Process pints for 60 minutes or quarts for 75 minutes, adjusting for altitude. (If canning with seafood, process pints or quarts for 100 minutes.)
Adjustments for Pressure Canner
seasonings and your choice of
Altitude
0-1,000 ft 1,001-2,000 ft 2,001-4,000 ft 4,001-6,000 ft 6,001-8,000 ft
Dial Gauge
11 pounds 11 pounds 12 pounds 13 pounds 14 pounds
Weighted Gauge
10 pounds 15 pounds 15 pounds 15 pounds 15 pounds
SHARON’S TIPS FOR CANNING SOUP
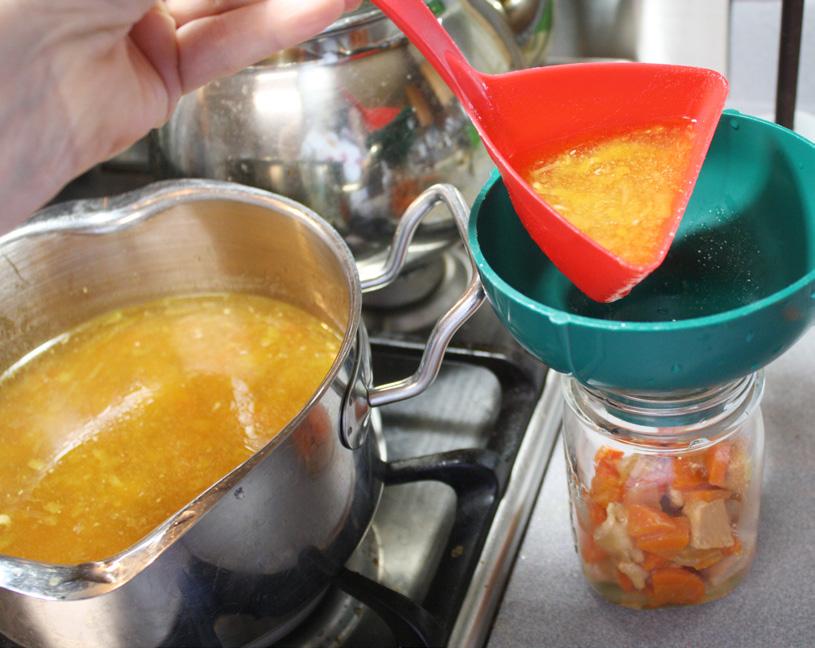
Important Safety Notes
Do not add noodles, rice, flour, cream, or any dairy or thickeners. All of these can be added when you heat the soup to serve it. The only ingredients you should use are ingredients that are safe to can. That means since cabbage does not have a tested method of canning just by itself, it is not considered an acceptable ingredient. (I know! I hate that!) Sauerkraut is a pickled item, so that is different than canning plain cabbage.
Pureed Soups?
It is not recommended that you can pureed-style soups, so I do not give directions for this. However, what I would do is just can your soup chunky. When you open the jar to serve it, puree it at that point. Simple solution! Remember... no creamy style though. Add the cream when you open the jar.
Quick Tip
Remember, just because you see something canned at the store does not mean you can do it at home. Commercial processes are completely different than what we can do in our own kitchens. Different equipment and different processes, so it is comparing apples to oranges. You need to work with what we are able to do with home canners.
Seasonings
Remember, some seasonings get strong when canned. For instance, sage is one that is noted for getting too strong. If you use bay leaves in your soup, be sure and remove them before you jar it up. The particular jar that ends up with the leaf will be very strong if you leave it! I keep our seasonings very simple.
Adapted from Resource:
https://nchfp.uga.edu/how/can_04/ soups.html
END NOTES
Thanks
Wow, putting this book together has been a trip. Without the help and encouragement of others, I would have never tried it and I would have missed out on all of the fun!
First, thanks, Mom, for giving me your pressure canner all those years ago. Who knew where that was going to lead, eh?!
Thanks also to my guys. My husband Tim and my 4 sons are who make my gardening and canning possible. They are ones who do all the fence building and rock picking. They also take a big part in the ever-fun task of weed pulling. Let’s see what else? Bean snapping, corn husking, and cherry pitting. Taste testing, kitchen cleaning and floor sweeping. And thank you, guys, for allowing me the time needed to build this business of mine. I love you more than you know.
Much thanks also to my assistants, Rachel Abernathy and Lou Valdeviezo. These two ladies keep me on track, sort through my disorganization, finding
images, outlines, and details. So many details come out when these two are asking me questions!
A huge thank you to all the people who visit me at SimplyCanning.com. When I started this site, I had no idea how big it would become or how much fun it would be “meeting” all of you.
Happy canning! And have a great day.
WANT TO LEARN MORE?
Reading instructions in a book can be helpful when you are learning something new. But the reality is, it’s hard sometimes to envision how things actually work, especially what things are supposed to look and sound like. Sometimes, you wish you could just see it instead. While I’ve tried to provide lots of pictures, charts, and step-by-step directions in this book to make it easier for you, that only goes so far.
The solution...video-based instruction.
Over the years, I’ve interacted with many people through my website and on social media. I’ve had local friends who have asked me to visit them and teach them canning in their own kitchens! I’d love to do that for others, but of course, I can’t do it for everyone around the world! :)
Simply Canning School is my paid, online training program designed to SHOW canning in action. I’ve filmed step-by-step videos straight from my kitchen, just to walk you through entire canning projects. You don’t have to wonder what it looks (or sounds) like!
If you still feel like you need more, please visit me there. The video series might just get you started.
CanningSchool.com
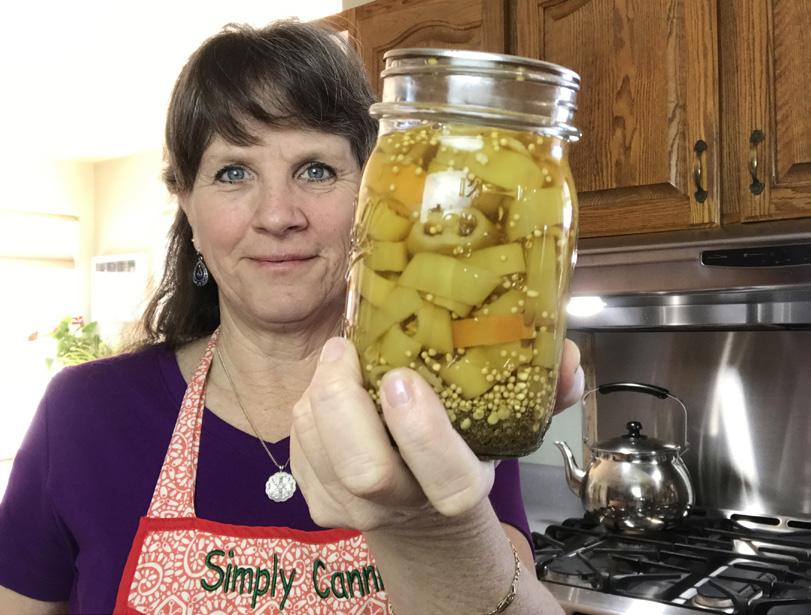
What others are saying...
Shannon says:
“Hi Sharon - my husband purchased us your Canning Basics videos, and I’ve really been enjoying them. You’re a great teacher and it’s easy to get excited about all the possibilities since your videos make me feel like I can actually do this thing”
Shae says:
“I so love your Canning School - especially as a first year canner! Thank you.”
Pat Brownlee says:
“I am so grateful for your encouragement and guidance this past canning season. We are enjoying the beans, tomatoes, jams, sauerkraut, apples, and the soup and stew recipes and all of the other goodies. You are a treasure and I hope to call you a friend.”
MASTER LIST OF SOURCES:
https://extension.umn.edu/
https://nchfp.uga.edu/
http://extension.usu.edu/
http://winnebago.uwex.edu/
https://www.canr.msu.edu/
https://extension.psu.edu/
Ball Low-Sugar Pectin insert
Ball Blue Book Guide to Preserving – June 1, 2004
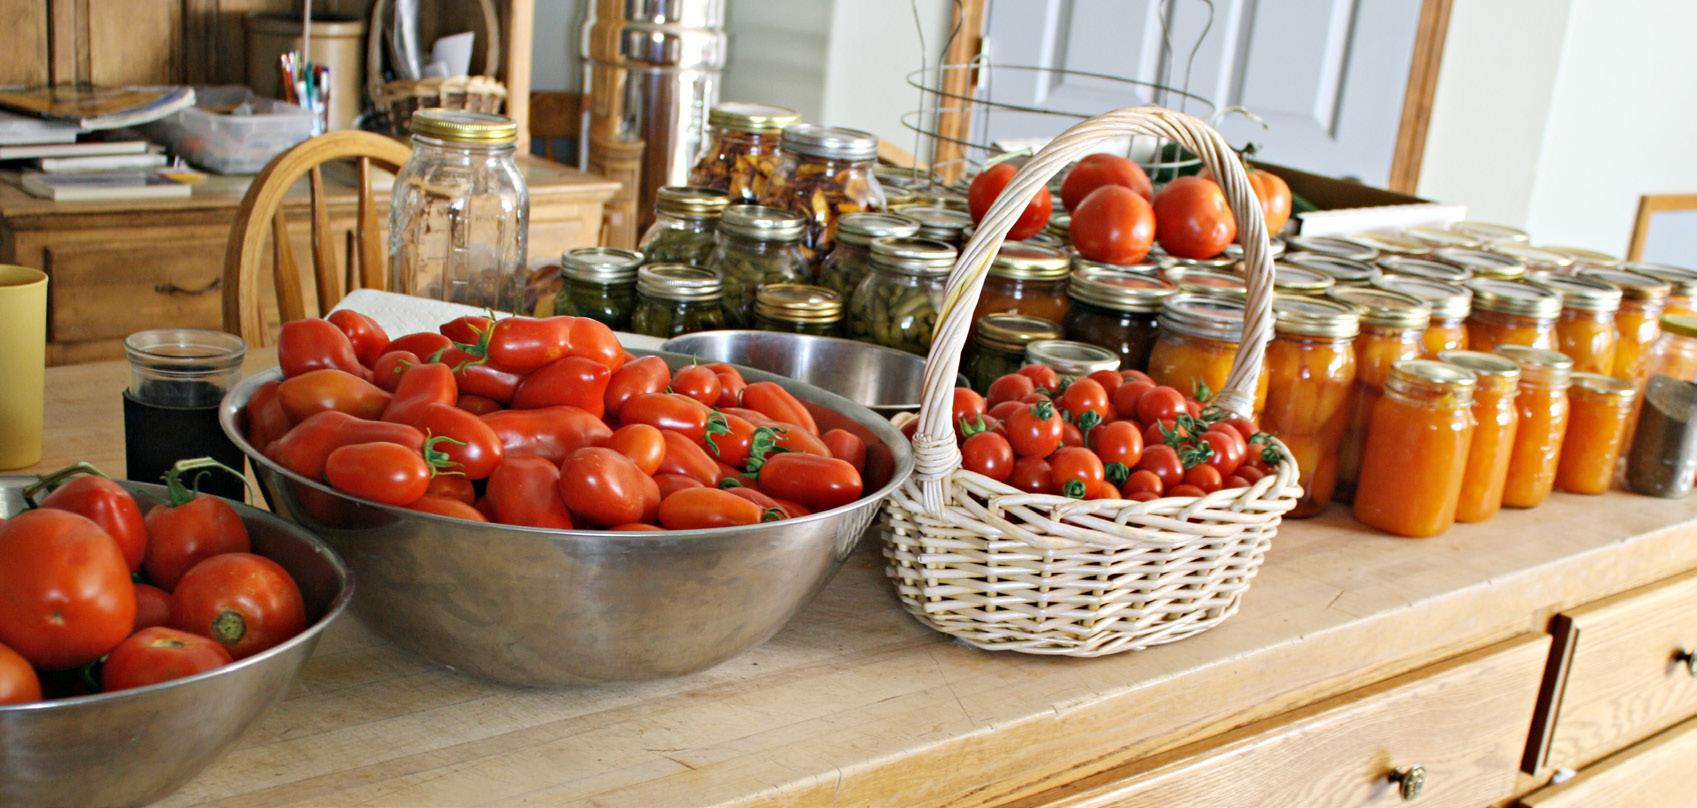
Pomona’s Pectin package directions
http://www.wyomingextension.org/
https://extension.oregonstate.edu/
https://extension.colostate.edu/
https://shawano.extension.wisc.edu/
https://fyi.extension.wisc.edu/
https://www.clemson.edu/
https://www.cdc.gov/botulism/index.html


