1 minute read
DYI Holiday Decorating, Au Natural


By Jenny Rhodenizer, Director of Marketing & Communications
I love making things from nature.
It allows me to save mementos from my garden, and reimagine them for my hygge (cozy) home. I was inspired by a twig star ornament I purchased a few years ago from the Garden Club of Toronto’s booth at the TBG Holiday Market. I used it as a prototype to make my own collection of twig ornaments. My 11-year old daughter loves to get crafty too, and this was a great project to work on together.
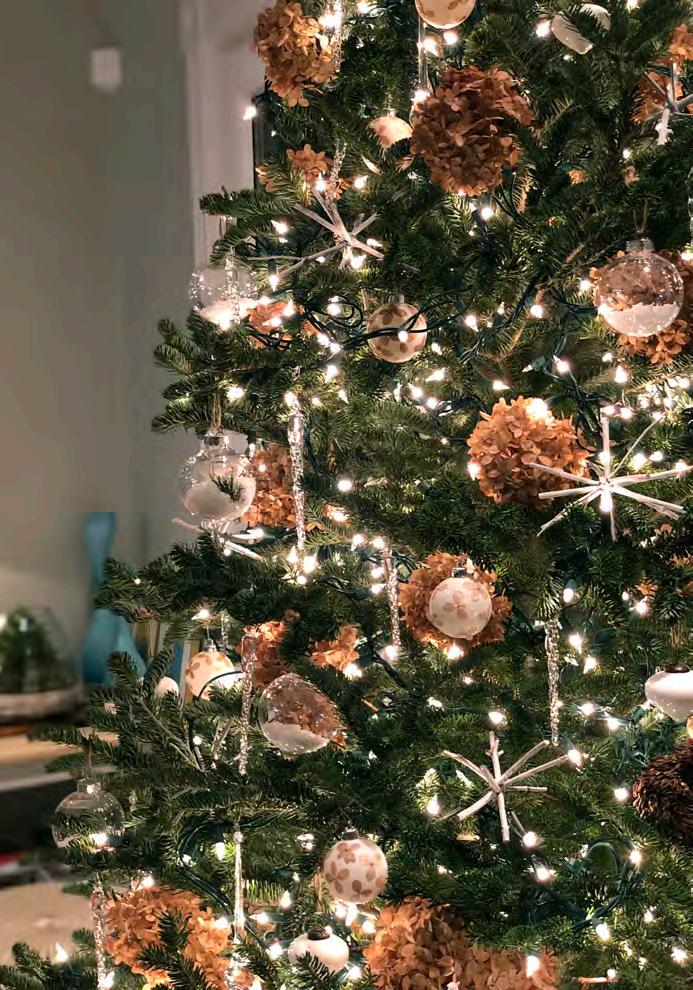
I also enjoy saving dried flowers. They can be added to a Christmas tree to fill in the gaps and add colour or texture. I have a hydrangea limelight bush which I clip and dry in the fall. Some years I will also sprinkle the blooms with a little glitter before tucking them into the tree. Pressed flower petals can be used to decoupage old ornaments to create “new” botanical bobbles to add to your tree or hang from the chandelier.
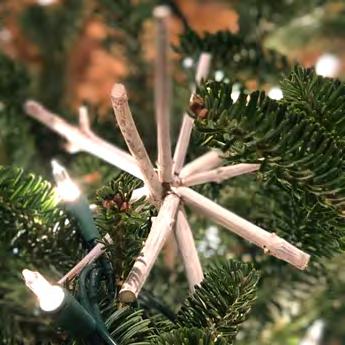
Twig Start Ornament
How to Create a Twig Star Ornament
Supplies needed:
• Twigs
• Pruners
• Ruler
• Glue gun
• Acrylic paint and brush
Cut a few branches from a tree then cut them to the size you want. Cut twigs to approximately 12 cm (5 in) in length. Divide and organize them by thickness and shape to help make the star shapes more balanced when you are assembling.
Start by creating a cross, and glue these twigs together in the centre to make a stable frame. Since we’re using hot glue, it will dry quickly.
Then angle twigs in all directions to create a three-dimensional star, gluing one twig at a time.
Once your star is completed, brush it with one or two coats of paint.
The twig ornaments are very light, so I just nestle them on top of the tree branches once it’s been decorated and I find they stay in place. They would look great on a gift or also on a wreath.