4 minute read
Generating Reports
Getting Started
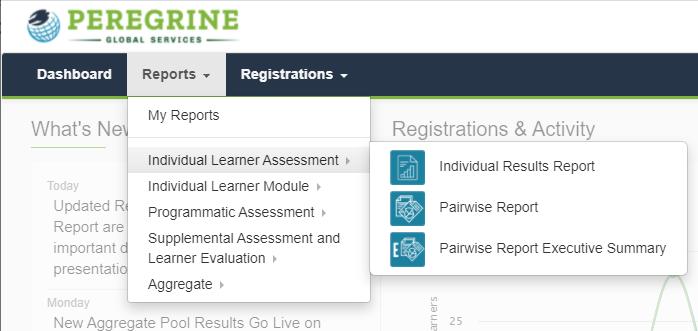
From the Client Admin Dashboard, go to Reports. Select your report category and a report from the dropdown menu.
Advertisement
Using the Report Wizard
Use the numerated tabs of the Report Wizard to complete the steps for report generation:
STEP 1. Choose your Assessment Period. Assessment completion dates will fall within the range you choose. For the Longitudinal Report, you will choose 2 to 4 time periods. Choose your Assessment Category, i.e., Business (BUS). If you have report criteria saved, you can click Load Report Criteria now.
STEP 2. Select an Academic Degree Level. Select Your Comparison Type – Assessments is selected by default. Should you desire to run your report by Program or Cohort, you may choose one program or cohort at a time. If you do select more than one, all the data will be combined into one report. Comparison of program or cohort data can only be done using the Program or Cohort report.
STEP 3. Select one or more Assessments. Choose the exam(s) for which you want to see results. If your Comparison Type was Program or Cohort, you will select the program or cohort for which you want to see results.
STEP 4. Select your External Benchmark(s). You may choose one External Comparison for the Internal Analysis Report, and up to five External Comparisons for the External Comparison, Program or Cohort, and Longitudinal reports. Depending on the data available for your assessment type and academic degree level, the aggregate pool categories to benchmark against include educational accreditation agencies, program delivery modalities, general demographics, and regional accreditors.
STEP 5. Report Filters. The Type of Registrants will default to Learner. Include ALL Exams or select Filter Exams Outliers by Completion Time. Using the slider, you can select the range of exam completion times (in minutes) to include in your analysis. For example, only include exams where the completion time is between 30 and 300 minutes. By default, sub-topical information will be included in your report, if applicable. Toggle No if you do not want to include sub-topic data in your report.
STEP 6. Review your report information. If changes are needed to any section of the Report Wizard, click the Edit button to return and revise the exam criteria. You may Save Report Criteria for future reference and use. Note that this feature will save all criteria except for the date range. When returning to use saved report criteria, click Load Report Criteria on Page 1 of the Report Wizard, and enter the dates for the period you want to see data.
Select the format for your report:
PDF – The most visually appealing format. All reports except the Individual Results Report and the Aggregate reports are available in PDF. CSV (Excel) – Use the Excel format to export your data to a spreadsheet.
PREVIEW REPORT. To preview the data in your selected report, click Preview Report. A new window will open and immediately display on your screen charts and tables containing the data in your report. To copy and paste any of the charts, tables, or other data, simply Right-click the image, and then select Save Image or Copy Image.
GENERATE REPORT. To generate your report, click Generate Report. A notification will appear: Report Has Been Queued. When your report is ready, a banner notification will pop up at the bottom of your screen: Your report has finished processing. A number will also appear above the bell icon in the upper right corner of your screen. The drop-down menu on the bell icon will list your generated reports. Return to Reports on the Client Admin toolbar and select My Reports. Locate your report from the list of processed reports and click the Download button.
Report Wizard Variations
Pairwise Report. In Step 3, choose your desired Inbound and Outbound Exams to build a list of applicable learners to report against. Students will populate based on each selection you choose. In Step 4, choose from the list the students you want included in your report. The list will only include students who completed both the Inbound Exam and the Outbound Exam. Step 4 is omitted when running the Pairwise Executive Summary Report, as individual student data are not included in the summary.
Program or Cohort Report. In Step 2, select your Comparison Type(s): Programs or Cohort, Specializations, etc. Select your assessment Timeline: Inbound, Outbound, or both. Select an Academic Degree Level. In Step 3, Choose your assessment. (This choice is optional.) In Step 4, select one or more cohorts to compare from the list provided. Alternatively, toggle YES for
Group Cohort Comparison.
Response Distractor Report. . With the Response Distractor Report, a Chi Square Test is used to determine significance. The standard for the report is p < 0.05. In Step 6, you have the option to choose a different level of significance, if desired.
For additional information on generating reports, please contact your Client Engagement Team via ClientServices@PeregrineGlobal.com.


