11 minute read
Kinky Kate


Zoe Clifton Take a step back in time to the days of corsets and high kicks with this medallion-style quilt. Starting with delicate sprays embroidered in the centre, the inner border is a collection of embroidery designs that have been designed to coordinate with Zoe's fabric range. The outer border features the actual printed fabric from the Kate range. The print was the design idea for the smaller embroidery sprays. Begin by stitching out each embroidery design, then the units go together in a typical quilt construction style.
Zoe Clifton Designs www.zoecliftondesigns.com.au zoecliftondesigns@gmail.com.au Bellarine Sewing Centre www.bellarinesewingcentre.com.au bellarinesewingcentre@outlook.com


Finished size: 123cm (48½in) square
Materials
1.2m (13⁄8yd) cream tone-on-tone print fabric (background) 50cm (5⁄8yd) raspberry tone-on-tone stripe print fabric (centre square peeper and binding Fat quarter white print fabric (setting triangles) 35cm (3⁄8yd) green tone-on-tone stripe print fabric (Borders 1, 3 and 4) Two squares, 6in of eight assorted print fabrics (block peepers) 10cm (1⁄8yd) each of eight assorted print fabrics (block borders) 1.2m (13⁄8yd) large-scale fl oral print on cream fabric (Border 4) 2.8m (3yd) backing fabric Batting at least 140cm (56in) square Kate embroidery design - available from Bellarine Sewing Centre Machine embroidery threads to coordinate with the fabrics. Zoe used Robison Anton Threads in Willow (2221), Glow (2234), Burgundy (2249), Pistachio (2250),
Smokey (2487), Desert Bloom (2503), Rosewood (2508),
Rockport Blue (2536), Pro College Blue (2647) and
Pro-Pearl (2741)
Fusible interfacing such as Parlan
Stabiliser
Hoop — to suit embroidery size
Water-erasable fabric-marking pen
Rotary cutter, ruler and mat
Sewing machine with ¼in foot
General sewing supplies Note: This quilt was made using the Kate range of fabric designed by Zoe Clifton. Extra yardage has been included in the Materials list to allow for fussy cutting the Border 4 border-stripe print. A full kit to make this quilt using the same fabrics as shown here is available from Bellarine Sewing Centre — see contact details at the end.
Cutting
From the cream tone-on-tone print fabric, cut: one square, 22in (centre square) three strips, 7in x width of fabric. Cross cut them to yield 16 squares, 7in (Border 2) From the raspberry tone-on-tone stripe print fabric, cut: two strips, 1in x width of fabric (peeper around the centre square) fi ve strips, 2½in x width of fabric (binding) From the white print fabric, cut: one square, 14¾in. Cut it twice across the diagonals to yield four quarter-square triangles From the green tone-on-tone stripe print fabric, cut: two strips, 1½in x width of fabric. From each strip, cut one strip, 1½in x 19½in and one strip, 1½in x 21½in (Border 1) another fi ve strips, 1½in x width of fabric (Borders 3 and 4).
Cross cut one of these strips to yield two strips, 1½in x 10in and two strips, 1½in x 5¾in (Border 4 sashings) From each of the 6in squares of assorted print fabrics, cut: four strips, 1in x width of the square (peeper around the
Border 2 blocks) From each of the 10cm (1⁄8yd) lengths of assorted print fabrics, cut: two strips, 1½in x width of fabric. Cross them to yield four rectangles, 1½in x 5½in and four rectangles, 1½in x 7½in of each fabric (Border 2 block borders) From the large-scale fl oral print on cream fabric, cut: four strips, 53/4in x length of fabric. These strips have been fussy cut so that the same part of the printed pattern was centred on each one
Centre square
1Use a water-erasable fabric-marking pen to draw a 19in square in the centre of the cream square cut for the centre square. Draw horizontal and vertical lines through the centre of the square. Then draw lines through each diagonal. Add diagonal lines connecting the ends of the horizontal and vertical centre lines, as shown in Diagram 1.
2On the horizontal and vertical centre lines, make a small mark 5¼in from the centre of the square. This is where the centre of each fl oral spray will lie. Now draw a line ¼in outside the diagonal square, as shown by the red lines in Diagram 2. This will be your cutting line once the embroidery has been completed.
3Download the Kate embroidery designs and select the Floral Spray. Place stabiliser in your hoop. Lay the marked cream fabric on top of the stabiliser, aligning the placement lines in the centre of the hoop — the embroidery designs are going to spin around the centre square.
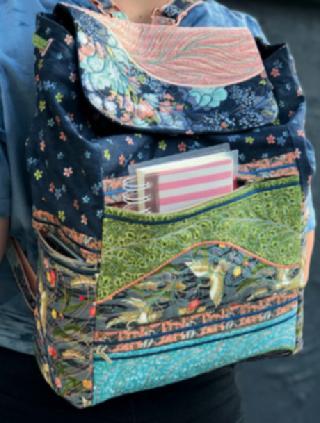
4Stitch out four Floral Spray designs, working around the centre square and referring to the photo of the quilt as a guide.
5Select the Single Flower design. Use the fabric-marking pen to make a mark 1¼in from the centre of the 19in square on each of the horizontal, vertical and diagonal lines — they indicate the placement for the eight single fl owers.
6Stitch out a Single Flower design in the centre of the 19in square and then stitch another one on each of the marks you made on the fabric in Step 5.
7To make the peeper border for the centre square, fold the two 1in strips of raspberry tone-on-tone stripe print fabric in half, wrong sides together and long edges matching. Press. Cross cut these folded strips to yield four strips 14in long.
8Pin a folded strip to the background fabric with its raw edges matching opposite edges of the outer square on your background fabric — the one marked in red in Diagram 2. Refer to Diagram 3. Stitch them in place using a scant ¼in seam.
9Repeat Step 8 to sew the remaining two folded raspberry strips to the other two edges of the outer square.
Diagram 1
¼in
5¼in
5¼in
Diagram 2 10 Cut the surplus fabric away from the centre square — cut along the outer (red line) square, which is now also the raw edges of the raspberry folded strips, as shown in Diagram 4. 11 Fold the centre square in half in each direction and fi nger press creases to mark the centre of each edge. Fold the four quarter-square triangles of white print fabric in half, short edges matching, and fi nger press a crease to mark the centre of their long edges. 12 Sew a white print quarter-square triangle to opposite edges of the centre square, matching centre creases. Press the seams outwards. Then sew the remaining quartersquare triangles to the other two edges of the centre square and press seams outwards. Your quilt top should now measure 19½in square from raw edge to raw edge.

Borders 1 and 2
1Sew the 1½in x 19½in strips of green tone-on-tone stripe print fabric to the top and bottom edges of the quilt top. Press seams outwards.
2Sew the 1½in x 21½in strips of green tone-on-tone stripe print fabric to the left and right edges of the quilt top. Press seams outwards. Your quilt top should now measure 21½in square from raw edge to raw edge.
3Place stabiliser and interfacing into your embroidery hoop, then ‘fl oat’ a 7in square of cream fabric on top of the interfacing. See Machine Embroidery Basics on page 134 for details on how to fl oat fabric.
4If you are using an embroidery machine that can stitch out a background fi ll stitch, follow the manufacturer’s instructions to add this feature around your designs. The fi nished area for the background fi ll is 5in square. If your machine does not have this function, you can add quilting to the block background later on.
5Select the following machine embroidery designs and stitch each one out in the centre of a 7in square of cream fabric: Blue Boot — stitch 2 Red Boot — stitch 2

Diagram 3 Diagram 4


Blue Hat — stitch 2 Red Hat — stitch 2 Umbrella — stitch 2 Corset — stitch 2 Flower with Two Buds — stitch 8.
6Put four of the Flower with Two Buds blocks aside — they are used later, in the corners of Border 4. Trim each of the remaining blocks to measure 5½in square, keeping the designs centred. 7 To add the border to each of these 16 blocks, select four 1in strips all cut from the same print fabric for the block peeper and two rectangles, 1½in x 5½in and two rectangles, 1½in x 7½in all cut from one of the coordinating print fabrics.
8Fold the 1in strips in half, wrong sides together and long edges matching. Press. Trim each strip to 5½ long. Pin a folded strip to the left and right edges of the block, raw edges matching. Stitch them in place using a scant ¼in seam. Then


pin the remaining two folded strips to the top and bottom edges of the block and stitch them in the same way.
9Sew the 1½in x 5½in strips of print fabric for the block border to the left and right edges of the block. Press seams outwards. Then sew the 1½in x 7½in strips to the top and bottom edges of the block and press seams outwards. Your block should measure 7½in square from raw edge to raw edge. 10 Repeat Steps 7–9 for all 16 blocks. 11 Lay the blocks out around the edge of the quilt top, referring to the photo of the quilt as a guide. Once you have decided on their arrangement, join the three blocks on the left edge of the quilt top together in a column, then sew the column to the left edge of the quilt top. Repeat with the three blocks on the right edge of the quilt top. 12 Join the fi ve blocks on the top edge and on the bottom edge together in rows, then join these rows to the top and bottom edges of the quilt top. Press seams outwards.
Borders 3 and 4
1Measure your quilt top horizontally through the centre. Trim two 1½in strips of green stripe print fabric cut for Border 3 and all four of the 5¾in strips of large-scale fl oral print fabric cut for Border 4 to this length.
2Sew a 1½in green strip to the top and bottom edges of the quilt top. Press seams outwards. Then sew a 5¾in strip of large-scale fl oral fabric to the top and bottom edges of the quilt top. Press seams outwards.
3Sew a 1½in x 10in strip of green stripe print fabric to one end of the remaining two 1½in strips of green stripe print fabric. Measure your quilt vertically through the centre. Trim these long strips to this length. Sew them to the left and right edges of the quilt top. Press seams outwards.
4Sew a 1½in x 5¾in rectangle of green stripe print fabric to each end of the remaining two 5¾in strips of fl oral fabric. Press seams outwards. Trim the four embroidered blocks that you put aside earlier to measure 5¾in square, keeping the design centred. Sew a block to each end of the Border 4 strips, referring to the photo of Zoe's quilt to orient tham correctly. Sew the strips to the left and right edges of the quilt. Press seams inwards.
Finishing
1Cut the backing fabric into two equal lengths, remove the selvedges and sew the two pieces together, side by side, with a ½in seam. Press the seam open.
2The quilt top, backing and batting are ready for a longarm quilting machine as they are. If you’re quilting by hand or on a domestic machine, follow the instructions for Preparing the Quilt Sandwich in the free downloadable Basics Guide* to pin or baste the quilt top, batting and backing together.
3Quilt as desired. This quilt was machine quilted in a variety of free-motion and straight-line designs.
4Trim the excess backing fabric and batting ¼in outside the edge of the quilt top.
5Follow the instructions in Binding the Quilt in The Basics Guide* to bind the quilt using the 2½in strips of raspberry print fabric.
A full kit is available at Bellarine Sewing Centre using the Kate fabric range designed by Zoe Clifton. Please email or refer to the website for ordering. *The Basics Guide is available as a free download from www.cosyproject.com/blog/quilting-guide