7 minute read
Basic Two-Ball Tactics: Part 2


By Jeff Soo
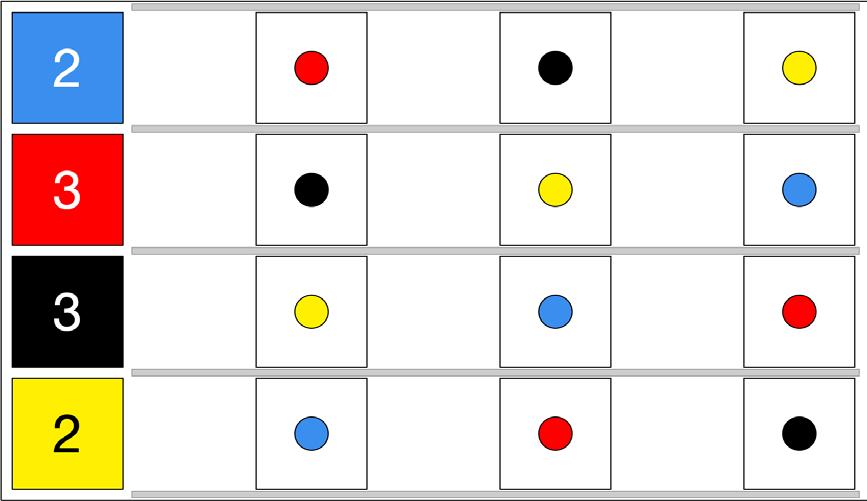
Abbreviations used: blUe, Red, blacK, Yellow
For Part 1, see the Croquet News 2024 Winter Issue.
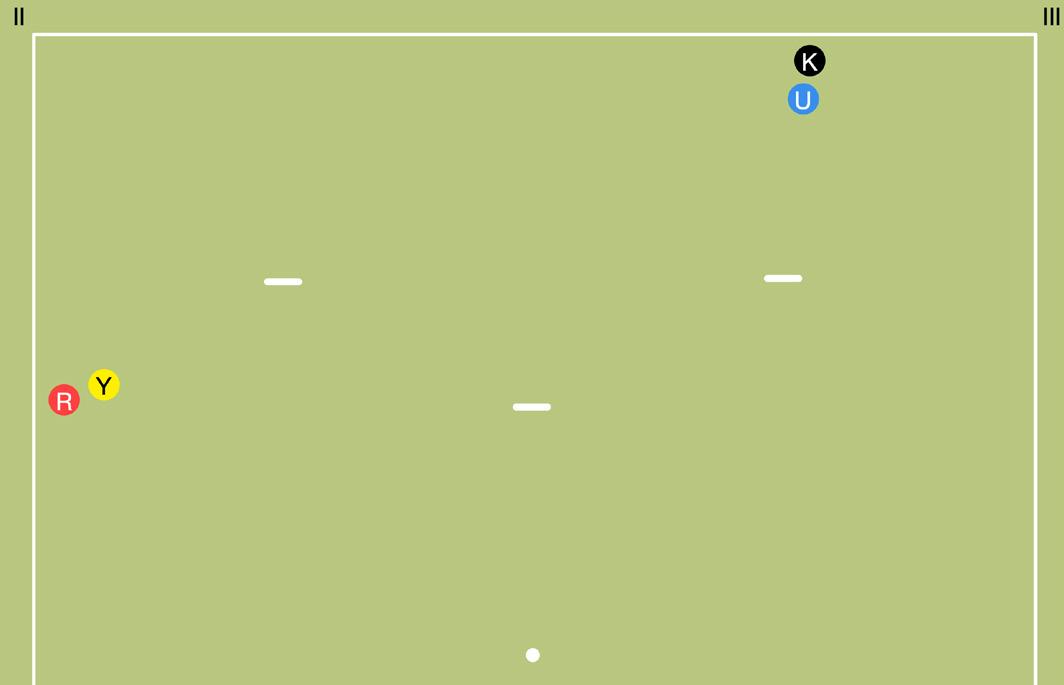
Figure 1 shows a Second Flight game that is just getting started. A short spell of out-game play allowed K to score 2 while Y was still in position at 1. Y entered the game and shot at R (U was at 2 and Y hoped for a 3-ball break) but missed. U then joined K on the boundary near 3 and it is R to play.
In Part 1 we looked at the trade-off between efficiency and safety when setting up two-ball breaks (2BB). For RY, the efficient play is for R to set Y for a rush to 2. Think a few turns ahead before deciding if this is a good choice for RY. That is, evaluate the rotational tactics of the situation.
Re-read Part 1 for a description of the three types of risk involved in two-ball tactics. If R sets for Y, Y’s chance of scoring 2 should be high and the risk of deadness low. A successful attack from K (including K clearing itself at 3) looks unlikely as it is too difficult at this level. So far, so good.
The problem is the third type of risk: giving the opponent a free three-ball break (3BB). U plays after Y and is also for 2. If Y rushes R to 2 and then leaves R there, U will have an easy start to a 3BB. Having scored 2, Y would have three reasonable options to deny U the break: scatter-shot R (i.e., cut-rush R so that both balls leave the court), rush R to 3 and score it or attack U and K. None of these options are reliable for a Second Flight player; each of them depends on running 2 with control and then playing one or more challenging shots afterward.
(And, if Y is willing to attack, a better time to do so is at the start of Y’s turn: rush R to 3, take off to K, croquet it into the court a bit while getting position for the rush on U, rush U to 2 and score, and now Y is set for a three- or four-ball break. A great play, well worth practicing, but a tall order for most Second Flight players.)
This is why stalemates are so common in the opening (see “The Stalemate at 2,” Croquet News 2023 Spring Issue). With all balls clean and for the same wicket, every ball faces the same dilemma: the first player who attempts to score risks giving a free 3BB to the opponent (or a free four-ball break if the wicket shot fails). But in Figure 1 not all balls are for 2. If RY waits for half a rotation, so that R is the ball scoring 2, this risk disappears: R can leave Y at 2 without giving up a 3BB, because K is for a different wicket. So, R should pass or move closer to Y: this is a case where safety is more important than scoring as quickly as possible.
The takeaway: when both your balls are alive on partner, giving you a choice of which ball to use for your next 2BB, check if either ball is immediately followed by a live opponent ball for the same wicket: the rotational trap. (Y faces just such a trap at the end of Part 1.)
Rotational traps can also occur when the opponent is one wicket behind. If that opponent ball is set up with a rush to its wicket, leaving a ball at the next wicket cedes the opponent a potential three-ball break.
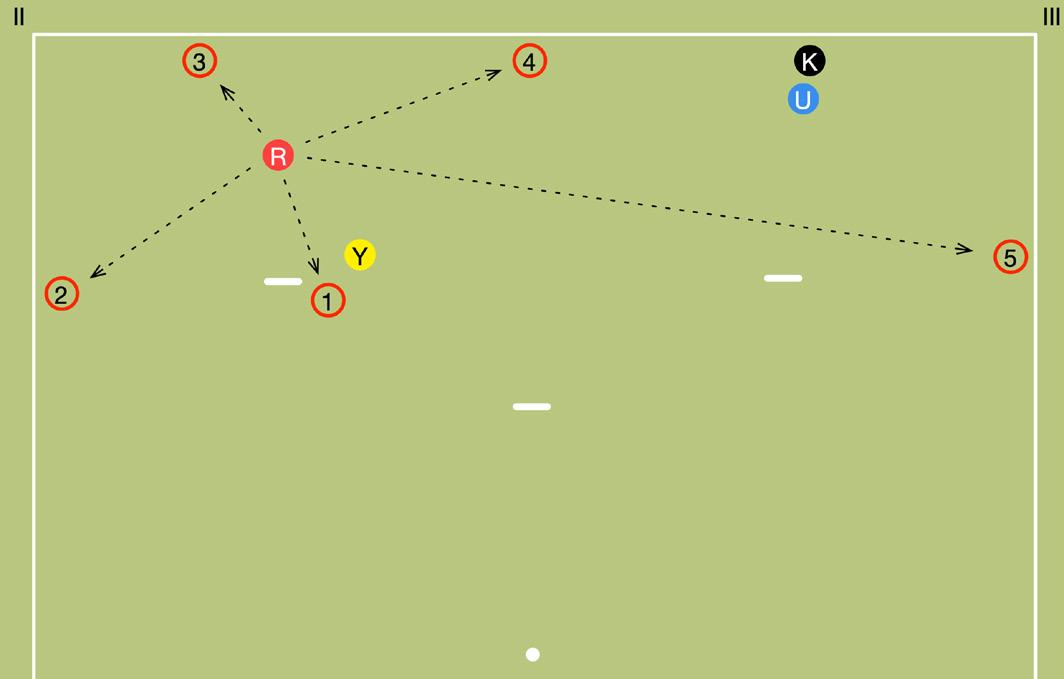
Now, put yourself in UK’s shoes. If R stays on the boundary next to Y, should K set a rush for U to 2? No, for the same reason R didn’t set a rush for Y: U faces a rotational trap if it attempts to score 2. K should stay on the boundary close to U (or move to the east boundary to discourage a possible attack). Figure 2 shows the position one rotation (four turns) after Figure 1.
And Figure 3 shows the position after R has just scored 2, with numbered positions showing some options for R’s continuation shot.
(An option not shown is for R to roquet Y. The best play after roqueting Y would be to take off to U and K, hoping to get close enough to roquet K first, then rush U to 3. But, as with Y in Figure 1, if R wants to attack U and K it would have been better to have done so at the start of the turn.)
With no useful rush on Y, what should R do? To answer that question, we will again rate our options by comparing efficiency and risk.
Position 1, joining Y at 2, is the most efficient, if UK chooses to leave R and Y alone, because Y would be able to score immediately. But leaving both balls on court is always risky when the opponent is joined and has no deadness, and, in this case, K would have some good attack options. Unless UK is an exceedingly cautious player, R should play to the boundary instead.
RY’s clips are on 2 and 3, so R should play to the boundary near one or both of those wickets. Point 2 is the least vulnerable to attack. It is also a good position for scoring again reasonably quickly. Y joins R, R sets a rush and Y rushes to 2 and scores. When you must separate from your partner ball, this is the quickest way to be reasonably sure of setting up an easy rush from the boundary: shoot out near your partner ball’s wicket, join and set the rush. On the downside, Y will be faced with a rotational trap here because U is also for 2.
K is about to score 3, so R will probably not be faced with a rotational trap at that wicket, and RY should focus on setting up a play for R. Point 3 is a good position if RY has the skills to play a line rush. Y would join R on the boundary, and R would then cut-rush Y to 3. Very efficient if RY is comfortable with that shot, but starting a 2BB from a line rush is more of a First or Championship Flight play.
That leaves two points that are reasonably close to 3 without being so close to K that it will be tempted to try to roquet R directly. Point 5 is a little safer, simply by being on a different boundary to K. Point 4 is playable, though. It has the advantage of being about equally close to both of RY’s wickets, although that advantage is mainly theoretical in this case, due to the rotational trap at 2.