

A Home Dyer’s Garden, Part III: Dyeing With Japanese Indigo
Wesley Crump, 1 Toree Park, 2 and Elizabeth Cohen1
1USU Extension Assistant Professor, Wasatch and Summit Counties
2Undergraduate Intern
Introduction
Dyeing with Japanese indigo grown in the home garden can be an exciting and satisfying way to incorporate gardening into more aspects of your life and create unique products for yourself and others. Of course, you do not have to grow Japanese indigo yourself to enjoy dyeing with the indigo pigment. This resource provides information to those who would like to experience the process from growing the plant until the final dyed project and those who would like to purchase the pigment and use it for dyeing. After preparing the fabric, there are many ways to dye with indigo. Two well-established methods, accessible and achievable for the beginning dyer, follow.
Preparing the Fabric
“Scouring ” your fabric will ensure the fibers are clean and ready to accept the dye. Soak your fabric in water for 30 minutes or more (some, like Maiwa, recommend up to 1 hour) with 2 teaspoons of a pH-neutral detergent, 4 teaspoons of soda ash (washing soda) per pound of fabric, and gently agitate (Figure 1). Use warm water for silk or wool and hot/simmering water for cotton A specific detergent for silks and wool, like Orvus Paste, may also be used at a rate of 5 teaspoons per pound of fabric. Allow the fabric to cool and rinse with water. Remove excess water by squeezing, but do not wring out delicate fibers like silk. Failure to properly scour your fabric can result in blotchy dye uptake.
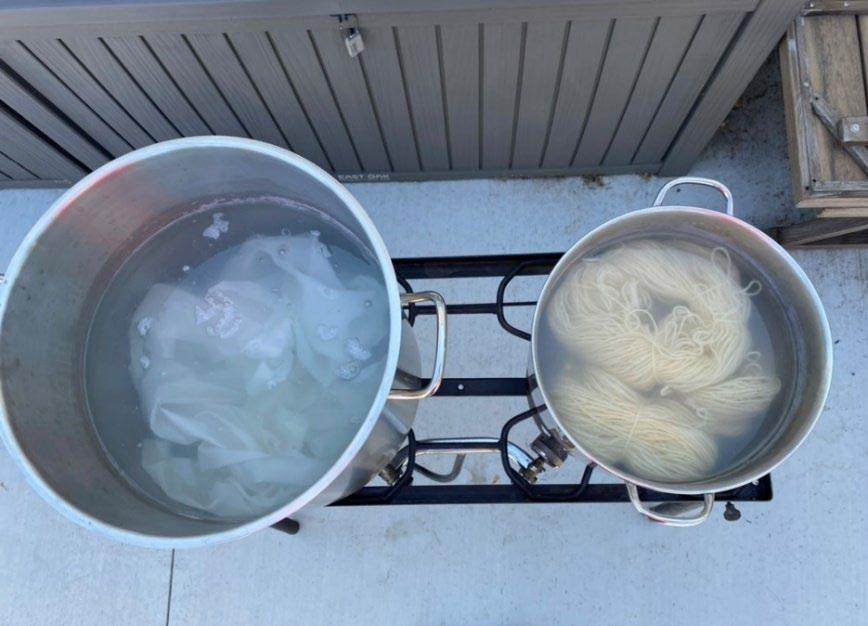
Figure 1. Scouring (left) Cotton and (right) Wool Before Dyeing
Method 1: Fresh-Leaf Dyeing
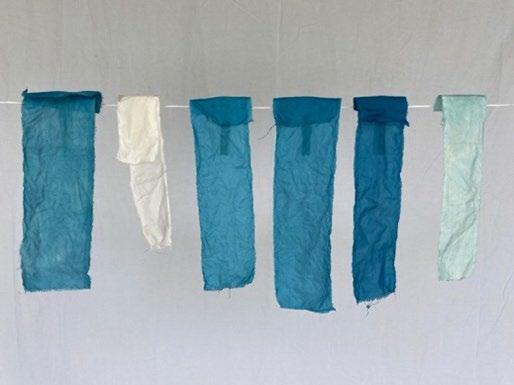
Fresh-leaf dyeing is the most basic form of dyeing with indigo. Colors from fresh-leaf dyeing include more green and aqua hues than what is traditionally associated with the “blue jean indigo” color (see Figure 2). Protein fibers (silk, wool) are best for fresh-leaf dyeing. While fresh-leaf dyeing can be used to dye cellulose fibers (cotton, linen, etc.), treating the fabric before dyeing with soymilk is necessary unless performing a more complex dyeing process (Marshall, 2018). Examples here focus on silk.
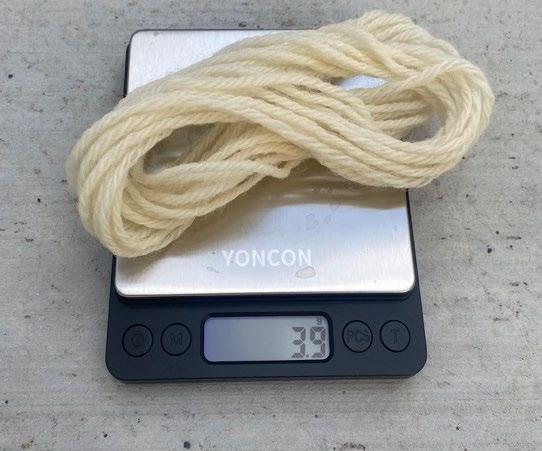
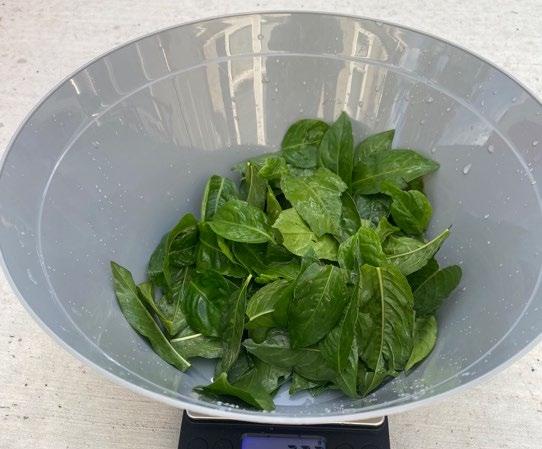
To determine how much fresh leaf material is needed, weigh the dry fibers you intend to dye (Figure 3). You will need 2–5 times or more of that weight in leaf material (the more leaves, the richer and darker the color). Harvest indigo early in the day, preferably before sunrise, to ensure the plant is not stressed, as this can decrease dye yields. To harvest, cut the stems, leaving several nodes if another harvest is expected. Keeping the harvested material as cool as possible will slow down pigment degradation. Submerging the harvested stems in cold water is an efficient way to accomplish this. After harvesting the stems, strip the leaves and weigh out the desired amount. These processes are illustrated in Figure 3. One of the two following options can then be used for fresh-leaf dyeing: kneading or blending.
Option 1: Kneading
From left to right: fresh leaf salt rub; undyed; (next three) blender approx. 5:1 leaf to fabric weight; and blender old dye bath.

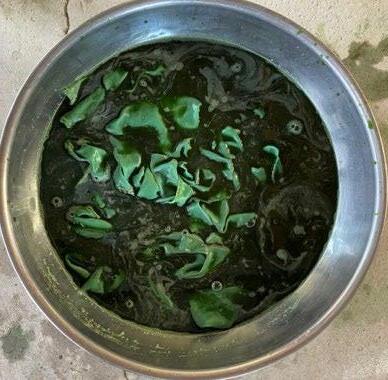
The first option is the simplest. In a container such as a large stainless-steel bowl, add the leaves and fabric with a pinch or two of salt and knead, squeeze, and mash the leaves and fabric together for 10 to 15 minutes. After several minutes of kneading, a rich, green-blue liquid will exude from the leaf mass and permeate the fabric (Figure 4). This method can be rough on delicate fabrics and can felt wool if not performed carefully. Once finished, wash the fabric with water until it runs clear and hang to dry in a shaded area.
Figure 2. Silks Dyed Using Fresh Japanese Indigo Leaves
Figure 3. (left) Weighing Fabric, (center) Keeping Harvested Leaves Cool Until Use, and (right) Weighing Leaves for Dyeing
Option 2: Blending
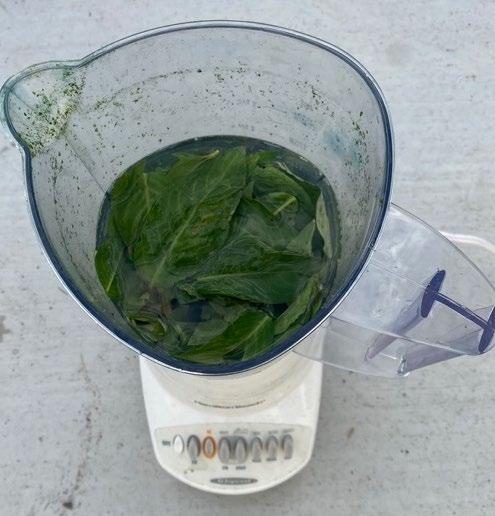
The second option is also simple but requires using a household blender and a straining cloth. Using a separate blender from one used in food preparation is recommended From the leaves needed to dye the fabric of choice, gently pack the blender about halfway and cover them with ice-cold water (Figure 4). Unless you dye a very small fabric swatch, you cannot blend all the leaves in one batch this is okay. Blend the leaf matter for approximately 1 minute or until completely smooth. Strain the slurry through a fine mesh filter or cheesecloth into a large bowl or basin. Repeat this process as swiftly as possible until all leaves have been blended. Add extra cold water if needed. Submerge the prepared fabric in the dye bath and gently swish for 10 to 15 minutes (Figure 4). After removing the fabric, rinse thoroughly with water and hang to dry in a shaded area. The dye bath can be used for other fabrics until the indigo is exhausted, though these subsequent dips will yield lighter colors. Additionally, more dye baths can be created for increasingly rich colors.

Method 2: Dyeing With Indigo Powder
The method outlined here is based on the 1-2-3 method popularized by French botanist and chemist Michel Garcia. A basic version is presented here, compiled from several resources (see Botanical Colors, n.d.; Maiwa, n.d.; Boutrup & Ellis, 2018).
The 1-2-3 refers to the proportions of the three ingredients in the following order: indigo powder, calcium hydroxide, and fructose. The starting amount of indigo powder will determine the vat’s dyeing ability (i.e., more indigo powder achieves darker colors). With a high-quality indigo powder, 2–2.5 grams of indigo per liter of final vat liquid will yield a lighter blue, 3–6 g /L will provide a medium blue, and 7–10 g/L will give a darker blue (Botanical Colors, n.d.). If you have extracted your own indigo pigment, you will likely need more indigo powder (sometimes as much as double, triple, or higher) as it will generally be of a lower quality than purchased powder.
As an example, if you were dyeing in a 5-gallon bucket with a 16-liter volume of liquid, you could use 64 grams of indigo powder (4 g/L), 128 grams of calcium hydroxide, and 192 grams of fructose for a medium-strength vat. A stepwise process for Method 2 using cotton fabric follows.
Figure 4. (left) Dyeing With Crushed Fresh Leaves, (center) Blending Leaves, and (right) Dyeing With Blended Fresh Leaves
Method 2 Steps (Dying With Indigo Powder)
Step 1. Heat water to a near boil (16 liters, in this case), and add approximately ¾ of the water to the 5gallon bucket. Heating up can be done in stages if necessary. Keep the other ¼ water for adding the other reagents.
Step 2. Add the indigo. “Wetting out” the powder is necessary before adding it to the vat. Either (1) add the measured indigo powder into a small watertight container with some hot water and a handful of marbles and shake for 1 minute (Figure 5A) or (2) add the indigo powder into a heavy-duty plastic bag with some hot water and massage until the powder is completely saturated. Add the paste to the vat. Use additional hot water to wash out any paste left behind in the container or bag into the vat
Step 3. In another container (quart jars work well), add the measured fructose and a portion of the hot water, dissolve, and add to the vat. Rinse the container with hot water and add to the vat.
Step 4. In the previous container, add the calcium hydroxide and some hot water, thoroughly mix (not all will dissolve; that is okay), and add to the vat. Wash out as above.
Step 5. Add any remaining hot water from the original 16 liters to the vat.
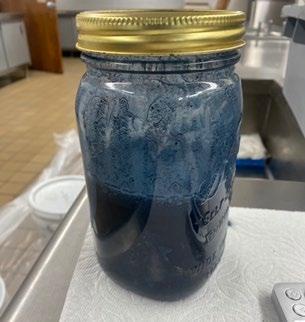
Step 6. Stir the vat well and allow it to settle (it can take 2+ hours). A collection of bubbles should form in the center (the “indigo flower” seen in Figure 5B). Once the vat is ready to dye, the liquid will be a clear yellow to amber color (Figure 5C). If the liquid is cloudy, stir again and allow it to settle.
Step 7. Debris will accumulate at the bottom of the vat, and ideally, the fabric should not touch it. Small mesh or wire inserts can be made to keep the fabric from the bottom, or the fabric can be lowered into the vat in any number of baskets/bags (Figure 5D).
Step 8. When ready to dye, carefully scoop the flower out (to be replaced when done) Wearing gloves, gently lower the fabric into the dye vat, disturbing the liquid’s surface as little as possible (oxygen in the vat decreases dye availability) Gently move the fabric in the vat periodically for 5–10 minutes to ensure even dyeing.
Multiple dips not prolonged dip times will increase color richness and shade.


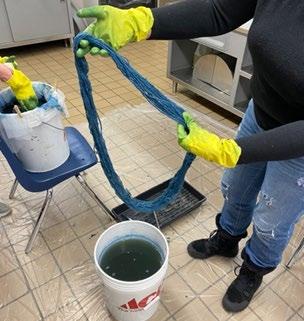
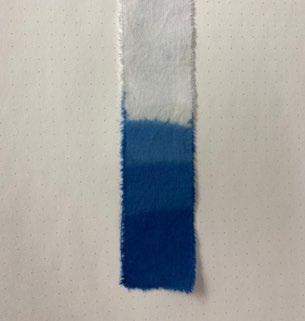
Step 9. After 5–10 minutes, carefully remove the fabric, attempting to squeeze out liquid right at or below the liquid’s surface to limit dripping and disturbance of the liquid’s surface. The fabric will initially be yellow-green and, upon exposure to oxygen, will turn blue (Figure 5E). Multiple dips, not prolonged dip times, will increase color richness and shade (Figure 5F) Allow the fabric to fully oxidize (no yellow or green coloring) before additional dips. The fabric can be dipped any number of times until the shade no longer changes. Rinse the fabric with water after each dip, including the last dip; this is especially important if your fabric touches the debris at the bottom of the vat. After your final dip and a thorough rinse with water, submerge the fabric in a bowl of water with a capful or two of 5% vinegar and allow it to sit for 15–20 minutes (or longer). Finally, rinse with water until the water runs clear. Remember that the color will be lighter when the fabric is dry. Wash the fabric separately for the first time or two. Handwashing will preserve color longer.
Find additional information regarding the continued care of an indigo fructose vat through the aforementioned resources and other sources. (Note that the inclusion or exclusion here of any particular source does not imply endorsement or disapproval.) To dispose of this vat, lower it to a neutral pH (add vinegar or introduce excessive air into the vat and let it sit without a lid for an extended period). Then, discard the liquid and throw away the debris collected at the bottom of the vat.

for dyeing

Indigo Dye Science
Chemistry in indigo dyeing is an active subject of research. Interested readers are encouraged to explore additional resources that discuss the production of indigo dye from plants listed in the References section and beyond (Bechtold et al., 2002; John et al., n.d.; John & Angelini, 2009; Wenner, 2017)
Photos
The authors contributed all photos.
References
Bechtold, T., Turcanu, A., Geissler, S., & Ganglberger, E. (2002). Process balance and product quality in the production of natural indigo from Polygonum tinctorium Ait. Applying low technology methods. Bioresource Technology, 81(3), 171–177. https://doi.org/10.1016/S0960-8524(01)00146-8
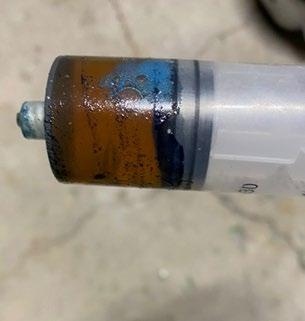
A. Wetting out indigo
B. Indigo flower
C. Yellow-amber liquid means vat is ready
D. Using mesh to keep fabric from the bottom of vat
E. Wool yarn just pulled from vat
F. Three dips with darkening color
Figure 5. Method 2 Illustrations, Dyeing With Indigo Powder
Botanical Colors. (n.d.). How to make a 1-2-3 fructose indigo vat https://botanicalcolors.com/fructose-indigovat/
Boutrup, J., & Ellis, C. (2018). The art and science of natural dyes. Schiffer Books.
John, P., & Angelini, L. G. (2009). Indigo – Extraction. In T. Bechtold & R. Mussak (Eds.), Handbook of natural colorants (1st ed., pp. 105–133). Wiley. DOI:10.1002/9780470744970
John, P., Seymour, K., & Macias, P. G. (n.d.). The production of natural indigo with a high purity. School of Plant Sciences, The University of Reading, UK. https://www.researchgate.net/profile/Philip-John2/publication/268362162_The_Production_of_Natural_Indigo_with_a_High_Purity/links/56573ef508aef e619b1ee77a/The-Production-of-Natural-Indigo-with-a-High-Purity.pdf
Maiwa. (n.d.). The fructose vat. Maiwa Handprints Ltd. https://naturaldyes.ca/fructose-vat
Marshall, J. (2018). Singing the blues, soulful dyeing for all eternity. St. Titus Press. Wenner, N. (2017). The production of indigo dye from plants. Fibershed. https://fibershed.org/ wp-content/uploads/2018/08/production-of-Indigo-dye-aug2018-update.pdf
In its programs and activities, including in admissions and employment, Utah State University does not discriminate or tolerate discrimination, including harassment, based on race, color, religion, sex, national origin, age, genetic information, sexual orientation, gender identity or expression, disability, status as a protected veteran, or any other status protected by University policy, Title IX, or any other federal, state, or local law. Utah State University is an equal opportunity employer and does not discriminate or tolerate discrimination including harassment in employment including in hiring, promotion, transfer, or termination based on race, color, religion, sex, national origin, age, genetic information, sexual orientation, gender identity or expression, disability, status as a protected veteran, or any other status protected by University policy or any other federal, state, or local law. Utah State University does not discriminate in its housing offerings and will treat all persons fairly and equally without regard to race, color, religion, sex, familial status, disability, national origin, source of income, sexual orientation, or gender identity Additionally, the University endeavors to provide reasonable accommodations when necessary and to ensure equal access to qualified persons with disabilities. The following office has been designated to handle inquiries regarding the application of Title IX and its implementing regulations and/or USU’s non-discrimination policies: The Office of Equity in Distance Education, Room 400, Logan, Utah, titleix@usu.edu, 435-797-1266. For further information regarding non-discrimination, please visit equity.usu.edu, or contact: U.S. Department of Education, Office of Assistant Secretary for Civil Rights, 800-421-3481, ocr@ed.gov or U.S. Department of Education, Denver Regional Office, 303-844-5695 ocr.denver@ed.gov. Issued in furtherance of Cooperative Extension work, acts of May 8 and June 30, 1914, in cooperation with the U.S. Department of Agriculture, Kenneth L. White, Vice President for Extension and Agriculture, Utah State University.
October 2024
Utah State University Extension Peer-reviewed fact sheet
