2 minute read
IMPLEMENTATION
FACTBOX 1
Magnitude – What is it?
When astronomers want to describe how bright a star is, they use the term magnitude. The concept of magnitude was already introduced prior to the Middle Ages when visible stars were divided into Image 8: Illustration of the Greek astronomer 6 different categories of size, magnitudes. The brightest Hipparchus observing the sky from Alexandria. He introduced the magnitude scale (Woodcut from 1876) stars were called ”First class stars”, or magnitude 1, while fainter stars had a higher magnitude, with the faintest having a magnitude of 6.
The magnitude scale was redefined in the 19th century, when more accurate measurements of brightness could be made. So now a star of magnitude 0 is 100 times brighter than a star of magnitude 5.
The limit of what you can see with the naked eye under the best conditions (the limiting magnitude) is around 6.5. The magnitude scale therefore works in reverse - a higher figure means that the star is fainter, while the brightest stars have a negative magnitude ( - ).
Sirius has the magnitude -1.5. The North Star varies between magnitude 1.86 and 2.13.
IMPLEMENTATION
After testing the method with a few school classes during the autumn of 2018 and receiving useful feedback and suggestions from teachers and pupils, the Star-Spotting Experiment was launched in February 2019.
In order to be able to compare the observations made around the country, it was important that everyone did it in the same way. In all research, it is important to carefully plan how the data is collected. The challenge in the Star-Spotting Experiment was to make the observation process as simple as possible (so that as many people as possible could participate), while ensuring that the observations were carefully undertaken. This was achieved by having detailed instructions.
10
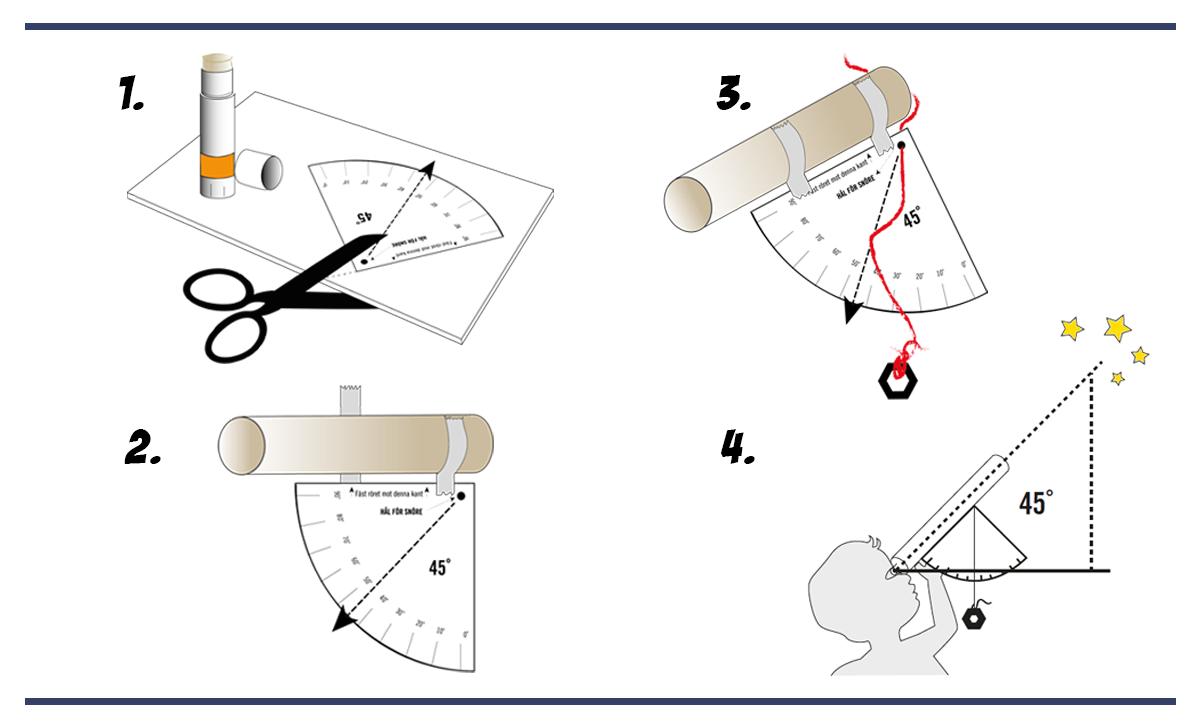
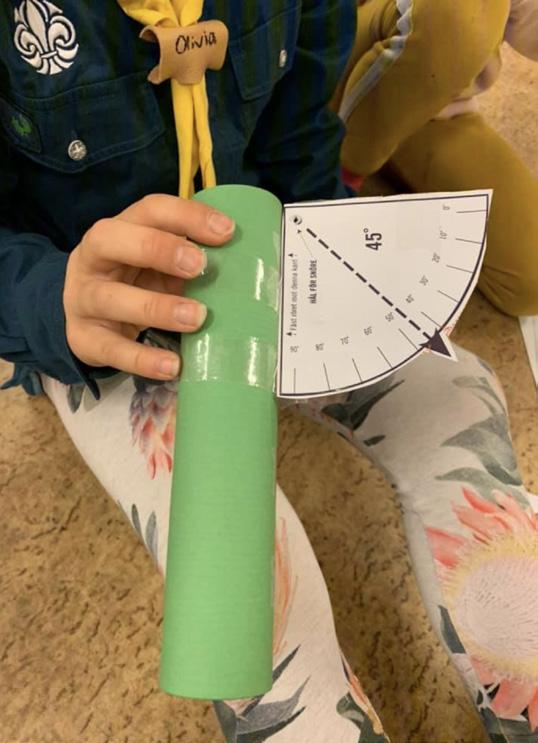
Image 9. Steps to make a measuring tube for the Star-Spotting Experiment. (1) Cut out a protractor, (2) Attach the protractor to the tube, (3) Attach some string with a weight tied onto it to the protractor. (4) This is used to show when the tube is at a 45-degree angle. Illustration: Lotta W Tomasson/VA.

Instructions:
North
1.
2.
3.
4.
5.
6. Go out an hour after sunset, or alternatively an hour before sunrise to ensure it is sufficiently dark. Wait 10 minutes without looking at another light source. Look at the sky instead and allow your eyes to get used to the darkness.
Northwest
West Zenith Northeast
East
Point the tube towards the sky at a 45° angle straight towards North (N). Southwest Southeast Use a compass to find the right direc- South tion. Use the protractor to get the right angle. It’s easiest if two people Image 10. Observations had to be made in help each other. different compass directions. Illustration: Lotta W Tomasson / VA. Hold the tube still to your eye and count the number of stars you can see through the tube. Record the number in the app or on paper so you can submit the data later. Turn to the Northeast (NE) and repeat. Continue with observations towards East (E) Southeast (SE), South (S), Southwest (SW), West (W) and Northwest (NW).
Finish by pointing the tube straight up in the air at the zenith and count the number of stars there as well. (The string with the weight will hang straight down from the tube).


