
22 minute read
FILM SCHOOLS: LEARNING NEW WAYS


LEARNING NEW WAYS TO EDUCATE TOMORROW’S INDUSTRY PROS
By CHRIS McGOWAN
TOP: An aerial shot of Talbot campus of Bournemouth University in Poole, England. The newly-opened Poole Gateway Building houses labs and studios for courses in the creative industries, including the National Centre for Computer Animation. (Image courtesy of Bournemouth University) Once the pandemic hit and turned classes into virtual events, VFX and animation schools scrambled to get their curricula online, make classes glitch-free and dynamic, and offer remote access to workstations. Zoom has been an essential platform for online classes and meetings, with Discord, Blackboard, SyncSketch, Slack, MS Teams and Shotgun, among others, also cited as key software – for collaboration, communication, learning and/or project management. Online classes have generally functioned well, according to schools contacted, and in some cases provided extra benefits like recordability for later viewing, available on demand. Plus, guest speakers can join a seminar even if they are in Timbuktu or Tasmania.
“As the world changed, so have we,” says Miguel Rodriguez about Vancouver’s InFocus Film School and its response to COVID-19. Rodriguez, Head of the 3D Animation and VFX program, comments, “It definitely was a rough process of adapting to the new normal. During the first week of the quarantine we worked hard to set up online learning tools and remote access to the class computers. It gave [students] 24/7 access to their workstations without leaving home.”
Regarding classes, Rodriguez notes that a webcam and microphone can’t convey as much as sharing a space, “but there are plenty of tools that help make the class more dynamic. Video, audio, drawing boards, screen and file sharing play an important part in this.
“Zoom is definitely important, allowing us to have classes and meetings without too much setup,” he continues. “We have also
used Discord with great success, [as its] ability to share multiple screens between several participants and share files while keeping a chat history makes it an effective tool when keeping track of several medium and large-sized projects. For production purposes, I’d say Shotgun is still the number one option when compiling all of the aspects surrounding a project.” As of fall of last year, InFocus animation and VFX classes were online, while the Canadian school’s film production classes were hybrid – with distancing and masks.
When USC’s School of Cinematic Arts (SCA) went online, it was a “stressful and difficult time for everyone – both professionally and personally,” notes Teresa Cheng, Chair of the John C. Hench Division of Animation and Digital Arts at SCA. “The resilience of our [division’s] students has really been impressive.” Cheng continues, “This pandemic forced everyone to adapt and do so quickly.” The silver lining is that “remote collaboration has been the norm in our industry for some time now.”
SCA’s animation and digital arts classes are using Zoom, Blackboard, SyncSketch and Slack, according to Cheng, plus “our Creative Technology department has worked out virtual desktop access for our students via Teradici.” However, she emphasizes that “our value is in our faculty. Zoom is just a tool. Of course, there are limitations [in not] being physically in the same space, but good teachers always find inventive ways to reach their students and deliver good content.
“We already have access to great people in the industry, alumni and professional contacts who are all eager to help,” she adds, “now
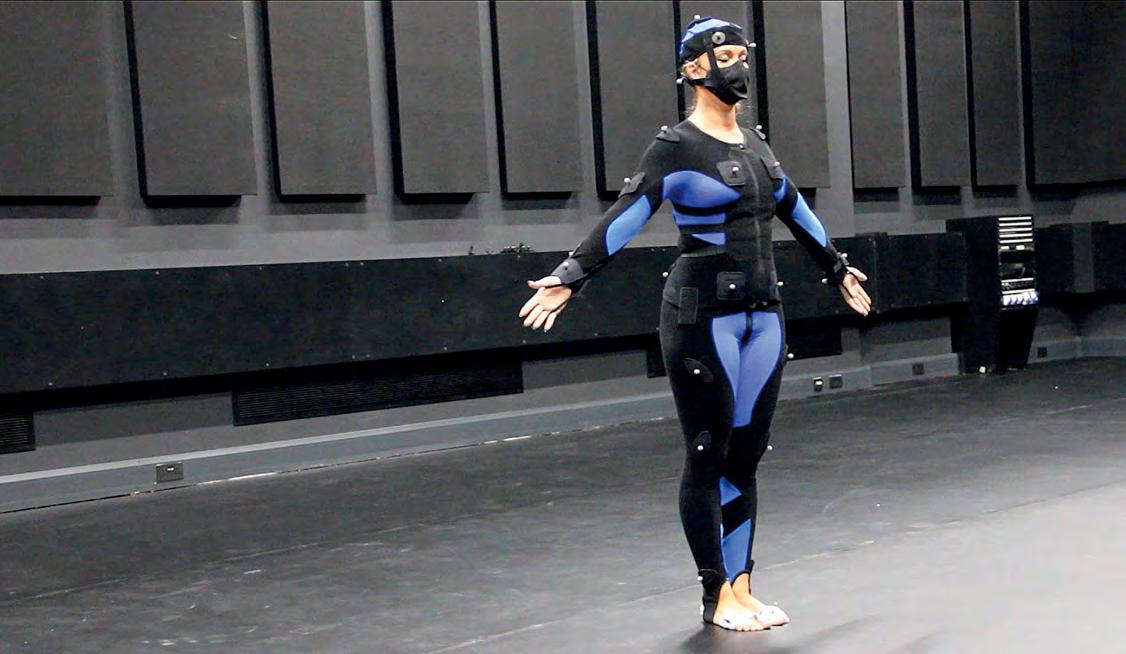
TOP: Actor Imogen Ridley, with face mask, utilizes the NCCA optical motion capture system for a medical education project at the National Centre for Computer Animation at Bournemouth University. (Image courtesy of Bournemouth University)
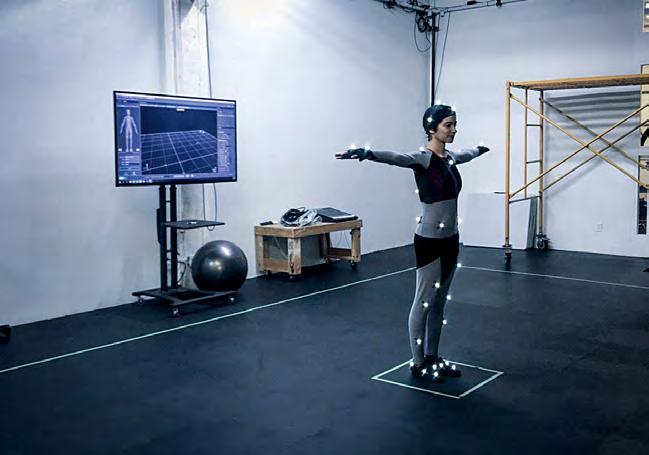
BOTTOM: A student keeps her social distance during a mocap session at the InFocus Film School in Vancouver, Canada. (Image courtesy of InFocus Film School)
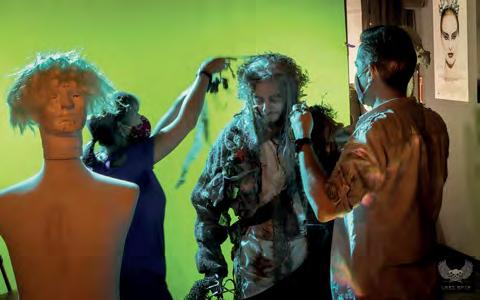
TOP: Lost Boys Studios Co-owner/Director Ria Benard and Founder/Director Mark Benard work with compositing student Chris Thomassin in Vancouver to add makeup and effects before filming with greenscreen for an ‘Ethereal Effects Project.’ (Image courtesy of Lost Boys Studios)
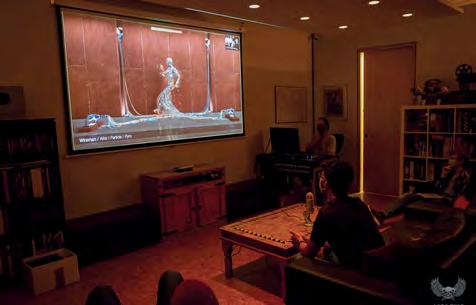
MIDDLE: Lost Boys Studios FXTD instructor Harrison Molling conducts a screening of students’ completed demo reels with industry guests. All are socially distanced with mandatory face masks after a temperature and symptoms check prior to the screening. (Image courtesy of Lost Boys Studios)
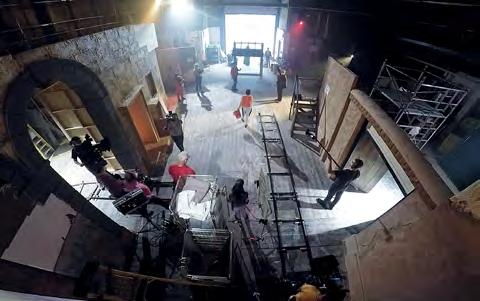
BOTTOM: Aerial view of Stage 1 of the National Film and Television School in Beaconsfield, U.K. during a test-shoot of Our Love Is Here to Stay in June 2020, when the U.K. COVID lockdown was lifted. (Image courtesy of the National Film and Television School) not limited to the same time zone.”
Guest appearances by notable film and VFX professionals have been a plus for SCA and many other schools. SCA’s summer 2020 “webinars” featured the likes of Jeffrey Katzenberg (Founding Partner of WndrCo), Ted Sarandos (Co-CEO of Netflix), Kristine Belson (President of Sony Pictures Animation) and Karen Toliver (Executive Vice President of Creative at Sony Pictures Animation). The webinars were for students and for professionals to keep up to date, and typically had about 200-400 participants.
VFX courses at the Savannah College of Art and Design (SCAD) also converted to remote learning for the spring through fall of 2020. SCAD has campuses in Savannah and Atlanta, Georgia and Lacoste, France. Kevin Mannens, Chair of SCAD’s Visual Effects degree program, comments, “Classes were conducted live over Zoom during the usual class times. Because lectures are recorded, students could revisit sections of a class they want to see again for better understanding. Students love this feature and we will keep recording classes even once we go back on ground.”
Mannens notes that even classes that required hardware and gear – like cameras, lights and greenscreens – were converted successfully to virtual, which in some ways “added benefits because the students were forced to flex their creative problem-solving muscles to come up with solutions to shoot, light and work on footage, despite not having access to the gear at SCAD,” he says. The university continued with virtual programming for its fall 2020 curriculum, but planned to open designated spaces for students who desired access to labs and studios with specialized equipment.
The College of Motion Picture Arts at Florida State University pursued a hybrid model for the fall of 2020, going remote when possible, according to Ron Honn, Filmmaker-in-Residence, Visual Arts. He notes that the school went the extra mile for its students when the pandemic began. “We were determined that our students would have the equipment necessary to continue work on their projects. So we shipped professional camera packages, lighting and grip gear, as needed, to students in their various locations.”
At New York City’s School of Visual Arts (SVA), “the value of experience, insight, advice and critique that our faculty bring to our students is fully present in our online classes, and ensures that a Zoom session can offer a valuable learning experience,” reports Jimmy Calhoun, Chair of BFA in Computer Art, Computer Animation and Visual Effects at SVA. In addition, “Our alumni and industry friends that work outside of New York City have been able to join us for guest lectures and workshops, and our industry thesis screening jury increased from 50 professionals to over 200 participants from around the world this past spring. As we look for ways to add value to what we are doing online, we find new things that we will retain when we return to campus.
“Zoom is certainly our go-to software for connecting students and teachers in real-time,” explains Calhoun, “and our
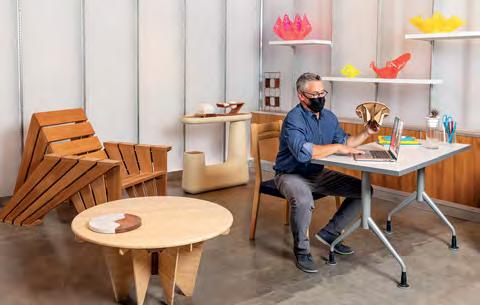
TOP: Professor Fred Spector gives a virtual class inside SCAD’s Gulfstream Design Center. Students have enjoyed the recordability of Zoom sessions as they could revisit sections of a class later. (Image courtesy of Savannah College of Art and Design)
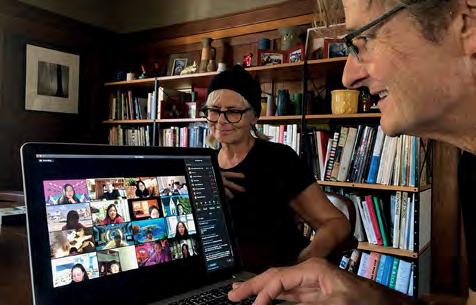
MIDDLE: Husband-and-wife School of Cinematic Arts professors Mike Patterson and Candace Reckinger teaching a remote Animation Design & Production class for grad students. The couple also co-directed a string of acclaimed music videos for Suzanne Vega, Sting and Paula Abdul, among other high-profile projects. (Image courtesy of the USC School of Cinematic Arts)
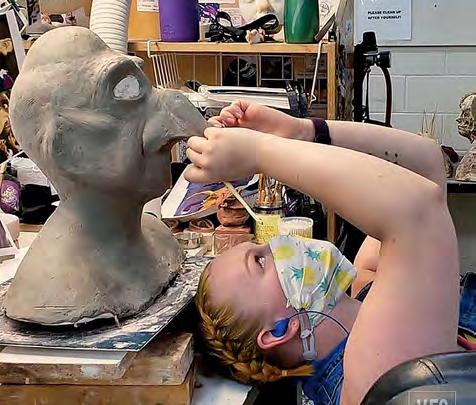
BOTTOM: Vancouver Film School Makeup Design for Film & Television student Aerien Steadman works on a clay sculpture after limited groups of students resumed campus activities last August. (Image courtesy of Vancouver Film School) instructors have found new and better ways to take advantage of our learning management software, Canvas. Our students and faculty have always used professional tools to both create and track their productions. Our reliance on Shotgun to monitor our students’ progress has been a huge benefit.”
Calhoun also expresses his continuing gratitude towards “companies like Autodesk and Epic Games, who make their software always free to students, and we are thankful [to] other software companies like SideFX, Avid and Foundry that have also been very supportive to our students in providing them access to the tools they need to create from home.”
The coronavirus situation has been different in every country and subject to rapid change. According to Richard Southern, Head of Department, National Centre for Computer Animation at Bournemouth University in England, the school will provide online classes through January, but will also open some facilities to students. “A small proportion of our teaching will necessarily need to take place in specialist facilities, such as greenscreen and camera training,” he elaborates, “although special measures are in place for the safe shared use of equipment.”
He explains that animation and VFX students have also had physical access to a proportion of the physical workstations. “The remaining workstations are available via a remote/virtual desktop solution” and all production software “available to students via VPN should they have the personal equipment to use it.” Zoom, MS Teams, Shotgun and SyncSketch are platforms used by the school, among others. Southern recalls that at first there were several specific problems to resolve. One example was that “the virtual/remote desktop access compatibility with OpenGL was a challenge.”
Southern explains that it was also challenging in the shift online to maintain “cohort culture,” which he considers one of the most valuable components of the school’s programs. The promotion of the use of collaborative platforms for peer contributions became “increasingly important – for example, the use of MS Teams for peer assess project dailies or pitches, and Shotgun for project management and collaboration,” he says. “In my experience the ability to screen share and work collaboratively on documents via MS Teams and Shotgun has actually improved small group collaboration and supervision.”
When adapting studies to the pandemic, SCA’s Cheng states, “We have to lead by example and show [students] how to pivot in an uncertain world under impossible circumstances. This is what professionals in our industry do all the time, so these lessons help prepare our students for the working world when they leave USC.”
InFocus Film School’s Rodriguez observes, “These are difficult times for everyone, but it’s also a great opportunity to look into developing your career. People will keep watching shows, movies and playing video games, much more so during these crazy times. That means more work needs to be done, more hands and talent are needed.”
HOW TO COMP A SHOT IN THREE DIFFERENT TOOLS
By IAN FAILES and MARIJN EKEN
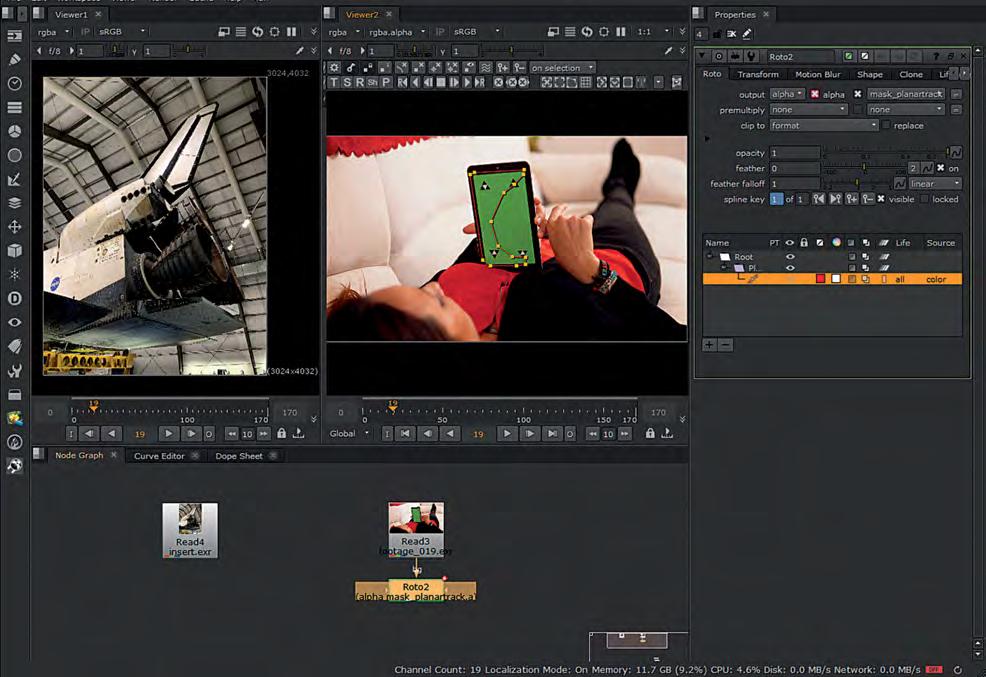
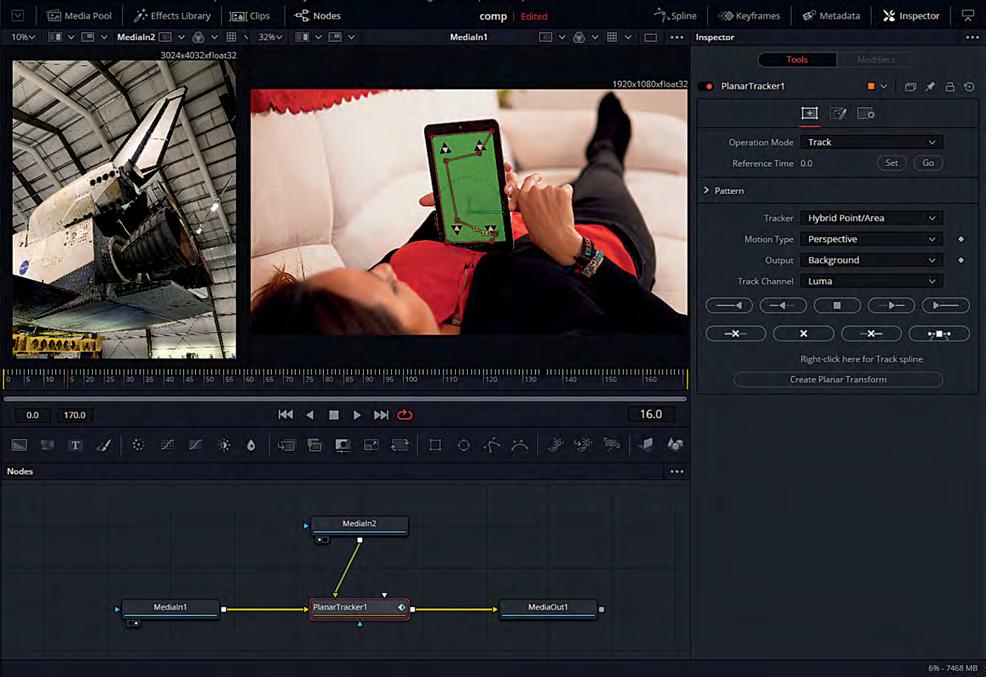
TOP: Using the PlanarTracker node in Nuke.
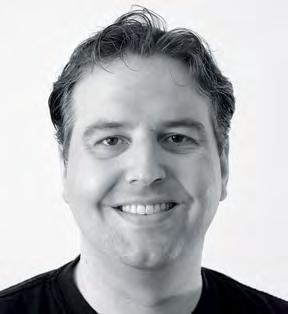
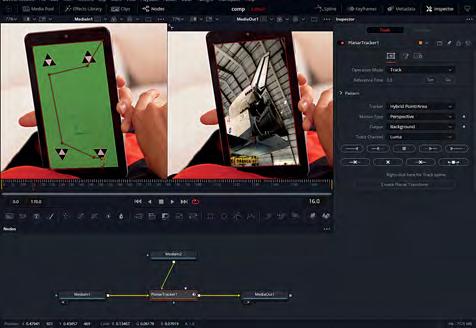
BOOTOM: Compositor Marijn Eken, who carried out the composite in Nuke, Fusion and After Effects. Visual effects artists already know there are often many ways you can pull off a particular shot via different filming methods and with different tools and techniques. That’s certainly the case with compositing, where several pieces of software and compositing workflows can be used.
Here, visual effects artist Marijn Eken – who has worked as a compositor at studios including DNEG, Scanline VFX and RISE | Visual Effects Studios, and currently teaches at the Netherlands Film Academy – explains how he might tackle compositing of the same shot in three separate packages. These are Foundry’s Nuke, Blackmagic Design’s Fusion (inside DaVinci Resolve) and Adobe After Effects, arguably the three most accessible compositing tools.
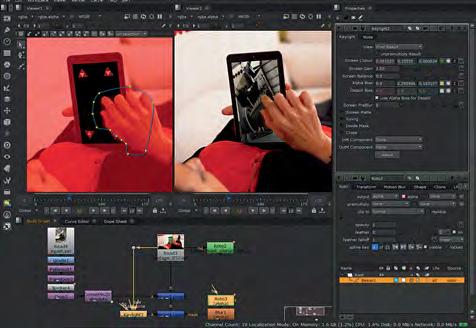
The elements supplied to Eken were stock footage of a woman pinch-zooming a greenscreen and the marker-covered tablet, and a photograph of the space shuttle Endeavour taken at California Science Center, with the idea being that she would be zooming into an area of the photograph on the device.
In coming up with a methodology for approaching this relatively simple composite in the three different packages, Eken generally followed these steps: 1. Track the four corners. 2. Use the corner pin method to composite the image over the screen. 3. Track the two fingers on the screen and use that to position and zoom the image. 4. Apply grading on the inserted image to match the black levels and white point.
5. Use the greenscreen and some roto to separate the hand and composite it on top.
These overall steps represent just one compositor’s view about how the elements could be composited together, along with some of the nuances involved in each of these common compositing tools.
Step 1. Tracking
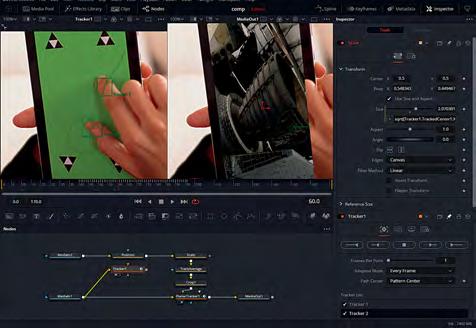
In general, for accuracy, it’s best to use as large an area as possible for tracking. Here, the hand comes across the screen at some point and obscures part of the screen and the lower right corner, so we need to work around that. For Nuke and Fusion, we can use a Planar Tracker. It’ll use a large surface area to track, and even though the lower right corner is obscured at some point, we can get an accurate location for that corner at all times. See below for what works best for After Effects. Nuke: We use the PlanarTracker node to create a roto shape that covers as much area as possible, without using any of the surface that is later covered by the hand. Just pressing the Track Forward button was enough to make this work in one go. Fusion: We use the Planar Tracker which starts in Track mode and directly allows us to draw a roto shape for the area we want to track. After the tracking is done, you have to switch the Tool’s Operation Mode to Corner Pin. Then you’ll get a rectangle that you can modify to place the corners in the correct location on one frame, and then it’ll follow the screen in subsequent frames. After Effects: You could do a planar tracker, but it involves going

TOP: The Planar Tracker in Fusion.
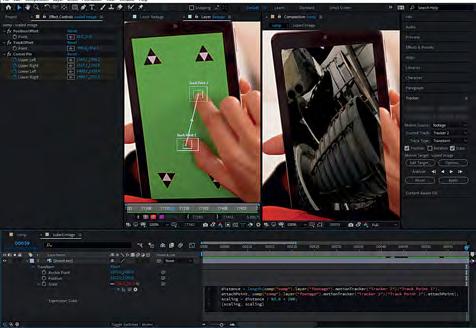
BOTTOM: Perspective Corner Pin track in After Effects.
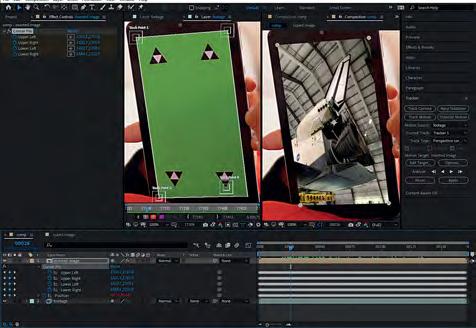
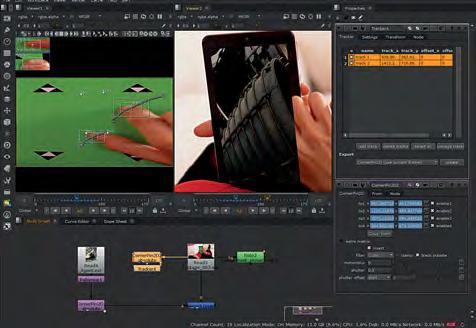
to the included Mocha application. That’s a bit involved, so for this demonstration I opted to stick with the built-in tools. That means we’re doing a perspective corner pin track using four trackers. Three of those we can place on the actual corners, but the bottom right one is obscured by the hand at some point, so we place it on the closest tracking marker on the screen. That’s not ideal, since we won’t be tracking the actual corner of the screen, and this will cause inaccuracies with the position of that corner. With a control-drag we can position the corner pin point on the actual corner.
Step 2. Corner pin
Nuke: We can select our PlanarTracker and choose Export > CornerPin2D (absolute). This will create a CornerPin2D node that does the work for us of warping the space shuttle image to match the screen. Our tracking data was created on an image of 1920 x 1080 (our source footage), but the image to be inserted has a resolution of 3024 x 4032. To make the corner pin work, we use a Reformat node, to ‘distort’ the space shuttle image into the 1920 x 1080 resolution, before applying the corner pin. Nuke is smart enough to not actually do two transforms back-to-back. It would be scaling the image down two times, which would result in a loss of image quality. Nuke uses what is called concatenation to gather all the transformations first, and only applies them once at the end. Once we have our properly distorted image, we use a Merge node to composite it on top of our footage. Fusion: We connect the space shuttle image to the special ‘Corner Pin 1’ input of the Planar Tracker. Fusion takes care of the resolution differences and compositing of the images. In fact, it uses a unique system of always describing coordinates and positions in a range from (0,0) to (1,1). Since the corner pin is warping the (0,0) and (1,1) coordinates (the corners) to the correct screen locations, this always works, regardless of resolution. After Effects: From the Tracker side panel, we select a Motion Target (our space shuttle image layer that we brought into the composition) and press Apply. This creates a Corner Pin effect on the space shuttle layer, with animated corner points, which squeezes the image to fit inside the four corners. Resolution differences are taken care of by After Effects.
Step 3. Finger tracking
The hand moves over the screen and makes a pinch motion. To translate that action into actually zooming into the content was the most difficult part of this exercise. I took the easiest approach in Nuke, which worked straight away. The other packages, though, couldn’t do the same, so I had to come up with some tricks with expressions, which are similar between Fusion and After Effects, but not completely. Nuke: I duplicated the CornerPin node that we already had and turned on the ‘invert’ checkbox. This inverts the corner pin operation, filling our screen with the tablet’s screen. The next step was to create a normal tracker node (not the PlanarTracker) and track the two finger tips moving apart. A
reference frame had to be chosen (frame 40) to be the frame at which no zooming or translation would be in effect.
By setting the tracker transform mode to ‘match-move,’ and ticking the Translate and Scale options (not the Rotation), the space shuttle image would follow the scale (distance between the fingers) and position (average of the two fingertips). By inserting the Tracker node before the CornerPin2D node, this assured the scaling would be applied in the correct ‘domain.’ Because the image is enlarged by zooming in, it was necessary to add a Crop node to remove the edges of the image that should not be visible beyond the screen of the tablet. Fusion: Using a Tracker Tool, we track the two fingertips. After the MediaIn Tool (which reads in the space shuttle image), we place a Transform Tool that we use to move the image around to position it where we need it. We also zoom in a little bit. Next is another Transform Tool we called Scale. This has an expression to do the scaling based on the movement of the fingers. We need to calculate the distance between the two points using good old Pythagoras.
We divide this number by the smallest distance when the fingers first touch the screen. That way the scale will be 1 at that point, and scale up accordingly with the distance between the fingers. That takes care of the zooming, but not the position yet.
To move the space shuttle image with the average position between the fingers, we need to do the following math on another Transform Tool, which we’ll call TrackAverage.
So we basically add the coordinates of the two fingertips and divide by two to get the average, but because the tracked footage has a resolution of 1920 x 1080 and the space shuttle image is a different resolution (3024 x 4032), we need to scale by the fractions between those x and y resolutions. After Effects: To apply the zooming of the image, we need to do this before the corner pin is applied, otherwise we’d already have lost resolution if zooming in after the corner pin effect. To do this effectively, we have to Pre-Compose the image layer. Inside this new composition we need to create an expression on the Scale parameter of the layer.
This expression is quite simple. It takes the two tracked fingertip points and calculates the distance between them with the ‘length()’ function. This distance is a number in pixels, so we have to ‘convert’ that into a scale. We determine that the smallest distance is 63.6 pixels (when the fingers touch the screen). If we divide by that number, the scale will be 100% when the fingers touch the screen. When they move away from each other, the scale will increase exactly by the right amount.
However, this doesn’t take care of the position just yet. When the fingers move apart, the position in between the fingers is used to move the image around. To mimic that, we create an expression on the Position parameter of the layer in the main composition.
It takes the original position and adds some motion on top. We take the average of the two tracked fingers by adding the two tracked positions and dividing by two. Adding this would create an offset, though, so we counteract that with a Track Offset parameter so that at the moment the fingers touch the screen, no extra motion is applied.
OPPOSITE TOP TO BOTTOM: Using a CornerPin2D node in Nuke. Changing the Planar Tracker mode to ‘Corner Pin’ in Fusion. Creating a Corner Pin effect on the space shuttle layer in After Effects. Dealing with the finger tracking in Nuke. THIS PAGE TOP TO BOTTOM: Fusion Transform Tool’s math formula calculates distance between two points. Finger tracking in Fusion. Finger tracking and expression creation in After Effects. Pushing the gain up in Nuke to check the grading.
TOP TO BOTTOM: Grading step in Fusion.
The ‘Levels (Individual Controls)’ effect in After Effects.
Using the Keylight node for roto in Nuke.
Step 4. Grading
To better integrate the space shuttle image into the final composite, we need to match the color of the image to the main footage. Nuke: We can use a Grade node directly after the Read node to control the color of the image that is inserted. We can select the darkest black for the ‘blackpoint’ and the brightest white for the ‘whitepoint’ in the space shuttle image. If we then select the darkest black in our footage for the ‘lift’ parameter and the brightest white for our ‘gain’ parameter, Nuke matches the blackpoint and whitepoint. This does need some manual tweaking, but it’s a starting point. To illustrate what this does, it’s hard to see without over-exaggerating the effect. By pushing the gain up on the viewer, you can see a before and after of what the Grade node does. Fusion: The process is similar to Nuke, but we don’t have the blackpoint/whitepoint feature. Using the Color Gain Tool, we can dial in the values by eye. But if we want to judge the darker levels, we need to use a Color Correct node to increase the gain, because the viewer doesn’t have a slider to do that (like Nuke and After Effects do). It’s important to check the ‘Pre-Divide/Post-Multiply’ option; otherwise, the lifting of the blacks will lift areas outside of our image too. After Effects: On the layer that holds our image, we can apply a ‘Levels (Individual Controls)’ effect to change the color. It does have a similar feature as Nuke with the ‘Input Black’ and ‘Output Black’ parameters, but you can’t use a color picker with those, so it makes less sense to use them. So I just did it by eye in this case.
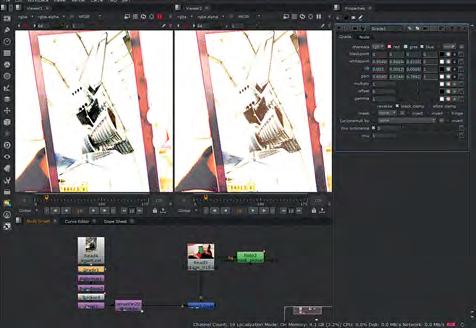
Step 5. Greenscreen
We now basically have everything working correctly, but our image covers the hand, so we need to fix that. There are multiple ways to achieve this, but the easiest, and I think best way, is to just layer the hand on top. Luckily we have the green to help us with that, otherwise we would have to use rotoscoping to do it. But sadly, there are markers on the screen, so we still need a little bit of roto. Nuke: For this example we’ll just use a Keylight node. Simply select the Screen Color and set the view to Final Result. With the Roto node we create a very simple shape around the hand that only needs to be accurate around the thumb area, where the tracking marker is. We Merge the result over the image, using the Mask input to limit the effect. Fusion: For the keying we’ll use an Ultra Keyer Tool. Using the color picker to select the Background Color quite quickly gives us a satisfying result, after tweaking a few values. The UltraKeyer has a separate Garbage Matte input that we can use with the B-spline Tool to mask out a rough roto for the hand with more accuracy at the thumb, where we need it. Using the Merge Tool, we combine this isolated hand with the image we had. After Effects: We duplicate our footage layer to composite our keyed hand on top. Then we apply the Keylight effect and select the Screen Color. On this layer we also create a Mask, for which we have to set the Mode to None. The mask is used inside the Keylight effect by selecting it as an Outside Mask and checking the Invert checkbox.


