
8 minute read
Food Tips: Holiday Meal Prep, Storage, Reheating


By Amy Casey
Amycaseycooks.com

With the hustle and bustle of the holiday season, prepping and preparing some of your menu in advance not only saves time, but also helps keep the holidays festive. Without a lot of last minute work, many appetizers, hassle-free main dishes and sides, and desserts can be made in advance of your celebration. With some planning, you’ll enjoy the holiday season stress free and spend more time with your family and friends.

Plan and Prep
Map out the holiday recipes to make in advance to ensure the prep, cooking and baking run smoothly. Next take an inventory of your pantry and make your list of the recipe ingredients to buy. Grocery shopping around the holidays is hectic. By getting a jumpstart, you’ll breeze through the store’s aisles.
The best recipes to make in advance are ones that taste as if they’re freshly made. Choose both room temperature and cold dishes. Appetizers such as puff pastry cheese straws, antipasto skewers and crudité and herb and garlic dip can be made entirely in advance. Hot appetizers like creamy cheese dips, mini meatballs and stuffed clams just need to be heated before serving.
Casseroles including breakfast French toast and overnight strata can be made the evening before serving and baked in the morning. Prep and refrigerate for 2 to 3 days or freeze for up to 1 month dishes that include a combination of meats, vegetables, sauces, cheese, and pasta. Cheesy lasagna, mac and cheese, Italian stuffed shells, beef tenderloin stew and butternut squash soup can all be made in advance. Even a whole turkey can be prepared in advance. Just slice the cooked turkey and store with some stock to keep it from drying out. When ready to serve, just reheat and eat.
Side dishes both hot and cold are ideal for a make ahead holiday meal. Green salads can be made in advance. Just add the vinaigrette or dressing before serving. Choose hearty vegetables like shredded Brussels sprouts, celery, kale and cabbage as they have a longer shelf life than delicate greens. Mashed potatoes, stuffed potatoes, stuffing, and roasted beets or acorn squash can be made 2 to 3 days before serving.
Baked goods such as dinner rolls, quick breads, muffins, cookies, and brownies are all perfect candidates for a ‘make in advance’ holiday. Pies including pumpkin, sweet potato, French silk, and coconut cream all need time to chill as their flavors will develop and improve.
Storage and Heating

By preparing both room temperature and hot dishes, you can maximize your storage space.
The refrigerator, freezer and the countertop are all options for storing holiday food.
Baked goods including bread sticks, quick breads, brownies and cookies can be left on the counter either in airtight containers or covered with plastic wrap for up to 2 days. Any assembled, but yet to be cooked dish such as lasagna, should be covered tightly with foil or plastic wrap and stored in the refrigerator for up to 2 days. Cooked dishes that will be reheated such as mashed potatoes and stuffing need to be completely cooled before storing them in the refrigerator or freezer. Cover tightly with plastic wrap and then foil to keep as much of the air out as possible.
When heating the holiday dishes, a few tips will make them taste as if they were freshly made. Gravies, soups and any dishes with sauces such as meatballs with marinara are best heated over low heat in a saucepan on the stovetop. Stir occasionally so the food heats evenly. Casseroles, lasagnas, mashed potatoes and stuffings should be covered with foil and heated in the oven at 350 degrees F. If a dish is frozen, thaw it in the refrigerator before heating. Any roasted vegetables can be heated in the microwave on 60 percent power. Cover the dish lightly with a paper towel or plastic wrap and heat for 1 minute. Stir and continue heating at 30 second intervals until the veggies are heated through.
There’s no need to sacrifice flavor when preparing holiday dishes in advance. With some planning, you can have a delicious and relaxing holiday with family and friends.
Recipes Shared by Amy Casey
Roast Beef Crostini with Horseradish Cream


1 long baguette or skinny loaf of bread, sliced ½ inch thick, about 20 slices extra virgin olive oil
kosher salt
¼ c. sour cream
1 tbsp. mayonnaise
1 tbsp. prepared horseradish
1 c. arugula
½ lb. deli roast beef, thinly sliced
½ c. finely shredded Gruyere cheese
1 small tomato, diced
Place the bread slices on a work surface. Lightly brush both sides with extra virgin olive oil and sprinkle with kosher salt. Heat a cast iron skillet or large sauté pan over medium high heat. Add the bread slices and toast until lightly golden brown on each side, about 1 minute per side. Remove to a large plate. In a small bowl, combine the sour cream, mayonnaise, and horseradish. To assemble each appetizer, spread about 1 to 2 teaspoons of the horseradish cream on a crostini. Top with a couple leaves of arugula, about ½ slice of roast beef, a dab of horseradish cream, a sprinkle of Gruyere cheese and a couple pieces of diced tomato. Place the roast beef crostini on a large platter and serve. Make roast beef crostini in advance ~ There’s no need for last minute prep for these easy yet fancy appetizers. Make them up to 2 hours in advance. Store in the refrigerator covered lightly with plastic wrap.
________________________________________
Chocolate, Chocolate Chip Pudding Cookies

1 c. salted butter, room temperature
¾ c. light brown sugar
¼ c. sugar
2 large eggs
1 tsp. vanilla extract
2 ½ c. flour
1 (3.9 oz.) pkg. instant chocolate pudding mix
1 tsp. baking soda
1 tsp. kosher salt
2 c. semi-sweet chocolate chips
Preheat oven to 350 degrees F. Line 2 large baking sheets with parchment paper and set aside. Beat butter and sugars until creamy. Add eggs and vanilla then beat until just combined. The batter will be lumpy. Add flour, pudding mix, baking soda and salt. Beat until the batter is combined. Add chocolate chips and mix on low until just combined. Form the batter into balls. Transfer to prepared baking sheets and place about 3 inches apart. Bake cookies for 13-15 minutes. Don’t overbake the cookies. They should be puffy and just set. Allow the cookies to cool for 3-4 minutes on the pan. Transfer to a cooling rack. Store the cookies airtight at room temperature for up to 4 days.
Submitted by Amy Casey, Amycaseycooks.com
_________________________________________
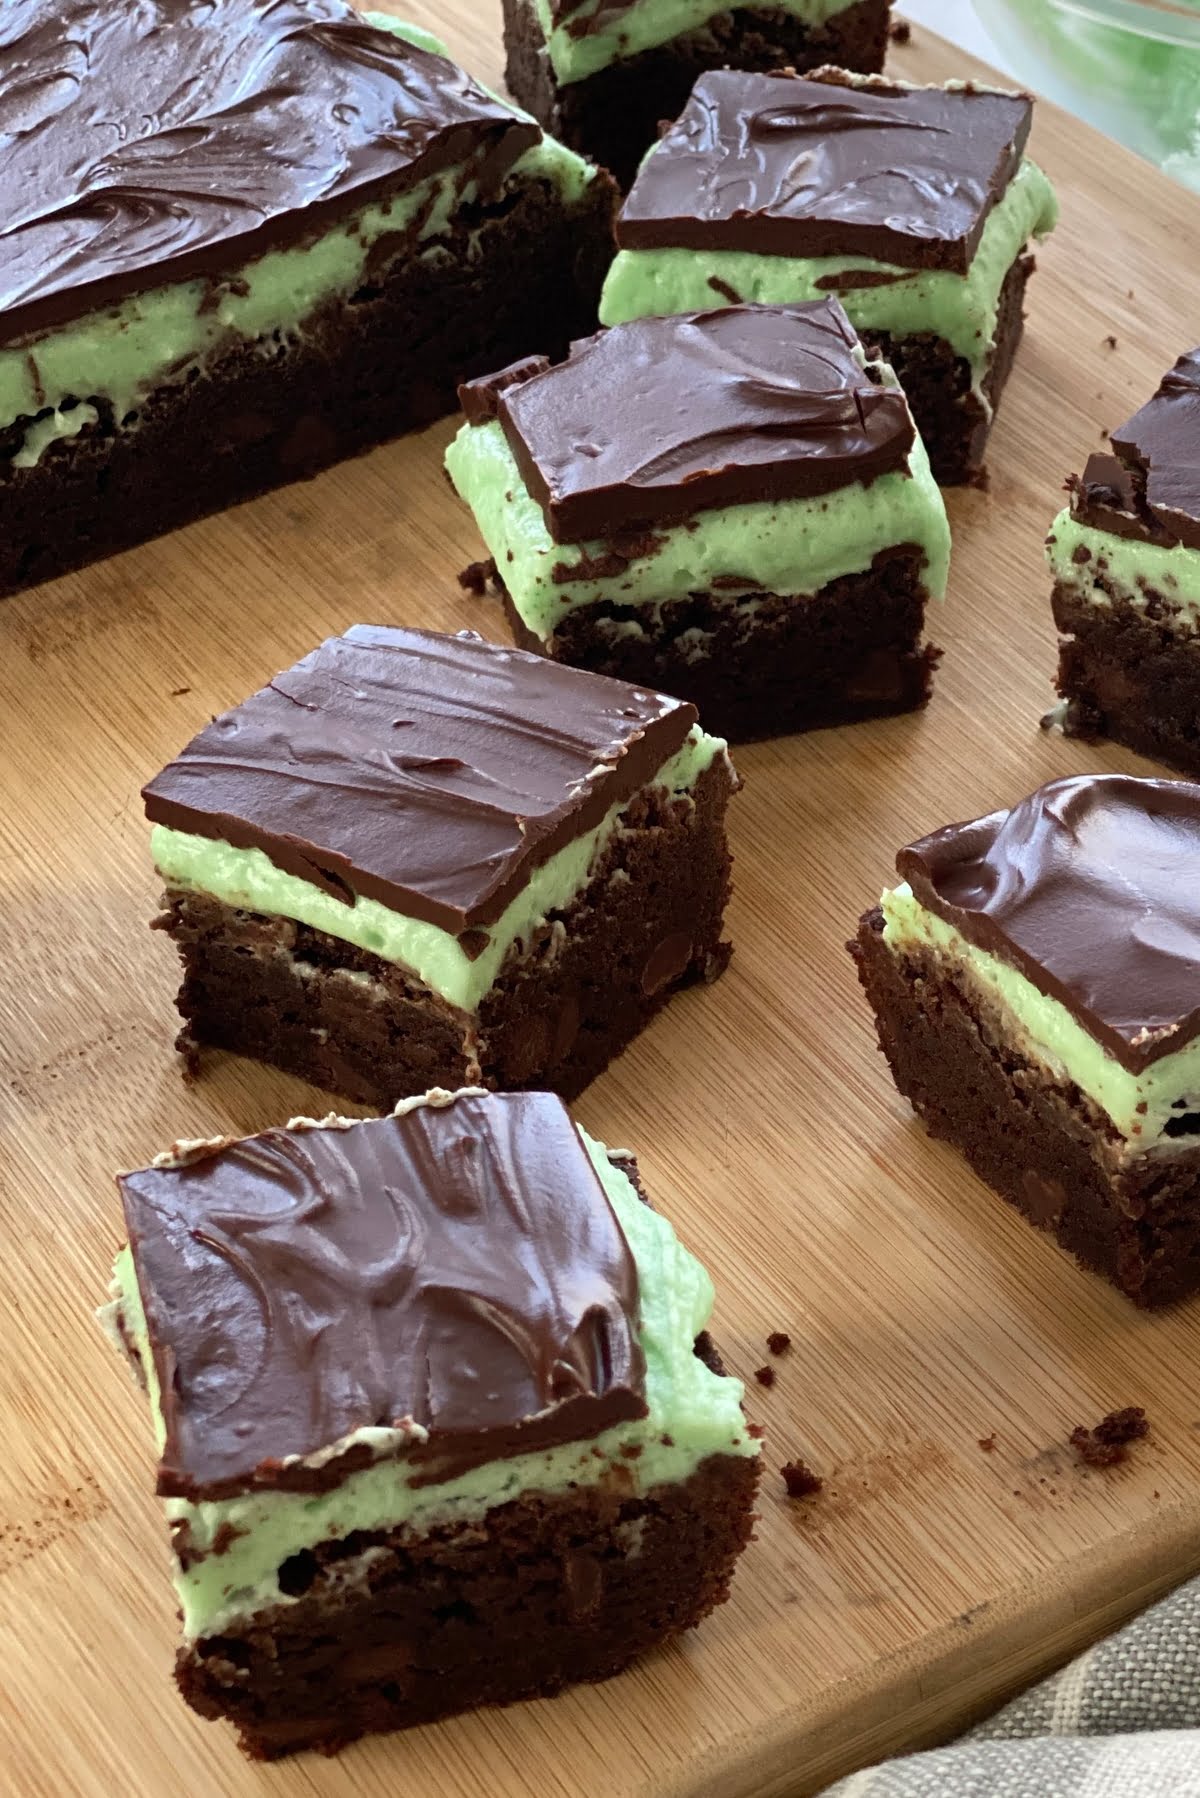
Mint Chocolate Fudge Brownies
For the brownies:
¾ c. salted butter (melted)
¾ c. salted butter (melted)
¾ c. granulated sugar
¾ c. light brown sugar
2 tsp. vanilla
2 large eggs, lightly beaten
¾ c. all-purpose flour
½ c. cocoa powder
½ tsp. baking powder
½ tsp. kosher salt
½ cup semi-sweet chocolate chips
For the mint buttercream:
2 c. powdered sugar
4 tbsp. salted butter, softened
1 ½ teaspoons mint extract
3 to 4 drops green food coloring
1 to 2 tbsp. whole milk
For the chocolate fudge topping:
1 c. semi-sweet chocolate chips
4 tablespoons salted butter
Preheat oven to 350o. Grease an 8 x 8” baking pan with butter. In large bowl, hand mix melted butter, sugars and vanilla until blended. Add eggs and stir until combined. In a small bowl, whisk flour, cocoa, baking powder and salt. Add chocolate chips and toss to coat with flour mixture. Gradually add flour mixture to the sugar mixture and stir until incorporated. Pour the batter into prepared pan. Bake 30 - 35 minutes or until a toothpick comes out almost clean. A few fudgy crumbs sticking to the toothpick are okay. Remove from oven and cool completely. For frosting, place listed ingredients in a bowl. Mix to combine, then beat for 1 minute. Add 1 - 2 tablespoons of milk and stir until a spreadable consistency. Spread on top of cooled brownies. For the chocolate fudge topping, place the 1 cup of chocolate chips and butter in an ovenproof bowl. Microwave at 20 second intervals, stirring in between, until melted and smooth. Allow to cool for 5 -10 minutes. Spread fudge over the mint buttercream. Refrigerate until the chocolate is hardened and the mint buttercream is set, about 45 - 60 minutes. Remove well-chilled brownies from refrigerator. Let sit 5 minutes before cutting into squares. Store in the refrigerator in an airtight container up to 3 days, or can be frozen for up to 2 months.
Submitted by Amy Casey, Amycaseycooks.com


