WILDLAND URBAN INTERFACE BASICS

PARTICIPANT GUIDE

Wildland Urban Interface Basics | PARTICIPANT GUIDE Wildland Urban Interface Basics | PARTICIPANT GUIDE 2 3 INTRODUCTION Development/background ...................................... 5 Overview 5 Schedule 7 Learning outcomes ................................................... 8 Instructors 8 Classroom .................................................................. 8 FIRE BEHAVIOR Heat transfer methods 11 Weather .................................................................... 12 Fuel 13 Topography 21 Forest Weather Index System (FWI) .................... 25 Head fire intensity 31 Parts of a fire ........................................................... 40 Types of fire 42 Fire behavior terms 42 WILDLAND URBAN INTERFACE (WUI) Urban interface ....................................................... 49 Urban intermix 49 Phases of a WUI fire .............................................. 50 Responding to WUI incidents 52 WUI size up 55 STRUCTURE TRIAGE Structure triage Alberta 61 Structure triage categories 62 Building construction .............................................. 64 Activity 67 Mapping ................................................................... 72 British Columbia specific 74 BC structure triage tactical actions 76 SPECIAL CONSIDERATIONS Remote areas 85 Heavy equipment 87 Industry ..................................................................... 88 First nations 88 Public ......................................................................... 88 Politicians 89 Social media 89 SPRINKLER SYSTEM SET UP Pump systems ......................................................... 93 Pump site set up 98 Site & structure prep 109 Sprinkler head types ............................................ 110 Mounting sprinklers 114 System test ............................................................. 119 Activity 121 ENGINE OPERATIONS IN THE WUI Resources kind & type ......................................... 125 Resources needed 126 Engine types 127 Truck types ............................................................ 131 Water tender types 132 Structure Protection Units (SPU) ......................... 135 Operations 137 Activity 138 Safety concerns ..................................................... 139 Methods of attack 142 Engine actions 143 Actionable vs nonactionable structures 152 Activity 154 Incident Command System (ICS) ....................... 156 General staff 157 Command staff 157 Structure protection in ICS ................................... 158 Strike team & task force 159 Activity 160 Engine crew responsibilities 163 Officer/Team leader 163 Pump operator/driver .......................................... 168 Crew member 169 CLOSING NOTES Appendix A ............................................................ 174 Appendix B 179 Appendix C 180 Appendix D 181 Appendix E 183 Appendix F ............................................................. 183 Appendix G 184 Acknowledgments 185
CONTENTS
TABLE OF
INTRODUCTION
DEVELOPMENT/BACKGROUND
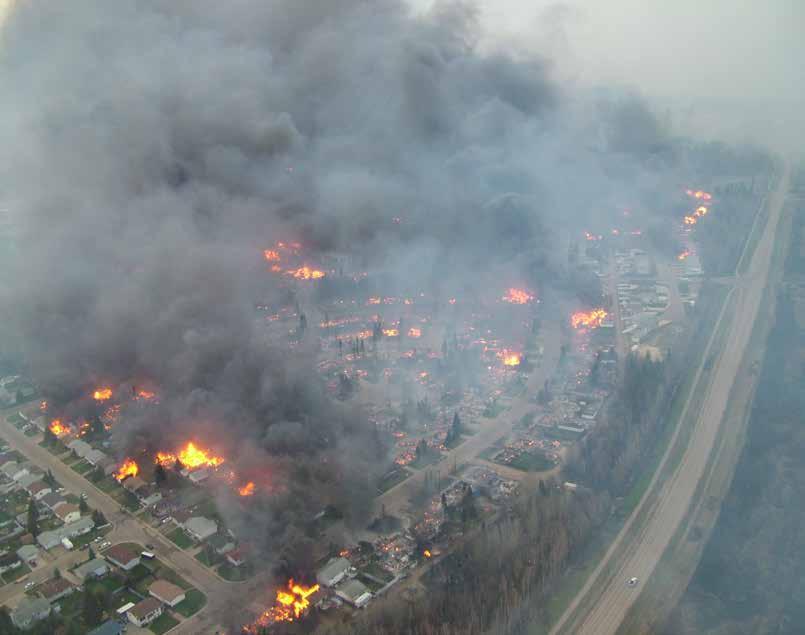
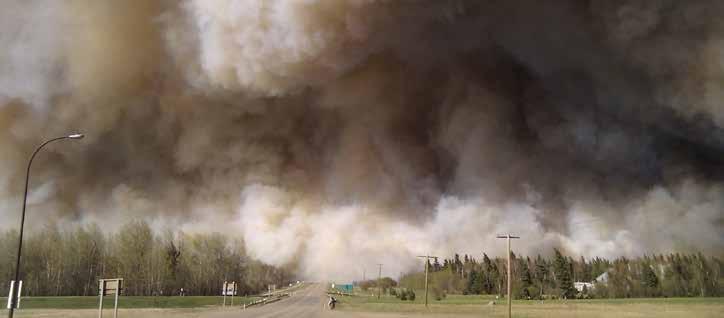
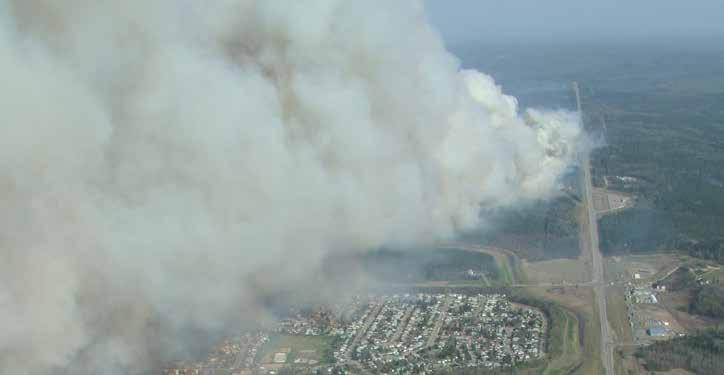
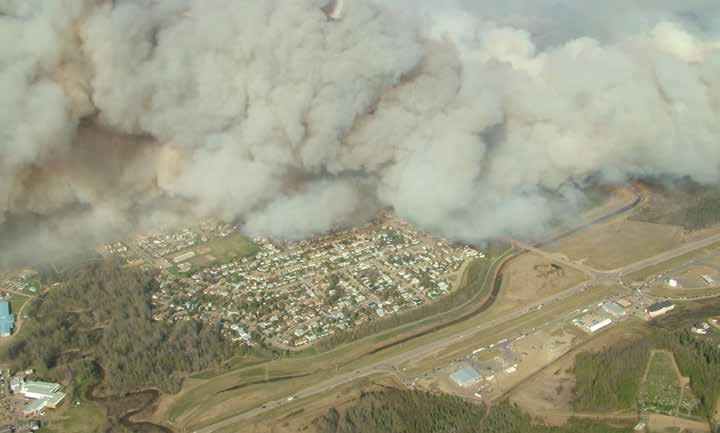
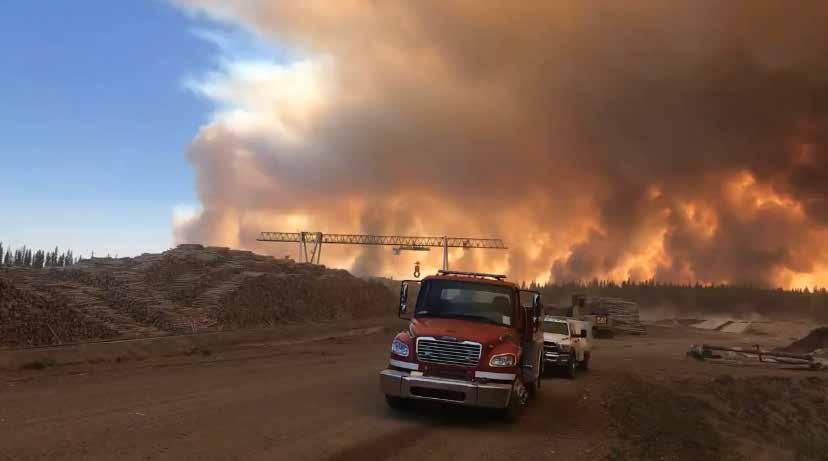
After the fire in Slave Lake in 2011, provincial funds were allocated to the Lesser Slave Regional Fire Service to focus on the 7 disciplines of FireSmart. This included cross training and inter-agency cooperation. As part of this, a 4-person full-time crew was assembled and began researching, training, and going on wildland fire deployments through contract Helitack work with Alberta Agriculture and Forestry (known at the time as SRD). As the program grew, we began responding to many WUI fires across Alberta and BC as a structure protection and Engine crew. Since 2011, your instructors have been on dozens of WUI events including: Slave Lake 2011, High Level 2015, Fort McMurray 2016, BC 2017, Chuckegg Creek 2019, BC 2021 and multiple others.
Through the years we began to compile the lessons learned and together with our own observations we started to build these courses. Currently there is minimal training in the way of WUI incidents. The S115 and S215 provide some awareness to these events but lack adequate time for hands on training. Although the theory is relevant, we found that a theory-based course does not prepare the responders for what they will actually encounter at a WUI Incident.
At many events we found a general lack of organization, know how, and skills required to action these events safely. The WUI Basic is one day of in class theory followed by 3 days of field skills and scenarios.
OVERVIEW
This course was designed to provide hands-on training to fire personnel responding to Wildland Urban Interface (WUI) events. The course is designed to focus on the current lack of hands-on best practice training and address the issues faced when responding to such a dynamic and boundary crossing event.
It will better prepare the responders to know what to expect, how to fall into the command structure, and function as an efficient single resource/strike team/task force at an event. It focuses on structure protection using site prep, sprinkler system set ups, burnouts, and various other protection methods. Engine operations at the strategy and tactics level is also a large component of the training.
The Basic is the first of 3 urban interface courses that have been developed by the Lesser Slave Regional Fire Service and its partners.
Wildland Urban Interface Basics | PARTICIPANT GUIDE Wildland Urban Interface Basics | PARTICIPANT GUIDE 4 5
The following is an overview of what is included in the four-day WUI Basic course.
FIRE BEHAVIOR
This section covers fire behavior, weather, fuel, topography, fire weather index (FWI), head fire intensity (HFI), parts and types of fire as well as common terminology. The theory portion goes into detail on each topic, while the activity is an opportunity to discuss and detail the skills necessary.
WILDLAND URBAN INTERFACE
In this section, we will cover the phases of fire, impingement, responding to incidents and sizing up including dispatch and hazards.
STRUCTURE TRIAGE
Both Alberta and British Columbia structure triage will be discussed, as well as information about interface priority zones, building construction and mapping.
SPECIAL CONSIDERATIONS
Here we will go over remote areas, helicopter safety, heavy equipment, as well as interactions with First Nations, the public and politicians. Included will be special considerations such as working on First Nations lands, industry, and remote site access and planning.
SPRINKLER SYSTEM SET UPS
Covering all types of sprinkler system set ups, including set-up, pros and cons for each system, trunk line lay, structure/site prep, mounting, testing and trouble shooting, For the practical sessions, the students will set up multiple different systems, use various types of portable water pumps, learn the benefits and when to use certain types of systems over others, and efficient use of equipment.
ENGINE OPERATIONS IN THE WILDLAND URBAN INTERFACE
This section focuses mainly on resources, engine, truck and tender types and operations. We will also go in-depth about safety concerns, methods of attack, and engine actions. The end of this section covers the incident command system, general staff, crew responsibilities by position and equipment maintenance.
COURSE SCHEDULE
DAY 1 In class theory learning, tabletop exercises, hands-on structure triage,and equipment familiarization
DAY 2 Hands on work in Pump site set ups, and sprinkler system deployments and scenarios
DAY 3 In class theory learning (morning), Engine operation strategy and tactics (afternoon)
DAY 4 Engine operations scenarios (morning), Full WUI scenario (afternoon)
Students will be given an incident with a time frame to prepare for and protect given structures from an impinging wildfire.
Once time frame is complete, students will assemble into strike teams and task forces to conduct a live fire impingement scenario (live fires will be hay bale and pallets outside of spring, during the spring grass hazard pre-burns of selected areas will occur beforehand to “guard” in places where small grass fires can be lit without chance of escape.
Students will then have to operate together to prioritize given fires and suppress as necessary, following chain of command and proper safety precautions.
We feel like this is needed training in Western Canada, as there is little in the way of training to prepare our people for what they will face on the ground out there.
This course was built on experiences of not only the Slave Lake crews but in coordination with multiple departments. and stakeholders involved with these events. The other two courses in this program are WUI Advanced (for leadership at WUI events) and Hazard Reduction Burning (controlled burning of grass fuel types for prevention and as a tactic in the field).
Wildland Urban Interface Basics | PARTICIPANT GUIDE Wildland Urban Interface Basics | PARTICIPANT GUIDE 6 7
LEARNING OUTCOMES
1. Identify & Mitigate Hazards in the Wildland Urban Interface Upon completion of this course, students should be able to:
2. Complete a size up and structure triage
3. Identify equipment in a sprinkler trailer
4. Select, set up, and troubleshoot an adequate pump site
5. Select, set up, and troubleshoot a working sprinkler system
6. Understand and perform engine operation strategies and tactics
7. Work efficiently and safely as a crew member in the Wildland Urban Interface
INSTRUCTORS
The instructors for this course are qualified individuals who have years of municipal and forestry deployments under their belts.
As mentioned earlier, this is the team that has responded to over 21 WUI deployments in various capacities such as engine/tender crew members/leaders, structure protection specialists, operation section chiefs, and incident commanders across Western Canada. We encourage you to ask questions, share your experiences and learn from the experiences of your instructors and fellow students. This is a casual learning environment intended to share best practices and build relationships to better our responses to WUI events.
The material is a combination of years of trial and error, mistakes made, and lessons learned.
CLASSROOM ENVIRONMENT
This course and the ones following it have been developed by firefighters for firefighters. Varying experiences, best practices, and lessons learned have blended into a concise format to provide the most up to date training known to exist on interface fires. The environment for delivering these courses is a casual one, intended to generate discussion and share experiences of the group. Therefore, it is a casual adult learning environment, ask questions when you have them, be respectful and learn from everyone you can, and do your best to keep an open mind. The content in the course may contradict past practices, or they are implemented in a new way. This is not meant to discredit the other material out there; it is rather an evolution of that material and years of trial and error in finding the most effective and efficient ways of protecting structures.
Be courteous, keep an open mind, learn from everyone you can, and build relationships with each other. You never know who may be standing next to you when faced with an interface event.
Wildland Urban Interface Basics | PARTICIPANT GUIDE Wildland Urban Interface Basics | PARTICIPANT GUIDE 8 9
NOTES
FIRE BEHAVIOR
HEAT TRANSFER METHODS
Radiation
Radiant heat spreads ahead, to the sides, above, below, and behind the heat source. Radiant heat dries fuels out ahead or near the fire and can lower relative humidity’s in the area of the fire, further drying out the air used in combustion and adding to fire intensity.
Conduction
Ground heat warming up the duff layer which in turn dries it out and allows fire to penetrate the organic ground layer.
Convection
Uses heat and smoke to rise and preheat fuels upslope, the air above (influencing atmospheric conditions), and reduce relative humidity’s in proximity to the fire.
FIRE TRIANGLE
OXYGEN: fire needs oxygen to sustain itself. Removal of oxygen stops combustion.

WILDFIRE TRIANGLE
TOPOGRAPHY: slope, aspect, and layout of the land contribute to spread rates and direction.
HEAT: fire needs a heat source to ignite and sustain itself. Removal of the heat (cooling) extinguishes the fire.
FUEL: fire needs the proper amount of fuel dried to the right amount arranged in a way that supports burning
WEATHER: wind, temperature, relative humidity, and precipitation all contribute to fire spread.
FUEL: the amount, arrangement, and moisture content of fuels contribute to fire spread and intensity.

Wildland Urban Interface Basics | PARTICIPANT GUIDE Wildland Urban Interface Basics | PARTICIPANT GUIDE 10 11
WEATHER
Relative Humidity
The measure of the amount of moisture in a given parcel of air expressed as a percentage. In English this is the amount of moisture in the air. Rule of thumbs are if RH is below 30% it is low, and you can expect to see increased fire behavior. Humidity plays a direct role in the drying of fuels by allowing them to evaporate their moisture quickly in drier air.
Temperature
Temperature speeds the drying of fuels by heating them throughout the day and increasing the amount of moisture they evaporate. As daytime heating increases, the fuels dry out more, leading to a part of the day known as “peak burn”. Peak burn is when the temperatures are usually the highest and are paired with the lowest relative humidity’s of the day. This time frame typically is from 16001800 each day. During this time period you can expect to see the highest fire behavior of the day and have the most control difficulties.
Crossover
The point at which the relative humidity is equal to or less than the temperature. This is a known benchmark to expect extreme fire behavior. For example, if the temperature is 27°C and the RH is 24%, you have crossover. The greater the spread apart (higher temp, lower the RH) the more extreme behavior can be observed.
Wind
Measured in kilometers per hour, wind is the biggest factor in the fire’s rate of spread. The higher the wind, the faster the spread. The more volatile, fine, or flashy the fuel is, the greater effect wind has on its spread rate. Wind also speeds up the drying of fuels by blowing away the moisture that is evaporating on the fuel’s surface. Wind is stated as a direction and speed. For example, winds to today are Northwest at 45kms/hr. Wind direction is ALWAYS stated from the direction the wind is coming from. So, a Northwest wind means it is blowing FROM the Northwest TO the Southeast.
Precipitation
Precipitation determines fuel moisture content. Immediate precipitation may have a limited effect on large fuels which take time to absorb moisture but can immediately saturate finer fuels. A long slow drizzle throughout the day does more to saturate fuels than a quick, hard downpour. Light precipitation has a very limited effect on fire behavior. It may slow fire progress, but only for a short time. Long steady rains are needed to impede fire growth.
FUEL FACTORS OF FIRE FUEL
Moisture Content
The amount of moisture in fuel is the major element that will determine how much of the fuel will burn (available fuel). According to how much moisture is in the fuel, all will burn, only part will burn or, if wet enough, none will burn. Of the fuels that do burn (the available fuel), the moisture that is in them affects the behavior of the fire. When the available fuels are moist, combustion is slow because much of the heat is expended in converting moisture in the fuel to steam. Fuel will not enter the combustion process and burn until the moisture is driven out of that particular particle of fuel and it has reached ignition temperature. As fuels become drier, the rate of combustion is increased because less heat is required to drive off the moisture that is left. Fuel moisture content is one of the important factors that determine ignition probability and fire behavior in forest ecosystems.
Size


Fuel size is dependent on surface area and mass. The more surface area and less mass the fuel has, the finer it is. The LESS surface area and MORE mass a fuel has, the heavier it is. Lighter, smaller fuels tend to ignite easily and be more “flashy” while larger, heavier fuels tend to take more to ignite, and burn slower. Compare this to starting a campfire. You wouldn’t start with the largest pieces of wood; you start it with finer fuels to get the larger fuels going.
Dead vs. Alive
Dead trees absorb moisture quickly, but they do not retain it for as long as live trees. Therefore, dead fuels dry out quickly and are more susceptible to drying days and preheating. Live fuels retain their moisture for longer and are more affected by long-term precipitation. Live fuels that are dry burn intensely, but live fuels that receive precipitation, or have a higher moisture content from previous days of precipitation, do not burn as intense.
Quantity
Refers to “how much” fuel there is. Think of this as a grass field, is it sparse in amounts of grass? Or loaded with grass? Quantity determines “fuel load” in an area and has a direct impact on control difficulty.
Arrangement
Describes where the fuels are placed on the landscape. Are they spaced tightly? Or sparse? Arrangement contributes to the “type” of wildfire you may encounter (ground, surface, crown)
Continuity
Speaks to how distributed the fuels are on the landscape. Is the fuel thick and continuous? Or does it change fuel types rapidly and unevenly? Think of a mixed wood fuel type, where coniferous and deciduous fuels are mixed and may vary in amounts grouped together.
Wildland Urban Interface Basics | PARTICIPANT GUIDE Wildland Urban Interface Basics | PARTICIPANT GUIDE 12 13
TEMPERATURE RELATIVE HUMIDITY (RH) MEASURED AS A % WIND MEASURED IN KM/HR PRECIPITATION MEASURED IN MM
FORESTRY FUEL TYPES
C1 SPRUCE/LICHEN WOODLAND

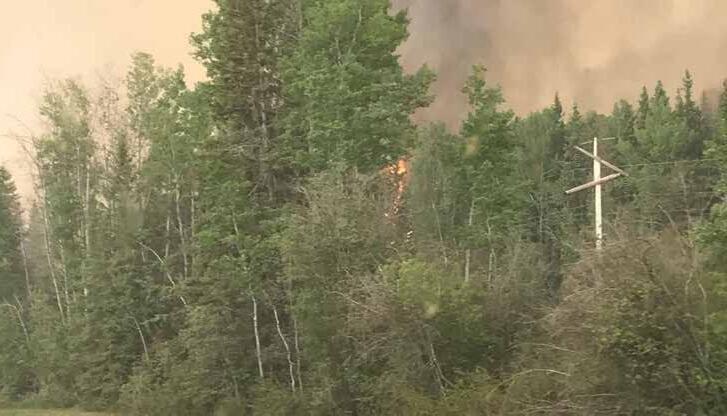
C2 BOREAL SPRUCE
C3 MATURE JACK OR LODGEPOLE PINE

C4 IMMATURE JACK OR LODGEPOLE PINE
C7 PONDEROSA PINE/DOUGLAS FIR
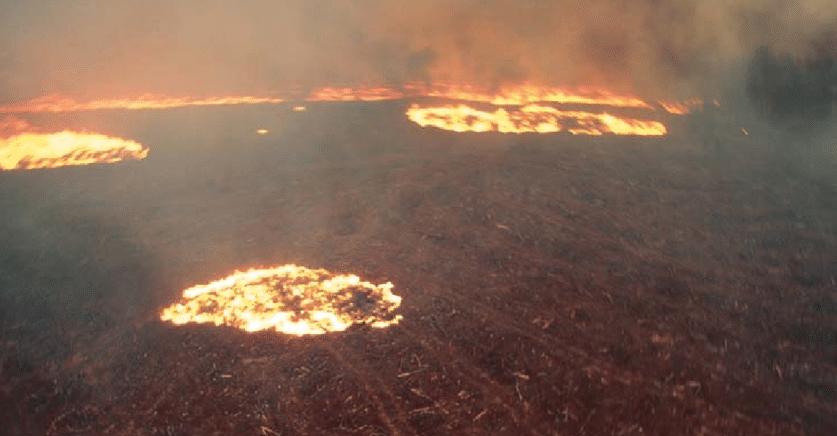
01A MATTED GRASS
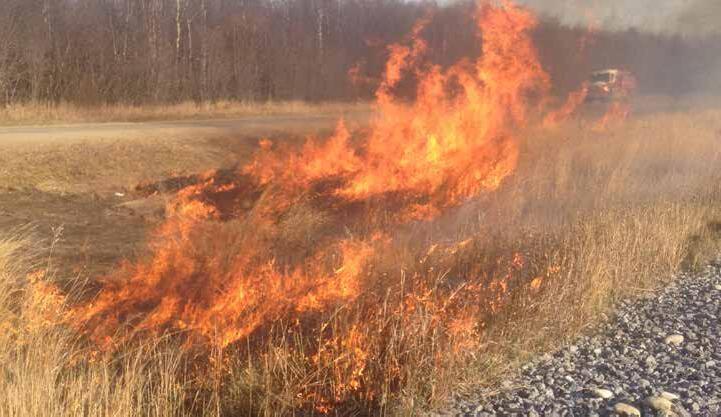
01B STANDING GRASS
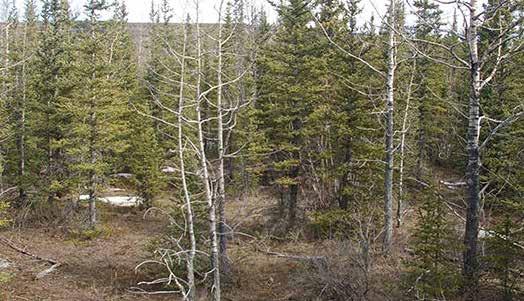
M1 BOREAL MIXED WOOD LEAFLESS (EXPRESSED AS A %, EX. 50/50)
M2 BOREAL MIXED WOOD GREEN (EXPRESSED AS A %, EX. 50/50)
D1 LEAFLESS ASPEN
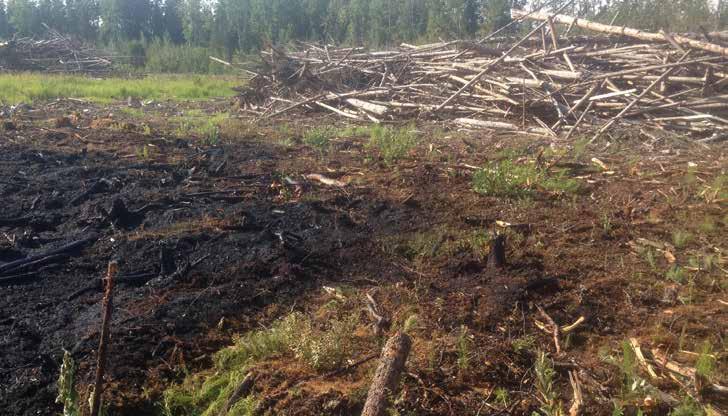
S1 JACK OR LODGEPOLE PINE SLASH
S2 WHITE SPRUCE/BALSAM SLASH
C1—SPRUCE/LICHEN WOODLAND
C2—BOREAL SPRUCE
Wildland Urban Interface Basics | PARTICIPANT GUIDE Wildland Urban Interface Basics | PARTICIPANT GUIDE 14 15
C3—MATURE JACK OR LODGEPOLE PINE


C4—IMMATURE JACK OR LODGEPOLE PINE
C7—PONDEROSA PINE/DOUGLAS FIR
01A—MATTED GRASS
Wildland Urban Interface Basics | PARTICIPANT GUIDE Wildland Urban Interface Basics | PARTICIPANT GUIDE 16 17
01B—STANDING GRASS
M1—BOREAL MIXED WOOD LEAFLESS (expressed as a %, ex. 50/50)

M2—BOREAL MIXED WOOD GREEN (expressed as a %, ex. 50/50)
D1—LEAFLESS ASPEN
Wildland Urban Interface Basics | PARTICIPANT GUIDE Wildland Urban Interface Basics | PARTICIPANT GUIDE 18 19
S1—JACK OR LODGEPOLE PINE SLASH
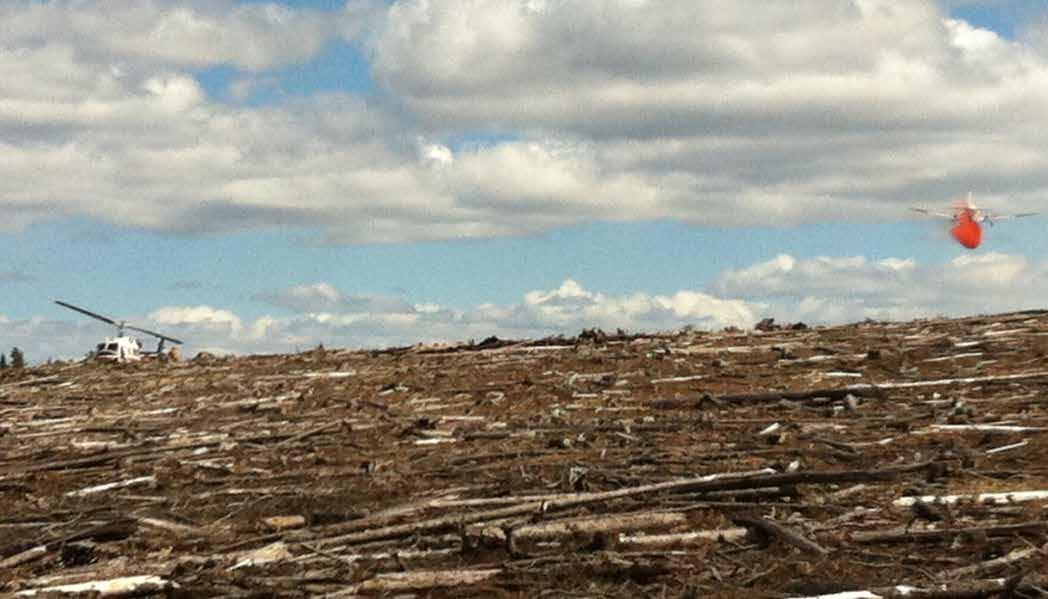
S2—WHITE SPRUCE/BALSAM SLASH
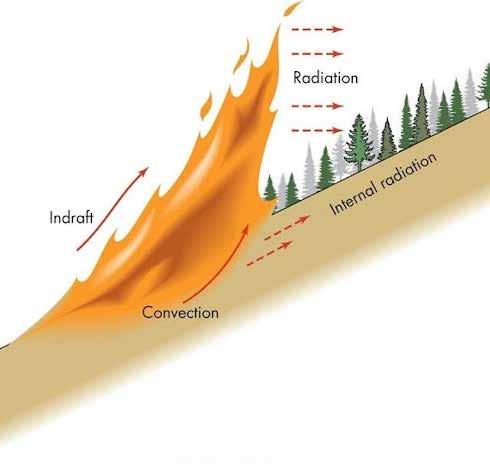
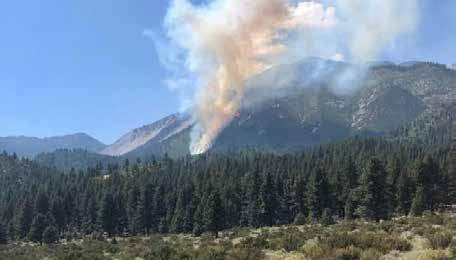
TOPOGRAPHY SLOPE
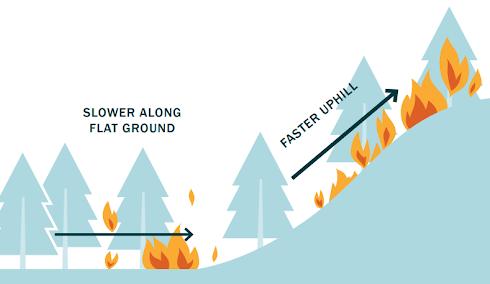
Slopes play a critical factor in predicting fire spread and direction. Fire tends to spread faster uphill than downhill, so valleys and chutes can be expected to create fire “runs”. This is due to fuels being preheated by convective heat rising upslope and flame lengths being closer to the fuels as they burn up hill. If wind is added to this equation the effects are multiplied and extreme spread rates can be observed. At the top of slopes winds will “eddy” and roll over the top. As a safety factor, refrain from being upslope of an active fire front.
Wildland Urban Interface Basics | PARTICIPANT GUIDE Wildland Urban Interface Basics | PARTICIPANT GUIDE 20 21
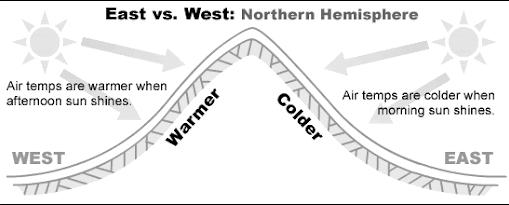
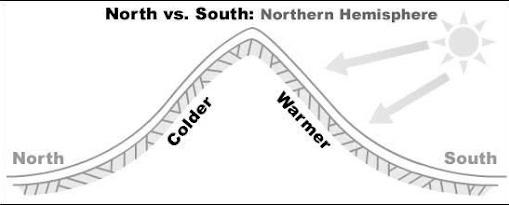
ASPECT
The direction the slope faces. As far as fire behavior goes, this is important to understand how a slope gets heated, what fuels tend to be on different aspects, and how they will react to fire. South facing slopes get more sunlight and tend to dry out quicker while north facing slopes are more shaded and hold more fuel moisture. South facing slopes tend to have more finer, flashier fuels as a rule while north facing slopes tend to have more heavier dense fuels. The farther south you travel the more prevalent this becomes. East slopes receive the cooler morning sun while west slopes get the hotter afternoon heating. As peak burn approaches, the Eastern slopes tend to become shaded and can be expected to have lower fire intensity than West slopes during peak burn.
SHAPE OF LANDSCAPE
The layout of the landscape will affect fire behavior by channeling winds, changing fuel types, and providing natural barriers. Ridges, mountains, saddles, draws, valleys, and barriers all affect the wind patterns and fire spread. Winds move like water across the landscape. Picturing how water would flow across the landscape can help you identify how winds will behave.

ELEVATION
Elevation plays a factor as elevation increases; humidity’s tend to increase. The caveat is that wind speeds tend to increase with elevation. At higher elevations temperatures are reduced and finer fuels become more prevalent than heavier fuels.
Wildland Urban Interface Basics | PARTICIPANT GUIDE Wildland Urban Interface Basics | PARTICIPANT GUIDE 22 23
Shape of Landscape Chute or Chimney
Shape of Landscape Valley
Shape of Landscape Eddy
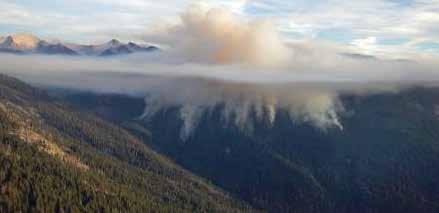
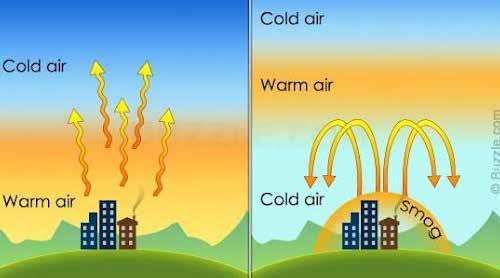
INVERSION
During normal days, air near the surface warms and begins to rise. As the air rises it hits cooler air and begins to cool. With inversion, cooler air at the surface gets trapped below a layer of warm air. This generally occurs in the morning hours and can trap smoke close to the ground hampering aircraft and reducing visibility. This can also limit fire behavior to an extent, but it can prevent aircraft from flying. As the ground starts to heat up, the cool air at the surface warms and becomes warmer than the air above it, lifting the inversion.
FOREST WEATHER INDEX SYSTEM (FWI)
The FWI system is a numerical rating system for fuel moisture and fire behavior predictions. It is made up of six calculations, three being fuel moisture codes and three being fire behavior codes. These are calculated by using data collected throughout forest protection areas and calculated daily to provide inputs into the index system. Fire weather observations track temperature, relative humidity, wind speeds, and 24hr rain fall. These observations provide the data for the index system.
FUEL MOISTURE CODES
Fine Fuel Moisture (FFMC)
A numeric rating of the moisture content of litter and other cured fine fuels. This code is an indicator of the relative ease of ignition and the flammability of fine fuel. FFMC needs minimum of 0.6mm of precipitation to effect it. Benchmarks for the FFMC is above 80 will support free burning and above 90 is high probability of spot fires.
Wildland Urban Interface Basics | PARTICIPANT GUIDE Wildland Urban Interface Basics | PARTICIPANT GUIDE 24 25
Duff Moisture Code (DMC)
A numeric rating of the average moisture content of loosely compacted organic layers of moderate depth. This code gives an indication of fuel consumption in moderate duff layers and medium-size woody material. The DMC is an indicator for the potential of holdover lighting fires. Benchmarks for the DMC would be above 20 holdover lighting fires may occur.
Drought Code (DC)
A numeric rating of the average moisture content of deep, compact organic layers. This code is a useful indicator of seasonal drought effects on forest fuels and the amount of smoldering in deep duff layers and large logs. This is a long-term buildup indicator, benchmarks being 15 – ground saturation, 300 – persistent fire, and 500 – significant ground fire activity and mop up difficulty.
Wildland Urban Interface Basics | PARTICIPANT GUIDE Wildland Urban Interface Basics | PARTICIPANT GUIDE 26 27
FIRE BEHAVIOR INDICES
Initial Spread Index (ISI)
A numeric rating of the expected rate of fire spread. It is based on wind speed and FFMC. Like the rest of the FWI system components, ISI does not take fuel type into account. ISI can change throughout the burning period. Benchmark is above 10 cured grass burns intensely and spruce stands crown.
Buildup Index (BUI)
A numeric rating of the total amount of fuel available for combustion. It is based on the DMC and the DC. The BUI is an indicator of fuel consumption, mop up issues, and a factor in fire intensity. Fuel driven fires tend to have high BUIs. Benchmark is above 60 will have increased mop up difficulty.
Wildland Urban Interface Basics | PARTICIPANT GUIDE Wildland Urban Interface Basics | PARTICIPANT GUIDE 28 29
FIRE WEATHER INDEX
A numeric rating of fire intensity. It is based on the ISI and the BUI and is used as a general index of fire danger throughout the forested areas of Canada. A high BUI and low ISI will give the same rating as a low BUI and a high ISI, but they are two very different burning days. A high BUI and low ISI will indicate it is very dry but not windy. A low BUI and high ISI are common in the spring when winds can be high, but the ground is still saturated.
WIND DRIVEN VS FUEL DRIVEN
Wind Driven
A high ISI value will result in a wind-driven fire. These are fueled by wind speed and direction. Fire is “pushed” by the wind and is very noticeable in flashy fuels. Fuels may not completely burn but will carry the fire spread. Potentially rapidly spreading, these can be patchy-incomplete burns.
Fuel driven
A high BUI will result in a fuel-driven fire. These are fueled by the “dryness” of the fuels. Fuels with substantially low moisture content add to the intensity of the fire by having more fuel available to burn than moisture rich fuels. Fuels burn more completely and intensely. Fuels may burn slower but release more heat. Fuel driven fires will see high numbers of spot fires associated with them.
HEAD FIRE INTENSITY
HFI is a ranking system for fire behavior. It measures energy released and flame lengths to determine a class of fire intensity. Each class (1-6) has recommended firefighting strategies tied to them. A rule of thumb to follow is to anchor at HFI 4 or greater. HFI rank can also be used in a size up to describe the fire behavior being observed to incoming resources.

SHOULD ANCHOR MUST ANCHOR MUST ANCHOR
Flame Lengths Rules of Thumb
When suppressing a wildfire, it may be difficult to understand what HFI you may be actioning. A simple rule of thumb to follow is if the flames are as tall as you, it is likely an HFI of 3. Hose lines are usually sufficient to control this size of fire.
If the flames are as tall as your apparatus, it is likely an HFI of 4 or greater. Hose lines may not be sufficient to deal with this size of fire. Aircraft or indirect attack methods will likely be required. It is a good rule of thumb to always anchor, and have planned and tested escape routes when suppressing any wildfire. Always have a lookout and be mindful of wind direction and speed as well as any changes to conditions. If actioning HFI 3 or greater, feeling the wind at your back is proffered as this means you are not at the head of the fire. Feeling the wind on the back of your neck and ears can help you to notice any changes in wind before it becomes a safety concern.
Wildland Urban Interface Basics | PARTICIPANT GUIDE Wildland Urban Interface Basics | PARTICIPANT GUIDE 30 31
Hazard rating FFMC DMC DC ISI BUI FWI HFI Low 0-76 0-21 0-79 0-1.5 0-24 0-4.5 1-2 Moderate 77-84 22-27 80-189 2-4 25-40 4.5-10.5 3 High 85-88 28-40 190-299 5-8 41-60 10.5-18.5 4 Very high 89-91 41-60 300-424 9-15 61-89 18.5-29.5 5 Extreme 92+ 61+ 425+ 16+ 90+ 29.5+ 6 FIRE WEATHER OBSTRUCTIONS FUEL MOISTURE CODES FIRE BEHAVIOUR INDICES Temperature, relative humidIty, rain Temperature, rain Wind Temperature, relative humidity, rain Fine Fuel Moisture Code (FFMC) Duff Moisture Code (DMC) Initial Spread Index (ISI) Fire Weather Index (FWI) Buildup Index (BI) Drought Code (DC) HFI 1-2 HFI 3 HFI 4 HFI 5-6 Flame lengths 0-1.5m Flame lengths 1.5-2.5 m Flame lengths 2.5-3.5 m Flame lengths 3.5 m +
attack
handtools
attack
pump and hose
air
on head
attack
Direct
with
Direct
with
or
support Indirect attach air attack successful
Indirect
air attack likely to fail on head SHOULD ANCHOR
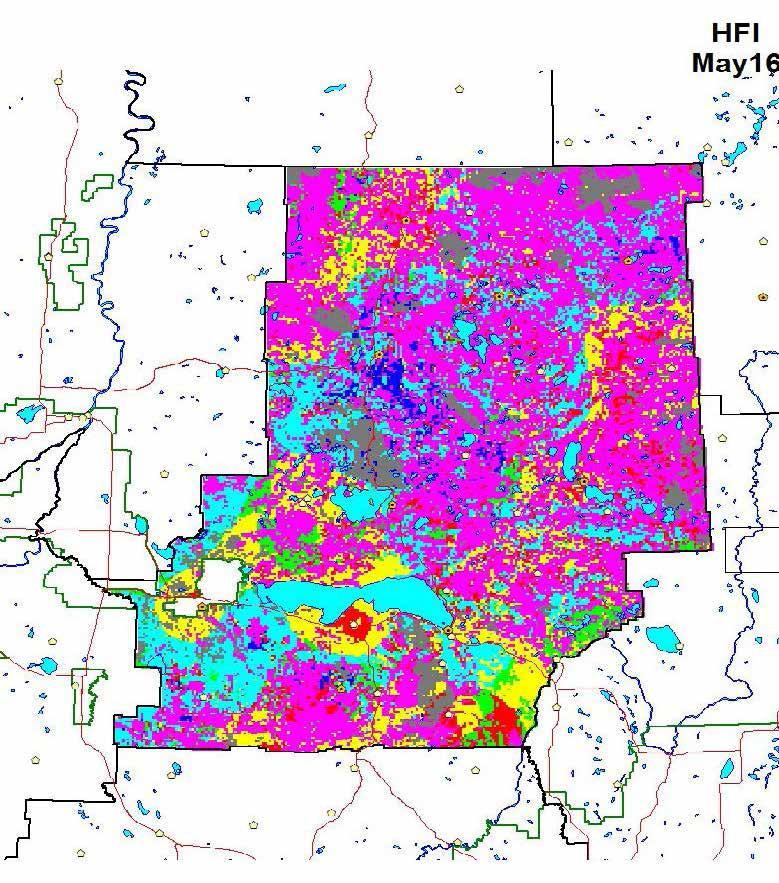
HFI MAP
Head fire intensity maps are maps forestry produces daily to show case the expected fire behavior in a forest protection area. They take fuel typing information, 24hr and long-term precipitation data, and expected HFI based on daily FWI calculations to show where the hazard is in the area. These are useful for developing pre-suppression plans (PPS) which determine how many and where the resources should be placed to match the hazard. These are useful to the municipal fire service in anticipating what fire behavior you are likely to see on the landscape.
ALBERTA AGRICULTURE AND FORESTRY DAILY FIRE SAFETY BRIEFING

A daily 10am briefing on expected fire weather and behavior for the day. They take forecasted weather, along with long term rainfall data and use it to make predictions on fire behavior. It notes expected HFI, spread rates in common fuel types to the area, and estimates fire size in 1 hour burning in those common fuel types. Notice the writing in RED, they show important information pertinent to the day’s conditions. Legal downs for rotary wing aircraft are also stated. For each forestry resource assigned to them (contractors included) the crews sign off on this daily and forestry gets a copy. Keep one for your records, they are good for billing if you run into issues.
Caution; Think safety before initiating fire action…..Fire intensities continue to climb as the dry weather conditions persist. All fuels available for combustion. Explosive conditions possible with gusting winds and cross over conditions. Be safe….one foot in the black
Extreme fire behaviour, serious control problems, sustained crown fire. Mid to long range spotting. > 10,000 kw/m
Flame Length: > 5.5 m
Safety Concerns:
□ Fire Environment ; EXPLOSIVE FIRE BEHAVIOUR with extreme indices
□Work Environment
□ Crew Concerns:
Duty Officer Jason Cottingham
Fire Behaviour Analyst
Aircraft Legal Down
Lake: 22:13 High Prairie : 22:21 Wab: 22:11
22:22
Crew Supervisor (print) (sign)
Crew Leader and Identifier Number (Use back of sheet if more space needed) (print) (sign)
Wildland Urban Interface Basics | PARTICIPANT GUIDE Wildland Urban Interface Basics | PARTICIPANT GUIDE 32 33
Fire Safety Briefing For : May 16, 2016 Location: Slave Lake Time: 17:00h Fire Weather: Predicted values based on PFFC WX forecast issued at 1500 hrs.
Location/S tation Used FFMC DMC DC ISI BUI FWI High Prairie 95 8 8 436 24 117 59 Wabasca S6 95 95 412 24 120 60 38 95 49 381 24 74 48 26 FBP Fuel Type Intensity Class ROS m/min Fire Size in 60 min (in Hectares) C2 Boreal Spruce O1 a Matte d grass 90 % M 2 50/50 C2 Boreal Spruce O1 a Matt ed Grass 90 % M 2 50/50 C2 Boreal Spruce O1 a Matt ed Grass 90% M 2 50/50 S1 Saulteaux 6 5 6 45 63 23 180 224 49 Wab asca 6 5 6 45 63 23 179 224 48 L3 6 5 6 40 62 21 145 218 42 HHFFI I CCL LAAS SSS 11 HHFFI CCL LAAS SSS 22 HHFFI CCL LAAS SSS 33 Fire starts not likely to sustain themselves. Control easily achieved. HFI: <10 kw/m, Surface Flame Length <0.2 m Direct Attack Fuels are receptive to sustain ignition. Creeping fire fairly easy to control. HFI: 10 – 500 kw/m, Surface Flame Length 0.2 to 1.5 m Direct Attack Highly v igorous surface fire. Intermittent crowning. Ground forces effective at lower end Heavy equipment and aircraft effective. 500 – 2000 kw/m Surface Flame Length: 1.5 to 2.5 m Direct Attack SHOULD USE ANCHOR POINTS HHFFI I CCL LAAS SSS 44 HHFFI CCL LAAS SSS 55 HHFFI CCL LAAS SSS 66 Burning conditions become critical.
range spotting. 2000 – 4000 kw/m Surface Flame Length: 2.5 to 3.5 m Parallel or Indirect Attack MUST ANCHOR Intermittent and sustained crown fire. Control is extremely difficult. Short to moderate range spotting. 4000 10,000 kw/m Surface Flame Length: 3.5 to 5.5
Suppression Flanks and Back Co-ordinated Ground & Air Tactics MUST ANCHOR
Intermittent crowning, short
m
Surface
Suppression
Co-ordinated Ground & Air Tactics MUST ANCHOR
Flanks and Back
□
Slave
Loon:
Forecast Zone Max Temp Low RH % Crossover Wind Precipitation Lightning Trend RE 25 15 YES S20G35 NIL L UP SH 24 15 YES S20G35 Nil L UP
PRE-SUPPRESSION PLAN (PPS)
A tool forestry develops daily to assign resources, both staffed and contracted to areas within district to meet response requirements. Using a model for which resources and how many they need to meet the hazard; local duty officers develop this plan and stage resources accordingly. They are a tool not only for assigning resources, but to let every resource know who is on and where they are at for the day. During a dispatch, these resources converge on a fire based on the fire’s control needs. Initial attack (IA), support resources, overhead support, and airtanker support are all identified here. These resource allotments all change with the hazard based on the fire weather index and HFI predictions. The higher the hazard, the more resources forestry puts on to meet the threat. These can be confusing but are laid out in a way to show the resources and where they are located throughout the day as well as what time they start and finish their shift.
Wildland Urban Interface Basics | PARTICIPANT GUIDE Wildland Urban Interface Basics | PARTICIPANT GUIDE 34 35
PPS P an Deta l - Wi d ire M anagement Area Repor Da abase: Prod-Ora10 FIRES App ica on: Alber a Susta nable Resource Deve opment - Wi dfire M anagement Page 1 of 4 2016 05 15 16:28 39 M odif er Assigned: HF 3: 22 HF 4: 7 HFI 5: 14 HF 6: 35 M ean HF : 6610 PFFC Signed Off: P an S gned Off: Data Source: A Part al y Covered %: 17 HF 3: 5 HFI 6 54 A Covered %: A Not Covered %: Last M od fied Date 33 M ean HFI Va ue 16463 28 M ean HFI Class: 6 N Y SFMS PM Fo ecast 2016 05/15 16 28:14 5 - Resource avai ab ty fac ors Reason for No Forecast HFI: Ac ua HFI for 2016/05 15: HFI 1: 2 HFI 2 20 Current Plan Date IA Coverage %: 67 HF 1: HFI 4 15 W M A S ave Lake A No Resources Required %: 22 HF 2: 17 HFI 5 7 Plan d: 42930 2016 05/16 ** 2 C ass: 5 NITIAL ATTACK RESOURCES - DEPLOYM ENT PLAN Base Name Fire # Stand To T me On Time Off T me AM Standby On Time Off T me PM S andby R W Reg R/W Type R W Size Crew ID Crew Type Getaway T me On Base T me Off Base T me Stand Down T me Ch pewyan Lake 10:00 NONE NONE FKMR AS350B3DH NT SH06 HAC 5 12 00 20:00 H gh Pra r e 10:00 09:59 20:01 GBGT AS350B3E NT SH03 HAC 5 12 00 20:00 nverness 10:00 09:59 20:01 GEDL AS350B2 NT SH01 HAC 5 12 00 19:00 20:00 L t le W h ef sh -Day F re base 10:00 09:59 20:01 GTAM AS350SD2 NT SH04 HAC 5 12 00 19:00 20:00 Loon R ver 10:00 NONE NONE GDEB AS350B2 NT SH08 HAC 5 12 00 20:00 Red Ear h 10:00 NONE NONE F EM AS350B3E NT SH07 HAC 5 12 00 19:00 20:00 S ave Lake 10:00 NONE NONE GRYK AS350B3E NT SH02 HAC 5 12 00 20:00 * S ave Lake 10:00 * * * * NONE * * NONE * *4X4W E * *SH09 HAC *5 * * 20:00 * Trout M n 10 00 NONE NONE GBSF 212HPBLR MED SFB02 FTAC 5 12 00 19:00 20:00 W abasca 10:00 09:59 20:01 GSLJ A119 NT SH05 HAC 5 12 00 20:00 0 8 1 0 Tota no o R W 9 R W: Crews: n tia Attack Resources Summary: LRG MED INT LGT 0 9 1 RAP: HAC: FTAC: 0 W FC2: UN T: 0 Tota no o Crews: 10 SUPPORT RESOURCES - DEPLOYM ENT PLAN Base Name / F re Number Skdr Bus Van Wa er Truck Cat Unit F/W Gtwy T me Crew Type PM S andby On Time Off T me AM Standby On T me Off T me Stand To T me On Base T me Stand Down T me Of Base Time Crew D R W Size R W Reg. 1440 W FC OD NONE 10:00 20 00 NONE SFB03 Bou der Creek 10 NONE 1 10:00 20 00 NONE Chipewyan Lake 5 FTAC NONE 10:00 12:00 20 00 NONE SFB06 MED GRNR High Pra r e 10 NONE 1 10:00 20 00 NONE Mar en Mounta n 10 NONE 1 10:00 20 00 NONE Nip s 5 FTAC NONE 10:00 12:00 20 00 19 00 NONE SFB01 MED GSLR Nip s 10 NONE 1 10:00 20 00 NONE Red Earth 10 NONE 1 10:00 20 00 NONE S ave Lake NONE 2 10:00 20 00 NONE W abasca 5 UN T NONE 10:00 12:00 20 00 NONE SU01 MED GCCD W abasca 5 FTAC NONE 10:00 12:00 20 00 NONE SFB04 MED GUW X W M A Duty Off cer: COM M ENTS: Co t ngham Jason B No resources ava ab e or export S I - Assessm ent LSK - Invest ga ion ETG - HEGS No es **Cur en p an tha has one or mo e a ch ves *F e d n he cu ren p an hat has changed s nce he ast s gned-o f
OVERHEAD SUPPORT
Man-up Superv sor Cou tor e le George Loon River N
Man-up Superv sor Belcourt Lance Tyle H gh Pra r e N
Man-up Supe v sor Thunder Gordon Henry Wabasca N
ndustry L ason Stegehu s Herm anus Slave Lake N
Response Of cer Jacobs Am brose M Slave Lake Y
Response Of cer Col ns Robert H gh Pra r e Y
Response Of cer Carew Ch istopher Wabasca Y
Response Of cer E uk Susan Loon R ver Y
Mapp ng Spec a st Abera Dan e S ave Lake Y
Log st cs Coord nato Bats one Ta ah S ave Lake Y
Depu y Du y O f cer DeGrazia Jam es S ave Lake Y
Warehouse Person Anderson Co e S ave Lake Y
W i d i e Invest gato McCorm ick C aig D S ave Lake Y
W i d i e Invest ga o Cha foux George K rby H gh Pra r e Y
W i d i e nvest ga or Per h B ent Chr st an Wabasca Y
W ld e nvest ga or Courtor e e Pau S H gh Pra r e Y
Adm in s rat ve Suppor Hansen S acey S ave Lake Y
W i d i e Assesso Pankratow Jason W G S ave Lake Y
Heavy Equ pm en Group Superv sor McLeod Mark Slave Lake N
Wildland Urban Interface Basics | PARTICIPANT GUIDE Wildland Urban Interface Basics | PARTICIPANT GUIDE 36 37 PPS Plan Deta l - W ldfire M anagement Area Repor Database Prod-Ora10 F RES App
Alberta Susta nab e Resource Development - W dfire M anagement Page 2 of 4 2016/05 15 16:28:39 On S andby
cat on
Pos tion Name Based At
SUPPORT RESOURCES - DEPLOYM ENT PLAN Base Name / Fire Number Skdr Bus Van Water Truck Cat Un t F/W Gtwy T me Crew Type PM Standby On T me Off Time AM Standby On T me Off T me Stand To T me On Base T me Stand Down T me Of Base Time Crew ID R/W Size R/W Reg W abasca 10 NONE 1 10:00 20 00 NONE To al Heavy Equ pm en : 2 6 0 0 0 Suppor Resources Summary: Crews R/W: LGT 0 NT: 0 MED: 4 LRG: 0 To a no of R/W : 4 RAP: HAC: FTAC: 0 0 3 W FC2 0 UN T 1 Tota no o C ews: 4 W M A Duty Of icer: COM M ENTS Cot ingham Jason B No resou ces ava lab e or export SI - Assessm en , LSK - nvest ga ion ETG - HEGS No es: **Cu ren p an ha has one o more arch ves *F e d n the cur en p an tha has changed s nce the ast s gned-o PPS P an Detai - Wildf re M anagement Area Report Database: Prod-Ora10 FIRES Appl ca on: A berta Sustainable Resource Deve opmen - Wildf re M anagement Page 3 of 4 2016 05/15 16:28:39 M odif er Ass gned: HFI 3: HFI 4: HF 5: HFI 6 M ean HFI: PFFC Signed Of : P an S gned Off: Data Source: A Partia ly Covered %: HFI 3: HFI 6: A Covered %: A Not Covered %: Last M odi ied Date: M ean HF Value: M ean HF C ass: N N Manua 2016 0 5 15 15 53:10 97 - PFFC Prov nc a PPS Plan - A cove age not app icab e Reason for No Forecast HF : Actua HFI for 2016/05/15 HFI 1 HF 2: Current Plan Date A Coverage %: HFI 1: HFI 4: W M A Edm onton A No Resources Requ red %: HFI 2: HFI 5: P an Id: 42932 2016 05/16 Not m andatory o ca cu ate HFI and In t a A tack Coverage - Th s p an for in o on y Class: AT Type AT Group On Red Off Base Stand Down Green Day Y/N A RTANKER GROUPS - DEPLOYM ENT PLAN Tanker Base On Yel ow On B ue L-188 GRP06 N Loon R ver 20 00 19:00 12 00 10 00 L-188 GRP07 N S ave Lake 20 00 19:00 12 00 10 00 CL-215T GRP03 N For McMu ray 20 00 19:00 12 00 09 00 L-188 GRP04 N Mann ng 20 00 19:00 12 00 10 00 CV580 GRP02 N For McMu ray 20 00 19:00 12 00 09 00 L-188 GRP12 N Loon R ver 20 00 19:00 12 00 10 00 AT802A GRP01 N Lac La B che 20 00 19:00 12 00 10 00 CV580 GRP08 N W h tecou t 20 00 19:00 12 00 10 00 AT802 GRP05 N Conkl n ATB 20 00 19:00 12 00 10 00 On Standby Pos t on Name Based At OVERHEAD SUPPORT nfra ed Coord nato S eep Bob Edm on on Y F re W ea her Meteoro og st Kruger Pau Edm on on Y Ign t on Spec al s Parkinson Kevin Edm on on Y Mapp ng Specia s Kea s Kev n Edm on on Y Logist cs Coord nator Parkinson Tracy L Edm on on Y Wa ehouse Pe son Bu ns Denn s Edm on on Y Wa ehouse Pe son Ha aday Mar e E Edm on on Y F re Behav our Anaylst F nn Dav d Edm on on Y W df re Invest gator Marce in Ha Edm onton Y Provincia A rc af Coordina or Anderson Robert Ne l Edm on on Y SUPPORT RESOURCES - DEPLOYM ENT PLAN Base Name F re Number Skdr Bus/ Van Water Truck Ca Uni F W Gtwy Time Crew Type PM Standby On Time Off T me AM Standby On Time Of Time S and To Time On Base Time S and Down Time Off Base T me Crew D R W S ze R W Reg. S ave Lake 60 NONE 10 00 10 00 20:00 20:00 NONE MED FNTR S ave Lake 60 NONE 10 00 10 00 20:00 20:00 NONE MED GSLZ S ave Lake 60 NONE 10 00 10 00 20:00 20:00 NONE MED GVIE S ave Lake 60 NONE 10 00 10 00 20:00 20:00 NONE MED GSLH W abasca 60 NONE 10 00 10 00 20:00 20:00 NONE MED FZQB Tota Heavy Equipm ent 0 0 0 0 0 Support Resources Summary: Crews: R W: LGT: 0 INT 0 MED 5 LRG 0 Tota no o R W 5 RAP HAC FTAC 0 0 0 W FC2 0 UNIT 0 To a no of Crews 0
COM
W M A Duty Off cer
M ENTS: MacNe l Sean M Operat ona Level 4 No es **Cur en p an tha has one or mo e arch ves *F e d n he cu ren p an hat has changed s nce he as s gned-of
Wildland Urban Interface Basics | PARTICIPANT GUIDE Wildland Urban Interface Basics | PARTICIPANT GUIDE 38 39 PPS Plan De ail - W ldfire M anagement Area Report Database Prod-Ora10 F RES App ca ion Alberta Sus ainab e Resource Development - W ldfire M anagement Page 4 of 4 2016 05/15 16 28 39 On Standby Pos tion Name Based At OVERHEAD SUPPORT W ld e nform a on Of cer She l an Barry A Edm onton Y D spa cher Bryan Dane e Edm onton Y W M A Duty Officer: COM M ENTS: MacNe l Sean M Operat ona Leve 4 No es: * Cu ren p an hat has one o more arch ves *Fie d n he cur ent p an tha has changed s nce he as s gned-o
PARTS OF A FIRE
PARTS OF A FIRE
Perimeter
The entire outside edge or boundary of the fire or the burned area.
Head
The fastest moving portion which is normally burning with the wind and up slope. Depending on the fuels burning, the fire usually has the greatest flame length, depth, and rate of spread.
Back/Rear
Opposite to the head, is usually the slowest spreading portion with the shortest flame lengths.
Flanks
Roughly parallel to the main direction of spread. Is less intense than the head, but more intense than the back of the fire. Flanks have less alignment with the wind and can be more fuel driven.
Finger
Long narrow extensions of fire that project from the main body of fire. Typically influenced by a more volatile fuel type tract.
Pocket/Bays
Unburned indentations in the fire edge formed by fingers or slower burning areas.
Islands
Areas where fuel was not burnt inside of the fire perimeter. Could be water, rock features, or a fuel type not carrying fire. Created when fingers close around a pocket or bay.
Spot Fires
Fires ignited outside of the main fire perimeter by lofted embers. Referred to as spotting and can occur a few meters to kilometers in advance of the head.
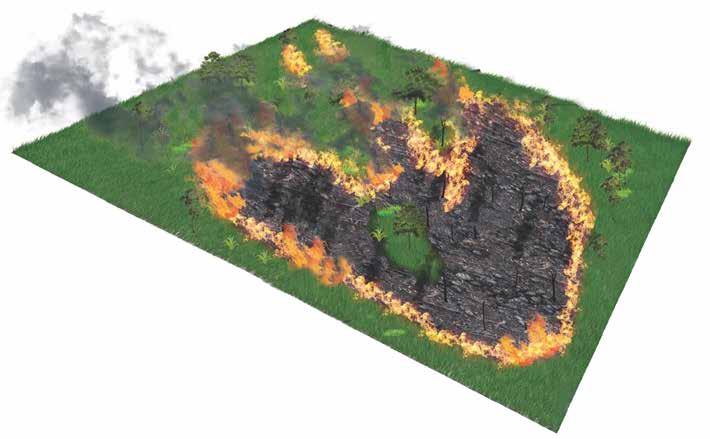
The Green
Unburned fuel along the fire perimeter.
The Black
Burned area void of fuels.
CONTROL LINE
One of the most important components of wildfire suppression, control lines are simply the boundaries—natural or manmade—that firefighters employ to control how and where a fire spreads. A rocky ridge or river can serve as a natural control line, or firefighters can establish a manmade one by, for example, clearing out an extended line of brush. Within this overarching definition, a fire line is when the barrier is scraped down “to mineral soil,” a scratch line is a preliminary line built in a hurry, and a wet line is when the area has had flame retardant or water applied.
Wildland Urban Interface Basics | PARTICIPANT GUIDE Wildland Urban Interface Basics | PARTICIPANT GUIDE 40 41
THE BLACK WIND DIRECTION HEAD LEFT FLANK RIGHT FLANK TAIL FINGER FINGER POCKET ISLAND SPOT FIRES
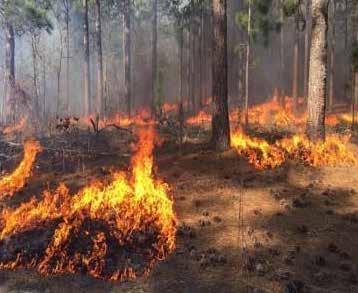
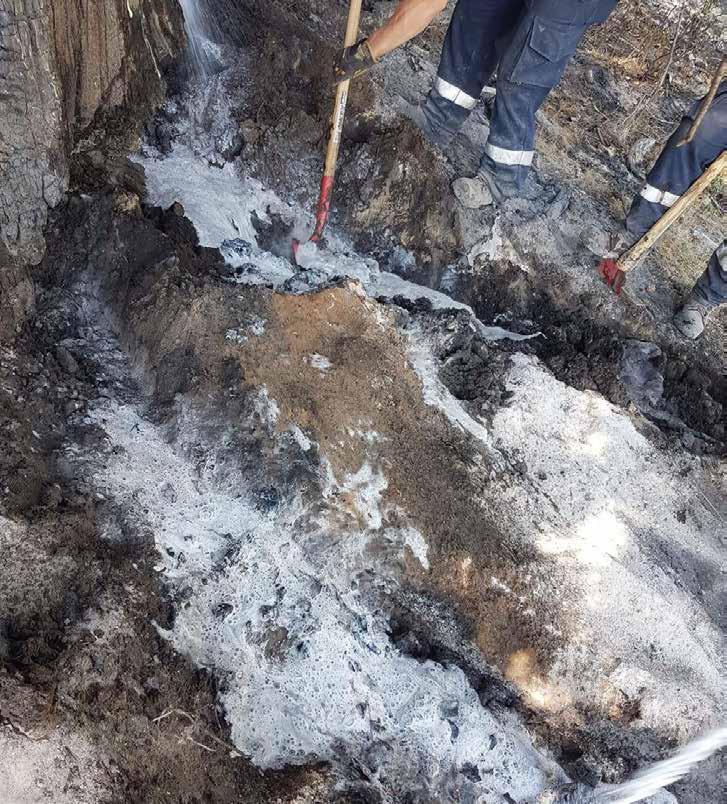
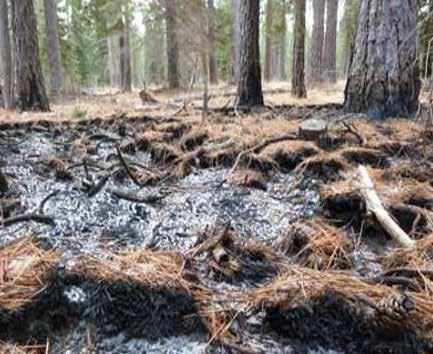
TYPES OF FIRE GROUND
Fire burning in the organic duff layers of the ground. Is typically a slow burning smoldering fire. Think sub-surface fires such as a peat moss fire.
SURFACE
A fire burning along the surface without significant movement into the understory or overstory. A fire that does not burn into the crown of the fuels. Your typical grass fire is a surface fire.
CROWN/AERIAL
Fire that has ascended into the forest canopy. Usually ignited at first by a surface fire that grows into the crown of the fuels. Flame lengths can be small to very high depending on intensity.
FIRE BEHAVIOR TERMS
Smoldering
A fire burning without open flame. Spread is slow and is lacking in oxygen.
Creeping
A low intensity fire with short flame lengths and slow rate of spread.
Running
A rapidly spreading surface fire with a well-defined head.
Wildland Urban Interface Basics | PARTICIPANT GUIDE Wildland Urban Interface Basics | PARTICIPANT GUIDE 42 43
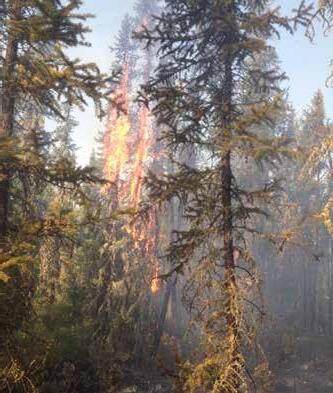
Torching/Candling
The ignition and flare-up of a single (candling) tree or small group of trees.
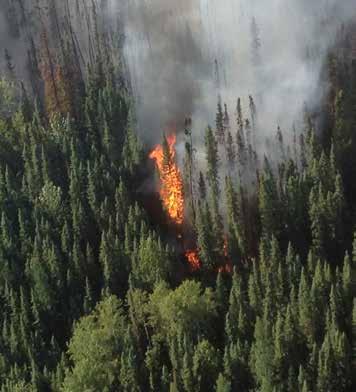
Continuous Crowning
A fire that has ascended from the ground into the forest canopy via ladder fuels. Can burn with (common) or independently (rare) of surface fuels.

Intermittent Crown
When individual or groups of trees ignite but are not sustaining continuous crown fire.

Spotting
When a fire produces sparks/embers that are carried aloft by the wind and ignite new fires outside of the fire perimeter.
Wildland Urban Interface Basics | PARTICIPANT GUIDE Wildland Urban Interface Basics | PARTICIPANT GUIDE 44 45
Wildland Urban Interface Basics | PARTICIPANT GUIDE Wildland Urban Interface Basics | PARTICIPANT GUIDE 46 47
NOTES
NOTES
WILDLAND URBAN INTERFACE
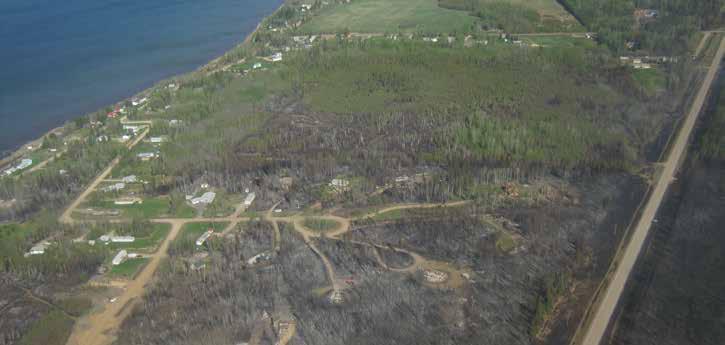
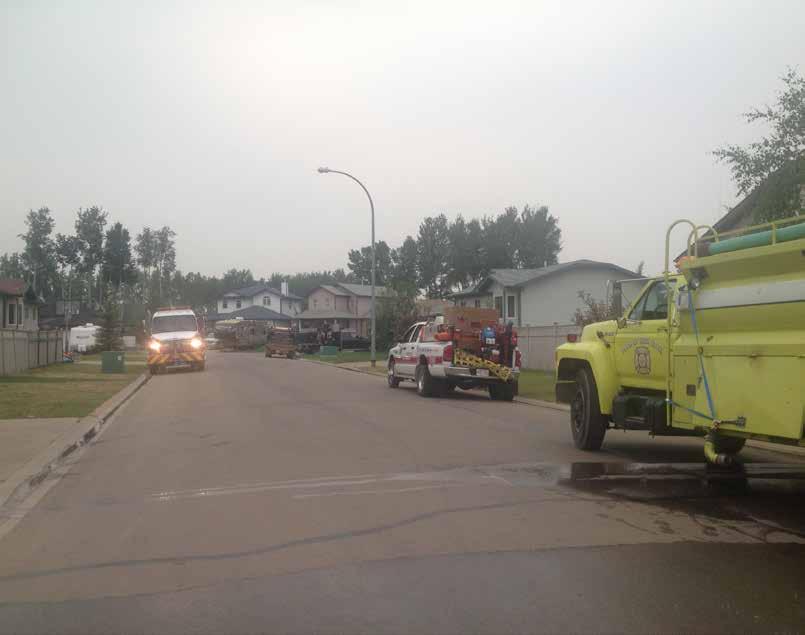
URBAN INTERFACE
The line, area, or zone where structures and other human development meet or intermingle with undeveloped wildland or vegetative fuels. The interface is the “edge” where the fuels meet the urban setting.
WILDLAND URBAN INTERMIX
A type of wildland urban interface in which the home or other structures are intermixed with wildland fuels, as opposed to a distinct area of wildland fuel adjacent to a developed area. Think of remote cabins, acreages, or properties that are dotted within the wildland landscape.
Wildland Urban Interface Basics | PARTICIPANT GUIDE Wildland Urban Interface Basics | PARTICIPANT GUIDE 48 49
PHASES OF A WUI FIRE
PRE-IMPINGEMENT
The time before a fire impacts an interface area. Could me minutes, hours, or days. The time when most structure and site prep occur including setting up sprinkler systems. The fire is in the area and threatens structures but has not impacted them yet.

POST IMPINGEMENT
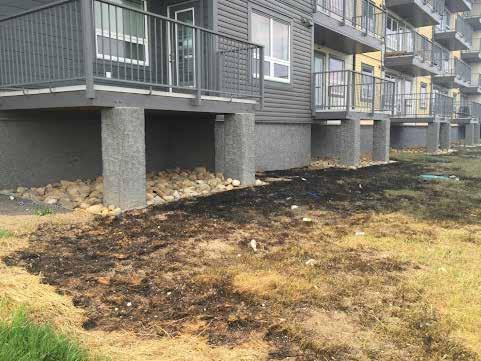
This phase is after the main fire front passes, usually leaving active fires burning throughout the interface area but the main threat of the fire front has passed. This is a critical phase in preventing structure to structure ignition. Think of structures as dominoes, to prevent a large-scale conflagration, dominoes need to be protected or “taken out of play” to prevent the rest of the dominoes from falling. Engine operations is heavily focused here as well.
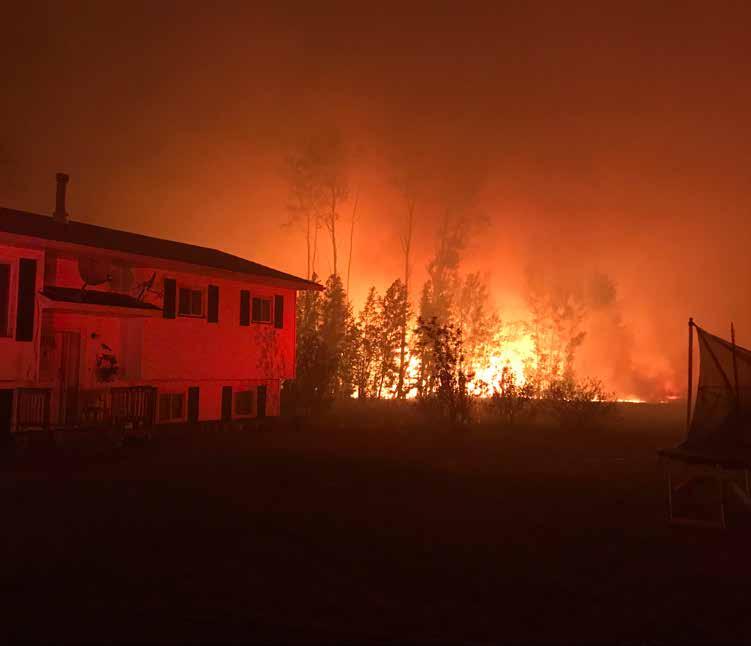
IMPINGEMENT
When a fire impacts an interface area. Usually begins with ember showers and leads into the fire front impacting the interface area. It is when active spot fires start to occur and the time when structure ignition begins. Impingement is when the chaos usually starts. Large amounts of spot fires quickly tend to overwhelm resources unless properly planned for.
The bulk of engine operations focuses on this phase of WUI fires.
Wildland Urban Interface Basics | PARTICIPANT GUIDE Wildland Urban Interface Basics | PARTICIPANT GUIDE 50 51
RESPONDING TO WUI INCIDENTS PLANNING
The key to ensuring preparedness for a WUI incident is proper planning. Structure protection planning can greatly improve a response should it be needed. They include critical information and procedures for handling a WUI incident. Contact information for mutual aid, provincial aid, ESS, utilities, forestry, OFC, and industry can be found there. Strategic and tactical maps may be a part of a good plan. These maps should include identified safety zones, escape routes, staging areas, water sources, and critical infrastructure. Resource planning should include the appropriate kind and type of resources to have on hand should an incident occur in the given planning area.
AREA FAMILIARIZATION
If time allows, crews should familiarize themselves with the response area. Make contact with the local fire service immediately if incident is outside of local response area. If the incident is located inside the Forest Protection Area (FPA), make contact with forestry early on to get the most up to date information. Identify areas of likely impact and the most at risk area. Identify critical infrastructure, water sources, access/egress routes, and resource needs. Develop a plan, refrain from running in and setting up sprinklers at random. Complete a structure triage and compare that to community layout. Where structure to structure ignition is possible, incorporate a strategy to prevent this from occurring. Prioritize what you can save in the moment and work towards a common goal.
DON’T HAVE A STRUCTURE PROTECTION PLAN?
Funding is available through government grant programs for mitigating WUI incidents. Hiring a qualified professional can help take the burden off of a stretched fire service and allow the best practices to be prescribed. If funding is a concern, starting out on your own is always a great way to increase local knowledge of at risk areas. Having a look at these areas with a different lens on can greatly change the perspective on what needs to be done during an incident. Write this information down, or better yet, map it out for future use.
Wildland Urban Interface Basics | PARTICIPANT GUIDE Wildland Urban Interface Basics | PARTICIPANT GUIDE 52 53
IDENTIFYING WATER SOURCES
Identifying water sources early in an incident will help you plan pump sites for sprinkler systems, tender fill sites, and anchor positions for strike teams and task forces. You will need to differentiate water sources for these tasks. Avoid selecting a water source for multiple applications unless it is large, has good access, and will not compromise other tasks being accomplished. Determine how reliable it is, how far from where the water is needed, and access points. For sprinkler systems try to select one closest to the structures being protected. This will reduce gear on the ground allowing you to protect more structures as well as improving flow and pressure in the systems. Types of water sources include static sources (ponds, lakes), waterways (streams, creeks, rivers), portable bladders/ drop tanks, and culvert damming or land depression filling with water tenders.
WUI SIZE UP
PRE-DISPATCH
Situational awareness for the day begins with weather. Know the winds, temperatures, and relative humidity’s that are expected for the day. If the hazard is not local, where is it located and what can you expect if deployed? Ask yourself, are we ready for an interface fire today? Is the apparatus and equipment ready to respond?
DISPATCH
Is the incident within local response areas? If so, determine where it is located and what fuels it could be burning in. Try to determine what could be threatened and gather any information you can on fire size, behavior, and spread rates. Determine if there are enough resources available to handle the incident and request more resources early if needed. If the fire is located inside of the FPA, determine what forestry is mobilizing. If the incident is outside of local response areas, ensure crews are ready to deploy and apparatus are equipped for the journey. Find out where to check in, who to report to, and what the accommodations will be.
CRITICAL INFRASTRUCTURE
Critical infrastructure is top priority for structure protection. Homes can be replaced but, hospitals, schools, water plants, policing and fire stations, communication buildings, and industry are difficult to bring back. These types of buildings are usually more fire-resistive but are critical to a community’s ability to recover and get back to normal.
Wildland Urban Interface Basics | PARTICIPANT GUIDE Wildland Urban Interface Basics | PARTICIPANT GUIDE 54 55
EN-ROUTE
Continually reassess information and weather on route. Try to gather as much information on the fire as possible. If you can see the column, try to determine smoke color, condition, size, and direction. If you are not the first arriving resource, listen to the initial radio report of the fire. Determine if structures are threatened and if the need to evacuate exists.
After gathering all the information you can, determine if the current resources are adequate to handle the incident. If there is doubt, ask for more resources.
EVACUATIONS
Lives are top priority, evacuate the public from the area if immediately threatened. Pass information up the chain of command if you think it is time to evacuate. Evacuations take time and coordination so pull the trigger earlier rather than waiting until it will impede the response when it is really needed. The local municipality decides if/when an evacuation occurs, but they will need input from the response to make that decision. Try to establish estimated timelines (forestry can help here) and determine the risk should residents stay in place. If it is an immediate threat, you can do a site level evacuation (tactical evacuation) to remove residents from immediate danger without the municipalities blessing. The reason the municipalities need to be notified is because once displaced, they are responsible for those residents and need to set up reception centers and ensure they are cared for.
ARRIVAL
Once you arrive, size up the scene. Look closely at fire behavior, weather, and what is threatened. Determine which phase of the fire you are in (pre-impingement or impingement) and select the appropriate strategy. Given the time and resources available, prioritize what you can save and begin building a structure protection plan.
Complete an initial radio report. Describe where you are located, the size of fire, HFI, values at risk, the strategy you are employing, and establish command. Assign the next in resources BEFORE they show up. This helps crews to understand what they are going to and what is needed of them before they arrive. Note any safety concerns and have crews establish LACES.
Strive to order resources early. Think “get big quick”. You can always send resources home If they are not needed, but results can be devastating if the appropriate resources are not there when needed in time.
Wildland Urban Interface Basics | PARTICIPANT GUIDE Wildland Urban Interface Basics | PARTICIPANT GUIDE 56 57
HAZARDS
Each job site or typical fire scene has its own set of hazards, WUI events present a wider variety of hazards to personnel. The typical home has utilities such as power and gas hook ups that present a real danger once they are compromised. Shutting the gas off at threatened structures beforehand may be an option if impingement is imminent. Overhead power lines present a real hazard to personnel and apparatus on roadways. They can be difficult to work around when putting up sprinklers as well. Give yourself lots of room around them and plan for them to be compromised during impingement. Simple things like access can prevent or hinder egress if a situation changes, so consider and plan if you will be placing resources in these areas. Always park facing out, avoid parking on flashy fuels, and be on the lookout for things that may compromise your escape routes.
NOTES
Wildland Urban Interface Basics | PARTICIPANT GUIDE Wildland Urban Interface Basics | PARTICIPANT GUIDE 58 59
STRUCTURE TRIAGE - ALBERTA

Structure triage is the process of inspecting and classifying structures based on their defensibility or non defensibility. It is based on fire behavior, location, construction, and adjacent fuels. In urban environments, structure arrangement and proximity can vastly affect triage needs. Care must be taken to triage correctly to ensure the maximum number of structures can be saved with the given resources. Too much time and resources spent on difficult to defend single properties rather than multiple, means more defensible properties can result in an inefficient operation.
STRUCTURE TRIAGE
Wildland Urban Interface Basics | PARTICIPANT GUIDE Wildland Urban Interface Basics | PARTICIPANT GUIDE 60 61
STRUCTURE TRIAGE CATEGORIES
STRUCTURE TRIAGE
Structures are prioritized based on the color rating as well as time and resources available. Firefighter safety is the largest consideration in triage, as we will not risk the lives of firefighters for property. Starting from zone 1A (0-1.5 meters) and working outward, assess the vegetation, building construction, ember traps, and areas around the structure that would be compromised during impingement. Base your triage colors on these items, not on time and resources. Priority is given to the most savable (green rocks) with limited resources. It is important to remember, that while these are family homes with memories and personal belongings attached to them, that a structure is no more than another type of tree in a wildland urban interface fire. We do not mean this to be heartless, but rather to understand that a structure itself IS FUEL. It will burn and can threaten other structures. It is important that while triaging we realize early, we cannot save them all and we certainly cannot protect them all at once. Once we break the human bond to the structures, we can do our jobs more effectively and in turn save more property. Leaving emotion out of it is important when you may know the homeowner.
THREATENED NON-DEFENSIBLE (RED ROCK)
Requires the most mitigation work and is likely NOT savable. It is usually the most work and unsafe for firefighters to protect. A rule of thumb for determining red rock structures is that they will receive no protection as losing gear will be highly likely. The risk to responders coupled with losing gear in a system that could compromise other structures make these structures undefended. This does not mean you will not try to save it if time and resources allow, just that it will be the last to receive protection pre-impingement and will be approached with caution during impingement.
THREATENED DEFENSIBLE (YELLOW ROCK)
Requires little work to prepare and is MOST LIKELY savable. These structures are safe for firefighters to action and provide good egress and have defendable space around them. These are the bulk of the sprinkler protection work and where we will engage the fire during impingement. These structures will have certain qualities that make them somewhat fire-resistive but will need some mitigation work to protect.
NOT THREATENED (GREEN ROCK)
Requires the least amount of mitigation work and MOST LIKELY is savable with little to no mitigation work. These properties are safe for firefighters to action and provide excellent egress and defendable space. Fire resistive building construction and great zone 1A-2 maintenance make these structures green rocks. Green rocks often get no mitigation work as the homeowner has prepared the structure for fire.
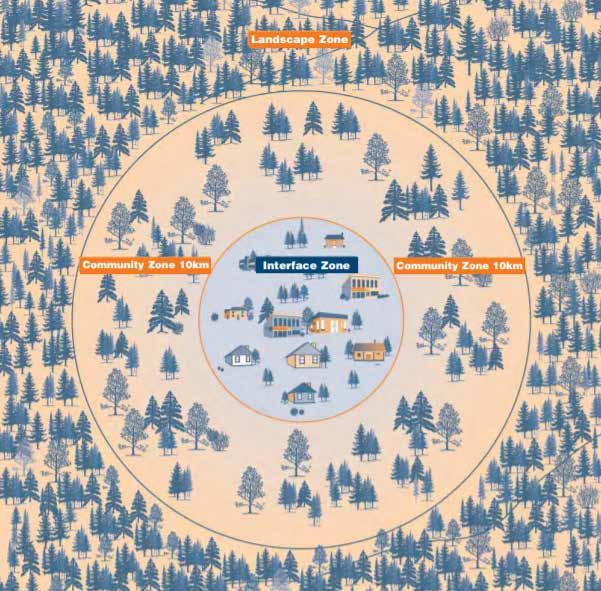
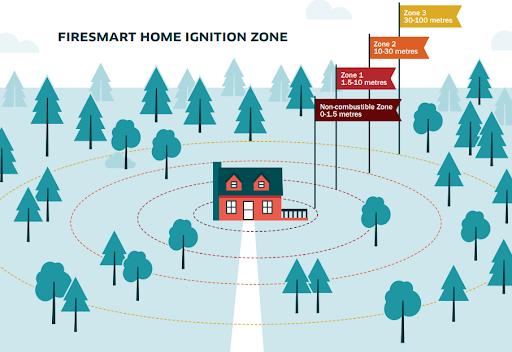
INTERFACE PRIORITY ZONES
ZONE 1A (non-combustible zone) 0-1.5 METERS
ZONE 1 1.5-10 METERS
ZONE 2 10-30 METERS
ZONE 3 30-100 METERS
Wildland Urban Interface Basics | PARTICIPANT GUIDE Wildland Urban Interface Basics | PARTICIPANT GUIDE 62 63
BUILDING CONSTRUCTION
Roof
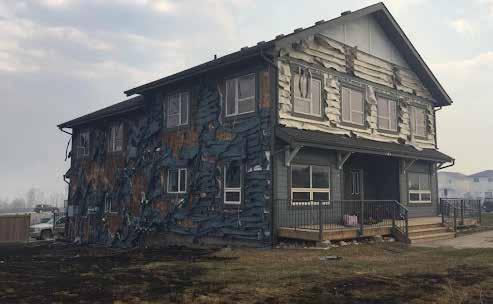
Starting with roof materials, look at the structure from the top down. Asphalt shingles, tin, clay tile, and rubber tiles are very fire-resistive while cedar is next to impossible to protect. Cedar roofs make a structure a red rock automatically. Next look at the eaves troughing. If they are full of organics, chances are they will be dried out and need to be removed or plugged off and filled with water to prevent ignition.
Siding
Siding made of wood paneling or vinyl are not fire resistive. Log buildings, cement board, stucco, brick, and metal siding are all very resistive to fire.
Windows
Pay attention to large windows next to fuels outside of the structure. The rule of thumb is the larger the window and the less panes of glass, the more likely it is to fail under heat stress from an impinging fire. This could be from a burning vehicle, bushes, or rubbish pile.
Skirting/Openings
Look for openings in the skirting and underneath decks and close them if possible. Keep a close eye on where leaves or debris has collected around the structure. These are the same places embers will collect and they are loaded with dead, dry material.
Fences/Decks
Fences can pose an issue if they are combustible and fastened directly to the house or decking. Fences that stop and do not attach through the siding often burn but do not compromise the structure if they are installed properly. Decks that are weathered will compromise a structure quickly, while a clean, treated, and maintained deck will resist fire. Pair that with a fully skirted surround and decks are not always bad.
Landscaping
The immediate landscaping in zone 1A plays a large factor in the survivability of the structure. Mulch and other organic material are popular, but it is a structure-killer. If kept saturated these materials are not a danger but whenever there is a risk of a WUI fire, chances are the weather is hot and dry. Therefore, all organics will be dry as well unless constantly irrigated. As in the previous chapter, fine fuels dry out quickly. Mulch will hide fire, often smoldering beneath the surface, only to appear all too often when resources have moved on from the area thinking the remaining structures are safe. Public engagement in interface areas pre-incident is needed to help homeowners use noncombustible materials in zone 1A such as rock.
Combustibles
Any clutter or debris on deck/adjacent to house, jerry cans, propane tanks, etc.
Wildland Urban Interface Basics | PARTICIPANT GUIDE Wildland Urban Interface Basics | PARTICIPANT GUIDE 64 65
STRUCTURE POSITION
Structures positioned mid to top slope are at an elevated risk of fire danger. As fire burns quicker and more intensely upslope, structures that are in the path of this will face higher levels of fire behavior. In more extreme cases, homes that are built on stilts or have exposed undersides are very hard to defend as they themselves will be preheated as the convective heat rises upslope. That paired with the fact that upslope is a dangerous position for firefighters, makes it likely that these structures will be hard to defend.

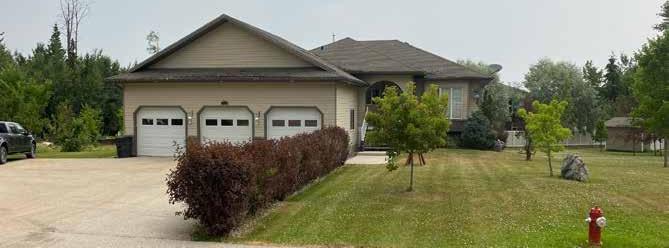
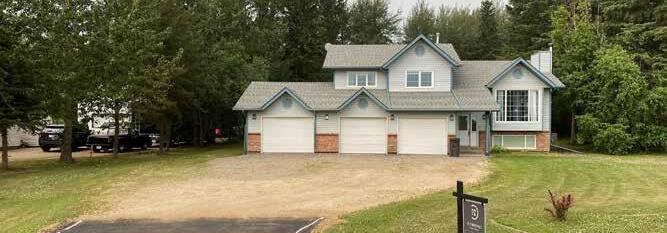
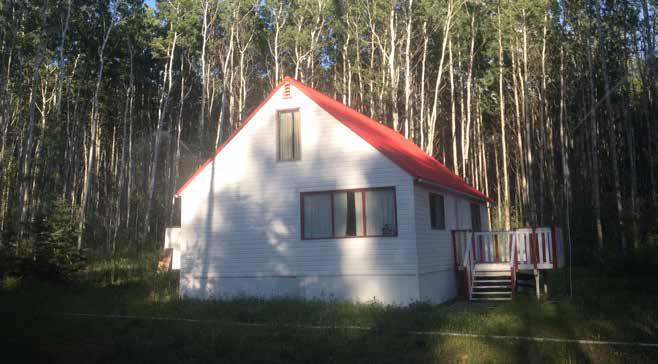
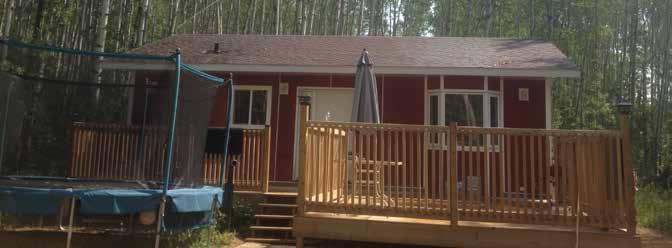
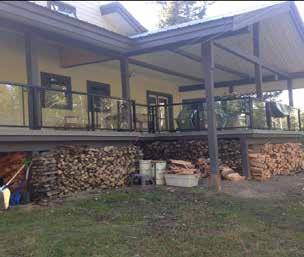
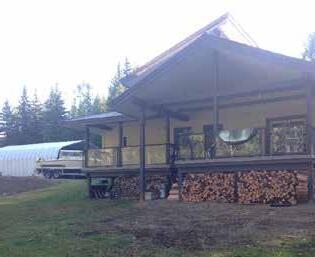
ACTIVITY
In groups, look at the following pictures and based on what you can see, triage the structures as Threatened Non-Defensible (Red Rock), Threatened Defensible (Yellow Rock), or Not Threatened (Green Rock). Come up with a list of reasons why you categorized them the way you did.
ARRANGEMENT
The arrangement of the structures is important when creating the structure protection plan. Like forest fuels, how homes are arranged, how close together they are, and how continuous they are play a large factor in how a conflagration spreads. Pair that with poor building construction and structure to structure ignition can quickly overwhelm a prepared response. Look at the community and neighborhood layout as a whole, but also individual properties and what could compromise them. Other structures or outbuildings are very susceptible to fire and those being to close or upwind of a structure could cast embers in a volume that you cannot defend. Remember the domino effect and how important it is to break the chain. Triage accordingly.
Wildland Urban Interface Basics | PARTICIPANT GUIDE Wildland Urban Interface Basics | PARTICIPANT GUIDE 66 67
Wildland Urban Interface Basics | PARTICIPANT GUIDE Wildland Urban Interface Basics | PARTICIPANT GUIDE 68 69
Wildland Urban Interface Basics | PARTICIPANT GUIDE Wildland Urban Interface Basics | PARTICIPANT GUIDE 70 71
NOTES
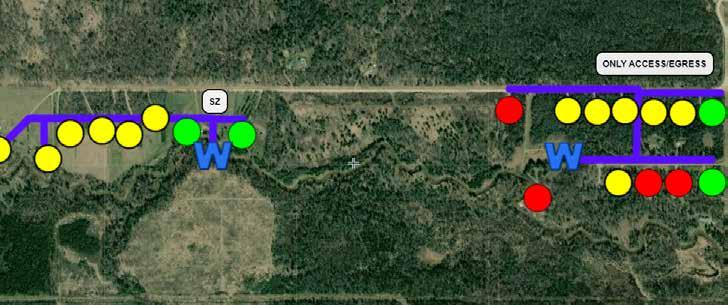
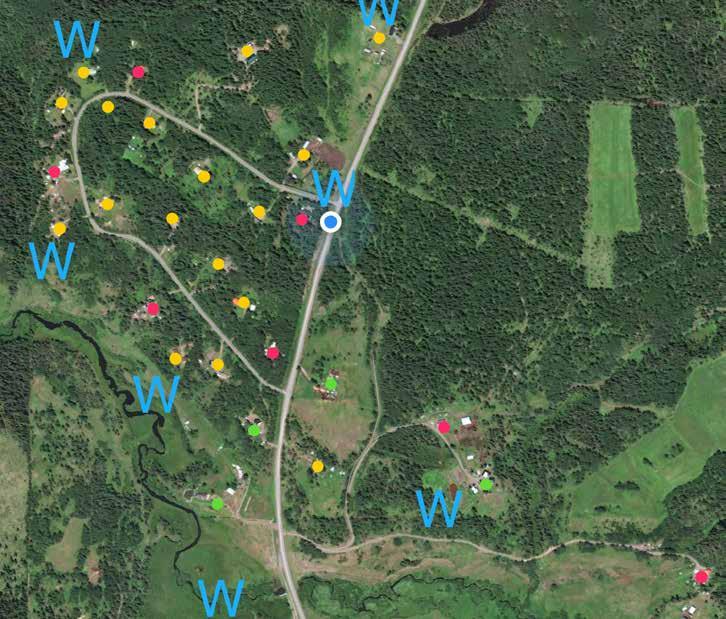
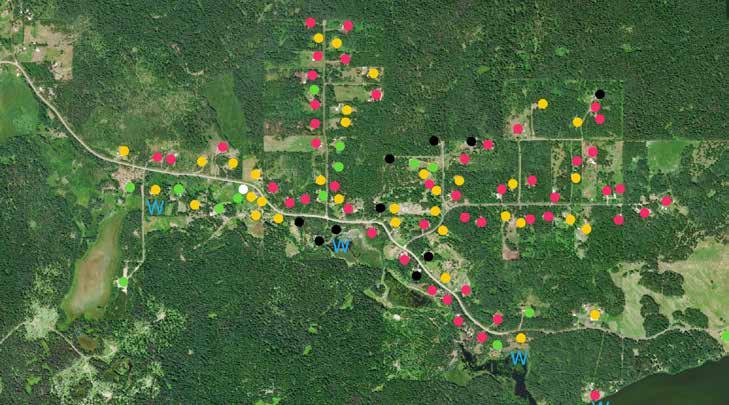
MAPPING CREATING MAPS
If you have time, create a map of structures triages. Place red, yellow, green, and black (black for structures lost) dots on the map to get an overall picture of the work to be done. Site check, locate water sources, and put them on the map. Digital formats are preferred because they can be shared with other resources. Currently there is no “global” input mapping program for structure protection. In the future, mapping will be available to everyone who has the training to use it. This will allow us to “triage on the fly” updating real time info with pictures and text icons dropped on properties that all resources can see. This will allow incoming resources to get a good lay of the land and when getting an address to work on, they can site check it digitally before arriving to be more efficient. For now, we just have programs such as google maps, scribble maps, or Avenza maps. While helpful, none of these programs currently meet the full needs of structure protection. If you have no access to digital systems, a paper map works well. Try to get one with satellite imagery and draw neatly on the map. Forestry can provide great paper maps in quantity, as well as geo-referenced pdf mapping. Triage mapping is very useful post-incident for the local municipality. It can give them a starting point to focus on prevention and homeowner engagement while the smoke is still in the air and they have everyone’s attention. By focusing on the yellows and reds, the municipality can help people engage in Fire smart activities.
MAPPING EXAMPLES
Wildland Urban Interface Basics | PARTICIPANT GUIDE Wildland Urban Interface Basics | PARTICIPANT GUIDE 72 73
In the province of BC, Emergency Management BC (EMBC) has identified a color system for classifying structures. This is done to speed up efficiency and accountability for every property in the interface area. Colored flagging tape will mark the property at its entrance to identify its classification.

TRIAGE FLAGGING
NO GO
TRIAGE ONLY
It is unsafe for firefighters to protect a structure and is likely nondefensible or not enough resources are available to protect.
Crews have determined the structure has a greater probability of surviving a WUI fire. Crews have completed a Structure Triage Report and requested the equipment and resources necessary to aid in protection.
PROTECTED sprinklers are in place and FireSmart principles have been implemented PUMP ON SITE A pump site exists at the property.
TENDER SITE
There is a bladder or drop tank that requires tenders to fill at the property.
Wildland Urban Interface Basics | PARTICIPANT GUIDE Wildland Urban Interface Basics | PARTICIPANT GUIDE 74 75
BRITISH COLUMBIA
SPECIFIC
BC STRUCTURE TRIAGE TACTICAL ACTIONS
DEFENSIBLE – PREP AND HOLD
DETERMINING FACTOR Safety zone is present.
SIZE UP Structure has some tactical challenges that require some mitigation.
TACTICS Firefighters needed onsite to implement structure protection tactics during ember showers and fire front contact.
DEFENSIBLE – STANDALONE
DETERMINING FACTOR Safety zone is present.
SIZE UP Structure has very few tactical challenges.
TACTICS Crews may not need to be directly assigned to protect structure as it is not likely to ignite during embers showers and initial fire front contact. No structure is completely without need of mitigation or protection. Patrols following the passage of the fire front will be needed to further protect the structure.
NON-DEFENSIBLE – PREP AND LEAVE
DETERMINING FACTOR NO safety zone present.
SIZE UP Structure has some tactical challenges.
TACTICS Firefighters are not able to commit to stay and protect the structures. If time allows, rapid mitigation measures may be performed. Set trigger points for a safe retreat and patrols following the passage of the fire front will be needed.
NON-DEFENSIBLE – RESCUE DRIVE-BY
DETERMINING FACTOR NO safety zone present.
SIZE UP Structure has significant tactical challenges.
TACTICS Firefighters are not able to commit to stay and protect the structure. If time allows, ensure people are not present in the threatened structure, especially children, elderly and the invalid. Set trigger point for a safe retreat and patrol following the fire front passage to protect the structure.
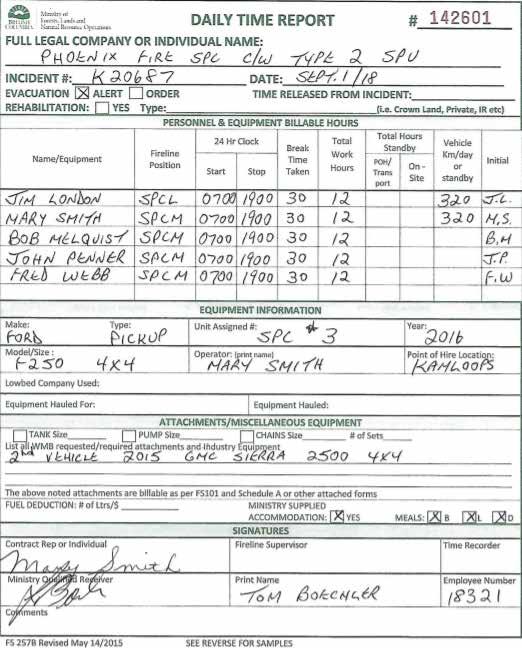
BRITISH COLUMBIA DAILY TIME REPORT (DTR)
Like Alberta, a daily time report is needed for each crew daily. The DTR is signed off by the Structure Protection Specialist (SPS) at the end of the day, a position filled by experienced personnel hired by the BC Office of the Fire commissioner to oversee municipal crews engaged in structure protection. Care must be taken to fill out DTRs correctly. If filled out incorrectly, billing issues will arise and could result in prohibitions from future deployments
Wildland Urban Interface Basics | PARTICIPANT GUIDE Wildland Urban Interface Basics | PARTICIPANT GUIDE 76 77
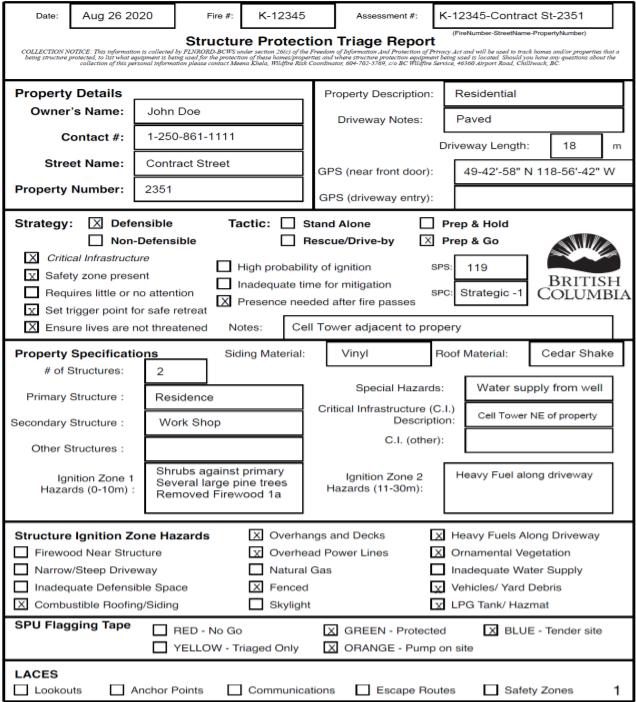
BRITISH COLUMBIA STRUCTURE TRIAGE FORM
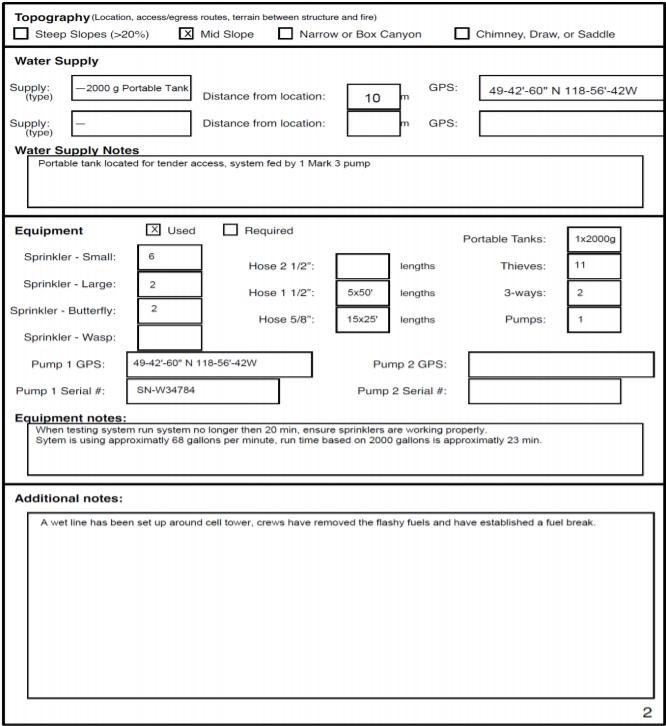
A British Columbia Wildfire Service (BCWS) structure triage report must be completed for each structure being assessed. It is vital that these report forms are filled out and supported by pictures with time and date stamps. Pictures must be inserted into the form and handed into the SPS daily, be sure to include status of occupants. Triage reports can be filled out by hand or with Form Connect on a tablet or iPad.
Paperwork
Be sure to fill out your DTRs, Structure Triage forms, and other paperwork in a timely fashion. Fill it out correctly, failing to do so will result in payment delays, headaches, and poor results from your department on deployments. Governing bodies are very driven on proper paperwork and documentation. Do your part to ensure you are filling out the required paperwork.
Wildland Urban Interface Basics | PARTICIPANT GUIDE Wildland Urban Interface Basics | PARTICIPANT GUIDE 78 79
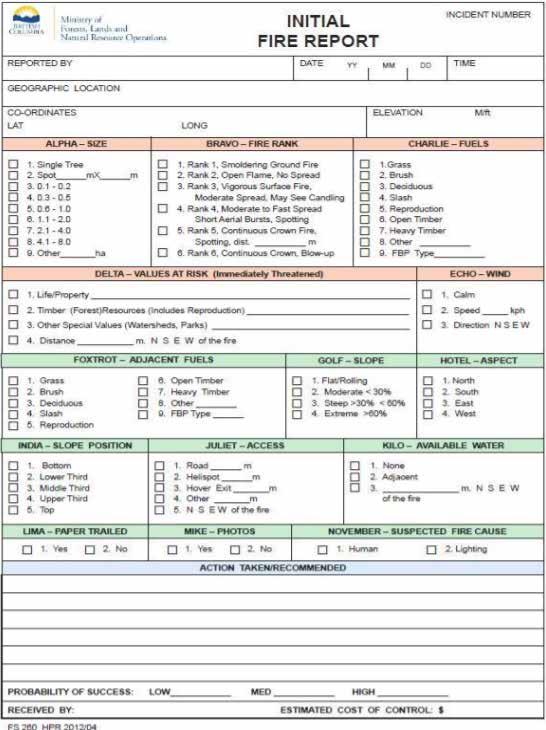
BRITISH COLUMBIA INITIAL FIRE REPORT
The Initial Fire Report is to be filled out by the first arriving resource to a new fire. The information gathered is used to determine control needs and further resources. It includes information such as location, fuel burning, estimated size, values at risk, estimated spread rates, slope, access, water sources, and recommended actions.

BRITISH COLUMBIA ADDITIONAL INFORMATION
BC has set requirements for training to be able to go on deployments. The Structure Protection Workshop (WSPP-115) is the prerequisite for all structural firefighters to participate on structure protection crews that are deployed provincially by the OFC or BCWS. The Wildland Firefighter Level 1 (WSPP-WFF1) is a prerequisite for all structural firefighters to participate on structural protection suppression crews that are deployed provincially by the OFC or BCWS. Resources are also listed prefire season for availability for deployment throughout the province. Municipal fire services submit a list of available resources they can offer if required. Each resource (engine, tender, SPU crews, etc.) have to meet a minimum requirement of personnel and equipment which is listed by the OFC and BCWS. If resources show up lacking personnel or equipment, they will be staged until the proper requirements are met or sent home. Requirements can be found at:
https://www2.gov.bc.ca/gov/content/safety/emergency-preparedness-response-recovery/ fire-safety/wildland-urban-interface-fire-information/about-structure-protection-program
Wildland Urban Interface Basics | PARTICIPANT GUIDE Wildland Urban Interface Basics | PARTICIPANT GUIDE 80 81
Wildland Urban Interface Basics | PARTICIPANT GUIDE Wildland Urban Interface Basics | PARTICIPANT GUIDE 82 83
NOTES
NOTES
SPECIAL CONSIDERATIONS
REMOTE AREAS
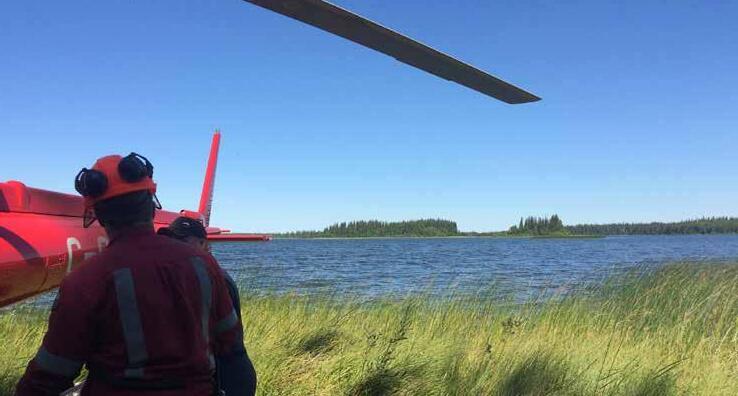
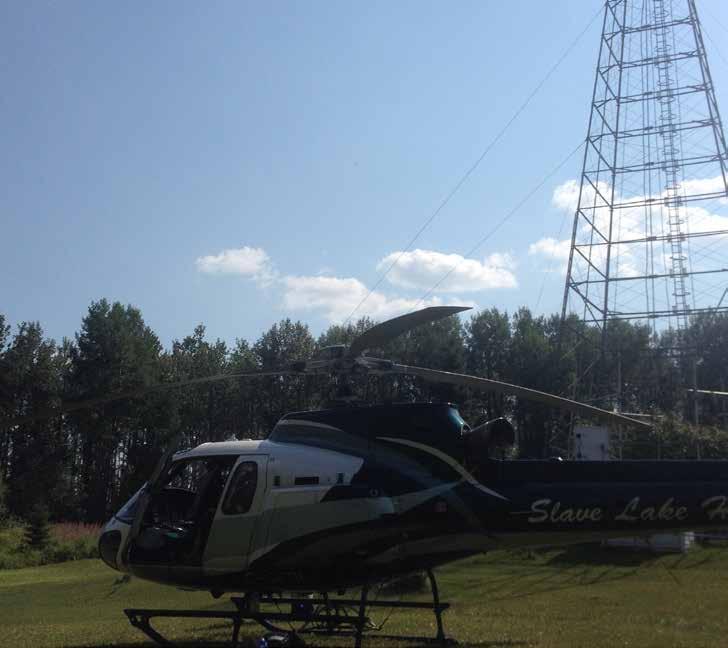
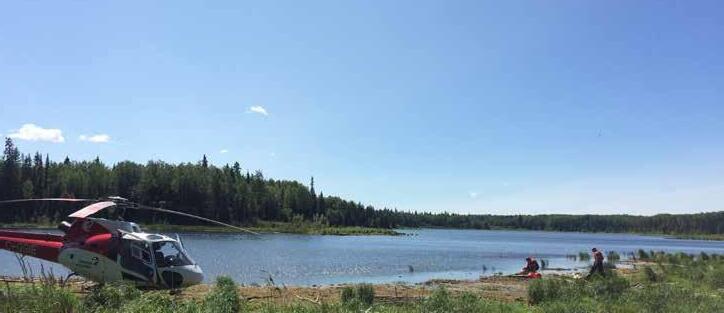
When working in remote areas many challenges that do not exist in developed areas become prevalent. Road access may be limited, cell service can be poor, and re-supply issues can be challenging. Having a good communications plan can help with some of these issues, but crews must also be as self-sufficient as possible. Some areas may need to be accessed by helicopter, so having equipment pre-weighed can help. Ensure everyone receives a safety briefing from the pilot and follow all loading and unloading procedures as per the pilot in command. Take the time to understand the hazards when working around aircraft.
Wildland Urban Interface Basics | PARTICIPANT GUIDE Wildland Urban Interface Basics | PARTICIPANT GUIDE 84 85
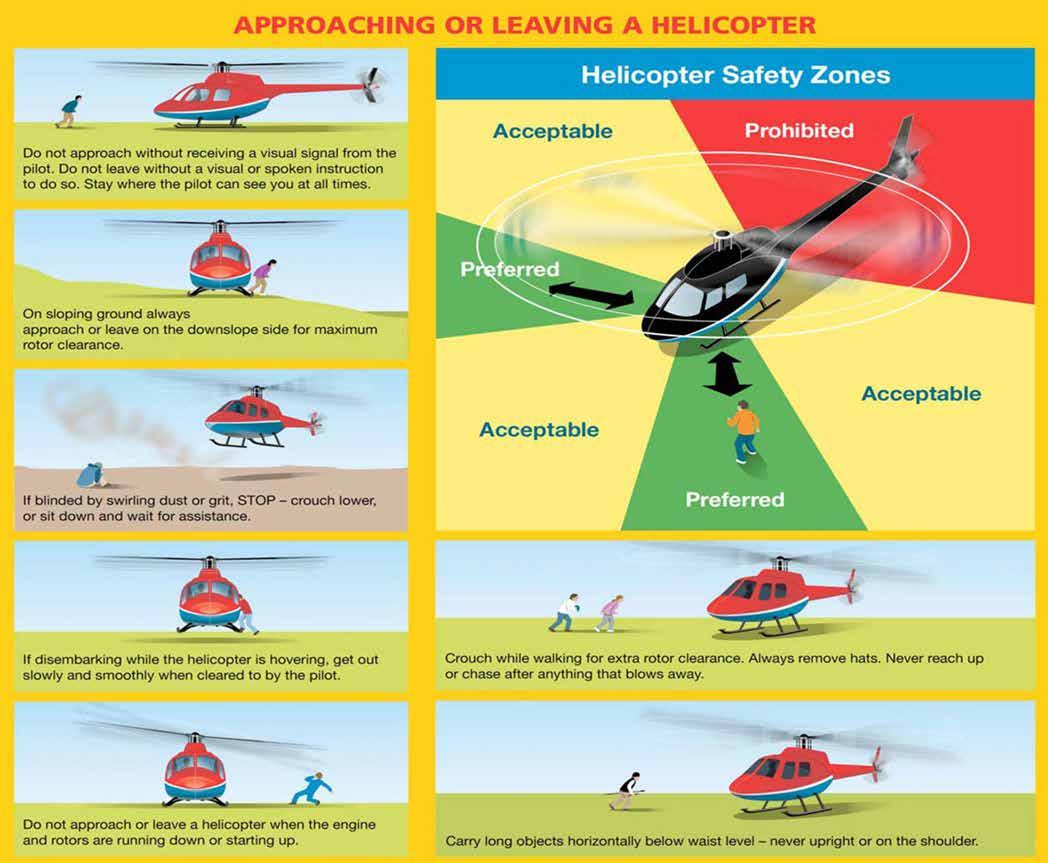
HELICOPTER OPERATIONS
When operating with rotary aircraft, care must be taken to ensure the safety of all involved. A pilot led safety briefing must be obtained before flight. This ensures the crew will operate within the safety regulations of the aircraft. The pilot has the ultimate say in who boards their aircraft, and must be listened to when recommending operations. Crew members must know their fully kitted weights, as well as the weight of their equipment. Each helicopter has a payload that cannot be exceeded. This includes helicopter fuel, crew weight, equipment weight, and pilot weights. The pilot is responsible for ensuring they do not exceed this limit. Weather and altitude also plays a factor in weights. The hotter the day and the higher the altitude you are flying in, the less weight the aircraft can carry. General rotor-wing aircraft safety rules are shown in the following picture. Take note of the approach angles and be sure to never carry tools above your waistline or throw objects near a helicopter. Always get visual or radio confirmation from the pilot before approaching a helicopter. They may not be prepared for your approach especially in a hover. Avoid being in a rush around aircraft and always think before you act.
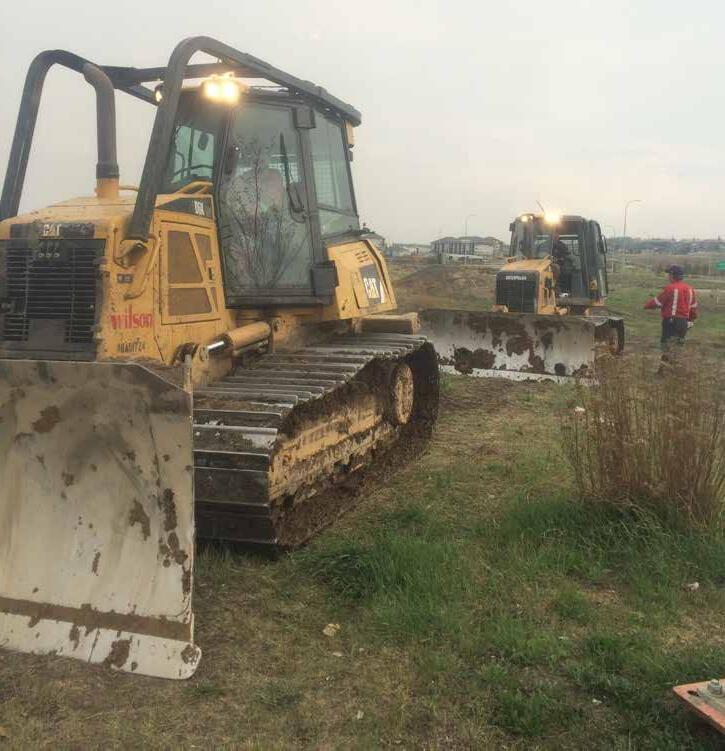
HEAVY EQUIPMENT
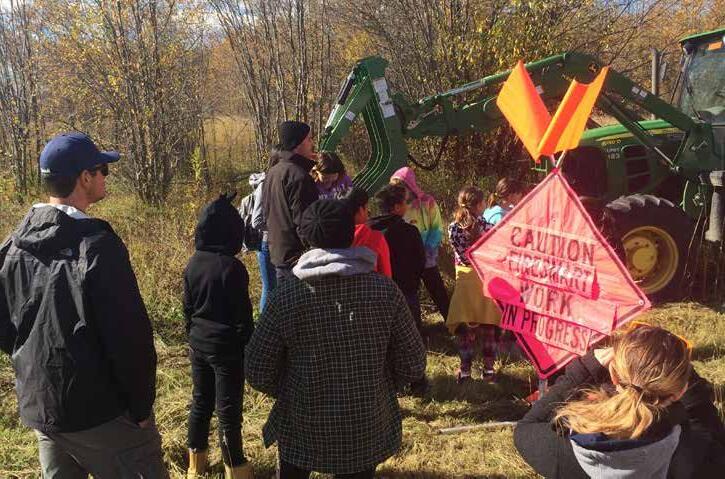
When working around heavy equipment, use caution. Forestry commonly deploys heavy equipment to wildfires. Always make eye contact with the operator if you are going anywhere near the equipment. Use radio communication where possible and understand where they will be working. Urban heavy equipment use can be highly effective once the fire progresses to a conflagration. Careful planning and tactics must be used when deploying heavy equipment to the urban setting.
Wildland Urban Interface Basics | PARTICIPANT GUIDE Wildland Urban Interface Basics | PARTICIPANT GUIDE 86 87
INDUSTRY
Working around industry can present safety concerns. While most oil and gas sites are inherently fireresistive, logging and mill sites may present great difficulties when trying to protect. Industry is great for knowing their site-specific hazards and they may have resources available that can help you (heavy equipment, water trucks, accommodation support). Try to build a relationship with industry and work together to help mitigate their risk to fire.
POLITICIANS
With any interface fire, politicians will be involved. Be courteous if you end up speaking with them, and direct them to your supervisor. Do not give them any fire-related information if you are not in a position to do so. Do not let them influence structure triage or the structure protection plan. Remember, you would not let a mayor or councilor tell you how to perform a vehicle extrication, so why would you let them tell you which structure to protect?’’
SOCIAL MEDIA
Care must be taken when at events with regards to social media. It is recommended that no crew member use their personal phones for pictures, as they may be requested at the end of the event by the respective governing body. Pictures known to be taken on personal phones (crew members caught taking photos) will be confiscated. This means they can take your phone and remove the pictures. Your crew may also not get asked to leave the incident and your department may not be requested in future deployments.
Posting of any incident pictures to social media is strictly prohibited. Even through your fire departments social media. Do not risk this, there has been cases in the past of resources getting sent home and “black listed” from future deployments for this reason. The governing body or provincial wildfire agency has sole authority for pubic information.
FIRST NATIONS
Working on First Nations lands can present both challenges and opportunity. We stress open communication and working with First Nations to help mitigate their risks. They may have site specific concerns or limitations that need to be considered. As with all relationships, build a good working relationship that can build trust when working on these lands.
PUBLIC INTERACTION
Dealing with homeowners can be challenging but try to stay calm and understand their concerns. Take the time to engage with them and they may be able to help more than hinder your operations. If you can help to educate homeowners on FireSmart principles, your site prep can be vastly reduced by having them get started on their own properties. Stay humble and respectful when interacting with the public, they are going through an experience they likely have not had before, and their livelihood may be threatened. Do not let homeowners dictate your structure triage or structure protection plan, fall back to priorities and training to make the right decisions.
Wildland Urban Interface Basics | PARTICIPANT GUIDE Wildland Urban Interface Basics | PARTICIPANT GUIDE 88 89
Wildland Urban Interface Basics | PARTICIPANT GUIDE Wildland Urban Interface Basics | PARTICIPANT GUIDE 90 91
NOTES
NOTES
PUMP SYSTEMS
The selection of a sprinkler system begins with developing a plan. Which structures and how many you protect, water source locations, trunk line locations, critical infrastructure, and how much time is available will all need to be considered. With proper community and structure triage, we can begin to develop a plan of action to protect structures using sprinkler systems. Sprinkler systems require adequate pressure to maintain proper coverage. Reducing the amount of gear needed (waste) to protect structures reduces friction loss in the system allowing you to stretch it farther. The more larger diameter hose and the less small diameter hose you can use the better.
SPRINKLER SYSTEM SET-UP
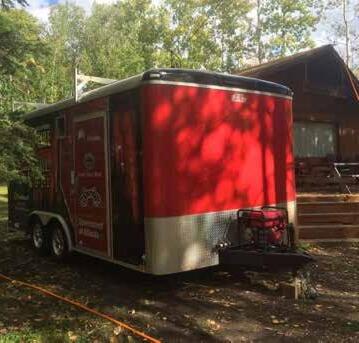
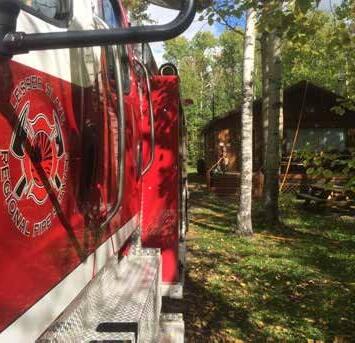

DEAD END
Dead end systems are laid out from the pump site towards the farthest structure. They branch out to protect structures as the trunk line is laid out, and dead end at the last structure. The sprinklers closest to the pump see the highest pressures, and then decrease in pressure the farther from the pump they are. Dead end systems are not always taught to be effective, but on smaller set ups it can be highly useful. A good strategy is to try a dead end first, as it saves on the most gear, then add a loop, counter pump, relay tank, parallel, or tandem if necessary. Depending on trunk line length, pump size, and number of sprinklers, a dead end can handle a standard small to medium sized set up. The biggest advantage is the extra equipment saved to protect more structures on additional systems.
WATER SOURCE
Wildland Urban Interface Basics | PARTICIPANT GUIDE Wildland Urban Interface Basics | PARTICIPANT GUIDE 92 93
LOOPED
For many years and is still frequent today, looping is taught as the only way to deploy sprinklers. The theory behind this is the same as what you see in a municipal water system or any type of “closed loop” fluid system. If you do not dead end the hose line and loop it back to itself either close to the pump or around a structure, you create equal pressure in the system. This is absolutely correct; however, this is a dangerous way of thinking as it is often interpreted as “it will increase the pressure” in the system. The latter is very FALSE. It ONLY EQUALIZES pressure, and that most certainly includes bad pressure. To simplify, if you have great pressure out of every sprinkler head, or only a small number of heads that need a little more pressure, looping an excellent strategy. However, if you have a lot of sprinkler heads with bad pressure and only a few with good-great pressure, looping will equalize the pressure in the system and create bad pressure on all heads. It ALWAYS makes the heads in the loop the same pressure, so you need great pressure to justify looping. A rule of thumb we have developed is that looping is only effective in a large system when AT LEAST 70% of heads have great pressure and NO MORE than 30% need a small to moderate increase in pressure. Looping also greatly increases the amount of gear deployed in the same system restricting you from protecting additional structures with the equipment available as well as increasing the friction loss in the system.
Often the solution to scenarios where the system is too big to loop is adding an additional pump at the opposite end of the system and having the pumps pumping towards each other (counter pumping). Typically, you will start by protecting what you need to in a dead-end fashion, then deciding whether to loop or counter pump. Other pumping solutions are available as described below, but all include adding an additional pump.
SINGLE HOUSE LOOP
In current and past thinking, looping each single structure is taught. Often this is not necessary on smaller structures (typical single-family dwelling) but is effective on larger homes or structures. The other case where this could be effective is the structure is farther off of the main trunk line and is needed to equalize pressure at the individual structure. The same 70/30 rule applies to be effective. Looping every single structure uses up a large amount of hose and fittings that could be used to protect more structures. Other solutions exist that increase the effectiveness of the system while saving on gear and time.
SYSTEM LOOP
In larger set ups, looping the trunk line around a large cluster of structures (think neighborhood) will equalize the pressure going to each structure. This works for a small to medium sized set up on a single pump. The 70/30 rule is critical here as well as a large amount of gear can be set up only to find that more pressure is needed. The heads farthest from the pump will see an increase, but closer to the pump pressure will be lost. Care must be taken to ensure using more hose and fittings is more appropriate than adding an additional pump.
Adding an additional pump can benefit the system by allowing you to protect more structures than were originally sprinklered.
Wildland Urban Interface Basics | PARTICIPANT GUIDE Wildland Urban Interface Basics | PARTICIPANT GUIDE 94 95
WATER SOURCE
COUNTER-PUMPING
Counter pumping is an excellent strategy that maximizes the number of structures you can protect with two pumps on a single system. For large set ups, pumps are on either end of the sprinkler system pumping towards each other. This is the standard go-to set up for larger numbers of structures to protect. This system can span an impressive distance with the right pumps and allows you to save on gear use. To simplify, counter pumping is used when a dead end is too large to create sufficient pressure in the system, and where a loop will only equalize bad pressure. In some cases where counter pumping is deployed, pressure in the center of the system may still lack pressure. This can be found when the system is spread too far and too many sprinklers are in play. The solution to this would be to add a “booster pump” precisely where the pressure is the lowest. This can be done by dropping a bladder or drop tank in the desired location. The only other solutions would be to cut the system up into smaller pieces or reduce the number of sprinklers or structures protected.
PARALLEL PUMPING
Parallel pumping uses the same water source and two pumps to boost pressure in the system. Both pumps flow separate hose lines for at minimum the first 100 ft or more, then Siamese into a single trunk line. Works great with larger diameter hose (65 mm) Siamesed into smaller hose (38 mm). This will have a noticeable increase in pressure, but counter-pumping should be considered if adding a second pump anyways due to being able to protect more structures farther down the line.
TANDEM PUMPING (RELAY PUMPING)
CENTRE PUMPING SYSTEM
Center pumping is a great option when the water source is central to multiple structures in a small to moderate sized set up. A single pump is used to pump in two separate directions from the water source. Using a wye, preferably one with no valve or restriction, the trunk line splits near the pump to travel separate directions. In the end it is simply two dead end lines but the pump is in the middle of the system. Center pumping may not be a good option when there is large numbers of structures to protect over great distances.
Tandem pumping is effective when large distances or grade must be traveled. The first pump at the water source pumps as far as it can until pressure and flow starts to be lost, then a second pump is added IN-LINE to boost the pressure. This set up is effective but can be challenging to find the correct location for the second pump. Almost always, maximum pump capabilities cannot be achieved due to the variables in running both pumps through the same hose line. If the correct location is not selected, the second pump cannot run at full rpm due to the risk of cavitating the supply line from the first pump. A relay tank system is more effective here as water supply is easier to manage. Tandem pumping should be used as a last resort to all other pumping systems for this reason.
PUMP SYSTEM TIPS
TANK RELAY PUMPING
Tank relay pumping is selected when the best water source is far from the structures or there is a significant grade to overcome before reaching the structures. This is done by pumping water from the main source to a second location such as a bladder, drop tank, ditch, or depression in the land to fill and use as the second water source. At the second water source another pump is required to run the sprinkler system. This system effectively “brings water to you” and is very useful when tender shuttles are not available, or roadways are not available/accessible. Typically, you can select the location of the 2nd water source as close as possible to the structures which reduces hose and fitting requirements allowing you to protect more structures on the single system. Where grade and sloping are the issue, the primary water source pump uses its pump power to overcome the grade, so the second pump does not waste pressure trying to both overcome the grade and protect structures.
The first thing to run out on all sprinkler systems is hose, specifically 38 mm, and pump power. SPUs are limited by the amount and type of pumps they carry as well as the amount of trunk line hose they carry. Always try to think, where can we optimize? Where can we cut gear out and achieve the results we need? How can we get more out of this system? Is every structure getting the proper coverage with this system? Limiting gear use does not keep it in the SPU, it simply allows you to protect more structures with less.
Wildland Urban Interface Basics | PARTICIPANT GUIDE Wildland Urban Interface Basics | PARTICIPANT GUIDE 96 97
PUMP SITE SET UP
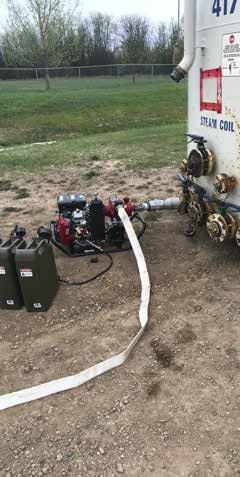
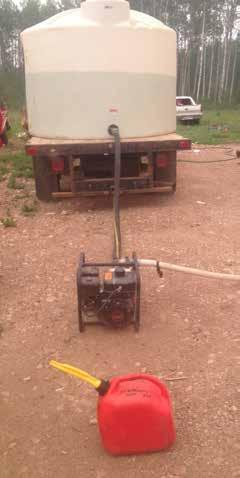
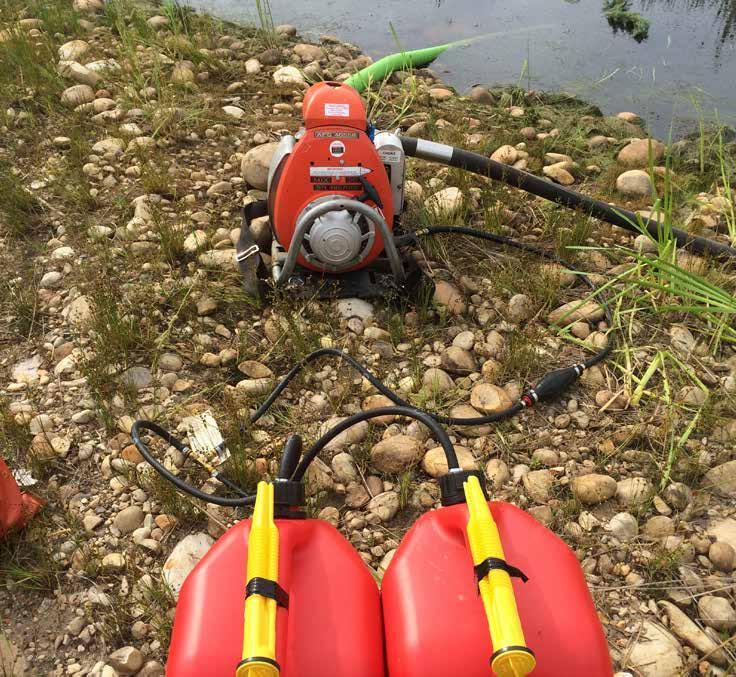
PUMP SITE
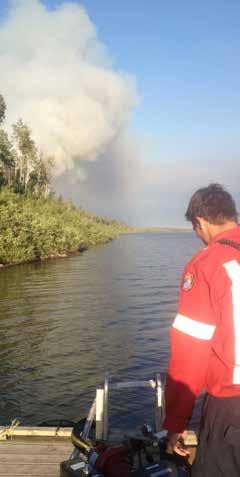
Once the plan has been made and water sources selected, you will likely begin by setting up the pump site. This can happen in tandem to the system set up given you have enough manpower and resources. This will include selecting the correct pump, securing the site, protecting the site, troubleshooting, check valve use, and testing. Use of fresh, premium, stabilized fuel is preferred as most pump issues outside of operator error involve poor fuel that has been sitting in the SPU for too long. You will need a pump, suction hose, fuel, pump kit, troubleshooting equipment, and water source to set up a pump site.
WATER SOURCES
You will want to select a large, clean, and reliable water source. Natural water sources are typically the best, as they hold large amounts of water that can be supplemented with tenders or hydrants. Rivers, streams, lakes, ponds, land depressions, ditches, or damming culverts are great options for large volume reliable water. Bladders and drop tanks are great options for placing them in the preferred locations if you have access to tender shuttles or hydrants to nurse them. AVOID tying the sprinkler systems to hydrants or using the municipal water system as a source of pressure. Hydrants add more volume than pressure and come with a large number of variables rendering them unreliable. Industrial 400-barrel tanks are excellent sources of water (16 600 US Gallons) when compared to a bladder or drop tank (500-4000 US Gallons) providing you have the adaptors to use them. Another serious complication to the 400-barrel tank is that they MUST be clean inside. In industrial applications these tanks hold all kinds of hazardous materials and must be steam cleaned prior to use. Most companies that provide these tanks will say they have been cleaned but ensure you check for yourself. This was a hard lesson learned in many WUI deployments where “dirty” water was used to sprinkler homes and resulted in massive clean-up efforts. Swimming pools are another great option for water.
Wildland Urban Interface Basics | PARTICIPANT GUIDE Wildland Urban Interface Basics | PARTICIPANT GUIDE 98 99
BLADDER/DROP TANKS
Bladders and drop tanks are excellent choices since you can place them directly in and amongst the structures to be protected. This is advantageous due to eliminating long trunk line lays, the pump sites are inherently protected by the sprinklers, and the locations can be set up for easy tender shuttle operations. The disadvantage to this option is they are limited to how much water they can hold. Bladders can be placed on minor slopes without affecting water capacity but drop tanks will see a large reduction in capacity when placed on a slope. Drop tanks take less manpower to set up, where as a bladder requires more personnel to set up effectively. Bladders store easier and are readily available through forestry, where drop tanks typically come on municipal fire apparatus and are limited to usually one per apparatus that have them. When placing either option for tender shuttle operations, ensure they can be easily accessed by a single operator of a tender. This includes placing them so the driver does not need to back up to it, rather they can pull up beside it and then drive away.
PUMPKIN BLADDERS
Pumpkins range from 300-3000 US Gallons and can be set up on low slopes without reducing capacity. They are affordable, easy to maintain, and easily drained and collapsed. They require more personnel to set up and are not easily stored on fire apparatus. These bladders may have pre-plumbed fittings at low points on it to hook a suction hose to.
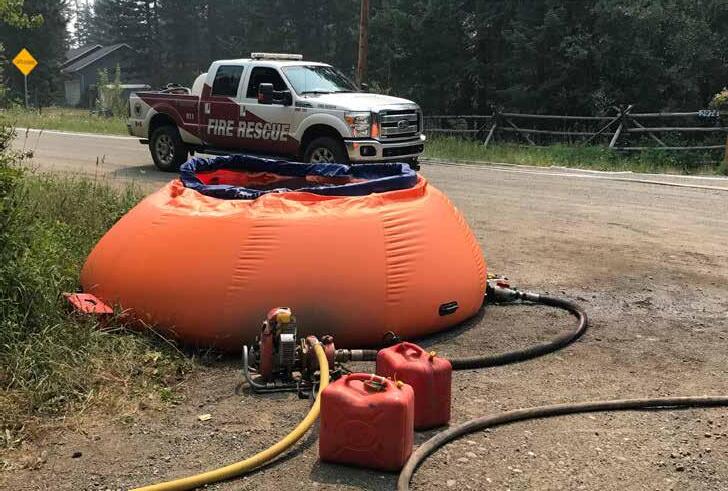
DROP TANKS
Typically used by the municipal fire service and stored on fire apparatus such as tenders. They require minimal manpower to set up and take down. The disadvantage to framed drop tanks is that they have reduced capacity when set up on any kind of grade or slope. They may or may not have pre-plumbed fittings to connect to.

Wildland Urban Interface Basics | PARTICIPANT GUIDE Wildland Urban Interface Basics | PARTICIPANT GUIDE 100 101
SUCTION HOSE FLOAT & SCREEN
When running a portable pump site from a natural water source with a suction hose, try to float the hose in the water to avoid picking up debris from the very bottom. This can be done with some empty water bottles or windshield washer jugs taped approximately two feet from the foot valve. If the bottom of the water source is clean such as a rock bottom or a bladder/drop tank, floating may not be necessary. Use a low-level strainer where possible in these situations to maximize water use. Ensure the suction side of the pump is air-tight and that the foot valve is functioning properly.
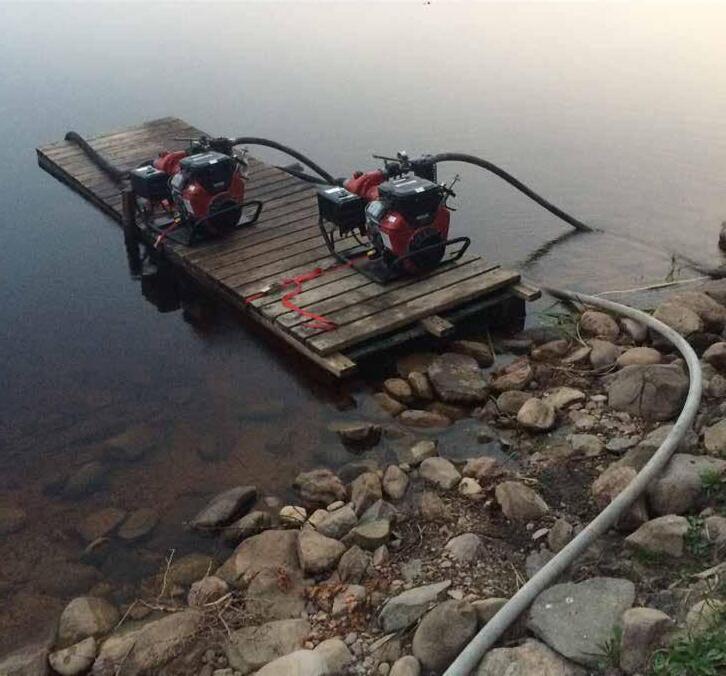
PUMP SECUREMENT
When pumps are running, they vibrate and need to be secured. Floating pumps need to be tied off in the event the discharge hose becomes disengaged. This will prevent the floating pump from floating away. To secure a pump, cut stakes from trees and hammer them into the ground around the pump. Then tie the pump to the stakes. Building a level pad out of wood or dunnage in muddy areas can ensure the pump does not vibrate into the mud too far. Ratchet straps, rope, or twine work well when tying off pumps. Pumps set up on slopes face issues of sliding into the water source or away from it. Protecting the pump from the wildfire may be a concern as well, so consideration should be made to sprinkler the pump site if needed.
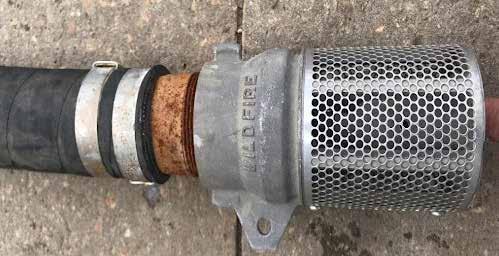
Wildland Urban Interface Basics | PARTICIPANT GUIDE Wildland Urban Interface Basics | PARTICIPANT GUIDE 102 103
PUMP SPECIFICATIONS
Pump selection is critical when planning a system. While there are many out there, the best have a pressure head or combination pressure-volume head. Standard pumps used in the interface are the Wajax (Waterax) Mark III and the BB4. Mark III’s are light, readily available, and easily serviced pumps that are widely used by forest agencies across North America. A maximum PSI of 380 with 98 GPM make them suitable pressure pumps for small to medium sized set ups. Mark III’s are 2 stroke and can be difficult to start without proper training or experience. The BB4’s have 4 stroke engines that are easy to start and can provide great pressure to a system. With 425 PSI and 105 GPM they provide a larger amount of pump power to the system, allowing you to protect more structures on a single system. Well suited for large set ups, they are heavy and usually require two people to set up.
PUMP SPEC COMPARISONS
FUEL
The fuel used in pumps must be fresh, clean, and preferably premium grade. Bad or old fuel is the leading cause of pump failure or issues. Changing fuel out in the spring before the fire season can ensure readiness and reliability in the pumps. Using generic jerry cans instead of unique, quick coupler jerry cans is preferred due to the compatibility and availability with other agencies equipment. Specialty jerry cans are harder to repair and are not compatible with what forest agencies use. Fuel lines should be in good repair and fitted with filters. Keep jerry cans and fuel lines clear of hot exhaust areas. Some pumps may have on board fuel tanks with fuel source valves to select on board fuel or jerry can fed fuel lines. Engine RPM and fuel capacity dictate how long the pump will run.
TROUBLESHOOTING (NO PRIME)
If you cannot achieve prime with a running pump, the first step is to check the suction side for air leaks. Tighten all fittings on the suction side and check for proper foot valve plunger operation. The plunger should not stick closed, it must open with ease to fill the suction hose when priming and pumping. Manually prime the pump if necessary, to help achieve prime. This can be done by filling the suction hose and pump head manually through the filling cap on the pump.
TROUBLESHOOTING (PUMP NOT STARTING)
The first step when a pump is not starting is to check that the ignition switch is in the “on” position. This is typically the most common mistake made when trying to start a pump. Ensure the fuel line is primed and not leaking fuel. Open the fuel tank’s cap to prevent air locking. Ensure the choke is on and throttle is at 1/3. If the pump does not start and you can smell fuel coming out of the exhaust while starting the pump it may be flooded. If this is the case, you can try a “Hail Mary” before pulling the spark plug. To do this, de-activate the choke, place the throttle at full speed, and attempt to start. If this does not work, shut the fuel off, pull the spark plug, and turn the engine over approximately 20 times. This should clear the “flood”. Check for spark by placing the spark plug against the engine block and turn the engine over. If no spark is seen, change the position of the plug on the block. If no spark is seen again, the plug may be in-operable. If spark is seen, put the plug back in and attempt to start the pump from step one.
CHECK VALVE USE
If you are pumping up a grade, you may want to consider using a check valve. This reduces back pressure on the pump head when starting the pump. Place the check valve after the first 10ft of hose. Face the check valve in the proper direction (improper direction will cause a burst hose or no flow). Check valves help keep water in the system and keep head pressure off of the pump head to allow for easier starting. If there is a lot of head pressure on the pump it will be difficult to start at an idle as the pressure coming in may be higher than the pumps discharge pressure at idle. Only use a check valve if overcoming elevation. If there is no elevation a check valve is not needed and will only increase friction loss in the system.
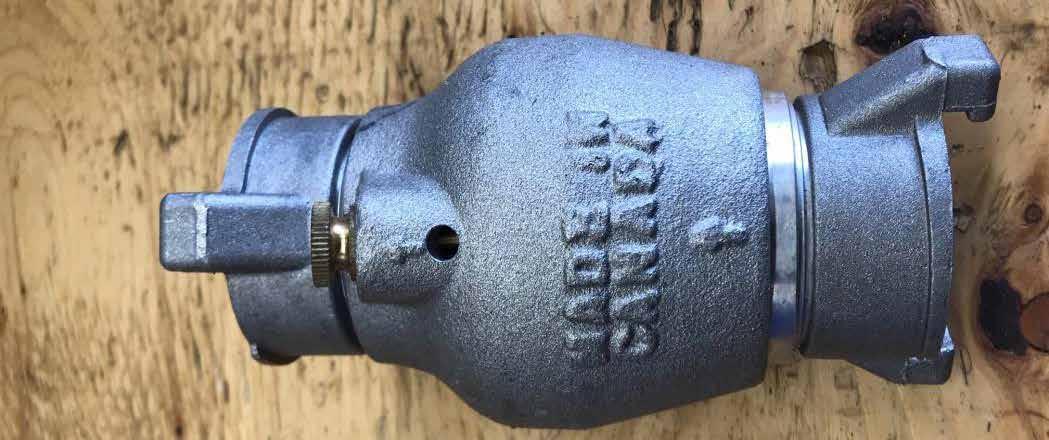
Wildland Urban Interface Basics | PARTICIPANT GUIDE Wildland Urban Interface Basics | PARTICIPANT GUIDE 104 105
MAX HEAD STAGE HORSEPOWER CYCLE WEIGHT MARK 3 Waterax 380PSI (2620 KPA) 98 USgpm (2620 KPA) 878ft (268m) 4 10hp 2 58.3 lbs Mark 3 Watson Waterax 380PSI (2620 KPA) 100 USgpm (379 KPA) 877ft (267m) 4 10hp 2 42 lbs BB-4 High Pressure Waterax 440PSI (3034 KPA) 106 USgpm (401KPA) 1016ft (310m) 4 23hp or (18hp is 2USgmp less) 4 170 lbs B2X Mid Range Waterax 200PSI (1379KPA) 300 USgpm (1136 KPA) 462ft (141m) 2 23hp or (18hp is 10 PSI less) 4 170 lbs Striker Waterax 230PSI (1586 KPA) 105 USgpm (397 KPA) 531ft (162m) 2 11.7hp 4 127 lbs Mini Striker Waterax 85PSI (586 KPA) 80 USgpm (303 KPA) 196ft (60m) 1 2.1hp 4 20 lbs Versax Multipurpose Waterax 120PSI (827 KPA) 105 USgpm (397 KPA) 277ft (84m) 2 5.5hp (Honda GX200) 4 70 lbs Wick 375 Mercedes Textiles 375PSI (2585 KPA) 100 USgpm (379 KPA) 4 10hp 2 56 lbs Wick 100G Mercedes Textiles 100PSI (689 KPA) 71 USgpm (269KPA) 1 2.4hp 2 17.4 lbs Wick 300-B Mercedes Textiles 275PSI (1896 KPA) 90 USgpm (341 KPA) 3 10hp 4 87 lbs Floto High Pressure (discontinued) Waterous 170PSI (1172 KPA) 60 USgpm (230 KPA) 1 8hp 2 42 lbs
PUMP MANUFACTURER MAX PSI MAX FLOW
PUMP SITE PROTECTION
When a pump site is located in the path of the fire, or is surrounded by fuel, it may be necessary to place a sprinkler near the site. Burning out around the pump is an option. Ensure jerry cans and fuel lines are clear of the exhaust and jerry cans are in a stable, upright position. If they can get knocked over by the pump vibrating away and “pulling” them by the fuel line, secure them as needed.
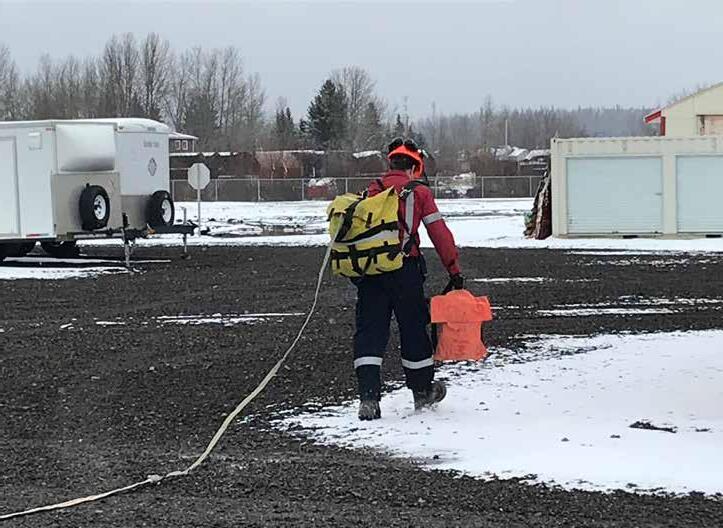
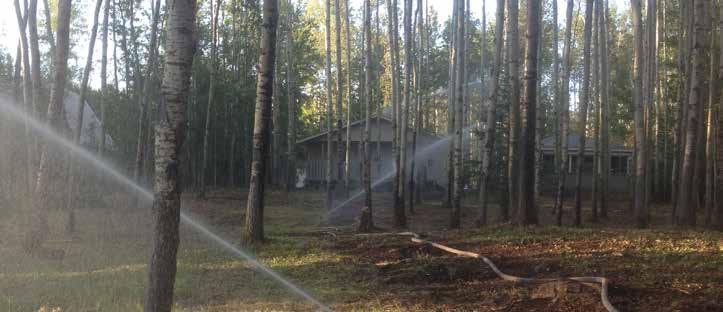
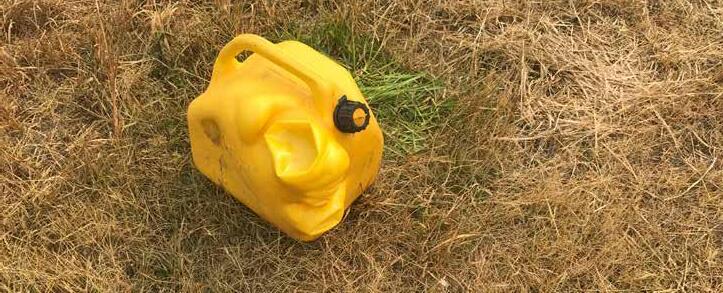
HOSE DEPLOYMENT METHODS
Rapid Deploy Bag
The rapid deploy bags are bags or backpacks that hold either rolled or flaked in hose line. Typically, in 38 mm, they feed out of the bag worn by the wearer. The advantage to this lay is that the trunk line can be surgically placed to reduce the amount of hose needed. It is a precise, accurate way to maximize the hose you have available. It can be labor intensive due to the wearer carrying 40-60 lbs. of gear and walking through uneven terrain. This is a slower way to deploy hose as it can only be deployed at walking speed but is a precise way to lay hose efficiently.
TRUNK LINE LAY
The trunk line in a sprinkler system is the main supply line that delivers water to the structures. It is the largest diameter hose that comes from the water source. Care must be taken to protect the trunk line from fire, vehicles, pinch points, and other potential hazards. Laying the trunk line through culverts when crossing roads is an excellent option but may be difficult to feed. Charging the line so you can “push” it through the culvert may be necessary. Never go over top of railway tracks, rather dig between two railway ties to feed the hose underneath the rail line. Lay the trunk line as close to the structures as possible to reduce the amount of small diameter hose in play. This will save on friction loss allowing you to protect more with that system.
Wildland Urban Interface Basics | PARTICIPANT GUIDE Wildland Urban Interface Basics | PARTICIPANT GUIDE 106 107
Single Roll
The single roll method involves deploying one hose roll at a time. It allows you to accurately lay the hose lay it precisely where you want it. It is the slowest method due to the time required in rolling out a hose section, fixing tangles, and straightening the line. Deploying hose 50-100 ft at a time is manpower intensive and can add to the confusion when large numbers of people are trying to deploy the hose according to the plan.
SITE & STRUCTURE PREP
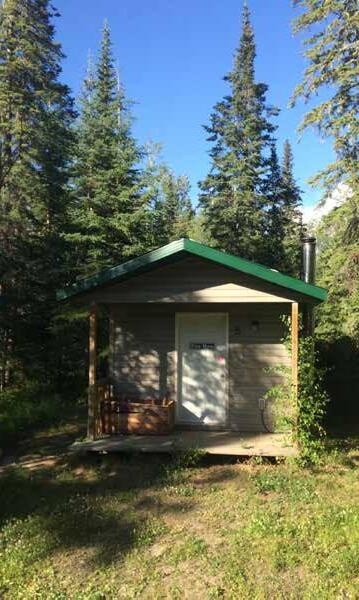
Preparing a site for sprinkler systems requires going back to triage and why it was categorized. Standard tactics of removing combustibles such as firewood, lumber, leaves, patio furniture, flammable containers, and BBQ propane tanks from Zone 1A apply. Removing objects that can obstruct sprinkler heads and their streams should be done if possible. Burning out vegetation and dead grass may be an option if proper resources and experience is present.
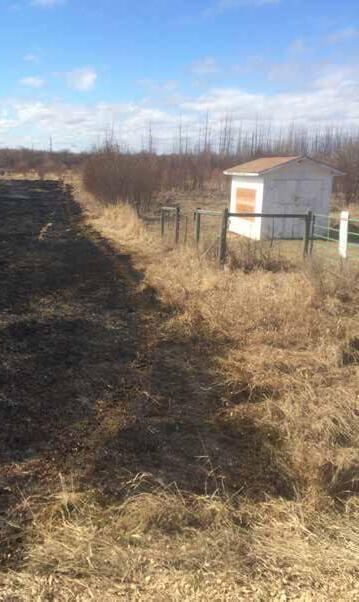
Hose Bed
Utilizing the hose bed of an apparatus is the quickest way to lay trunk line. It is quick, easy, requires little manpower, and can be beneficial in an urban setting. This method is the least accurate and can be limited by where there is road access. It will increase the amount of smaller diameter hose needed to get to the structures by not laying the trunk line directly beside them. Should be used when lack of time is a factor. When adequate time exists, more precise methods are preferred.
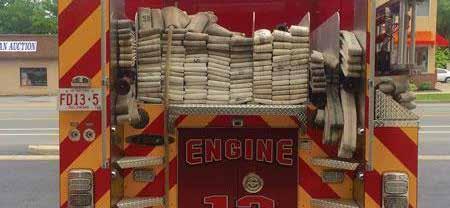
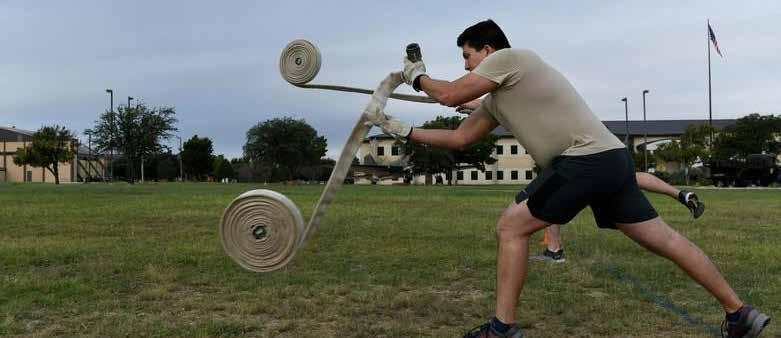
Wildland Urban Interface Basics | PARTICIPANT GUIDE Wildland Urban Interface Basics | PARTICIPANT GUIDE 108 109
SPRINKLER HEAD TYPES
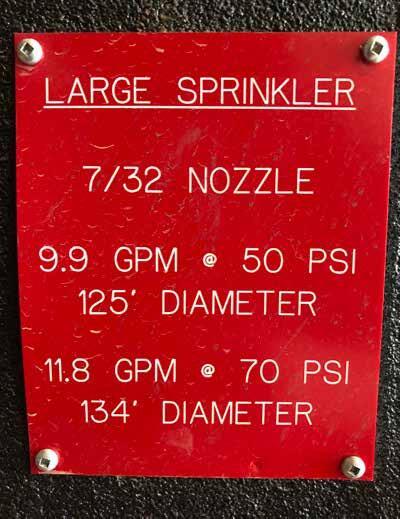
Many factors exist when selecting the proper sprinkler head. Each have their own advantages and disadvantages. Knowing the equipment and what it can do are key to selecting the correct sprinkler for the plan. A good rule to follow is to use the smallest heads needed to protect the structure due to saving on flow and pressure in the system. If a large head is in place but a smaller one would do the job, select the smaller one to conserve flow and pressure. This will allow you to sprinkler more with your system in most cases.
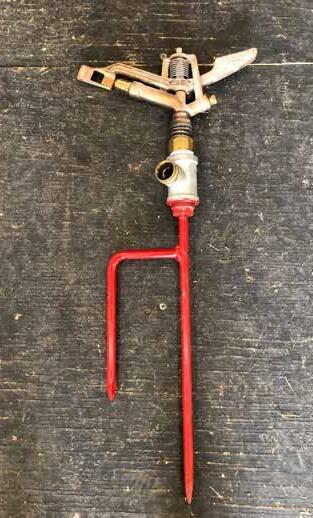
BUTTERFLY
Butterfly sprinklers create a mist pattern that soaks the immediate area. They have limited range (20ft) and can be adversely affected by the wind. They are best used in small coverage areas such as wood piles, underneath decks, or on mulch gardens. Avoid placing them on the roof as the wind can eliminate their effectiveness. They also would require large numbers of them for a single roof.
LARGE SPRINKLER (RAIN BIRD)
The rain bird is the mainstay of sprinkler systems. Available in a variety of nozzle sizes, the most common is 7/32. This provides them with great reach and volume to protect structures. Standard sized single-family dwellings need only two rain birds to protect. They typically come in a “deadend” design and rarely see blockage issues. With a range of up to 60 ft and a flow of approximately 10 GPM, they are a hardy and versatile sprinkler.
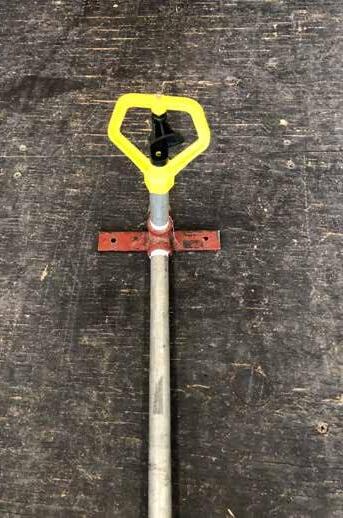
• 4.8 GPM
• Good mist pattern
• Small coverage area
Wildland Urban Interface Basics | PARTICIPANT GUIDE Wildland Urban Interface Basics | PARTICIPANT GUIDE 110 111
SMALL SPRINKLER (MINI-RAIN BIRD)
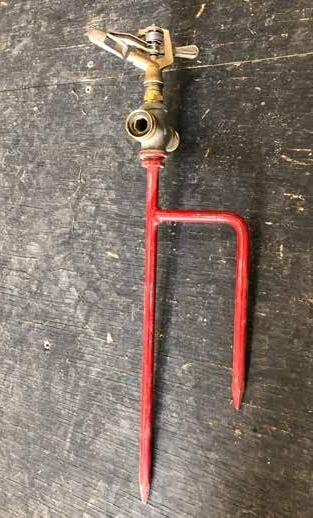
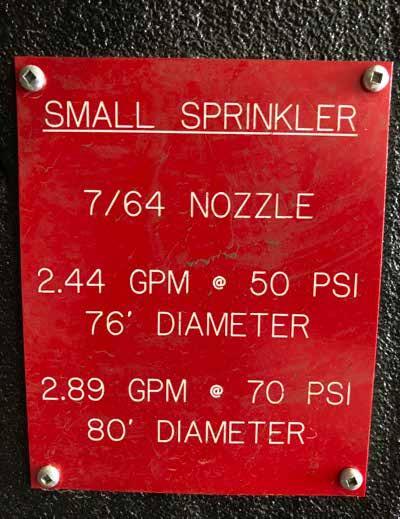
The rule of thumb for small sprinklers is that small sprinklers are great for smaller structures. Their range is approximately 40ft and they flow around 2.5 GPM. They can get blocked easily by debris in the water as the suction screen holes are typically larger than the tip size of these smaller sprinklers. Clean water is a must when using these heads. They also are susceptible to over-pressure issues. They will not spin when too much pressure is applied. The solution to this is to “gate back” the valve that feeds it. This will reduce the pressure to the head and allow it to resume spinning. They typically come in a flow through design.
SPRINKLER CANNON
Sprinkler cannons are very large sprinkler heads originally intended for agricultural irrigation uses. These sprinklers can be effective in covering a large areas (three of them will cover a football field), but can take immense amounts of pressure from your sprinkler system. These should be set up with their own dedicated pumps as incorperating them into a system can greatly reduce the amount of other sprinklers you can run with that system. They can deliver a large amount of water an impressive distance, but suffer when tied into larger systems. They very in GPM based on intake and tip sizes. They range from 27-89 GPM.
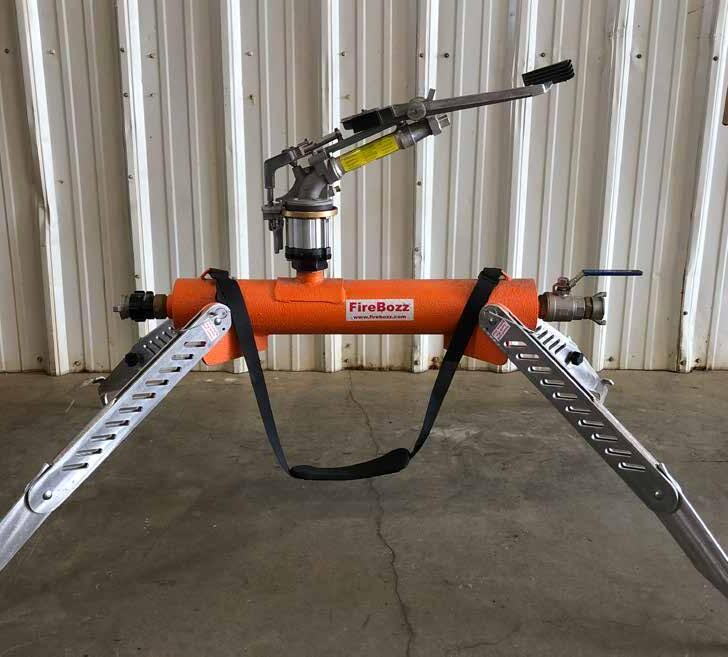
Wildland Urban Interface Basics | PARTICIPANT GUIDE Wildland Urban Interface Basics | PARTICIPANT GUIDE 112 113
FLOW RATES
It may be important to calculate flow rates when using tenders to fill water sources. This is to determine the “turnaround time” for the water shuttle. This can be done simply by adding up the kinds of sprinklers deployed and multiplying that by their approximate GPM. The GPM will vary based on the pressure it is receiving but we can assume some rough numbers for easy math. Once the GPM for each kind of sprinkler has been multiplied by how many are deployed, simply add the values together to get a total GPM for the system. Then take the amount of water you have and divide it by the GPM of the system to find the estimated run time of the system.
FOR EXAMPLE:
12 Rain Birds x 10 GPM = 120 GPM
6 Small Sprinklers x 2.5 GPM = 15 GPM
3 Butterfly Sprinklers x 5 GPM = 15 GPM
TOTAL SYSTEM USE = 150 GPM
2500 Gal. Bladder ÷ 150 GPM = 16.6 Minutes
Following this example, you can roughly determine the 2500 Gal. bladder will last 16 minutes. This will allow you to time the tender shuttle and determine if you need more tenders to maintain the system.
MOUNTING SPRINKLERS
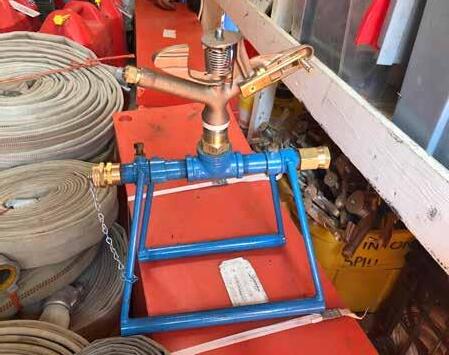
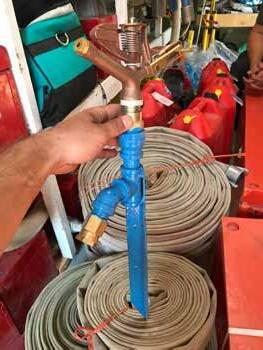
A wide variety of options exist when it comes to mounting sprinklers to structures. Most often you will fasten the sprinkler to the gable ends of the structure. Care should be taken to not damage the drip edge or roof overhang when mounting sprinklers. Using a spacer to overcome the roof overhang is a great option to eliminate damage and keep sprinklers upright. Some methods of mounting sprinklers are listed below.
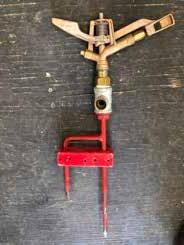
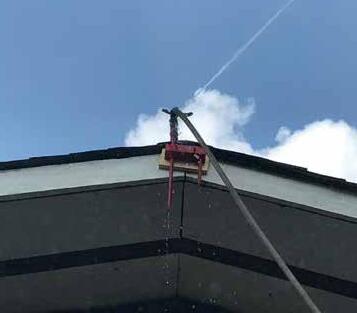
MOUNTING SOLUTIONS

When roof pitches are too steep or gable ends are too high to reach, pecker poles may be the solution. Start by cutting a small tree or finding a pole or piece of lumber that can be fasted around the structure. Mount a sprinkler to one end and connect the water supply. Selecting a proper location to fasten the pole to (deck rails, lower section of gable), raise the pole and secure it. Using gorilla tape is a great option when nailing or screwing isn’t an option. Gorilla tape has been proven to hold sprinklers in place for months on structures when used properly. Zip ties can work too, but caution must be taken because the sprinkler can twist in the ties and become dislodged. Base and pole mounts offer homemade solutions to sprinklers with spiked bases.

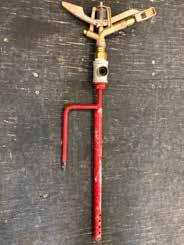
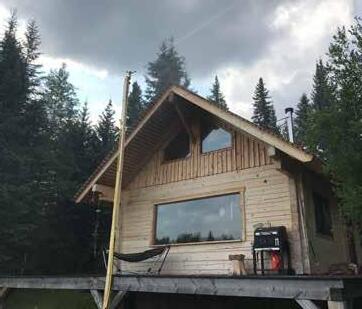
Wildland Urban Interface Basics | PARTICIPANT GUIDE Wildland Urban Interface Basics | PARTICIPANT GUIDE 114 115
MULTIPLE OPTIONS ARE AVAILABLE
TOOLS REQUIRED
Using the right tool for the job in any setting makes it easier. Mounting sprinklers is no different. Using specific equipment can aid in setting up sprinklers with ease and reduce frustration and time loss. Using double headed nails that are 2 ¾” in length allow for deep enough penetration through the mount and into the gable while providing easy removal with the double head. Framing hammers are preferred for nails due to their cross hatched tips that reduce the number of shearing strikes that can occur. Screws need to be long enough and the correct type of screw (wood/metal) for the application. They also require power tools that have battery or corded options and come with their pros and cons. Corded options are the most reliable but require a power source close by. Battery powered tools are the most versatile but require multiple batteries and a charging source. Roofers tool pouches are great non-cumbersome pouches that hold the right number of tools and nails/ screws to accomplish the task. A tool bag for carrying sprinklers, hose, and fittings is required to make transport of these items easy. Ladders that are lightweight are key. They do not need to be structure fire rated and should be easy to set up with a single person. Telescoping 15-20 ft ladders reach most gable ends but a 24-30 ft extension ladder should be on hand for taller sections of roof.
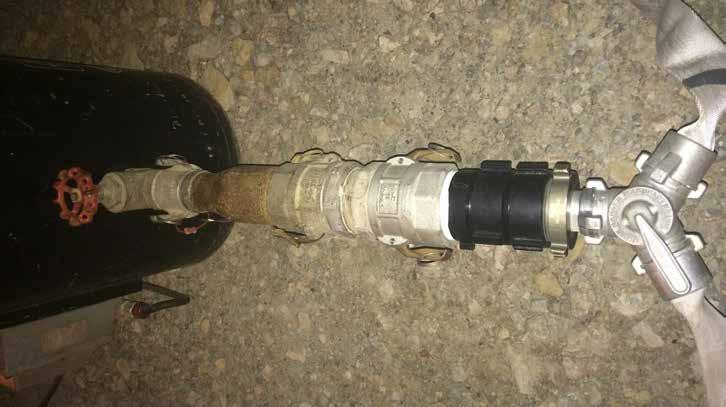
WORKING ON ROOFS
Care must be taken when working with ladders. Follow the standard 4:1 climbing angle and avoid climbing directly onto roofs when possible. If roof access must be made, use caution and a roof ladder to maintain safe work practices. If the roof pitch is too high and too aggressive, mount the sprinkler at a lower part of the gable end. As long as the stream clears the roof angle and provides proper coverage the sprinkler will be effective. Watch for overhead power lines and stay away from overhead building services.
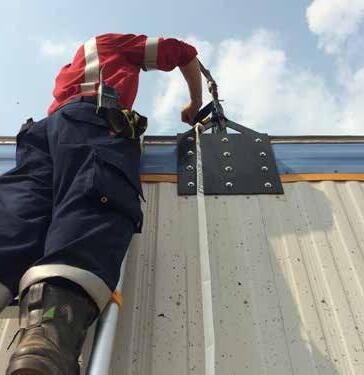
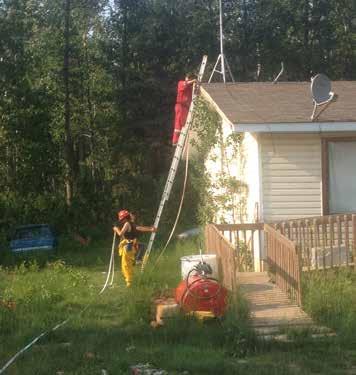
EXTRA EQUIPMENT TO CONSIDER
Using an ATV/UTV to transport equipment to structures can greatly increase speed and ease when setting up a system. They can be used to haul pumps to the water sources, transport hose and fittings, and move personnel to the required locations. Using high pressure pumps is much more effective than volume pumps. Chainsaws and hand tools should be on hand for site prep tasks. Patch kits for bladders/drop tanks can be used to fix leaky tanks and retain water supply. Floodlights and headlamps allow work to continue into the night if necessary. One of the most essential extras to have is adaptability of fittings. Being able to connect to municipal, forestry, and industrial water supplies can make or break a system. Having a variety of extra fittings on hand can help you adapt when needed.
Wildland Urban Interface Basics | PARTICIPANT GUIDE Wildland Urban Interface Basics | PARTICIPANT GUIDE 116 117
STRUCTURE DEFENSE LINE
Structure defense lines are hose lines placed at each property or every other property to suppress fires if needed. They are made up of 50-100 ft of ¾” hose with a nozzle that is coiled up near the structure. The intent of this line is to preserve water and deployment time of apparatus when suppressing small spot fires around a structure. The line should reach all the way around the structure to be effective. This saves a lot of time for suppression crews by not having to deploy their own hose and use their precious water to suppress fires. They can also be used a fill line for apparatus that are staged in the area.
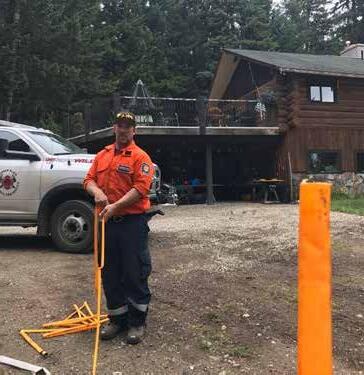
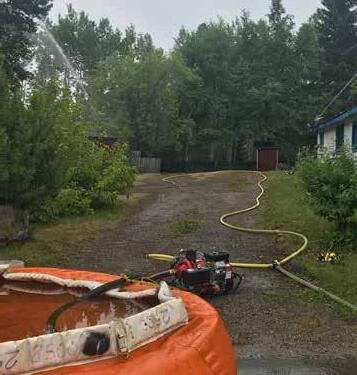
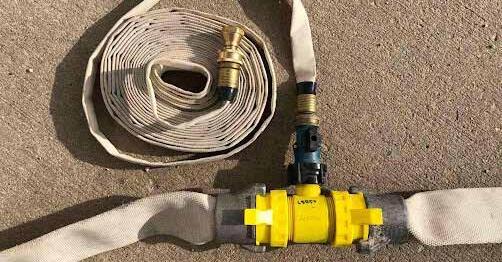
SYSTEM TEST
A sprinkler system is not complete without a test. To complete a test, start by walking the system and double check that every valve is in the correct position and kinks are out of the hose lines. Then, start the pumps at an idle and allow all hose lines and sprinklers to fill with water before raising the engine throttle. Once water is flowing through every sprinkler, raise the engine throttle slowly up to maximum recommended operating RPM. Walk the entire system and get a visual on every head. Watch the entire rotation of the head and ensure there are no “shadows” in the coverage. Ensure everything that needs to get wet is inside the coverage area and receiving water. Fix any issues such as hose kinks, ruptured lines, blocked sprinkler heads, or tilted sprinklers. Double check the pump sire is secure before shutting down. Once the test is complete, refuel pumps and jerry cans, top off water sources, and clean up remaining gear. This allows for the longest run time possible when the system needs to be started. Tests also allow for the opportunity to eliminate or add gear where needed. Often this will tell you if you can eliminate gear or if you must add a pump to boost pressure. You must trust that the system will work when needed and that the final product is ready for the impingement phase. When multiple days exist during the impingement phase, test systems daily to ensure readiness and to saturate the fuels in the area.
Wildland Urban Interface Basics | PARTICIPANT GUIDE Wildland Urban Interface Basics | PARTICIPANT GUIDE 118 119
ENSURE PROPER COVERAGE
• Be mindful when flowing water on structures
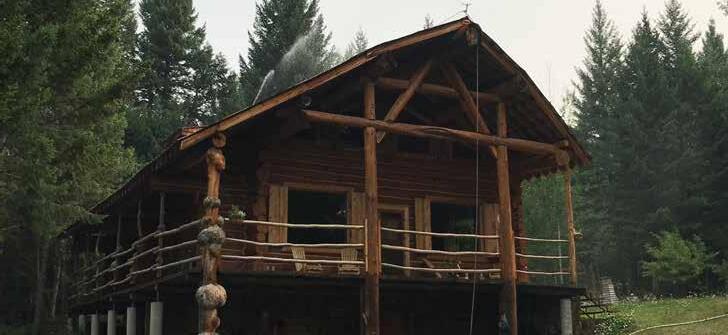
• Watch where it’s going
• Ensure it’s not going down chimneys
• Streams should not impact windows
• Structures are meant to shed water from above
• Ensure the fuels are wet that can threaten structures
• Check for shadows
• Watch water run off to ensure it is not going to impact structure
ACTIVITY
Given the following information, come up with a structure protection plan to protect the structures in the image from impingement. Select water sources, trunk line lay, and any other tactics you would implement to protect these six structures.
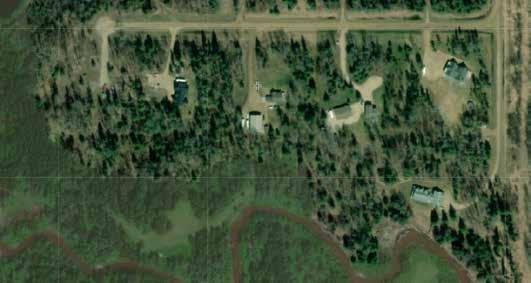
SCENARIO
It is May 23rd at 1400 hours local time. A wildfire has started just west of a rural subdivision in Northern Alberta. Winds are high and the relative humidity is low, the fire behavior is expected to be extreme. The fire is expected to impinge on the subdivision in a matter of two hours. The residents are evacuated, you have a crew of four with a Type 6 Engine and a Type 2 Structure Protection Trailer. You have been tasked with protecting these six structures, what is your plan?
RUN TIMES
Sprinklers should be left to run for an hour before impingement occurs when possible. This allows fuels to get adequately saturated and resist ignition. Water sources and fuel capacity are the two factors that limit sprinkler system run times.
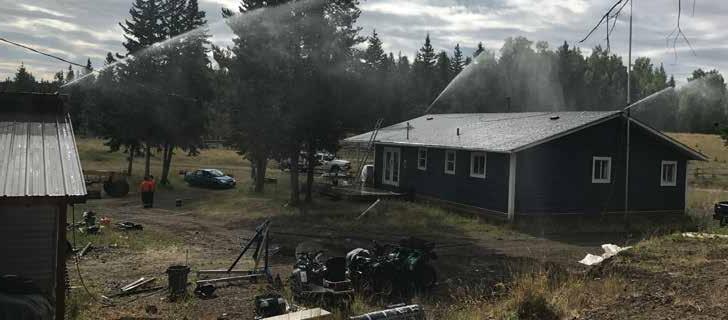
Wildland Urban Interface Basics | PARTICIPANT GUIDE Wildland Urban Interface Basics | PARTICIPANT GUIDE 120 121
Wildland Urban Interface Basics | PARTICIPANT GUIDE Wildland Urban Interface Basics | PARTICIPANT GUIDE 122 123
NOTES
NOTES
ENGINE OPERATIONS IN THE WUI
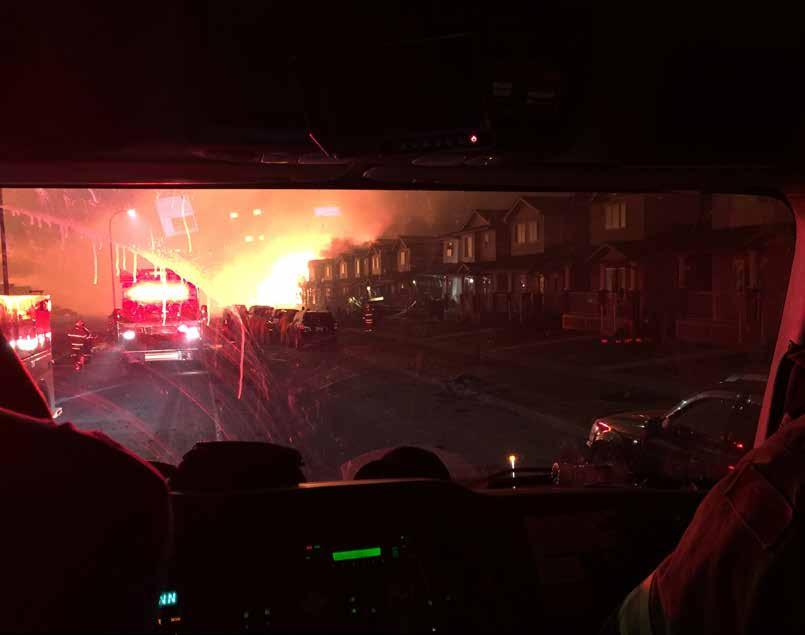
RESOURCE KIND & TYPE
KIND
Resource kind describes what the resource is, such as an engine, tender, dozer, or helicopter. It speaks directly to WHAT IS the resource.
TYPE
Resource type describes the size, capability, equipment, and staffing of a resource. A certain KIND of resource typically has many TYPES. For example, not all engines are created equally. Think of a large urban engine and a wildland engine. Both are ENGINES (kind) but the TYPE of engine they are differs in their size, capability, equipment, and staffing.
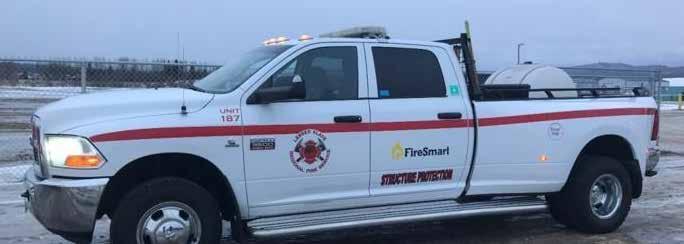
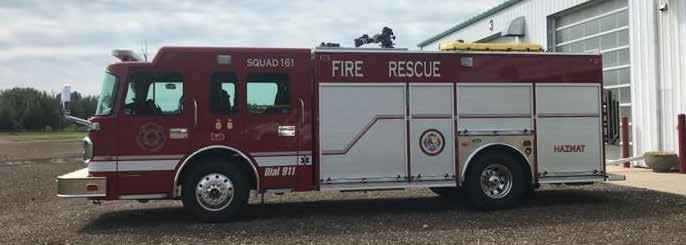
Wildland Urban Interface Basics | PARTICIPANT GUIDE Wildland Urban Interface Basics | PARTICIPANT GUIDE 124 125
Type 1 Engine
Type 7 Engine
RESOURCES NEEDED
When ordering resources, understand what you need (what problems do you need to solve?) This will help you order the right resources for the job. Refrain from asking for just “more” resources. Be specific on the kind and type if you can. All too often resources that show up at the incident are not capable or are less capable than the resources that are actually needed. Some easy ways to remember what resources are is to think of what they are typically used for. Extra human resources such as RCMP, EMS, victim services, and municipality utility operators may be needed to help with problems fire service personnel are not equipped for. Resources and personnel from forestry agencies such as heavy equipment groups, helicopters, air tankers, and firefighting personnel can add to the effectiveness of the response. A WUI incident is a large team sport, many players are needed to make it work safely.
ENGINE TYPES
ENGINES
Type 1 engines are urban pumpers designed with large pumps and low tank capacities for fighting structure fires with hydrants. Type 6 engines are purely wildfire firefighting units. Small tank capacity and pump capabilities are the norm, and they are nimble and fast for fighting spot fires and accessing tight areas. Type 3 engines are best suited for WUI operations due to their dual role in wildland and structural firefighting. They come with pump and roll capabilities and a good amount of personnel and equipment to be mobile and efficient. Pair that with larger tank capacities and great pumping capabilities they become the most useful engines at WUI events. They also are not as heavy and low to the ground which helps with accessing areas urban pumpers cannot reach.
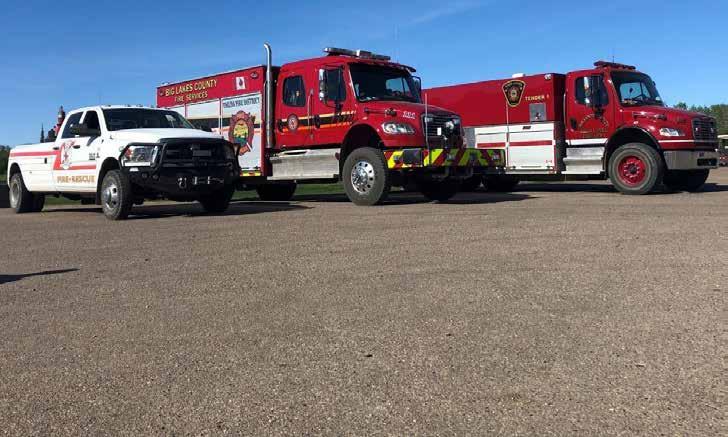
Wildland Urban Interface Basics | PARTICIPANT GUIDE Wildland Urban Interface Basics | PARTICIPANT GUIDE 126 127
Type Purpose 1 2 Structure 3 4 5 Wildland 6 7 Tank capacity- Liters 1,100 1,100 1,900 2,800 1,500 570 190 Flow rate (liters/min) 4,000 2,000 550 200 200 200 40 At Rated Pressure (kPa) 1,000 1,000 1,700 700 700 700 700 Hose 65 mm (m) 360 300 N/A N/A N/A N/A N/A Hose 38-45 mm (m) 150 150 300 90 90 90 N/A Hose 25 mm (m) N/A N/A 150 90 90 90 60 Master Stream Yes No No No No No No Pump and Roll No No Yes Yes Yes Yes Yes Ladders as per NFPA Yes Yes No No No No Maximum GVW(kg) No No 11,800 8,850 6,350 Minimum Personnel 4 3 3 2 2 2 2
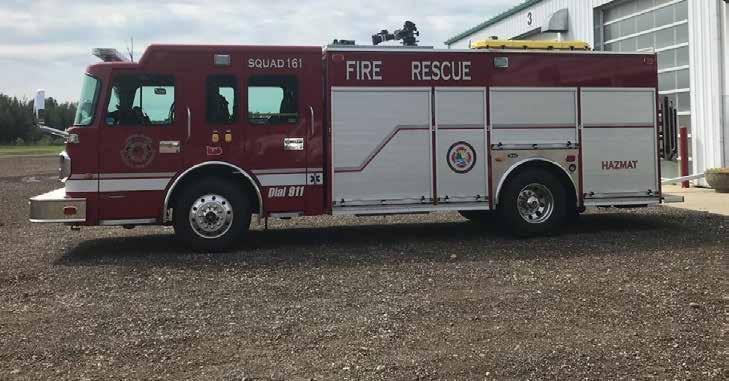
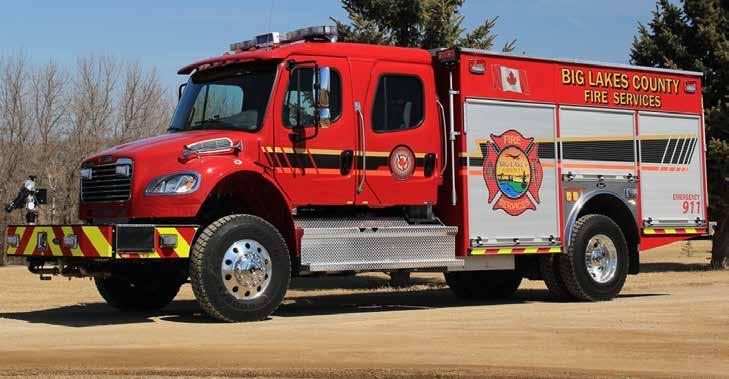
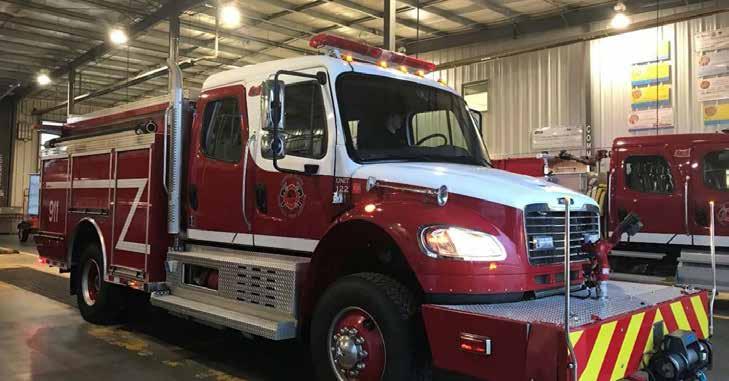
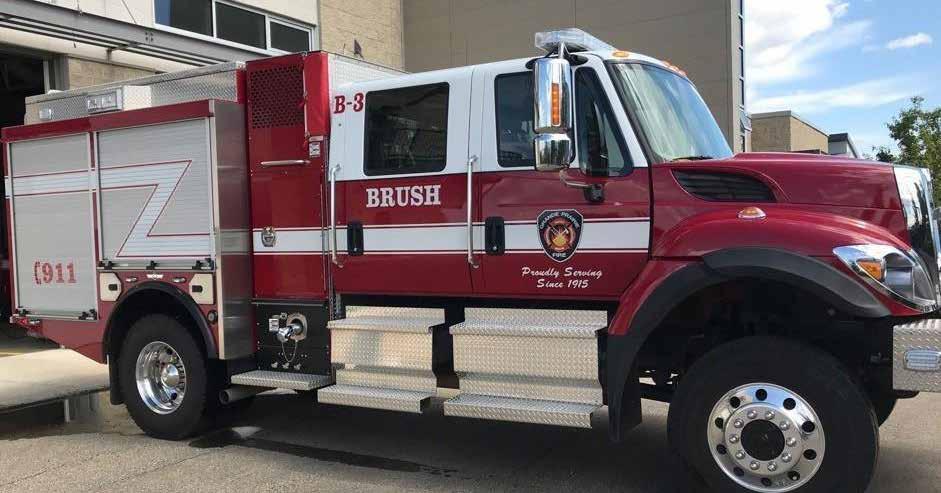
Wildland Urban Interface Basics | PARTICIPANT GUIDE Wildland Urban Interface Basics | PARTICIPANT GUIDE 128 129
Type 1 Engine
Type 2 Engine
Type 3 Engine
Type 4 Engine
TRUCK COMPANY TYPES
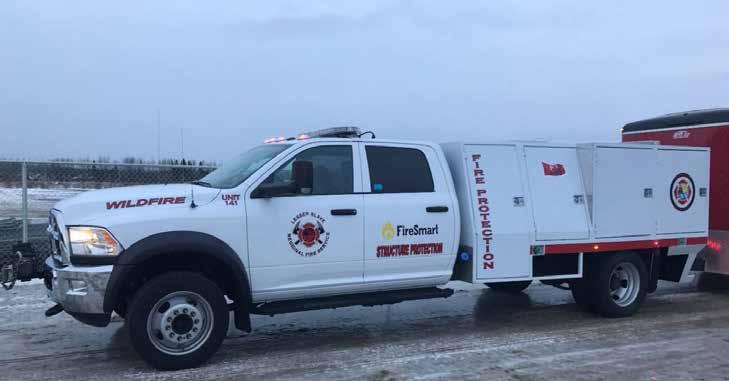
TRUCKS/AERIALS
Ladder trucks are large, heavy, urban apparatus with limited roles in the WUI. They should be kept for anchor and hold actions and nothing else. Water tank capacities are very low which makes them next to useless with any other type of action.
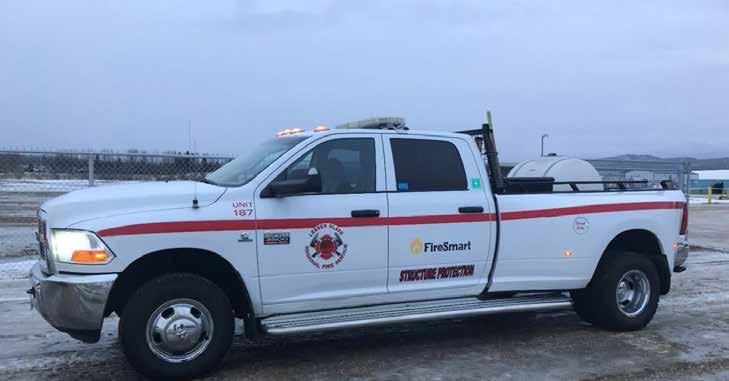
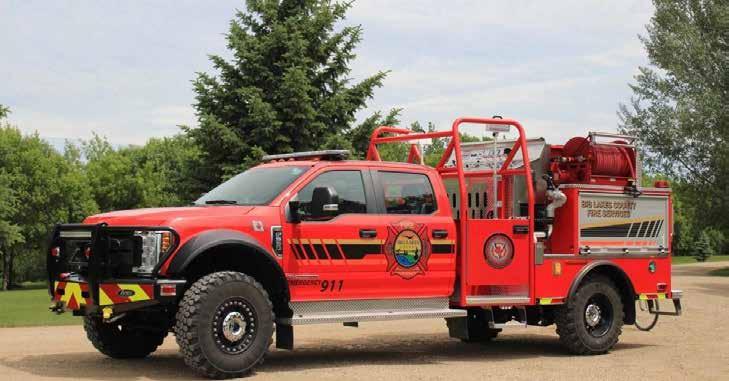
Wildland Urban Interface Basics | PARTICIPANT GUIDE Wildland Urban Interface Basics | PARTICIPANT GUIDE 130 131 Type 5 Engine
Type 6 Engine
Type 7 Engine
Type T1 T2 Aerial Height 20m(65ft) 15m(50ft) Flow rate (liters/min) 2,000 2,000 Ground Ladders (meters) 35m 35m Minimum Personnel 4 4
WATER TENDER TYPES
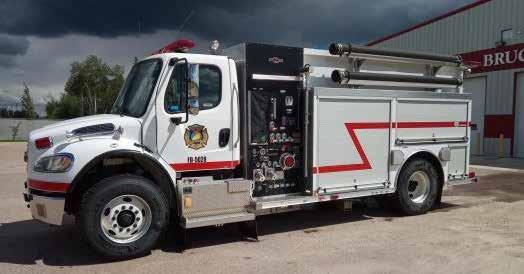
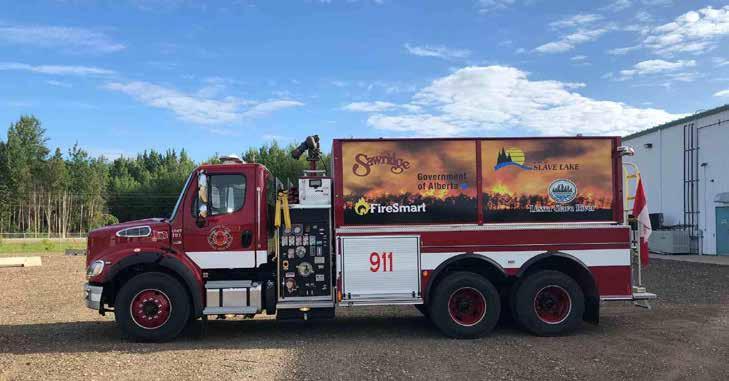
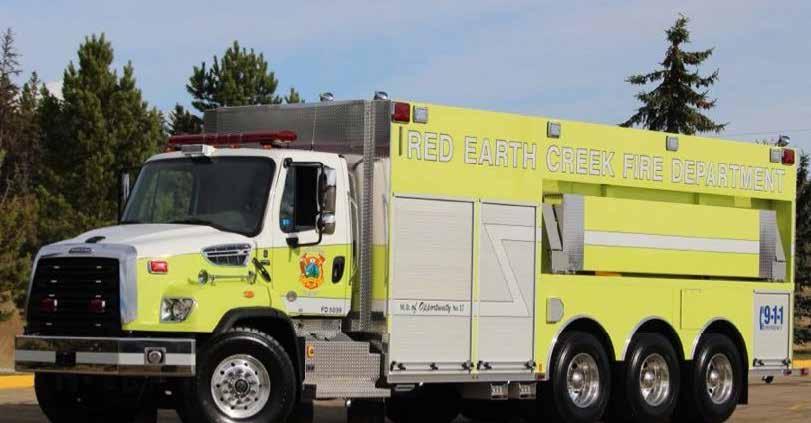
TENDERS
Tender classes may be difficult to understand but are relatively simple. S class (support) tenders are large water haulers with no pump and roll capabilities. S class tenders are staffed with 1 member and are purely water delivery vehicles with small pump capabilities. They are intended to “dump” their loads through end or side dumps into static water sources. T class (tactical) tenders are smaller more nimble firefighting/water supply vehicles. They have higher pump capabilities, are pump and roll capable, and come with 2-member staffing. They are designed to access tighter areas and complete both suppression and water supply tasks.
Wildland Urban Interface Basics | PARTICIPANT GUIDE Wildland Urban Interface Basics | PARTICIPANT GUIDE 132 133
Type S1 S2 S3 T 1 T2 Tank capacity (liters) 15,000 9,500 3,800 7,600 3,800 Flow rate (liters/min) 1,100 800 800 1000 1000 At Rated Pressure (kPa) 350 350 350 1,050 1,050 Pump and Roll NO NO NO YES YES Minimum Personnel 1 1 1 2 2
Type 1 Support Tender (S1)
Type 2 Support Tender (S2)
Type 3 Support Tender (S3)
STRUCTURE PROTECTION UNITS (SPU)
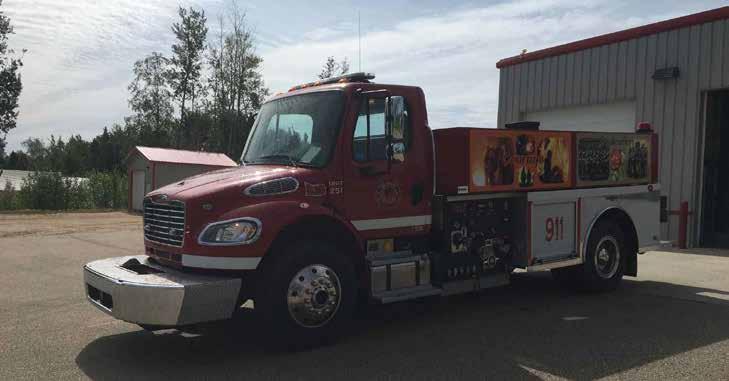
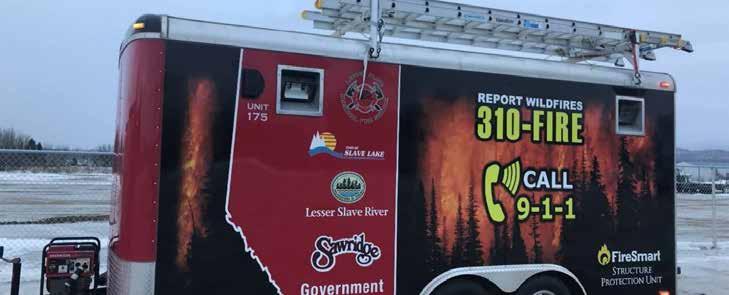
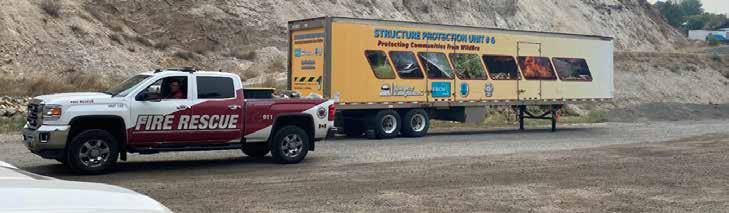
Type 1 2 3
Approximate Number of Structures Able to Protect 31+ 21-30 10-20
SPU structure numbers are based on number of sprinklers divided by 4 (assuming 4 heads per structure)
STRUCTURE PROTECTION UNIT (SPU)
For SPUs, Type 1s are a semi “reefer” trailer load of equipment. Type 2s are very common, tandem axle cargo trailers. Type 3s are less common, single axle cargo trailers. Keep in mind their capabilities are classed on 4 sprinkler heads per structure, where in reality most single-family dwellings take no more than 2-3 heads to protect. This means SPUs can often protect more structures than they are rated for, depending on length of hose lays and number of pump sites.
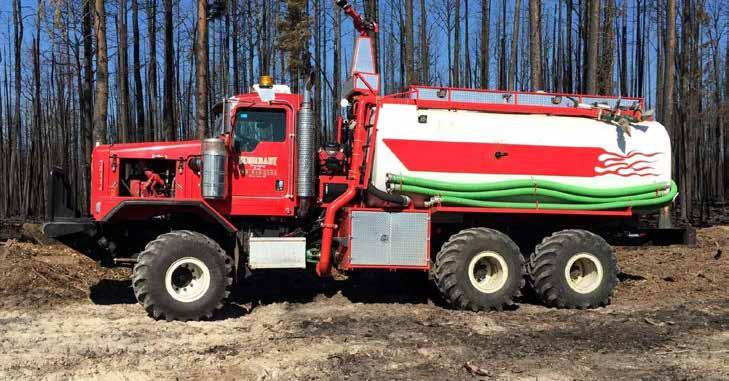
Wildland Urban Interface Basics | PARTICIPANT GUIDE Wildland Urban Interface Basics | PARTICIPANT GUIDE 134 135
Type 1 Tactical Tender (T1)
Type 2 Tactical Tender (T2)
Type 1 Structure Protection Unit
Type 2 Structure Protection Unit
OPERATIONS
OBJECTIVES
Objectives are created to solve the incident problems. Problems are identified by the needs of the incident. Objectives are then set by the incident management team to solve the problems. Resources are brought in to accomplish the given objectives by utilizing strategies and tactics.
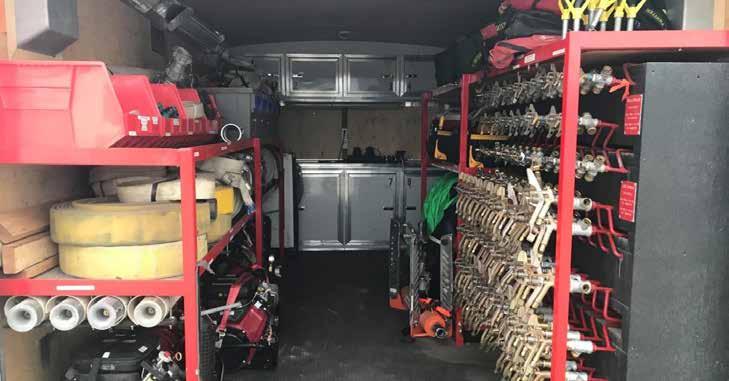
STRATEGY
A strategy is defined as a plan of action designed to achieve a major or overall objective. This is WHAT you are going to do to accomplish an objective.
TACTIC
A tactic is defined as an action that is carefully planned to achieve a specific end. This is HOW you are going to accomplish an objective. setting contains an enormous number of man-made hazards.
Power lines are often compromised and can remain energized while on the ground, smoke can obstruct visibility, roadways may become blocked or inaccessible, and communication breakdowns
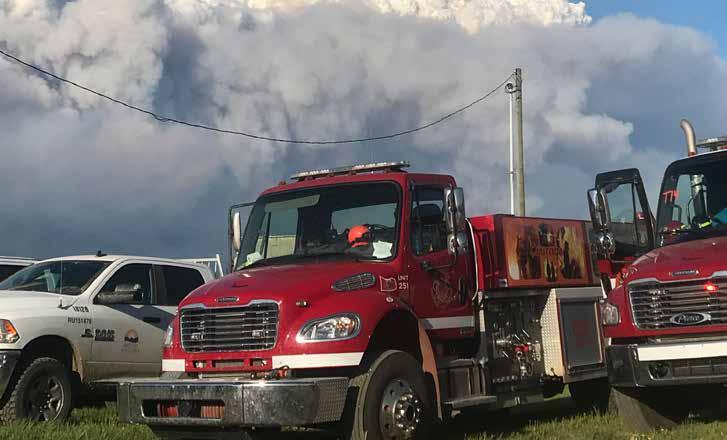
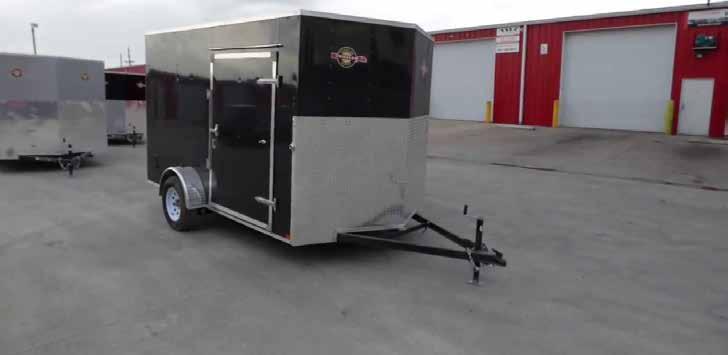
Wildland Urban Interface Basics | PARTICIPANT GUIDE Wildland Urban Interface Basics | PARTICIPANT GUIDE 136 137
Type 2 Structure Protection Unit (Interior)
Type 3 Structure Protection Unit
ACTIVITY
SCENARIO

Your child glues in the bathtub plug and fills the tub up to the brim with water.

• What is the objective?
• What are your strategies?
• What are your tactics? Break into groups and determine five strategies and the tactics that go with them to share with the group.
SAFETY CONCERNS GENERAL SAFETY
A WUI environment presents many varied and unique safety concerns. The combination of wildfire and structural firefighting safety concerns collide on a large scale with high-extreme fire behavior. We must prepare for the hazards we will encounter to understand how to mitigate them. At many WUI incidents wildfire fuel types present flashy and dangerous fire conditions while a built-up setting contains an enormous number of man-made hazards.
Power lines are often compromised and can remain energized while on the ground, smoke can obstruct visibility, roadways may become blocked or inaccessible, and communication breakdowns are common. The public may be in the area hampering suppression efforts, pressurized fuel sources exist at nearly every property, and flying embers add to the difficulty of working in this environment.
Wildland Urban Interface Basics | PARTICIPANT GUIDE Wildland Urban Interface Basics | PARTICIPANT GUIDE 138 139
SAFETY TIPS
There are many things you can do to mitigate hazards, although due to the quickly changing environment there may not be time to handle them all. In any case, we must be able to identify them and know that they exist while working around them. For example, with downed power lines there is little we can do to mitigate them as the utility companies will likely be overwhelmed and not able to shut power off at each location. The solution is to avoid the lines, mark their locations, and keep a safe working distance from them. This may mean you cannot suppress fires that are actively burning near the lines, but we cannot sacrifice responder safety to save property. In most cases the best we can do is to have escape routes to safety zones known and tested, keep windows and compartments closed on apparatus, park facing out/away at each stop, and be mindful of where we are working at all times. Avoid parking on or near flashy fuels, watch for soft roadway shoulders, septic fields, long or tight driveways, and fuel loaded access points.
LACES
When actioning fires or working on the fireground in general, we can follow some simple safety rules to increase our situational awareness and safety in the WUI. LACES identify keep points from common denominator tragedy and near miss fires.
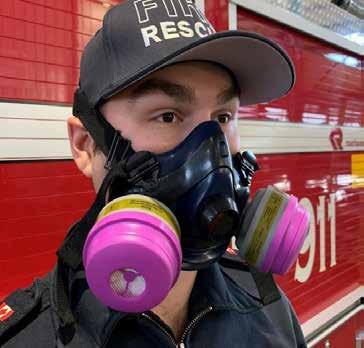
• LOOKOUTS—post lookouts to watch for fire behavior
• ANCHOR—anchor to a safe working line (road, the black)
• COMMUNICATIONS—establish and test communications to be used by everyone
• ESCAPE ROUTE—have as many escape routes to a safety zone as possible, and test them
• SAFETY ZONES—establish safe zones where you can retreat to until the hazard passes
PERSONAL PROTECTIVE EQUIPMENT (PPE)
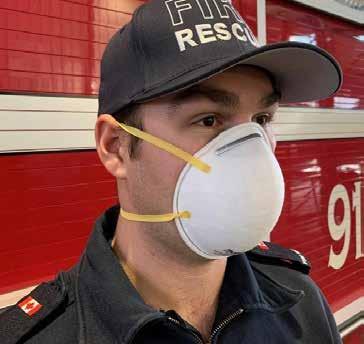
A wide variety of protective equipment is available to use at a WUI incident. At a minimum crew members should have a Nomex outer layer, steel toed boots with a minimum six inch rise, tight fitting gloves, helmet (preferably w/chainsaw visor), safety eye wear, and a respirator or N95 mask to use if required. There is currently no standard for respirators in the WUI. N95 masks can protect against a lot of particulates but if members are working hard, the mask can become saturated with contaminants and sweat and will need to be changed often. Cartridge respirators offer great protection but reduce the inhalation capacity of the wearer. It can also cause great difficulty in hearing the wearer speak which can lead to communication break downs.
WHAT IS IN WILDFIRE SMOKE?
The hazardous ingredients of smoke include particulate matter, carbon monoxide, and chemicals such as, aldehydes, polycyclic aromatic hydrocarbons and benzene. Exposure to smoke can lead to health effects can range from eye, nose and throat irritation to reduced lung function, bronchitis,exacerbation of asthmas and even risk of death. Particulate matter (dust) exposure may result in irritated eyes, stuffy nose or throat, and/or coughing or difficulty breathing, especially during strenuous work.

Wildland Urban Interface Basics | PARTICIPANT GUIDE Wildland Urban Interface Basics | PARTICIPANT GUIDE 140 141
METHODS OF ATTACK DIRECT ATTACK
Direct attack involves directly suppressing the fire’s edge along the perimeter of the fire. Working on the fire’s burning edge using hose lines, hand tools, heavy equipment, or aircraft to directly suppress the active burning. This is a common method on fire activity with a HFI of 4 or less. Using these methods, we can “wrap” a fire by starting from the rear or flank and suppressing along the fires edge to create sections of extinguished line. This can be done with multiple resources working together on different sections of the fire. When access and fire conditions are favorable, this is a highly effective method. Anchoring is always recommended whenever using direct attack. Situational awareness should be heightened as conditions can change in an instant.
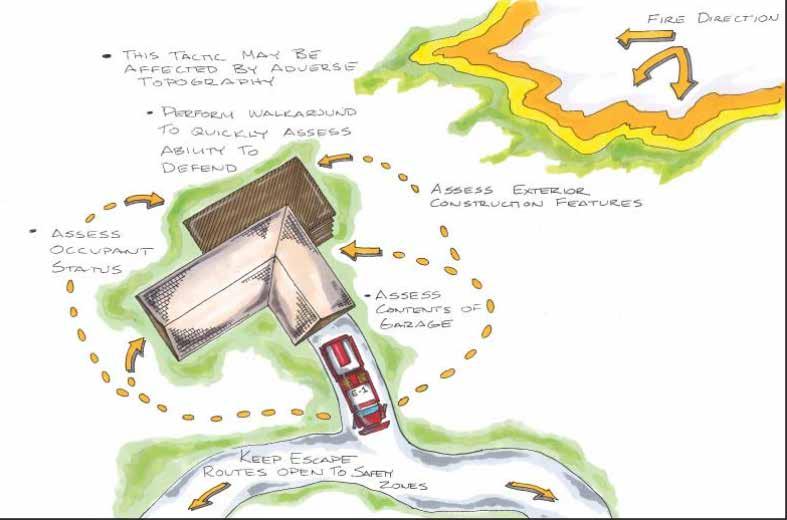
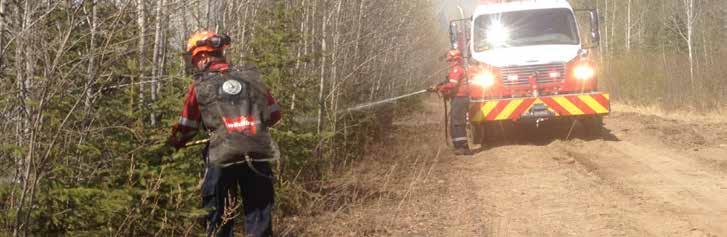
ENGINE ACTIONS CHECK & GO
Check and go is conducted when properties are un-defendable or there is a lack of time and resources to conduct more desired actions. This involves a rapid check of the property for occupants requiring removal or rescue. Check and go should be used when there are no safety zones available nearby. The most mobile apparatus should be assigned to check and go as there is no site prep or suppression activities to be conducted while utilizing this action. Follow up actions may be needed once the fire front passes.
INDIRECT ATTACK
Indirect attack involves working away from the fire’s edge. Using control lines both natural and manmade, fire breaks are created to stop the advance of the fire at predetermined locations. Natural and man-made barriers to fire growth can be widened based on the fire behavior using heavy equipment, retardant, or burnouts/backfires. This method is generally used when access is an issue or when HFI is 4 or higher.
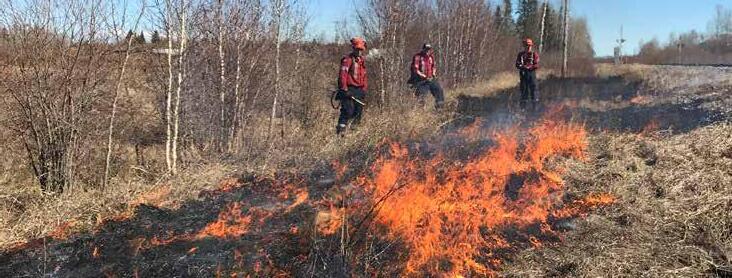
Wildland Urban Interface Basics | PARTICIPANT GUIDE Wildland Urban Interface Basics | PARTICIPANT GUIDE 142 143
PREP & DEFEND
Prep and defend is an action to use when a structure is threatened but based on forecasted fire behavior, it will be safe to defend as impingement arrives. Safety zones exist and adequate time is available to safely prepare a structure for defense during the pre-impingement phase. Resources will prep the site and stage to defend as impingement arrives. Apparatus are not anchored to a water source and are parked facing out. This action is best utilized on single properties in more rural settings but can be advantageous in sections of built-up areas if it is safe to do so. Resources utilize hose lines, burnouts, and hand tools to defend the structure as the fire front arrives. Apparatus should be staged to utilize the structure as a heat shield from radiant heat. Only as many hoses as needed should be deployed for defense, as well as an apparatus protection line as a safety factor.
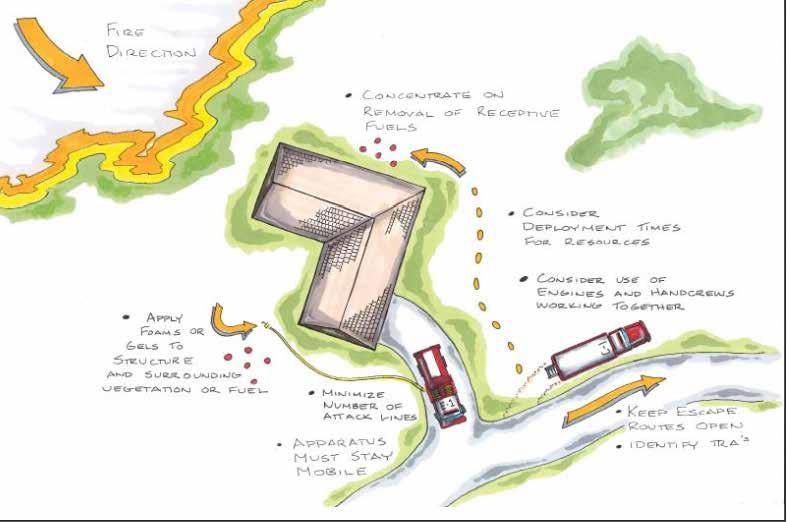
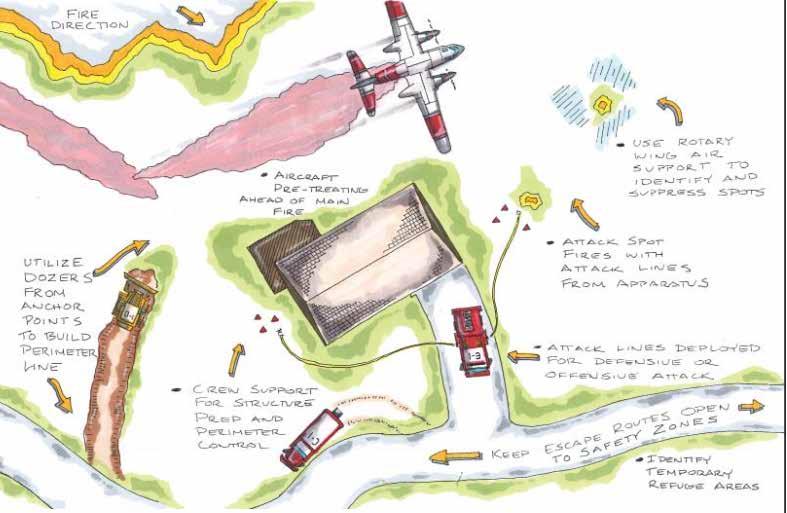
PREP & GO
Prep and go is an appropriate action to use when it is not safe for resources to remain when the fire arrives, but there is enough time during the pre-impingement phase to prepare the structure for impingement. Bare minimum tasks are accomplished quickly to give the structure the best chance of survival. Removing combustibles in zone 1A and mitigating flammable material in zone 1 should be the priority while using this action. Once prep is complete or impingement is imminent, resources retreat to a safety zone or are assigned to another action in the area.
Wildland Urban Interface Basics | PARTICIPANT GUIDE Wildland Urban Interface Basics | PARTICIPANT GUIDE 144 145
FIRE FRONT FOLLOWING
Fire front following is a defensive action that allows resources to defend structures while staying behind the fire front or near the flanks of the fire. This fast-paced action requires resources to move quickly behind the fire front engaging spot fires around structures before they can ignite the structure itself. Even engaging partially involved structures where feasible is part of fire front following. Fire front following is used in conjunction with other actions such as check and go, prep and go, and bump and run. Resources may retreat for a time while the fire front passes, only to immediately return once it is safe to action fires. While staged, resources should refuel, rewater, and prepare for a prolonged firefight in hazardous conditions. Fire front following should be considered when there is a lack of water supply, smoke conditions are too heavy, risk of burn over or entrapment exists, or there is an inexperienced or exhausted resource.
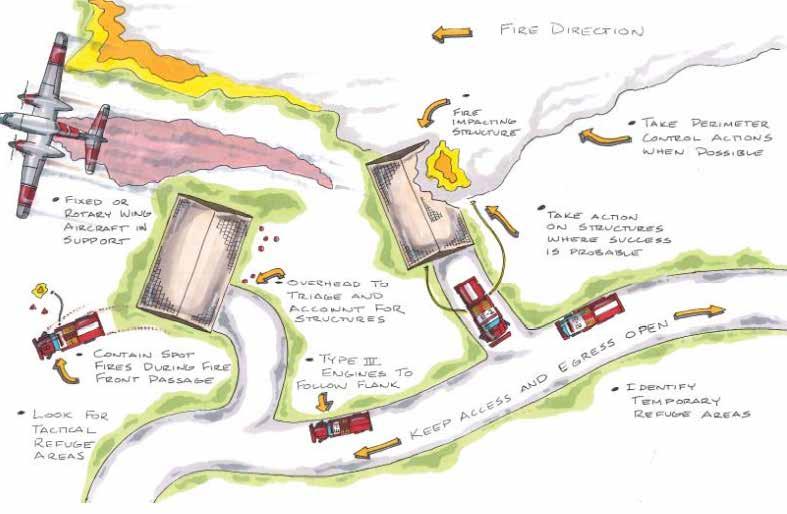
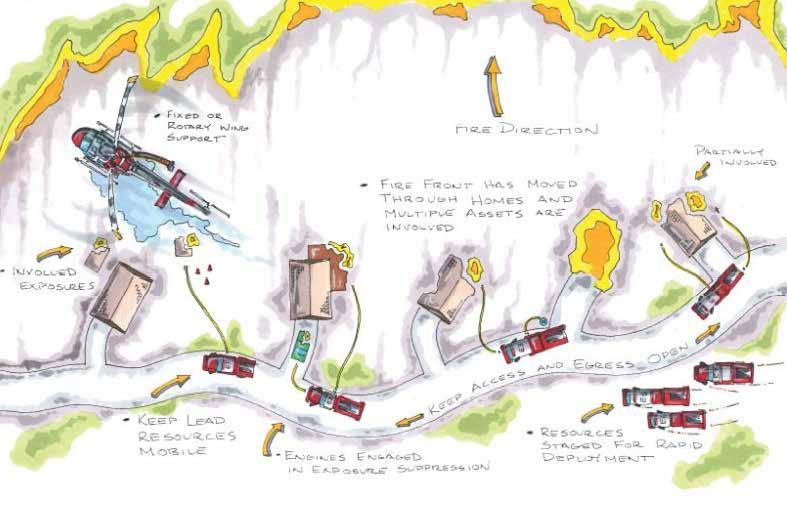
BUMP & RUN
Bump and run is an action used when fire front impact is imminent, ember showers have commenced, or fires are already burning around structures. Bump and run is also used when not enough resources are available to effectively take fire perimeter control action. During bump and run, resources move at or near the fire front, often in the spotting zone, to extinguish spot fires and defend as many structures as possible. Once a structure is secure and the threat has passed, resources re-deploy to another location and repeat the process. Resources should remain highly mobile and ready to re-deploy to priority areas. Booster tanks should remain topped up where possible, even using a properties garden water supply to top off at every opportunity. Crews should be mindful with water use and keep a quarter tank of reserve water for emergency use. When wetting down structures avoid using just water. In a WUI environment water will evaporate quickly. Supplement with gels or foam to have more of a lasting effect.
Hose management is key when conducting bump and run. Having a method to quickly rack the hose in a way it can be re-deployed fast is key. Cut and run is a tactic that can be used when an apparatus needs to leave quickly. Crew members disconnect the nozzle from the end of the hose and the hose from the discharge port of the apparatus. The hose is left behind and the nozzle is taken to be added on at the next site. Booster lines are preferred over stretching conventional hose die to the speed of deployment and stowing.
Wildland Urban Interface Basics | PARTICIPANT GUIDE Wildland Urban Interface Basics | PARTICIPANT GUIDE 146 147
RUN – QUICK RACKING HOSE OPTIONS
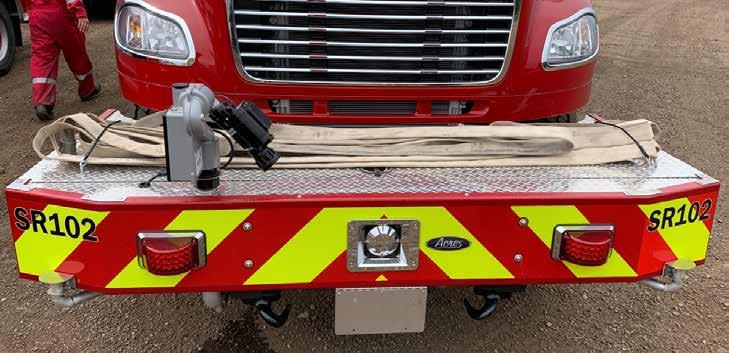
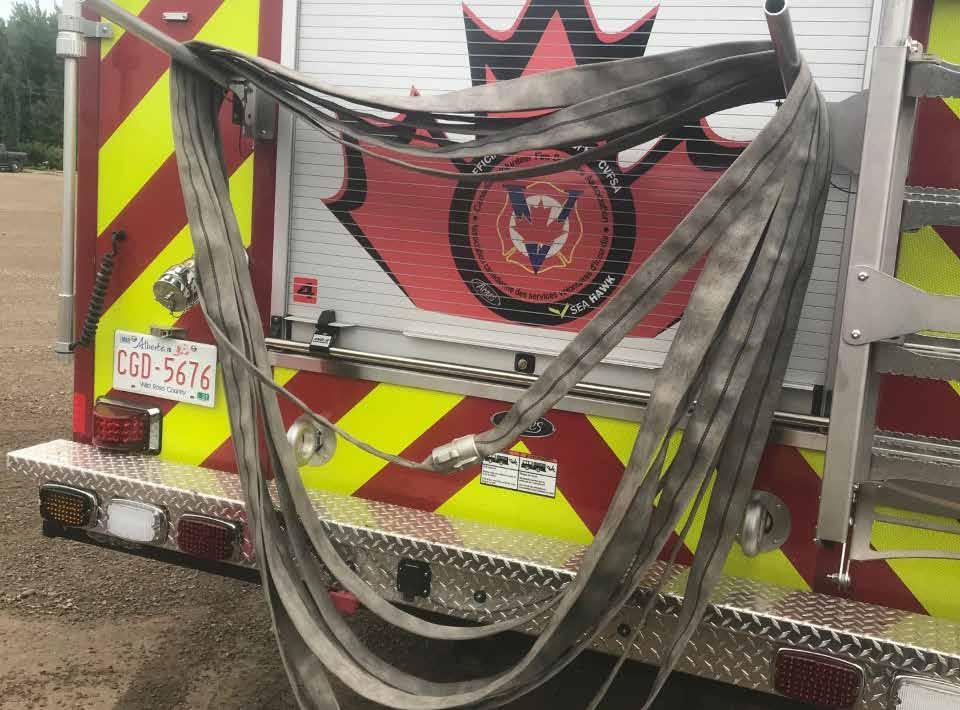
ANCHOR & HOLD
The anchor and hold action is a method to defend structures directly exposed to other burning structures or vegetation, extinguish structure fires, and reduce ember production in built-up areas where fire spread is primarily structure to structure. Anchor and hold is used to prevent structure to structure ignition and requires significant planning and a secure water source.
Single or multiple apparatus may be fixed to a water source to supply mobile apparatus and fixed hose lines to defend structures. Anchor and hold should be selected only if it is safe to fight fire without risk of burn over or entrapment. Apparatus are committed to a position and remain until the threat no longer exists.
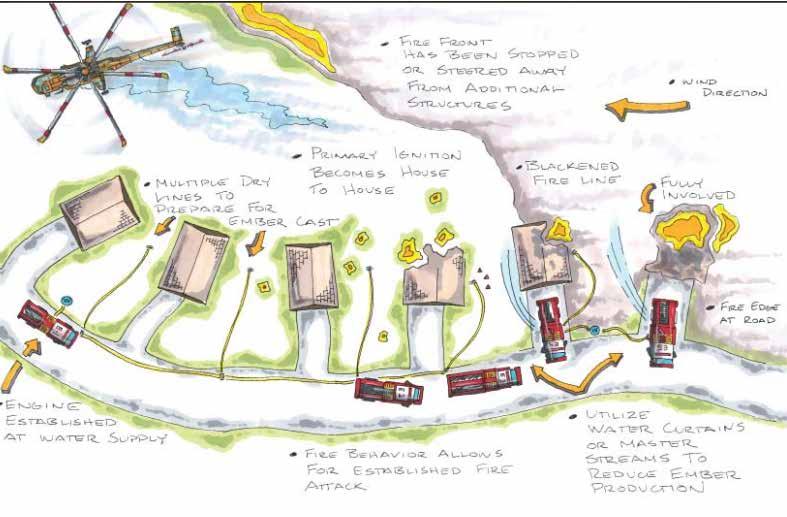
Wildland Urban Interface Basics | PARTICIPANT GUIDE Wildland Urban Interface Basics | PARTICIPANT GUIDE 148 149 BUMP &
TACTICAL PATROL
Tactical patrol involves apparatus moving throughout the area during the impingement or postimpingement phase patrolling for spot fires or hazards in the area. Resources are given an area of responsibility (division) to act as rovers to proactively search for spot fires. The key element is that the resources stay mobile and continuously monitor the area for ignitions. Once a spot fire is located, other actions are taken to suppress the fire based on fire behavior, time, and resource availability. Tactical patrols should be conducted in areas exposed to downwind ember showers and areas where the fire has passed but structures remain at risk. Properties should be searched for hidden fires burning in hard to see areas such as eaves, wood piles, under decks, lawn furniture, and other areas that can threaten structures. Resources must be vigilant on their search for fires, utilizing an aggressive search and destroy mentality.
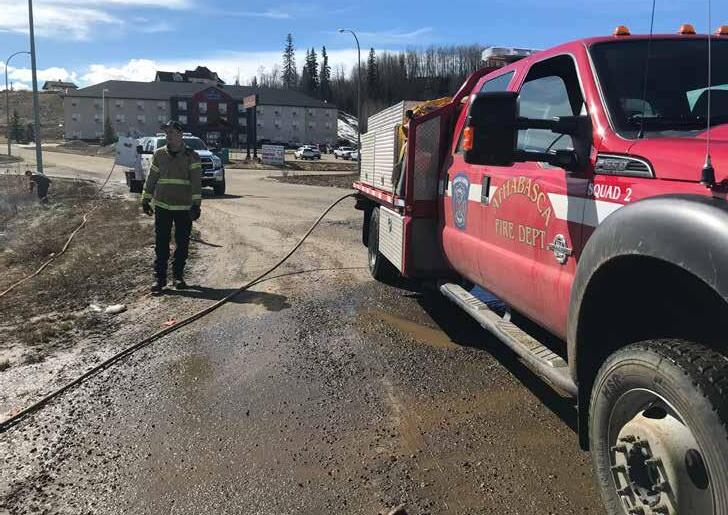
CONNECT THE DOTS
Connect the dots action involves stopping the fire spread at a particular structure or property. This becomes a “dot” in the overall perimeter control effort. Resources suppress the fire at specific locations to make a “dot” in the perimeter. Then the fire is suppressed or controlled between the dots to create sections of controlled fire line. For example, connecting one dot to a section of road nearby that is holding the fire is one way to increase perimeter control by using this action.
Certain actions work better when used in conjunction with others. Pairing them to a structure defense category allows us to better select the appropriate action to conduct on the structure.
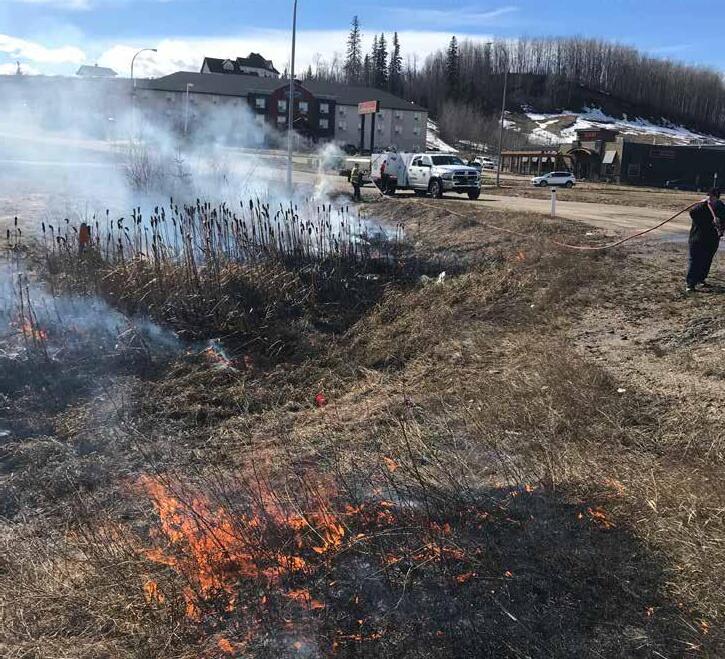
Wildland Urban Interface Basics | PARTICIPANT GUIDE Wildland Urban Interface Basics | PARTICIPANT GUIDE 150 151
Certain actions work better when used in conjunction with others. Pairing them to a structure defense category allows us to better select the appropriate action to conduct on the structure.
ENGINE ACTIONS
STRUCTURE DEFENSE CATEGORY
Non-threatened (Green Rock)
APPROPRIATE TACTICAL ACTIONS
Prep and Defend
Tactical Patrol
Prep and Defend
Bump and Run
ACTIONABLE STRUCTURES
When deciding whether to action a structure or not, we should consider how involved it is. Structures that are in the early growth stages may be savable with limited resources and time. A more well involved structure may be actionable if it is the best use of the available resources. Spot fires threatening structures are easy to contain and should be actioned. Structures that have vegetation pushed back could be less susceptible to radiant heat. Easy access to the structure and less than ¼ roof involvement should be considered.
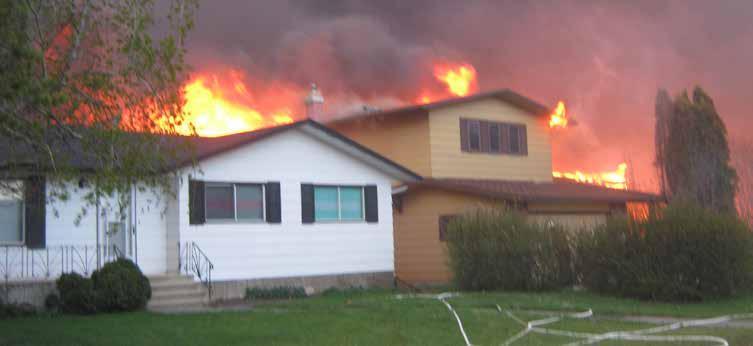
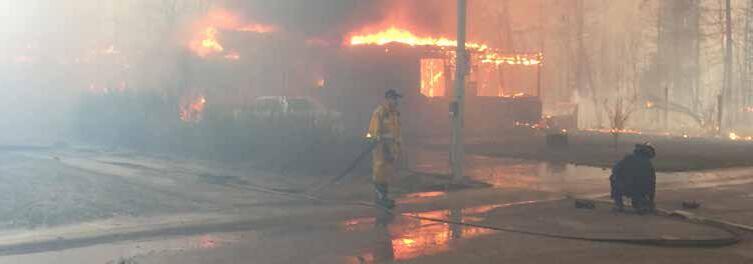
Threatened Defensible (Yellow Rock)
Anchor and Hold
Connect the Dots
Tactical patrol
Check and Go
Prep and Go
Threatened Non-defensible (Red Rock)
Fire Front Following
Tactical Patrol
ACTIONABLE VS. NON-ACTIONABLE FIRES
When structures become involved during a WUI incident, we must have a criteria for actioning them or letting them burn and focusing our efforts elsewhere. Time and resources are the two biggest limitations at a WUI fire. When it comes to actioning structures that are on fire, we must consider what the best use of resources is. It may be easier to extinguish spot fires in ten other locations than to focus all efforts on one property while putting other properties that are not involved in at risk. Focus on saving the savable structures rather than the ones that are likely already a loss. Ask yourself, is it worth saving one structure that is likely a loss rather than protecting the rest of the community. The goal is to extinguish as many priority fires as possible. Stay ahead, stay neutral, and stay focused on what you can save, not what you have lost.
NON-ACTIONABLE STRUCTURES
Structures that are more involved may not be actioned if resources are better used elsewhere. If the structure will take more than the immediate suppression capability or present a prolonged fire fight, it may not be actioned. Any unsafe, impassible, or tight access/egress factors make structures more difficult to action. When heavy fuel loading exists around the structure it may absorb more radiant heat and be more challenging to extinguish. Any structure with more than ¼ roof involvement should be considered a loss unless enough time and resources exist.
Wildland Urban Interface Basics | PARTICIPANT GUIDE Wildland Urban Interface Basics | PARTICIPANT GUIDE 152 153
ACTIVITY
Given the following pictures, determine your course of action with your own department’s typical first arriving unit to a wildfire or structure fire if they were to encounter the following situations. Discuss what you would action and what you would not and why. Prepare for group discussion.
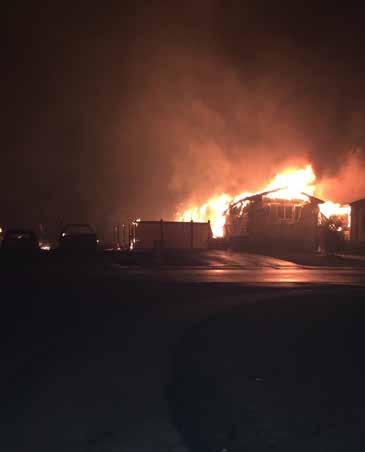
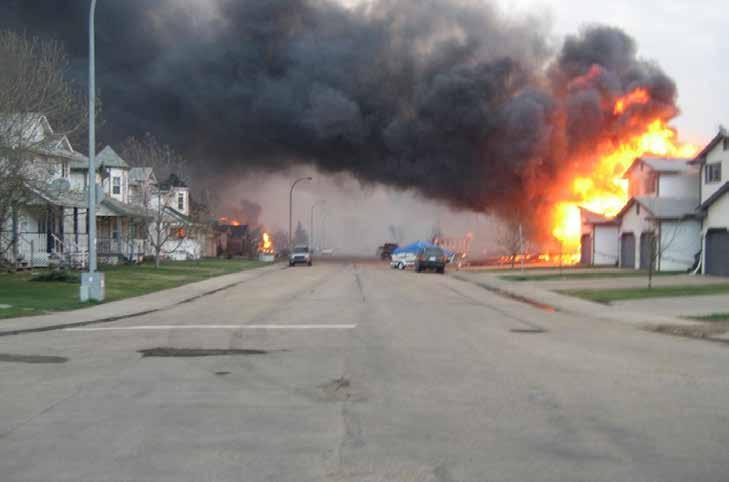
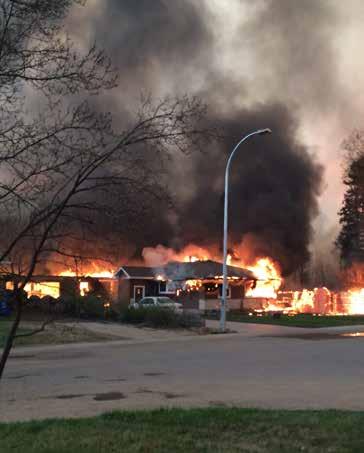
Wildland Urban Interface Basics | PARTICIPANT GUIDE Wildland Urban Interface Basics | PARTICIPANT GUIDE 154 155
INCIDENT
COMMAND SYSTEM (ICS)
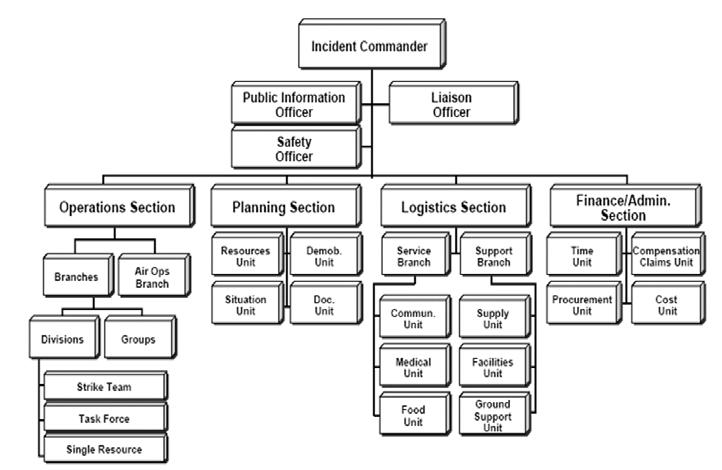
ICS was developed to provide a platform for responding to any incident. The incident command system is a standardized on-site management system designed to enable effective, efficient incident management by integrating a combination of facilities, equipment, personnel, procedures, and communications operating within a common organizational structure. ICS helps to ensure the safety of responders, the achievement of incident objectives, and the efficient use of resources. It follows 14 principles that maintain a universal language for incident response. Forest wildfire agencies tend to follow ICS as a standard operating system while municipal fire services use a modified version. Common terminology is where communication breakdowns most often occur between forestry and municipal fire service personnel.
COMMAND STAFF
INCIDENT COMMANDER
Sets objectives and priorities, has overall responsibility at the incident or event
PUBLIC INFORMATION OFFICER
Is responsible for communicating information to the public, media, other agencies, and stakeholders.
SAFETY OFFICER
Is an advisor to the IC but has the authority to stop or suspend operations when unsafe situations occur.
LIAISON OFFICER
Is responsible for initiating and maintaining contact with government agencies, regulatory authorities, and mutual aid partners.
GENERAL STAFF OPERATIONS
Conducts tactical operations to carry out the plan develops the tactical objectives, organization, and directs all resources
PLANNING
Develops the action plan to accomplish the objectives, collects and evaluates information. Maintains resource status
LOGISTICS
Provides support to meet incident needs, provides resources and all other services needed to support the incident
7.
8.
9.
10.
FINANCE / ADMINISTRATION
Monitors costs related to incident, provides accounting, procurement, time recording, and cost analyses.
Wildland Urban Interface Basics | PARTICIPANT GUIDE Wildland Urban Interface Basics | PARTICIPANT GUIDE 156 157
PRINCIPLES AND FEATURES
COMMON TERMINOLOGY
ESTABLISHMENT AND TRANSFER OF COMMAND
CHAIN AND UNITY OF COMMAND
UNIFIED COMMAND
MANAGEMENT BY OBJECTIVES
INCIDENT ACTION PLAN (IAP)
ICS
1.
2.
3.
4.
5.
6.
MODULAR ORGANIZATION
MANAGEABLE SPAN OF CONTROL
COMPREHENSIVE RESOURCE MANAGEMENT
INCIDENT LOCATION AND FACILITIES
INTEGRATED COMMUNCIATIONS
INFORMATION AND INTELLIGENCE MANAGEMENT
ACCOUNTABILITY
DISPATCH/DEPLOYMENT
11.
12.
13.
14.
STRUCTURE PROTECTION IN ICS
Incident Commander(s) Single or Unified
Operations Section Chief Planning Section Chief
STRIKE TEAMS AND TASK FORCES
While both contain different resources and functions in a WUI event, their roles and responsibilities are very similar. Both strike teams and task forces in the WUI will prioritize fires, suppress fires, patrol for fires, work with other agencies to complete objectives, and report on fire conditions. Typically, these teams/forces are given an area of responsibility (division) to maintain however, they can be moved as needed. Divisions are set up based on geographical area. For example, Division A could be the NE quadrant of town, Division B being the SE quadrant, etc. Groups are set up based on function and not tied to any one location, rather they complete their task across the entire incident. For example, air attack groups are often set up on wildfires assigned to aerial firefighting and crew transports. When assigning resources, call signs should be implemented to reduce confusion. This eliminates the need to know each agencies unit numbering systems. Just think how many engine 1 unit numbers exist in the fire service. Call signs should be consistent and known. Using a white marker and writing the unit number on the windshield and doors of the apparatus keeps them identifiable.
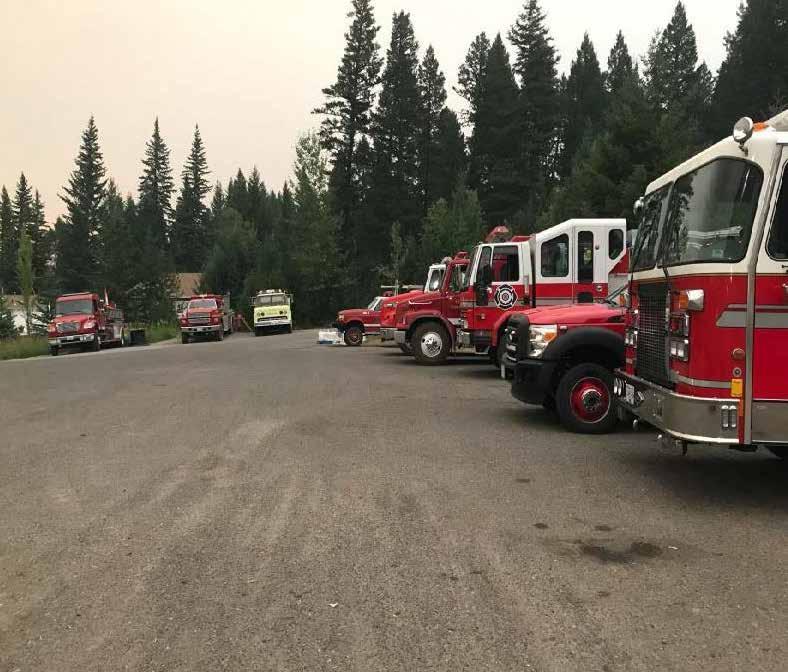
Structure Protection Branch Director(s) (STPS1)
Structure Protection Technical Specialist(s) (STPS1 or 2)
Structure Protection Div/Group Supervisor(s) (STPS2)
Structure Protection Crew/Strike Team/Task Force Leader(s) (STPL)
Structure Protection Members(STPM)
Structure Protection Resources
Wildland Urban Interface Basics | PARTICIPANT GUIDE Wildland Urban Interface Basics | PARTICIPANT GUIDE 158 159
STRIKE TEAMS AND TASK FORCES STRIKE TEAM
A strike team is composed of three or more of the same KIND and TYPE of resource. They are mainly used for specific tasks. The easy way to remember the difference between strike teams and task forces is that strike is like. Strike teams will be led by a team leader.
TASK FORCE
A task force is made up of three or more resources of different kinds and types. Commonly seen at WUI incidents due to the variety of resources and apparatus that show up. They are typically well suited for a variety of tasks but may lack enough resources for one specific task. Task forces with be led by a team leader.
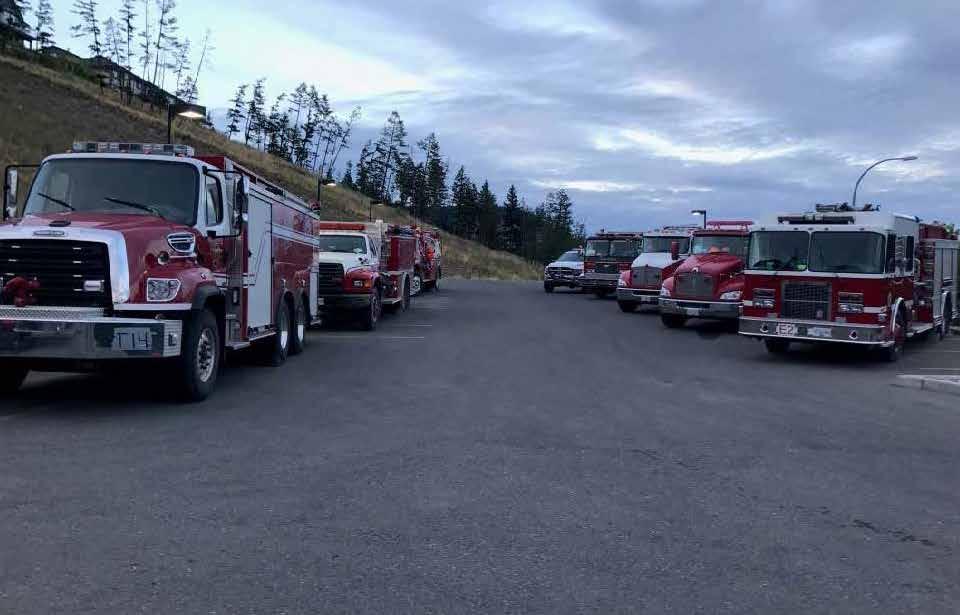
ACTIVITY
Given the following resource list for a WUI incident, decide how you would organize these resources effectively in working groups. Think about the potential tasks that need to be accomplished and remember span of control (3-7). Be ready to present your resource breakdowns to the class.
• Slave Lake Unit 141 (Type 6 Engine)
• Big Lakes County Urban 1 (Type 3 Engine)
• Widewater Unit 251 (T2 Tender)
• Edmonton Tower 4 (Type 1 Truck Company)
• Whitecourt Engine 4 (Type 3 Engine)
• Flatbush Unit 451 (S1 Tender)
• Jamie and Will E54 (Type 7 Engine)
• Westlock Pumper 1 (Type 1 Engine)
• High Prairie RAT (Type 6 Engine)
• High Level Engine 2 (Type 1 Engine)
• Athabasca County Rapid (Type 6 Engine)
• Red Earth Tender 1 (S1 Tender)
• Forestry HAC 6 (Type 6 Engine)
• Peace River RAT 2 (Type 6 Engine)
• Big Bill Contracting Unit 16 (Type 5 Engine)
• Vance’s Vac Truck Service Unit 11 (1000 Gallon VAC Truck)
• Island Lake Pump 2 (Type 2 Engine)
• Stony Plain Tower 1 (Type 1 Truck Company)
• Spruce Grove UTV 1 (6x6 UTV)
• Edson Rescue 1 (Rescue Company)
• Yellowhead County Engine 8 (Type 6 Engine)
• Lac La Biche County Water 1 (T2 Tender)
• Wabasca Pumper 2 (Type 3 Engine)
• County of Grande Prairie Brush 1 (Type 6 Engine)
• Valleyview Squad (Rescue Company)
• Swan Hills Wildland 2 (6x6 UTV)
• Grimshaw Tanker 4 (T1 Tender)
• Morinville Engine 1 (Type 1 Engine)
• Boyle Pumper 3 (Type 3 Engine)
• Tim’s Tank Truck Service Unit 6 & 11 (3000 Gallon Water Trucks)
• Fawcett Pumper 2 (Type 2 Engine)
Wildland Urban Interface Basics | PARTICIPANT GUIDE Wildland Urban Interface Basics | PARTICIPANT GUIDE 160 161
Wildland Urban Interface Basics | PARTICIPANT GUIDE Wildland Urban Interface Basics | PARTICIPANT GUIDE 162 163
NOTES NOTES
ENGINE CREW RESPONSIBILITIES
OFFICER/TEAM LEADER
SITUATIONAL AWARENESS
Crew responsibility and safety rest with the supervisor in charge. Situational awareness needs to be maintained at all times. It starts at the beginning of the day and never stops. Watch for safety concerns and changing fire conditions and complete 360s whenever possible. Take care of crew members, watch for fatigue and keep them healthy. Know which resources will be working with or near you should you need to cooperate. Understand the weather factors and what the weather is forecasted to do. In WUI events, leaders can be overwhelmed quickly and need to avoid getting tunnel vision. Try to think of the big picture and do not get caught up in the action. Trust your crew to do the little things, take care of the overall strategy and allow them to execute the tactics. Continually size up threats and understand the lay of the land. Familiarize yourself with relevant maps and site checking to have a good understanding of the area.
DECISIVENESS
Decisiveness is key to the success of the plan. Make a decision and evaluate it as you progress. If the decision turns out to be the wrong one, change the plan and try to anticipate problems before they happen. Always be thinking of the next step and have plans A-Z. When plan A isn’t working, be ready to switch to plan B and so on. A good rule of thumb is to do it, delegate it, or delete it. You may not have the capability to fight every fire, so either deal with it yourself, delegate it to another crew, or delete it (forget about it) and move on to the next task. Prioritize fires in your area (division). Determine what you can manage with the resources you have and do not get overwhelmed with the workload. Request help early as it is easier to turn around resources than to call them too late.
COMMUNICATE
Communicate with your direct supervisor. Relay information such as your position, condition, status, and needs. Report on your availability and keep them in the loop. Know which radio channels you are operating on and which one you need to monitor.
Communicate with the crew members. Inform them of the plan and the “why” to what you are doing. Let them in on the tactical planning to get buy in to the task. Giving crew members responsibility will make them part of the plan and they will respond in a helpful manner.
TASKS
A supervisor has different tasks depending on their position but all do follow some basic principles. Supervisors must brief their crews on the most up to date fire information, resources, and incident objectives. They are accountable for their subordinates and their actions as well as their safety. They assign tasks to their resources and ensure they are done in an efficient and safe manner. They also handle any disciplinary and corrective actions.
Supervisors collect time sheets and document important details such as incidents within an incident, damage to property or equipment, damaged structures, pictures and GPS locations of fire damaged structures, and all actions taken relevant to the incident. They collect billing information and track equipment for invoicing purposes.
DEPLOYMENT KIT
An organized and properly equipped deployment kit for supervisors is a must to ensure efficient tracking of information and documentation. Using a deployment kit makes life easy for the supervisor. It is a place to store important documents such as receipts, incident reports, and time sheets. Deployment kits help when leaders return from deployments and have to submit paperwork and handle invoicing. Deployment kits should include time sheets, notepads, pens, erasers, whiteout, stapler, phone charger, GPS, quick reference guides, WCB paperwork, spare batteries, and folders to organize documents.
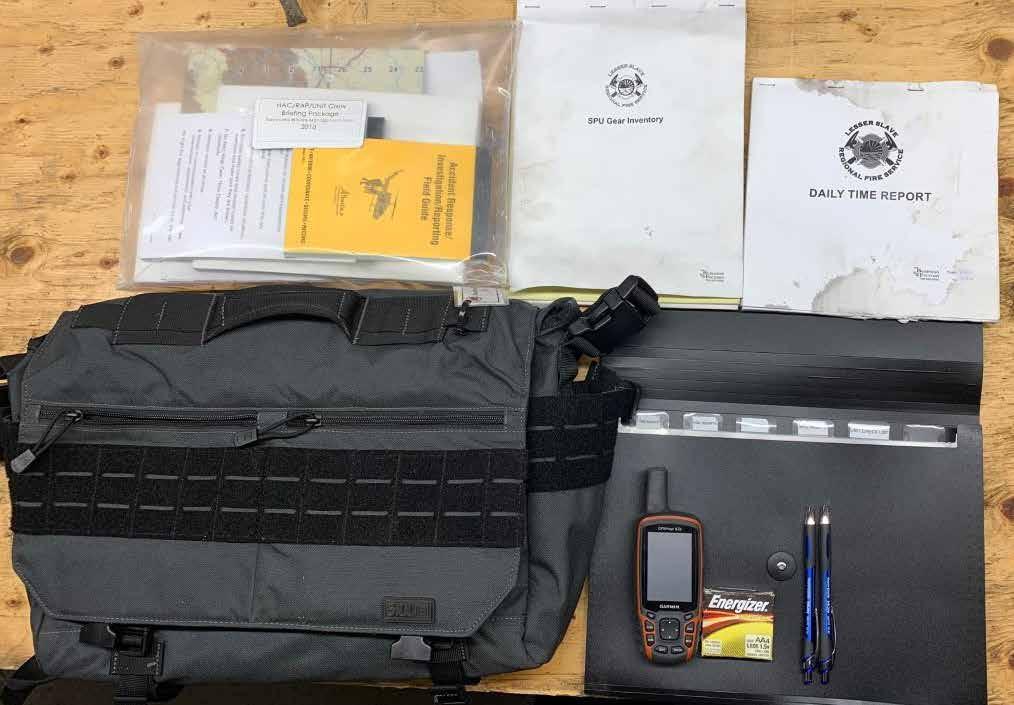
Wildland Urban Interface Basics | PARTICIPANT GUIDE Wildland Urban Interface Basics | PARTICIPANT GUIDE 164 165
Wildland Urban Interface Basics | PARTICIPANT GUIDE Wildland Urban Interface Basics 166
PUMP OPERATOR/DRIVER DRIVING
Operators must drive in a safe and efficient manner. They must be able to manage the adrenaline that comes with working at a WUI fire. Drive in a controlled, smooth fashion to avoid any vehicle incidents. Keep an eye out for pedestrians, livestock, other vehicles, downed power lines, road hazards, and soft terrain. Keep in mind that there will likely be smoke conditions that can limit or inhibit visibility and drive to the conditions. Be able to adapt to changing conditions and drive accordingly. When parking, park facing out at every opportunity in the event that conditions change and you need to quickly escape or re-deploy. Do not park on or near flashy fuels, keep windows and compartments closed, and be a lookout for the crew while they are working. Many apparatus have been damaged or lost due to improper driving and parking.
CASE STUDY
In the 2011 Slave Lake fire, a type 6 engine was lost after becoming stuck in a septic field on a property. The fire impinged while the crew was trying to free the vehicle and had to be abandoned. They crew made it out safely but due to the fire and downed power lines they were not able to return in time to save the unit.
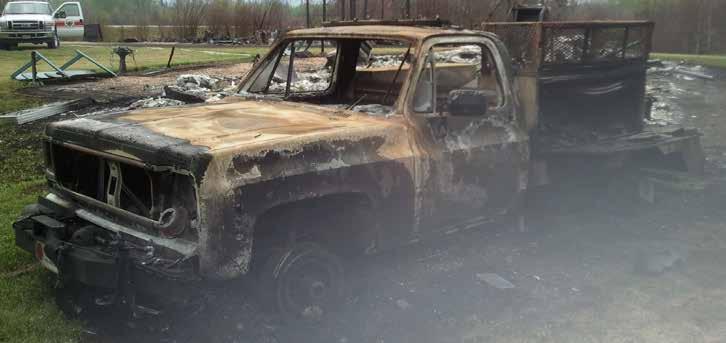

The lesson learned here was to drive slowly onto properties, stay on the roadways if possible, using caution when leaving the roadway. Backing onto the property would have prevented this as well. If possible, take the time to walk the property before leaving the roadway. Pre-rigging tow straps to the vehicle can save time and effort when the vehicle has sunk below tow points.
CREW MEMBER
VEHICLE MAINTENANCE
The operator is responsible for ensuring fuel levels remain sufficient and that the apparatus is ready for service. Completing unit checks and doing preventative maintenance will ensure that the unit will perform when needed. Understand how to troubleshoot and fix the equipment as best as reasonably possible.
WATER SUPPLY
The operator is responsible for water management of an apparatus. They must keep the officer informed of water levels and when the apparatus needs to leave to re-fill.
Communication of water supply and locations where the apparatus can fill up should be noted and known by the operator. A good rule of thumb is to actively top up every chance you can, even at each property using the structures garden water supply.
When working as a crew member, fight fires safely and efficiently. Follow directions and avoid becoming a safety concern. Be mindful of where you are standing and working, and always keep a close eye on fire conditions. Try to anticipate fire behavior and select the appropriate time to action the fire. If the task is unclear, always request clarification. Try to conserve water and do not be wasteful with it. Stay motivated and be ready to work. Stay positive and help keep the crew morale up. Work in a WUI environment can be very taxing, it may be hours on end without help or rest. Do not give up or slack off, all efforts count, and structures or crew members could be lost as a result of poor efforts.
EQUIPMENT MAINTENANCE
Equipment will need constant servicing to ensure its readiness. Make sure equipment is always ready for its next mission. This includes putting it back on the apparatus after use so that it is ready for its next use. If equipment becomes inoperable, get it back in service as soon as reasonably possible. Maintain equipment cleanliness and document when equipment breaks. Inform supervisor of any equipment issues and fix what you can.
Wildland Urban Interface Basics | PARTICIPANT GUIDE Wildland Urban Interface Basics | PARTICIPANT GUIDE 168 169
PERSONAL CARE
Take care of yourself on the fireground. Crew members are no help if they are not ready for service no different than the equipment we use. WUI incidents are a highly demanding physical event, stay hydrated and mentally prepared for what is to come. Be mentally prepared to lose structures keep from burning out. Communicate your needs to your crew and supervisor before you become a safety concern. If you see something that looks unsafe or a change in conditions speak up. The rest of the crew may not notice what you have, and by speaking up you can alter tactics to make it safe for everyone.
PERSONAL KIT
Each crew member should be equipped with a 24-hr and 72-hr kit. The 24-hr kit should have enough supplies to last the crew member 24 hrs without any help. This includes food, water, survival gear, overnight minimums, and cold weather gear. 72-hr kits should have enough supplies to sustain a crew member for 72 hrs without any help. This includes food, water, bedding, change of clothes, toiletries, and a tent. Another kit worth having on hand is a personal “go bag”. This bag should be a backpack or small duffle bag that contains what the crew member desires to have for the deployment. It may contain creature comforts and extra supplies to get through deployments. Personal clothing, phone charger, extra toiletries, towel, comfortable footwear, and any other supplies you may need to remain effective for days on end at WUI incidents.
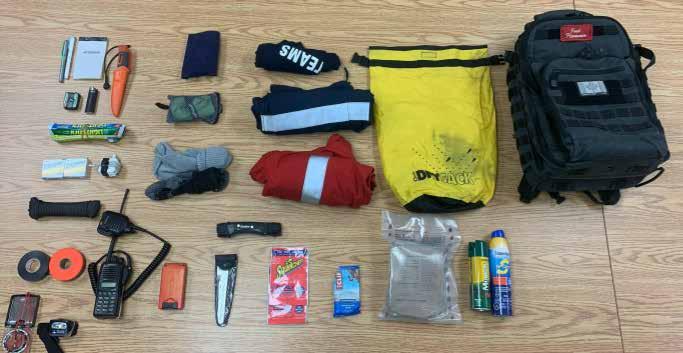
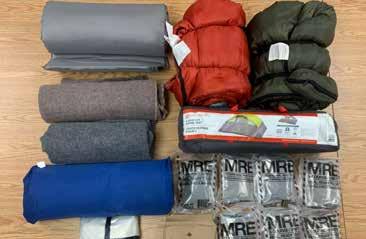
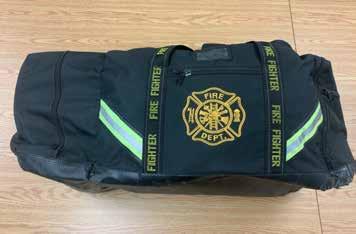
CLOSING NOTES
While there is always much to discuss and learn with respect to wildland urban interface fires, it is our hope that this information has served as a guide to safely and efficiently mitigate these incidents. This information was gathered through years of training, exercises, wildland fire response, and WUI deployments of the many partners involved with these fires across Western Canada and the United States. Interface fire suppression is both a science and an art, combining knowledge and skill with intuition and instinct. Firefighters are constantly challenged with interface fires and their complexities. Often times, we have a matter of seconds to make decisions based on our experience, training, current conditions, and personal convictions. The more command presence, situational awareness, fire behavior forecasting, structure triage, strategy and tactics, and operations in the WUI environment that are understood, the more prepared will become to make the right decisions to mitigate these incidents.
We urge you to build relationships at every opportunity and learn from everyone you can with respect to interface fires. There is always more to learn, more to experience, and more we can do to better ourselves when responding to these events. Stay safe out there, and never stop learning.

Wildland Urban Interface Basics | PARTICIPANT GUIDE Wildland Urban Interface Basics | PARTICIPANT GUIDE 170 171
Wildland Urban Interface Basics | PARTICIPANT GUIDE Wildland Urban Interface Basics | PARTICIPANT GUIDE 172 173
NOTES
NOTES
APPENDIX A | GLOSSARY
Area Command: An organization established to oversee the management of multiple incidents that are each being handled by a separate Incident Command System organization or to oversee the management of a very large or evolving incident that has multiple incident management teams engaged. An agency administrator/executive or other public official with jurisdictional responsibility for the incident usually makes the decision to establish an Area Command. An Area Command is activated only if necessary, depending on the complexity of the incident and incident management span-of-control considerations.
Assessment: The evaluation and interpretation of measurements and other information to provide a basis for decision making.
Assignments: Tasks given to resources to perform within a given operational period that are based on operational objectives defined in the Incident Action Plan.
Available Resources: Resources assigned to an incident, checked in, and available for a mission assignment, normally located in a Staging Area.
Base: The location at which primary Logistics functions for an incident are coordinated and administered. There is only one Base per incident. (Incident name or other designator will be added to the term Base.) The Incident Command Post may be co-located with the Base.
Branch: The organizational level having functional or geographical responsibility for major aspects of incident operations. A Branch is organizationally situated between the Section Chief and the Division or Group in the Operations Section, and between the Section and Units in the Logistics Section. Branches are identified by the use of Roman numerals or by functional area.
Cache: A predetermined complement of tools, equipment, and/or supplies stored in a designated location, available for incident use.
Camp: A geographical site within the general incident area (separate from the Incident Base) that is equipped and staffed to provide sleeping, food, water, and sanitary services to incident personnel.
Chain of Command: A series of command, control, executive, or management positions in hierarchical order of authority.
Check-In: Process in which all responders, regardless of agency affiliation, must report in to receive an assignment in accordance with the procedures established by the Incident Commander.
Chief: The Incident Command System title for individuals responsible for management of functional Sections: Operations, Planning, Logistics, Finance/Administration, and Intelligence/Investigations (if established as a separate Section).
Command: The act of directing, ordering, or controlling by virtue of explicit statutory, regulatory, or delegated authority.
Command Staff: Consists of Information Officer, Safety Officer, Liaison Officer, and other positions as required, who report directly to the Incident Commander. They may have an assistant or assistants, as needed.
Common Terminology: Normally used words and phrases-avoids the use of different words or phrases for same concepts, consistency.
Complex: Two or more individual incidents located in the same general area and assigned to a single Incident Commander or to Unified Command.
Critical Infrastructure: Essential underlying systems and facilities upon which our standard of life relies.
Delegation of Authority: A statement provided to the Incident Commander by the Agency Executive delegating authority and assigning responsibility. The Delegation of Authority can include objectives, priorities, expectations, constraints, and other considerations or guidelines as needed. Many agencies require written Delegation of Authority to be given to Incident Commanders prior to their assuming command on larger incidents. Same as the Letter of Expectation.
Demobilization: The orderly, safe, and efficient return of an incident resource to its original location and status.
Deputy: A fully qualified individual who, in the absence of a superior, can be delegated the authority to manage a functional operation or perform a specific task. In some cases a deputy can act as relief for a superior, and therefore must be fully qualified in the position. Deputies generally can be assigned to the Incident Commander, General Staff, and Branch Directors.
Director: The Incident Command System title for individuals responsible for supervision of a Branch.
Division: The partition of an incident into geographical areas of operation. Divisions are established when the number of resources exceeds the manageable span of control of the Operations Chief. A Division is located within the Incident Command System organization between the Branch and resources in the Operations Section.
Emergency Coordination Center (ECC): The physical location at which the coordination of information and resources to support incident management (on-scene operations) activities normally takes place. An ECC may be a temporary facility or may be located in a more central or permanently established facility, perhaps at a higher level of organization within a jurisdiction. ECCs may be organized by major functional disciplines (e.g., fire, law enforcement, and medical services), by jurisdiction or some combination thereof. Sometimes referred to as Emergency Operations Centres (EOC).
Evacuation: Organized, phased, and supervised withdrawal, dispersal, or removal of civilians from dangerous or potentially dangerous areas, and their reception and care in safe areas.
Finance/Administration Section: The Section responsible for all administrative and financial considerations surrounding an incident.
General Staff: A group of incident management personnel organized according to function and reporting to the Incident Commander. The General Staff normally consists of the Operations Section Chief, Planning Section Chief, Logistics Section Chief, and Finance/Administration Section Chief. An Intelligence/Investigations Chief may be established, if required, to meet incident management needs.
Group: Established to divide the incident management structure into functional areas of operation. Groups are composed of resources assembled to perform a special function not necessarily within a single geographic division. (See Division.) Groups are located between Branches (when activated) and Resources in the Operations Section.
Incident Action Plan (IAP): An oral or written plan containing general objectives reflecting the overall strategy for managing an incident. It may include the identification of operational resources and assignments. It may also include attachments that provide direction and important information for management of the incident during one or more operational periods.
Wildland Urban Interface Basics | PARTICIPANT GUIDE Wildland Urban Interface Basics | PARTICIPANT GUIDE 174 175
Incident Command: Responsible for overall management of the incident and consists of the Incident Commander, either single or unified command, and any assigned supporting staff.
Hazard: A potentially damaging physical event, phenomenon or human activity that may cause the loss of life or injury, property damage, social and economic disruption or environmental degradation.
Incident Commander (IC): The individual responsible for all incident activities, including the development of strategies and tactics and the ordering and the release of resources. The IC has overall authority and responsibility for conducting incident operations and is responsible for the management of all incident operations at the incident site.
Incident Command Post (ICP): The field location where the primary functions are performed. The ICP may be co-located with the incident base or other incident facilities.
Incident Command System (ICS): A standardized on-scene emergency management system specifically designed to provide for the adoption of an integrated organizational structure that reflects the complexity and demands of single or multiple incidents, without being hindered by jurisdictional boundaries. ICS is the combination of facilities, equipment, personnel, procedures, and communications operating within a common organizational structure, designed to aid in the management of resources during incidents. It is used for all kinds of emergencies and is applicable to small as well as large and complex incidents. ICS is used by various jurisdictions and functional agencies, both public and private, to organize field-level incident management operations.
Incident Management Team (IMT): An Incident Commander and the appropriate Command and General Staff personnel assigned to an incident. IMTs are generally grouped in five types.
Incident Objectives: Statements of guidance and direction needed to select appropriate strategy(s) and the tactical direction of resources. Incident objectives are based on realistic expectations of what can be accomplished when all allocated resources have been effectively deployed. Incident objectives must be achievable and measurable, yet flexible enough to allow strategic and tactical alternatives.
Information Officer (IO): A member of the Command Staff responsible for interfacing with internal clients, the public and media and/or with other agencies with incident related information requirements.
Jurisdiction: A range or sphere of authority. Public agencies have jurisdiction at an incident related to their legal responsibilities and authority. Jurisdictional authority at an incident can be political or geographical or functional (e.g., law enforcement, public health).
Kind: An Incident Command System resource classification that refers to similar resources. All fire engines for example are grouped as the same “Kind” of resource, their capability however is defined by “Type”.
Liaison Officer: A member of the Command Staff responsible for coordinating with representatives from cooperating and assisting agencies or organizations.
Logistics: Providing resources and other services to support incident management.
Logistics Section: The Section responsible for providing facilities, services, and material support for the incident.
Mitigation: Sustained actions taken to eliminate or reduce risks and impacts posed by hazards well before an emergency or disaster occurs; mitigation activities may be included as part of prevention.
Objective: The overarching purposes or aims of an incident response is expressed as an objective. Objectives are priority based, specific, measurable to a standard and a timeframe and are both reasonable and attainable.
Officer: The ICS title for the personnel responsible for the Command Staff positions of Safety, Liaison, and Public Information.
Operational Period: The time scheduled for executing a given set of operation actions, as specified in the Incident Action Plan. Operational periods can be of various lengths, although usually they last 1224 hours.
Operations Section: The Section responsible for all tactical incident operations and implementation of the Incident Action Plan. In the Incident Command System, it normally includes subordinate Branches, Divisions, and/or Groups.
Plain Language: Communication that can be understood by the intended audience and meets the purpose of the communicator. Plain language is designed to eliminate or limit the use of codes and acronyms, as appropriate, during incident response involving more than a single agency.
Planning Section: The Section responsible for the collection, evaluation, and dissemination of operational information related to the incident, and for the preparation and documentation of the Incident Action Plan. This Section also maintains information on the current and forecasted situation and on the status of resources assigned to the incident.
Resource Management: Efficient emergency management and incident response requires a system for identifying available resources at all jurisdictional levels to enable timely and unimpeded access to resources needed to prepare for, respond to, or recover from an incident.
Resource Tracking: A standardized, integrated process conducted prior to, during, and after an incident by all emergency management/response personnel and their associated organizations.
Resources: Personnel and major items of equipment, supplies, and facilities available or potentially available for assignment to incident operations and for which status is maintained. Resources are described by kind and type and may be used in operational support or supervisory capacities at an incident or at an emergency operations center.
Safety Officer: A member of the Command Staff responsible for monitoring incident operations and advising the Incident Commander on all matters relating to operational safety, including the health and safety of emergency responder personnel.
Section: The organizational level having responsibility for a major functional area of incident management (e.g., Operations, Planning, Logistics, Finance/Administration, and Intelligence/ Investigations (if established)). The Section is organizationally situated between the Branch and the Incident Command.
Sector: On large incidents such as wildland fires, a Division can be further geographically subdivided into sectors. Sectors can be managed by a Task Force Leader or Strike Team Leader depending on the resources assigned.
Single Resource: Individual personnel, supplies, and equipment items, and the operators associated with them.
Span of Control: The number of resources for which a supervisor is responsible, usually expressed as the ratio of supervisors to individuals. (An appropriate span of control is between 1:3 and 1:7, with optimal being 1:5.)
Wildland Urban Interface Basics | PARTICIPANT GUIDE Wildland Urban Interface Basics | PARTICIPANT GUIDE 176 177
Staging Area: Established for the temporary location of available resources. A Staging Area can be any location in which personnel, supplies, and equipment can be temporarily housed or parked while awaiting operational assignment.
Strategy: The general overall plan or direction selected to accomplish specific incident objectives.
Strike Team: A set number of resources of the same kind and type that have an established minimum number of personnel, common communications, and a leader.
Supervisor: The Incident Command System title for an individual responsible for a Division or Group.
Tactics: The set of specific, measurable actions or tasks for various incident management functional activities that support the defined strategies.
Task Force: Any combination of resources assembled to support a specific mission or operational need. All resource elements within a Task Force must have common communications and a designated leader.
Technical Specialist: Individual with special skills that can be used anywhere within the Incident Command System organization. No minimum qualifications are prescribed, as technical specialists normally perform the same duties during an incident that they perform in their everyday jobs, and they are typically certified in their fields or professions.
Type: An Incident Command System resource classification that refers to capability. Type 1 is generally considered to be more capable than Types 2, 3, or 4, respectively, because of size, power, capacity, or (in the case of incident management teams) experience and qualifications.
Typing Resources: Resources are organized by kind, and type, including size, capacity, capability, skill, and other characteristics. This makes the resource ordering and dispatch process within and across organizations and agencies, and between governmental and non-governmental entities, more efficient, and ensures that the resources received are appropriate to their needs.
Unified Command (UC): An Incident Command System application used when more than one agency has incident jurisdiction or when incidents cross political jurisdictions. Agencies work together through the designated members of the UC, often the senior person from agencies and/or disciplines participating in the UC, to establish a common set of objectives and strategies and a single Incident Action Plan.
Unit: The organizational element with functional responsibility for a specific incident Planning, Logistics, or Finance/Administration activity.
Unit Leader: The individual in charge of managing Units within an Incident Command System (ICS) functional section. The Unit can be staffed by a number of support personnel providing a wide range of services. Some of the support positions are pre-established within ICS (e.g. Base or Camp Manager), but many others will be assigned as Technical Specialists.
APPENDIX B | COMMON ACRONYMS
AAF Alberta Agriculture & Forestry
AAO Air Attack Officer
AAR After Action Review
AEMA Alberta Emergency Management Agency
ATV All Terrain Vehicle
BCWFS British Columbia Wildfire Service
BUI Buildup Index
DC Drought Code
DMC Duff Moisture Code
EMBC Emergency Management BC
EOC Emergency Operations Centre
ETA Estimated Time of Arrival
FFMC Fine Fuel Moisture Code
FPA Forest Protection Area
FWI Fire Weather Index
GPM Gallons Per Minute
GPS Global Positioning System
IA Initial Attack
IAP Incident Action Plan
IC Incident Commander
ICS Incident Command System
ICP Incident Command Post
IMT Incident Management Team
ISI Initial Spread Index
KPA Kilopascal
LACES Lookout, Anchor Point, Communication, Escape Route, Safety Zone
LPM Litres Per Minute
NFPA National Fire Protection Association
OFC Office of the Fire Commissioner
PPE Personal Protective Equipment
PSI Pounds per Square Inch
RECON Reconnaissance
RH Relative Humidity
RPM Revolutions Per Minute
SCBA Self Contained Breathing Apparatus
SOP Standard Operating Procedure
SPU Structure Protection Unit
UC Unified Command
UTV Utility Terrain Vehicle
WUI Wildland Urban Interface
Wildland Urban Interface Basics | PARTICIPANT GUIDE Wildland Urban Interface Basics | PARTICIPANT GUIDE 178 179
APPENDIX C | 17 WATCH OUT SITUATIONS
1. You are in Country not seen in daylight
2. You are constructing a line without a safe anchor point
3. You are attempting a frontal assault on the fire
4. There is unburned fuel between you and the fire
5. You are building a fireline downhill with fire below
6. You are on a hillside where rolling material can ignite fuel below
7. The weather is getting hotter and drier
8. The wind increases and/or changes direction
9. You are getting frequent spot fire across the line
10. Terrain and fuels make escape to safety zones difficult
11. You feel line taking a nap near the fireline
12. You are unfamiliar with weather and local factors influencing fire behavior
13. You are working in an area where numerous snags and hazard trees are present
14. The management of the fire is transitioning
15. You are driving when fatigued and/or in conditions where darkness, dust, and/or smoke make visibility difficult
16. The fire is in the wildland urban interface
17. You have significantly exceeded the 2:1 Work/Rest Ratio or have been operating at the 2:1 ratio for an extended period.
10 STANDARD FIRE ORDERS
1. Know what your fire is dong at all times
2. Keep informed on fire weather conditions and obtain forecasts
3. Base all actions on current and expected fire behavior
4. Give clear instructions and be sure they are understood
5. Post lookouts in potentially hazardous situations
6. Establish safety zones and escape routes for everyone and make sure they are known
7. Be alert, keep calm, think clearly, and act decisively
8. Maintain control at all times
9. Remain in communication with crew members, supervisor, and adjoining forces
10. Fight fire aggressively but provide for safety first
APPENDIX D | PUMP TROUBLESHOOTING
FUEL ISSUES
Do you have a sufficient amount of the proper fuel for the pump you are using?
Being prepared ahead of time with enough fuel to get you started will go a long way. Jerry cans and fuel tanks should be topped up with the proper fuel before being deployed. 4 stroke pumps should use premium fuel with fuel stabilizer to maximize fuel life. 2 stroke pumps use mixed fuel, carry extra mixing oil and refer to engine manufacturer specs when mixing fuel.
If pump has an onboard fuel tank is it set to use it or jerry cans?
Ensure members are properly trained in using the pumps your crew will be working with, including on or off board fuel tanks and the valves that direct the flow of fuel.
Are your fuel lines in good working order?
Check fuel lines for cracks or kinks and keep them clear of exhaust on the pump. Carry extra parts in pump kits to overcome any issues you may find.
Is the fuel vent cap open?
If you do not have a vent cap open the engine will not be able to draw fuel from jerry cans and you will lose fuel prime.
If you are having trouble starting the pump and smell fuel is the pump flooded?
If you suspect the pump to be flooded try a “Hail Mary” by turning the choke off, go to max rpm and try to pull start engine to a maximum of 20 times. If the “Hail Mary” doesn’t work remove the fuel line and spark plug from pump. Be sure to have toggle switch in the on position and choke off. Clean off fuel from spark plug or replace with a new one and put it back in the spark plug cap. Hold it against the outside of the cylinder and pull starter rope to remove excess fuel and check for spark. When excess fuel is removed and you have a good spark reassemble pump and start your pump procedure all over again.
SPARK ISSUES
Is the reset rod in the proper position for starting and the engine switch “ON”?
Before starting pump go through each step to ensure switches are in the proper position for starting. Skipping one step may result in longer start up time if you flood the pump.
Is the spark plug screwed in properly and spark plug cap on tight?
Make sure you have good contact with plug and pump or before turning over pump.
Is the spark plug in good working order?
Proper maintenance ahead of time should alleviate most issues but it is good practice to carry extra spark plugs and gap tools in your pump kit.
Wildland Urban Interface Basics | PARTICIPANT GUIDE Wildland Urban Interface Basics | PARTICIPANT GUIDE 180 181
AIR ISSUES
Is the air filter dirty or is the carburetor loose?
Pull off air filter and clean it out using air or replace it. Good maintenance ahead of time helps prevent problems on deployments. Tighten up carburetor using tools in pump kit if it becomes loose.
WATER PRIME ISSUES
A pump losses prime when air enters the pump head from the suction side of your pump instead of water. This causes the pump to rev up and will damage your pump if not turned off and corrected. Mark 3 pumps have an over speed cut off switch that will shut the engine off at a certain rpm to prevent further damage. Before attempting to start your pump ensure all switches are back in the proper position for start-up, re-prime pump and start as normal.
If your pump is losing prime be sure to check the following:
• Check the foot valve at the bottom of your suction hose to make sure it is not plugged and functioning properly.
• Ensure the foot valve is fully submerged in water and kept out of any silty bottoms. Protecting it with spruce bows is a good technique.
• Check all fittings on the suction side of the pump including the primer cap on top of the pump head to make sure they are tight and do not draw air into your pump. If using foam on the suction side of the pump be sure to check those fittings and remove if you cannot keep prime.
• If you are missing a suction hose or it is damaged the mark 3 pump head can be submerged in the water or you can use spare fittings to make due in a pinch.
• If your pump is drawing air into the pump head due to a vortex in shallow water you can use a vortex eliminator such as beach balls, water bottles or a hard hat.
BAD DAY ISSUES
It is always good practice to keep spare fittings that can mix with other agencies and contractors. Find out what types of fittings your local partners may be using so you can work together. Broken recoil rope?
Be sure to carry extra rope in your pump kit. Remove recoil cover from engine and wrap new rope around the recoil unit. Make sure your pump is primed and all switches are in the proper position before attempting to start the pump. Wrap the rope around a stick or spark plug wrench to get a better grip and try starting your engine. Be ready to repeat steps over and over again checking switches between pulls to make sure nothing was missed.
Sure you have everything set up right and the pump still will not start?
Some engines will not turn over with low fluid levels. Check oil levels on 4 stroke pumps prior to being deployed and carry extra oil in pump kits to add if necessary.
APPENDIX E | PUMP SITE CHECKLIST
• Pump
• Suction Hose w/Foot Valve + Strainer
• Fuel Lines
• Fuel
• Pump Kit
- Spare Spark Plug
- Spare O-Rings
- Spanner Wrench
- Small Crescent wrench
- Pony Length of 1 1/2 ‘’ hose
- Funnel
- Forestry Adaptors Male & female
- Collapsible Water Bucket
- 1L Oil For Pumps
- Small Grease Gun
- 2” Camlock Both Male and Female Threads to Female Camlock
- Wire Mesh
- 5/8s Nozzle
- Forestry Wye
- Adaptor 1 ½” male to 2” Female NPSH
- Floatation for Suction Lines
APPENDIX F |BLADDER PATCH KIT CONTENTS
• Heat Gun
• J Roller
• Rubbing Alcohol
• Tank patch Material
• Rags
• Scissors
• Hose Patches Various sizes
Wildland Urban Interface Basics | PARTICIPANT GUIDE Wildland Urban Interface Basics | PARTICIPANT GUIDE 182 183
APPENDIX G | CREW MEMBER KIT LIST
SPU MEMBER GEAR LIST
Hard Hat – 1
CSA Approved Steel Toed Boots w/6” rise – 1
High Vis Nomex Uniform Pants – 2
High Vis Nomex Uniform Long Sleeved Shirt – 2
Cotton T- Shirt – 2
Gloves – 1
Safety Glasses – 1
Affrax Radio – 1
Spare Battery for Radio - 1
24-Hr Bag (see contents list) – 1
72-Hr Bag (see contents list) - 1
Knife – 1
Alberta P (Personal) First Aid Kit – 1
Flagging Tape
Electrical Tape
Pen
Notepad
Appropriate Personal Clothing
Sunscreen
Insect Repellant
EXTRA GEAR FOR LEADER
Cell Phone – 1
Cell Phone Charger – 1
Ipad - 1
Kestrel Weather Reader – 1
Knee Board – 1
GPS Garmin GS 62s – 1
Compass – 1
ACKNOWLEDGEMENTS
24 HOUR KIT CONTENTS
Food for 24 hrs
Dry bag or Sack - 1
Spare Roll of Electrical Tape - 1
Spare AA Batteries
Knife – 1
Flashlight – 1
Green Glowsticks – 4
100 ft length of Paracord – 1
Lighter – 1
Headlamp w/spare batteries – 1
Small Packable Towel – 1
Any personal Items
10 ft x 10 ft Piece of 20 mm Poly
72 HOUR KIT CONTENTS:
Food for 72hrs
Sleeping Bag – 1
Sleeping Pad – 1
Tent – 1
Towel - 1
Toiletries (Body Wash)
Appropriate Personal Clothing
Any personal Items
Every effort has been taken both to provide proper acknowledgement of the original source and to comply with copyright law. If cases are identified where this effort has been unsuccessful, please notify the Lesser Slave Regional Fire Service.
Lesser Slave Regional Fire Service
901 Caribou Trail. N.W Slave Lake, AB T0G2A1
1-780-849-4110
fireadmin@slavelake.ca
Copyright ©2022, Lesser Slave Regional Fire Service
We also wish to acknowledge and thank the following for use of their information and illustrations:
FireSmart Canada
Alberta Agriculture and Forestry
CAL Fire, California
USDA Forest Service
British Columbia Office of the Fire Commissioner
British Columbia Wildfire Service
COURSE DEVELOPMENT & REVIEW TEAM
Jamie Coutts (SeaHawk Service)
Patrick McConnell (Kelowna Fire Department)
Ryan Coutts (FireSmart Crew Leader LSRFS)
Logan Skahl (FireSmart Crew LSRFS)
Jordan Lampertz (FireSmart Crew LSRFS)
Glenn Martin (Edmonton Fire Department)
Adam Shirley (Edmonton Fire Department)
Scott Allan (Edmonton Fire Department)
Shawn Kearney (DC Rural Operations LSRFS Ret.)
Alex Pavcek (Regional Fire Chief LSRFS)
COURSE DESIGN
John McDermott (Regional Deputy Chief LSRFS)
Randah Mouallem (Northern Lakes College)
GRAPHIC DESIGN AND PRODUCTION
Kelle Cloutier, 7th Stranger Creative
Wildland Urban Interface Basics | PARTICIPANT GUIDE Wildland Urban Interface Basics | PARTICIPANT GUIDE 184 185
Wildland Urban Interface Basics | PARTICIPANT GUIDE 186
