This book was written by the students of Mr. Ochoa’s Culinary Arts classes at Manual Arts High School in spring 2024.
The views expressed in this book are those of the authors and do not necessarily reflect those of 826LA. We support student publishing and are thrilled you picked up this book.
All rights reserved. No part of this book may be reproduced in any form without written permission from the publisher.
Este libro fue escrito por los alumnos de Mr. Ochoa de el Programa Culinario en la escuela secundaria de Manual Arts en la primavera de 2024.
Las opiniones expresadas en este libro son las de los autores y no reflejan necesariamente las de 826LA. Apoyamos la publicación de jóvenes autores y estamos felices que hayan recogido este libro.
Todos los derechos reservados. Prohibida la reproducción total o parcial de este libro sin autorización escrita del editor.
Editors:
Angie Martinez Morales
Danielle Neal
Marco Beltran
Anissah Madrid
Godwina Ogbeide
Mysaiah Duke
Yahir Gaytan
Cover Artwork & Book Design: Nicolette Wood
Section illustrations: Rose Feduk
In celebration of our 20th Anniversary, 826LA dedicates this publication to all of those who have helped make our community what it is, what it was, and what it will become.
Thank you to the students, volunteers, educators, donors, staff, community partners, and time-travelers who have filled the last 20 years with such creativity, joy, and hope.
We look forward to another 20 years in partnership!
Illustration by Loris Lora
Introduction
How food develops and changes with time is fascinating to me. When a new person makes a dish, they add their name to the family or local history of that dish. When each person makes it, even if it’s from a recipe, they make changes that reflect their own tastes, like a culinary game of telephone. Maybe the change is a subtle one, like adding a bit more salt to a step, or drastic like omitting a step, but it’s all with goal of improving or perfecting what they consider to be their ideal version of a dish. Sometimes there’s a lot of emotion connected to recreating the original version of a recipe, but it’s those bittersweet notes that season the food and push us to reach out for those flavors we have in our memories. Hamburgers didn’t always have cheese. Someone had to come around, tired of having a cheese-less burger, thinking that a slice of cheese was the one thing that would make a burger perfect. Or something as simple as eggs. Someone out there had to deviate from the original way people ate eggs to get to variety of ways we eat eggs today. That’s the magic of food, but something I had never experienced first hand until the creation of this cookbook.
My family is Salvadoran. We have our set menu of culturally Salvadoran recipes handed down from some family source lost to time. There are a few changes here and there made by some of my extended family, mostly due to lack of skill and taste (sorry family), but all recipes are done fairly similarly. While working with Mr. Ochoa’s classes, I found myself making connections with students with similar cultures, recalling those flavors I’d come to know from my familys’ version, only for those memories to be altered by the big little changes their families made. At first I was taken aback, like when someone corrects your pronunciation of a word you’d only read in books. El Salvador as a country is so small that it was hard to wrap my head around the different versions of the same dish I grew up with. The more differences I saw, the
more beauty I saw in the subtle changes from dish to dish.
The students were tasked with sharing a recipe for a dish whose smell, taste, or process to make it transported them to a different time in their lives. Many shared their favorite family dishes. Unfortunately for the rest of us, some of those dishes are a heavily guarded family recipe. In those cases, the students tried their best to replicate as much as they could remember.
In helping them realize their stories and dishes, I was also able to create new ones of my own that I’d like to share so I can keep them forever:
-Listening to a whole class argue about the number of hot sauces on the WingStop menu with a student. He argued there was only one.
-Listening to students debate “water cornbread” with that same student. He remained unconvinced “water cornbread” was real despite how many students tried to convince him otherwise.
-Explaining what a pie was to students who had never seen a pie in their lives, then watching them perfectly lattice the crust from an image off of google.
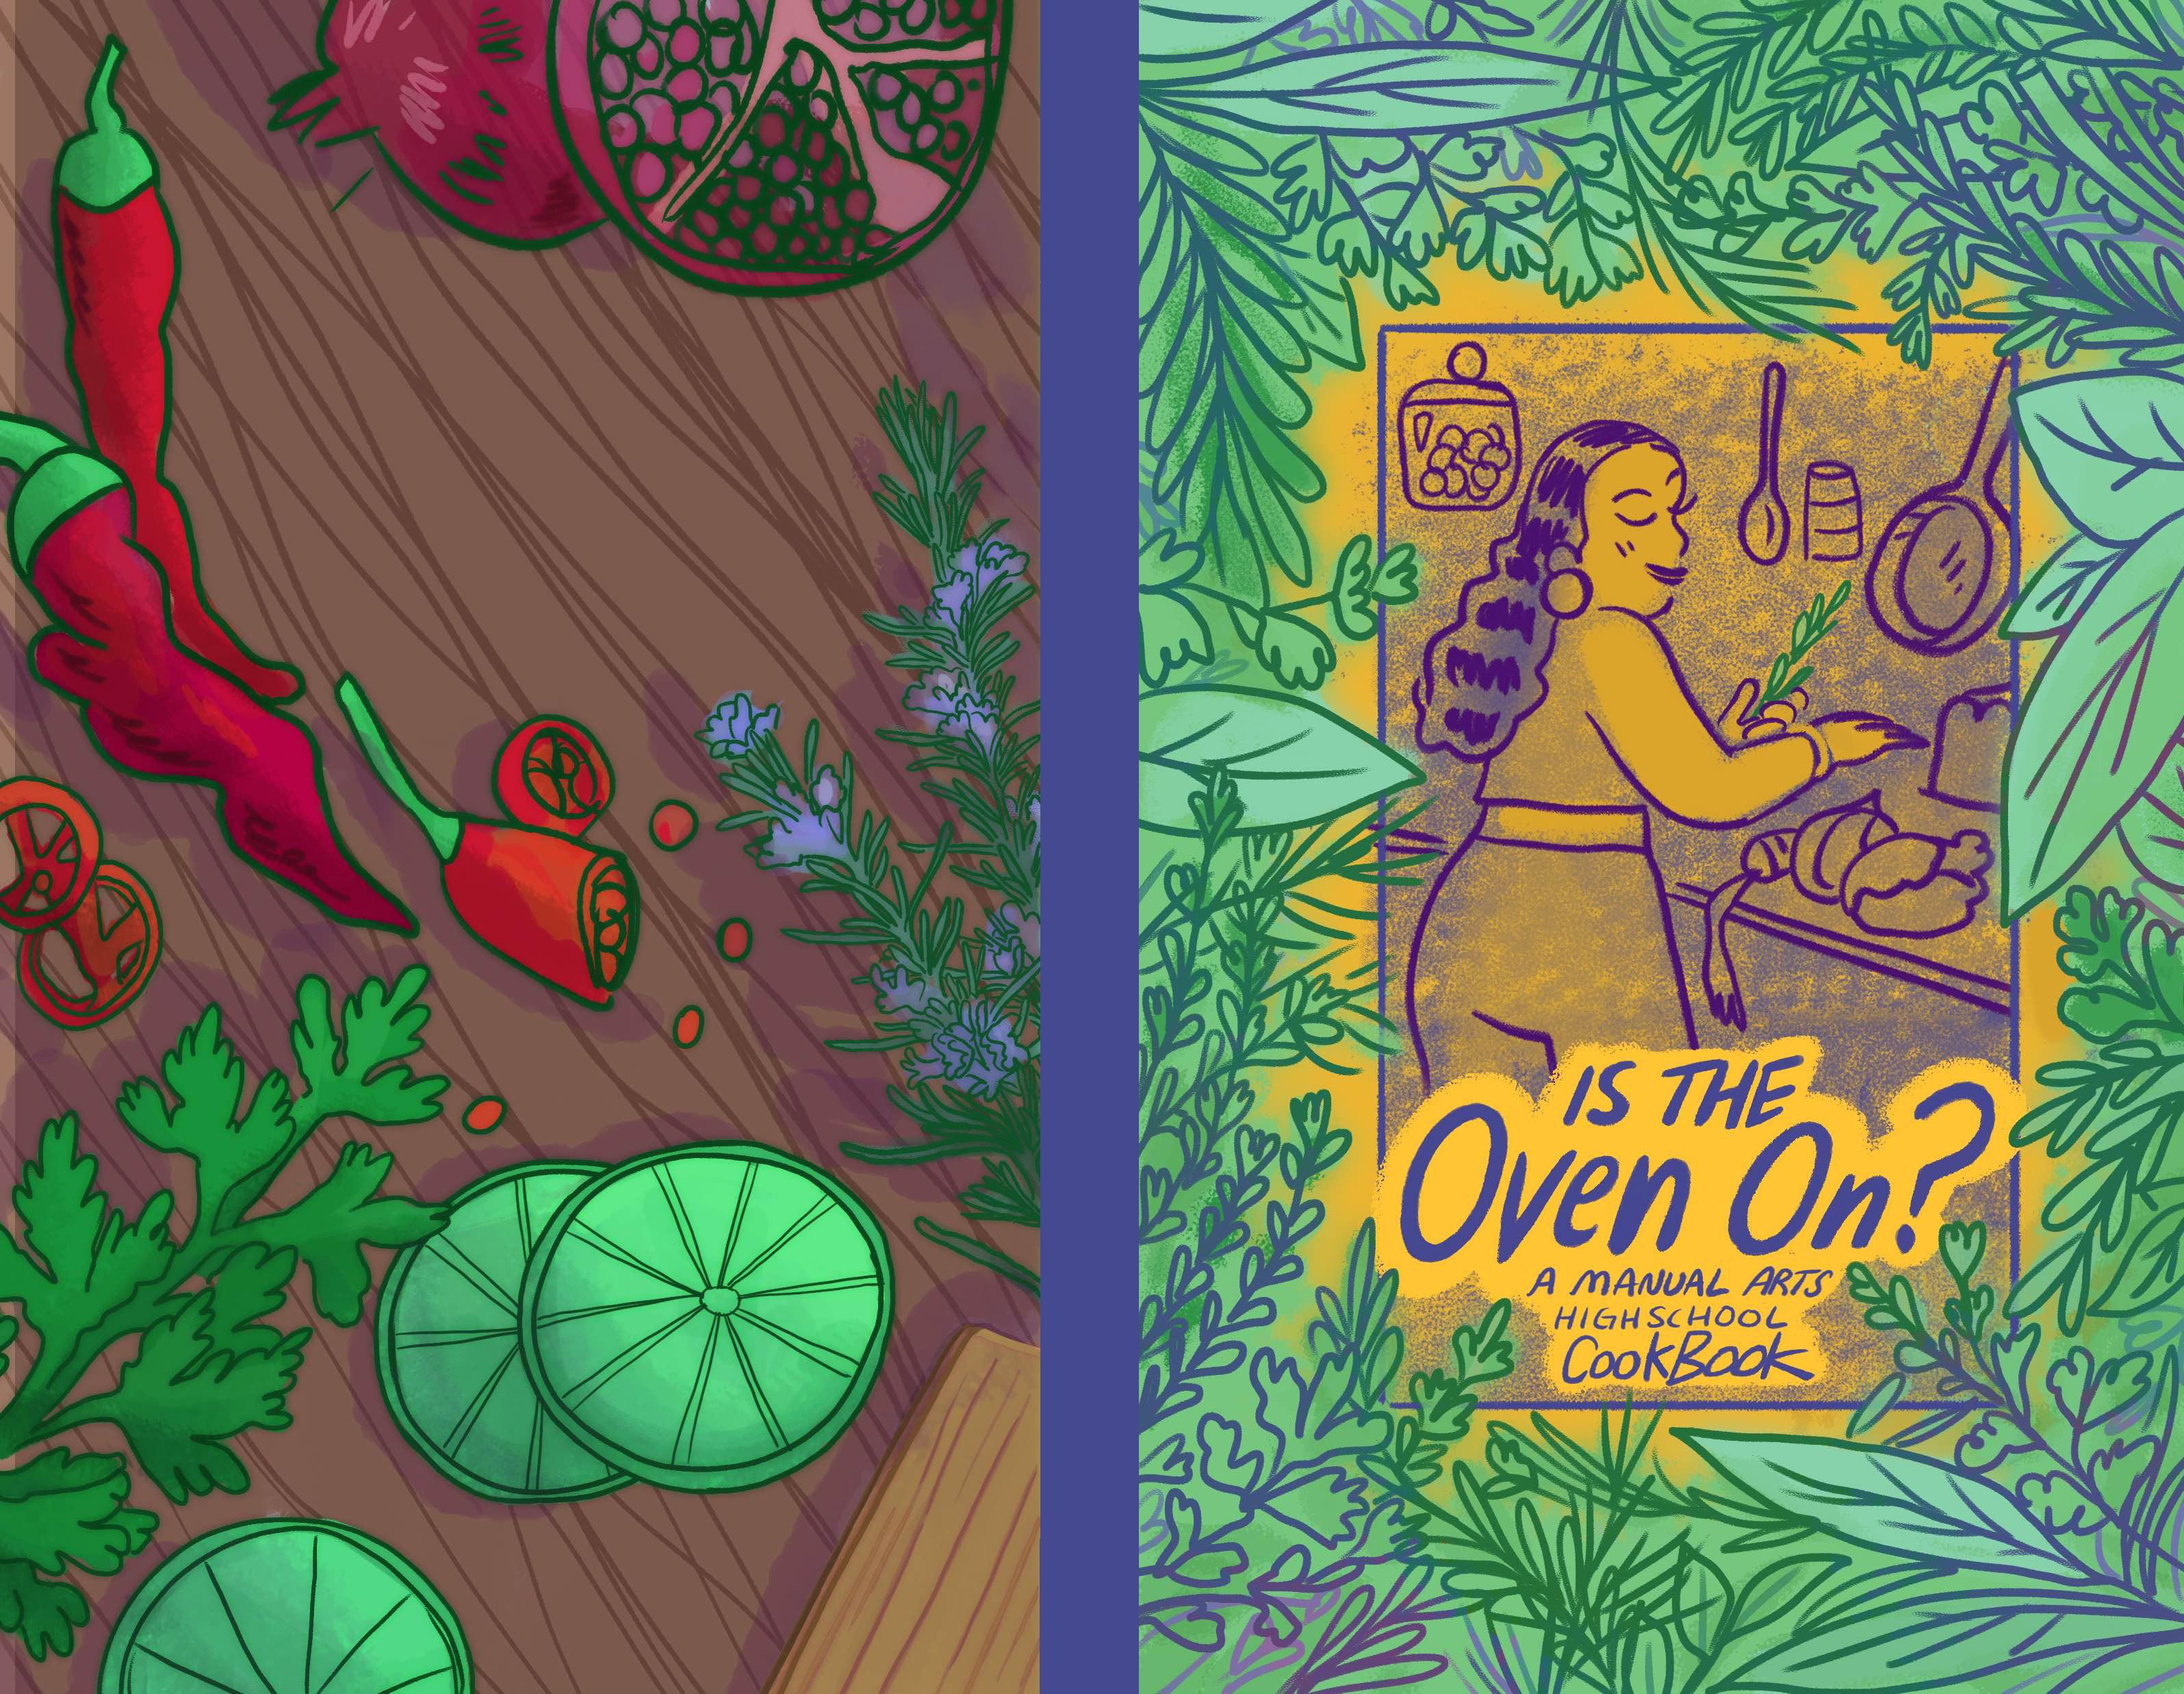
The title itself is based on a memory I have of being in the class. The pilot light on the stoves the students use are very temperamental, so Mr. Ochoa would have to remind the students to make sure the oven was on before putting anything in.
Every time I look at this book, read the writing shared within, I’ll be transported to the memories I have working with this class. I hope that in trying to make these dishes and reading their stories, you too are able to make new memories with food.
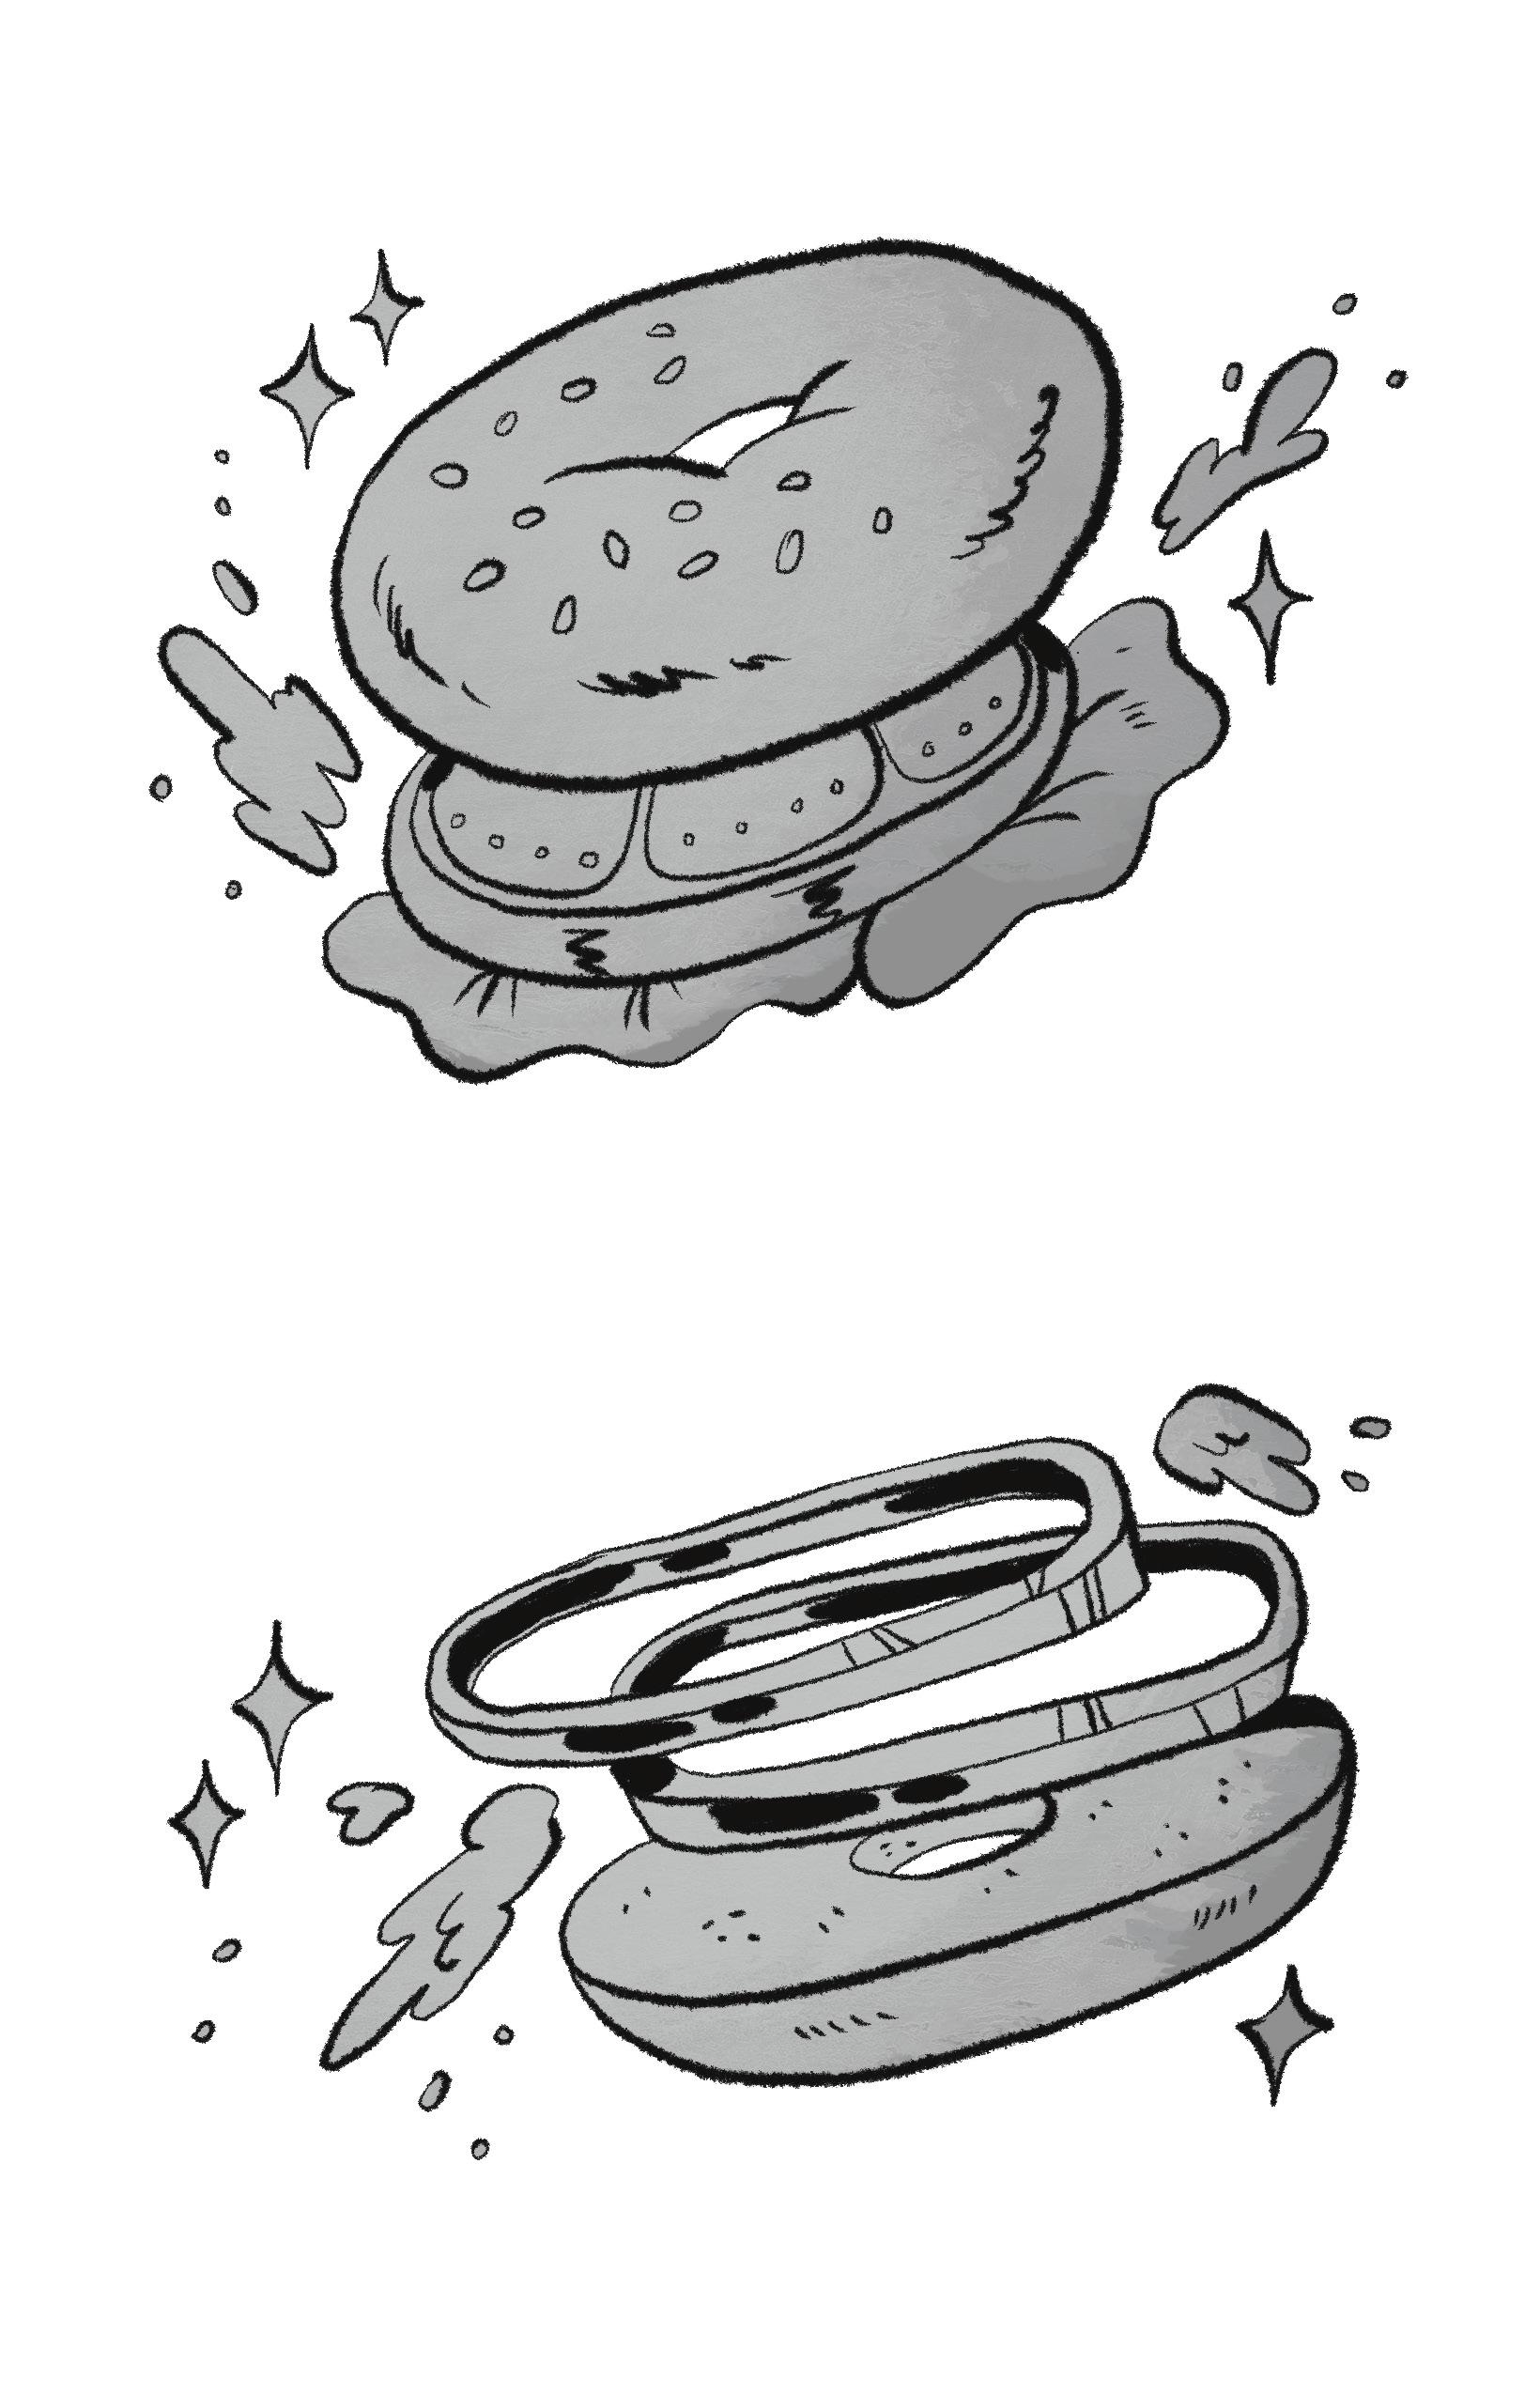
This fast yummy tasteful bagel has quite a story. Bagels have always been my comfort food since quarantine, but I would always eat the bagel with just cream cheese. One day I thought about making it more colorful so I would feel full enough. I found out that adding more volume to your food gets you full enough to be hungry until lunch. A good heavy breakfast is always needed to start your day good and energized. Adding protein, fats, and greens to your food is more tasty than just eating it plain. My bagel was just made one lazy morning. I woke up really hungry that day and saw that I had bagels, egg, ham, bacon, and spinach to make a tasty bagel to enjoy all by myself with a good glass of warm coffee or even ice coffee. This meal is very special to me cause it got me through a tough time. This bagel makes me have energy for the day and be the best person when I eat it.
INGREDIENTS
• Eggs
• Turkey bacon
• Spinach
• Everything bagel
• Pepper & salt
• Turkey ham
RECIPE
1. Heat up pan
2. Scramble the eggs
3. Oil the pan when hot
4. Add the eggs, add seasoning
5. Add bacon on pan as well
6. Put bagel in warmer to get toasted
7. Remove eggs and bacon off pan
8. Get bagel when toasted
9. Add cream cheese on bagel
10. Add the ham egg bacon spinach
11. Close it up and fire sandwich bagel
Cajun Fries
Ruth A.
Whenever my friends come over to my house and we want to snack and munch, I make fries. It’s simple and tasty yet so impressive since you make the best crispy fries. These fries come in clutch when the only thing in your house is potatoes. The taste of my cajun fries brings me memories of a restaurant nearby my school. Somehow the place went out of business but I can still remember getting a full bag of fries every Friday. Ever since I crave those delicious fries. My recipe tastes so similar I’m convinced I stole the recipe from them. All the seasoning goes perfect when you add a side of melted cheese and one thousand island sauce dips.
INGREDIENTS
• 5 potatoes
• 3 cups of vegetable oil
• 1 tsp lemon pepper
• 1 tsp paprika
• 1 tsp cayenne pepper
• 2 tsp Old Bay seasoning
RECIPE
Serving size: 3 people
1. Wash, peel, and cut potatoes into ⅜ in fry size shapes.
2. Let oil in the pan get hot until 375 degrees.
3. Put all cut up potatoes into the hot pan and fry the fries.
4. Have a plate with paper towels to catch all leftover oil.
5. In a clean bowl, season fries evenly and shake them around the bowl.
Chilaquiles Verdes
Yaretzi C.
Chilaquiles Verdes has always been my favorite ever since I was about 10 years old. I don’t know if it was the feeling I got when they were made too spicy that made it my favorite food in the world, but it somehow is. My mom would make them for me when I was feeling down to cheer me up and it has always been there for me when I needed to feel warmth. Eventually I learned that recipe for myself and as soon as I learned to make it, it was my breakfast, lunch, and my dinner. I never got tired of it and I don’t think I ever will because it was there through every stage. It was there through that awkward stage in middle school. It was there when I made and lost friends. It was there when we had to quarantine, and there when we went back to school. It’s going to continue to be there when I go off to college and when I’m going through something. Being Mexican also ties into my dish because it’s such a staple dish in Mexican culture. When I get that first bite I feel as if I am in Mexico, waking up to the smell of a fresh pot of coffee and to the sound of the rooster crowing. Being with my grandpa helping him shuck corn and feeding pumpkin to his horses. The connection I have to this dish molded me to who and what I am today. Not only did I learn the dish, I was able to build a stronger connection with my mom when helping in the kitchen. Helping my mom cook food is my favorite thing as well because we always talk about life. We talk about when I’m feeling sad or when I’m feeling stuck. We talk about when I made an accomplishment or when I got a good score on an assignment I was dreading doing. Just like the chilaquiles, my mom is always going to be there for me. So when I’m feeling down or going through something I will rely on that spicy, crunchy, savory dish to help bring me back up.
INGREDIENTS
• 8-12 corn tortillas
• Vegetable oil
• Half an onion
• 2-3 jalapenos
• 3 tomatillos
• 1 garlic clove
• Handful of cilantro
• 1 tbsp Knorr caldo de pollo seasoning
RECIPE
(Serving Size 5)
1. Start off by taking about 8 to 12 tortillas and cutting them up into squares. After doing that,take a pan and put oil into the pan. While you wait for the oil to heat up, set up a pot with boiling water and place your Jalapenos and Tomatillos in the water. After your oil is heated up, cut about ⅓ of your onion and place it into the oil as well as the tortillas.
2. After your water starts boiling, turn off the heat and place your jalapenos and tomatillos into a blender. Add about ½ a cup of the same water into the blender as well. Start adding 1 garlic clove, A handful of cilantro, ⅓ of an onion, 1 tbsp of the caldo de pollo Knorr seasoning.
3. Blend it all up until it becomes a sauce. Put that to the side and focus on frying the tortillas until it is crispy. Fry tortillas for about 10 minutes or until they are as crispy as you would like. After they are as crispy as you would like, slowly incorporate the sauce and let it simmer for about 3-5 minutes. You are now ready to add your toppings and enjoy!
Optional: You can add sour cream and queso de polvo on top and avocado on the side. You can also fry up some eggs and eat with the chilaquiles.
Chilaquiles al Estilo Guatemalteco
Laura R.
When I think about this food it takes me back to my childhood. Every morning before I got up, my grandmother would start cooking, while I was in bed I would smell the delicious smell of fried onion, after that the smell of fried tortilla and eggs together. It was also a bit noisy since I was using the blender to make a tomato sauce. It brings back memories because when it rained it was a meal that I couldn’t miss and I could enjoy time with family and be grateful for life. But it is not a requirement to do it when it rains. For me, it is a memory that I have with my family as those moments bring us closer together.
It is a very nice recipe, since it is just a few steps. Also with ingredients at home that you probably have. This dish is of Mexican origin, but in Guatemala it is made with fewer ingredients and in a different way.
INGREDIENTS
(For a single dish)
• 3 tortillas
• 2 eggs
• Salt
• Water
• 2 tomates
• Jalapeño
• Coriander
• Onion
• Cotija cheese
RECIPE
1. First step, cut the tortillas into triangular or square shapes.
2. Put oil in a frying pan and sauté the onion and add the pieces of tortilla.
3. Once they are golden, add the eggs until they are cooked.
4. In a blender add the tomatoes, onion, salt, jalapeno, chicken seasoning and cup of water and blend it.
5. Once it is blended, put another pan on the stove with oil. Once it is hot, add sliced onions and add the tomato sauce. Once it is boiling, turn the fire off.
6. Once everything is done, combine the egg and tortilla with the sauce and serve it on a plate.
It is optional to add beans, cilantro, and cotija cheese for a better result.
Chile Rellenos
Perla M.
Chile Rellenos holds a significant meaning for me. Growing up, it was one of my favorite Mexican dishes. When I think of Chile Rellenos, I think about my mom and her cooking. I remember she would always ask me to help her prepare them for dinner. Cooking Chile Rellenos evokes a nostalgic yet joyful feeling, as it reminds me of the quality time that was spent with my mom. I enjoy making this dish with the intent to share with my family. I wouldn’t exactly say these are made for a special occasion, just for a casual family dinner for us to enjoy. Whenever I make this dish, I see my mom making the rice and peeling the chiles. I imagine her asking me to make the fluffy egg and stuffing the chile poblano with cheese as she makes the rice.
INGREDIENTS
• 5 large chile poblanos
• ½ pound of Monterey cheese (cut into about 1 inch cubes)
For the batter:
• 4 large eggs
• ¼ tsp salt
• ½ cup all-purpose flour
• 32 ounces Vegetable oil for frying
RECIPE
1. Roast peppers on the stove in high heat until their skins are blackened and blistered.
2. Peel skins off the peppers. Make a slit down the middle of the pepper and remove the seeds, being careful to not tear the pepper.
3. Insert the cubes of cheese into the pepper until they are fully enclosed.
4. In a bowl, beat the eggs until stiff peaks form.
5. In another bowl, beat the egg yolks with the salt until thick and pale.
6. Gently fold the egg yolks into the egg whites until combined.
7. Heat about 1 inch of oil in a large skillet over medium heat.
8. Place the ½ cup of flour on a plate. Lightly dredge each stuffed pepper in the flour. Lightly coat each stuffed pepper in the flour.
9. Dip the floured peppers into the egg batter, coating them completely.
10. Carefully place the coated peppers in the hot oil, frying until golden brown on all sides.
11. Try to do 2 at once to avoid overcrowding.
12. Remove the fried peppers from oil and drain on paper towels.
13. Wait five minutes and enjoy!
Enchiladas
Damari K.
My mom sometimes makes enchiladas for the family and we love it. I guess it’s like a Mexican dish, because it reminds me of Mexican food. When eating this dish, I just happy eat and remember the memories we have created as a family. I have not personally cooked this, but my mom makes it for me and my family members on occasions like the Fourth of July, Easter, and sometimes Memorial Day. My mom will also just make the Enchiladas just for me, my dad, and her. When I’m eating this dish that my mom makes, I just think of family. There’s always a big pan of it and we dig in for it and get to grubbing down. I may sometimes help my mom and the feeling I get when helping her. I just love it when we cook together when we get a chance to. I love her so much.
INGREDIENTS
• 1 tsp of salt
• 3 tsp of garlic powder
• 3 tsp of black pepper
• 1 lb Ground Beef
• Tortillas (depends on the size of your casserole dish)
• 1 pack of taco seasoning
• 1 onion, chopped
RECIPE
1. Cook the ground beef in a pan. Add 3 tsp of garlic powder, 1 tsp salt, 3 tsp of black pepper. Cook until brown.
2. Add a pack of taco seasoning and the onions.
3. In a bowl, mix enchilada sauce and cheese.
4. Next we get the tortillas together, fry them in cooking oil. We used to roll them, but now we fry them and dip them in enchilada sauce.
5. We then lay them in the casserole dish. Add the ground beef and cheese on top, add cilantro in there. Layer it again, doing the same thing until you have about three or four layers.
6. Top it off with cheese. We sometimes add olives and cilantro.
7. Put in the oven until the cheese is golden brown. Let cool and eat.
Eggs with Sausage
Denisse H.
Eggs with sausage holds a significant meaning to me. As a kid, my mom or grandma would make me eggs with sausage for breakfast and it was delicious. This recipe evokes a special feeling because I would eat it often as a kid on a certain princess plate my mom got me. I cook this for others, like my younger brother whenever he gets hungry. It is something simple and easy to make. When I am cooking this dish, I imagine my mom, because as a kid whenever she would make me eggs with sausage, I would sit patiently at the table with my tablet, looking at her in the kitchen from time to time. When I am cooking this I feel calm since this dish isn’t a difficult process and it’s something easy. The smell of eggs and sausage cooking on the stove floods my senses as I cook it. I can hear the sound of the sausage sizzling in the oil on the pan and everything going silent when I add the whisked eggs.
INGREDIENTS
• 2 eggs
• Sausage
• Salt
• Oil
RECIPE
1. Grab a bowl and crack 2 eggs in it.
2. Once both eggs are in the bowl, add a pinch of salt. Not too much though because then it will be salty.
3. You can use a fork or a whisk to whisk the eggs. I personally use a fork to mix the eggs with salt.
4. When I’m finished with doing that, I put a pan on the stove and add a tbsp of oil and let that heat up.
5. While the oil heats up, I use a cutting board and cut up 2 sausages. When it’s cut I add them in the pan and let them cook there for like 2-3 minutes before I add in the mixed eggs.
6. When I add the eggs, I start to mix them up together until it is fully cooked. It doesn’t take a long time to cook, but once it’s done you can just serve it on a plate and you’re done.
7. With 2 eggs and 2 sausages, it’s enough for just one person but for more people you will need more of the ingredients.
Grilled Cheese Deluxe
Jonathan U.
I would like to present my grilled cheese deluxe. It all started one summer day in 2016 when I was watching my favorite cartoon of all time, Regular Show. There were episodes where the main protagonists Mordecai and Rigby go to a restaurant from time to time known as “Cheezers” and they would buy a grilled cheese deluxe. I was fascinated by how delicious this dish appeared, and I was fairly hungry that morning so I asked my mom if she could recreate it exactly how it appeared. It never showed the making of the grilled cheese deluxe, but one scene had a clear side shot of the sandwich that visibly showed what was inside. Purely based on the picture, my mom attempted to make the famous grilled cheese deluxe from Regular Show, and although it may not have been the exact recipe, I vividly remember its taste: flavorful, crunchy and overall delicious. It tasted heavenly, and for nearly a year straight I ate it at least 3 out of the 7 days of the week. I don’t eat it so often now, but after school I am definitely going to ask my mom to make me one; it holds heavy significance to me because my mom made it, and it comes from my favorite show, so not only does it taste good, but it has sentimental value to it as well. The funny part about it though is that I would never eat the olive, and to this day I still haven’t eaten one.
INGREDIENTS
• 1 sourdough bread loaf covered with mayo
• 1 tsp butter on pan
• 2 slices of sharp cheddar
• 2 slices of swiss cheese
• 2 slices of colby jack cheese
• Another layer of cheddar on top
• Add other sourdough bread to make sandwich
• Cover pan with top so it can melt until bread golden brown and cheese melted
• Add toothpick through and add the optional olive
RECIPE
1. My mom started off with two loaves of bread and proceeded to coat them with some mayo, while she put a tbsp of butter on the pan to melt.
2. She then proceeded to put two orange slices of cheese on the bread along with some specific slices of ham that was only from Ralph’s but sadly got discontinued, and on top of the ham she put two white slices of cheese.
3. She then covers the pan with a top and adds a little bit of water inside so it can steam until it is nicely melted.
4. After it melts, she puts the other loaf of bread on top to complete the sandwich. The bread is supposed to be golden brown and very crunchy, and the ham and cheese are supposed to be fluffy and full; it should ooze out of the bread.
5. Finally, she cut the grilled cheese in triangle half form while adding toothpicks and an olive on top of each half.
Huazontles/Chupes
Lizbeth V.
Chupes, as I’d like to call them, is a seasonal dish that is made by my mom. I grew up with this dish and what makes it special to me is shopping to get the ingredients with my mom. Huazontles are very hard to find because you cannot find them at any local grocery stores. They are a native plant of Mexico, and aren’t really sold here in the US. My mom and I go on sort of like a hunt to find them at swap meets, and sometimes we still can’t find any. Whenever I eat Huazontles, I think about when I first ate them when I was like 7. I think about that very specific moment because after that age, I didn’t get to eat them for a long time. The craving for them just grew. I didn’t know what they were called before, or how they were made, but the style of eating it lingered with me. Where I had to suck on the huazontle to enjoy it. Thus giving it the name “Chupes” which means suckers in Spanish. I think about my mom, because she’s the only person who I knew ever made that dish. The dish itself is hard to describe, which is why it was hard for me to figure out how to explain to my mom what dish she made me years back.
INGREDIENTS
• 1.5 pounds of huazontles
• 2 blocks of mozzarella cheese
• 2 tbsps of flour
• 25 dried arbol chiles
• 1 garlic piece
• 6 eggs
• Corn oil
• 20 oz of water
RECIPE
1. First soak the huazontles in hot, but not boiling, water for 15 minutes.
2. While they are soaking, take the stems off the chiles, and also soak them in room temperature water for 15 minutes.
3. Cool the huazontles off with cold water, and squeeze all the water off of the huazontles.
4. Crack open 6 eggs, and separate the egg whites with the egg yolks. Take the egg whites, and put them in a separate bowl. Whisk them as fluffy as you can, and add 2 tbsps of flour. Add the egg yolks and also whisk them in.
5. Cut the block of cheese into long thick strips, and wrap the huazontles around the strips of cheese.
6. Take the chiles with the water, add garlic, and blend. You need thread to tie the huazontles up so that they won’t fall apart.
7. Cover the surface of the pan with corn oil. Dip the wrapped huazontles in the egg mixture fully, and put them in the pan. You can pour oil over it, so that it can get on all sides. Once fried, put it on a clean plate. Pour the chili mix onto the huazontles as a sauce.
Huevos con Salchicha
Lesly G.
A dish that brings me childhood memories is huevos con salchicha (eggs with sausage). It’s a dish that has always been something simple but something good to eat, especially because it can feed two people depending how many eggs you put in. My mom would always cook this when I was a little girl, when we didn’t have much. At the age of 14, I wanted to learn how to cook this because it was something I could depend on whenever I got hungry. Everytime I eat this, I always think about how my mom has always been such a hard worker since I was young, and still comes home to clean and cook to feed all of us even if it’s something simple like this recipe. It’s good every time and even better when my mom cooks it, while talking to her and getting the smell. This dish is something I still cook especially to this day when no one is home and I have to cook for myself after school QUICKLY before leaving to work.
INGREDIENTS
• 1-3 eggs
• ½ black pepper
• ½ tsp
• ⅓ cup sliced sausages
• ½ tbsp of oil
RECIPE
1. First off, I get a frying pan, pour a bit of oil in it, and turn the stove on between low and medium because I don’t want the pan too hot.
2. I grab three eggs from the fridge, crack them into a bowl, and whisk it until liquidy and put a pinch of salt/pepper.
3. Once that’s done, I quickly cut up some sausages into little pieces and put it on the side.
4. I pour the eggs into the pan and with a wooden spatula, I begin stirring it and kinda doing it all throughout the pan then let it for a bit while I add the cut up sausages and press it down with the spatula to cook it a bit faster and get that brown color.
5. Once I see that brown color on the sausage and eggs, and get that meat smell with a bit of smoke coming out when I rip it apart, I grab a griddle pan, turn the heat up to medium, and wait a bit before putting in my tortillas.
6. After it’s hot enough, I put my tortillas in and flip them every once in a while.
7. I finally serve my eggs with sausage, or tortillas, soda, and put tapatio on the eggs.
My Good Ol’ Baked Mac N Cheese
Cheyenne S.
Baked Mac N Cheese has always been an important part of our culture as African Americans, especially in Soul Food. This specific dish is important to me because on special holidays like Thanksgiving or Christmas, I am the one to cook and serve the Mac N Cheese. Some people make it seem complicated, but our recipe and instructions are pretty manageable. A special memory I have with this dish was my first time making it. On Christmas at around 3pm, my mom was preparing to cook her Christmas dinner, which consisted of greens, Mac N Cheese, yams, ham, and rolls. Everything was going well and smelled so delicious until my mom thought she was going into labor. So when my mom was escorted to the hospital, she trusted me to finish the Mac N Cheese as it was the only thing that wasn’t finished. I was nervous as it is an important dish. But, after it was done, everyone loved it. My mom received a plate while in the hospital and she loved it as well. From then, I’ve been the one to make Mac N Cheese on holidays.
INGREDIENTS
• Elbow macaroni pasta
• Velveeta cheese block
• Evaporated canned milk
• Shredded cheese
• Butter
RECIPE
1. For this dish, measurements are based on the size of your party.
2. First, fill a pot with water and pour your elbows in when the water comes to a boil. Allow the macaroni noodles to cook for about 10-15 minutes (grab one noodle with a fork to ensure they are cooked through).
3. After your noodles are done boiling, drain your noodles with a strainer then pour them back into the pot. Season your noodles with a bit of black pepper and salt followed by butter afterwards.
4. While your noodles are cooling down, grab your 2nd pot for your cheese sauce. To prepare your cheese sauce, pour your evaporated milk in with butter and stir until the butter is melted. After the butter is melted, cut your velveeta block into squares to make it easier for the melting process. Add your velveeta cheese blocks slowly and stir until all the cheese is melted. You can also add a bit of your shredded cheese. Seasonings for this recipe are optional and you can use garlic salt, garlic powder, and black pepper.
5. Stir the cheese until you get a cheesy, sticky, thick consistency. After the cheese sauce is ready, combine your sauce and noodles and mix it all together.
6. After everything is combined, sprinkle the shredded cheese over your noodles until the noodles are fully covered with cheese over the top. Then, sprinkle a bit of paprika over the top of your mac n cheese for color.
7. Cover your pan of mac n cheese with foil and bake for 30 minutes. After the cheese over the top is all melted, remove the foil and broil the mac n cheese for about 5-10 minutes to give it a crusted brown topping.
8. When the top is crusted to your liking, now your mac n cheese is done broiling. Remove it from the oven and let it cool down for about 10-25 minutes before serving. After it is cooled down, it is now ready to serve! enjoy!
Nopales con Chapulin
Liz L.
Because I was so young, I don’t remember the first time I tried chapulines, nopales, and quesillo, but I know I never passed up the chance to have them after that–and still don’t. Having Mexican parents, Mexican food and culture has always had great influence in my life. This specific dish is one of the things that never fails to make me feel connected to my Mexican roots, but due to the lack of chapulines directly sent to me from family in Mexico, there’s a slight difference in the taste of the chapulines. Regardless, I still enjoy those nopales, bell peppers, quesillo, and chapulines altogether, somewhat like a salad. The name of this dish is “Chapulines a la Mexicana con Nopales,” pretty straightforward. When people find out that chapulines are crickets, they assume that they taste nasty, but in reality chapulines have this seafoodlike aftertaste, a slight crunch when bitten into, and an earthy smell that leaves you wanting more. That taste and smell remind me of Oaxaca, Mexico (where my mom is from), along with the quesillo which also originates from that city. I’ve only ever visited once when I was 6 years old, but I still remember waking up to enjoy the coast and having all sorts of flavors coming from the food that I was given, such as mole (which unfortunately I didn’t really enjoy), tlayudas (which I also didn’t enjoy), and chapulines coming in first place of ranking. I didn’t even know this dish existed at the time until I went to eat with both my parents at “La Mayordomia.” While being someone who’s picky, as soon as I saw the name and picture of the dish, along with a small description, I decided I was getting it. It had all of my favorite things and of course it did not fail its expectations. There was the perfect amount of tanginess with all the combined flavors and it was here where I discovered how well these flavors mixed and how badly I needed to try and make it myself.
INGREDIENTS
• 1 red bell pepper & 1 green bell pepper
• Half a red onion
• 1 clove of garlic
• 1 cup of chapulines
• 1 nopal
• 1 quesillo Oaxaqueño
• Salt & sazonador
RECIPE
1. Chop up the garlic into small pieces, slice the bell peppers, and slice the onion.
2. Then proceed to add a little bit of cooking oil in a pan where you will then fry the garlic for about 30 seconds, then add in the sliced onion and the sliced bell peppers, letting them cook for about 3 minutes with a bit of sazonador.
3. Then begin prepping your nopal, most are already somewhat prepped when bought in stores, If not remove any spines on the nopal by running a sharp knife against the grain of the spines, on both sides, repeating the process until gone. Be sure to protect your fingers and use a kitchen towel at the base.
4. Next, you want to cut away the outer edge and then slice off the base of the nopal to ensure all thorns are removed.
5. Slice the nopal, and lightly score it, but keep the base intact.
6. Then in a griddle, place the nopal (somewhat sliced) and grill with a pinch of salt, making sure it’s flipped on both sides to fully cook. This can take up about 4 to 5 minutes per side, depending on how you want it.
7. Once done, you can begin plating. Start by placing the nopal on the plate, then the sliced bell peppers, then add your quesillo on top of both in strings, and lastly add the chapulines on top of everything else.
Once that’s done, you can enjoy your “Chapulines a la Mexicana con Nopales.”
¡Buen provecho!
Pastalicious
Melony G.
My recipe is called “Pastalicious.” It is a creamy, tomatoey, cheesy pasta. I first created this recipe during quarantine. I came up with this recipe whilst being bored and hungry at home. I decided to look around my kitchen and find something to eat, after doing so, I found nothing but raw pasta. An idea had came to my head; why not use the raw pasta and create something? So that’s exactly what I did. I grabbed additional ingredients and the pasta and began to construct “Pastalicious”. Whilst creating this recipe I smelled the tomato, and pepper flakes. I hear bubbling, boiling, and sploshing. After enjoying the way “Pastalicious” came out I continued to make this recipe for my family, specifically my sister. She loves “Pastalicious” and always asks me to make it for her.
INGREDIENTS
• 16 ounces of raw penne pasta
• 1 ½ cups Salvadoran cream
• 1 ½ cup tomato sauce
• Mexican style cheese
• ½ tsp of salt
• ½ tsp of pepper
• 1 tsp of oregano or basil
• 1 tbsp of chili flakes
RECIPE
1. I first started with water in a pot, added salt to the water and allowed it to boil.
2. After boiling, I added the raw pasta and let it sit. When I finished cooking the pasta I poured some water out and added Tomato sauce.
3. After giving it some time to heat up I added Salvadorian crema and cheese.
4. For spices I added salt, pepper, oregano/or basil, and red pepper flakes.
Platanos Fritos con Frijoles
Avilene C.
Growing up I always went to my babysitter’s house while my mom worked. I was really close to her and I didn’t really see her as a babysitter, I always saw her as my grandma. I remember going to her house and always being happy, and especially excited because she would cook for me. My favorite thing that she would make was platanos Fritos with frijoles. My family is Mexican so we never really made this dish. I only had it when she would make it and I would tell my mom about it. Whenever she would make this dish I would really look forward to it. I remember asking her what she would make and whenever she would say that she was going to make platanos Fritos with frijoles, I would get really excited, because the way she would make the platanos Fritos was so good, and as a Mexican, I never really ate beans the way she would make them. She would make frijoles licuados, which were the beans that were more to the liquid side. This was also something I really liked. Her grandkid and I would sit close to the kitchen and we would just wait until the food was ready. I remember the amazing smells that would come out from the kitchen while she would cook. I really don’t eat platanos fritos anymore but when I do I will always remember her. This dish will forever remind me of the times I would go to her house and how she would take care of me.
INGREDIENTS
• 3 platanos
• Vegetable oil, or olive oil
• 2 1-pound bags of beans (you’ll have leftovers)
• Salt
RECIPE
1. Peel the platanos
2. Cut the platanos diagonally and slice them
3. Put them in oil and fry them, enough to cover half
4. When they start to turn brown, flip them. Fry until both sides are the same color. Remove from the pan and place on a plate.
5. Take out the excess oil with a paper towel
6. Then boil the beans in enough water to cover them.
7. Put salt on them while they are boiling, generously. We use Morton’s Salt and pour it directly into the pot from the container. It should feel like too much salt, and it’ll take a few tries to get right.
8. When the beans are tender, around 3 hours, set aside from the pot to blend. Add a little bean water to get your desired texture of refried beans.
9. Pour a couple of teaspoons of oil onto the pan and fry the beans. This will help thicken them a bit.
Scrambled Eggs
Kevin V.
I like to eat scrambled eggs with cooked ham and some brown rice with some sriracha. Growing up my grandma used to babysit me and once every morning she would cook scrambled eggs with ham and a side of hash browns which was really good. I guess every time I ate it I just got a warm feeling from the food. My grandma had moved back to Mexico and since then I’ve really missed her cooking a lot. The dish gives me joy and reminds me a lot of my grandma and how she used to be here. I would usually eat it with some tortillas and maybe with some rice on the side and sriracha.
INGREDIENTS
• 6 eggs
• 3-4 sausages
• Oil
• Salt
• Butter
• 1 cup brown rice
RECIPE
1. Put 1 cup of rice in the rice maker.
2. Cut up the 3-4 sausages (depending on size) into small parts.
3. Make sure to have 6 eggs at the ready for when you need them.
4. Put butter on the pan or oil, your choice.
5. Cook the 3-4 sausages first, then add 6 eggs.
6. Mix around till it looks cooked.
7. Take out the rice and start plating.
8. The last step is you eat it.
Torta Del Chavo Del Ocho
Uriel M.
La Torta Del Chavo Del Ocho is just a ham sandwich made in the Mexican show Chavo Del Ocho. This recipe is important to me because I grew up watching the show with my family. My mom made the sandwiches to show me how it was made in the show and how it tastes. Now, the sandwich reminds me of the characters in the show that are still alive, most of the actors have died. It reminds me of when the main character Chavo would eat the sandwich. I make this recipe for myself when I am alone. If my family is around, I make enough for all of us, and extra just in case or to finish off some ingredients. The more I make this recipe, the more curious I become about what I can add to the recipe like other vegetables or sauces and other ingredients.
INGREDIENTS
(Serves 1 person)
• 1 piece of bolillo
• 1 spoon mayonnaise
• 4 slices of ham
• 2 leaves of lettuce
• 3 slices of tomato
• 4 slices of avocado
Optional: Adding 2 pieces of any cheese of your choice. Optional: Adding 4 slices of jalapenos or whole jalapeno on the side.
RECIPE
1. First you have to prepare the ingredients by slicing the tomatoes and jalapenos into thin circles and slice the avocados into a “U” shape.
2. You have the option to toast your bolio if you want it to be crispy and warm, after you choose to toast or leave it, you first slice the bolio in half.
3. Next, you spread the mayonnaise onto one or both slices of bolio to your liking.
4. Once applied, you add the 4 slices of ham and add the cheese on top if you choose to add cheese.
5. Then have either 1 or 2 leaves of lettuce to add on the ham.
6. After that you can add all the tomato, jalapenos, and avocados you want onto the sandwich.
7. Finally, you can put everything together and enjoy your sandwich.
Vegan Enchiladas
Kariya R.
My family has been making enchiladas since I could remember. The first member of my family that I could remember making them was my mom. I asked her if I could be in the kitchen while she cooked. I knew that these special enchiladas were being made this day for a birthday coming up in the family. They are only made when there is a holiday, birthday, or cookout, which is when the family gets together and make one of their favorite meals. You know when enchiladas are being made when you smell the aroma of the spices, garlic, sauce, and the frying sounds of the meats and tortilla. One thing that is very important to my mom while she is cooking is cleaning after yourself. When you make big portions of food for a big group of people, you should always clean after yourself so you can have more space when you need it. After the enchiladas were done, they were served with a side of Spanish red rice and a small side salad. When everyone is eating and it suddenly gets very quiet, you know the food is good. Normally, if you wanted to make this recipe, you would have to use meat. However, I do not eat meat any more, so my sister helped me transform this meal into my liking, by teaching me how to make the enchiladas vegan. It’s very easy to make as I only make a small portion for myself.
1. First cook the vegan meat with the following seasonings: garlic powder, pepper, lemon pepper, and seasoning salt.
2. Then begin cooking the tortilla only until they’re soft.
3. Dip the tortillas into the enchilada green sauce.
4. Then you’re going to layer the tortilla, meat cheese, then repeat until you reach the top of the pan. Then put in the oven at 200 degrees for 30 min or until the cheese on top is golden brown.
Pollo Brings Me Back Chicken recipes for the chicken lover
Black Soup
Briana A.
Cooking Black soup is a traditional Ghanaian dish made with roasted corn, palm nut or oil and various spices. It’s a flavorful and hearty soup that is popular in Ghanaian cuisine. It reminds me of when my mom would make it for me when I asked her to. Around Christmas time when my family that came down from Chicago and Las Vegas would come, my grandma would make Black Soup for us. During this time we would sit down and eat as a family, be a happy family and laugh together. We cook it on Sundays and holidays. My mom doesn’t only cook it for me, she cooks it for me and my sisters. I don’t know how to cook this food, but I would love to learn how to make it for my family. When I imagine myself making the soup it would taste good when I make it. When I smell the food and it floods my senses it smells really good and makes me want to go for seconds. It does evoke a special feeling in me, because eating our soup and enjoying our time as a family makes me happy.
INGREDIENTS
• 1/4 cup black recado
• 1 chicken cut into parts
• 2 tbsp cilantro chopped
• 2 tomatoes diced
• 2 tbsps Malher chicken bouillon
• 3 potatoes in cubes
• 3-4 fresh tomatoes
• 1/2 onion sliced
• 3 garlic cloves mashed
• Salt and pepper
• 6 boiled eggs
• 3-4 Lb stewing chicken
• 2 lbs ground meat
• 8 hardboiled eggs
• 2 raw eggs
• 1 square black recardo
• 2-3 epazote leaves crumbled
• 2 tsp oregano leaves crushed
• 1 tsp salt
• ½ tsp black pepper
• 1 medium onion sliced
• 2-3 plugs garlic crushed
RECIPE
1. Clean and season chicken. Set aside
2. Cut up onions and crush garlic.
3. Heat the frying pan and add 1 tsp fat.
4. Season ground steak with onions, garlic, oregano leaves and epazote leaves. Place meat mixture in frying pan.
5. Fry until well done. Turning frequently.
6. Remove from heat and add raw eggs. Mix well.
7. Stuff seasoned chicken with ground meat. Putting in a whole egg after each portion of ground meat is inserted. Continue until all ground meat and eggs are used up. Sew up chicken.
8. Boil chicken in sufficient water to cover up chicken.
9. Add black recardo to 1 cup water. Mix to soften. This gives the color.
10. Turn chicken frequently to cook properly.
11. Chicken can be removed from liquid and browned in the oven (served with liquid from pot). Serve with corn tortillas.
Chicken Alfredo Pasta
Diego E.A.
After a long and tiring day of school on a Wednesday, I had afterschool choir practice that went on until 5 PM. By that time, my stomach was already in desperate need of some food after not eating for a while. After choir practice was over, I speed-walked my way to the bus stop so I could get home as soon as possible. As I made my way to the bus, my stomach was growling as I’m savoring whatever it is my grandma made for me. Once I arrived at home, I headed straight to the kitchen and to my surprise I saw a new dish that my grandma made…it was chicken alfredo pasta. I grabbed a plate of it and headed for the kitchen with my dog sitting on the Grandma Chair, waiting for me to bring the food to the silent dining table. I took the first bite of the hot and creamy pasta and it sent me to another world. I was so mesmerized by the taste of the pasta that I couldn’t even hear the whines of my dog. It was so delicious that I ate the whole plate and grabbed another plate, which I rarely ever do, to satisfy my stomach. This was my first time trying alfredo pasta sauce and it changed my view on food as someone who used to be picky with food. My grandma asked me how the dish was and I told her, “it was astonishing.”
INGREDIENTS
• 2x16 oz of Ragu Classic alfredo pasta sauce, made with real cheese
• 16 oz Barilla penne
• 1 tbsps of unsalted butter
• 1 pound of chicken breasts
• ½ tsp of salt
RECIPE
Should be enough for 4-6 servings
1. Prepare the chicken by melting the butter on a pan with the heat at medium-high. After that, put the chicken on the pan and season it with salt. Once chicken is cooked place it aside.
2. Put a pot of water to boil it and add water.
3. Add the pasta to the water and leave it there for about 8-10 minutes.
4. As the pasta is cooking, heat up your alfredo sauce in a separate pan.
5. Use a colander to drain the water once the pasta is done.
6. Add the cooked pasta and the chicken to the pan with the pasta sauce and evenly spread the sauce.
7. Let the pasta simmer with the sauce so the flavors can blend for a few minutes.
8. Once a few minutes are done, remove the pasta from the heat and it is ready to serve.
Chicken In Tomato Sauce With Rice
Anabel L.
When I think about this food, I am transported to my childhood and memories come to my mind of when my grandmother prepared this delicious food for me. Whenever I asked her for this food she did not hesitate for a second to prepare it. I was the happiest because she pampered me by making the dish. The smell of fried chicken and that delicious smell of rice made me even hungrier and the best of all was that we could all enjoy it together as a family. It is a very easy recipe to prepare since it does not have many ingredients.
INGREDIENTS
• 2 lb chicken breast
• 6 tomatoes
• 1 onions
• 2 cups the water
• ½ spoon the salt
• 2 cups of rice
• 2 tomatoes
• Half an onion
• Half a tbsp of chicken broth
• 2 cups of water
RECIPE
1. First put the chicken to fry.
2. Then chop up the tomatoes and onions to make the sauce.
3. Next, put the tomatoes and the onions in the blender to crush them with a cup of water.
4. Finally, add the sauce to the chicken with a little salt and let it boil for about 10 minutes.
5. Cut the tomato and onion, fry and then add the rice and then add water, a pinch of salt and a little chicken broth, cover and leave for about 15 minutes until ready.
Coq au Vin
Dallas S.
In Julius Caesar’s account of his conquest of Gaul, he mentions a dish made with fowl marinated in wine. However, the modern version of Coq au Vin we know today became popular in the Burgundy region of France during the 16th century. My sister brought it back from France when she was on vacation back in 2019. She brought it over in a freezer bag when we were living in the Bronx. Now, my sister knows how to cook it. When she makes it, it makes me reminisce about the first time I had it and the aroma whenever it’s cooking is immaculate. What I like about the dish is that it marinates the chicken in red wine.
INGREDIENTS
• 1 whole chicken, cut out into 8 pieces (or 8 chicken thighs)
• Salt and pepper
• 2 tbsps of olive oil
• 4 slices of diced bacon
• 1 large onion chopped
• 2 carrots, sliced
• 3 cloves garlic, minced
• 2 tbsps flour
• 2 cups red wine (preferably Burgundy)
• 1 cup chicken stock
• 2 tbsps tomato paste
• 1 bay leaf
• 1 tsp fresh thyme (or ½ tsp dried thyme)
• 10-12 small peeled pearl onions
• 10-12 sliced button mushrooms
• 2 tbsps butter
• Chopped Fresh parsley (for garnish)
RECIPE
1. Season the chicken pieces with salt and pepper.
2. In a large, heavy-bottomed pot or Dutch oven, heat the olive oil over medium-high heat.
3. Add the chicken pieces and brown on all sides. Remove and set aside.
4. In the same pot, add the diced bacon and cook until crisp.
5. Remove with a slotted spoon and set aside. Add the chopped onion and carrots to the pot and cook until softened, about 5 minutes.
6. Add the garlic and cook for another minute.
7. Sprinkle the flour over the vegetables and stir well to coat. Gradually add the red wine, stirring constantly to avoid lumps. Add the chicken stock, tomato paste, bay leaf, and thyme. Stir to combine.
8. Return the browned chicken pieces and the bacon to the pot. Bring to a boli, then reduce the heat to low and cover. Simmer for about 1.5 hours, until the chicken is tender.
9. In a separate skillet, melt the butter over medium heat. Add the pearl onions and mushrooms, and cook until browned and tender. Add the cooked mushrooms and onions to the pot during the last 30 minutes of cooking.
10. Remove the bay leaf from the pot Adjust seasoning with salt and pepper if needed. Garnish with chopped fresh parsley before serving. Serve the Con au Vin with crusty French bread, mashed potatoes, or egg noodles. And Enjoy your meal!
Father’s Chicken Recipe
Elijah D.
My father has a sort of tradition he does at least once a month. He makes this certain type of dish that involves chicken, carrots, potatoes, mushrooms and onions. I don’t know where he got this from but I believe that it just slipped his mind one day and he just thought about making it. I don’t believe that the recipe or dish is that important or that much of an impact on our family, but it’s still some pretty good food. So far all I know is that my family or my dad is the only person or this is the only place that cooks this dish and never fails to make someone that’s new to the dish to like it or love it right after.
INGREDIENTS
• Seasoning salt
• Pepper
• Garlic powder
• Olive oil
• 10 chicken legs, washed and dried
• Potatoes, carrots, mushrooms and onions
RECIPE
1. Preheat the oven to 400 degrees F.
2. Season the chicken, potatoes, carrots, mushroom, and onions with seasoning salt, pepper, garlic powder.
3. Once the oven is ready, put all the ingredients in an oven safe baking sheet lined with aluminum foil. Make two rows of the chicken legs so that the exposed bone part of the legs are facing each other. Lay the vegetables along the middle.
4. Put a timer on for 40 minutes.
5. When the timer rings, cut off the oven and leave it shot until the oven cools down.
6. Serve.
Flautas de Pollo y Papa
Heber L.
Flautas de pollo y papa reminds me of the time I lived in Mexico when I was a child. My mother would send me to the store to buy chicken and potatoes, along with the other ingredients. It always excited me when she prepared it because it is my favorite food. Now that I live in California, I have to prepare this for myself. My dad works and I don’t want to give him more work to make it for me. It is not the same flavor as my mother’s, but mine is passable. Whenever I prepare this recipe, I remember those beautiful, unforgettable moments with my mom.
INGREDIENTS
Recipe is for 2 people, double the ingredients for more people.
• 1 pound chicken breast
• 3 potatoes
• 10 Tortilla
• ¼ head of chopped lettuce
• Lala’s media crema
• 3 serrano chiles
• 3 tomatoes
• 1 clove of garlic
• ¼ cup cotija cheese
RECIPE
1. In a pot of room temperature water, add the chicken breast and a pinch of salt, then allow the water to come to a boil, for about 40 minutes. You can check the chicken breast with a fork, piercing the meat, if the meat comes off it is because it is cooked.
2. After it is cooked, shred the chicken breast.
3. In a different pot, boil 3 large potatoes, add salt to taste. Once the potato is tender, remove it from the water and let cool for 2 minutes.
4. In a bowl, combine the potato with the chicken meat and stir.
5. Take the tortillas and put the potato and chicken mixture inside and roll up, pierce the flautas with thin toothpicks to hold them and prevent them from losing their long flauta shape.
6. Put oil in a frying pan, enough to cover half of the flautas.
7. Fry the flautas on both sides until golden.
8. For the sauce: roast 3 serrano chiles. Boil 3 tomatoes, let the tomatoes cool for 2 minutes. In a blender, combine the serrano chiles and tomatoes with a clove of garlic. Salt to taste. Blend until everything turns into a sauce.
Put a flat plate, put 4 to 5 flautas, add the chopped lettuce, put sour cream on top to taste. My family uses Lala’s media crema, but your preferred sour cream should be fine. Add cotija cheese to taste. Then add the sauce.
Panes Rellenos
Jose A.L.
This dish is part of my culture. My family is from La Libertad, El Salvador. We make panes rellenos for birthdays or also in December for Christmas. It brings back good memories because my sister would make it when I was in my country and they make it here too. During the holidays, we do it with our family and we celebrate. I always remember the time when I ate panes rellenos. I love it very much. The sauce is good, but I love the chicken also. What I love is that they taste the same all the time. I know they’ll always be delicious compared to getting it from anywhere else, so that’s why I enjoy them.
INGREDIENTS
• 8 pieces of French bread
• 1 chicken
• 7 tomatoes
• 1 small jar of mayonnaise
• 1 small jar of mustard
• 1 bunch of watercress
• 3 eggs
• 1 package of radishes
• 2 cucumbers
• 1 cabbage
• Chicken cosomé
• Salt and pepper to taste
• 1 large cooking onion
• Green chili to taste
RECIPE
Makes 8 servings
1. Stew the chicken with salt, mustard, chicken broth and your favorite spices for seasoning.
2. Once cooked and not so hot, crumble.
3. Boil the eggs and cut them into slices.
4. For the tomato sauce, boil the tomatoes.
5. Blend them with the tomatoes, onion and green chili until smooth.
6. Place the sauce in a pot, add the shredded chicken and let it boil.
Pollo Catracho
Astrid F.
This recipe is important to me, not because it is where I am from, Honduras, but because this food brought my family together. My family doesn’t care if we make this food three times for three different birthdays in a row. My family likes this recipe because it reminds them of when they were in Honduras, a country where they had to forcefully leave their family and friends.
This food might be quite simple but in my house and in my culture it is something much more than that. When I was little it was just me and my mom, and she didn’t have money to even make me this dish. She could only afford to make me tajadas. As I grew older I got to appreciate food more and those who are providing me with it. Growing up I always wanted to be able to eat on the table with my family and when I do I’m always eating pollo con tajadas.
INGREDIENTS
• ½ pound of chicken thighs per person
• 1 limon (to clean the chicken)
• Chicken thighs
• ½ cup of mustard
• 1 cup Coke
• ½ cup of mayonesa
• A pinch pepper Hondureño
• ⅓ cup Balboa sour orange/naranja agria
• 2 cups of flour
• 1/2 tsp of pepper
• Pinch of salt
• Oil
Tajadas:
• ¾ cup of oil
• 5 green plantains
• Pinch of salt
Sauce
• 1 cup of mayonesa/mayonnaise
• 1 cup of ketchup
• ½ cup of milk
RECIPE
Makes 8 servings
1. To clean the chicken, you have to get a bowl and leave the chicken in the limón juice for 30 minutes.
2. After 30 minutes, put it in a different bowl and start adding the ingredients mustard, coke, mayonnaise, pepper, and Balboa sour orange, and leave it overnight.
3. Once the chicken has marinated overnight, you’re ready to fry. Add flour with pepper and salt to a separate bowl to dredge the chicken.
4. Then, in a frying pan, add enough oil to cover half of the chicken to fry. When the oil is at 350 degrees, cook each piece of the chicken for 20 minutes, until each piece is brown and crunchy.
5. Tajadas should be peeled and cut in a 90 degree angle then add the salt and then add the tajadas in a different frying pan with the oil heated up at 350 degrees until is fully cooked.
6. The sauce should be made in a bowl with mayonesa, ketchup and milk mixed together until a liquid consistency.
Pan con Pollo
Melody U.
Pan con Pollo is a star Salvadorian plate. A great mixture of veggies, and chicken with bread in order to show the salvadorian taste. The key to the pan con pollo is the sauce the chicken is drowned in. The sauce makes the veggies and bread just wet enough to hold its structure, and makes each bite full of every flavor.
Personally, Pan con Pollo brings me back to every birthday morning, coming down the stairs following the smell of the sauce being boiled to its point. My mother being loud in the kitchen on the phone, ordering the bolillos while boiling the chicken, and asando the tomatoes. My sisters cutting the veggies, and arguing over how many bolillos will fill the whole family up. I was always filled with warm feelings and thoughts, knowing the day was about me, and my mother remembered my favorite meal. That comfort feeling knowing that day next year, I would be woken up by the same smells and noises. ‘Til it stopped.
INGREDIENTS
(Serves 2 people, 2 panes each)
• 1 pound of chicken
• 6 tomatoes
• 2 carrots
• 2 cucumbers
• 6 radishes
• 2 beets
• 1 cabbage
• 2 onions
• 1 red pepper
• 1 tsp of salt
• 1 tsp pepper
• 4 Basil leaves
• 1 hand of cilantro
• 4 rolls
RECIPE
1. Clean, chop and pat dry the chicken.
2. Set aside all veggies (beets, tomatoes, cucumbers,radish, cabbage, carrots).
3. Slice veggies, but chop cabbage and carrots together.
4. Mix the carrots and cabbage together, add mustard, mayo and pepper to make coleslaw topping.
5. The rest of the veggies are sliced and stored.
6. Boil tomatoes, onions, and pepper, add in all spices than blend.
7. Mix chicken with sauce over the fire till cooked thoroughly in a large pot. About 35 minutes.
8. Shred the chicken.
9. Grab the bread roll, slice open, stuff with shredded chicken, and coleslaw than top with sliced veggies.
10. Enjoy! :)
Pollo Empanizado
Allyson S.
Pollo empanizado with rice and coditos holds a lot of personal meaning to me because it reminds me of all the times my mother would cook me this. When I cook this dish, I can see my mother cooking the rice while yelling at me to help warm up the tortillas. I can almost smell the chicken cooking and the smell of the rice in the pot. I also feel a strong rush of happiness to be cooking this, at the same time I feel sad. It reminds me that at some point my mother will not be around to help me cook it anymore. This is a big reason why I decided to learn how to make this dish. I enjoy cooking it for friends and family members so they can feel that joy too. I also want other people to learn the recipe so it can stay alive and be enjoyed by many.
INGREDIENTS
• 2 pounds of chicken tenders or large boneless chicken breasts cut into tender-sized strips
• 2 eggs beaten with 2 tbsps of water for egg wash
• 1 cup panko bread crumbs
• 2 cups of seasoned panko bread crumbs
• 2 tbsps of sazón
• 4 tbsps of avocado oil
• 1 tsp of salt
• 1 cup white rice
• 2 cups water
• ½ lb (2.27 g) uncooked elbow macaroni
• Water (To cook the pasta)
• 1½ cup (12 oz) pineapple, diced (I use about 8 slices from a can and then chop them)
• 2 celery sticks, finely chopped
• 1 cup (8 oz/227 g) cooked ham, diced
• Salt to taste
• ½ cup (4 oz/120 g) mayonnaise
• ½ cup (4 oz/120 ml) heavy cream
RECIPE
1. Mix all the breadcrumbs together in a food processor.
2. Place the chicken on a plate. One shallow baking dish should have the egg. There should be breadcrumbs in the second baking dish. The last baking dish must be empty so you can put the finished chicken in.
3. Season the chicken with salt and pepper, and make sure both sides of the chicken are thoroughly seasoned.
4. Dip the chicken in the egg mixture, then dip in breadcrumbs and set aside on a plate.
5. Brush each chicken piece with oil on both sides. Preheat a pressure cooker with nothing on for 5 minutes at 375 degrees. Then place the chicken in the air fryer basket at 375 degrees for 12 minutes.
6. The chicken should be done!
7. For the rice, melt butter in a medium saucepan over medium heat. Add rice and stir to coat. Cook until rice grains begin to turn opaque, 1 to 2 minutes; do not brown. Add water and salt.
8. Bring to a boil; reduce heat to low. Cover and let simmer for 15 minutes. Do not lift the lid.
9. Remove from heat and let stand, covered, for 5 minutes. Fluff with a fork.
10. You are done.
Taquitos Con Pollo
Jeffrey O.
As soon as I taste the different flavors of the toppings and flavorful chicken of the taquitos, it reminds me of a simpler time in my life when I was younger. I would leave in the afternoon as soon as I got home from school, coming home only to change clothes, and spend my whole time with the local neighborhood kids getting into all types of trouble and playing all the games that would keep our simple minds entertained. As soon as the street lights turned on, I made my way back to my house. As soon as I walked in the door, I was greeted by a warm house filled with a strong smell of spice from the sauce my mom would make for the taquitos. I would take a seat on the table and my mom would serve me my plate with 5 taquitos and in that first bite I would taste so many different flavors and textures that combined together made a perfect meal. Soft flavorful chicken in the middle with a crunchy tortilla topped with rich cream and a perfectly spicy and fresh sauce. With the lettuce added on top and topped with cotija or parmesan made for a perfect meal.
INGREDIENTS
Yields around 25 taquitos
• 1 chicken breast
• 4 tomatoes
• 1 green pepper
• ¼ of an onion
• 1 serrano pepper
• 1 Head of lettuce
• Sour cream
• 1 avocado
• Cotija cheese
• 1 pack of corn tortillas
RECIPE
1. To start the dish, first put to boil a pot of water then grab your 2 chicken breasts and you’re going to want to wash them by putting them into a bowl of cold water add salt and squeeze a lemon let the chicken sit until your water starts to boil then place the chicken in the water and salt the water and cook for around 30 minutes.
2. While the chicken is cooking, you’re going to want to grill your vegetables so chop off the stems and wash your vegetables and grill your tomatoes, red bell pepper, onion and garlic. Odd oil and salt to the vegetables. Then add your grilled vegetables in the blender, add salt, pepper to taste. Then, prepare your toppings by chopping lettuce and cutting an avocado.
3. Once your chicken is cooked, remove from the hot water and shred your chicken. The easiest way to do it for me is get 2 forks while it’s hot and just poke and rip apart the chicken. Heat up a pan of oil on low heat and one pan for your tortillas. Heat your tortillas till slightly hot and pliable then place chicken on the side of the tortilla and tuck the chicken with the tortilla going down and roll them up. Place the taquito opening side down and fry till golden brown and flip occasionally to get all sides fried.
4. Assemble your taquitos by topping them with sauce, chopped lettuce, crema, grated cheese and avocado then enjoy.
Tostadas de Tinga
Yared O.
As I walk in the kitchen, I get a whiff of an aroma of a nice spicy, flavorful smell. My mom is in the kitchen stirring the sauce as she asks me to shred the boiled chicken. The kitchen is filled with a light smog making the temperature feel hot. As you breathe, you feel that nice little kick in the back of your throat. Growing up, I’ve always loved my moms cooking. My mother being from Mexico, I grew up with a lot of Mexican dishes. Tostadas de Tinga is something quick and easy for a single mother with multiple kids. This dish made for many and ensured that every mouth was fed. A lot of Mexican dishes are very flavorful, with a lot of seasoning, ensuring that a little spice is always added. This dish gives me a feeling of serotonin because it’s one of my favorites. It’s a mix of soft and crunchy. The chicken is covered in the sauce on top of a crunchy tostada (hardened tortilla) topped with nice cold, crunchy shredded lettuce and drizzled crema.
INGREDIENTS
• 2 whole chicken breasts
• 8 tomatoes
• ¼ onion, ½ medium onion
• Two garlic cloves
• 1 small chile chipotle en adobo
• 3 cups of chicken broth
• Chicken bouillon seasoning
• Salt
• pepper To plate:
• Half lettuce
• Crema Mexicana
• Queso fresco
• tostadas
RECIPE
1. In a pot, fill up enough water to cover chicken breasts and boil until cooked.
2. Onced cooked shred chicken and set aside.
3. In a blender blend your 8 tomatoes, ¼ onion, 2 garlic cloves, can of chipotle, and the 3 cups of chicken stock used from the boiled chicken.
4. In a pan, heat up ½ cup of onion and let it become transparent. Then add shredded chicken and salsa made previously in the blender. When mixed, add your chicken bouillon seasoning, salt, and pepper to your liking. And any other seasoning you prefer.
5. When done your outcome should include a nice mixture of chicken submerged in a spicy flavorful sauce. If your spice tolerance is low, you can add less chipotle sauce to your recipe.
6. To a plate, add chicken with sauce on top of a tostada, add your shredded lettuce, drizzle your crema mexicana, and to top off sprinkle some queso fresco.
7. Enjoy!
A la Diabla
Pedro O.
When I cook a la Diabla, I see rich red sauce, vibrant spices, and intense flavors coming together to create a fiery bold, deep color in the dish.
When I cook a la Diabla, I smell a tantalizing mix of spicy chilies, garlic, onions and various aromatic spices. The dish is known for its bold and fiery aroma that fills the kitchen as it cooks.
I sometimes feel the heat from the spicy chilies and the warmth of the dish as it simmers. I sometimes feel a sense of excitement and anticipation as I prepare a flavorful and intense meal.
When I cook a la Diabla I hear the sizzle of ingredients in the pan, the bubbling of the sauce as it simmers, and the spices releasing their flavors.
My family and I like to cook a la Diabla because we enjoy intense and spicy flavors in our food. The “Diabla” style usually involves a spicy and flavorful dish that can awaken the palate and offer an exciting culinary experience. In my family I cook it very often, since it is an excellent option for lovers of food with a spicy touch.
INGREDIENTS
• 1 lb large shrimp, peeled and de-veined
• 2 tbsps vegetable oil
• 1 small onion, finely chopped
• 2-3 garlic cloves, minced
• 1 cup tomato puree
• ½ cup chicken or vegetable broth
• 1-2 chipotle peppers in adobo sauce, chopped adjust to taste
• 1 tsp dried oregano
• Salt and pepper to taste
• Lime wedges and chopped cilantro for garnish
RECIPE
1. Heat oil in a large skillet over medium heat. Add onions and garlic, saute until softened.
2. Add the tomato puree, chipotle peppers, oregano, salt and pepper. Cook for a few minutes until flavors combine.
3. Pour in the broth and bring to a simmer.
4. Add the shrimp to the skillet and cook until they turn pink and are cooked through, about 4-5 minutes.
5. Serve the camarones a la diabla hot, garnished with chopped cilantro, and lime wedges.
6. Adjust the spiciness of the dish by adding more or fewer chipotle peppers. Serve with rice, beans, or warm tortillas for a delicious meal.
Bistek a la Mexicana
Melanie R.
The recipe I chose is called “Bistec a la Mexicana.” It is a Mexican dish. When I think about this recipe, I feel something special. My mom loves to make this dish and it is special to me because she makes it with love. It also reminds me of eating this while growing up.
INGREDIENTS
• Bistek de res
• Onion
• Tomatoes
• Garlic
• Bay leaf
• Potatoes
RECIPE
1. Season the meat with salt and pepper.
2. Heat a frying pan with oil, and after it heats up, add the meat and close it with the top, and let it cook.
3. Add the potatoes, and after they are cooked, add garlic and onion and let them cook for a few minutes.
4. Add the tomato along with the other ingredients in the pan. Add a little bit of water so it can have juice.
5. Add bay leaf and chicken seasoning and let it cook for 15 minutes. After that, it is ready to serve.
Birria
Britsy H.
Birria is special to me because it’s the last meal my family had with my brother before he went to jail. I remember being eight years old and overhearing my mother get a call from my brother from jail. At the time we didn’t know that the tacos de Birria my mother had made earlier that afternoon would be his last homemade family meal we had together. The recipe calls for birria, cheese, tortillas, chillies, and oregano. Birria being the main ingredient of the dish and traditionally served with consommé broth along with a mixture of cilantro and white onion. The tacos have both a juicy and crunchy texture. When the cheese melts into the tender meat it adds a bursting flavor. When dipping the crunchy tortilla that wraps the birria and cheese together into the consume it enhances all the flavors and really ties everything together.
INGREDIENTS
• Oil
• Bay leaves
• Tomatoes
• Onion
• Garlic
• Salt and pepper
• Beef chuck roast
RECIPE
1. Bring meat to room temperature and then season with salt.
2. In a large pot place meat over medium-high heat.
3. Add the chiles, tomatoes, onions, spices and garlic to a pot for about 20 minutes.
4. Drain liquid from the pot and then transfer chiles, tomatoes, onions, spices and garlic to a blender with a cup or two of beef broth or water. Set meat aside.
5. Add the meat back to the large pot and pour the sauce over it. Pour a cup of broth in the blender.
6. Shred the meat with a fork.
7. Add some of the sauce to a bowl and add a little beef broth.
8. Mix up some onion and cilantro.
9. Add a spoonful of the cilantro and onion mixture to the consommé and add a squeeze of lime.
10. Dip a tortilla into the sauce, and add it to a non-stick skillet, set over medium-high heat.
11. Flip over and then add a small handful of shredded meat and a handful of cheese
12. Shape it into a quesadilla/taco. And flip it over so it can get crispy and melty on the other side.
Ceviche
Joseph G.
Ceviche has a heavy meaning to me, it’s always a favorite in my family, and I always love eating it. It reminds me of my grandpa because he’s the one who got me into it. The juices in Ceviche are very good. I cook it for my family and friends, and sometimes just for me, even if that’s selfish. I go to the market to buy shrimp, so I can make the Ceviche on a type of occasion when we have a get together or a carne asada outside. While I make Ceviche, I smell lemon and all the veggies that are cut up and that go in the dish. Whenever I make Ceviche, I feel like I earned something, maybe the way to someone’s heart..
INGREDIENTS
Serves 4-8 people
• 1 pound jumbo shrimp, peeled and deveined
• 5 large lemons, juiced, or as needed
• 2 white onions, finely chopped
• 1 large tomato, seeded and chopped
• 1 cucumber, peeled and finely chopped
• 1 bunch radishes, finely diced
• 2 cloves fresh garlic, minced
• 3 fresh jalapeno peppers, seeded and minced
• ¼ cup chopped fresh cilantro
• Tortilla chips
RECIPE
1. Peel and devein one pound of shrimp.
2. Set a bowl of ice water next to your stove. Fill a medium saucepan with water and bring it to a boil. Add the shrimp and cook until just pink, for about 1 minute. Use a slotted spoon to remove the shrimp and immediately dunk it into the ice water. This will stop the residual heat from overcooking the shrimp. Let it sit for about 5 minutes, then drain well.
3. Marinate the shrimp in citrus: Chop the shrimp into small pieces and add to a medium glass bowl (or non-reactive bowl) bowl. Add 1 cup lime juice, ½ cup lemon juice, and 2 tbsps of orange juice. Stir in 2 finely chopped shallots. Make sure the shrimp is covered well with the citrus juice. If your shrimp isn’t well covered, transfer to a smaller bowl or add more juice. Cover the bowl and set in the fridge for 30 minutes to 1 hour.
4. Prep the veggies: Chop 1 jalapeno (remove its seeds if you don’t like spicy). Slice 2-3 Roma tomatoes in half and squeeze out their seeds to discard. Chop into small pieces. Slice an avocado in half and remove its pit. Chop the flesh into small pieces. Finely chop about ½ bunch of cilantro leaves (a few tender stems are okay) to make ⅓ cup.
5. Mix the ceviche: Gently mix in the jalapeno, tomatoes, avocado, and cilantro. If there’s too much juice for your liking, pour some out into your sink.
Chow Mein
Luis M.
This recipe comes from my family because it is a custom made chow mein. Since I was little I always liked to know how to cook the chow mein, so I could control the flavor, the texture, and how soft it comes out with vegetables. My family would make it too simple and I wanted to add my touches to make it delicious. I make it very often, as often as every couple weeks. I like it because you can put as many meats in it as you want, even three meats if you want, and customize it to your taste. Overall, you have to find a balance with the ingredients, so that the flavor isn’t too simple or too salty.
INGREDIENTS
• 3 pounds of chicken
• 5 pounds of beef
• 4 pounds of shrimp
• 3 carrots
• 2 chayote
• 3 celery
• 2 onions
• 3 sweet chilies
• 1 soy sauce
• 1 Worcestershire sauce
• ½ consume cube
• ½ salt
• ½ onion salt
• ½ garlic salt
RECIPE
1. First, cook the chow mein noodles for about 10 minutes.
2. In a separate pan, cook your desired meats. Once everything is done, you’ll combine them.
3. For chicken, I cook it for 30 minutes. The beef is 35 minutes, and the shrimp 25 minutes.
4. When they are cooked, the chicken is shredded and the meat gets chopped into small pieces. The shrimp goes in whole. If you can peel them, it’s better, but you can add them unpeeled if you want.
5. Then we cut the vegetables into strips. We cook the vegetables a little bit in a pan, so that it gains flavor.
6. When the vegetables and the meats are ready, mix them into the chow mein. Finally, add the Worcestershire and stir until mixed together.
Curry Meat Pie
Cejai M.
Curry meat pie or jerk chicken meat pies bring back memories of being back home in Belize. It also brings back memories of my grandma because she used to make food to sell and I used to always sit in the kitchen to observe what she was doing and I remember the smell of her freshly cooked food and freshly baked goods. I don’t remember much more from that experience outside of that because she died when I was four. She did leave me a cookbook which I still use to this day. .
INGREDIENTS
• 2lb ground beef
• 1 chopped onion
• 1 chopped sweet pepper
• 1 handful of chopped cilantro
• 1 tsp Lawry’s seasoned salt
• 1 tbsp Maggi consommé powder
• 3 tbsp Maizena cornstarch flour
• 3 cups of water
• 3 small red recado balls
• 2 tsp of curry powder or 1 ½ tsp jerk seasoning
RECIPE
1. Preheat oven to 350 F.
2. In a large frying skillet, brown the meat in a little oil then add the onion and sweet pepper, habanero, seasoning salt, curry powder, and cilantro and saute for 5 minutes.
3. Mix the water, and red recado until well blended then add Maggie consommé and let it simmer gently for 30 minutes
4. Then mix in three tbsps of corn starch like Maizena and stir the meat mixture till it starts to simmer and reduce to make it thickish.
5. If it is too thick add more water.
6. The mixture should be thick but still runny. If you want spicier add another habanero.
7. Allow cooling a little before placing in muffin tins lined with crust.
8. Turn off the heat, and allow it to cool.
9. Dough: Add shortening and most of the water. Mix and blend by hand, rubbing fingers together. Press between fingers until the dough forms tiny bread crumbs. The final dough should barely hold together and have a breadcrumb-like texture.
10. Add about 1 cup of cold water a little bit at a time while mixing the dough and water with your hands. A soft dough will form.
11. Gather the dough to form a small ball but do not knead the dough. If you knead this dough it will not be flaky.
12. With a rolling pin, roll the dough out and use a water glass to cut circles for the bottom and top crust.
13. Line each muffin tin with the dough, then add filling ¾ full then add the top crust.
14. For the top crust roll the dough with a wooden rolling pin, a little thinner then cut again with glass to make circles and brush with water so you can stick the top and bottom crust together firmly.
15. Assembling the meat pies: Fill each dough crust with cooked ground beef mixture leaving some room. Don’t overfill the pies as they will bubble and overflow when baking.
16. Place covers on each meat pie.
17. Make a little hole in the middle of the top crust with a toothpick so steam can escape when baking.
18. Place in the oven at 400 degrees for 15 to 20 minutes, or until the dough turns golden brown and the pies are hot!
Fried Tilapia and Rice
Luis Z.M.
Fried tilapia and rice has been a very special dish to me ever since I was a little kid. I remember coming home from elementary or middle school, and there would be days where I wasn’t feeling it all. I would then come home to a very rich and flavorful smell of my mom cooking me fried tilapia with some rice. Now as a kid, for some reason, I believed fish was very expensive, so I thought the dish was extra special and made with so much love. In my head, my mom bought an expensive fish just for me and cooked it just for me. I would also say that this dish is very delicious. I like to grab a tortilla and a piece of fried tilapia with some rice and take a bite. Now that I am a bit older I like to have some salad with it, but when I was a kid I didn’t enjoy the salad. This dish without the salad reminds me a lot of my childhood.
INGREDIENTS
• 3-4 Frozen Tilapia Filets
• Seasoning (1 tbsp chicken bouillon, ¼ tbsp Goya’s adobo all purpose seasoning, and ¼ tbsp fish seasoning Chef Merito)
• 2 tbsp Chef Merito’s fish fry seasoned batter
• Canola oil
• 1-1 ½ cups of white rice
• 2 cups of water
• 1 whole onion
• 1 Tbsp Chef bouillon seasoning
RECIPE
1. You must first dethaw your frozen tilapia filets, once dethawed you must clean them with water.
2. After you finish washing them, you grab your three seasonings and add them to the tilapias with the recommended measuring. You don’t have to follow the measurements exactly, season to your taste.
3. After you’re done seasoning them, you must let them sit and marinate with the seasoning.
4. While it’s marinating you can get started on your rice. Cook the rice in a pan that’s deep enough to fill water, with 2 tbsp of canola oil. You then add a slice of onion and let it cook on the pan.
5. Get 1-½ cups of rice and add it to the pan. You then must add chicken bouillon seasoning to the rice and finally add your two cups of water. You then top your rice with a cover and let the rice cook.
6. After your rice is done cooking, you get your fish fry seasoned batter on a plate. You then grab your marinated tilapia filet and coat it with the seasoned batter. You must have another pan deep enough to deep fry your tilapia filets.
7. Once you have this pan’s surface filled with canola oil, you can now deep fry your tilapia filets until it is a perfectly, crispy, golden brown. You must flip it to its other side once one side is done, and then get ready to plate 1-2 tilapia filets with some rice on the side. You add a lime to the dish or any side you would like to add.
Garnachas
Kimberly G.
Garnachas remind me of my grandma, who died when I was twelve. She used to love garnachas, and now I do too, and they evoke special feelings and memories. One of my favorite special memories of my grandma is when she used to cook and talk about how much she loves garnachas, and how she used to share her food with everyone because that was her way of saying “I care about you.” My grandma was a wonderful person, always very kind, lovely and overall caring. She was just the type of person who cared about everyone. Grandma was just so special, and kind even sharing the food she made with those who didn’t have any money or family. This is why I like to cook garnachas to feel close to her, because she is no longer with me.
INGREDIENTS
• 1 pound of meat
• Finely chopped onion
• 3 tbsps of finely chopped fresh parsley
• 1 ½ cups of sunflower oil for frying
• 80 small tortillas one centimeter thick
• 200 grams of hard cheese (to decorate)
RECIPE
1. Cook 8 tomatoes in two cups of water in a pot, 1 chili pepper, half an onion and 4 cloves of garlic, 1 guaque pepper, and 1 raisin pepper.
2. To prepare the meat, cook the meat in the pressure cooker with bay leaf, thyme, onion, salt, and consommé.
3. To make the tortillas, add 3 cups of water, ½ pound of flour and mix until it gets soft. You need a griddle to heat up the tortillas.
Menudo
Aurora A.
Menudo always reminds me of my mom and how she would prepare the menudo ahead of time, the night before, and let it slowly cook overnight so that the flavors can combine with one another and the meat can get all the flavor from the broth. When I was younger my mom would cook menudo quite often, and I would sit at our dining table with my food after the whole family had their food in front of them. We would pray before eating. This is very special to me because the age gap between me and my eldest siblings is quite significant and this was one of those special bonding moments when we would eat together. This memory of eating menudo is very nostalgic and everytime I eat it I am reminded of how colorful and bright the flavors were, especially when I was younger.
I personally have never cooked menudo by myself, but I have helped my mom when she cooks it. In fact, most of my fondest memories are when I would watch my mom cook for me and my siblings. When my mom finished the menudo in the morning, I would just be waking up to the birds chirping and the sun shining brightly. I have a deep love for soups and stews and menudo is why. I love a good soup that has been seasoned and cooked with love. Especially in the summer. Something about the sun shining and eating a warm delicious meal that is filling and can warm you up on summer mornings after sleeping with a fan on all night, it brings good emotions and memories. Soups are a food that I will eat when I am sick or feeling down because it warms me up and gives me energy.
When cooking this meal with my mom, I can smell all the pungent and aromatic spices that flavor the broth. The fresh acidic lemons that my mom would make me pick from our tree in our front yard. As well as the extremely pungent and aromatic onions and cilantro that we would cut up when the menudo has finished cooking. I can hear the boiling pot in the kitchen as well as the knife chopping up all the additives/toppings. I can hear my brothers playing video games first thing in the morning. I can hear the music my mom would play when cooking and cleaning before we eat. I can hear
the laughter of my family and the joyous bliss my siblings and I had as kids.
INGREDIENTS
• 15 quarts of water
• 8 pounds of honeycomb tripe
• 5 pounds of regular beef tripe
• 2 pounds of quartered beef feet (patas)
• 2 large yellow onions
• 3 small heads of unpeeled garlic
• 16 peppercorns
• 2 bay leaves
• 5 tbsps of kosher salt
• 5 tsps of oregano
• 4 dried arbol chiles
• 10 dried guajillo chiles
• 1 onion
• 3 cloves of peeled garlic
• 3 tbsps of ground cumin
• 2 cans (6lbs 9oz) of dried white hominy and pureed chile
RECIPE
1. To a pot add 15 quarts of water, and set to low heat to heat up the pot of water.
2. Get 8 pounds of honeycomb tripe and 5 pounds of regular beef tripe, rinse both well: cut off the fat and cut into 1 inch squares, then add to the pot.
3. Get 2 pounds of quartered beef feet (patas); 2 large yellow onions and quarter them, 3 small heads of unpeeled garlic, 16 peppercorns, 2 bay leaves, 5 tbsps of kosher salt, 5 tsps of
4. Add them to the pot and bring it to a boil then reduce heat to a simmer. Allow the pot to simmer until the beef becomes tender (approximately 2 hrs), then remove unpeeled garlic.
Meanwhile as the broth simmer:
5. Get 4 dried arbol chiles and 10 dried guajillo chiles then remove the seeds & stem and toast on a skillet for about 30 secs or til fragrant.
6. Pour water into the pan till the chiles are all covered and simmer at low heat.
7. Add 1 onion & 3 cloves of peeled garlic.
8. Simmer for about 1 hr, then remove the chiles, onion, and garlic from the water and place into a blender along with 3 tbsps of ground cumin.
9. Add about a cup of the simmering broth into the blender and blend until smooth (add broth as necessary).
10. After blending, sieve the chile into a bowl to remove any seeds or skin, then place the bowl with the sauce into the fridge until it is time to add to the broth.
Back to the broth:
11. After the broth is done add 2 cans (6lbs, 9oz) of dried white hominy and pureed chile into the pot and stir till well mixed, allow to cook for 2 more hrs on a low simmer and season with more salt to taste.
Additives/Toppings:
1. Dried oregano
2. Chopped onion
3. Chopped cilantro
4. Sliced lemon
5. Corn tortillas
6. Chile flakes
Pupusas
Anonymous
Pupusas revueltas makes me reminisce about how crunchy and tasteful they are. My aunt makes this dish and they come out perfect, and I’ve always liked this Salvadorian dish even though I am Guatemalan. Pupusas revueltas are made out of tortillas filled with cheese, pork, and refried beans and that’s what makes it an interesting type of food to think about. The ingredients that crafts this delightful dish are so well made because of this, they are very popular. They also have pupusas de queso and pupusas de chicharrón. There’s more varieties of pupusas, but revueltas are the best one there is. I love them so much to the point I start thinking about getting some once a week due to how appetizing they are. When it comes to cooking this kind of recipe, I imagine how Salvadorians or any other hispanic person cooking this on a stove and seeing all the juiciness coming out when flipping it over. When I see my auntie cooking the pupusas I feel a scent that accentuates nostalgia to me and how when they are being finished, smell of crust of cheese. The smells flood into my senses when it’s being made at home or at a restaurant are very fragrant and rich. I especially imagine the melting cheese that makes me want to devour. I hear the hand moving and the stove it is on and it makes me delighted on why it’s gonna be worth the wait to eat pupusas revueltas.
INGREDIENTS
• Get corn flour masa/dough
• Get refried beans
• Get cheese
• Get beef/pork
RECIPE
1. Once everything is done, how do you create the pupusas.
2. Get aluminum foil (will be used after it’s done being made).
3. After all is combined put it on pan/stove and flip it until it is fully crispy and fresh.
4. Put on the aluminum foil if needed to or on plate.
5. You can eat it with a side like curtido.
Posole
David C.
Growing up, posole was one of my favorite warm Mexican dishes. My mom would make it year round, especially during the cold and winter seasons. It is a brothy soup with pork and hominy that can be accompanied with diced cabbage, a tomato salsa, radish, diced onion, a red chile salsa, and lemon to create the perfect tangy flavor. There are different versions of posole like green and red posole that are made. My family makes the white version of posole where we add our choice of salsa after the posole is done, whereas the green and red posole get their color and salsa during the process where the posole is cooked. Usually posole is the choice of dish in Mexican parties within my family. Special occasions like weddings and birthday parties. Posole is chosen because of how inexpensive it can be and for how many people it can feed since it is a brothy soup. Although it takes about four hours for the hominy to soften and the pork to cook within the broth of the posole, the end result is worth the time it takes to come together. This dish brings nice memories of my mom and how she would wake up early to start cooking the posole. How the smell would make its way into my room and make my cold room warm. This dish makes me feel closer to my cultural roots. How this dish has been passed down through generations and continues to be the favorite of many including myself.
Spicy Salmon Bowl
Joel F.
Spicy Salmon Bowl reminds me of my brother and his cooking journey. Watching him test out and learn from cooking was nice to see. A fond memory I have is of him cooking up some salmon and throwing random ingredients together to make me a salmon wrap. He had this lemon pepper seasoning he had bought from our local CVS. We even used some lettuce instead of a tortilla which made it feel and taste really fresh. My parents weren’t home yet and we were both so hungry that we ate it in the kitchen. The salmon had a nice crust with a hint of lemon. It’s not too much to be overpowering but still enough to be enjoyable. The lettuce also gave it a nice crunch and it held all the juices together. We both enjoyed it but knew something was missing, something like a kick that could elevate it higher. My brother leaves and returns with a hot sauce bottle; the rest is history. I still remember the salmon wrap TO THIS DAY and trying not to steal it directly I wanted to make something inspired by it.
INGREDIENTS
• 1 cup of rice
• ½ avocado
• ½ lemon
• 1 cut of salmon
• 1 spoonful of spicy mayo
• Pickled onions to your liking
• 1 jalapeno :)
• A chef pinch of salt
• Favorite seasoning
RECIPE
1. Go to the store and buy the ingredients you don’t have! :D
2. Realize you don’t wanna make it. :p
3. Proceed to prep the ingredients.
4. Wash the jalapenos, avocado, and lemon for good measure.
5. Realize you’ve never made a salmon bowl.
6. Sit and look at the wall for about five minutes before getting back to work.
7. Make sure you’re hydrated.
8. WASH THE RICE.
9. PLEASE REMEMBER TO WASH THE RICE PROPERLY.
10. Put the rice in your rice cooker which you should own as rice cookers can be used for many things other than rice but we’re making rice this time. :P
11. While the rice cooker does its thing we can grill the salmon! :D
12. Season your salmon generously with what you like and take a deep breath to admire this life you have.
13. Heat a skillet to 125 degrees F and hit the salmon with a little bit of pizzazz.
14. Our grilling should be done in about 6-8 minutes so flip it every 2 ½ minutes.
15. Most of the grilling should be done on the skin side to give it a nice crisp, so about 70%.
16. After you consider the salmon to be done we can take it off the heat.
17. If your rice is not done yet you shall wait patiently until.
18. ONCE YOUR RICE IS DONE: IT’S TIME TO PLATE! :D
19. Get your favorite bowl or one that would look good in pictures.
20. Place it all together and WAH. :0
21. Your salmon bowl is ready.
Salmon with Potatoes
T’ayana C.
Some people use this dish for meal preparation, to say they’re eating “less calories,” or because it’s good for a quick meal. My mother was the one to make this for us. I do recommend adding extra garlic butter over the salmon or the potatoes. I would also say this is budget friendly for most people. This goes for any dish, don’t rush your food. Also you can switch the starch or the veggie with rice or asparagus, it doesn’t have to be my exact ingredients. I picked this recipe to share because this is budget friendly, a low calorie meal, and easy to cook. This can be a beginning recipe for people learning to cook as it is something simple to make.
INGREDIENTS
Salmon:
• 1 tbsp paprika powder
• 1 tbsp cayenne powder
• 1 tbsp garlic powder
• 1 tbsp onion Powder
• 1 tbsp black pepper
• ½ tbsp Old Bay seasoning
• ½ Garlic Salt
Mashed Potatoes:
• 5 lbs. red potatoes, unpeeled
• 5 cloves garlic, minced
• ½ cup butter
• 4 oz. cream cheese
• ½ cup buttermilk
• Salt and pepper, to taste
RECIPE
1. Before any of these steps, make sure you set your oven to 350 degrees. Damp your salmon with a dry paper towel to get all that excess water off, then season using garlic powder, paprika, cayenne powder, garlic salt, black pepper, onion powder, Old Bay, squeezed juice from the lemon, and chopped up garlic cloves.
2. Preparing to get cooked: You’ll need a 16x12 deep pan, a sheet of foil then you’ll gently place your salmon in the pan. Preheat your oven to 400 degrees. Depending on the size of the salmon, it can take from 12-15 minutes.
3. Mashed potatoes: Start off by getting a few potatoes, rinse them off, peel them with a potato peeler, and wash them again. Grab a cutting board and cut them into 4’s. Start down the middle then half. Boil the potatoes until tender and pour out the water. Lightly mash the potatoes and add your buttermilk, cream cheese, and butter one at a time. Try not to over mash the potatoes so they don’t turn gummy. Salt and pepper to taste.
4. Broccoli: In order to have the right texture on your vegetables is to steam them for 6-7 minutes. You don’t want too many hard pieces or too many soft pieces.
5. Assemble your plate.
7 Mares
Christopher F.
The first time I ever tried 7 Mares seafood soup was when my mother made it for the first time. I was about 11 years old. I was never a big seafood eater and hearing all the meats, for example, shrimp, mussels, clams, and octopus, disgusted me a bit. My mom forced me to try it, and surprisingly, it tasted really good. So good, I served myself a bigger bowl. This dish is a very important dish to me because it opened a pathway into trying more seafood dishes. The following are the steps that my mom takes to make 7 Mares.
INGREDIENTS
Serves 6 People
• 1 lb shrimp, peeled and de-veined
• 1 lb mussels, cleaned and debearded
• 1 lb clams, scrubbed
• 1 lb fish fillets, cut into bite-sized pieces
• 1 lb squid, cleaned and sliced into rings
• 1 onion, chopped
• 3 cloves garlic, minced
• 1 bell pepper, chopped
• 1 can diced
• 4 cups fish or seafood broth
• 1/2 cup white wine
• Salt and pepper to taste
• Chopped cilantro for garnish
RECIPE
1. In a large pot, heat some olive oil over medium heat.
2. Add in chopped, garlic, and celery until vegetables are softened.
3. Stir in diced tomatoes, vegetable broth, and a bay leaf.
4. Bring the mixture to a simmer and let cook for about 15 minutes.
5. Add in seafood as shrimp, mussels, clams, and octopus.
6. The seafood cooks until it is fully cooked and tender.
7. Season the soup with salt, pepper, and any other desired herbs or spices.
Tlayuda Oaxaqueña
Alexis M.
Tlayudas are a delicious dish that has great influence in Mexican homes. Originally from the central valleys of Oaxaca, the tlayuda is one of the most emblematic “antojitos” of this state. It is consumed in the state of Oaxaca and in some other places in the country. The advantages of this are that they are a varied dish since we have together the three sections of the plate of good eating, which transforms the dish into a complete and delicious meal. This dish is something that represents my culture and the state I am from, which is Oaxaca. We normally eat this dish at community parties or birthday parties held for family members. The Tlayuda is a dish that has as ingredients meat, refried beans, pork lard, lettuce, tomato, avocado and an ingredient that is very well known in Oaxaca, which is quesillo or also known as Oaxacan cheese. Every time I eat a tlayuda it reminds me a lot of my grandmother because she would prepare them for me every year for my birthday. It also reminds me of the place where I grew up and where my roots of being Oaxacan come from.
INGREDIENTS
Serves 6 People
• 2-3 pounds of corn dough
• Half a pound of beans, refried
• 1 pound of cheese
• Finely chopped lettuce
• Chorizo or cooked cured meat
• Avocado to taste
• Tomato slices to taste
RECIPE
1. On a comal or non-stick pan, place the tortilla, let it cook for a few minutes on both sides until it begins to brown a little and begins to have a brittle texture. As it is a thin tortilla, it does not take long to cook, repeat the process until you have finished all your dough.
2. Now you just have to start assembling your tlayuda, you can spread a little lard or leave it without fat.
3. On the griddle at low temperature, spread a layer of refried beans all over the side of the tortilla.
4. Next, add the cooked chorizo or cecina and enough Oaxaca cheese to cover the tlayuda.
5. Lastly, add lettuce finely chopped, slices tomato and avocado to taste, you can also add a little red or green sauce to your liking, let the tlayuda heat for a few minutes and remove from the comal.
Desserts and Antojitos
Banana Pancakes
Luisa Fernanda L.
This banana pancake recipe is really special to me. Growing up my grandmother would always make the most delicious banana pancakes. She still does. Personally, I love waffles more than pancakes, but when she makes pancakes I find myself loving pancakes more. I have tried to recreate this banana pancake recipe for breakfast, but it does not come out the same. Something is always missing, even though I follow every step. When I make them, I hear her telling me the recipe in my head. I once asked my grandmother why my pancakes didn’t taste the same as hers and she said, “I have a special ingredient no one has.” I’m pretty sure the ingredient she was talking about is love. When I go to a restaurant and order pancakes I know they won’t be my favorite because they don’t taste like the ones my grandmother makes. When I make pancakes, I always think of her. I think about the love she puts into the food she prepares for me and my sisters. I remember one day I was feeling sad, my grandmother came to my room to check on me and then she left. Fifteen minutes later she returned with homemade pancakes and hot chocolate. That day she made me feel happy on a sad day. These banana pancakes remind me of home and my grandmother, Alma.
INGREDIENTS
• 1 cup of flour
• 2 eggs
• 4 bananas
• 1 capful of vanilla
• Oil
RECIPE
(Makes about 6)
1. In a large bowl, take the four bananas and mash them.
2. Add the flour, two eggs, a capful of vanilla (about a teaspoon), and mix until everything is mixed together in a smooth-ish batter.
3. Once it’s all well mixed, start heating up your pan. Add the oil when it’s hot and give the oil a second to heat up. Once it’s ready, start pouring the batter to your desired pancake size.
Cherry Apple Pie
Vanessa Erika G.
I bake cherry apple pie every Christmas. Pie is my favorite dessert and that is why I make it. It has become a tradition now and my family asks for it every year. I love the tart and sweet balance of a pie along with a flaky crust. When I decided to make it, I realized I didn’t have enough cherries and decided to do both cherry and apple because they have the same tart taste I like. From then on I’ve been making cherry apple pie.
INGREDIENTS
Pie crust:
• 2 sticks plus 4 tbsps unsalted butter, chilled
• 3 cups of all-purpose flour + plus more for rolling out
• 2 tbsp sugar
• 1/2 tsp of salt
• All-purpose flour, for rolling out
Pie filling:
• 1 cup of fresh pitted sour cherries
• 3 to 4 apples
• 4 tbsps of light brown sugar
• 5 tbsps finely grated lemon zest
• 1 tsp vanilla extract
• 1 tbsp lemon juice
• ½ tsp ground cinnamon
• ¼ tsp salt
• Granulated sugar for sprinkling the top
RECIPE
1. Add all-purpose flour to a medium size bowl and then add the sugar and salt. Take 5 tbsps of the cold butter and cut it up
into half-inch cubes. Then take the remaining 5 tbsps of cold butter and cut it into thin slices. Add the cubed butter to the bowl of flour.
2. In the bowl use your hands and break the butter into smaller chunks until the butter is in small chunks. Then add the thinly sliced butter and break it into not as big of a chunk.
3. Then slowly add cold water to the bowl of flour and butter adding about a quarter cup of water at a time until the dough starts clumping together. You do not want to over hydrate the dough, once parts of the dough start to clump together you can put them on a cutting board and leave the remaining dry parts of flour and butter and add a bit more of water to it.
4. You don’t want to knead the dough just put it in a bag or plastic wrap and set it in the fridge for a minimum of 1 to 2 hours, but I recommend at least 10 hours or more.
5. For the filling, cut the apples into thin long slices. Remove the seeds from the cherries and them in half. Combine your cherries and apples along with cinnamon, vanilla extract, salt, lemon zest, lemon juice, and light brown sugar into a bowl and mix them together. If you are still not going to add it to the pie crust, immediately place it in the freezer.
6. When you roll out one half of the dough, start by waking it to get the butter to soften. Roll the dough to cover the pie tray.
7. Roll out the other half of the dough to the length of your pie dish and cut long strips.
8. Now you’re ready to assemble. First, add your filling. Then you will start on the lattice you want to evenly space out 4 to 7 strips of dough and fold out every other strip. Place one long strip in the center. Fold back the alternating strips and then add another long strip of dough. Repeat until the weave is complete. Then crimp the edges with a fork or with your hands.
9. Place in the oven at 420 degrees for 15 minutes then lower the heat to 350 degrees for 50 to 55 minutes, or until the filling is bubbling and the crust is golden brown.
Chocolate Chips Cookies
Helen P.
My grandmother’s s’mores chocolate chip cookie recipe holds a lot of personal meaning for me! She used to make them for me when I was a kid, and they always brought me so much joy. Whenever I bake them now, it feels like she’s right there with me. Baking my grandmother’s s’mores chocolate chip cookies brings back all those warm and nostalgic feelings. The smell of the cookies filling the house, the taste of the gooey chocolate chips. It’s like a delicious time machine that takes me back to those cherished moments with my grandma. It’s a special feeling that I can’t quite put into words.
I love baking my grandmother’s s’mores chocolate chip cookies for others! I often make them for special occasions like birthdays, holidays, or when friends come over for a cozy get-together. Sharing these cookies with loved ones brings me so much joy, and it’s a way for me to pass on the love and memories that my grandmother shared with me. I sometimes bake them just for myself, because they’re just too good to resist.
When I cook my grandmother’s s’mores chocolate chip cookies, I often imagine my grandma herself, with her warm smile and loving presence. It’s like she’s right there in the kitchen with me, guiding me through the recipe. I can almost imagine hearing her voice and feel her love as I mix the ingredients and shape the dough. It’s a beautiful way to keep her memory alive and feel connected to her. During the cooking process, I feel a sense of joy and nostalgia. It’s a comforting and fulfilling experience for me.
As I mix the ingredients and watch the dough come together, I feel a sense of anticipation and excitement. When the aroma of freshly baked cookies fills the air, it’s like a warm hug for my soul. Baking these cookies brings me happiness and a connection to my past, which makes the whole process incredibly special. The smells that fill the kitchen when I bake my grandmother’s s’mores chocolate chip cookies are absolutely divine. The rich, buttery aroma mixes with the sweet scent of vanilla and the irresistible smell of freshly baked cookies. When those s’mores chocolate chips start melting and creating a heavenly chocolate fragrance
(sweet smell), it’s pure bliss! Just thinking about it makes my mouth water.
RECIPE
In a bowl, mix the following ingredients:
• Flour
• Butter
• White sugar
• Salt
• Vanilla extract
• Eggs + an extra egg yolk
• Add chocolate chip
• S’mores
• Then add leavening agents such as baking soda or baking powder
I mix with an electric mixer and bake it on 350 or high. Bake for 15 mins or less
Mexican Wedding Cookies
Angelica G.
During winter, when my mom buys a bag of pecans, I know what’s to come. You can smell the roasted pecans coming from the kitchen. I imagine I’m there with my mom baking in the kitchen making our favorite sweet treat around that time of year. We often work together; my mom crushes the pecans while I mix the batter. Every now and then I taste the batter as it is safe to eat raw since no eggs are present. My mom has to constantly remind me not to eat too much of the batter because we have to make the cookies. Yet, it’s still hard to resist eating the batter. Despite them usually being at weddings, in my family we like to make them during the winter. I enjoy making these cookies because it’s quality time I get to spend with my mom.
INGREDIENTS
• 1 cup of soft butter (unsalted)
• ½ cup of powdered sugar for the batter (2-4 cups more is needed later on in the recipe)
• 2 cups of regular all-purpose flour
• ¼ tsp salt
• 1 tsp vanilla extract
• 2 cups of pecans
RECIPE
(Makes 70 cookies)
1. The first step is to preheat the oven to 375 degrees. Then you will turn on the stove to a low heat. While you do this, set your butter out on the table to have it become room temperature for when you need to use it.
2. Then you will dump the two cups of pecans into the pan. You will roast the pecans in the pan which should take about 5 minutes. Use a spatula to move the pecans around in the pan
every now and then.
3. Then split the pecans equally into two separate ziplock bags.
4. One bag with the pecans will be crushed completely until it’s like dust. (you can crush the pecans by using something like a rolling pin to hit them). The second bag will have the pecans crushed but into slightly bigger pieces.
5. Next, you will get a bowl and put the butter in it. You will use a spatula to mix the butter in the bowl until it has a creamy texture.
6. Next, you will add the powdered sugar and flour into the bowl and mix until they’re well combined. Then add the salt and vanilla extract and mix until well combined again.
7. Then you will add the pecans from the completely crushed bag into the batter. You will have to mix this in by using your hands so make sure your hands are cleaned well.
8. After this, you will add the partially crushed bag of pecans to the mix and combine them by hand.
9. Next up you will need to start making them into little balls. The size should be as big as what can fit in the measurement of a teaspoon. Then put them on a baking tray with parchment paper on it.
10. Next, you will put the cookies in the oven for 10 minutes, while this is happening you will set up a plate or tray and put the rest of the powdered sugar in it for later.
11. Finally, once the cookies are out let them set for about 3-5 minutes. The cookies should still be warm and you will then roll the cookies in the sugar so that they’re fully covered. Tada! You’re finally done.
Acknowledgments
826LA would like to thank to following for their support in making this chapbook possible:
Gianna Desdune
USC Service Learner
Keira Norrell
USC Service Learner
Salvador Lopez
USC Service Learner
Juliana Rosales
UCLA College Corps
Hilary Khteian
Salvador Lopez
USC Service Learner
Rachel Woo
USC Service Learner
Mia Hu
USC Service Learner
Lilly Metz
USC Service Learner
Yolitza Godinez
USC Service Learner
Stefanie Li
USC Service Learner
Anissah Madrid
UCLA College Corps
Godwina Ogbeide
UCLA College Corps
Mysaiah Duke
UCLA College Corps
Yahir Gaytan
UCLA College Corps
About 826LA
Vision: 826LA envisions a Los Angeles where every child has access to quality writing education and is empowered to express themselves creatively through writing. We envision a Los Angeles where every teacher is supported in their writing-based educational objectives.
Mission: 826LA is dedicated to unlocking and cultivating the creative power of writing for students ages 6 to 18, and to helping teachers inspire their students to write.
How we advance our mission: A nonprofit organization, our services are structured around our understanding that great leaps in learning can happen with one-on-one attention, and that strong writing skills are fundamental to future success.
With this in mind, we provide after-school tutoring in all subjects, evening and weekend workshops, in-school programs, field trips, college access, help for English language learners, and assistance with student publications.
All of our programs are challenging and enjoyable, and ultimately strengthen each student’s ability to express ideas effectively, creatively, confidently, and in their own voice.
Core Values: 826LA values joy in the service of achieving educational goals. Our community norms value diversity, equity, inclusion, and access. We therefore prioritize partnerships with Title 1 Schools, engagement with historically marginalized populations, and training and deploying communitybased volunteers in support of our mission. As a teaching approach, we value creativity, authenticity, empathy, and lively, rigorous, and studentcentered writing education. As an educational enrichment organization, we value supporting teachers, principals, and other school staff in the pursuit of excellence.
Programs
As an educational enrichment organization, we value supporting teachers, principals, and other school staff in the pursuit of excellence.
Tutoring
From Monday to Thursday, students attend 826LA for free individual tutoring in all subjects. Students receive homework help and write stories based on prompts. Students submit their writing for inclusion in chapbooks, which 826LA publishes throughout the year. To celebrate students’ hard work, 826LA unveils these chapbooks at book release parties, where students read their work to thunderous applause from their volunteers, families, and peers.
Write On! After School (WO!AS)
Monday through Thursday, we offer after-school tutoring to our younger students ages 5 to 11. Students work one-on-one with trained volunteers to receive homework and writing support.
TNT Tutoring
On Tuesdays and Thursdays evenings, we offer after-school tutoring to our teen students. Students work with volunteers on homework, writing, and college preparedness.
In-Schools and Writers’ Rooms
Because not all students can come to one of 826LA’s writing labs, 826LA brings specially trained volunteers into under-resourced public schools. The volunteers provide one-on-one assistance with writing projects. 826LA works with teachers to craft projects designed to engage students while targeting curricular issues. In addition to visiting many schools in the Los Angeles Unified School District each year, 826LA hosts Writers’ Rooms at Manual Arts High School, Roosevelt High School, and Venice High School.
Workshops
826LA’s Workshops bring students together with artists, writers, and professionals for creative collaboration and development. Whether the subject is flash fiction, playwriting, or preparing for the AI singularity, our workshops foster creativity while strengthening writing skills. This includes our Summer Writers Workshop and monthly Sunday workshops at the Hammer Museum.
Write On! Summer Camp
826LA’s Workshops bring students together with artists, writers, and professionals for creative collaboration and development. Whether the subject is flash fiction, playwriting, or preparing for the AI singularity, our workshops foster creativity while strengthening writing skills. This includes our Summer Writers Workshop and monthly Sunday workshops at the Hammer Museum.
College and Career Access Programs
Our College and Career Access Program is designed to support students in their journey toward higher education and career success. The program culminates in two major events each year. In the Fall, the emphasis shifts to college applications, where students receive one-on-one assistance from specially trained volunteers to enhance their application writing. In the Spring, the emphasis shifts to scholarship applications, where again students are paired with dedicated volunteers to craft compelling scholarship essays. Additionally, our career access initiative offers robust internship programs, providing valuable work experience for many high school students. This comprehensive support system ensures our students are well-prepared for both academic and professional achievements.
Sign up to make a monthly donation to 826LA and you’ll join our Future Bestsellers Club. For as little as ten dollars each month, we’ll deliver writing from our brilliant, emerging authors right to you!
Go to 826LA.org/donate and click on Future Bestsellers Club to join.
Staff
Jaime Balboa
Executive Director
Diego Quevedo
Chief of Staff
Shani Foster
Director of Education
Christie Thomas
Director of Development
Pedro Estrada
Programs & Operations Manager, Echo Park
Mike Dunbar Programs & Operations Manager, Mar Vista
Mateo Acosta
Associate Director of Community Engagement
Carinne Mangold
Store and General Operations Manager
Time Travel Marts in Echo Park & Mar Vista
Alma Carrillo
Senior Manager of Strategic Partnerships and Communications
Trevor Crown
Senior Manager of Volunteer Innovation and Assessment
Ariadne Makridakis Arroyo
Senior Volunteer Coordinator
Katie Feige Institutional Giving Manager
Maddie Silva Manager of Special Initiatives
Arisdeysi Cruz
Tutoring Program Coordinator
Marco Beltran Writers’ Room Program Coordinator Manual Arts High School
Wendy Beltran
Senior Writers’ Room Program Coordinator, Roosevelt High School
Cole Montgomery
Senior Development Coordinator
Ariana Ponce Olivares
Senior Civic Engagement Coordinator
Wilson Swain
Creative Engagement Specialist
Julia Malinow
In-Schools and Tutoring Program Coordinator
Board
Karen Van Kirk
Board President Customer Experience & Operations
Sarah Rosenwald Varet Board Vice President Governance Committee Chair Attorney
David Ullendorff Board Treasurer Finance Committee Chair Co-Founder, Mathnasium
Cisca Brouwer
Development Committee Chair Attorney/Writer
Ben Au Litigation Partner, Orrick
Jeff Boos Brokerage Operations & Services, Side
Scott Boxenbaum Comedian & Real Estate
Iman Farrior
Business Affairs Executive, Creative Artists Agency
Joe Ferencz CEO/Founder, GameFam
Scott A. Ginsburg Real Estate, Boulevard Partners
Susan Ko Clinical Psychology & Executive Leadership
Hon. Holly A. Thomas Circuit Judge, United States Court of Appeals Ninth Circuit
Dave Eggers Emeritus and 826 Founder
Advisory Board
J.J. Abrams
Judd Apatow
Miguel Arteta
Mac Barnett
Steve Barr
Joshuah Bearman
Father Gregory Boyle, S.J.
Amy Brooks
Stefan Bucher
Kathleen Caliento
Monique Demery
Mark Flanagan
Ben Goldhirsh
Rebecca Goldman
Ellen Goldsmith-Vein
DeAnna Gravillis
Terri Hernandez Rosales
Christine Jaroush
Spike Jonze
Miranda July
Catherine Keener
Keith Knight
Al Madrigal
R. Scott Mitchell
Lani Monos
B.J. Novak
Miwa Okumura
Amber Paasch
Jane Patterson
Keri Putnam
Sylvie Rabineau
Sonja Rasula
Will Reiser
Luis Rodriguez
Tara Roth
Brad Simpson
J. Ryan Stradal
Natalie Tran
Sarah Vowell
Sally Willcox
Julie Wiskirchen
Shop the Time Travel Mart!
Visit our Time Travel Mart storefronts in Echo Park and Mar Vista where you can shop for all your time traveling gears and gadgets. From Mammoth Chunks to Robot Milk to original student-authored books, we pride ourselves on being the only Los Angeles purveyor of quality goods from the past, present, and future. The proceeds from the store help to keep all programs free for our students. You can also visit the stores online at timetravelmart.com.
Echo Park 1714 Sunset Blvd., Los Angeles, CA 90026
Mar Vista 12515 Venice Blvd., Los Angeles, CA 90066
ABOUT THIS BOOK
Whether it’s a McDonald’s sandwich hastily eaten on the way to work or the dinner a family has been making for generations, at some point in the day we connect with food in a meaningful way. Is the Oven On? is a collection of recipes and stories written by the students in Mr. Ochoa’s Culinary Arts classes at Manual Arts High School. The students were tasked with sharing a recipe for a dish whose smell, taste, or process to make it transported them to a different time in their lives.