Marvelous Monthly Series


INSPIRATION GUIDE | APRIL 2023

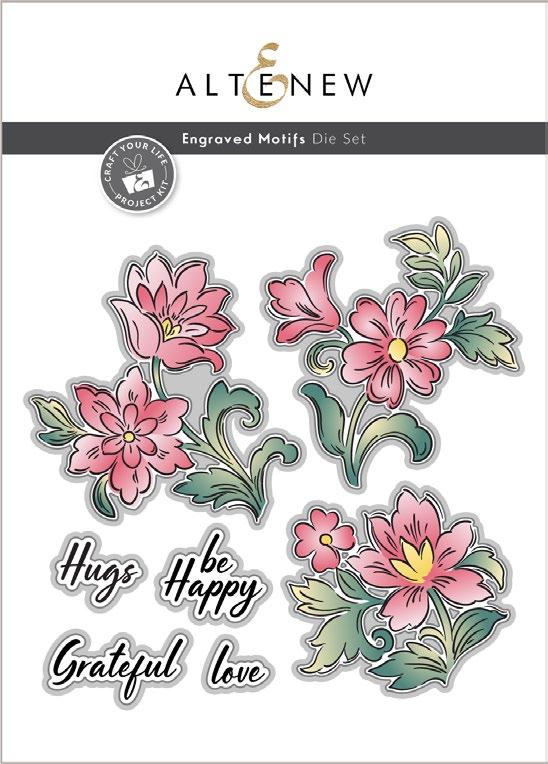
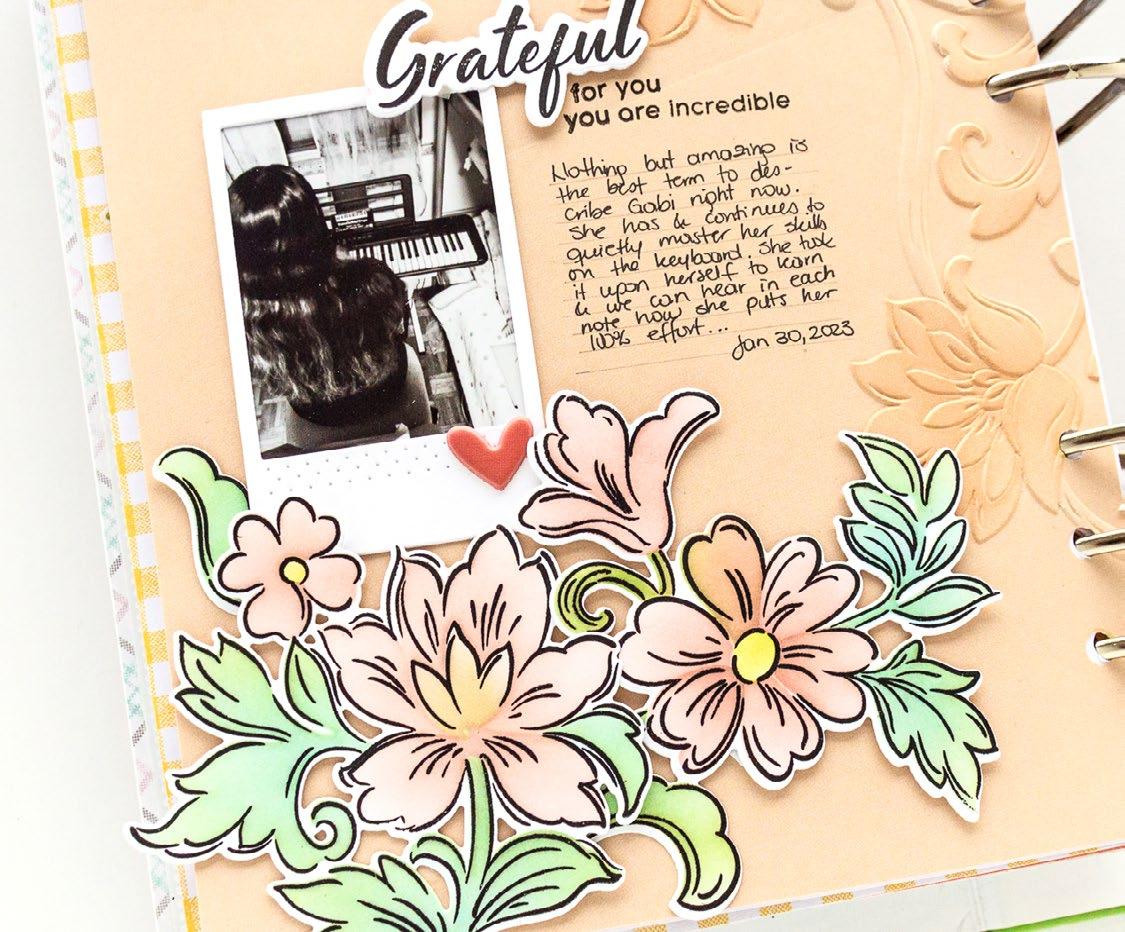
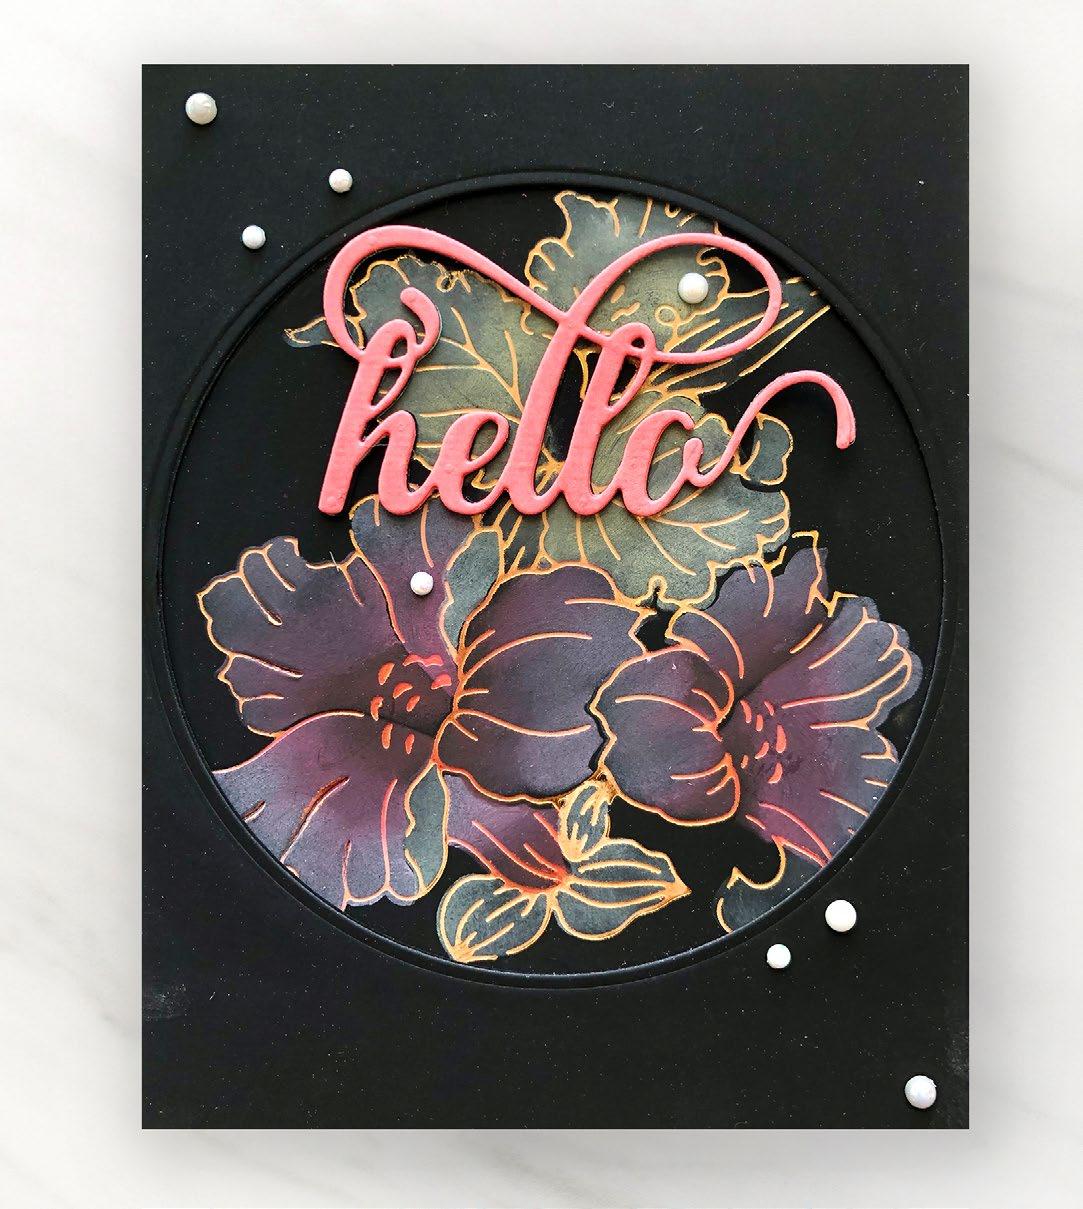
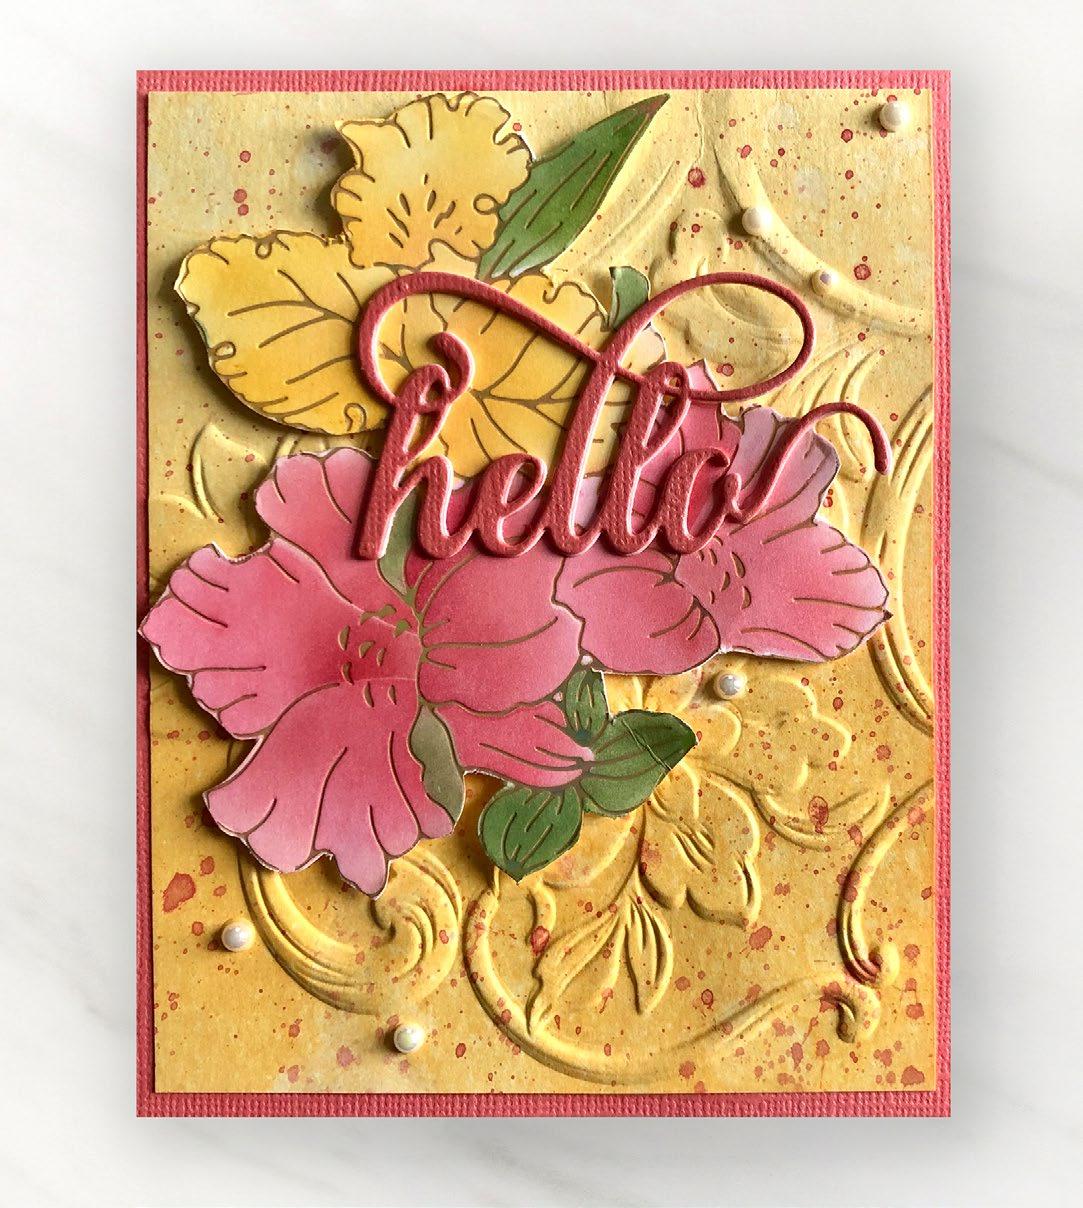
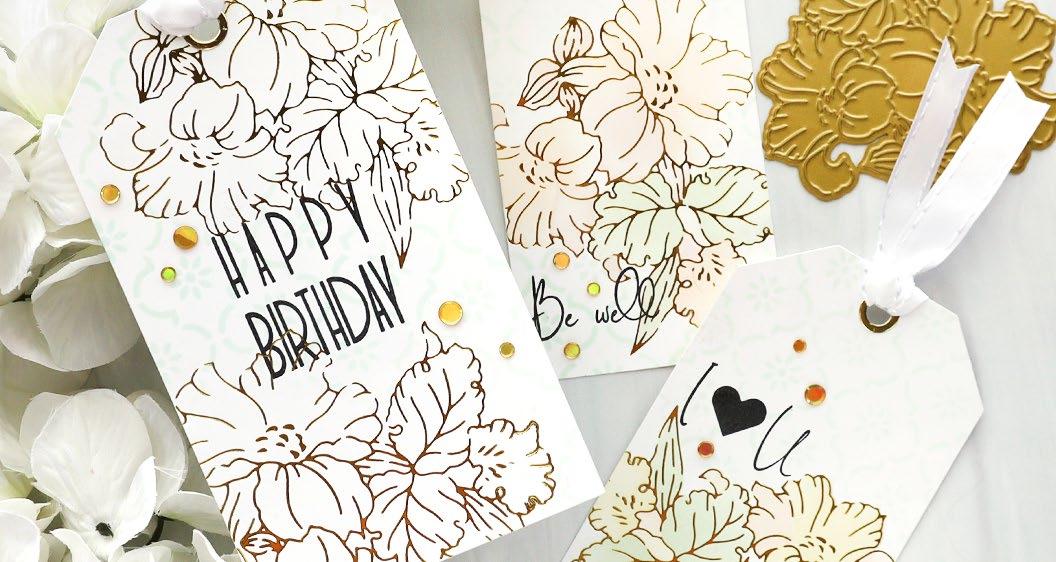
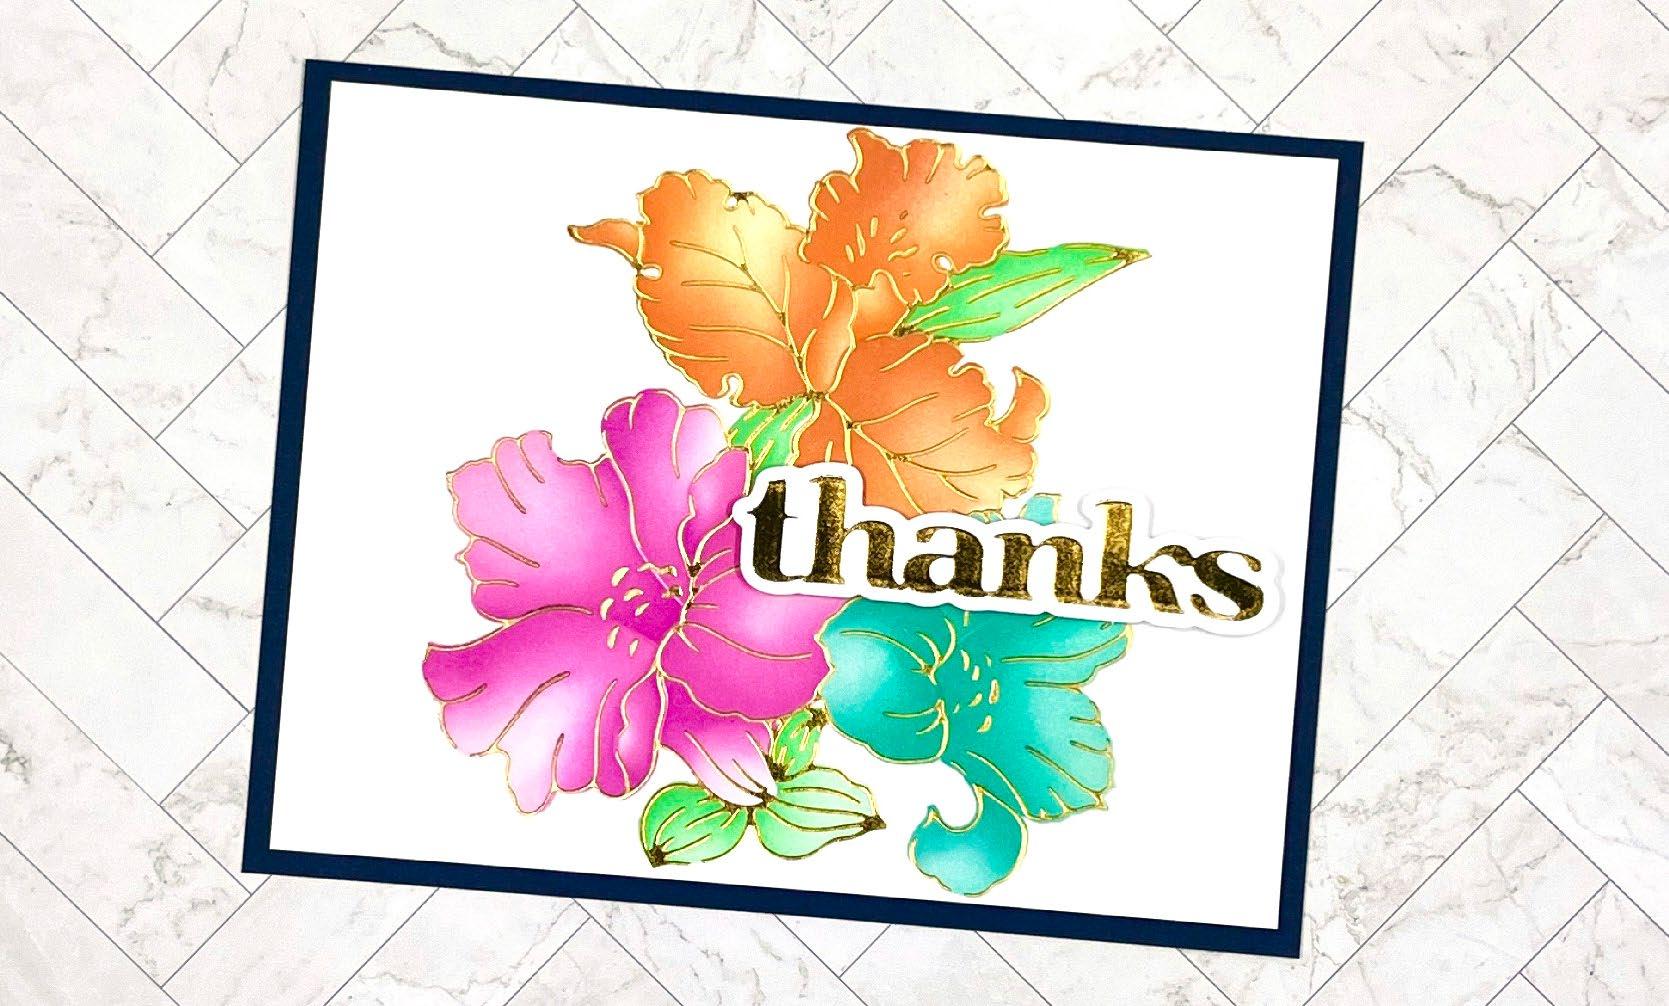
Let this ultimate paper crafting delight inspire your creativity today! This curated guide will help you get started on your own handmade cards. The following exclusive project inspiration will show you how to make our Craft Your Life Project Kit: Engraved Motifs come to life on your page!
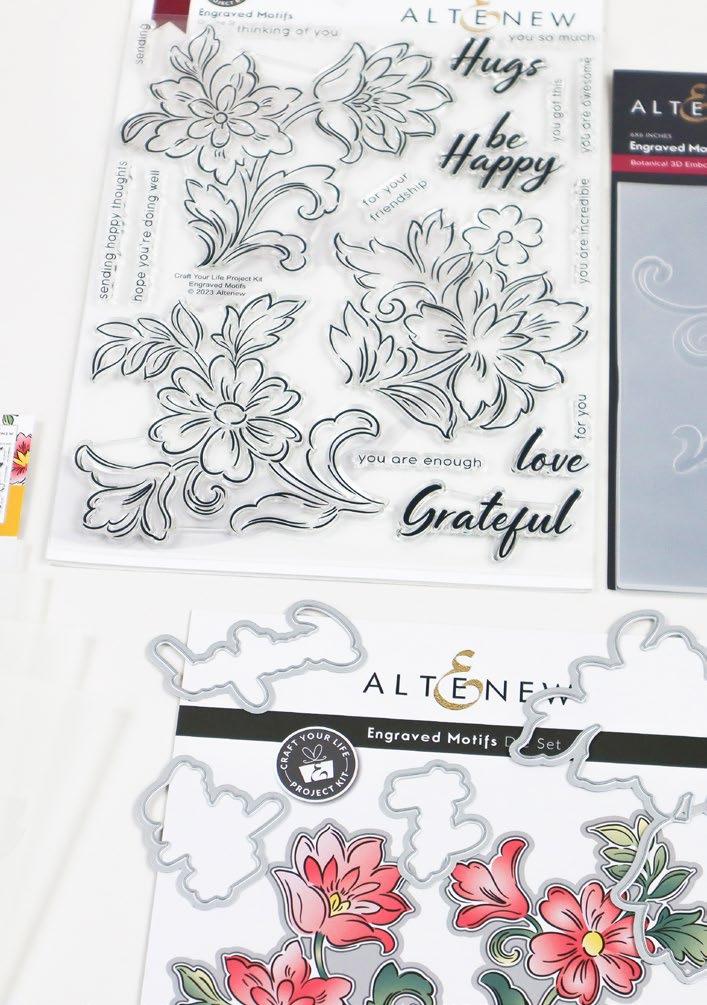
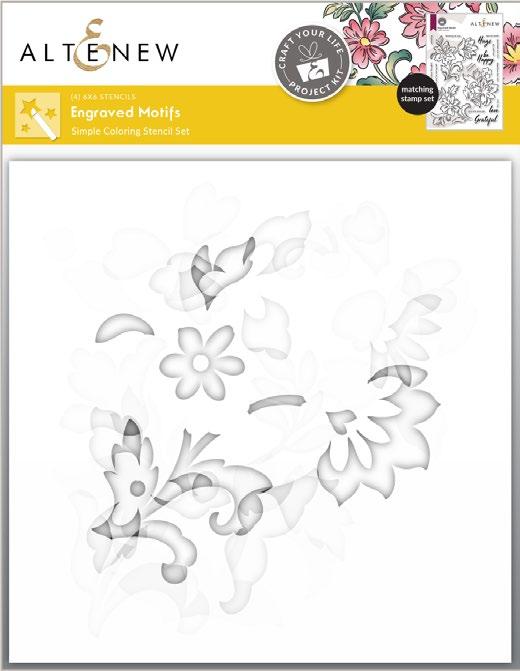
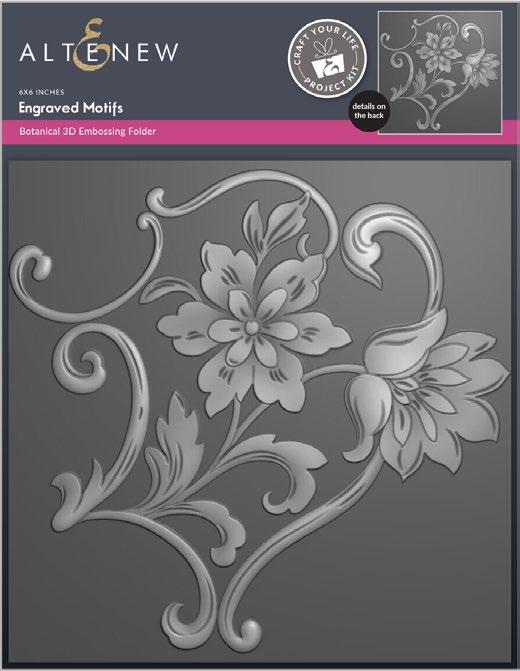
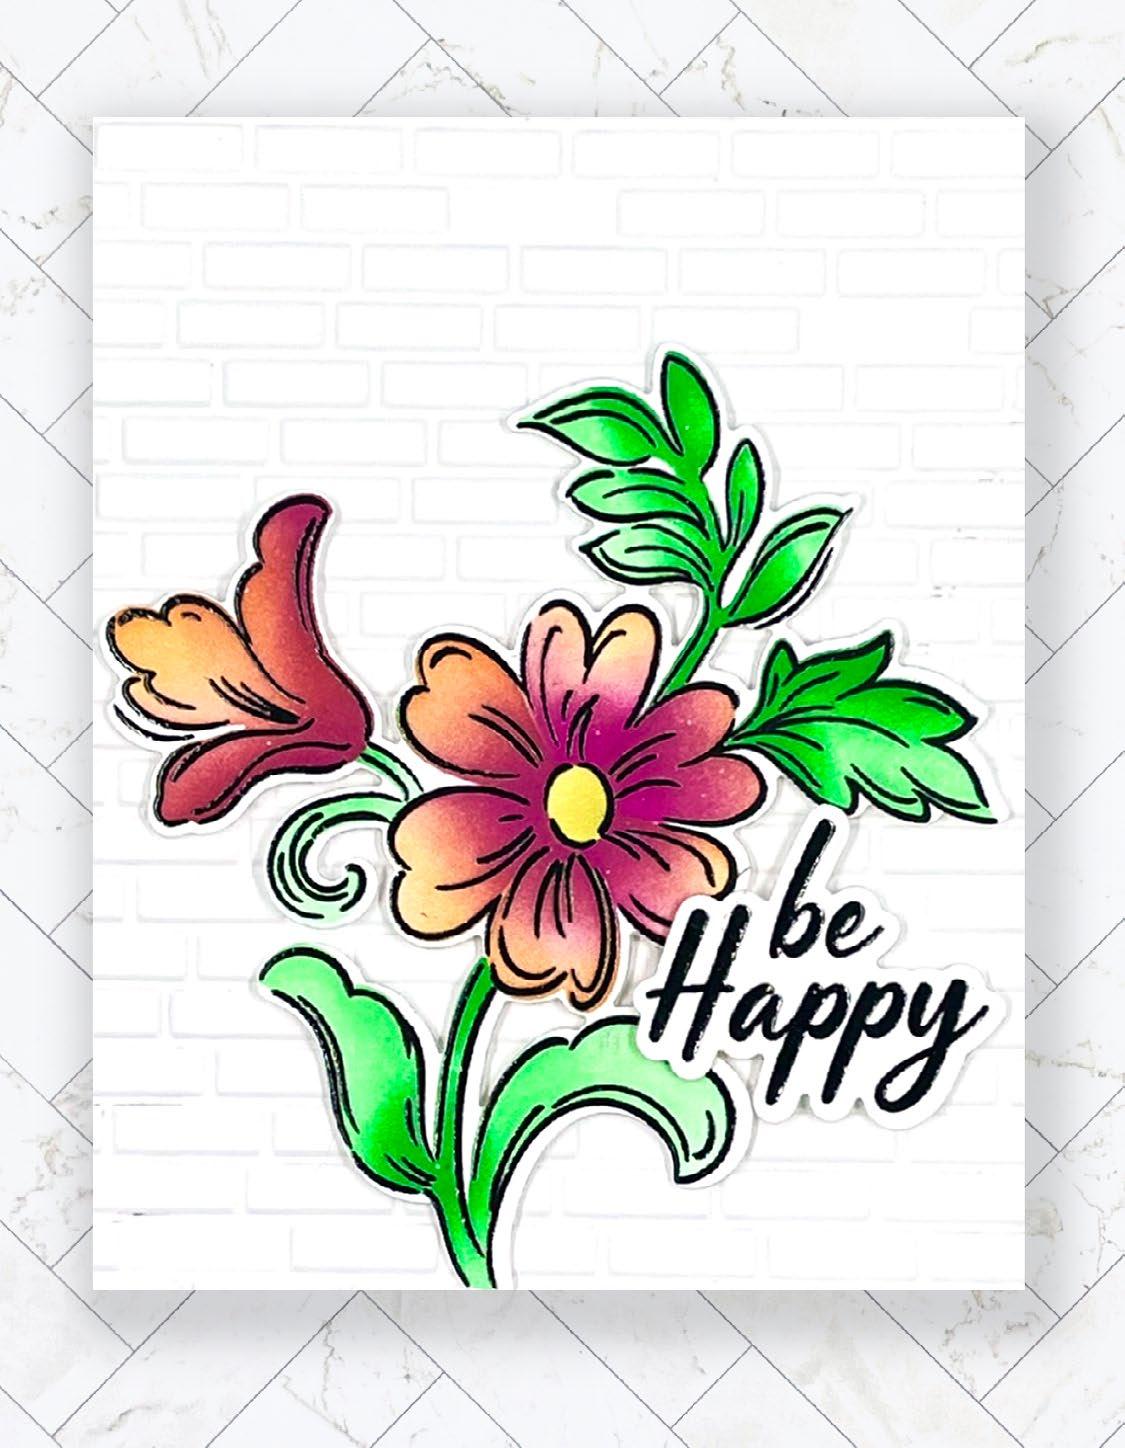
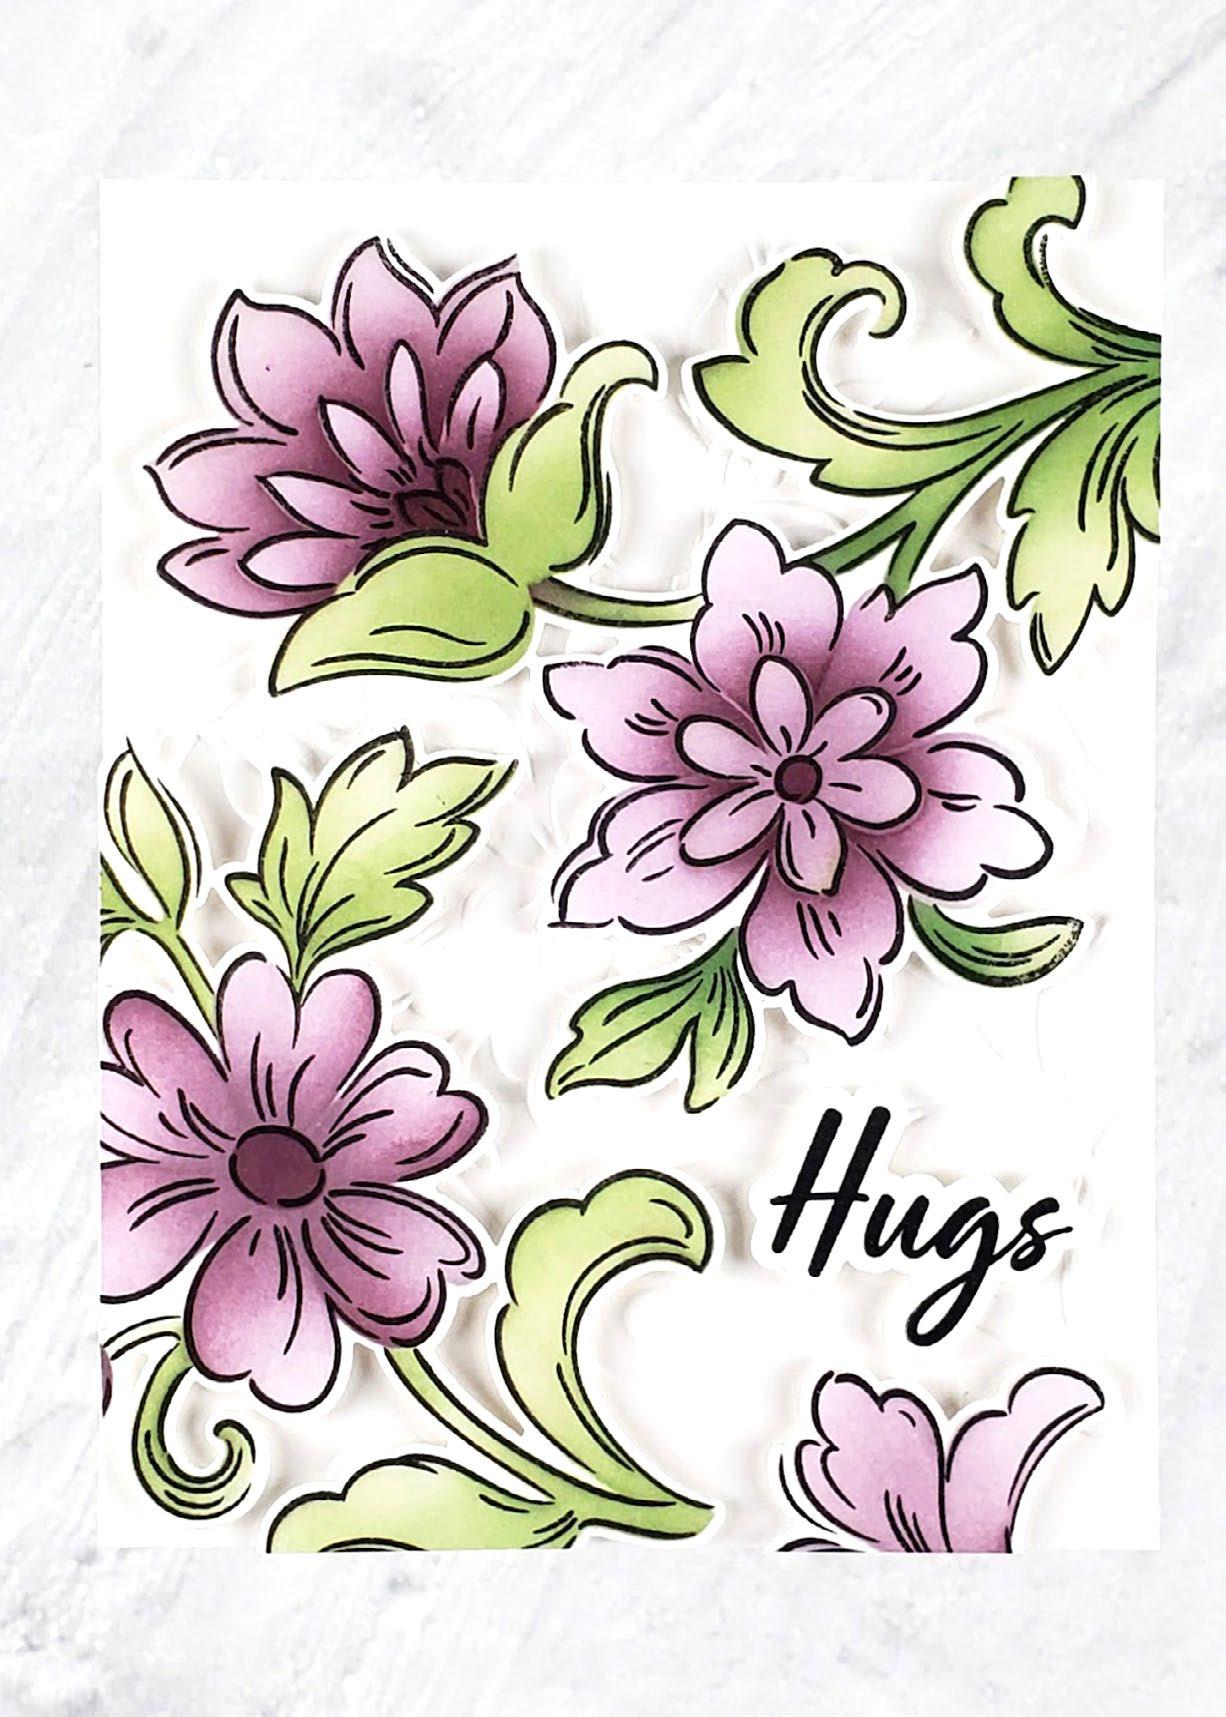
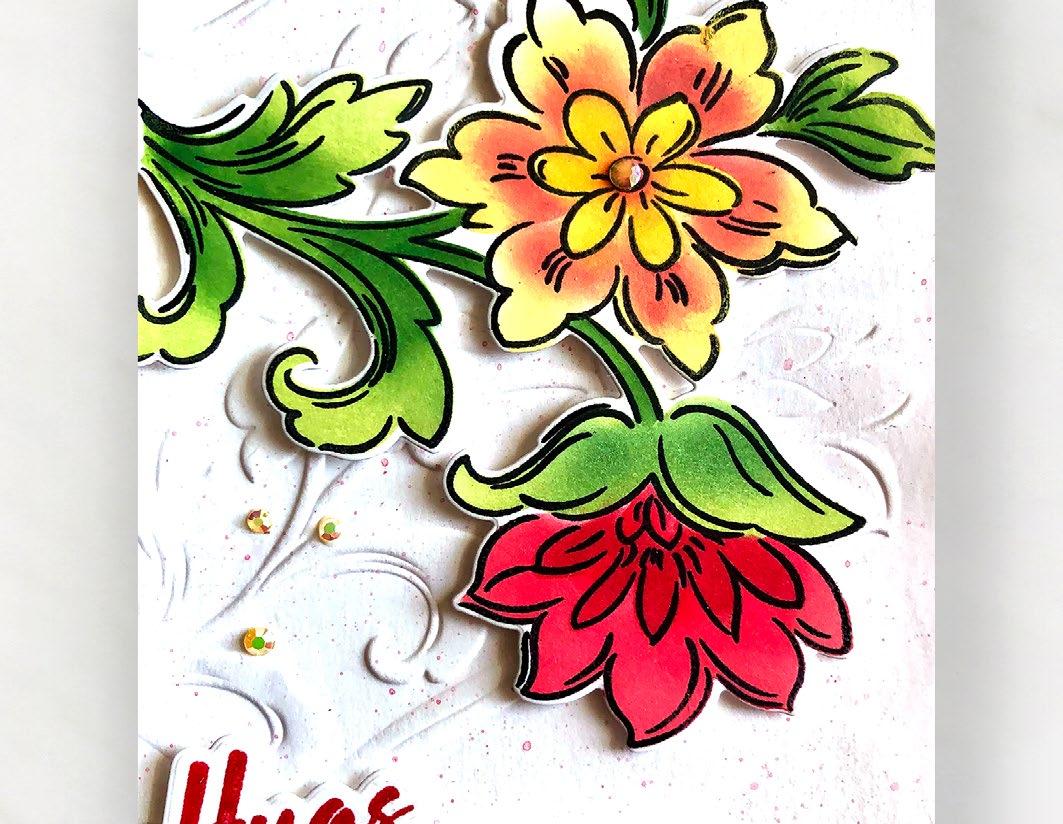
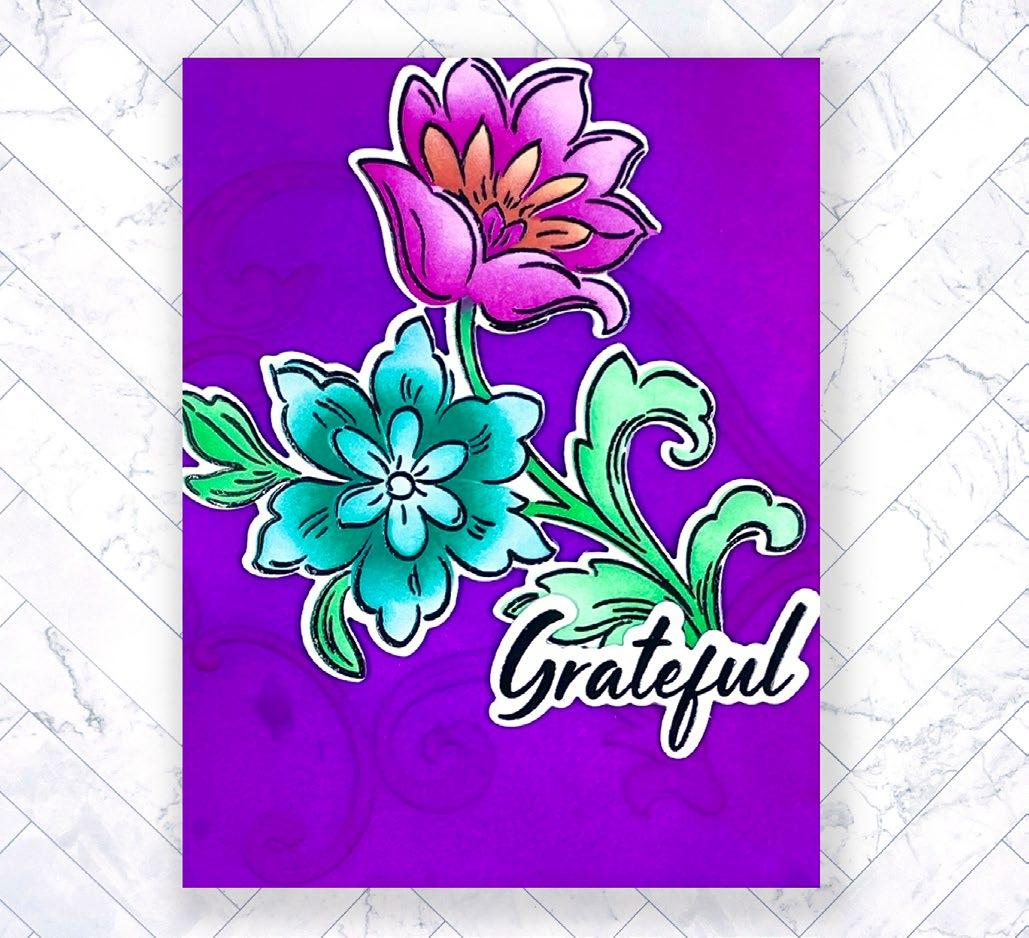
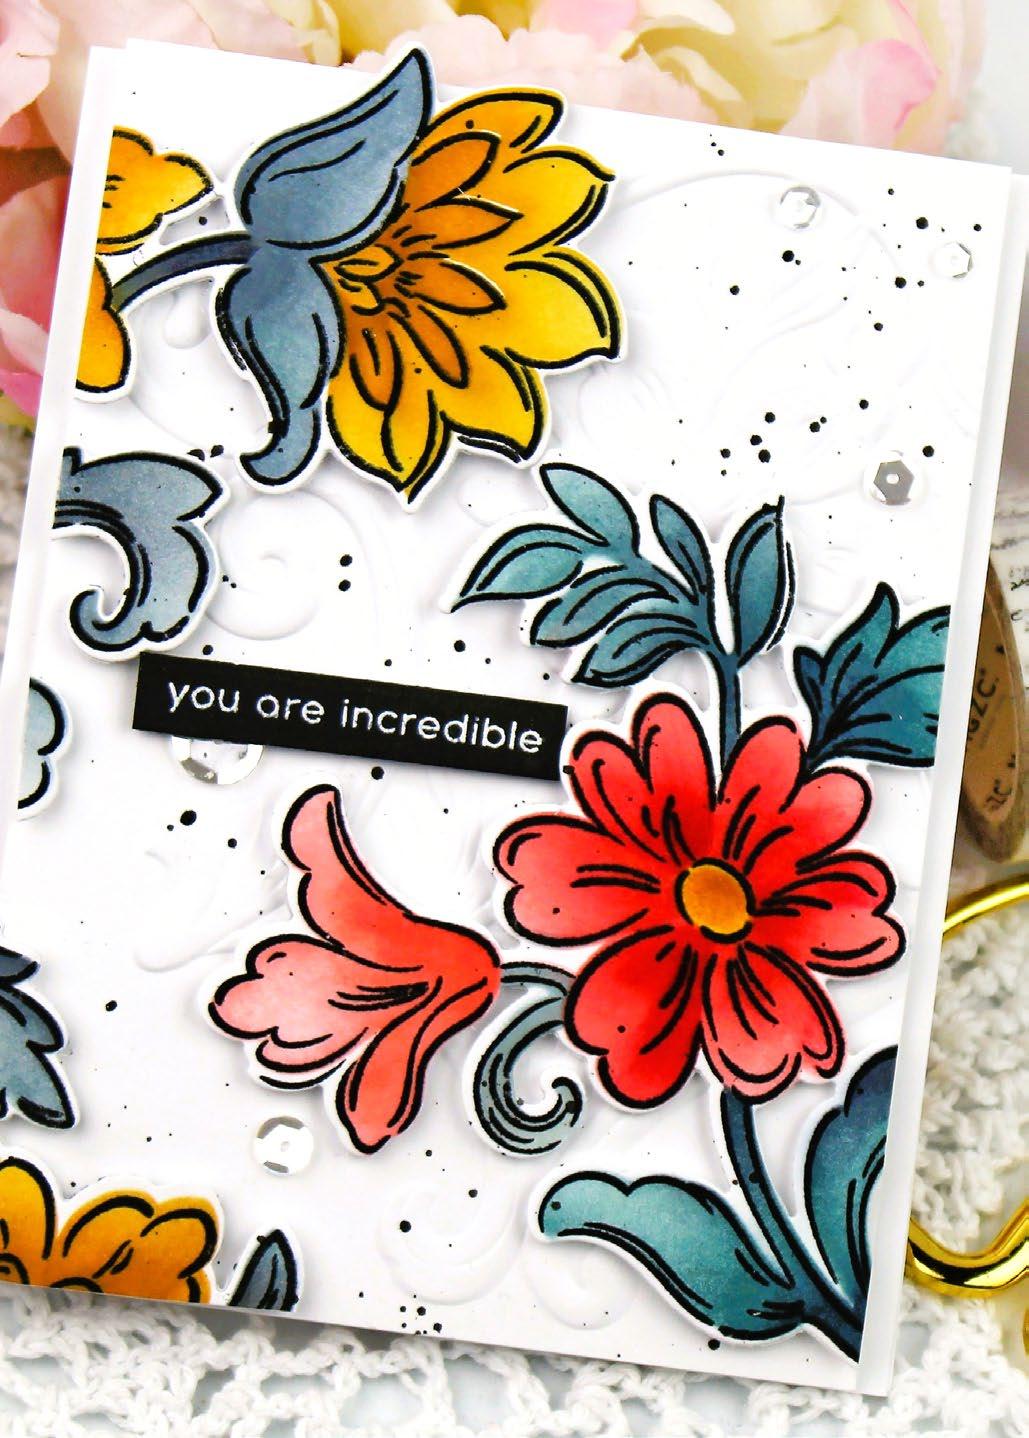
This project kit showcases beautiful floral motifs drawn in bold, heavy brushstrokes. These motifs look stunning as is, but if you want to add color, the coordinating simple coloring stencils will let you do so in a few simple steps. The embossing folder features one of the floral motifs from the stamp set, further enhanced by decorative swirls. In addition, the 15 sentiments are great for sending a smile to your loved ones.

SUPPLY LIST
Craft Your Life Project Kit:
Engraved Motifs
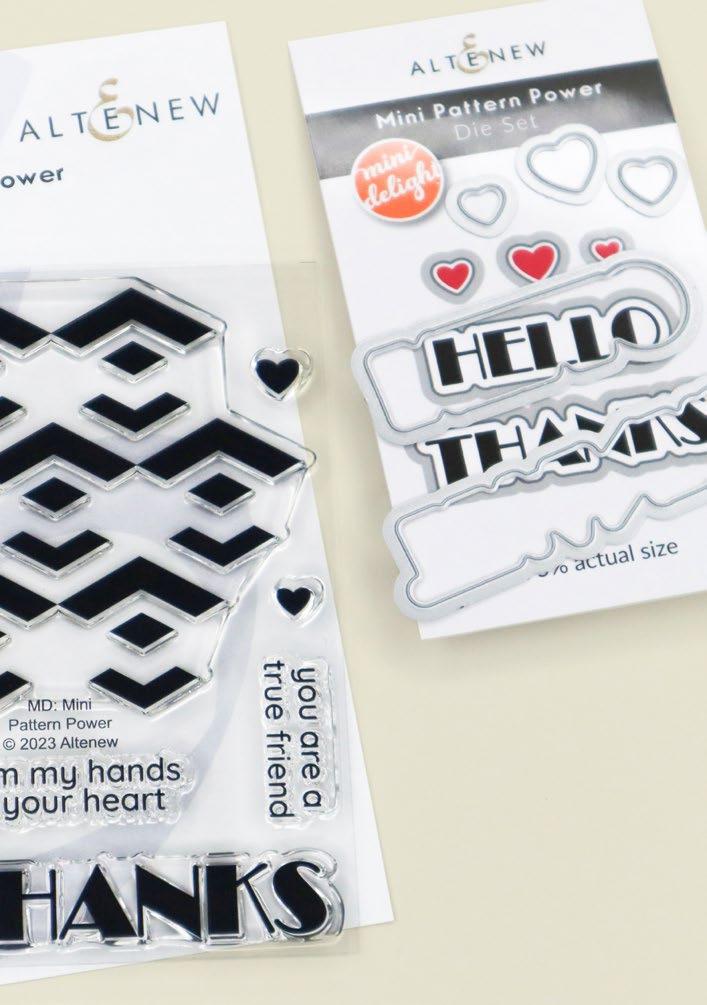
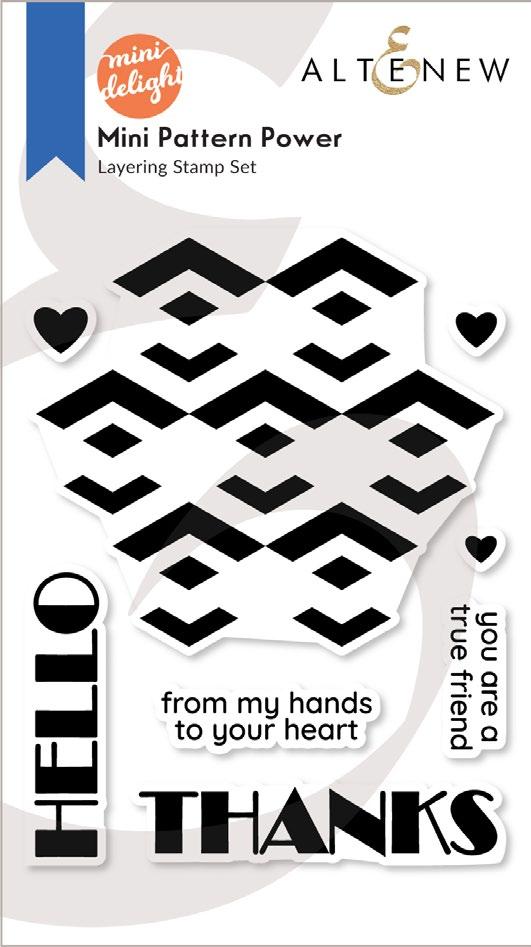
Mini Delight: Mini Pattern Power
Stamp & Die Set
Cardstock- Classic Crest Solar White, Navy
Inks- Embossing, Chamomile, Marigold, Grass Field
Antique Gold Metallic Ink Spray
Rose Gold Crisp Embossing Powder
Instant Dimension Foam Tape
Glue Tape
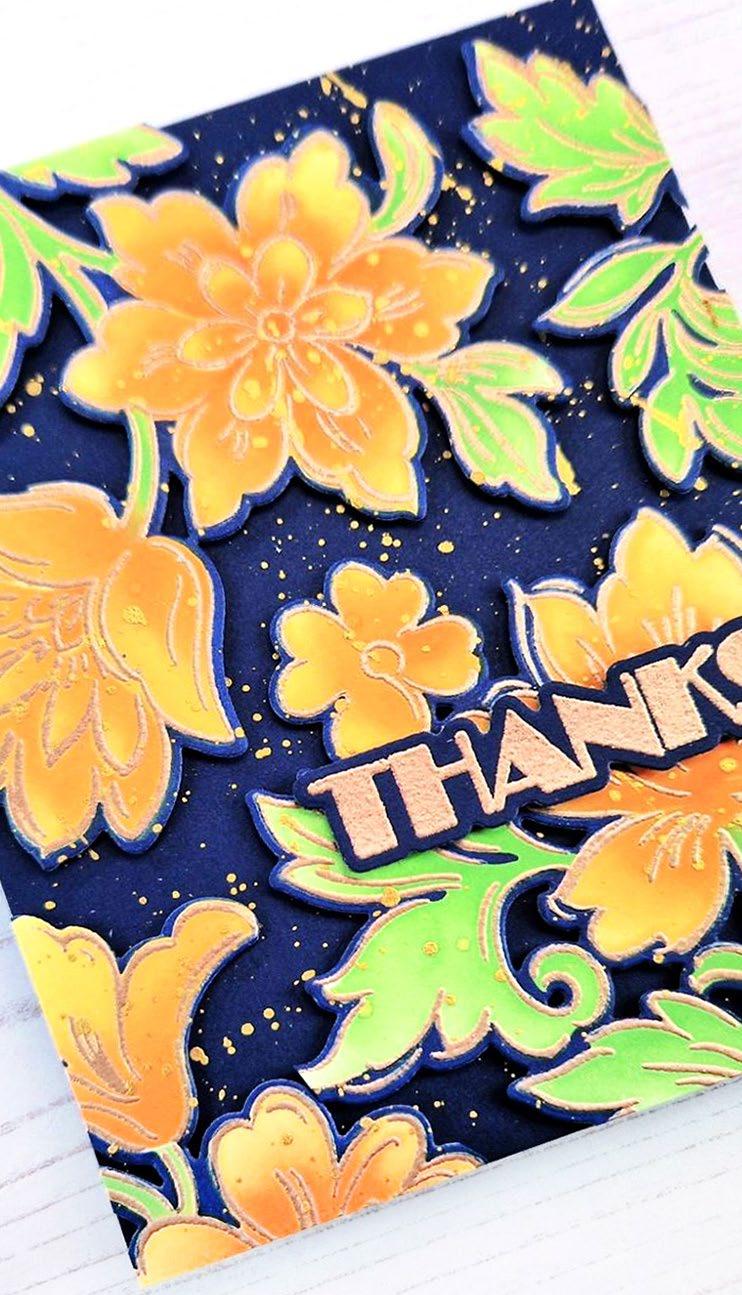
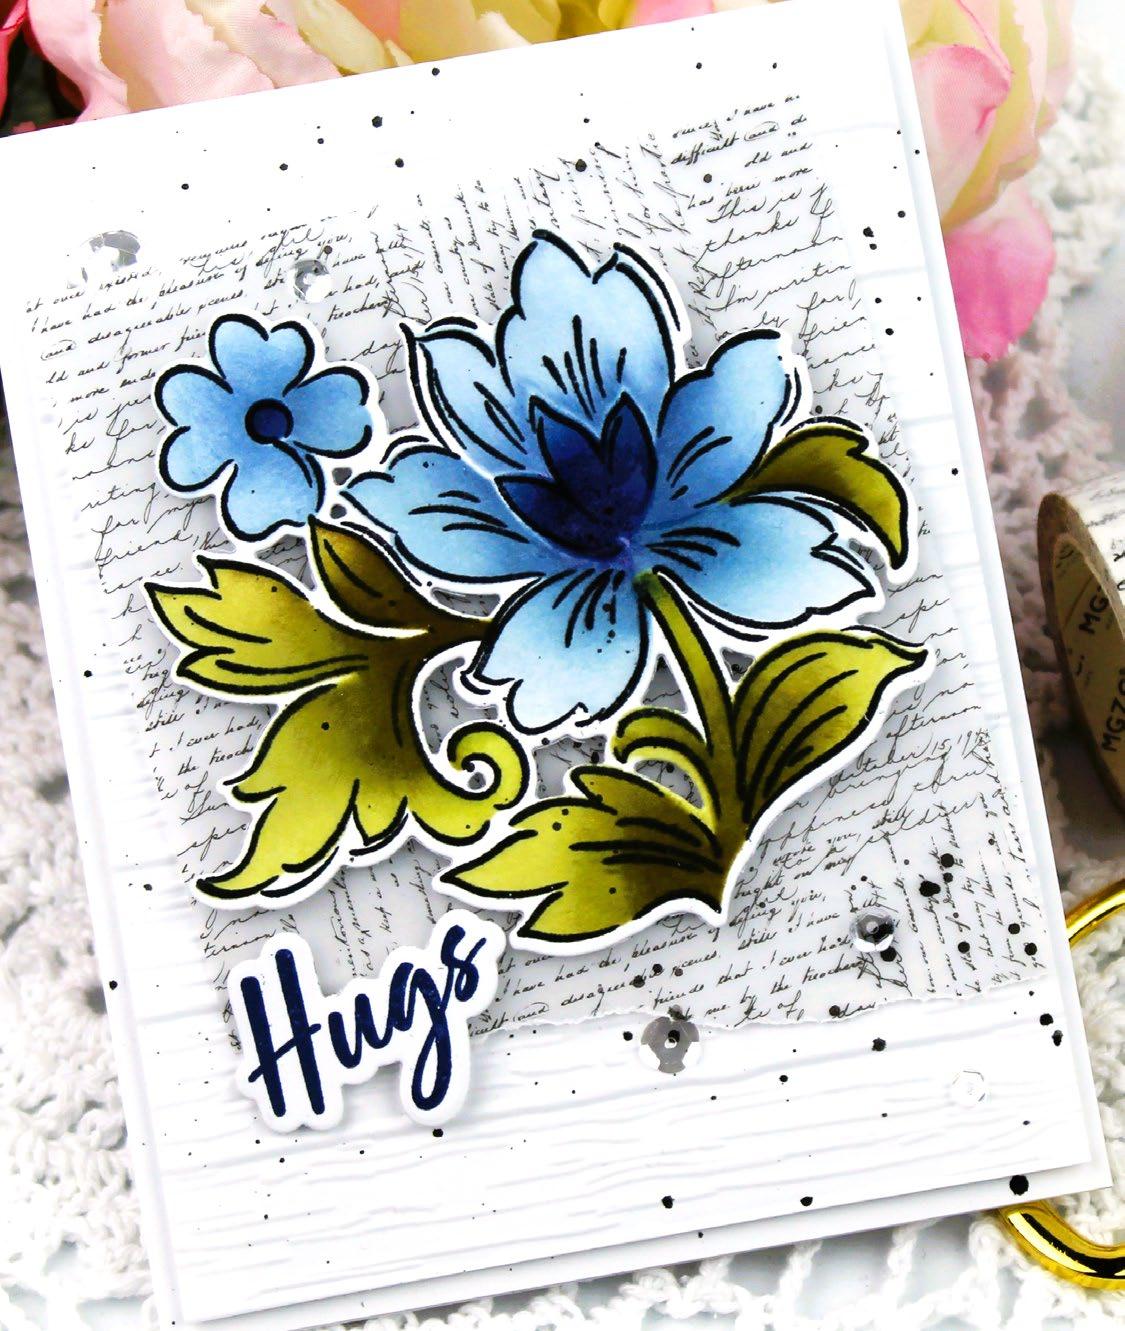
1. Create a 4 ¼” x 5 ½” top folding card base from Classic Crest Solar White Cardstock.
2. Stamp images from Craft Your Life Project Kit: Engraved Motifs onto a piece of Classic Crest Solar White Cardstock using Embossing Ink and heat set using Rose Gold Embossing Powder.
3. Color images using coordinating Simple Coloring Stencil. Use Chamomile and Marigold Inks for the flowers and Grass Field Ink for the leaves and stems.
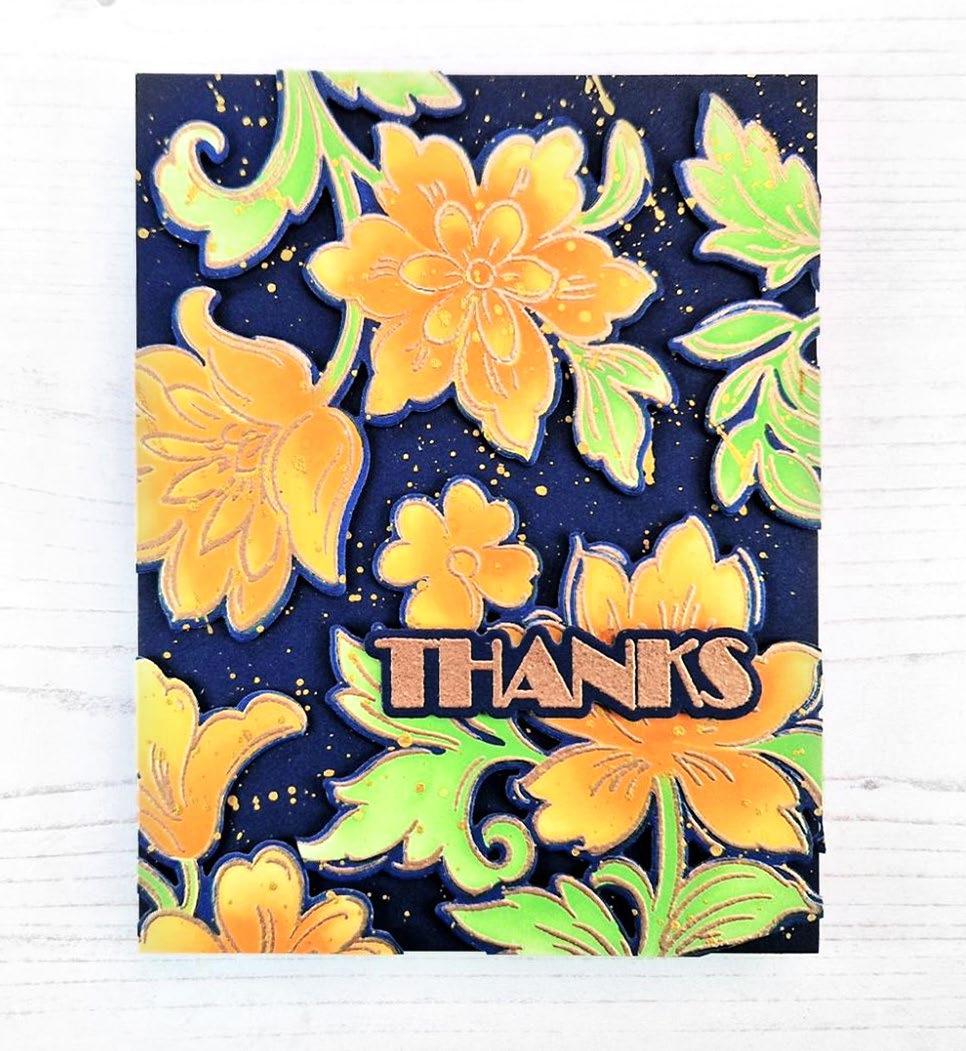
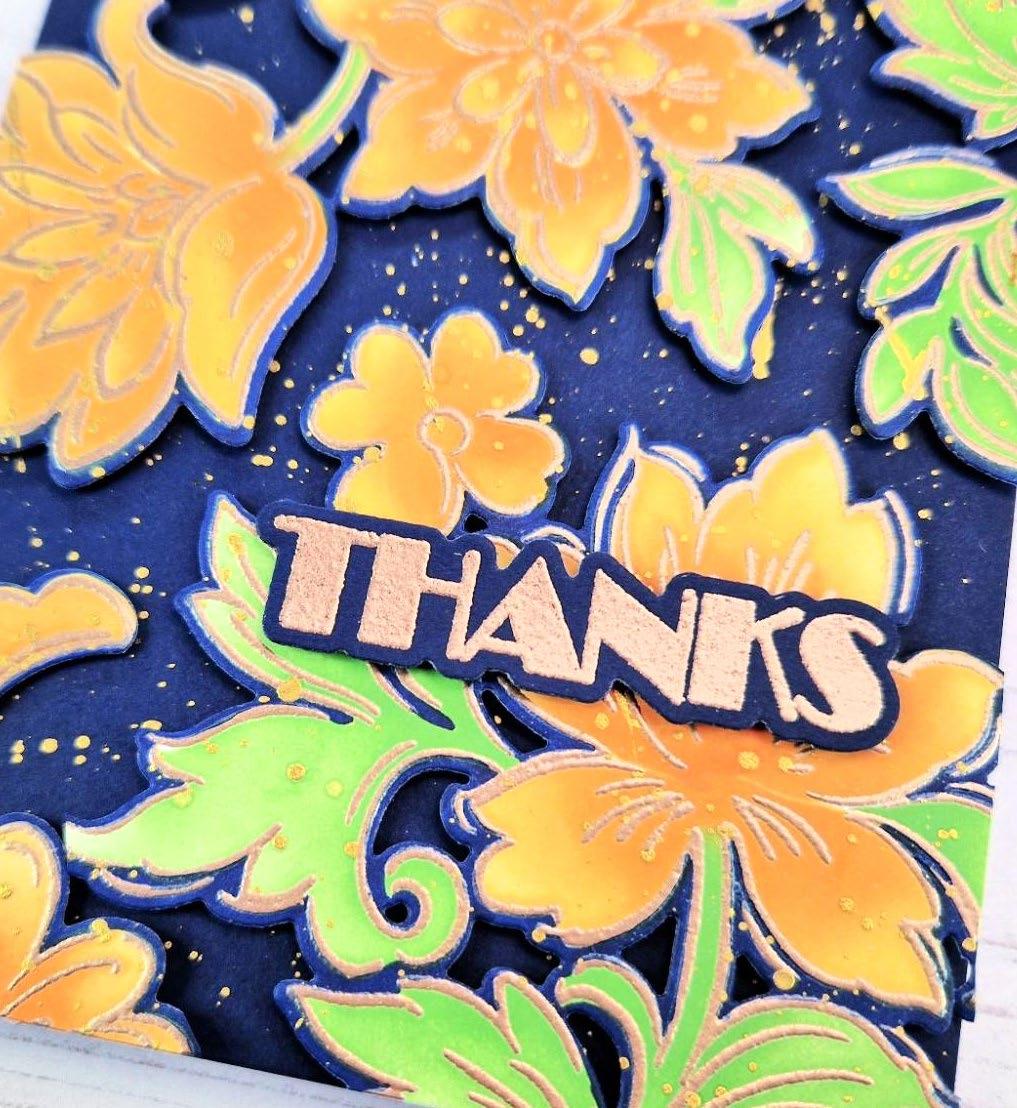
4. Color around colored images using Starlight Artist Marker.
5. Die cut images using coordinating dies.
6. Adhere die-cut images into place onto a 4 ¼” x 5 ½” panel of Navy Cardstock using foam tape.
7. Add splatters using Antique Gold Ink Spray.
8. Adhere panel to card base using glue tape.
9. Stamp sentiment from Mini Delight: Mini Pattern Power Stamp Set onto a piece of Navy Cardstock using Embossing Ink and heat set using Rose Gold Embossing Powder.
10. Die cut sentiment using coordinating die.
11. Adhere die-cut sentiment into place using foam tape.
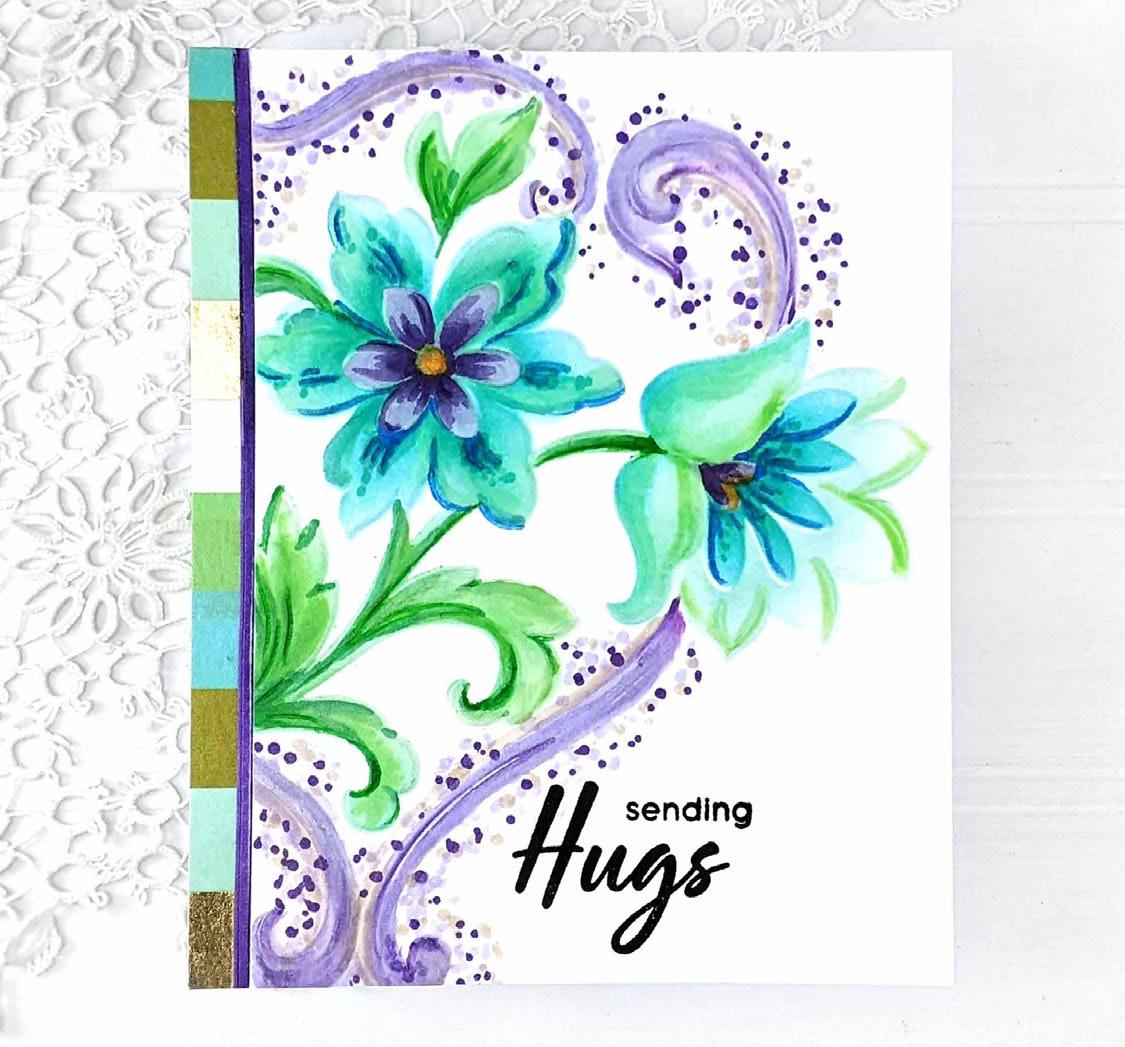
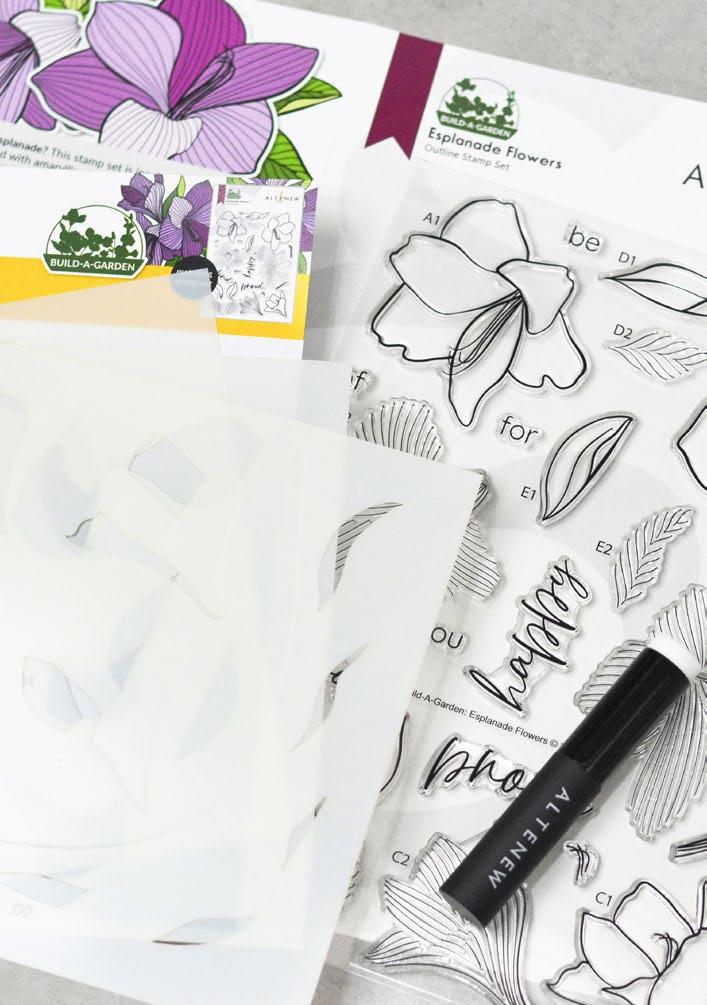
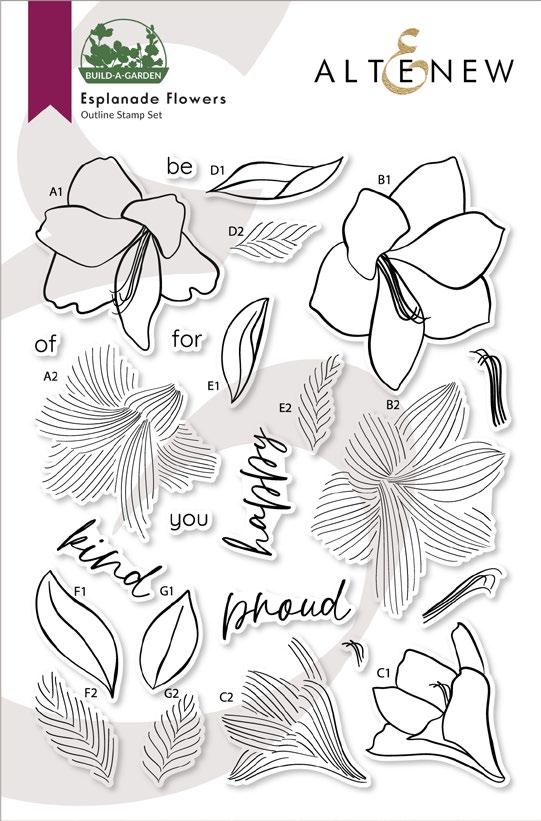
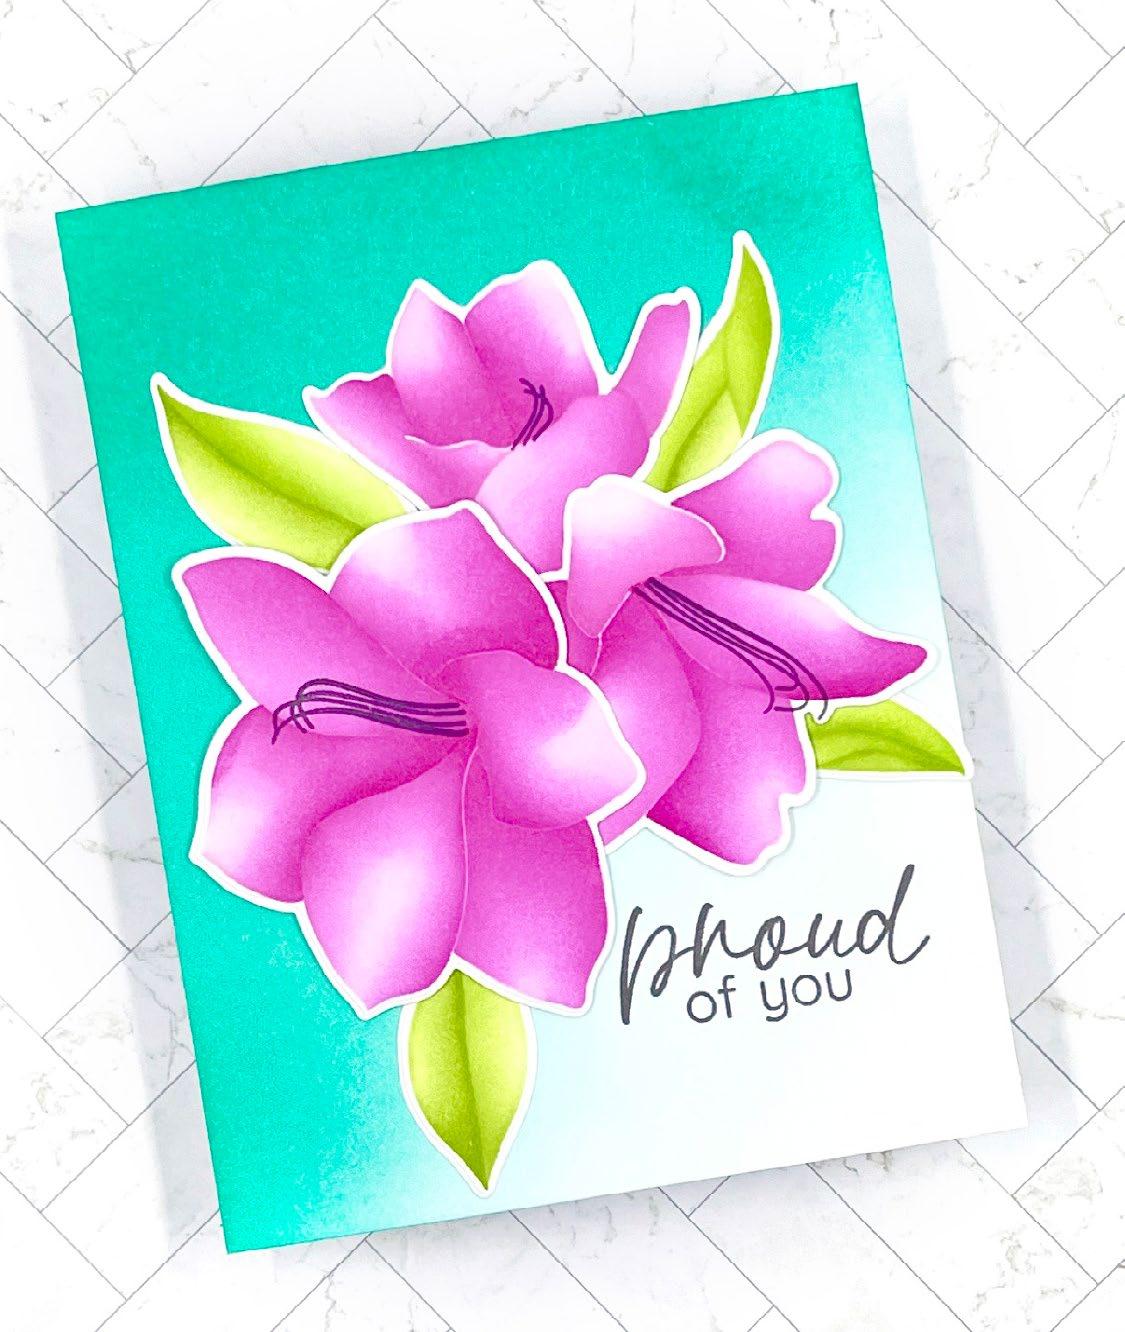
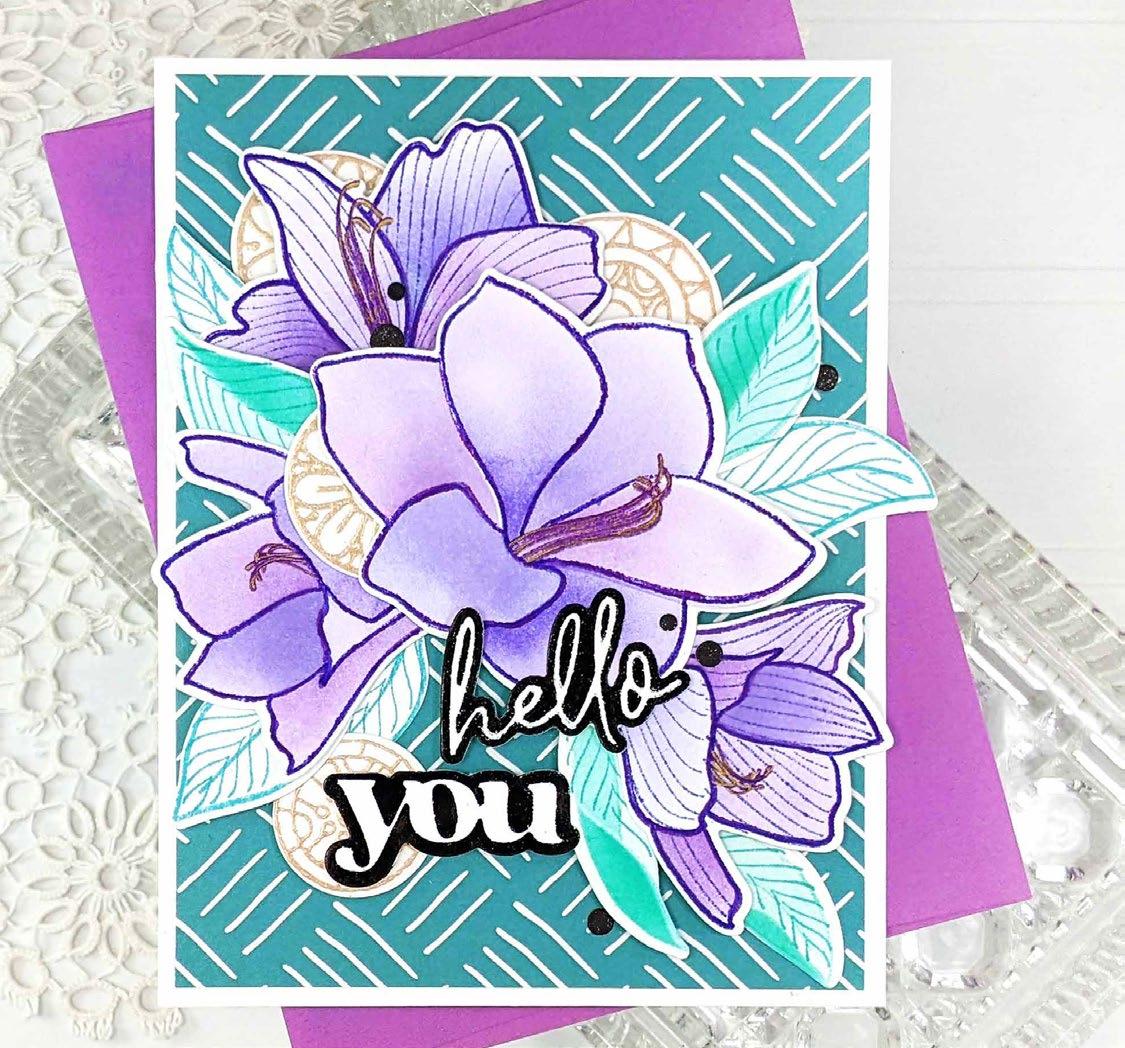
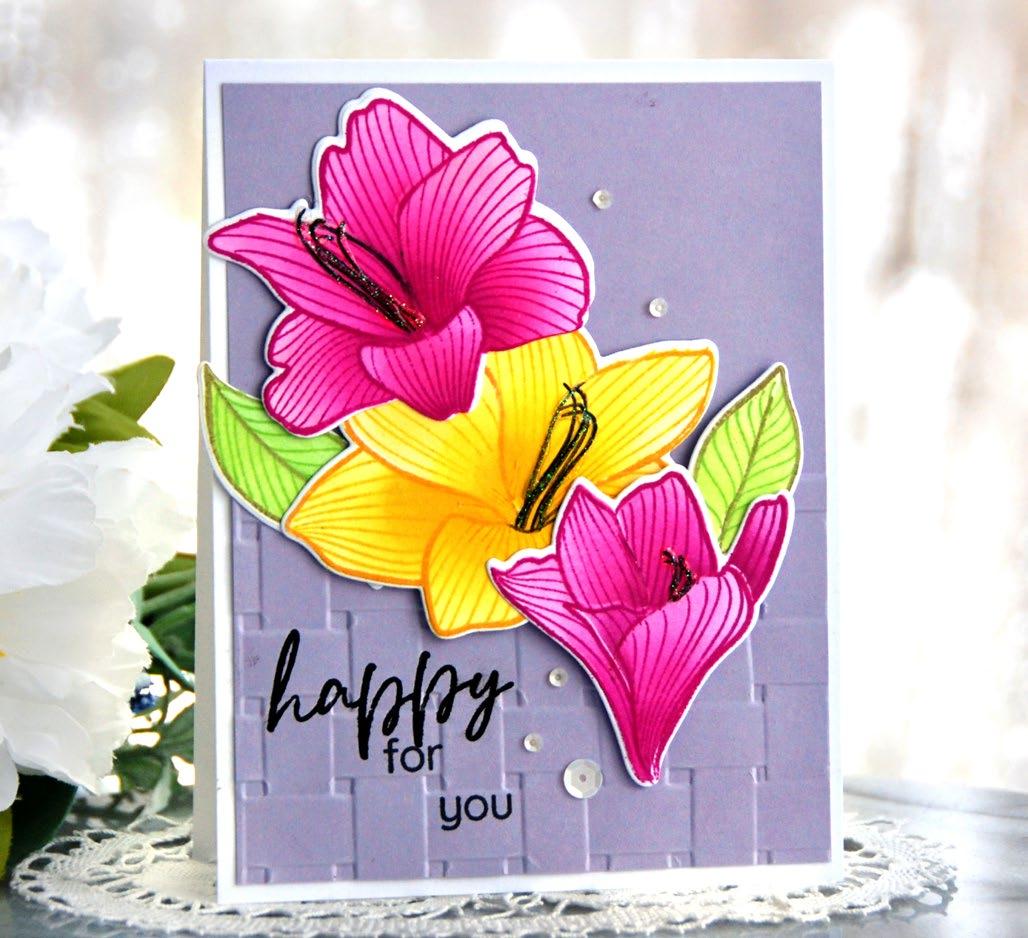
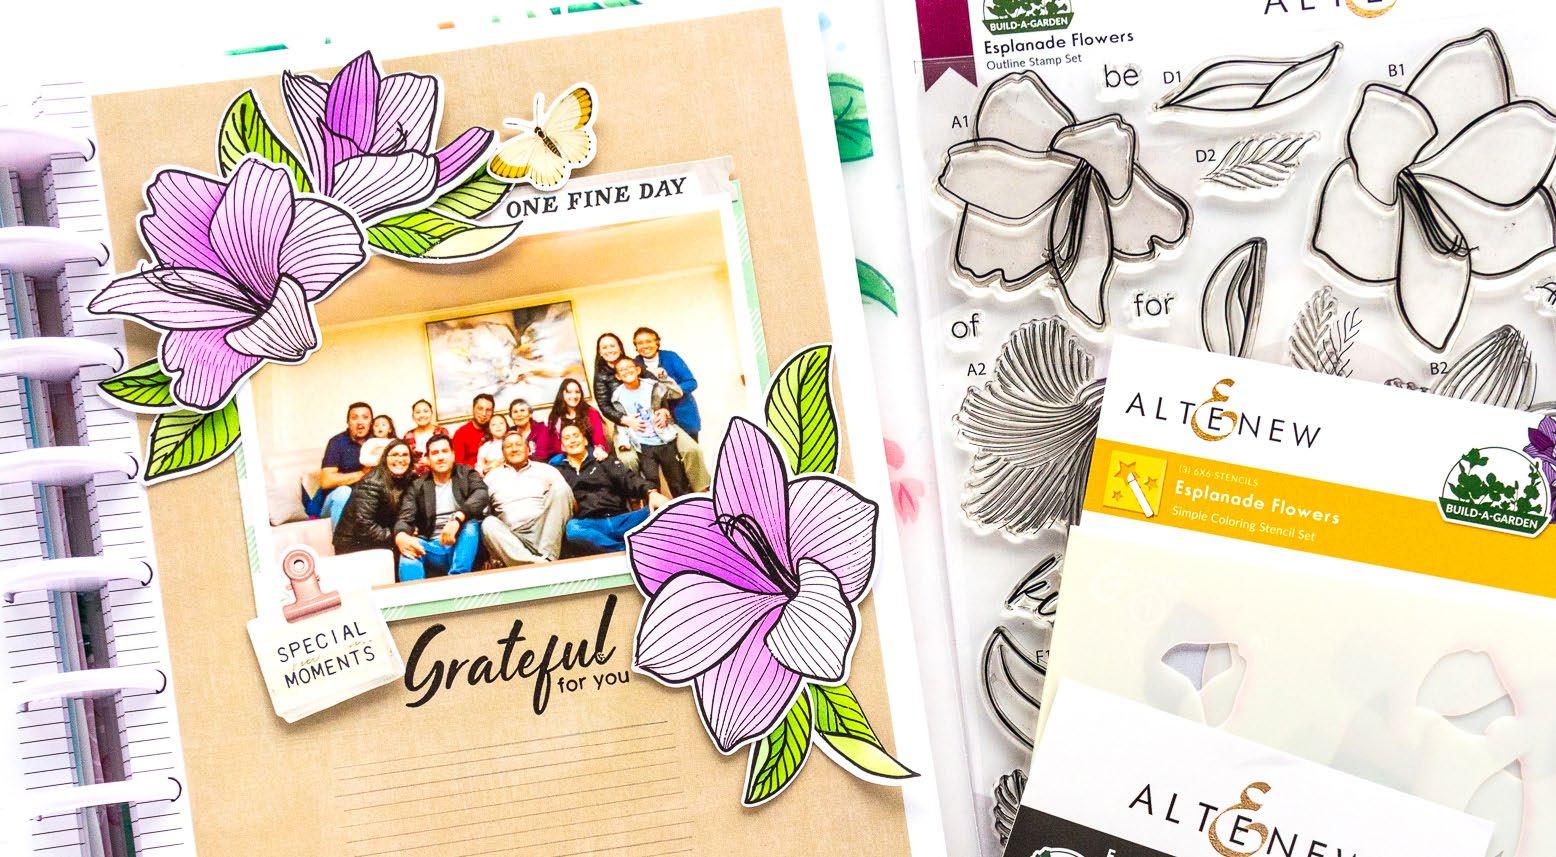
Have you ever walked down an esplanade? This stamp set is inspired by a walk down a picturesque esplanade lined with amaryllis plants. It features three flowers, accompanying leaves, and some versatile sentiments. Create a blooming focal point or a bold border around your project. The optional lines/veins you can stamp within each element provide multiple design possibilities!
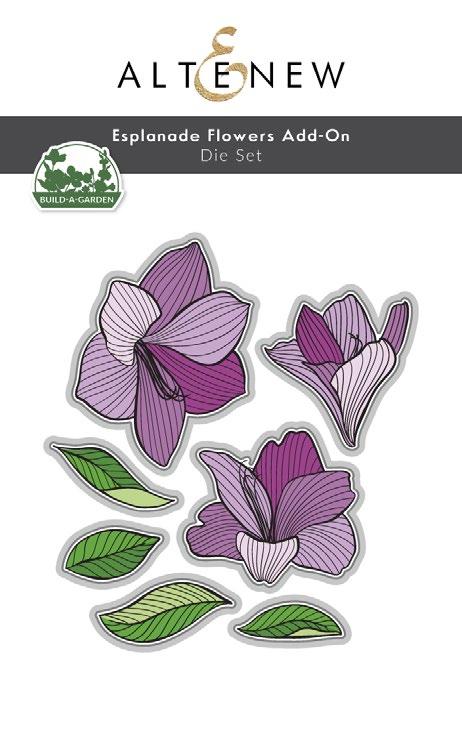

*Add-0n Die Set not part of the bundle

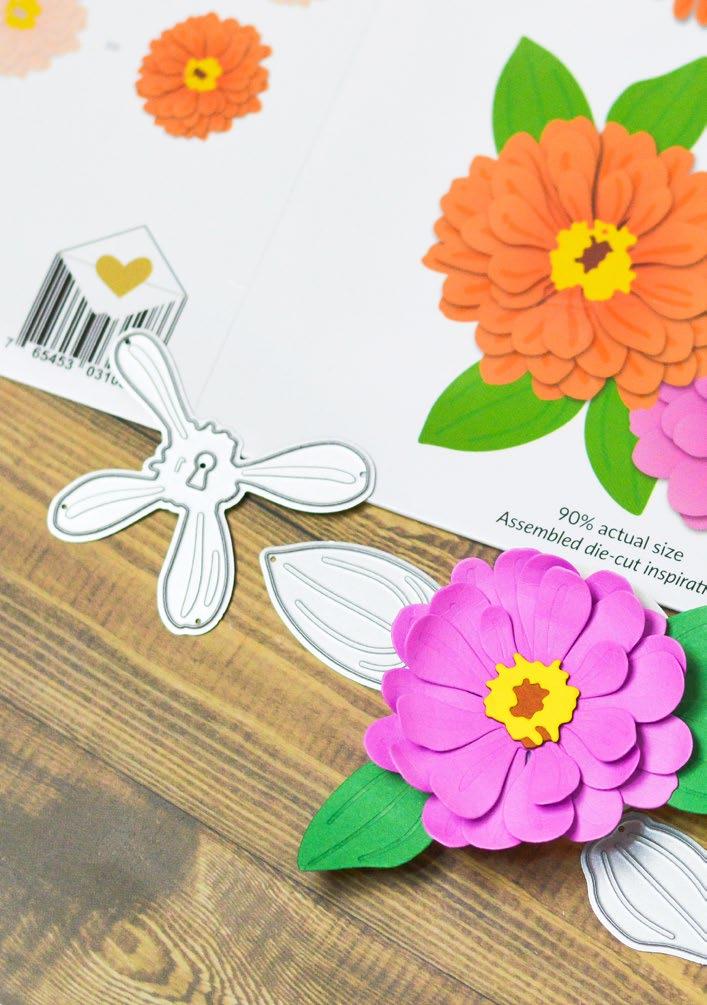
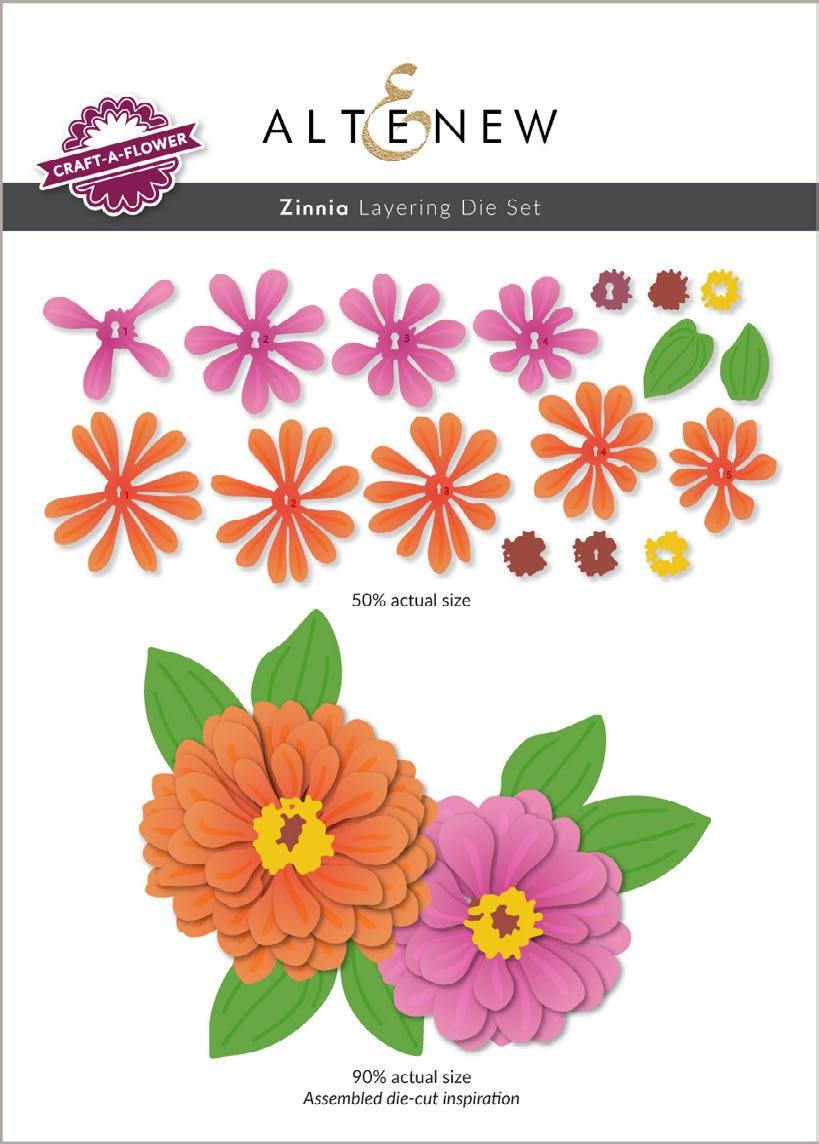
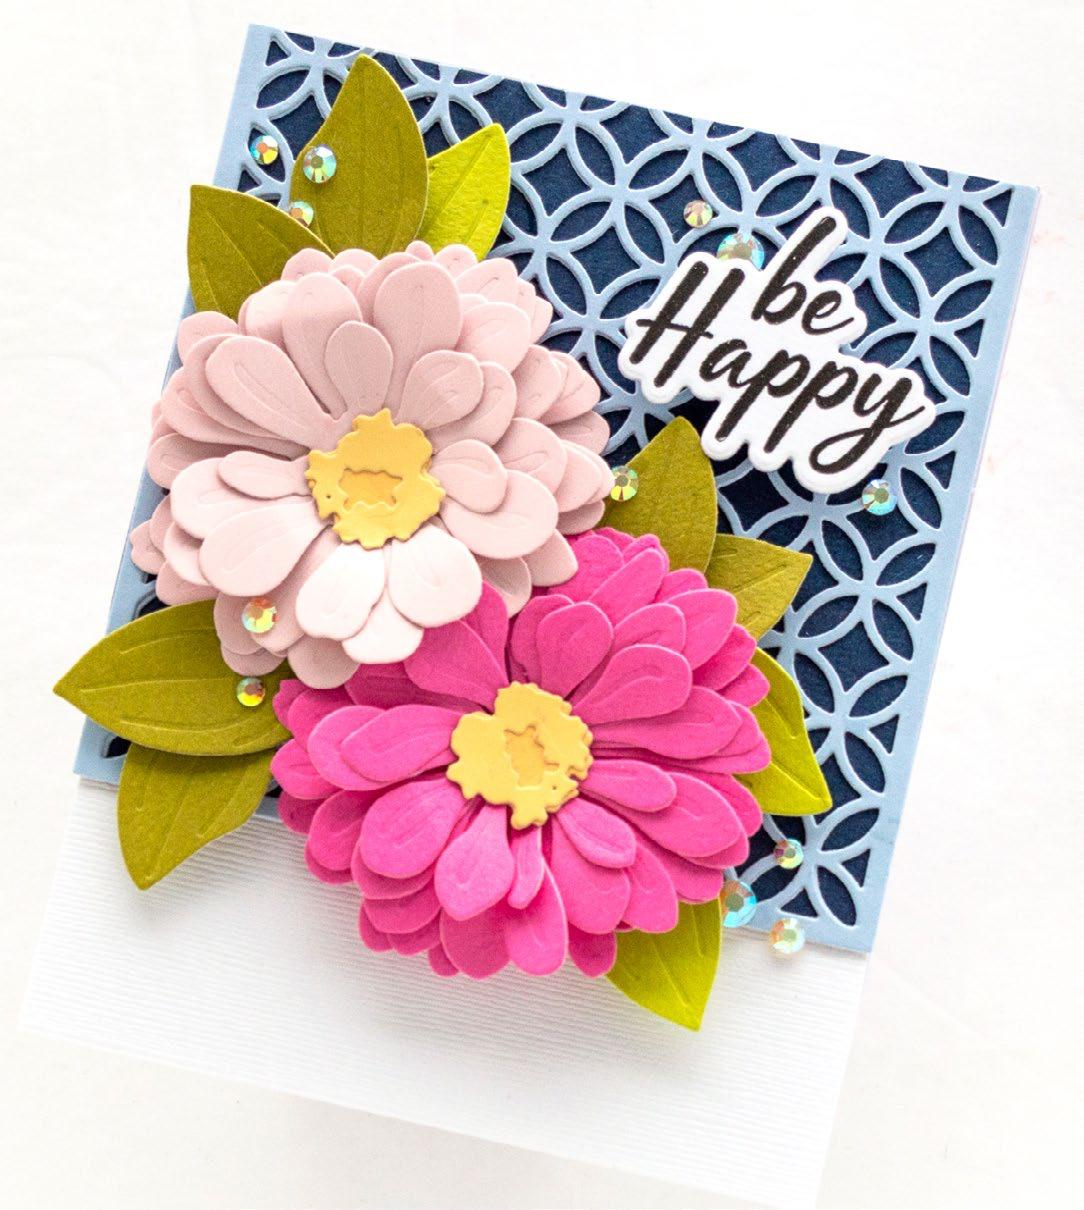
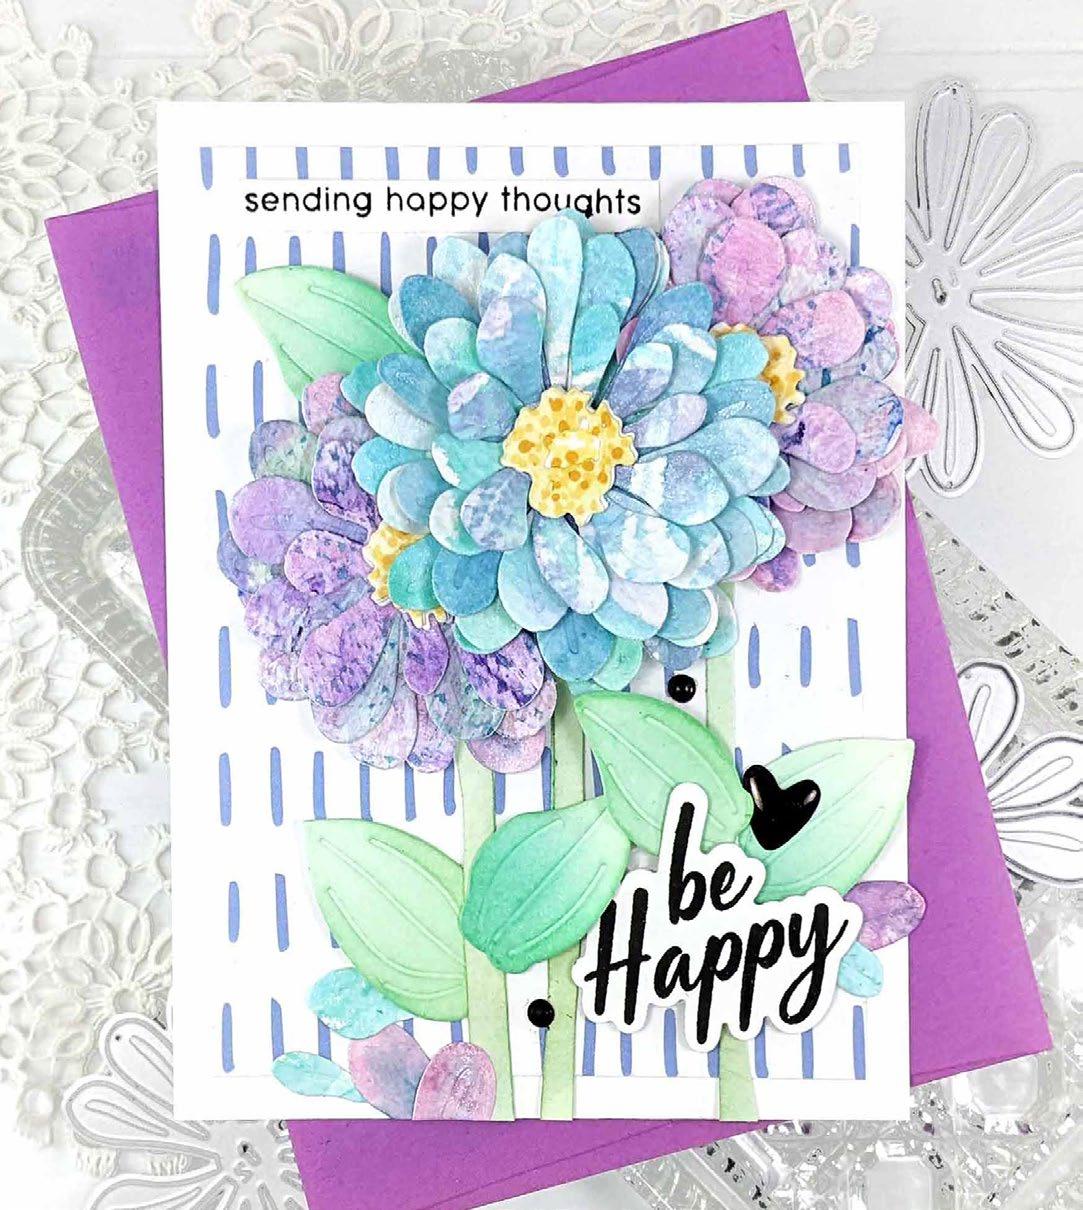
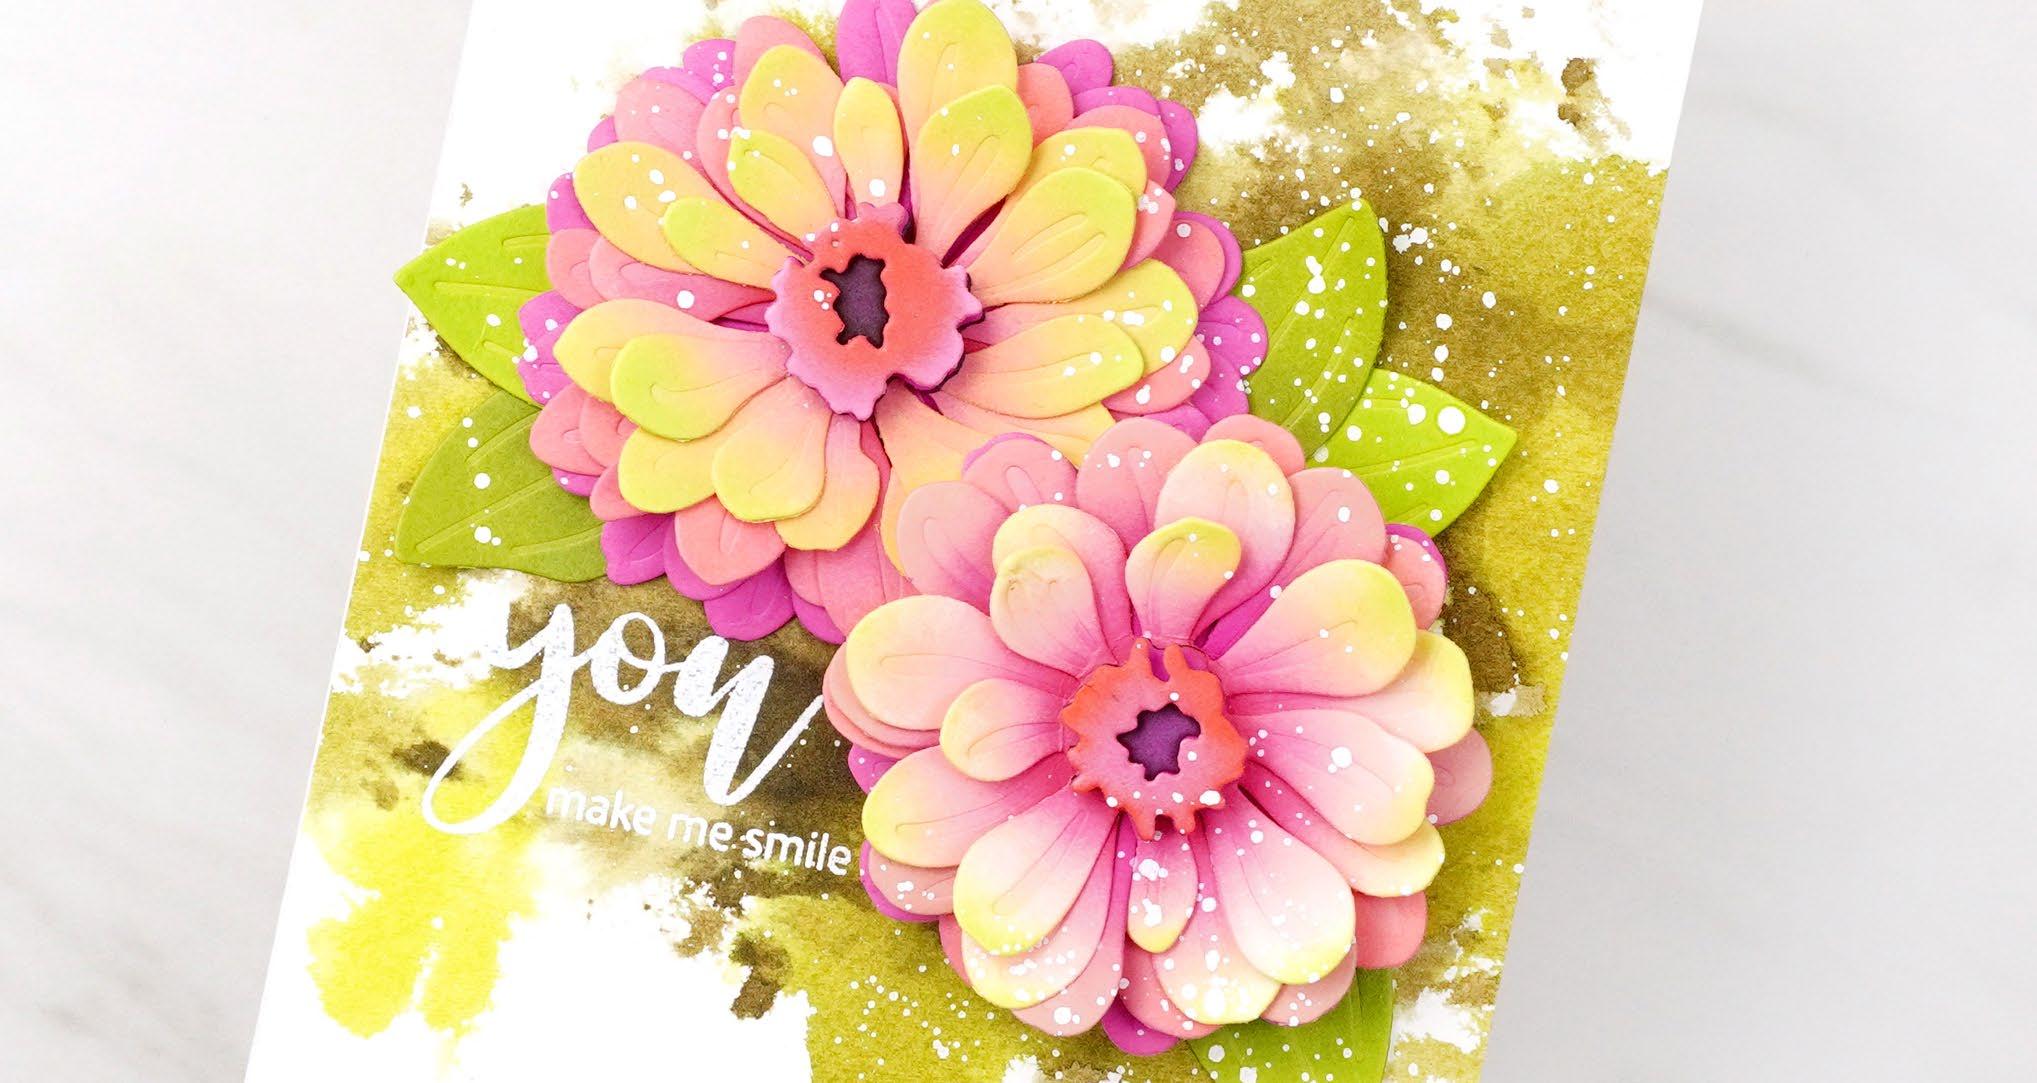
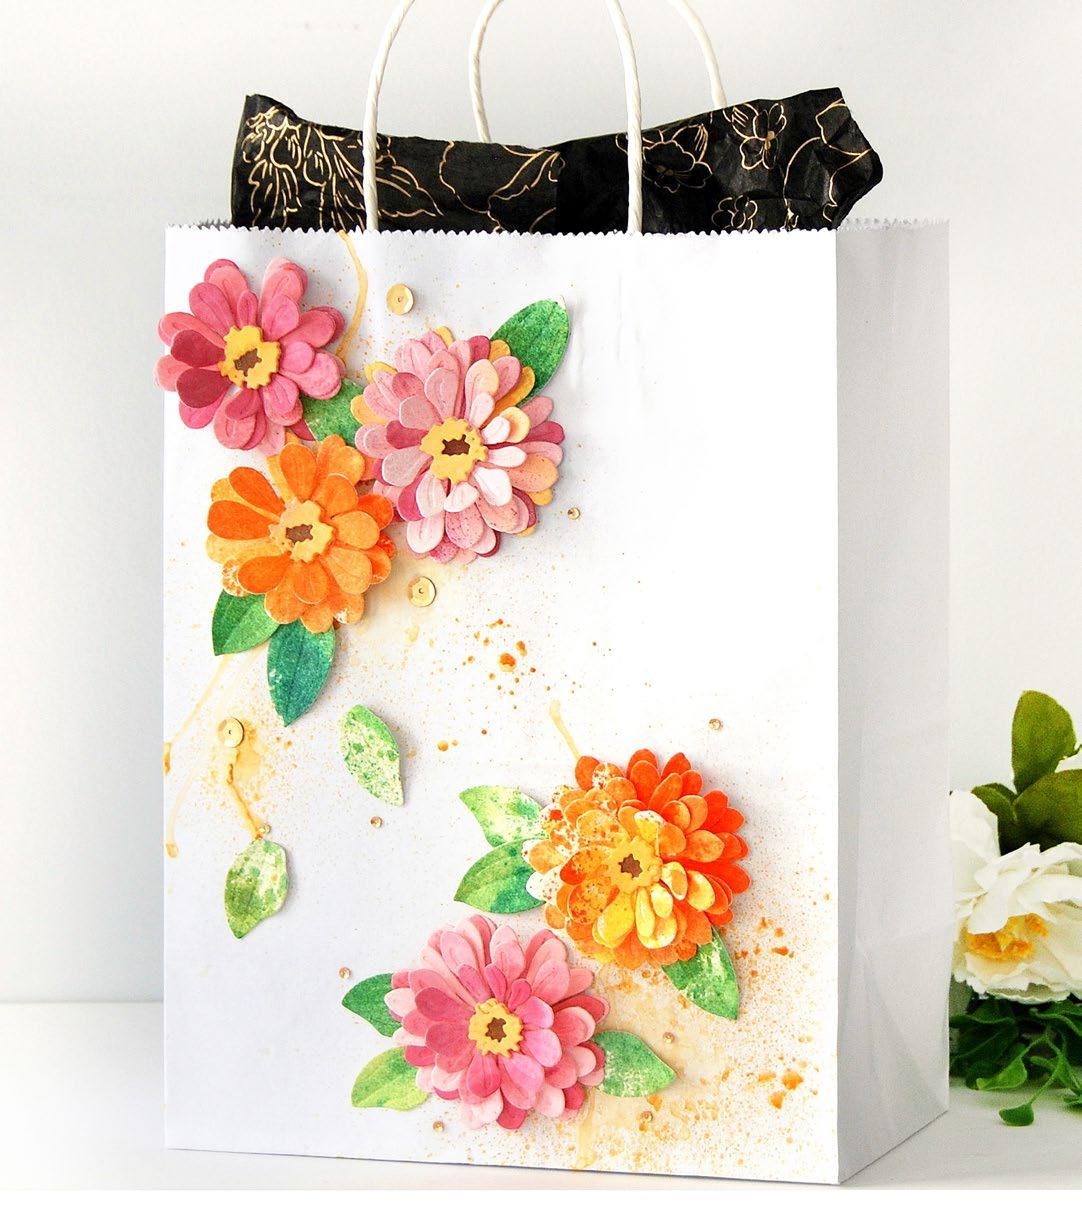
The zinnia is one of the most colorful flowers you can add to your garden! This die set helps you to create two stunning zinnia flowers. The larger bloom has 5 layers of petals and the smaller flower has 4 plus additional layers for the flower center. They are easy to align with our innovative keyhole/ arrow aligning guides.
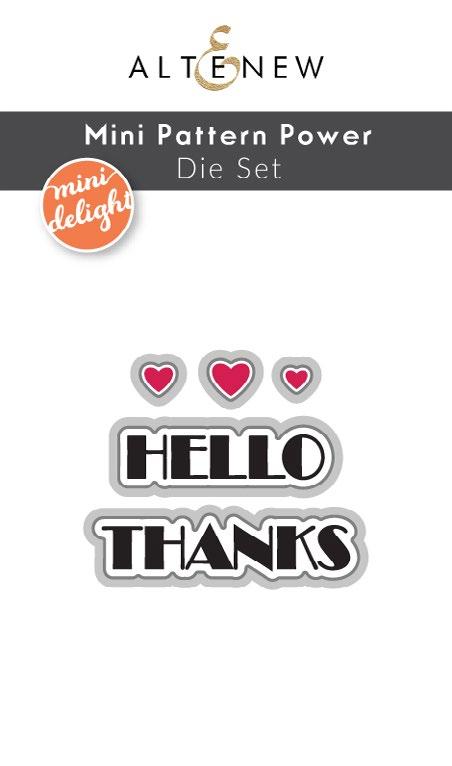
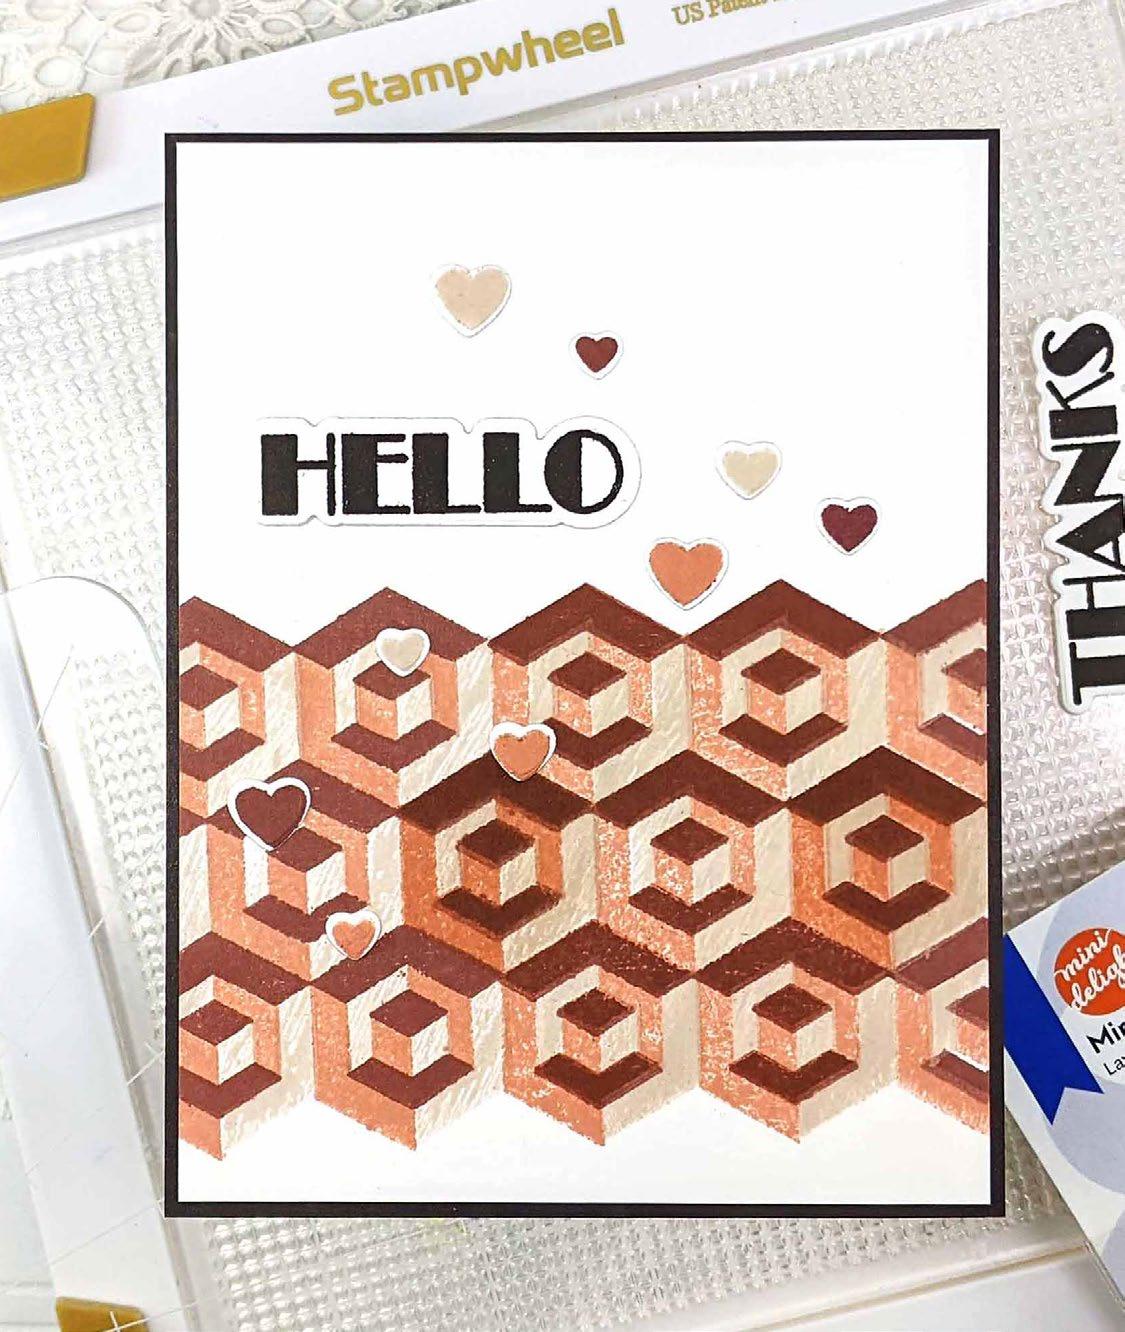
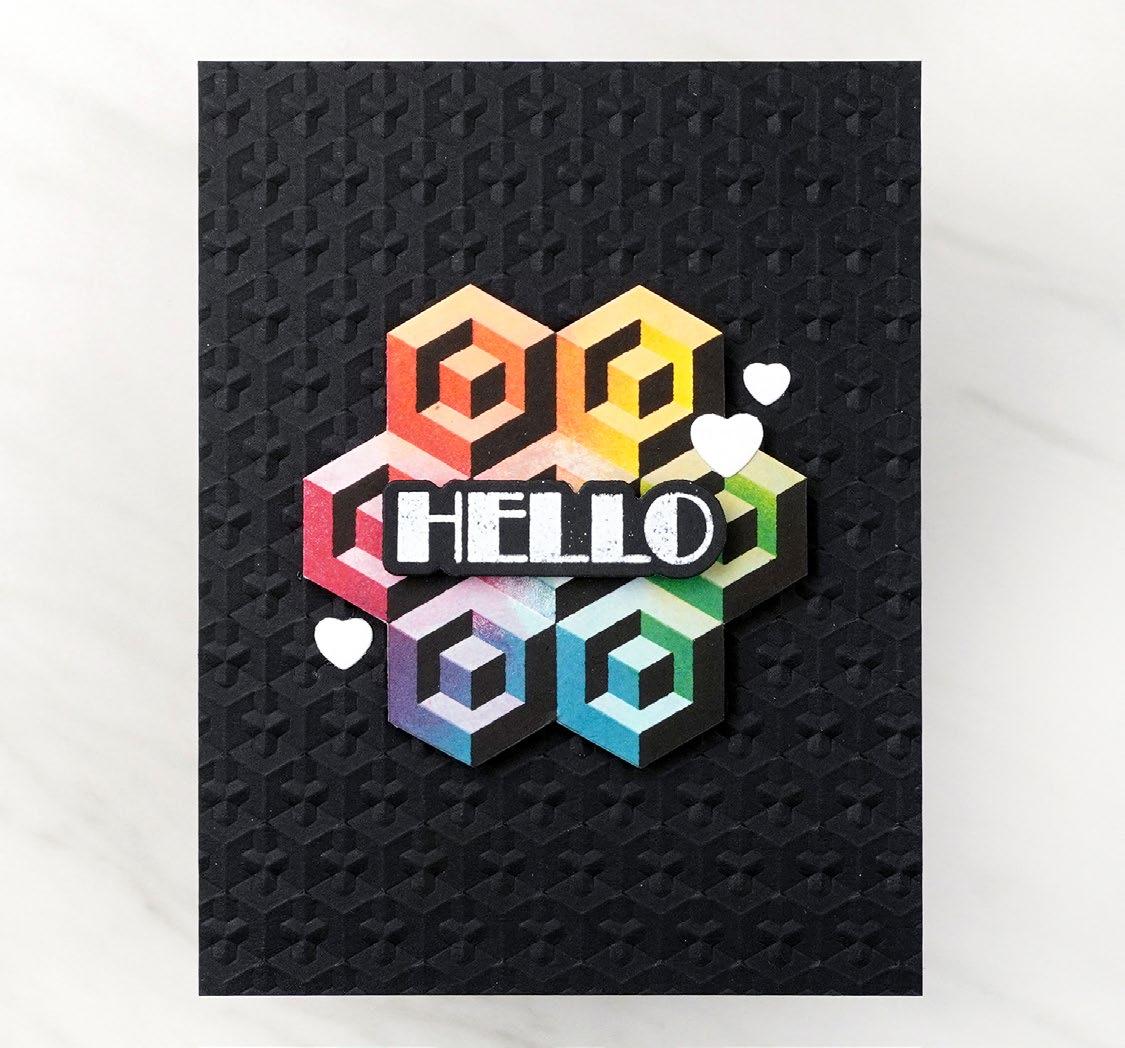
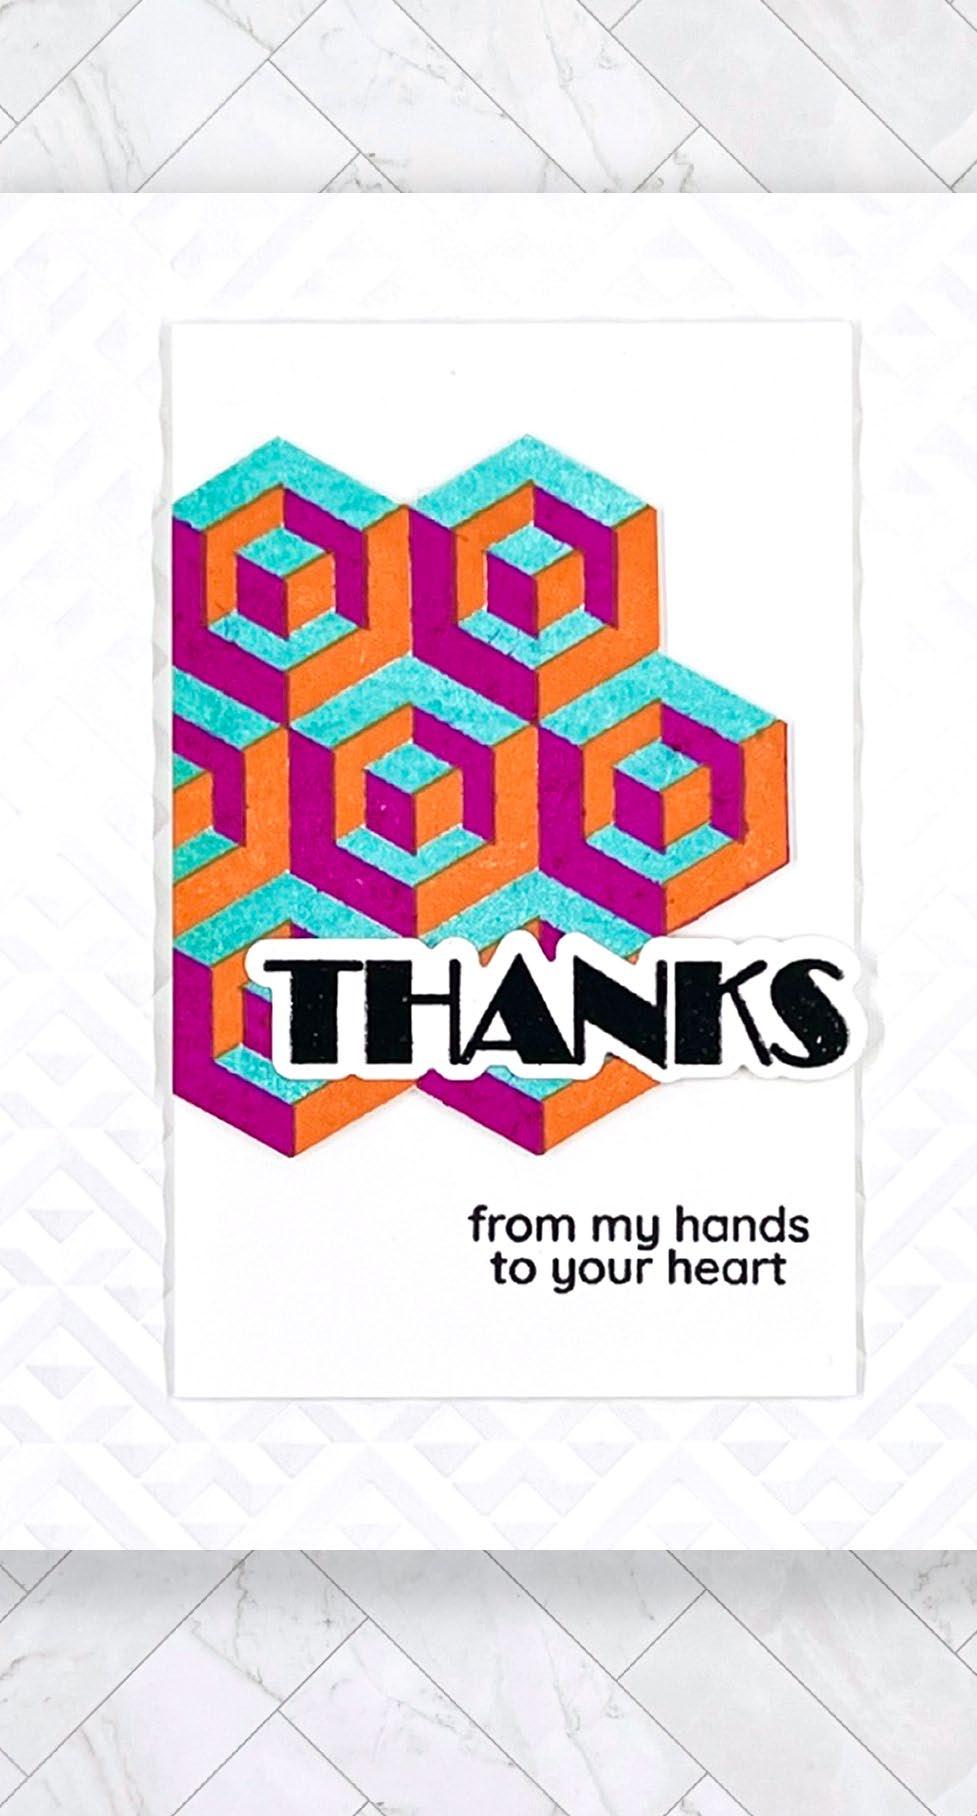
Unleash your inner creativity with this cleverly designed set that perfectly complements the Pattern Power Stamp Set! The main image can be stamped in multiple colors, rotating 120° each time for instant 3D effects. Use different color combinations to create full or partial backgrounds on your next project!
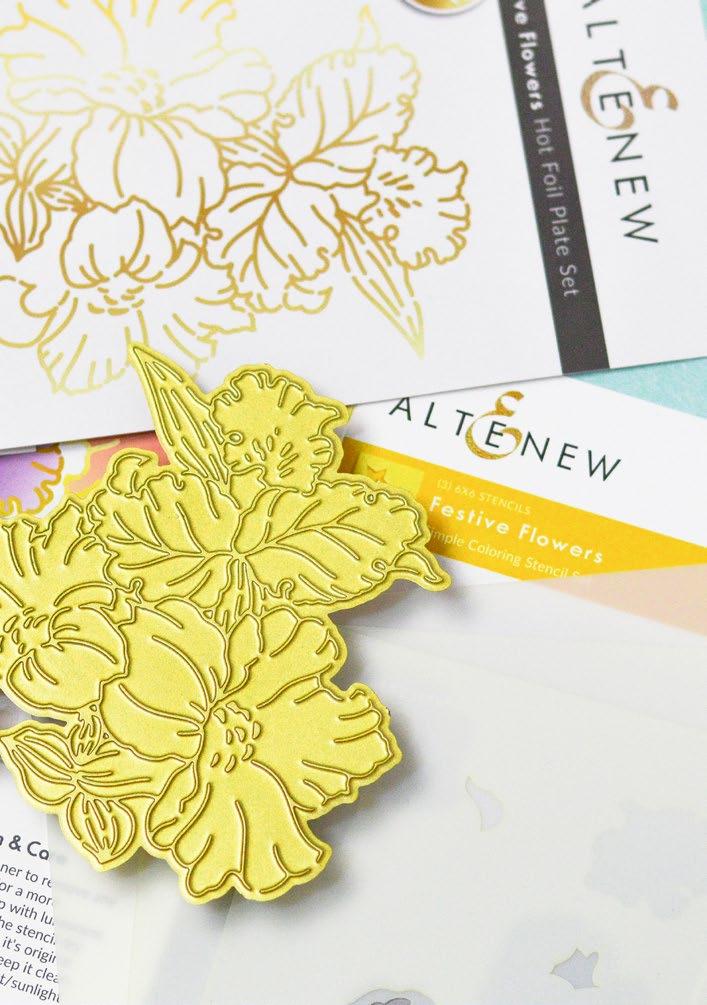
Did you know cattleyas represent the beauty of the Colombian flora? Spark Joy: Festive Flowers Hot Foil Plate features a beautiful arrangement of a cattleya and daylilies. Simply foil this image in your favorite hue, then add color to the flowers using the coordinating simple coloring stencil set.


 Created by Bridget Casey
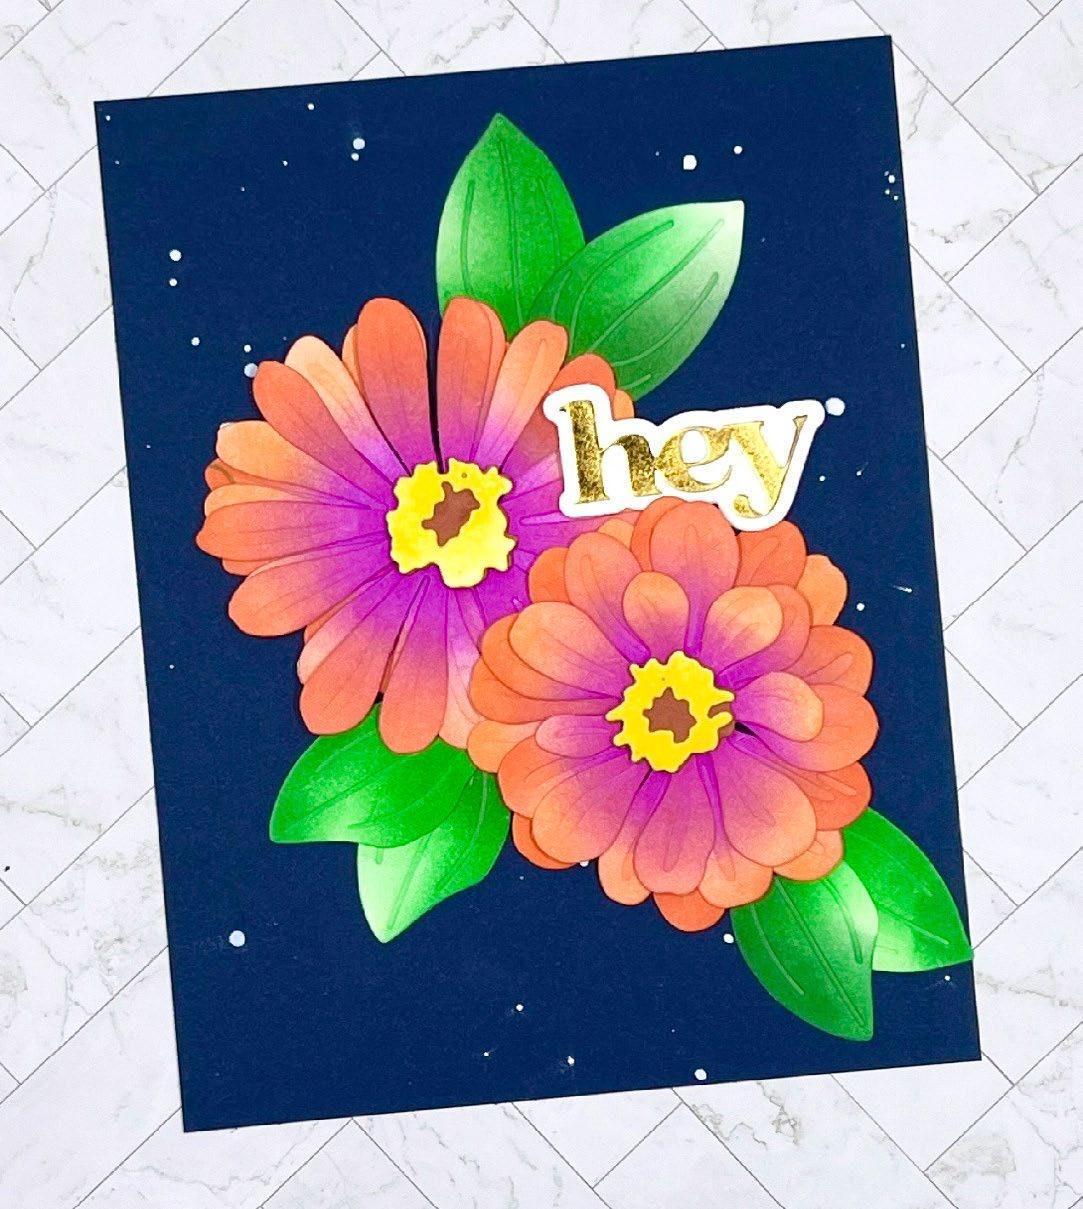
Created by Caly Person
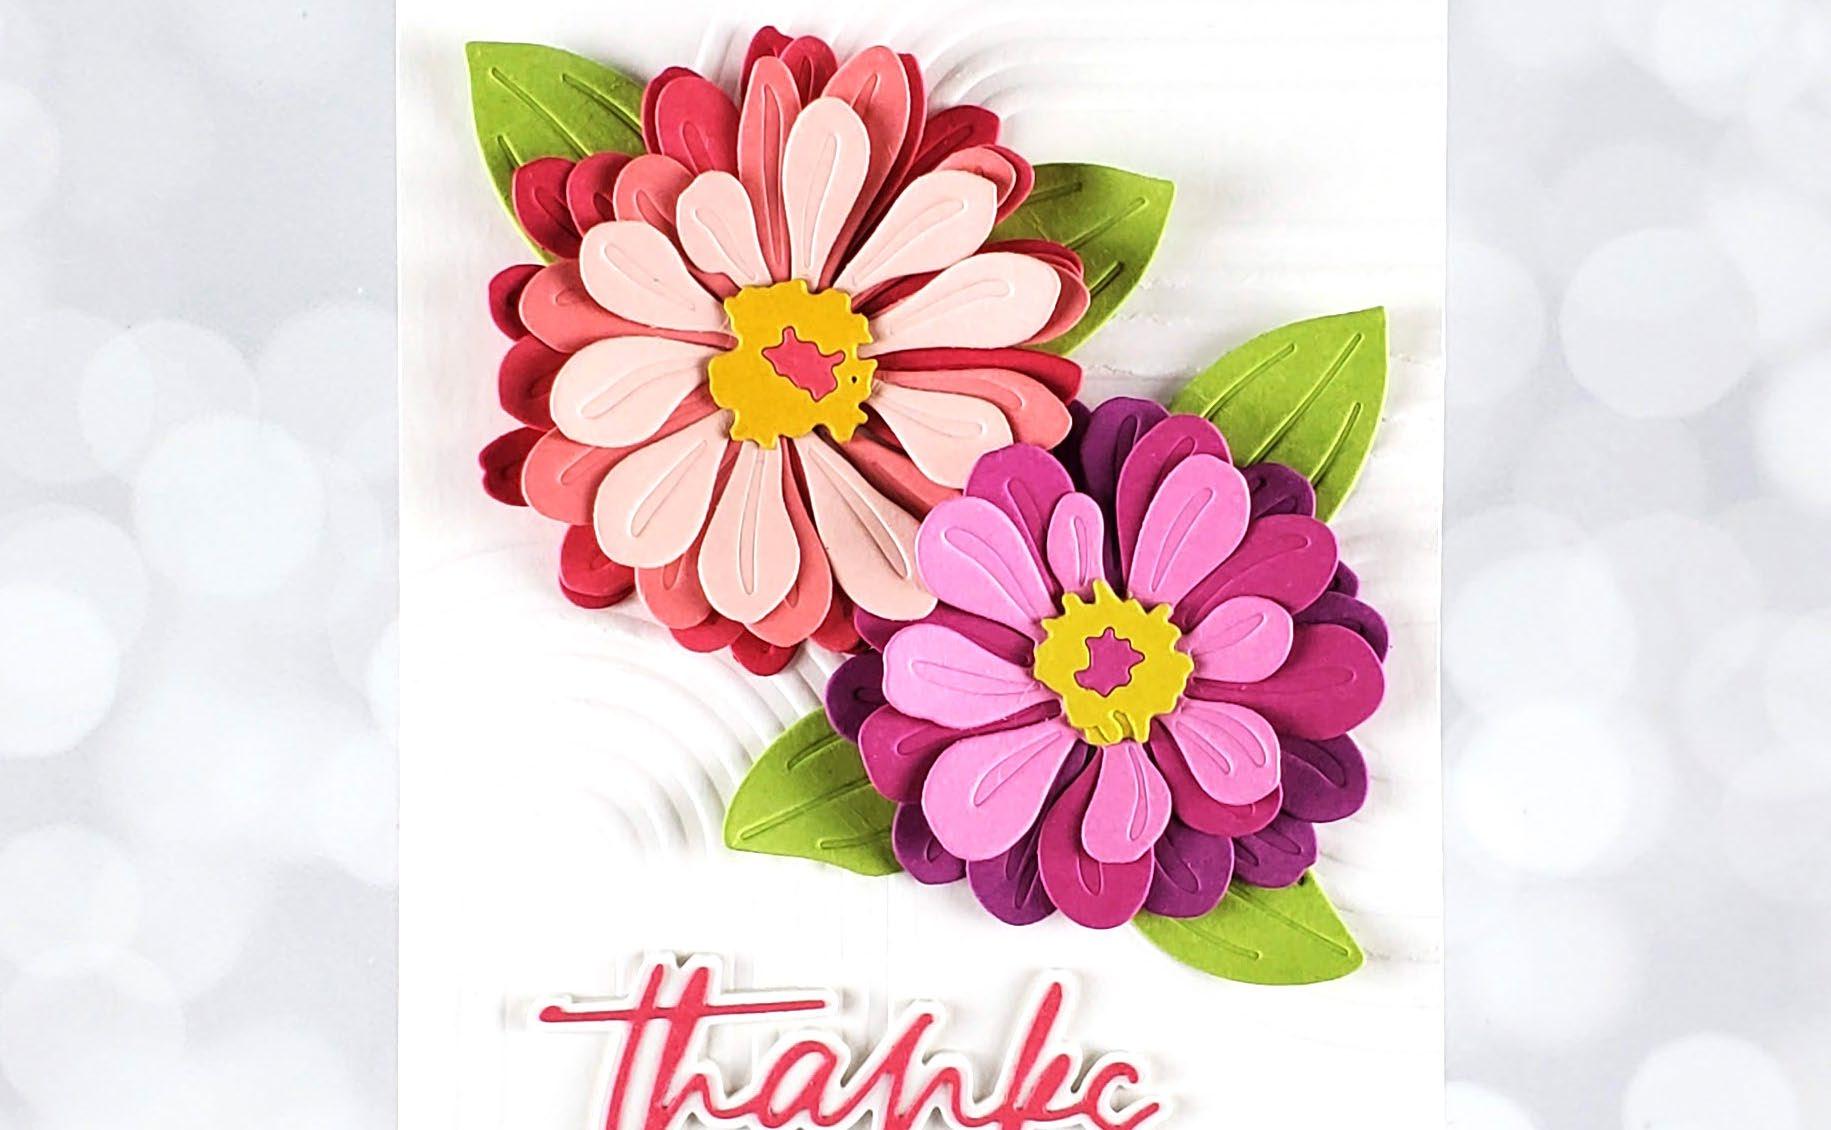
Created by Bridget Casey
Created by Caly Person

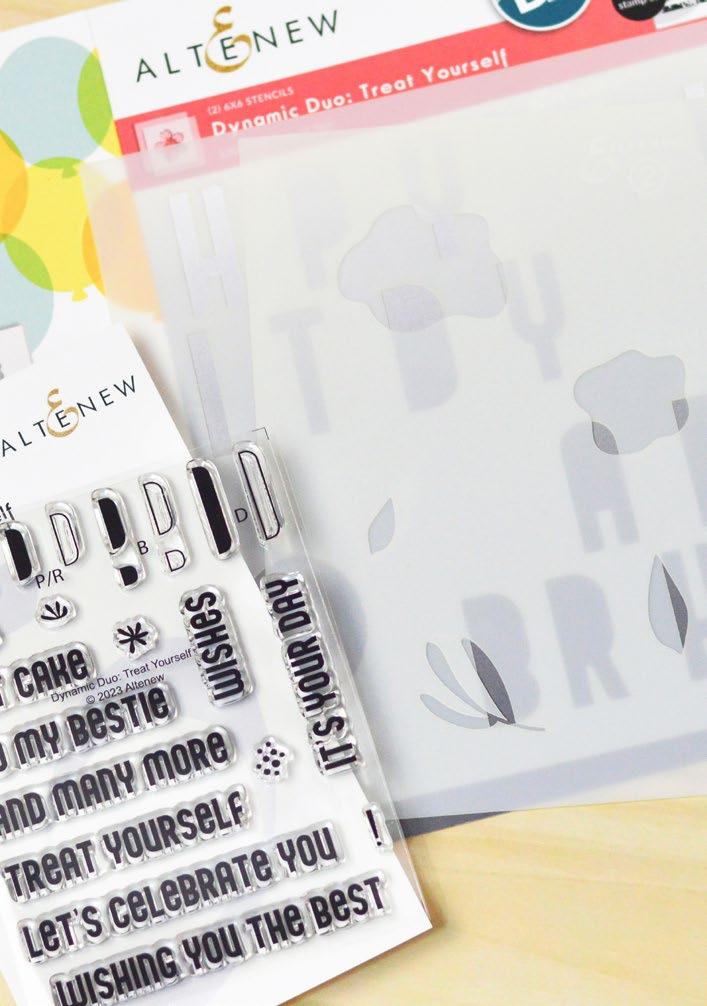
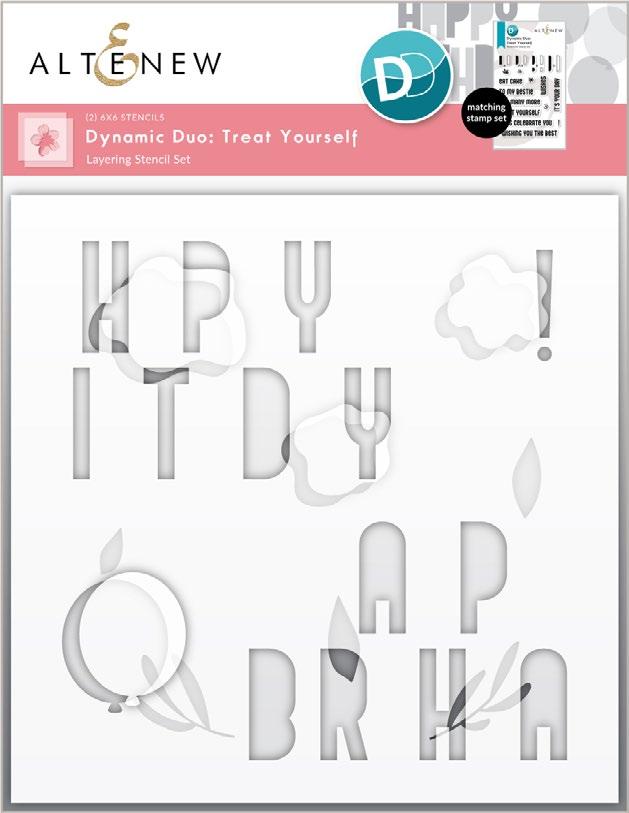
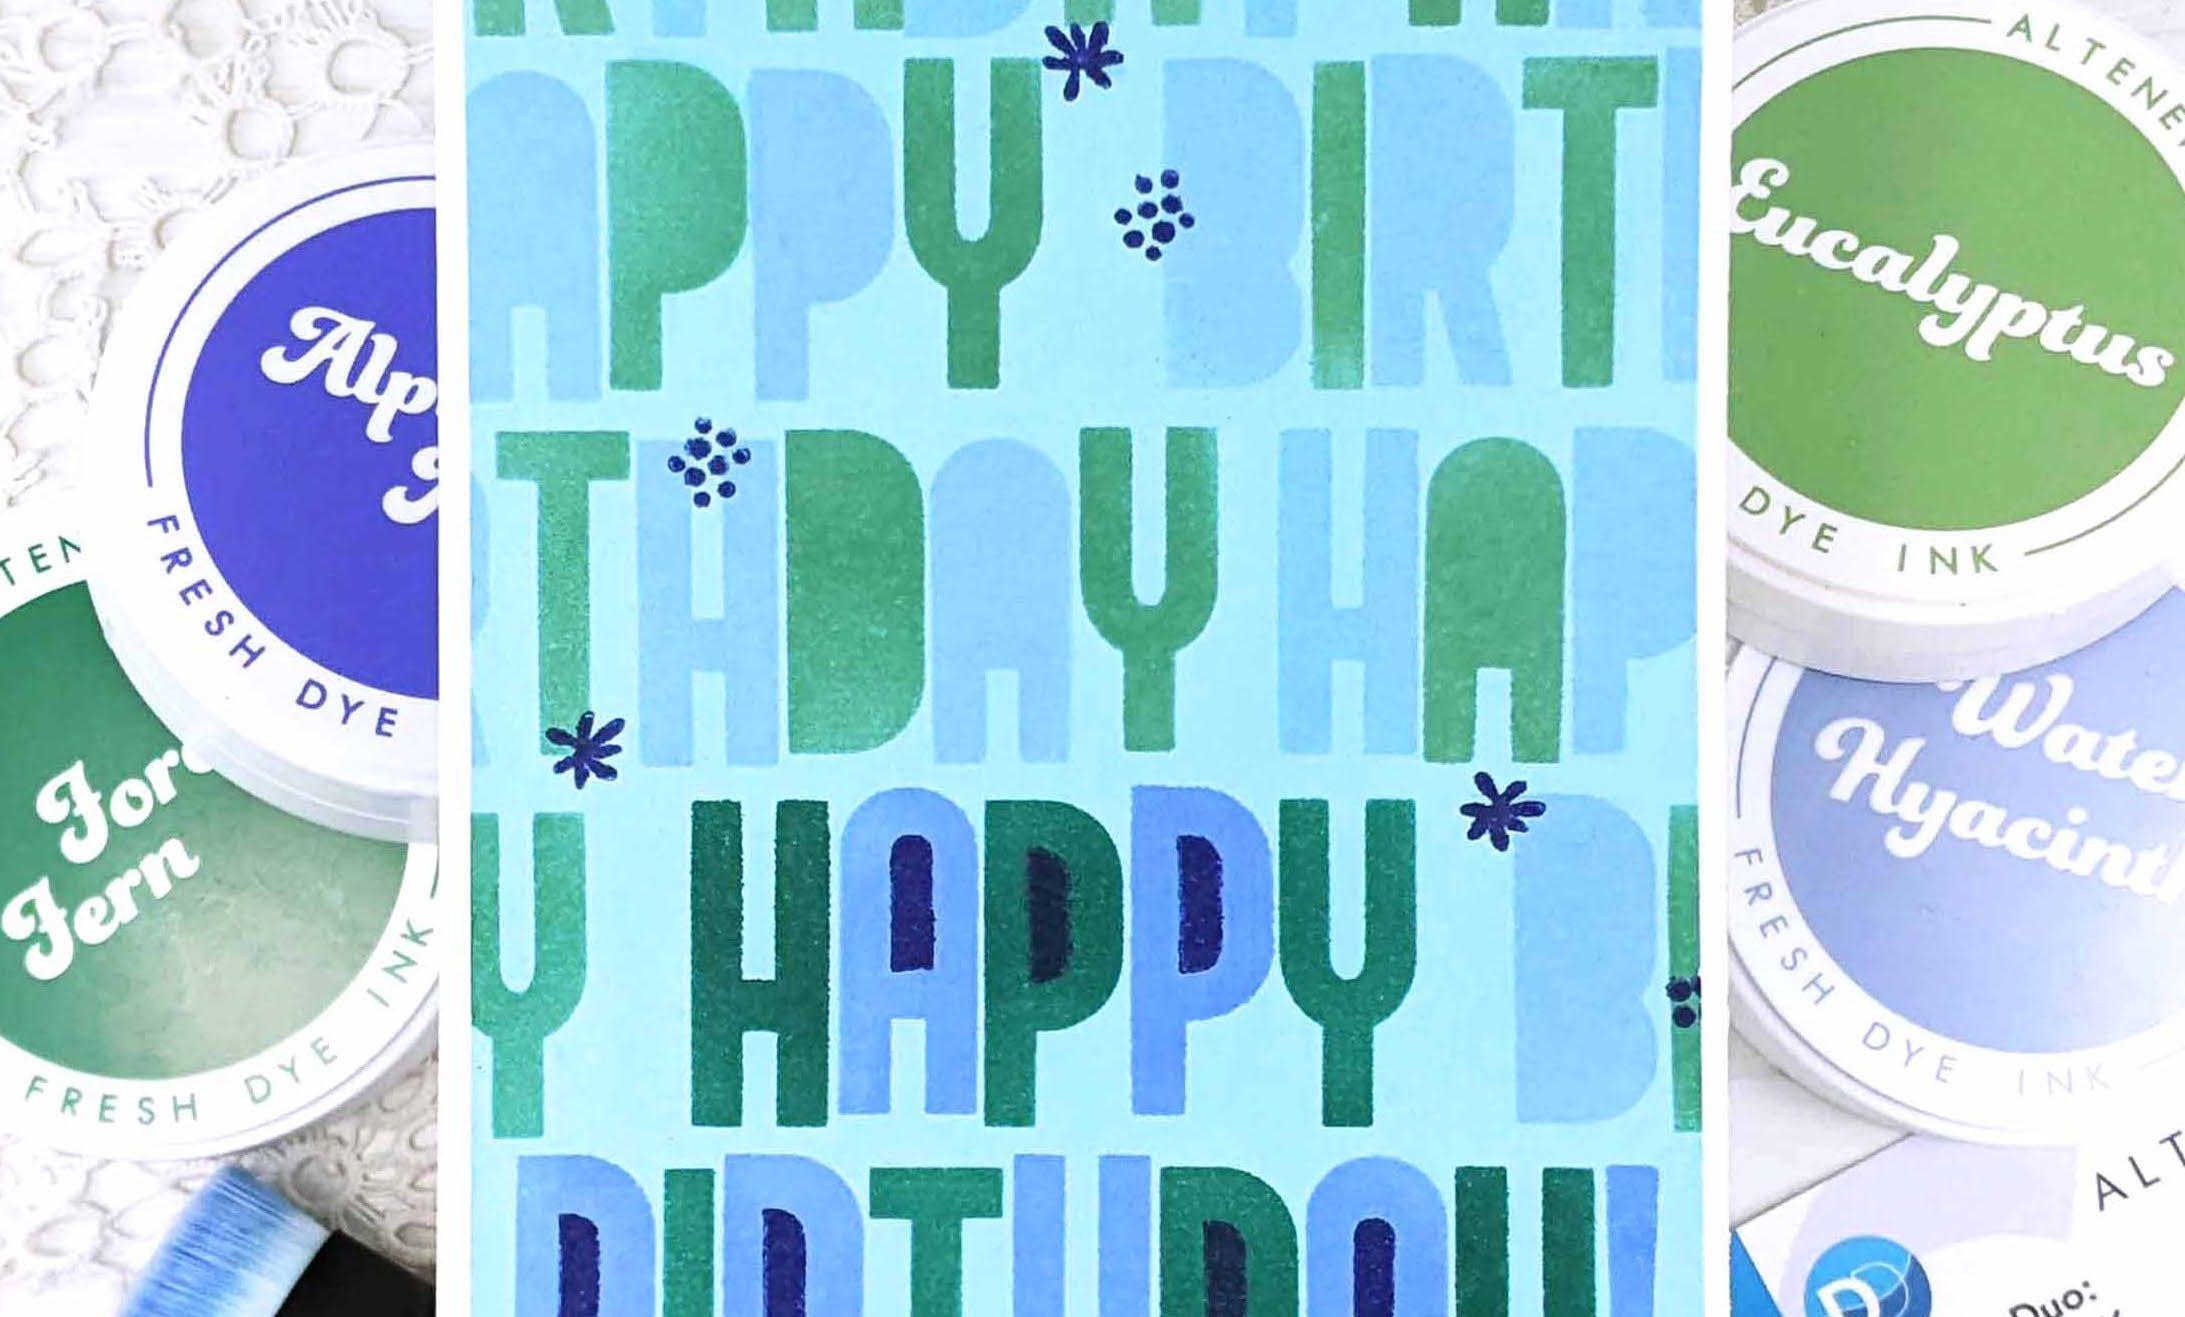
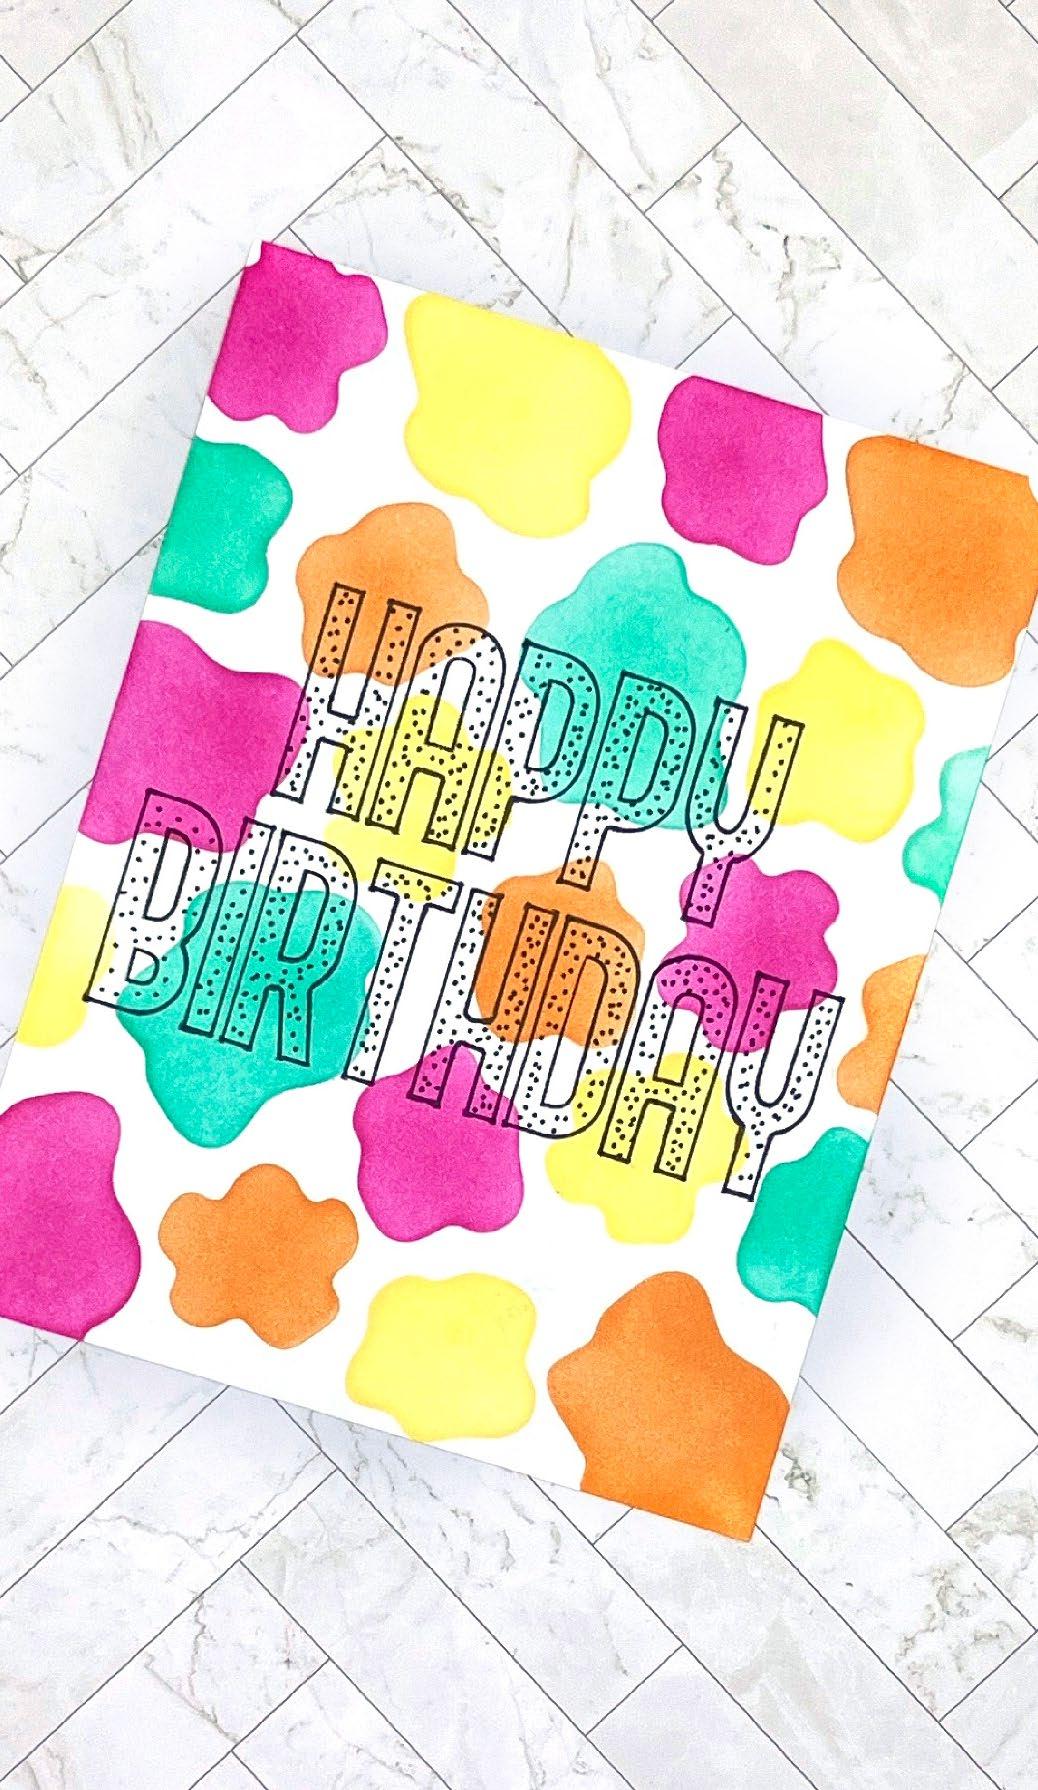
Use the clever stencil set to create a fun Happy Birthday sentiment accented by modern flowers or balloons. Then, use the stamp set to complete your project by adding details to the letters, centers to the flowers, and sentiments!

 Created by Caly Person
Created by Bridget Casey
Created by Caly Person
Created by Bridget Casey


