
7 minute read
LET IT SNOW
Let It Snow! Let It Snow!
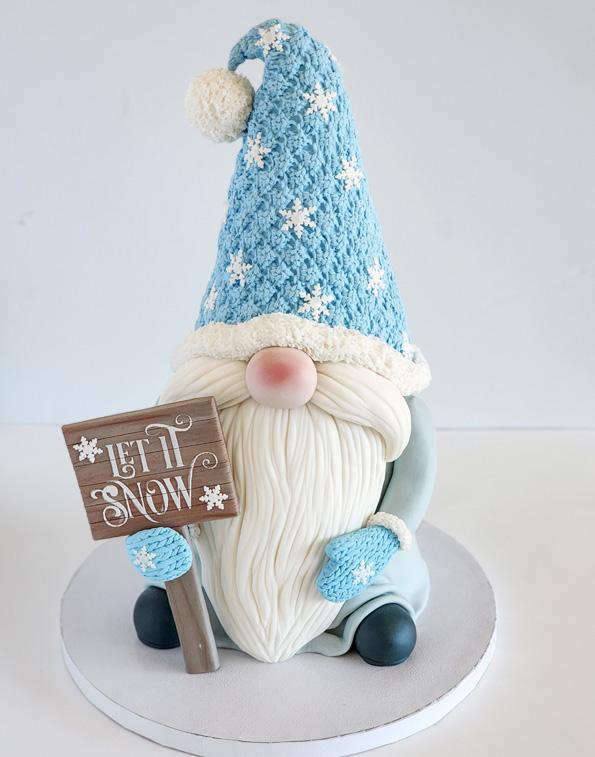
Celebrate the winter season with the cutest sculpted gnome.
BY LAURA NEWHOUSE
Laura Newhouse
always loved baking. In 2012, after having her first child, she thought it would be a fun hobby to learn to decorate cakes. After teaching herself to decorate, she started working at a couple of bakeries and then a local venue making custom wedding cakes. After welcoming her third child, she started her own business, Cakes by Laura Newhouse. To her, there is nothing more satisfying than a smooth buttercream canvas. Perfecting her sharp buttercream edges has become her specialty. She enjoys creating anything from fondant figures to intricate buttercream flowers and she loves sharing her tips and tricks with other cake artists to help them improve their skills. She looks forward to someday teaching her own classes.
LEVEL:
COMPONENTS
Edibles:
Three 5-inch cakes Buttercream 4-inch cake 3-inch cake Rice cereal Fondant: dark gray, light blue, white, ivory, medium blue, and brown (Renshaw) Edible glue Petal dust: pink, dark brown, light brown, and white (Petal Crafts) Tylose powder (Wilton) Royal icing Wafer paper Pearl luster dust (Sunflower Sugar Art)
Equipment:
Dowels Cardboard rounds Sharp knife Flexible smoother Rolling pin Dresden tool Paintbrush Knit impression molds (Marvelous Molds) Cocktail sticks Tape Let It Snow stencil Straight edge Snowflake cutter Food processor Cake drum
BUILD THE GNOME
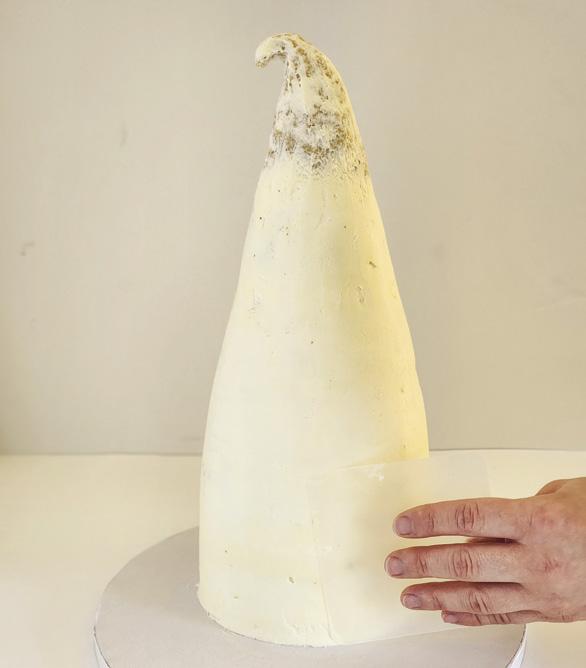
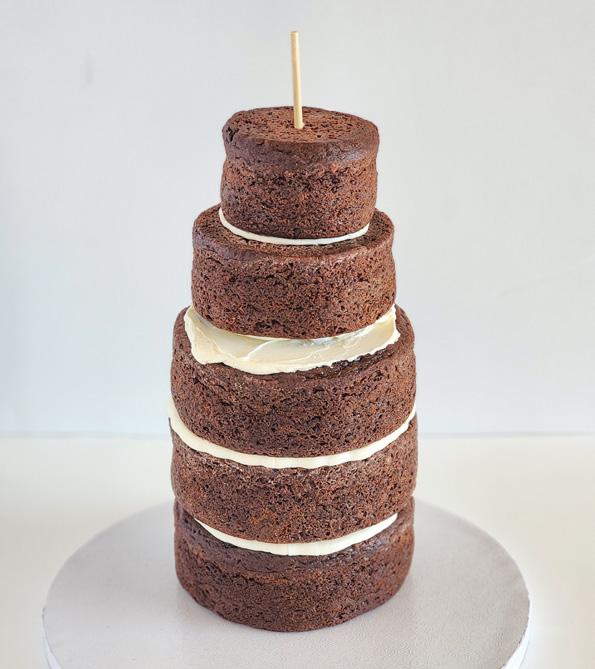
1. Start off by stacking and filling three 5-inch cakes with buttercream. Add 3 dowels and a 3-inch cardboard round off center toward the back of the cake. Stack the 4-inch cake on top of the cardboard, followed by the 3-inch cake. 2. Press a center dowel through the cake and into the board, leaving 2 inches exposed. Use a sharp knife to carve the top edge of each layer, carving it into a cone shape. 3. Roll rice cereal treats into a teardrop shape and curl the point over. Press this onto the top of the center dowel. 4. Cover your cake in a thin layer of buttercream, using a flexible smoother to smooth it out.
1

2&3 4
ADD THE DETAILS
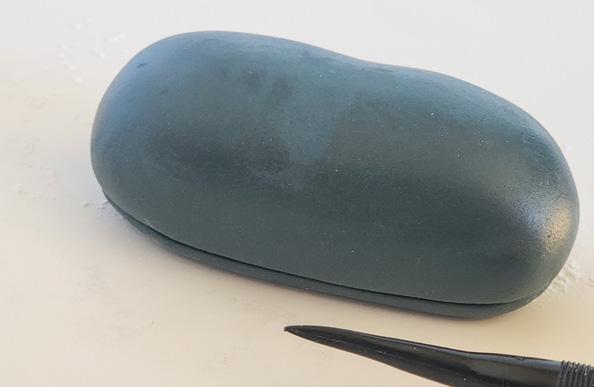
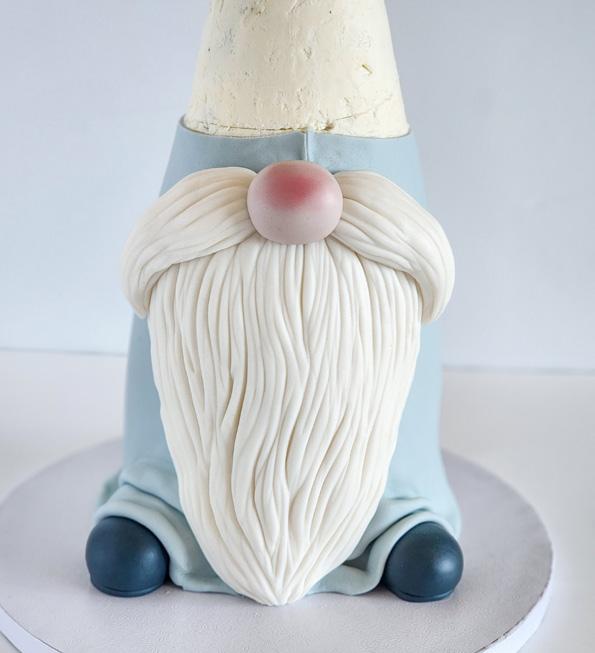
1. For the boots, roll out dark gray fondant into a sausage shape. Press it down in the center and then cut it to make the boots. Using a Dresden tool, score a line around the bottom of each boot.
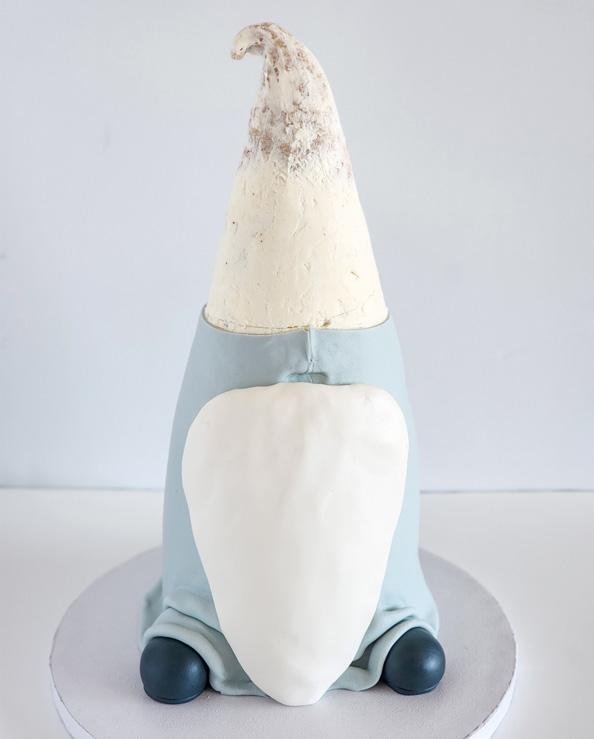
2. Place the boots on either side of the cake, leaving room in the middle for the beard.
3. Roll out a large rectangle of light blue fondant. Center your rectangle at the back of your cake, bringing each end to the front. Fold your fondant around the boots, making sure all of your cake is covered. Pinch the seam to the center and trim it. The beard will be covering the seam, so it doesn’t have to be perfect. 4. Make an indent where your nose will be. Roughly shape your beard out of white fondant, making sure it’s long enough to go from the nose to the board. Using edible glue, attach the beard underneath the nose indent.
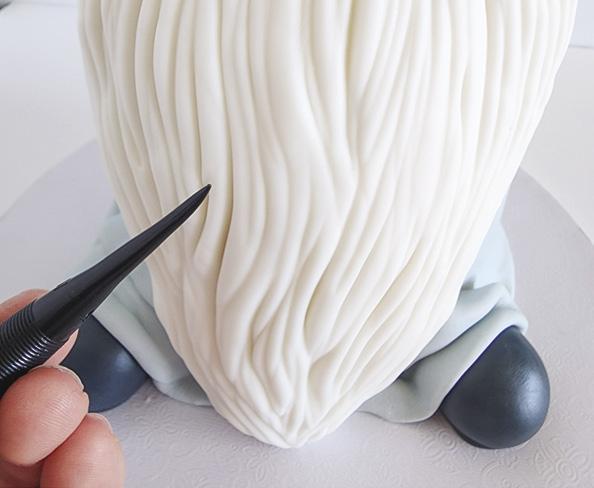
5. Use the Dresden tool to score the hair.
6. Roll out white fondant into 2 long teardrop shapes and attach them to each side of the nose indent. Use the Dresden tool to score the hair.
7. Roll out ivory fondant into a ball to make the nose and attach it with edible glue.
Using a paintbrush, dust the nose with pink petal dust.
1
2 3
4
5
6&7 2a

CREATE THE HAT
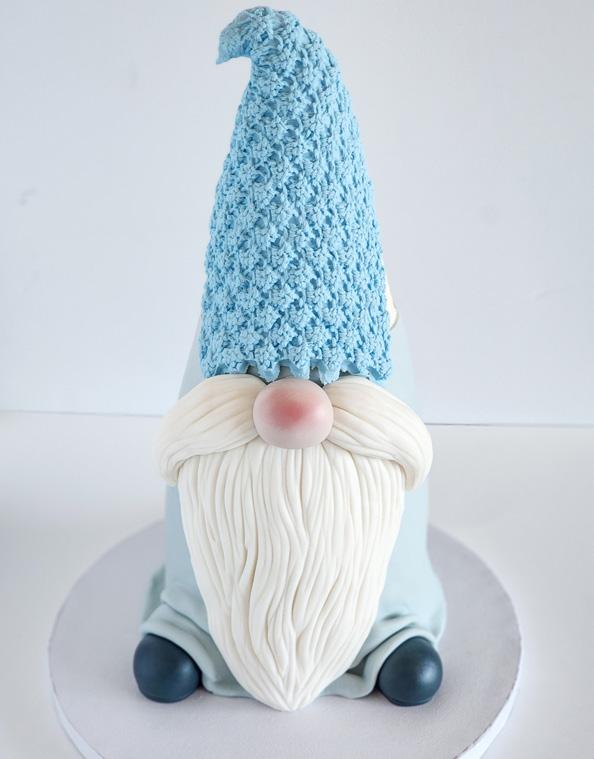
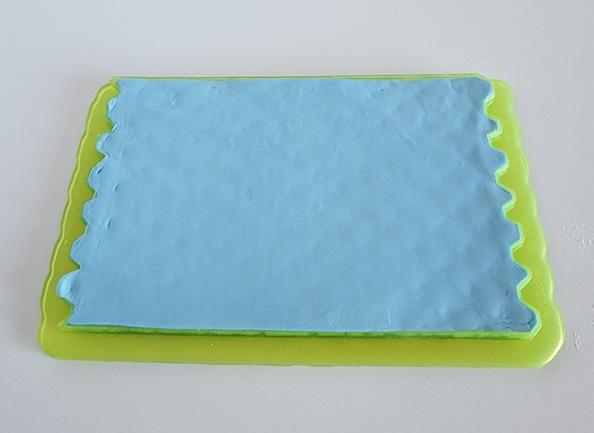
1. For the hat, press medium blue fondant into a knit mold and repeat 2 more times. 2. Place the first piece of fondant on the front of the cake, directly above the nose. Add the other 2 pieces of fondant.
Fold the knit mold in half and gently press on the seams to blend them in.
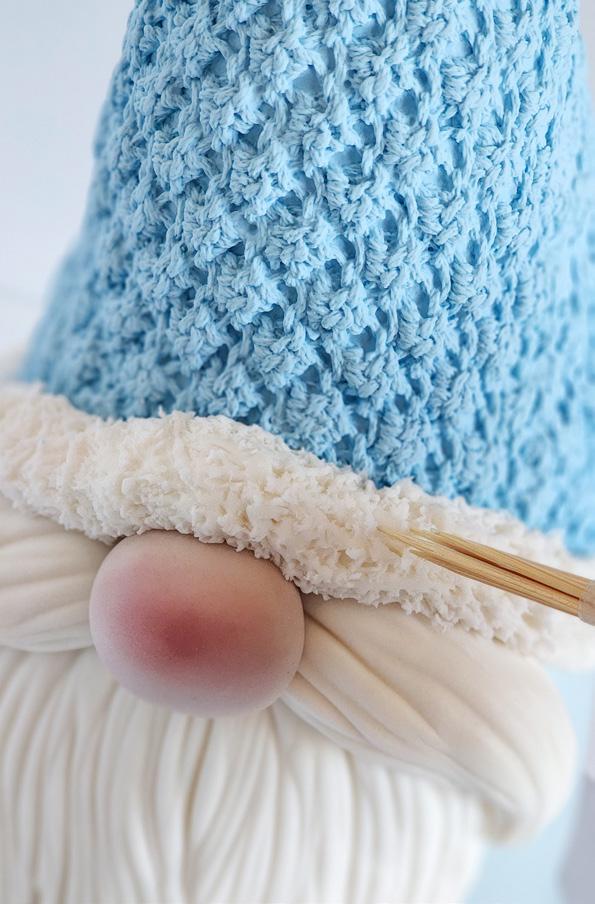
3. Roll out some white fondant into a large noodle to wrap around the bottom of the hat.
Attach it with edible glue.
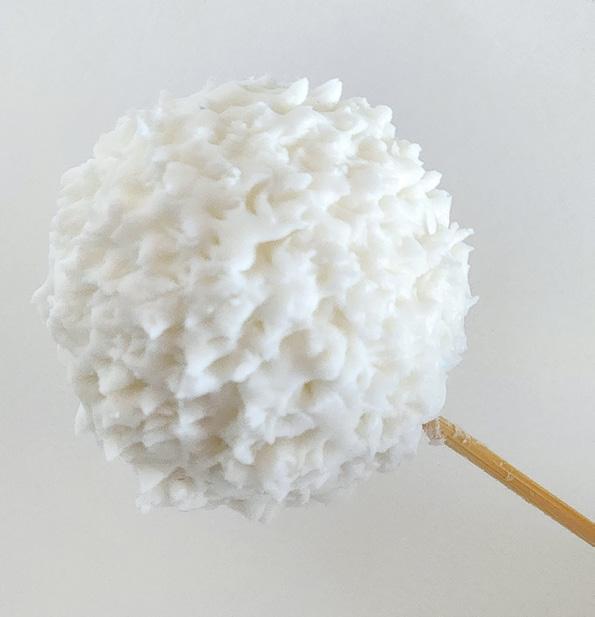
Using 5 cocktail sticks taped together, make little swirls in the white fondant to give it a fluffy look. 4. For the pom-pom, roll out a ball of white fondant. Use cocktail sticks to fluff it. Using a cocktail stick with edible glue, attach it to the side of the hat. Press the point of fondant coming off of the hat into the top of the ball.
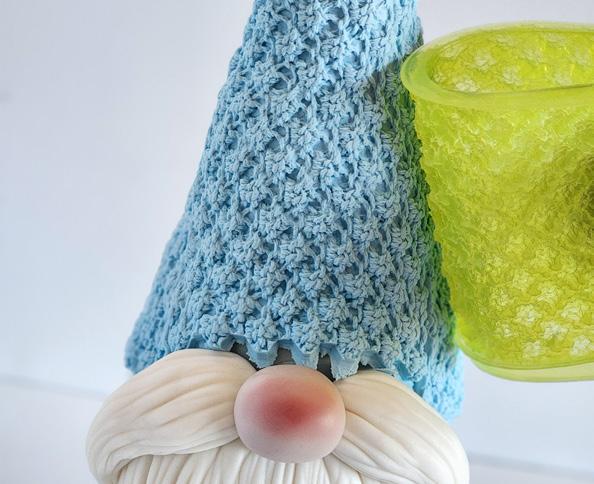
1 2b
3
4a 4b
FORM THE SIGN
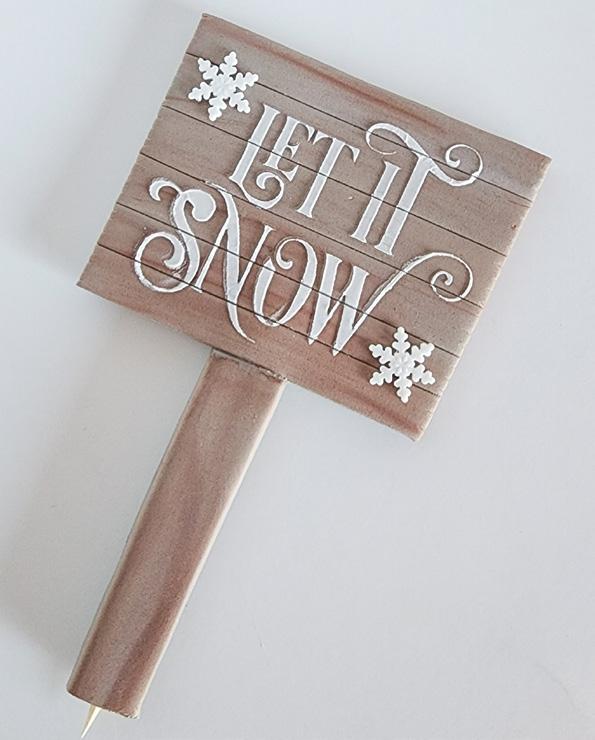
1. Roll out some brown fondant mixed with tylose powder.
Use dark brown, light brown, and white petal dust and brush them back and forth to give it a worn wood look.
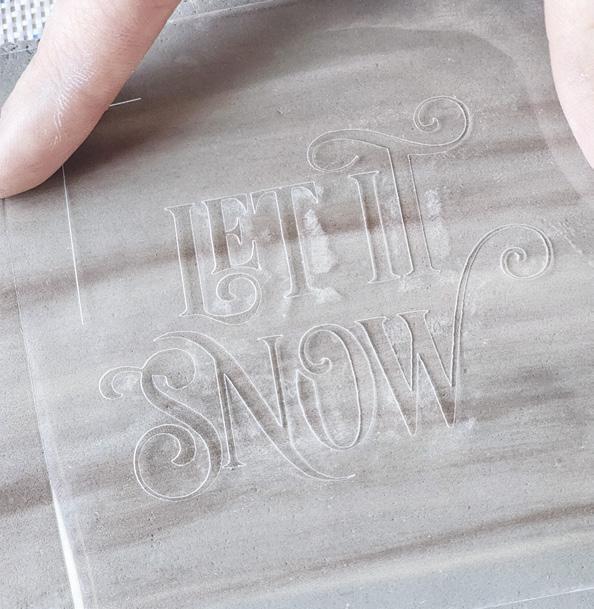
Hold your stencil firmly and spread a thin layer of royal icing across it. 2. While your icing is still soft, immediately cut your sign out. Use your straight edge to score lines horizontally to make it look like wood boards.
3. Cut a long rectangle for the post of your sign. Brush it with petal dusts from step 1 and attach to the bottom of the sign. Insert a dowel through the post and into the bottom of the sign. Set it aside until completely dry and firm.
1
2&3
MAKE THE MITTENS
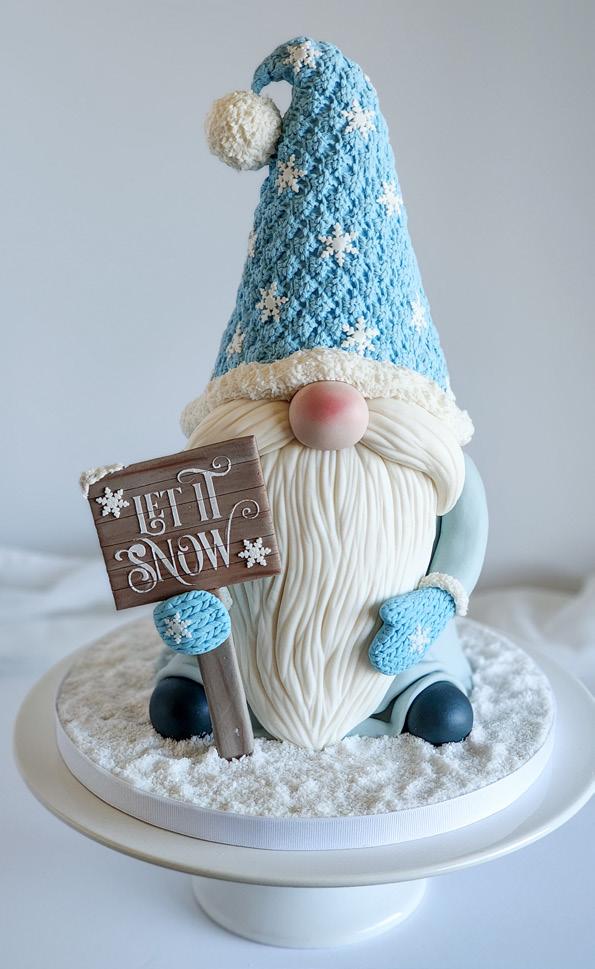
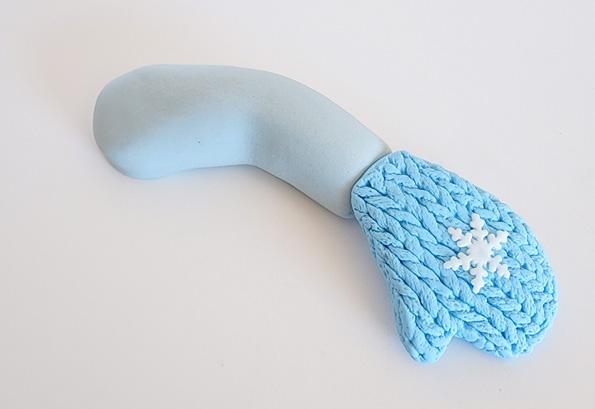
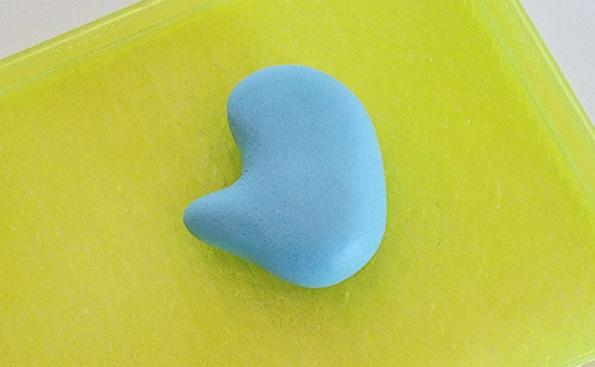
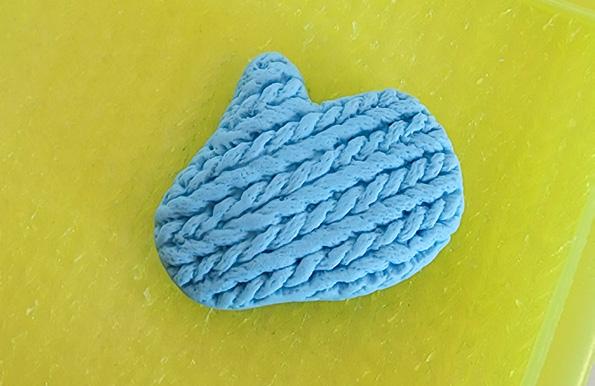
1. Roll out an oval of medium blue fondant. Using your finger, press halfway down to make an indent. Roll the piece below the indent between your fingers to make a thumb. 2. Press your glove into the knit impression mat. Fold the mat in half and press it into the sides.
1 1
FINISH THE CAKE
1. Using your snowflake cutter, cut out 15 to 20 snowflakes.
Using edible glue, attach them to the hat and press o1 on to the top of each glove and either side of the sign. 2. Run 4 sheets of wafer paper through a food processor.
Sprinkle in some pearl luster dust to give it a shine. Cover your board in royal icing and then sprinkle the crushed wafer paper over top. ACD
1
2
2
3 2
ADD THE ARMS

1. Mix some of your light blue fondant with tylose powder.
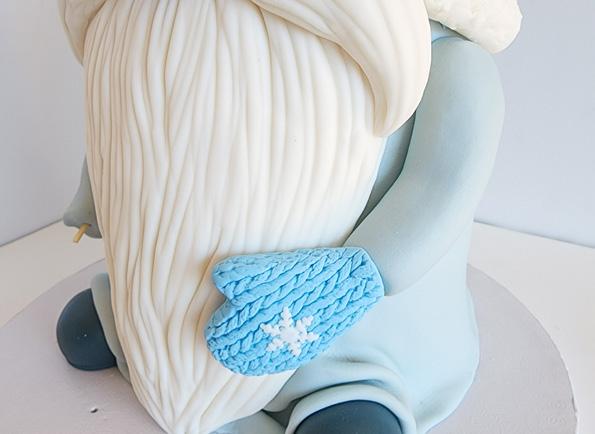
Roll it into 2 logs roughly 3 inches long. Using cocktail sticks and edible glue, place 1 of the arms along the beard
right under the hat and bend it slightly so the bottom is just starting to go over the beard. 2. For the other arm, bend it halfway down and use cocktail sticks to keep it in place. You want an inch or so to be sticking straight out to hold the sign. Using a cocktail stick, attach your glove and score it halfway down. Bend the glove around the handle of the sign and attach it with edible glue. 3. Roll out a small amount of white fondant into a noodle. Wrap it around each glove and use cocktail sticks to fluff it.
Grab a Print or DigitalIssue!
MASTER THE ART OF AMOROUS CAKES, BAKES, & SWEETS
Love Love IS IN THE AIR
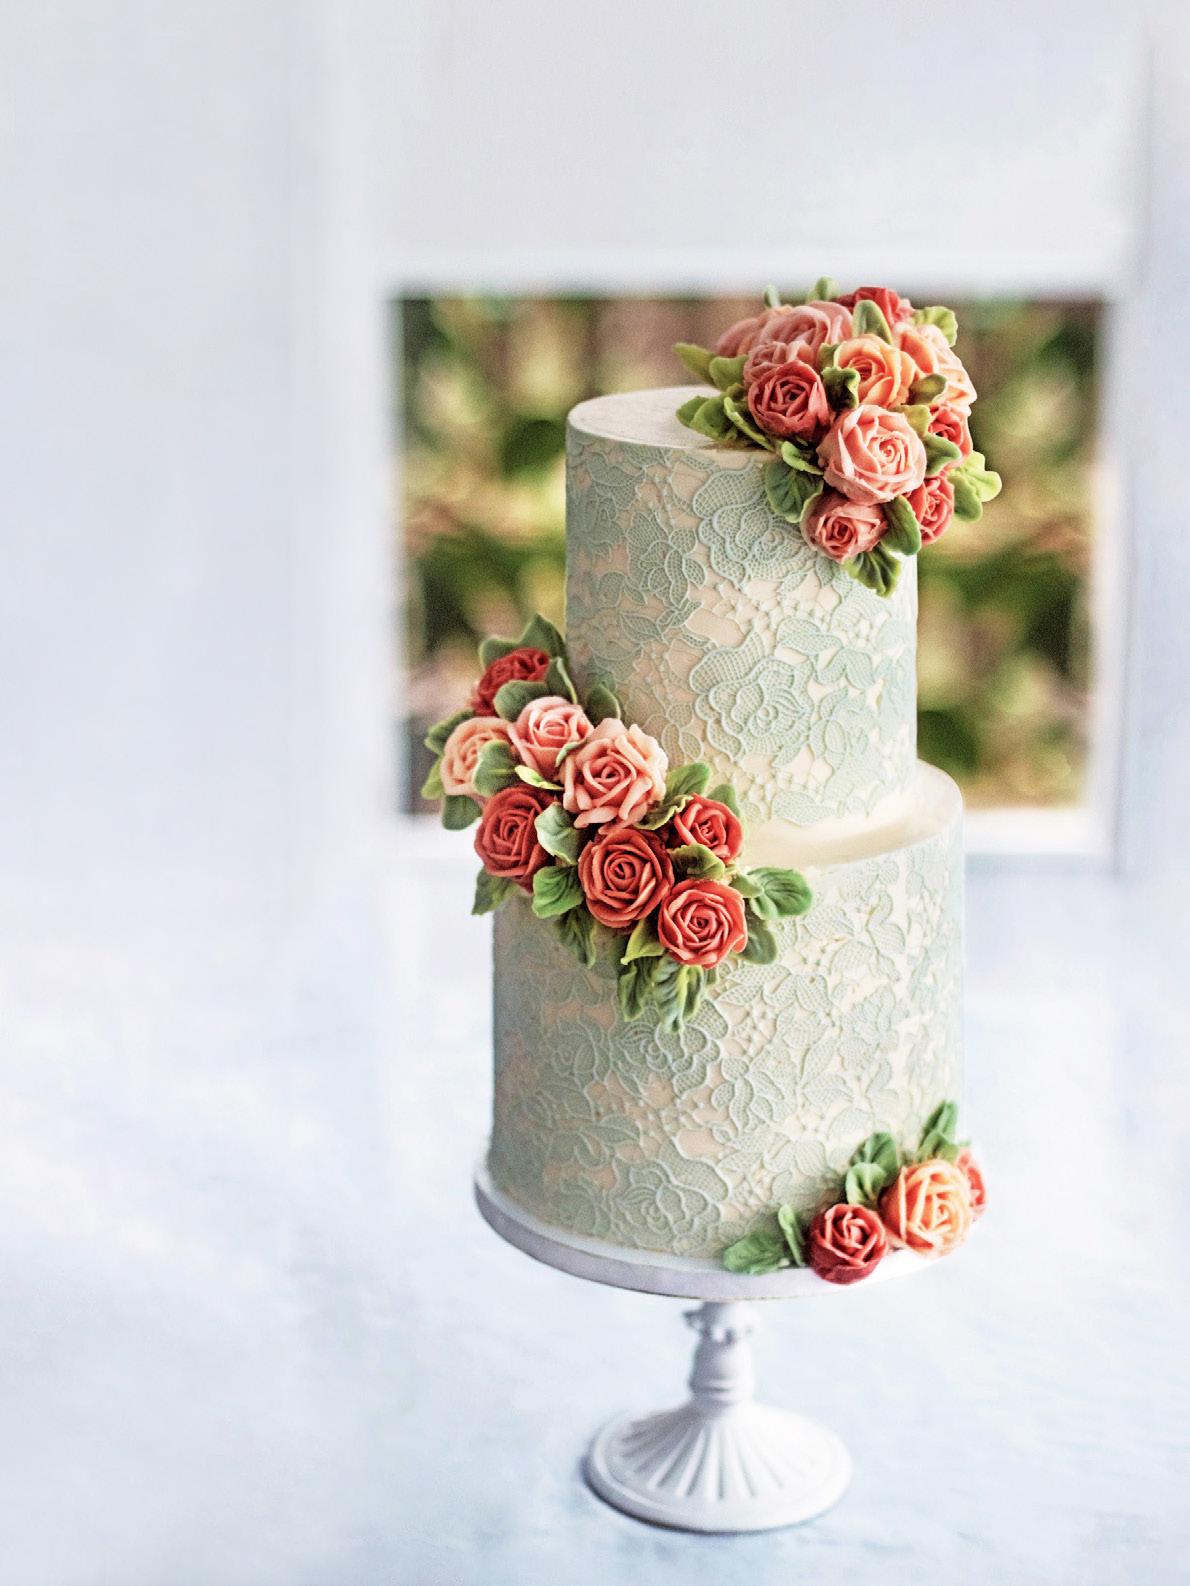
WITH LUXURIOUS LACE BUTTERCREAM
12 ROMANTIC TUTORIALS
30th ANNIVERSARY f
Add textured lace using a silicone mat.
PLUS, BEHIND-THE SCENES LOOKS AT: A ROYAL WEDDING PAGE 22 NEXT-GEN BAKERS
MONEY MANAGEMENT
Make your own chocolate sculpture.
JAN FEB 2022 • ISSUE 436
MASTER THE ART OF AMOROUS CAKES, BAKES, & SWEETS
Love Love IS IN THE AIR
WITH LUXURIOUS LACE BUTTERCREAM
12 ROMANTIC TUTORIALS
30th ANNIVERSARY f
PLUS, BEHIND-THE SCENES LOOKS AT: A ROYAL WEDDING NEXT-GEN BAKERS PAGE 22 MONEY MANAGEMENT
Make your own chocolate sculpture. Add textured lace using a silicone mat.
JAN FEB 2022 • ISSUE 436


