5 minute read
Civil 3D
from AUGIWORLD
by AUGI, Inc.
Implementing Revit Within Your Civil 3D Workflow
As a civil engineer, sometimes working with an architect has been nothing more than “Just send me your stuff and I’ll get it in the right spot”. And as an architect, sometimes working with the civil engineer’s JUNK is not worth the hassle. I am 100% guilty when it comes to both of those statements! But there are some helpful ways to implement Revit to Civil 3D and/or Civil 3D to Revit workflows.
COORDINATE SYSTEMS
I thought I’d briefly explain how the coordinates of both Civil 3D and Revit work.
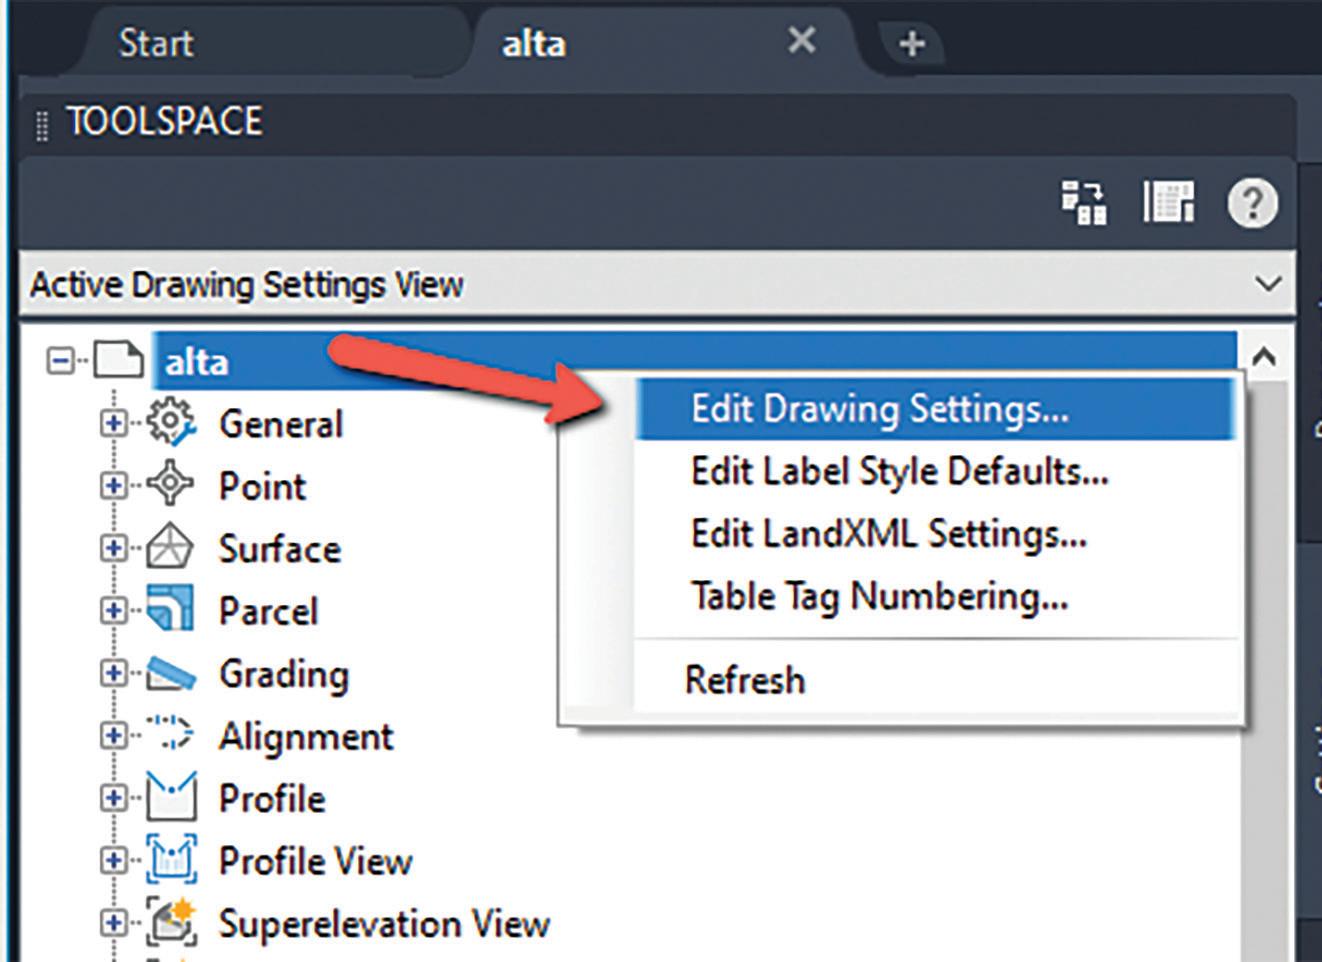
Civil 3D is preloaded with a huge library of coordinate systems and easy to create custom coordinate systems, or project coordinate systems in. Setting the coordinate system in Civil 3D is very easy, simply right click on your drawing name from the Settings tab of your Toolspace. From the Units and Zone tab you can set your Category (State/Country) and well as choose from a list of available coordinate systems (CS). If you know your CS code, you can simply type it into the box.


Figure 2 internal coordinate system, which provides the basis for positioning all elements in the model. Note: The internal origin is also called the startup location. The location of the internal origin never moves.
From the internal coordinate system, you can establish the following: • The project coordinate system (Project base Point): provides local context for measuring distances and positioning objects in relation to the model. • The survey coordinate system (Survey Point): provides a real-world context for the model.
We will use the survey point to assist us in tying down the Revit model.
Once a coordinate system is selected, you can do things such as turn on Bing Maps, reproject GIS data and images, and many other project related tasks. Bing Maps is great to serve as a reference tool and has imagery that can easily be turned on and off. A CS must be set in order to use this functionality.
Revit, however, doesn’t come loaded with CS and has further limitations on what the size of your model can be, and the distance from the project origin.
Taken directly from the Revit help menu:
“When you create a Revit model, you are working on a modeling work plane that is 20 miles or 32 kilometers in diameter, with a radius of 10 miles or 16 kilometers from the internal origin. All geometry for the model, including geometry from an import or a link, should reside within the limits of the modeling work plane.”
AUTODESK SHARED REFERENCE POINT
The Autodesk Shared Reference point has been around for almost a decade now! Hard to believe, but it has been there a while but often gets overlooked. It is important to note that it must be installed for both Civil 3D AND Revit.
You can typically download it from your Autodesk Desktop App and the tool can be launch from the Toolbox tab of your Toolspace, under the Subscription Extension Manager where you can simply right click and execute the command.
The internal origin is the starting point for the


Figure 4 Once you execute the command, it will ask you to select the Origin Point and North axis. Once selected, you are presented with the following dialog box, which will export the selected data into an XML file.
Import XML from Shared Reference Point into Revit
Once that XML file has been exported, we can now use it within Revit. Once inside Revit, you may want to turn on your grid line if that is helpful to you.
From the Add-Ins tab of the ribbon, you can select Import Shared Coordinates from XML File. This will be the file you just exported.

Figure 6
You’ll be prompted to select the same 2 points you selected in Civil 3D. It’s crucial that you pick the same points. Once you’ve selected the second point, you will then select the XML file, followed by a message asking if you’re sure you want to create a New Shared Coordinates, select YES.
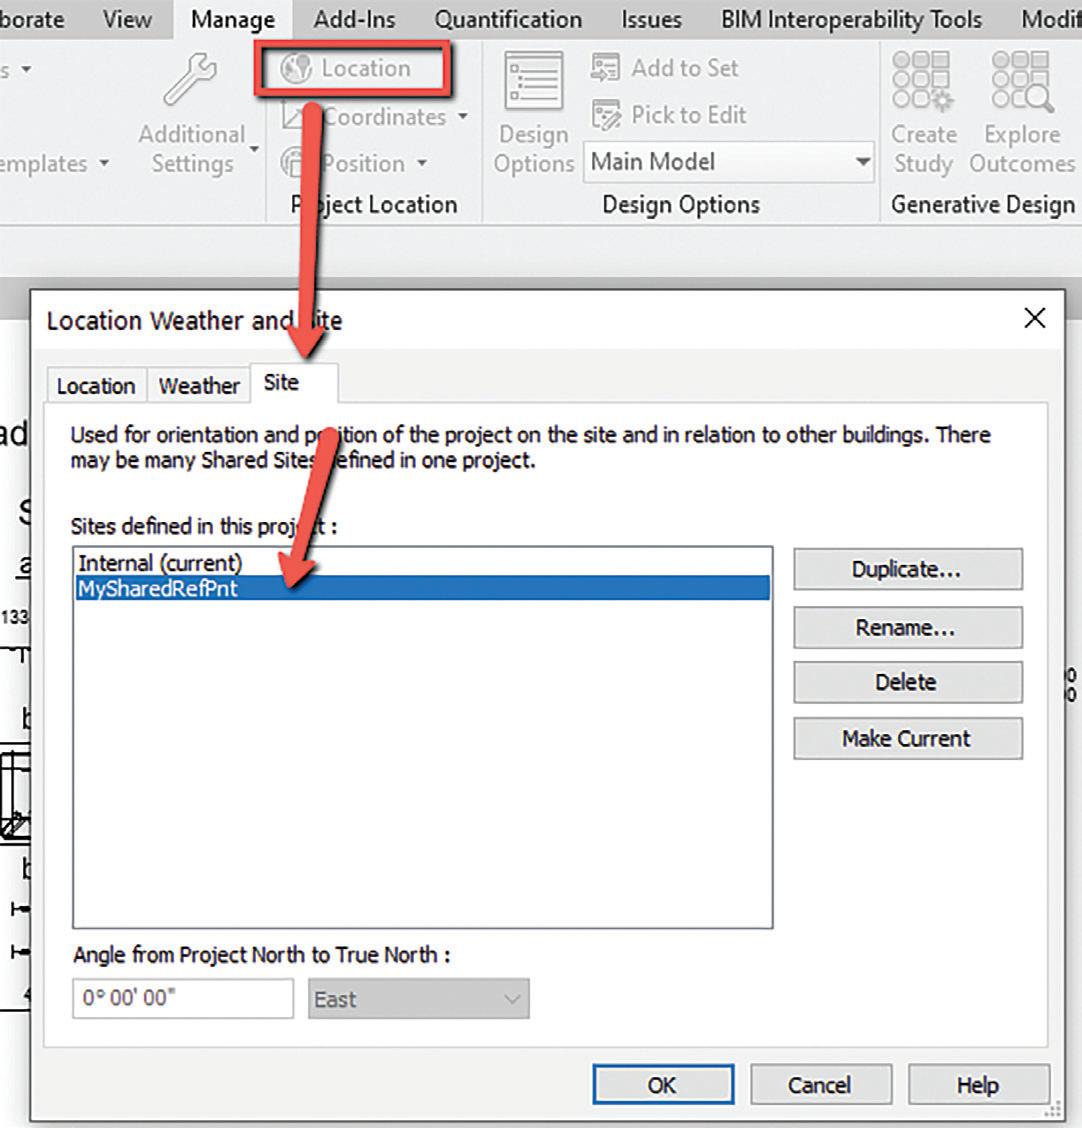
This creates a new site, where you can then go to the Manage tab of the toolbar, select Location, and from the Site tab you will see, and be able to select, your MySharedRefPnt.
Your Revit project is now linked to your Civil site!! For a quick test to see if it worked you can check the model orientation. Just toggle the orientation to North and your model should orient just as your Civil 3D file is.


Figure 7

Figure 8
CONCLUSION
I know this is a quick explanation of working with the Autodesk Shared Reference point, but this tool is often overlooked by many on the Civil side and Architectural side and can probably ease a little tension on the data handoff between the 2!
There are several ways to get your Civil surfaces/ linework into Revit, and we will explore that at another time. But for now, I hope this helps understand a bit more between the 2 products.
Thank you!
DWG EXPORT FROM REVIT TO CIVIL 3D
To export a 3D model out of Revit, choose the Default 3D view.
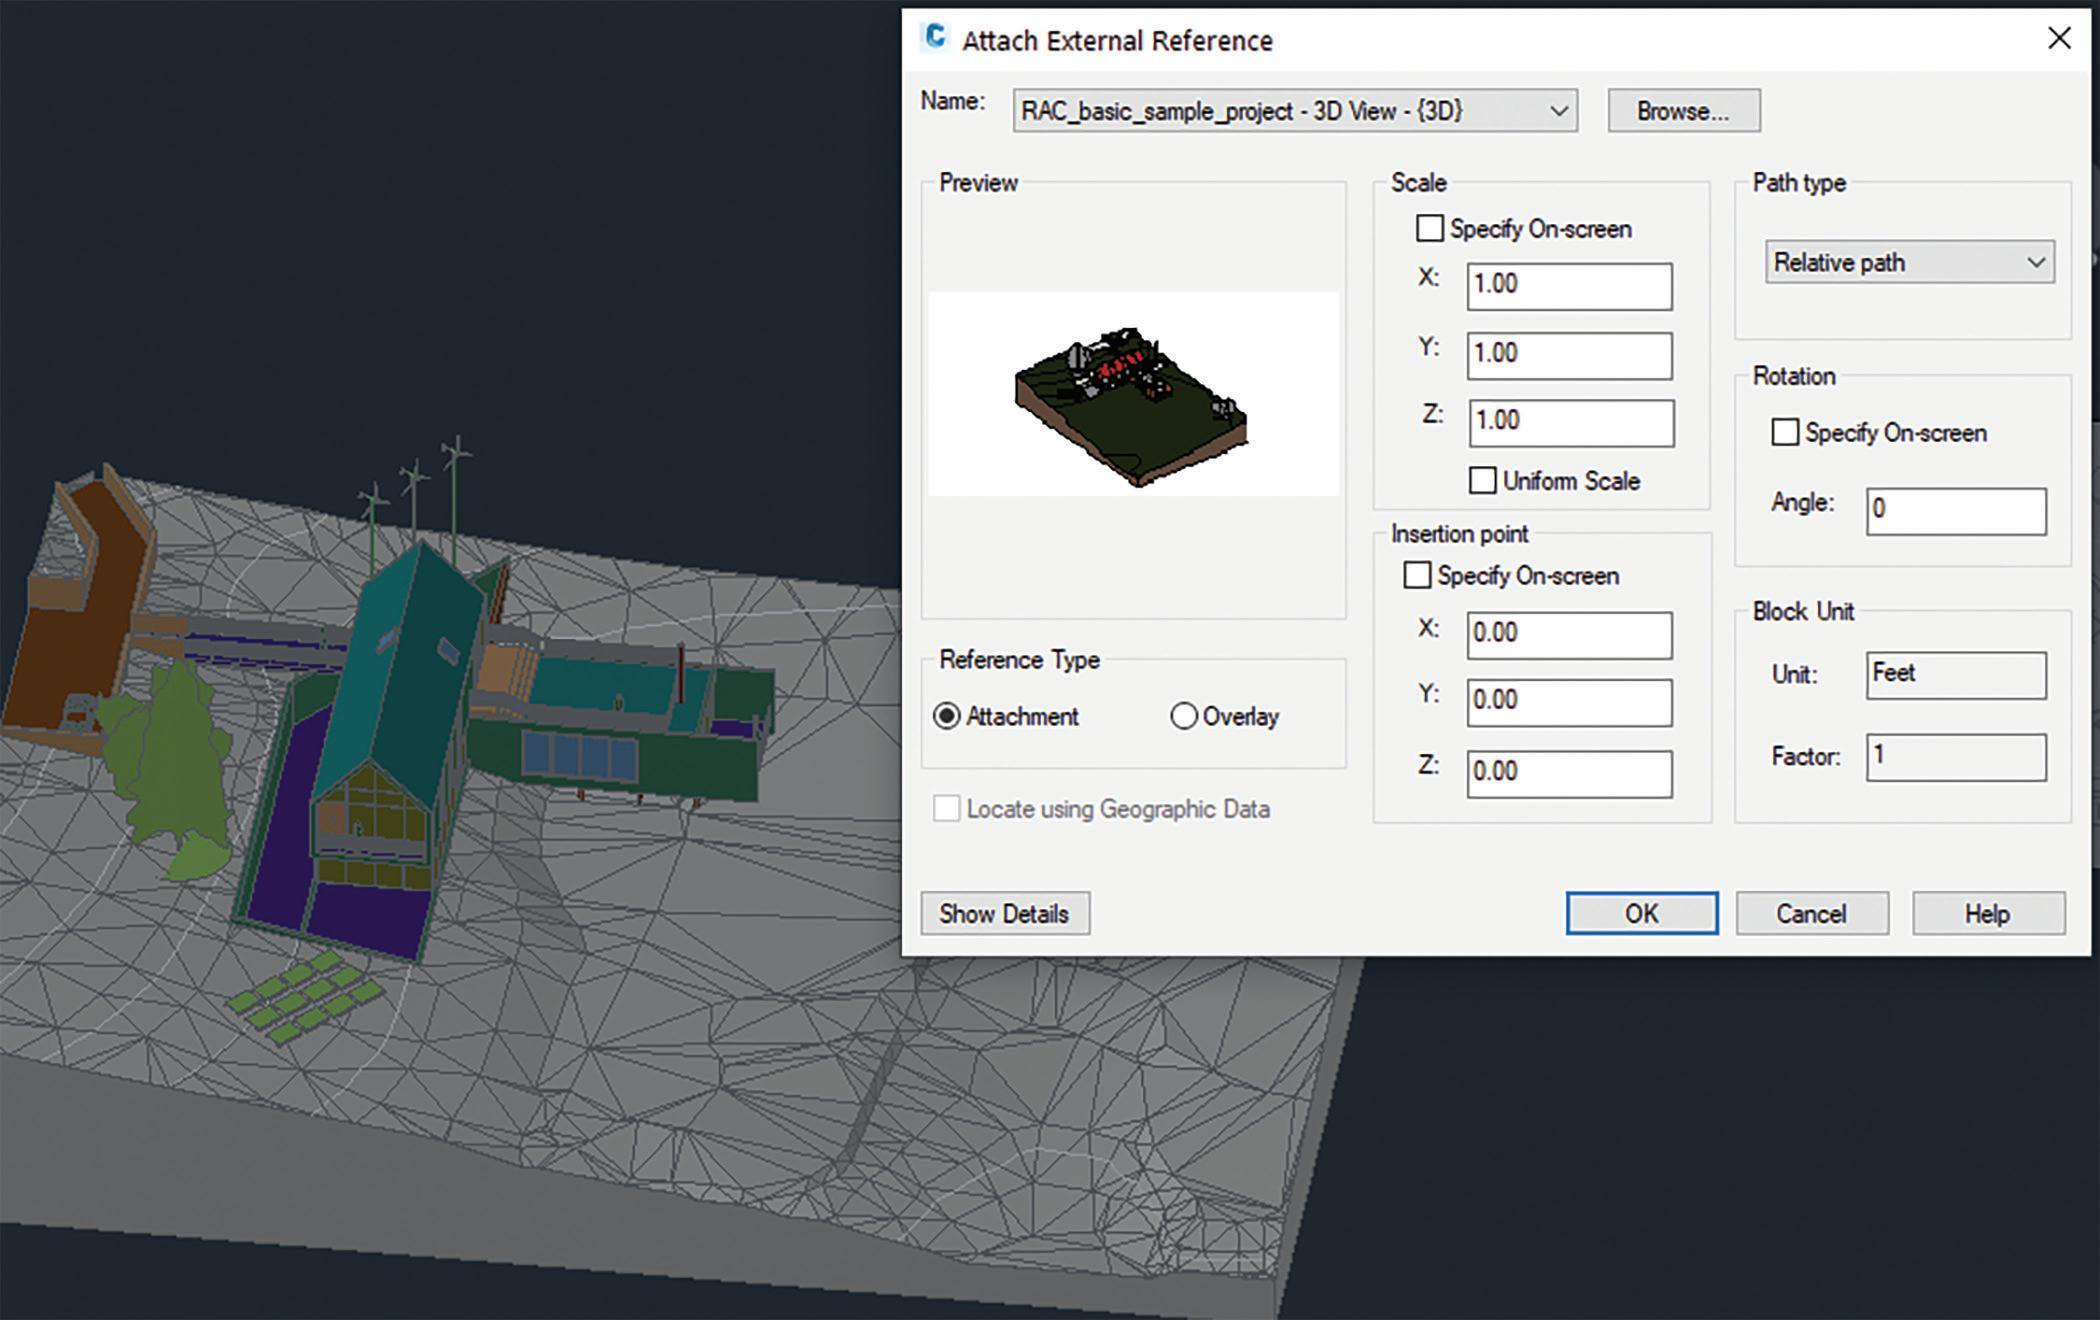
Choose the FILE tab of the ribbon, choose Export, select CAD Formats, and select DWG. A quick setting needs to be changed for the Revit export to be coordinated with the Civil 3D file. Under the Modify DWG/DXF Export Setup dialog, ensure that the correct units are set and that we’re using the Shared Coordinate NOT the Internal Origin. Switch back to Civil 3D and XREF the model in just like any other XREF! Make sure your insertion point is set to 0,0,0, and select OK. Now take a look at different views and elevations, and your Revit model now resides in Civil 3D without any manual modification!
Shawn has been a part of the design engineering community for roughly 15 years in all aspects of design, construction, and software implementations. He has implemented and trained companies across the Country on Civil 3D and other infrastructure tools and their best practice workflows. Shawn can be reached for comments or questions at sherring@ prosoftnet.com.


