7 minute read
HE r E storation o F an i C on p art 3
However, while heat is needed to safely remove a bearing, for example to prevent damage to a hub, I have found fitting of the new bearing is much easier in our Queensland climate. Thus, you put the bearing in a plastic bag, put it in the freezer over night to contract it, then in the Queensland sun leave the hub for an hour or two to expand in the morning, before fitting it. They will almost fall into place – promise.
The only word of caution is to remember to tell the memsaab the bearing is in the freezer, otherwise it might end up in the casserole! And do not forget about it.
Front end, including steering head and suspension:
If we follow each section down as we go. Firstly, the handle bars, secondly the steering head, and then the suspension itself. Now briefly, the fitting of the bearings in the steering head went quite smoothly, so not much to say here, other than I must do them in my R100RS soon. (They went a bit funny and as a quick and temp fix I packed the top bearing with some grease in situ).
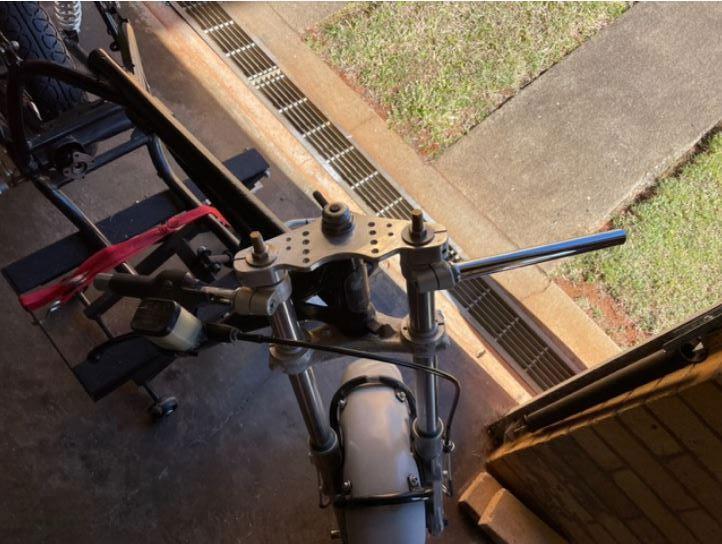
Now as per Photo 1, I have opted for the drop bars. These bars are the Tarozzi Race Clip Ons from Flat Racer (https://www.flatracer. com). In addition, from the same place I have also got the fork pre-loader adjusters and top nuts to go on the top of the suspension struts, for some fine tuning in handling (read here spring compression). Further to handling, I also obtained from Flat Racer and have fitted progressive fork springs. Meaning that the springs work harder the more they are compressed. Ideal for hard braking - if the brakes work (see below for brake comments)!!!
To this end, and knowing the state of the heavy forks of a standard BMW and the ‘oh so flexible frames of 1970s bikes’ (ride a 70s Kawasaki 750, triple, 2 stroke, for an extreme of frame flex), necessary and wise upgrades are a strong triple replacement clamp and stronger fork brace.
Firstly, the triple clamp (please refer to Photo 1 again). There are a number of types and varieties available. Invoices show I purchased this from Boxer Metal in the USA (https://boxermetal. com). It was a one-off purchase from them, but they have some bloody good and interesting stuff there. Looks like I paid around $223 USD and $41 USD postage. (Ouch, bloody ouch, again).
I selected this particular clamp as it has a number of strategically and symmetrical predrilled points on the clamp that will allow me to position an electronic tachometer and an electronic oil pressure gauge, but more on those later. I added a fork brace from Flat Racer for additional stability. (Please refer to Photo 2).
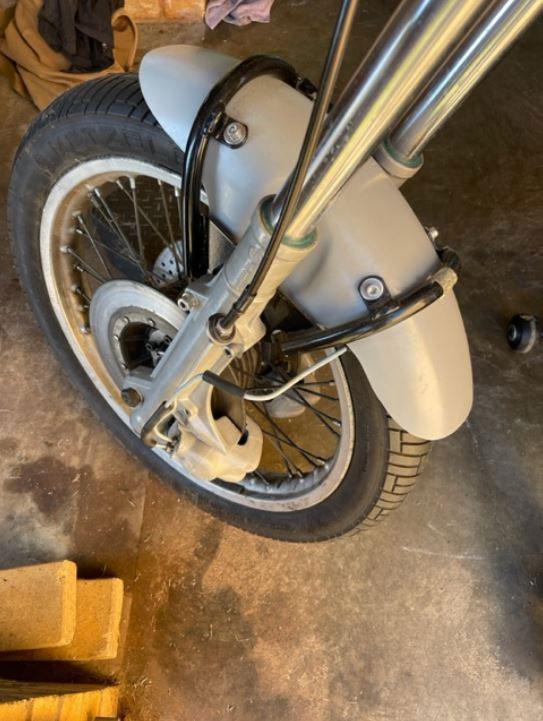
Now, as we know, the R75/6 was among the first of the disc brake BMWs, yet only one disc brake was supplied. This absence of a second disc necessitated getting a second-hand strut with a disc mount, to convert the bike to twin disc. Absolutely needed for any power upgrade of a bike for racing. I got this from, along with a disc, second hand caliper and hand brake master cylinder, from Motorworks (https://www. motorworks.co.uk as discussed in Part 1) . I also know (if you look closely in Photo 2) that just for mock up purposes, I have a late drilled disc on one side and the old flat disc on the other – this will be rectified in the end.
The forks were all cleaned and overhauled with new seals and oil. I used seals and gaskets from Munich Motorcycles (https://www. munichmotorcycles.com.au) to overhaul the struts and was a pretty straight forward exercise. Now, as I wanted to maintain that clean alloy look, without polishing it every time I used the bike, I coated the struts with a high temperature 2K Urethane clear (Gilsten) from Permanent Painted Coatings (PPC https://www.ppcco.com. au). (You should see a sheen in the forks in Photo 2). I used a lot more hardener than they recommended. Bloody stuff would not set (go off hard) for days even in summer. Unusually, this time I read the instructions before I did it and I am sure I read the required mixture right (famous last words).
Now I also coated (2 coats) the gearbox with this mixture, and honestly, I have yet to decide whether this was a good idea or not. Time will tell whether it works. I only hope that if I have to remove it there are no issues. PPC were great to deal with and have a range of automotive paint products and provide information and advice quite freely by email. and the bloody front brakes: I would have to describe this part of the bike as “work under progress and continual refinement.” These have been a bit of a pain and are really an ongoing issue to be sorted out. Now to recap, BMW in their wisdom (read here why the f**k did they do this? - perhaps so the thing could leak brake fluid and corrode the top frame bar in peace, or did it seem like a good idea at the time) placed the master cylinder under the fuel tank, mounted on the top frame bar.
As mentioned above I obtained a second-hand BMW handlebar master cylinder, (likely from an R80 – but overhaul kits go by bore size generally) overhauled it with parts from Munich Motorcycles and fitted it. (Refer Photo 1). I then overhauled the brake calipers, using original calipers. All seemed well.
(But, remember as discussed in Part 1, I cannot do just what I like. It’s not just a custom job
t HE r E storation o F an i C on p art 3
where you can be somewhat flexible. I am bound by the rules of Motorcycling Australia. In general, it must look like a 1974 BMW – (I know I am pushing the envelope mounting a later master cylinder on the handle bars).
Now in my wisdom (if that is not a mutually exclusive sentence) I decided to run a flexible brake line half way down to the left-hand caliper and make and run steel lines in series from the left to the right-hand caliper. (Please refer to Photo 2 again).
In theory, running brakes in series should not be an issue. But despite a few mounting issues, and pressure bleeding, like our politicians or an evangelical preacher, I have yet to get the air fully out of the system. Master cylinder is operating perfectly.
Interestingly, the original brake line on the R90 with twin discs ran a short line then split a brake line to each individual caliper. In fact, I might rework the brake lines and split them just after the master cylinder on the bars with flexible brake lines to each respective caliper. Still thinking about it….bit of time yet…
Other bits and pieces of interest: Fuel tank. I decided about this early on. I just did not like the look of the R75 tank. However, and despite this, I saw on eBay a newly made aluminum R75 tank, made of course in India, for around $275AUD. Wow every race bike has an aluminum or fiberglass tank I thought. Now this was tempting so I put in a bid of $225 AUD. Just as it was about to close a new bid was submitted (I think by the maker) of $375AUD. Nope, I was not going to play his game over a damn R75 tank.
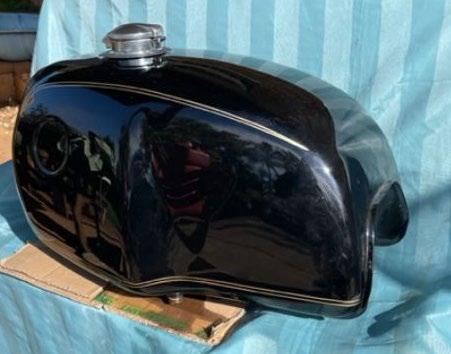
About two months later a near new R100 steel tank came onto the market (Please refer to photo 3). It turns out a guy was cleaning out his dead Uncle’s shed (around Newcastle from memory) and he found the tank in a cardboard box, complete with a tank cover. According to the nephew he used another larger tank, what type, he did not know.
I left the task of what transpired into a bidding war on eBay to the memsaab. As is her way, she pulled down her visor, let the red mist form, and went for it. Long story short, we won it for $300 and I added a Monza fuel cap from Flat Racer on it to top it off.
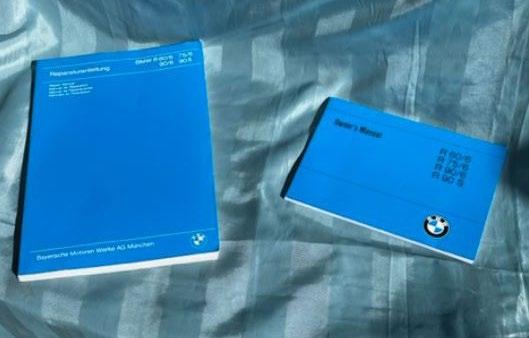
Books. One small note of interest, if not amusement, is the purchase (please refer to Photo 4) in the 1990s of a reprint of a workshop manual and owners’ manual. Likely it was from Motorworks. For some reason at that stage I was unsure whether I was going to rebuild it as a standard bike or race bike….and we know what won!!!
As we say good bye to the boring bit, to end all boring bits, we have now caught up to real time in the build. Yep we next move on to high drama with the motor……And as we say and know “… much, much more pain and enjoyment to come…”
Any questions or comments only too glad to receive them. Contact details below.
Yours in the saddle (if one is still allowed to say that?).
Chris PH: 0403 868 375 christopheroberston@bigpond.com
Bmwmcq Training Course Subsidy
Your club encourages all members to continue to improve as a rider and offers a financial incentive to foster greater uptake in rider training. A broad interpretation of training has been adopted to include First Aid Training and Traffic Accident site safety management. The intention of the subsidy scheme is to not only improve the road craft of individual members but also to enhance the safety and enjoyment of club runs and events for all participating members.
These are the simple rules to qualify for a subsidy:
1. Every financial member is eligible.
2. Subsidy is limited to one in three years for each member eg subsidy February 2022 re-eligible February 2025.
3. Subsidy provided in the form of a $50 reimbursement after course has been completed and invoice presented to the Treasurer.
4. The applicant must present details and receive approval for the intended training course from the Club Secretary prior to the course being undertaken.
There you have it, an incentive to help to make you a better and safer rider. If you undertake a course please let us know your thoughts on the success of the course, positive or negative.
Tony Gray - President BMWMCQ
A few of Neil Andersen’s pics from his BMW Off-Road Adventure Skills Course (story on next page)!
Above left: did the training, got the t-shirt!
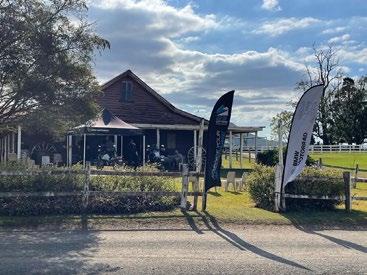
Above: Kenilworth Homestead, training venue
Left:
