8 minute read
FUE lin G F r U strations
and install a new one over the hose pipe before inserting the new brass replacement.
• Slide the new clamp up to the old position (pipe will be indented from old clamp) and crimp the clamp closed with the pincer pliers. Note how tightly clamped the original clamps are and replicate that. They are not meant to be pulled in so tight that the hose bulges.
• Repeat this process for the male and female fittings on the RHS and for the male fitting on the LHS above the pump.
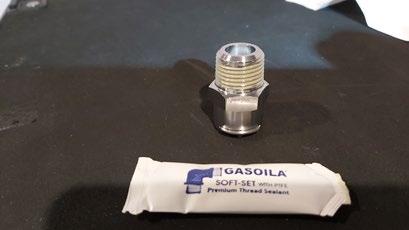
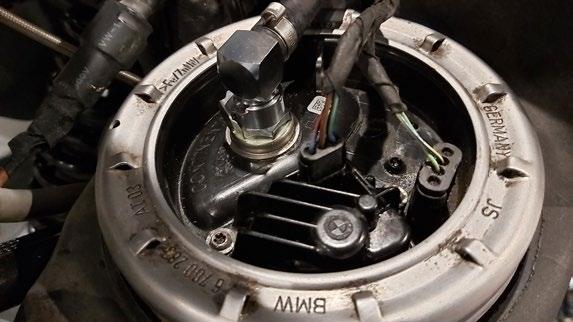
• The threaded female fitting above the pump can be unscrewed with the 19mm spanner after first making a pen mark to how this fitting is aligned. The new fitting should align with this mark. Note the metal reinforcing ring stays in place. When I removed mine the ‘well’ in the housing was full of debris from the old thread gel. I carefully removed all of this with cotton buds then used a workshop absorbent towel to ‘wick’ up all of the fuel that contained small particles of residue. You want this area clean and dry before installing the new fitting. The kit I got came with a small tube of thread sealant and instructions:
• Apply the thread sealant to the new fitting and leave stand until tacky - about 30 minutes. Screw in the new fitting by hand - it should go in easily - if you feel any resistance then back it out and start again. Remember this is a metal thread going into plastic so a high risk of cross threading unless installed gently and carefully. Nip up with the 19mm spanner by about half a turn after finger tight - this should align approx to the mark you made from the old fitting.
Now go and have a beer as you must wait 24 hours for the thread gel to set before turning on the pump.
Labour Of Love
“It’s just a machine,” no doubt some say “Plastic, metal & rubber at the end of the day”
“It’s not worth fixing, it’s getting old”
Blasphemous words that send him cold
That’s no way to treat a faithful steed
In its hour of darkness, its hour of need With a quarter of a million kilometres together
Through every sort of terrain & weather

Trying to find an explanation
A lengthy process of elimination
Hours & days of a labour of love
He & his bike go hand in glove
It might take time but there’s no doubt
The loyal Gray Ghost will be out & about
There’s still life yet in our grand old girl
She’s taken us so far around the world
Building a Richthofen 750 or the creation of a Franken R75/6 Part 2. Starting to look good and we have lift off!!!!
By Christopher Robertson, Member #243
Nothing like a positive title, bit like a TV advert - little bit of truth built around hype! This part will cover the rear drive, rear shocks, “rear set”, gearbox and flaring. However, not all goes as one would want and we come across some unusual problems. (If you want to have a look at an R75 race bike from the period refer to this site - Butler & Smith).
Firstly, let’s catch up with more perspective navel gazing. Now hopefully following on from the first Part and this Part 2, the Reader will gather two underpinning concepts associated with this project. The first, conception of what you are doing (planning, direction and objectives wise) is as equally as important and significant as the execution of said planning, direction and objectives.
Secondly, now with regard to execution part, you cannot undertake such a project without special tools. Now with respect to this last point, tools for old BMWs are still available from Dan at Cycleworks. But these are not just reproduced factory tools, they are modified tools based on experience, that work brilliantly and reliably. They are very helpful.
Further, to digress even more, I have neglected to acknowledge in Part 1, that short of winning the lotto, we budgeted around $20k (hopefully less) to do the project. But the spondoolies were not just sitting there in the bank, it would have to be accumulated and spent over time, requiring the most monetarily efficient, responsible and available way to get there. (i,e. getting it past the missus who is an accountant).
Yet one must note with justifiable skepticism that such an approach really contrasts completely, after buying readily available bits and pieces in the UK (outlined in Part 1). This exercise, which I had reasoned at the time, was a “Get them while they are there,” option and executed under the watchful eye of the missus, within highly sensible and frugal cash flow guidelines.
Now there is are pros and cons to this approach. Pro – yes, the parts were cheaper –especially when you look at current costs. Con,even more parts of quality or better specs have become available. In fact, if one takes a deep breath and look around the motor industry as a whole there are currently an amazing number of parts, if not whole vehicles, available for many Internal Combustion Engineered (ICEs) vehicles. Four more points that need to be highlighted:
1) All bearings on the bike, engine or otherwise, would be replaced - regardless;
2) All bolts, where feasible, would be replaced. Usually with the normal BMW Allen head hex head, of stainless quality. These were usually purchased through Northside Fastners;
3) All alloy was cleaned by using soda. I simply took a kerosene gun (air compressor type), and brought baking soda from the supermarket and used that;
4) Reasoning that even though BMWs of the era tend to be over-engineered in places, the fact they are now old and you are going to put more horsepower through it, nothing should or could be left to chance.
Rear Drive:
The BMW motorcycle rear drive of an airhead is by its very nature and integral unit that can be removed and refitted very easily. In fact, at the track during the 1970s ratios were changed by actually changing the rear drive as a unit, rather than individual gear box ratios. Much quicker! Now I would like to draw a distinction between the diff as a unit to remove and refit and actually overhauling the unit. Now upfront, undertaking and replacing elements of the rear unit is not a job I would recommend for the amateur at home. Fortunately (for me at least) my brother has a garage and despite his complaints (which were many and ongoing) we managed to overhaul the unit.
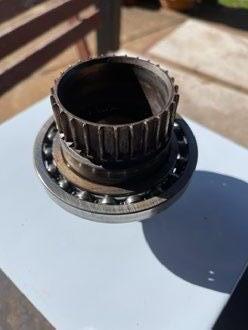
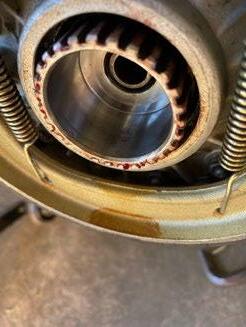
Refer to photos 1 and photo 2. These photos show how badly the crown wheel splines where worn. Both splines and drive rings were replaced along with the bearings, seals and gaskets. All parts efficiently provided by Munich Motorcycles (MM). The unit was then fitted to the frame.
New shocks for racing and “rear sets”: These were provided by Flat Racer. These shocks are English made Hagons, model 2810 adjustable and are preset for my weight, for a series R75/6. It will be interesting to see how they perform given the long wheelbase of the bike. I see now they are around £274.99, but you are offered chrome or black springs. The rear sets (rear sets are the footpegs, rear bake and gear change linkages) are a combination of incorporating Tarozzi foot pegs and pedals and Flat Racer’s own linkage system. They are positioned on the rear footpeg mount and in the instructions, they warn of the incompatibility with the kick start mechanism. Refer photo 3.
Gear box:
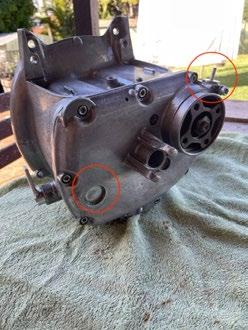
Parts for the gear box were supplied by MM. While Moorspeed and Motoren-Israel offer great gearbox modifications for racing, we decided to stick with the standard box for now. (Read here, missus won that battle on spending). You will of course require some tools from Cycle-works (as discussed above) to successfully complete the task of overhauling the gearbox. Overhaul parts came from Bruce at MM. As a tip do not forget to change the nylon gear change selector bush for a metal type roller, if you are going to give it hard full-on use. Regardless, I had to do some modifications and there are three points to this gearbox work worth noting. Please refer to Photo 4. The first concerns removing the kick start, as mentioned above. Photo 4 shows the internals of the gear box that were removed. Finally, a weight saving. Now we are then faced with the question of what do we blank the rear cover off with (where the kick start shaft came through)? Maxbmw has new covers both for kick start gearboxes and non-kick start bikes.
Further, now if you look closely in our instance, the photo discloses the clutch pivot on the rear cover has already been repaired once before, but this looked ok or at least good enough to get it on the track for a while, until it really broke and forced my hand to my wallet. (second win to the missus). A new cover is $330.99 US. Likely by the time I get it to us, we would be looking at between $550-$600 (Aus) - ouch. Also remember in the first Part an objective cited was to use as many of the original parts as possible. Anyway, the clutch pivot repair looked good and in lieu of refitting the shaft only, we looked for a far cheaper weight saving option. Besides nothing would sound as good as boasting to the memsahib that I had saved even more money on the project. Yet no blanking grommets or plugs of the right size could be had. Damn!!! A few nights later I was trawling, as we all do, through Ebay and found a group called Core Plugs International. They had exactly the size we needed. A steel plug was quickly ordered it and it arrived ok. You see it inserted in the picture. It has been fitted with sealant as a precaution and is of the “tap to expand” type plug. Issued solved.
Now the second point is, as you will see ringed in photo 4, the addition of a gearbox breather instead of a speedo cable. This came from Motoren-Israel.
The final point is that the gearbox, once soda blasted, then cleaned, is (as will be discussed with the front struts in the next Part) coated in a protective 2k Urethane Clear. Whether this was a good thing to do or not the jury is still out. Time will tell. For a comparison, I did the gearbox, but not the final drive – let’s see how they look in time.
Fairing:
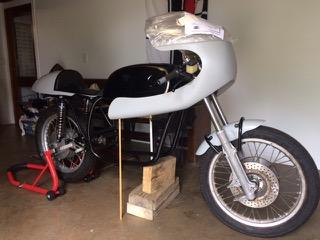
Please refer to photo 5. I must have had an epiphany early on, as I notice the invoice for the fairing kit is dated December 2014. Hell, time bloody flies! We purchased it from Fibreglass Specialties in Garfield (great place to live if you love cats), Arkansas the USA, the total invoice being $729 (AUS) including shipping and handling an incredible $15.00!
If I remember at the time, I decided I did not want a full fairing and such smaller fairings were not all that common in the market place. (Again, this highlights the pros and cons made above, buying early means cheaper, but the choice is limited). While it comes with all the windscreen hardware, including a drill bit, you have to make up the brackets for holding the fairing, which I have yet to do.
In fact, looking at the Fibreglass Specialties site, I am not so sure they do motorcycle fairings anymore as they seem to be into model aircraft parts. You could always contact them or try Flat
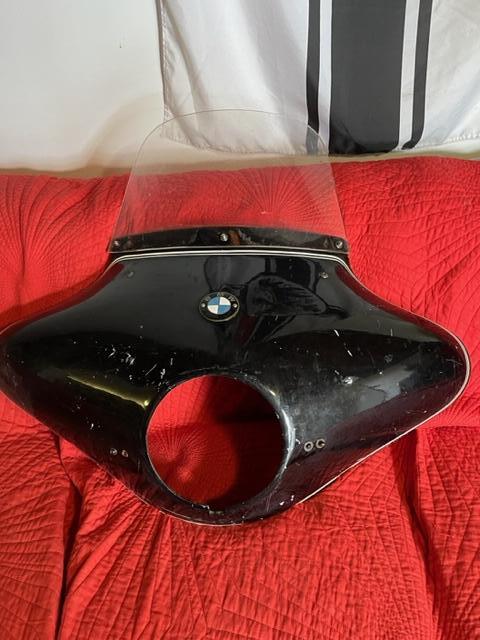
Racer - but note the prices. Time, I think, I molded the parts I have for the fairing in case one breaks something on the track!!! To be perfectly honest here, I am still mulling it over whether I actually use a front fairing…watch this space…as I will discuss in a future Part regarding the instruments I am using. For amusement, I have included a photo of the bike’s old fairing. (Refer photo 6).
Next Part: 3 Steering head, front end, front brakes and other bits and pieces… Thanks, and hope you enjoyed it. And as we say “…much, much more pain and enjoyment to come…”
1. Old splines you could shave with. How close was I to shearing these off prior to taking the bike of the road in the 1990s?
2. New drive splines, along with new brake shoes.
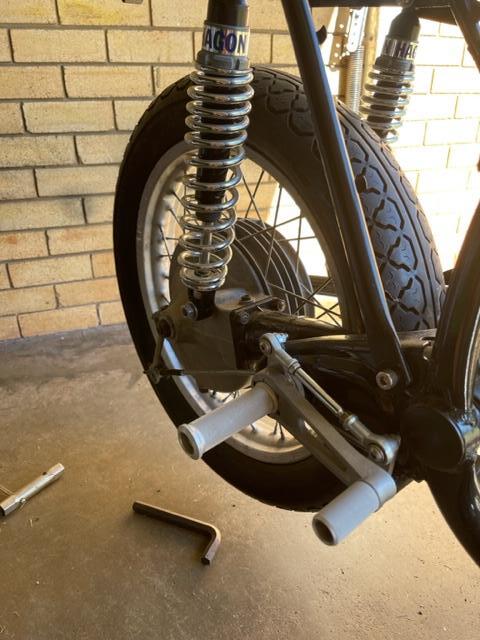
3. All in place at the rear, including the R/H ‘rear set’, and shocks. Tyre at this stage is an old one (must be near 30 years old), just there to making working on the bike easier.
