Automation
Take the leap from a basic tap timer to full flow automation.
By automating your irrigation, you can program your system to turn on at the right time of day for the right zone.
By saving water from evaporation, you also save money while growing a healthier garden.
Water anytime of the day
Control from your smart device
No mains power required
High flow rates
FEATURING
Toro Solenoid Valve
Solenoid valves are like gates, controlling the water flow into your system.
They range from 13mm - 25mm depending on your available space and flow requirement.


Here’s what you’ll need to automate your system:

Controller
Tells your system when, where and for how long to water, and has wireless capabilities for even more control.
I/N: 0295419


Nipple & Cap
A male threaded fitting that connects the solenoid valve to the manifold.
I/N: 0575820, I/N: 0575815


Cable & Cable Connectors
Coloured wire to connect the solenoid valve to the controller.
I/N: 3110718, I/N: 0295428

Solenoid Valve
Acts like a gate to control the flow of water into your system. Look for the arrow that shows the direction of water flow.
I/N: 0295435

Director
The threaded end attaches to your solenoid valves, and the barbed end then connects to your system.
I/N: 312144

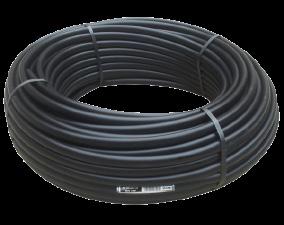
Poly Pipe & Clamps

Connects everything along your irrigation system, and keeps it in place with commercial-grade clamps.
I/N: 3100121
Before you start, calculate your flow rate!
It’s important to calculate your flow rate to determine how many sprinklers, sprays, pop-ups or drip tube you can run in one zone.
1. Place a bucket under the tap and turn it on fully.
2. Time how long it takes to fill the bucket.
3. Use this formula: 60 ÷ (seconds to fill bucket) x (bucket size in litres) = your flow rate in Litres per minute


Manifold
Connects the water supply to your solenoid valves. Available in 1, 2, 3 and 4 outlets.
I/N: 0575824

Valve Box
Houses all the automation parts in a central spot, keeping them safe from weather, kids and pets.
I/N: 0127182


Sprinklers, Sprays, Pop-ups or Drip Tube
Pair with your selection of water emission devices.
I/N: 0423548
Scan to use our online calculator
1. Plan your system

1. Determine system capacity
Based on your flow rate and the required pressure on your emission device, you can determine how many spray heads or how much drip line you can have in each zone.

3. Plot your zones
Figure out how many zones you’ll run, so you know how many valves you need and how many ports on your manifold. The number of zones you need will depend on the size of your yard and water flow rate.
2. Connect your system
This is how the main components of the automated system fit together:

2. Select emission device
Use your results from the online calculator to determine how many devices you can use before running out of water.

4. Choose location for valve box
Try to get as close as possible to your water source. AC controllers are best positioned close to the house to reduce cable routing. Battery operated DC controllers will allow more flexibility.
Ensure o-ring side is attached to Solenoid Valve
Note: Nipple has both sealing thread & o-ring to ensure watertight connections on all Valves
Ensure arrows on Valve that indicate flow are pointing in the correct direction when attaching Nipple and Director
How does a solenoid valve work?
Valves act like gates, letting water flow into your irrigation system. Inside is an electric coil (the solenoid) with a movable centre (the plunger). When an electric current passes through the coil, it creates a magnetic field which forces the plunger up, and allows water to flow through the valve.

The difference between AC & DC solenoids:
AC solenoid coils need a constant electrical signal to open, so you’ll need to run cable from your controller to the valves.
DC valves are becoming more popular, because they make installing new systems much easier. You don’t need to run a cable from the controller. Instead, a waterproof battery controller sits in the valve box and sends a signal to the coil which switches it on.
On average, you should get 12-18 months out of your DC controller battery, depending on how often you run the system.


Tempus® DC 4 Station Controller Kit
The Tempus DC Kit offers customers the convenience of products to kick-start their irrigation project with its complete irrigation control system bundle, that includes all components required. The Tempus® DC BatteryOperated Controller is ideal for managing irrigation areas without mains power, enabled with Bluetooth to provide full watering control from a phone or tablet.
Kit includes: 1 x Tempus DC 4 Station Controller, 1 x 4 Outlet Manifold, 1 x Manifold End Cap, 4 x Manifold Nipples and 4 x Solenoid Valves

