Panamic poles apart MAINTENANCE GUIDE www.panamic.net 02-459 V8
CONTENTS
Section 1.0 - REPLACING AND ADJUSTING END STOPS.
2.0 - REPLACING THIMBLES AND BUSH SETS.
3.0 - ADJUSTING END STOPS TO REDUCE HANDLING NOISE
4.0 - REPAIRING SPLINTERING CARBON FIBRE SECTIONS
5.0 - REMOVING & REPLACING EXTRA BUSHES FITTED ON SELECTED MODELS OF BOOMS
COMPONENT GUIDE
Thimble
Large Shoulder Bush
Split Bush
Small Shoulder Bush
To purchase a new boom contact sales@canford.co.uk 1
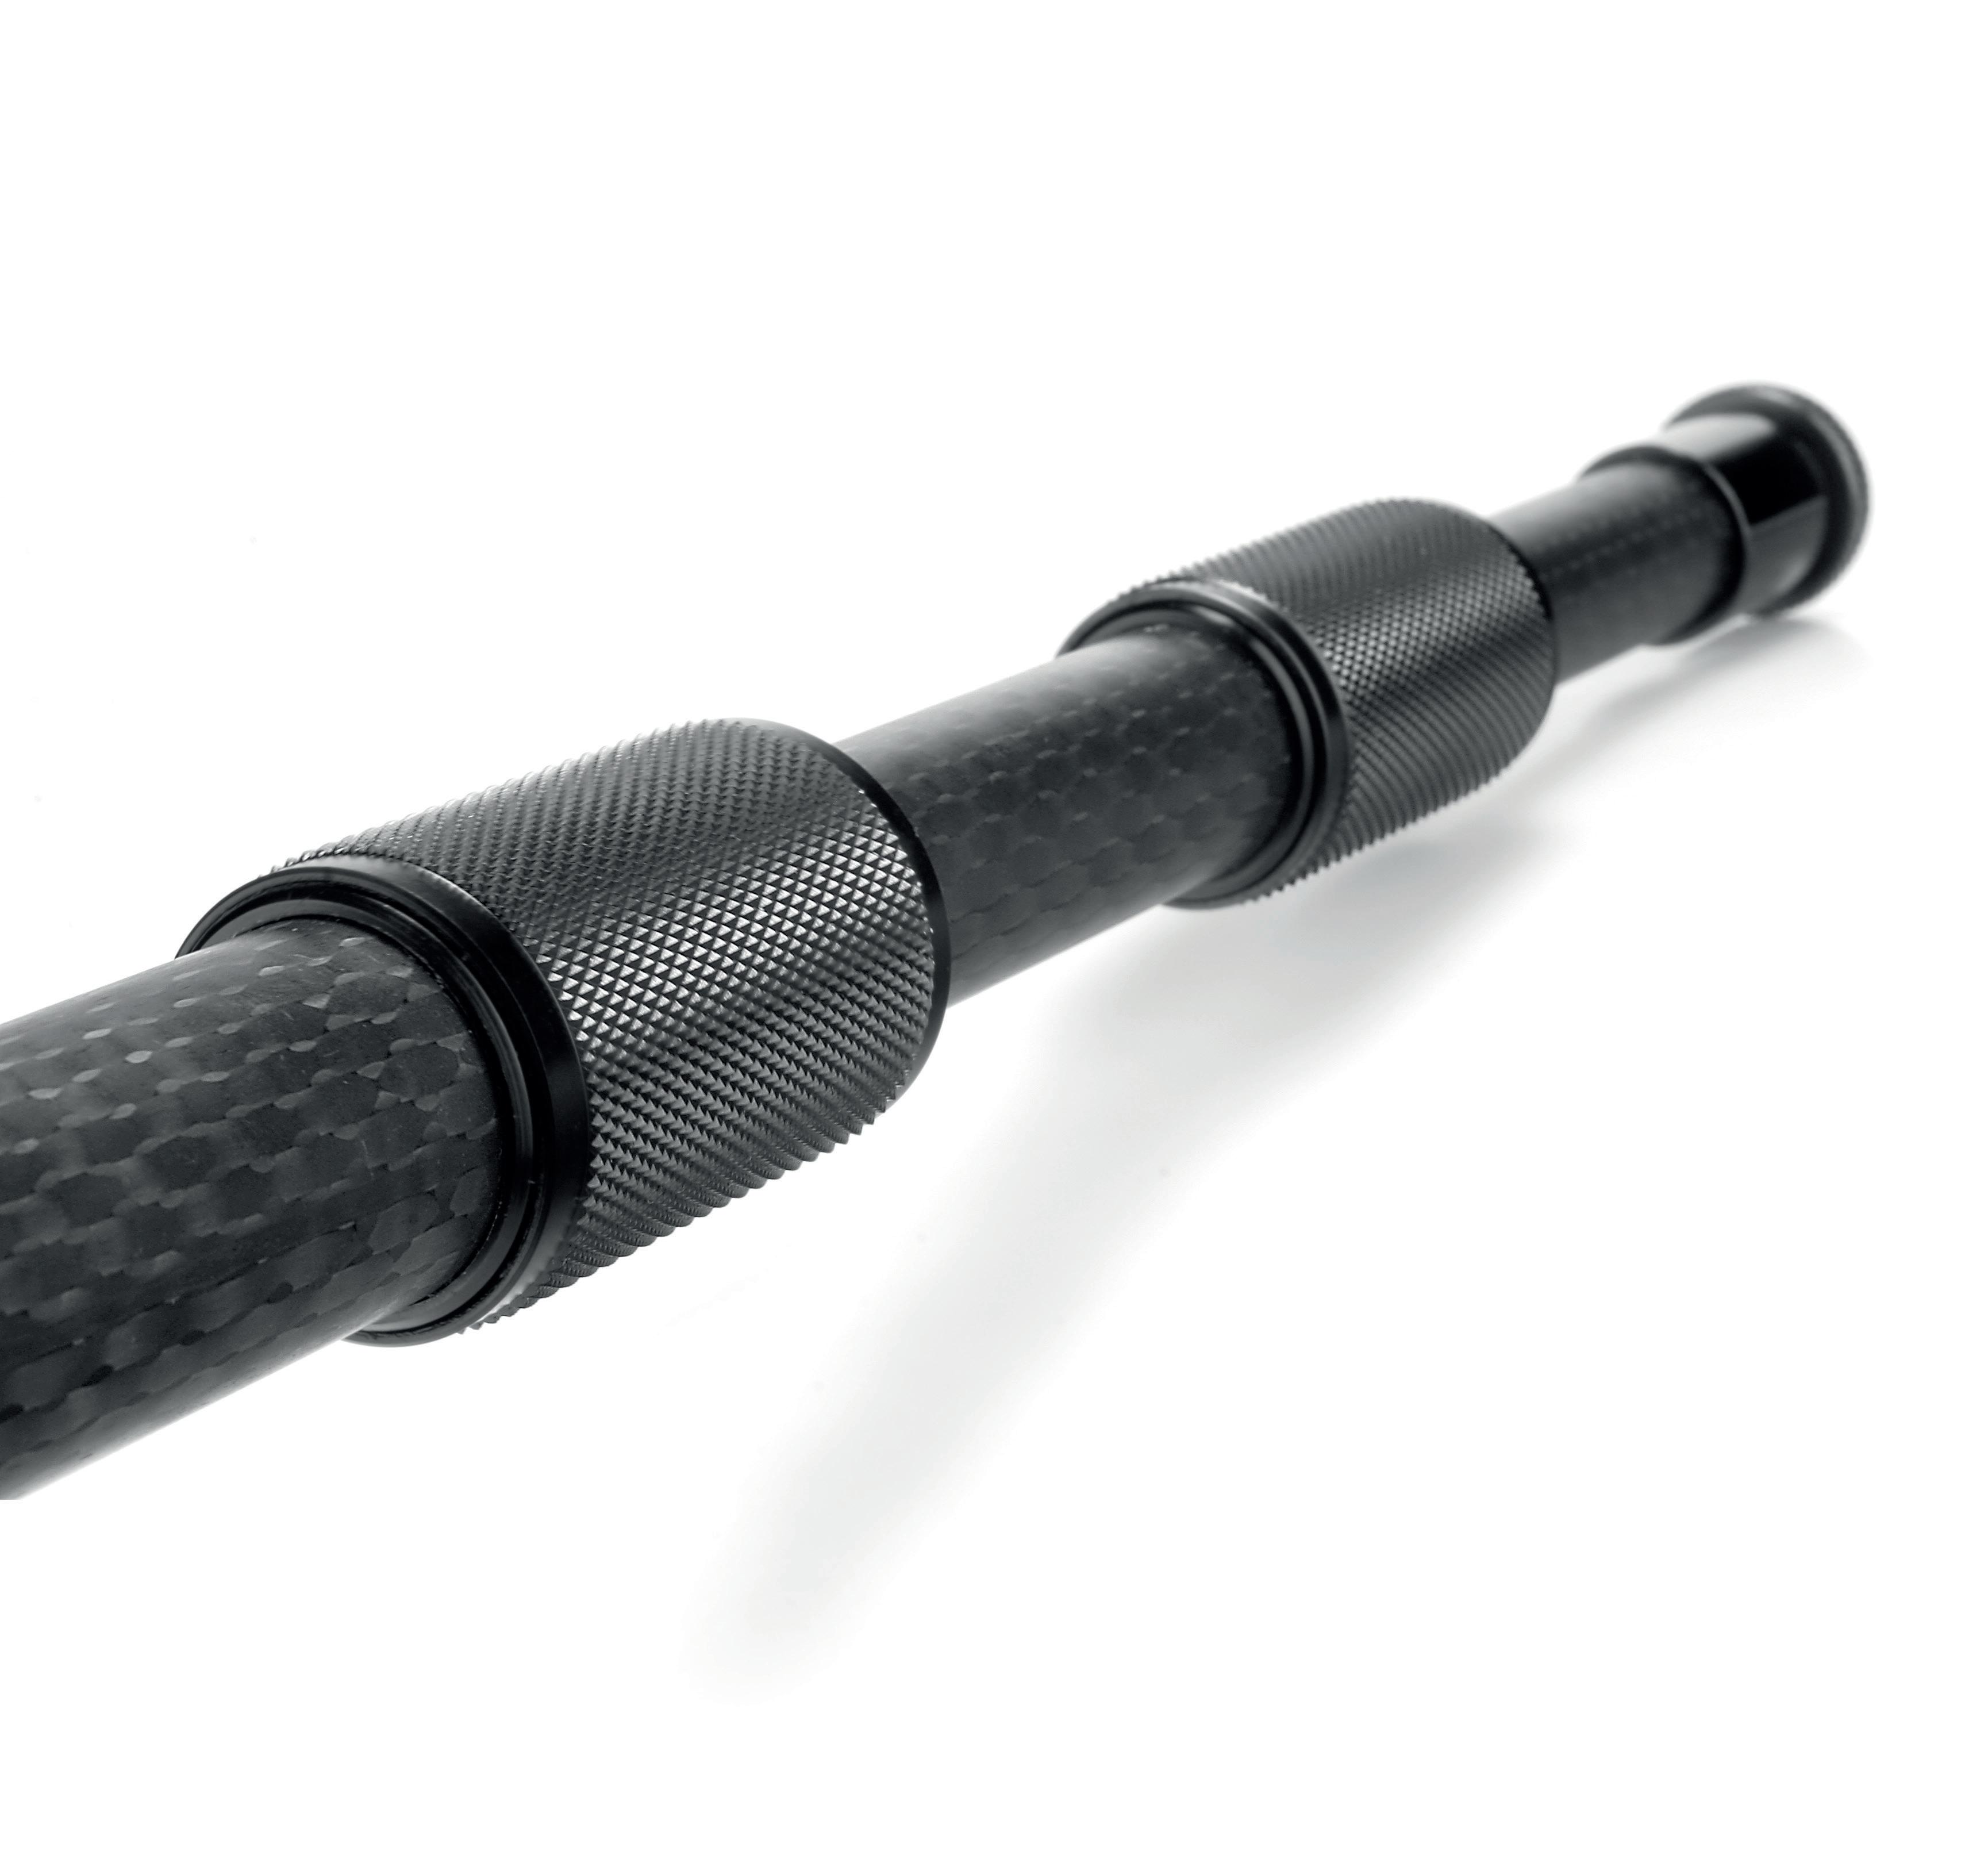
Panamic poles apart
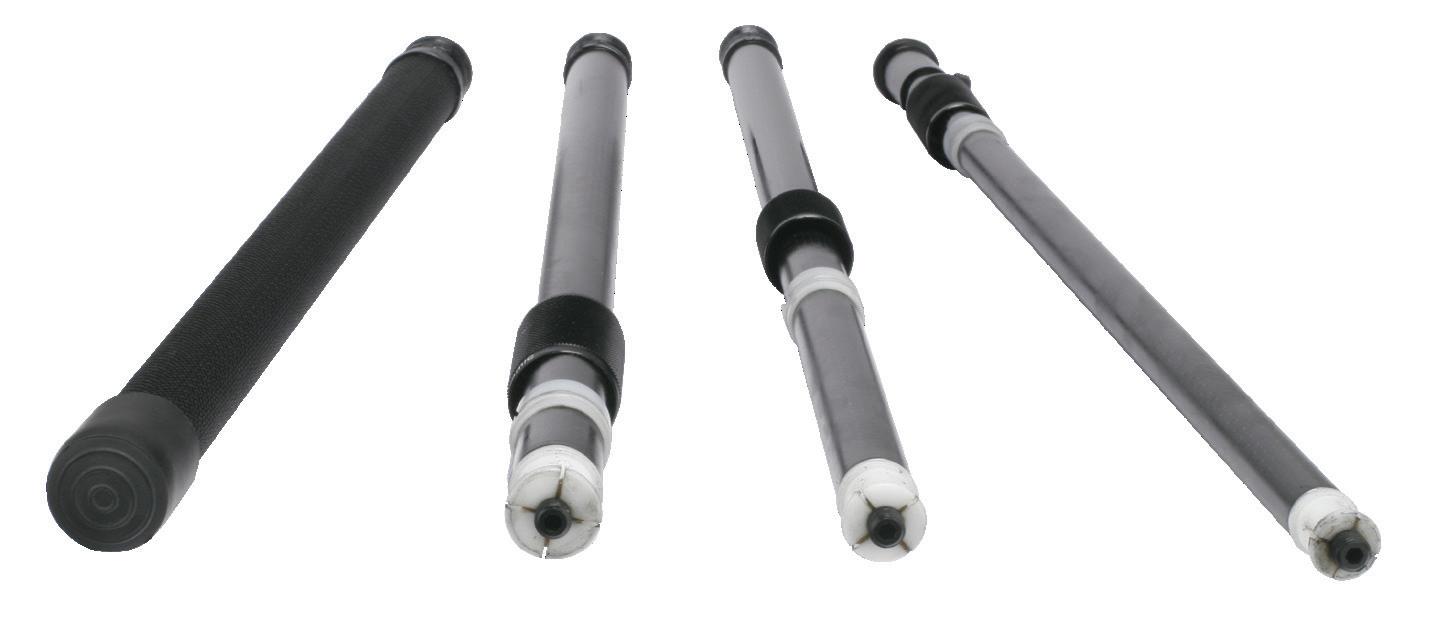
Tip Section 2nd Section 3rd Section Handle Bung
1.0 REPLACING AND ADJUSTING END STOPS

To carry out the service below we recommend customers use the Panamic Maintenance Kit (Part Code: 53-5850) which contains: Lithium Grease, Silicon Fluid and Allen Keys.
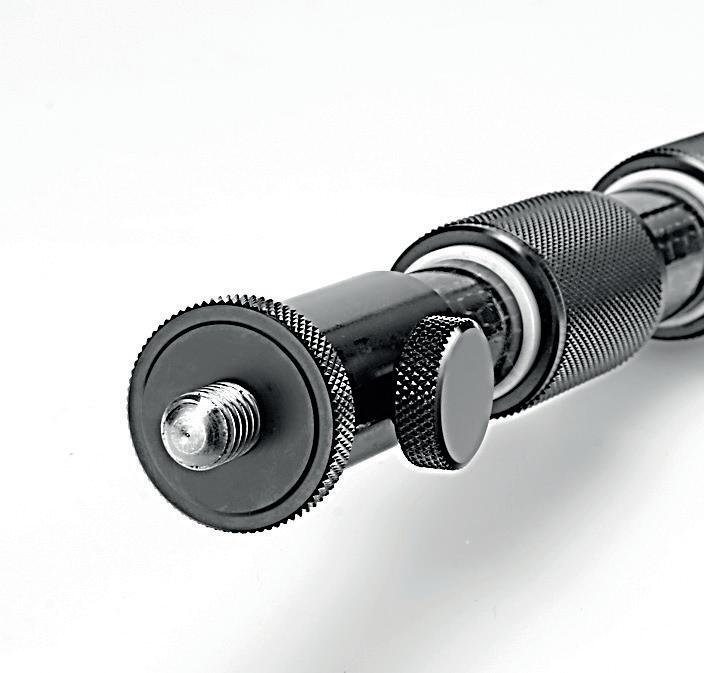
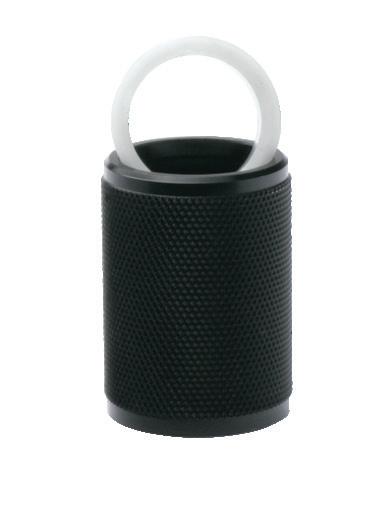
1.1 Undo knurled Thimble on each section and remove from mating section (see Fig.1) remove Rubber Bung from handle section.
NOTE: Rubber Bungs on Panamic poles 53-5801 & 53-5802 unscrew. All other poles have pull off Bungs.
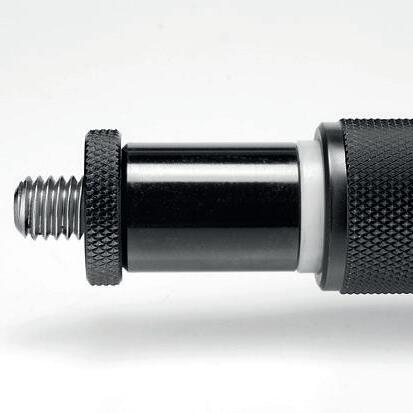
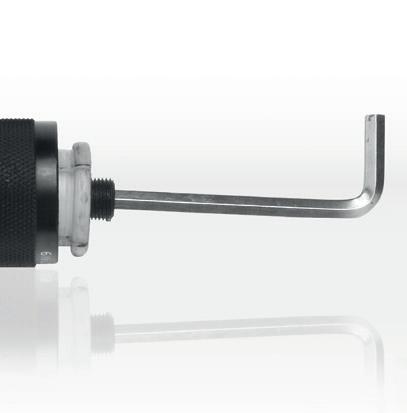
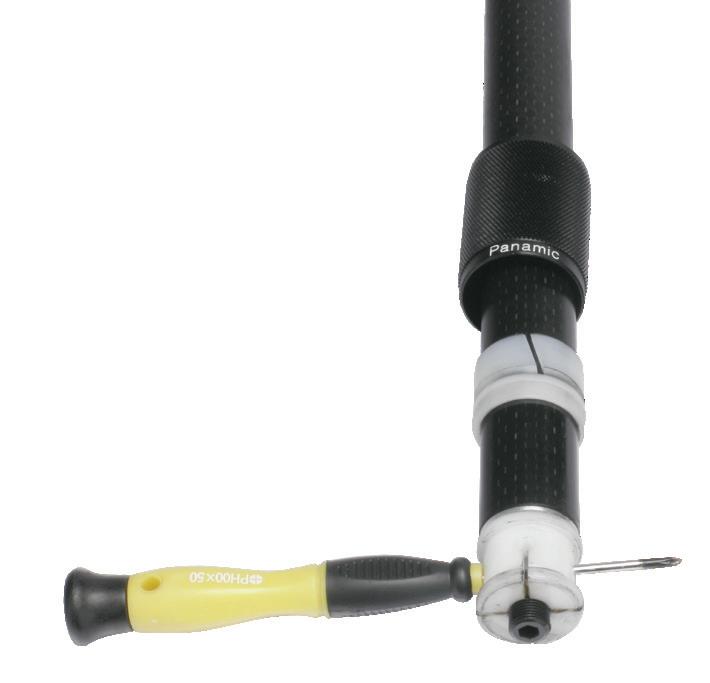
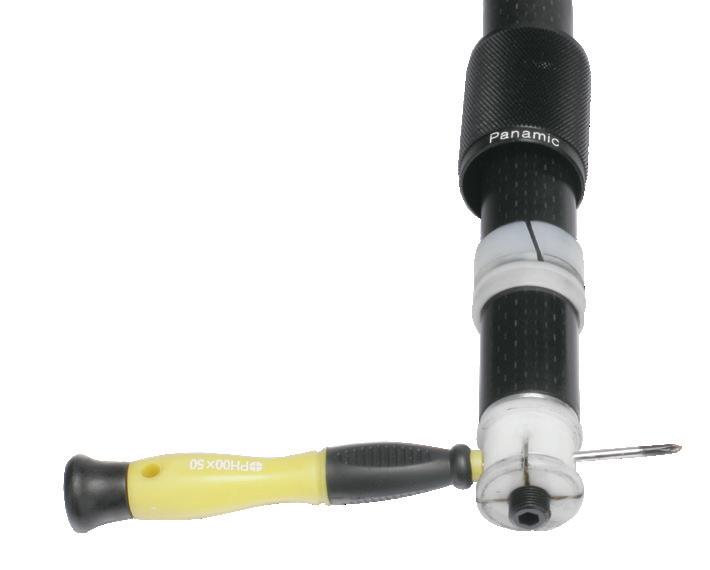
1.2 Remove End Stops from the bottom of each section. To do this insert a small screw driver (or suitable tool) through the cross holes and unscrew (see Fig.2).
Once the End Stops have been removed, slide the knurled Thimble, slotted Bush & small shoulder Bush to the top end of the pole to prevent them from sliding off the end.
NOTE: If the poles are old, the End Stops can seize in the Inserts and they will then need to be machined out prior to the new End Stops being fitted. This is an operation best carried out by our skilled staff.
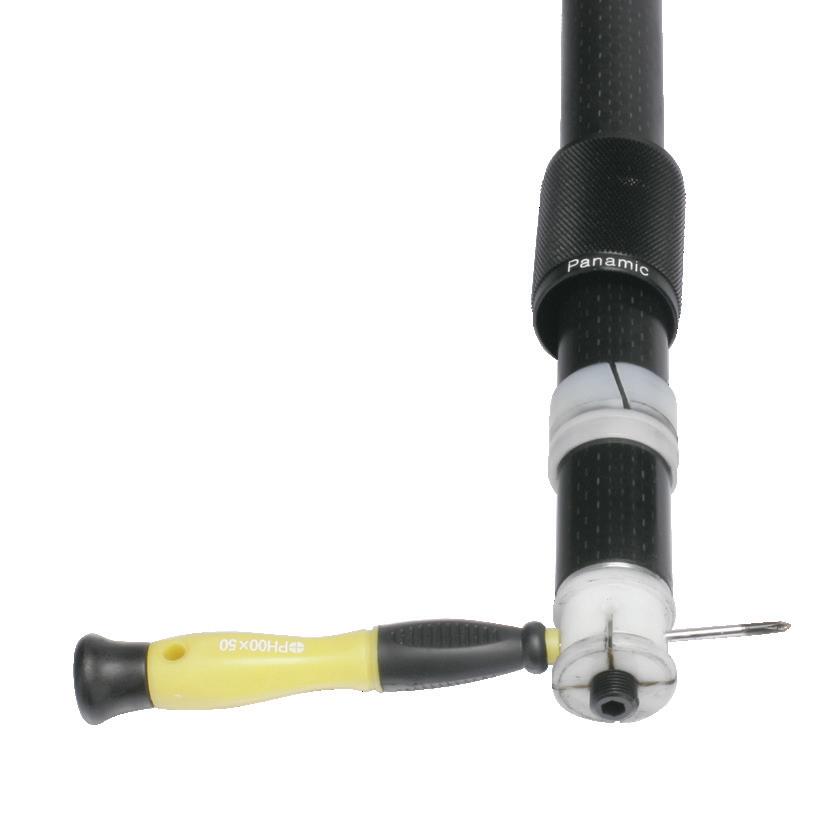
1.3 Starting with the tip section, replace the End Stop. To do this tighten by hand and then insert a small screw driver (or suitable tool) through the cross holes & lock up as tight as possible (see Fig.2).
NOTE: We recommend using a pin point drop of Loctite 222 on the last thread of the End Stop during re-assembly, this stops it accidentally undoing during normal usage.

1.4 Wipe a small amount of silicon fluid over tip section & slide into mating part. Put a small amount of lithium grease on the threaded end of the mating section and screw together with Thimble on tip section; lock up then undo ¼ of a turn.
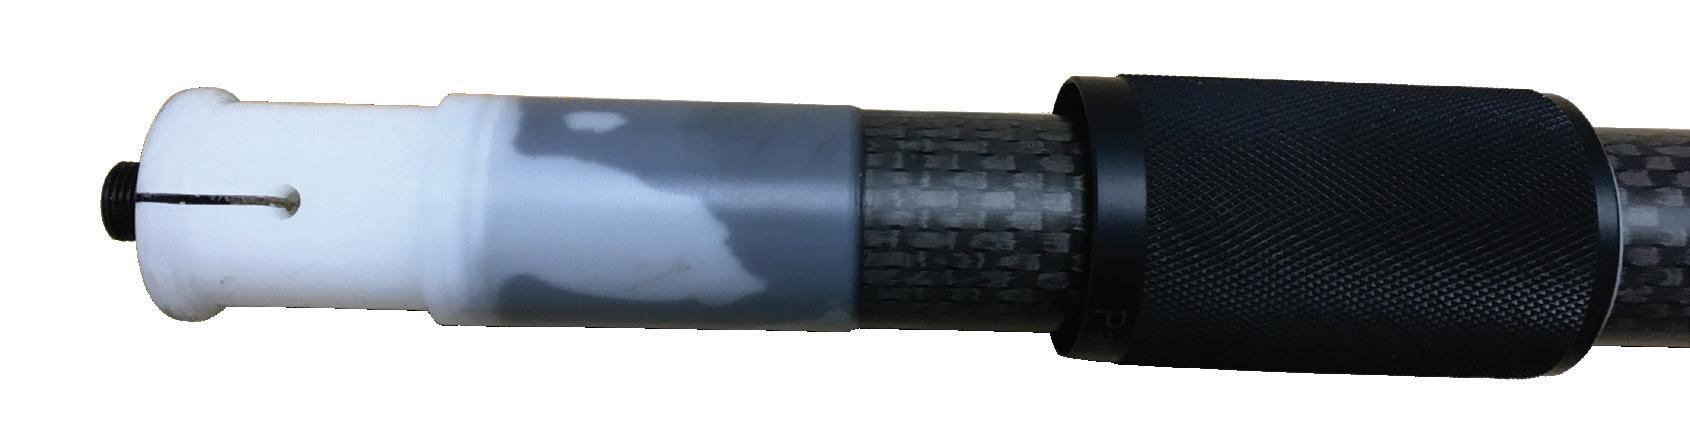
1.5 Using a 4mm (5/32”) or 4.8mm (3/16”) Allen key, (depending on age of pole) tighten grub screw by ¼ of a turn at a time; test the sliding action with the mating section between each ¼ turn until a nice smooth sliding action is achieved through the length of the tube. (see Fig.3 - the End Stop is inside the end of mating part).
NOTE: Do not make sliding action too stiff as it will stiffen up more once the Rubber Bung is replaced.
For all other Panamic enquiries contact info@panamic.net www.panamic.net 2
Fig.1
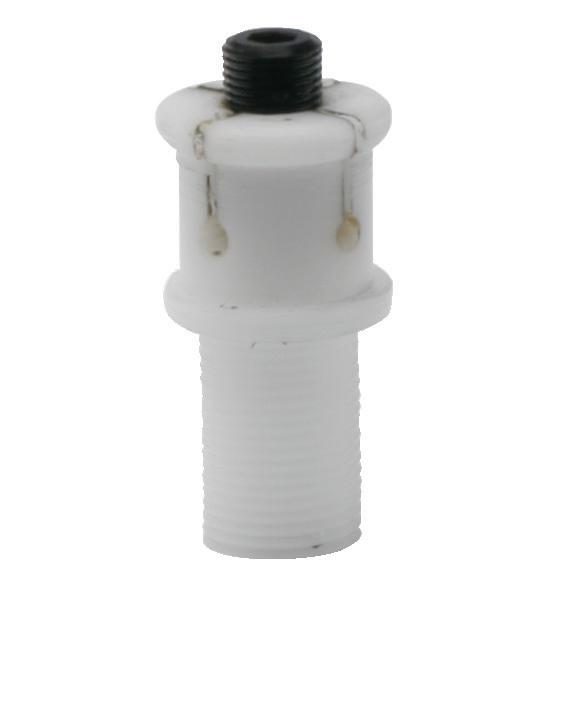
end stop
Fig. 2
Fig. 3
1.6 Continue by reassembling the End Stop into the next consecutive section and following steps 1.4 & 1.5, until the whole pole has been reassembled.
1.7 Replace Rubber Bung. Check again that the slide action is smooth for each section.
1.8 If a section feels tight or gritty readjustment maybe required - wipe clean and follow steps 1.4 & 1.5.
2.0 REPLACING THIMBLES AND BUSH SETS
To carry out the service below we recommend customers use the Panamic Maintenance Kit (Part Code: 53-5850) which contains: Lithium Grease, Silicon Fluid and Allen Keys.
2.1 Undo knurled Thimble on each section and remove from mating section (see Fig.4). Remove Rubber Bung from handle section.
NOTE: Rubber Bungs on Panamic poles 53-5801 & 53-5802 unscrew All other poles have pull off Bungs.
2.2 Remove End Stops from the bottom of each section; to do this insert a small screw driver (or suitable tool) through the cross holes and unscrew (see Fig.5).
NOTE: If the poles are old, the End Stops can seize in the Inserts and they will then need to be machined out prior to the new End Stops being fitted. This is an operation that is best carried out by our skilled staff.
2.3 The split Bush and small shoulder Bush will slide straight off the section; the large shoulder Bush will need prising out of the top of the Thimble with a small screwdriver (see Fig.6).
NOTE: Keep each set of removed Bushes together with mating Thimble. This will allow comparison with the new Bushes and Thimble so that the correct parts are fitted to each section.
To purchase a new boom contact sales@canford.co.uk 3
Panamic poles apart
Fig.6
Fig. 4
end stop
Fig. 5
2.4 To replace the large shoulder Bush, press into top end of Thimble (see Fig.7).
2.5 Manipulate Bush so that the raised shoulder sits on the thread inside the Thimble (see Fig.8 for orientation).
APPLY PRESSURE AT THESE POINTS
THIMBLE
LARGE SHOULDER BUSH ORIENTATION
THIMBLE
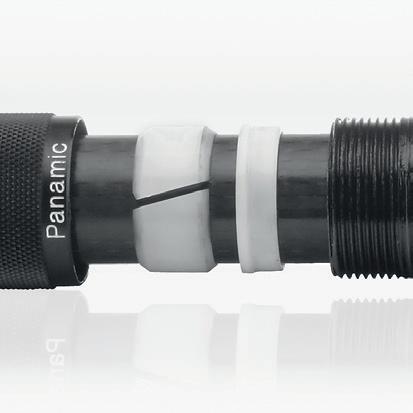
2.6 Slide Thimble onto carbon fibre section then slide on slotted Bush and small shoulder Bush (see Fig.9 for orientation).
2.7 Replace End Stop; to do this tighten by hand and then insert a small screw driver (or suitable tool) through the cross holes and lock up as tight as possible (see Fig.10).

NOTE: We recommend using a pin point drop of Loctite 222 on the last thread of the End Stop during re-assembly, this stops it accidentally undoing during normal usage.
end stop
For all other Panamic enquiries contact info@panamic.net www.panamic.net 4
Fig.9
Fig. 10
Fig.7
Fig.8
Panamic
poles apart
2.8 Wipe a small amount of silicon fluid over tip section and slide into mating part (2nd section); put a small amount of lithium grease on the Threaded End of the mating section and screw together with Thimble on tip section; lock up then undo ¼ of a turn.
2.9 Using a 4mm (5/32”) or 4.8mm (3/16”) Allen key, (depending on age of pole), tighten grub screw by ¼ of a turn at a time (see Fig.11 - End Stop is inside the end of mating part); test the sliding action with the mating section between each ¼ turn until a nice smooth sliding action is achieved through the length of the tube. Complete steps 2. 8 – 2.11 each time adding the next section until pole is fully assembled.
NOTE: If End Stops have not had much wear they may not need adjusting.
11
2.10 Replace Rubber Bung - check again that the slide action is smooth for each section. Sliding motion air resistance should be felt, once the the Bung has been replaced.
2.11 If a section feels tight or gritty, remove, wipe clean and re-adjust grub screw in End Stop.
3.0 ADJUSTING END STOPS TO REDUCE HANDLING NOISE

To carry out the service below we recommend customers use the Panamic Maintenance Kit (Part Code: 53-5850) which contains: Lithium Grease, Silicon Fluid and Allen Keys.
3.1 Undo knurled Thimble on each section and remove from mating section (see Fig.12). Remove the Rubber Bung from handle section.
NOTE: Rubber Bungs on Panamic poles 53-5801 & 53-5802 unscrew All other poles have pull off Bungs.
To purchase a new boom contact sales@canford.co.uk 5
Fig.
3.2 Remove End Stops from the bottom of each section. To do this insert a small screw driver (or suitable tool) through the cross holes and unscrew (see Fig.13). Once the End Stops have been removed, slide the knurled Thimble, slotted Bush and small shoulder Bush to the top end of the pole to prevent them from sliding off the end.
NOTE: If the poles are old, the End Stops can seize in the Inserts and they will then need to be machined out prior to the new End Stops being fitted. This is an operation that is best carried out by our skilled staff.
3.3 Remove all grub screws from the bottom of End Stops using a 4mm (5/32”) Allen key. Put a small amount of lithium grease on thread of Grub Screw and screw back into End Stop about ½ of its length, leaving the rest for adjustment.
3.4 Starting with the tip section replace End Stop into the bottom of this section.
3.5 Wipe a small amount of silicon fluid over tip section and slide into mating part. Put a small amount of lithium grease on the Thread End of mating section & screw together with Thimble on tip section; lock up then undo ¼ of a turn.
3.6 Using a 4mm (5/32”) or 4.8mm (3/16”) Allen key, (depending on age of pole), tighten grub screw by ¼ of a turn at a time; test the sliding action with the mating section between each ¼ turn until a nice smooth sliding action is achieved throughout the length of the tube. (See Fig.14 - the End Stop is inside the end of the mating part).
3.7 Continue by reassembling End Stop into next consecutive section and following steps 3.5 & 3.6, until the whole pole has been reassembled.
3.8 Replace Rubber Bung - check again that the slide action is smooth for each section.
3.9 If a section feels tight or gritty readjustment maybe required - wipe clean and follow steps 3.5 & 3.6. NOTE: Do not make the sliding action too stiff as it will stiffen up more once the Rubber Bung is replaced.
For all other Panamic enquiries contact info@panamic.net www.panamic.net 6
12 end stop
Fig.
13
Fig.
poles apart
4.0 REPAIRING SPLINTERING CARBON FIBRE SECTIONS
Carbon Fibre can suffer accidental damage which may cause small splinters to raise from the material surface; to fully carry out the service below you will need Silicon Fluid & Lithium Grease these are available in the Panamic Maintenance kit (Part No: 53-5850)
4.1 Undo knurled Thimble on each section and remove from mating section (see Fig.15).
4.2 Remove End Stops from the bottom of section that is showing signs of splintering; to do this insert a small screw driver (or suitable tool) through the cross holes and unscrew (see Fig. 16).
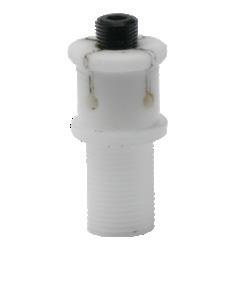
NOTE: If you are working on a new model 53-5807, a 53-5812 or 97-5011 you will see an extra bush that covers the bottom of the Carbon Fibre do not attempt to remove the End Stops or these Bushes, carry out the following steps by sliding the Thimble & movable Bushes to the opposite end of the Carbon Fibre you are trying to work on.
NOTE: If the poles are old, the End Stops can seize into the Inserts and they will then need to be machined out prior to the new End Stops being fitted. This is an operation best carried out by our skilled staff.
4.3 Carefully slide Thimble and Plastic Bushes off of the Carbon Fibre length.
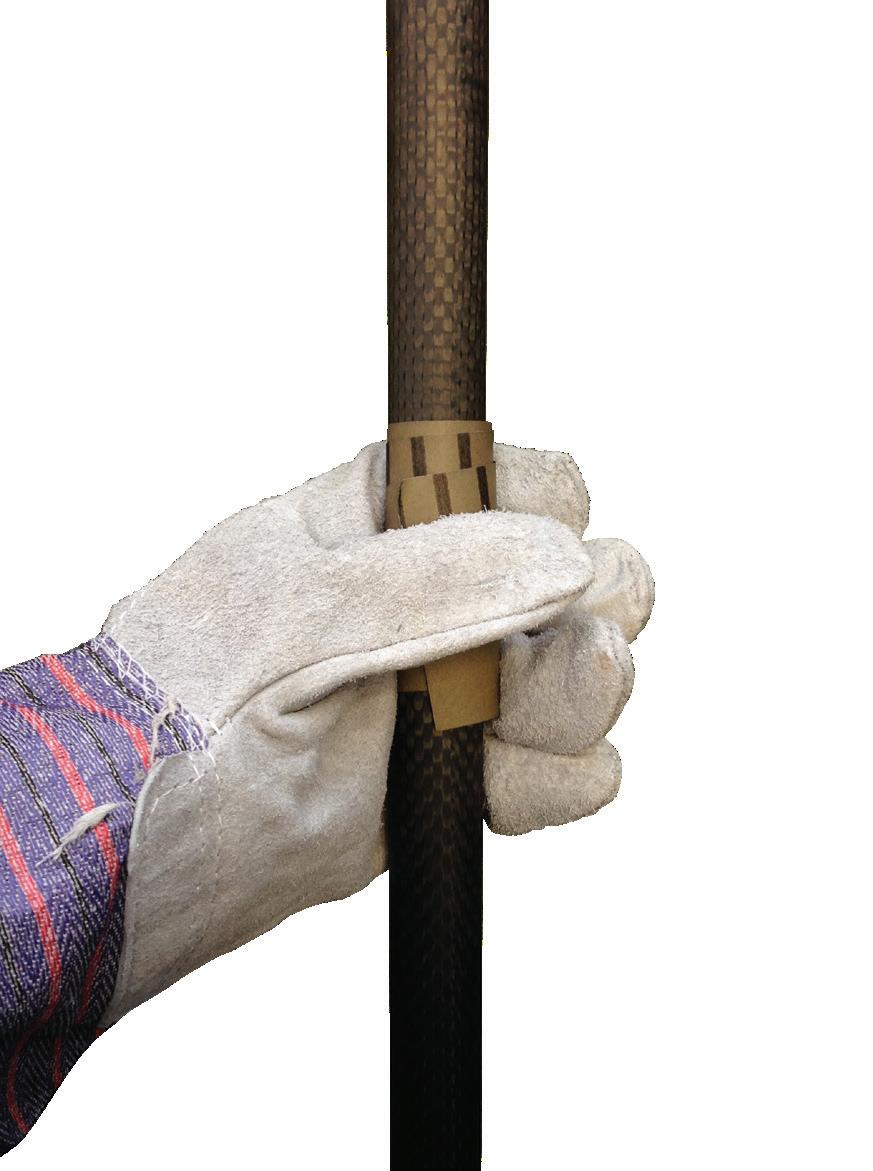
4.4 PUT ON SAFETY GLOVES TO PROTECT HANDS.
4.5 Wrap a small piece of P240 wet & dry sandpaper around Carbon Fibre tube and gently rub up & down the length until splinters are removed. (see Fig. 17)
To purchase a new boom contact sales@canford.co.uk 7
Panamic
end stop
Fig.17
Fig. 16
Fig. 15
4.6 STILL WEARING GLOVES; wipe gently over rubbed down section with a piece of cotton cloth, you may still feel a slight pick up on the cloth but there should not be any evidence of splinters left; if there are repeat the rubbing down process with sand paper until these are removed.
4.7 Slide the Thimble and Plastic Bushes back into place, ensure all bushes are correctly orientated (Orientation highlighted on exploded diagram on page 1).
4.8 Replace the End Stop. To do this tighten by hand and then insert a small screw driver (or suitable tool) through the cross holes & lock up as tight as possible. (see Fig. 18)
NOTE: We recommend using a pin point drop of Loctite 222 on the last thread of the End Stop during re-assembly, this stops it accidentally undoing during normal usage.
4.9 Wipe a small amount of silicon fluid over section and slide into mating section. Put a small amount of lithium grease on the Thread End of section and screw together with Thimble on mating section.
4.10 If sliding action of boom is too stiff or too loose End Stop adjustment maybe required, please follow the instructions in section 3.0
If your boom has suffered irreparable damage and the steps above are not rectifying the problem; the best course of action is to contact Canford Audio Plc and ask us about a replacement section.
For all other Panamic enquiries contact info@panamic.net www.panamic.net 8
end stop
Fig. 18
5.0 REMOVING & REPLACING EXTRA BUSHES FITTED ON SELECTED MODELS OF BOOMS (53-5806, 53-5807, 53-5810 & 53-5812)
REMOVING THESE EXTRA BUSHES
5.1 Undo knurled Thimble on each section and remove from mating section (see Fig. 19) remove Rubber Bung from handle section, as explained in section 1 of the Panamic Maintenance Guide.
end stop
5.2 Remove End Stops from the bottom of each section. To do this insert a small screw driver (or suitable tool) through the cross holes and unscrew (see Fig. 20).
5.3 Some of the extra bushes will remove easily just by a gentle twist/slide action. If they won’t stand the bush end of the carbon in a cup of hot water (not boiling) for a few seconds, remove and slide off. (The walls of these bushes are very thin so if you are going to be re-using the same bushes be very gentle when removing).
NOTE: If the poles are old, the End Stops can seize in the Inserts and they will then need to be machined out prior to the new End Stops being fitted. This is an operation best carried out by our skilled staff.
5.4 Wipe over carbon fibre section while free of components.
To purchase a new boom contact sales@canford.co.uk 9
Panamic poles apart
Fig. 20
Fig. 19
5.5 Replace Bush kit and Thimbles as advised in section 2 of the Panamic Maintenance Guide.
5.6 To re-fit/replace the extra Bush prior to fitting the End Stop, drop into a cup of hot water (not boiling) for a few seconds, remove and quickly shake/wipe off excess water. Place over the end of the correct section and slide into position. If extra pressure is required place bush onto a flat surface and press carbon carefully down into the bush. If necessary return to the hot water for a few seconds and re-apply pressure.
5.7 Once bushes are in place, replace End Stops and rebuild boom as advised from part 1.3 – 1.8 of section 1 of the Panamic Maintenance Guide.
NOTES
For all other Panamic enquiries contact info@panamic.net www.panamic.net 10
Panamic
BOOM POLE SPARES
Stock code Style
53-5851 Panamic Titanium tip (complete)
53-5852 Panamic Titanium tip cross screw
53-5853 Panamic Titanium tip locking wheel, large, for detachable tips
53-5854 Panamic Titanium tip locking wheel, small, for fixed tips
53-5856 Panamic Rubber bung for mini booms (fits 53-5803, 53-5804, 53-5805, 53-5806, 53-5807)
53-5857 Panamic Rubber bung for 3 section midi/maxi booms (fits 53-5809, 53-5811)
53-5858 Panamic Rubber bung for 4 section midi/maxi booms (fits 53-5810, 53-5812)
53-5859 Panamic End screw cap for mini booms (fits 53-5801, 53-5802, 53-5808)
53-5861 Panamic Set of 6 bushes for 3 section mini booms
53-5862 Panamic Set of 9 bushes for 4 section fixed-tip mini boom
53-5863 Panamic Set of 9 bushes for 4 section detachable tip mini boom
53-5864 Panamic Set of 12 bushes for 5 section mini booms
53-5865 Panamic Set of 6 bushes for 3 section midi and maxi booms
53-5866 Panamic Set of 9 bushes for 4 section midi and maxi booms
53-5871 Panamic Adjustable end stop for mini booms, 0.625 inch tube
53-5872 Panamic Adjustable end stop for mini booms, 0.750 inch tube
53-5873 Panamic Adjustable end stop for mini booms, 0.875 inch tube
53-5874 Panamic Adjustable end stop for mini booms, 1 inch tube
53-5875 Panamic Adjustable end stop for 3 section midi/maxi booms, 0.875 inch tube
53-5876 Panamic Adjustable end stop for 3 section midi/maxi booms, 1 inch tube
53-5877 Panamic Adjustable end stop for 4 section midi/maxi booms, 0.875 inch tube
53-5878 Panamic Adjustable end stop for 4 section midi/maxi booms, 1 inch tube
53-5879 Panamic Adjustable end stop for 4 section midi/maxi booms, 1.125 inch tube
53-5880 Panamic Replacement handle for mini booms, 0.48 metres
53-5881 Panamic Replacement handle for mini booms, 0.56 metres
53-5882 Panamic Replacement handle for mini booms, 0.73 metres
53-5883 Panamic Replacement handle for mini booms, 0.73 metres
53-5884 Panamic Replacement handle for mini booms, 0.73 metres
53-5885 Panamic Replacement handle for mini booms, 0.80 metres
53-5886 Panamic Replacement handle for mini booms, 1.00 metre
53-5887 Panamic Replacement handle for 3 section midi boom, 1.24 metres
53-5888 Panamic Replacement handle for 4 section midi boom, 1.24 metres
53-5889 Panamic Replacement handle for 3 section maxi boom, 1.50 metres
53-5890 Panamic Replacement handle for 4 section maxi boom, 1.50 metres
53-5891 Panamic Thimble for mini booms, 7/8" thread
53-5892 Panamic Thimble for mini booms, 1" thread
53-5893 Panamic Thimble for mini booms, 1 1/8" thread
53-5894 Panamic Thimble for mini booms, 1 1/4" thread, engraved
53-5895 Panamic Thimble for mini booms, 1 1/8" thread, engraved
53-5896 Panamic Thimble for midi & maxi booms, 1 1/8" thread
53-5897 Panamic Thimble for midi & maxi booms, 1 1/4" thread
53-5898 Panamic Thimble for 3 section midi & maxi booms, 1 1/4" thread, engraved
53-5899 Panamic Thimble for 4 section midi & maxi booms, 1 3/8" thread, engraved
www.panamic.net CANFORD GROUP LTD, Elliott House, Crowther Road, Washington, Tyne & Wear, NE38 0BW, UK Tel: +44 (0) 191 418 1000 Fax: +44 (0) 191 418 1001
poles apart
