It’s coming into chilly season, but that’s no reason to hibernate—it’s time to warm your soul by getting the garden into tip top condition after the long, hot days of summer. In our eighth edition of CANNATalk, we’re giving you the chance to win an exclusive CANNA PS5 bundle to keep you sorted this winter, plus we dig into the world of organic gardening and look at the best products to help kickstart your chemical-free patch.
We’re also shining the spotlight on the amazingly versatile cauliflower, we take a closer look at trace elements and how they can boost your crops, and we investigate the best ways to defeat thrips. As always, if you have a question, query, or comment—please get in touch! You can find us in the questions section at www.canna.com.nz.
Happy gardening!
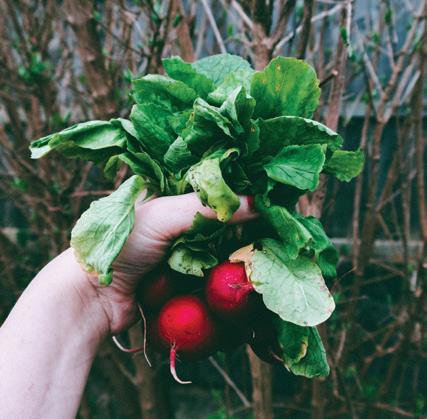
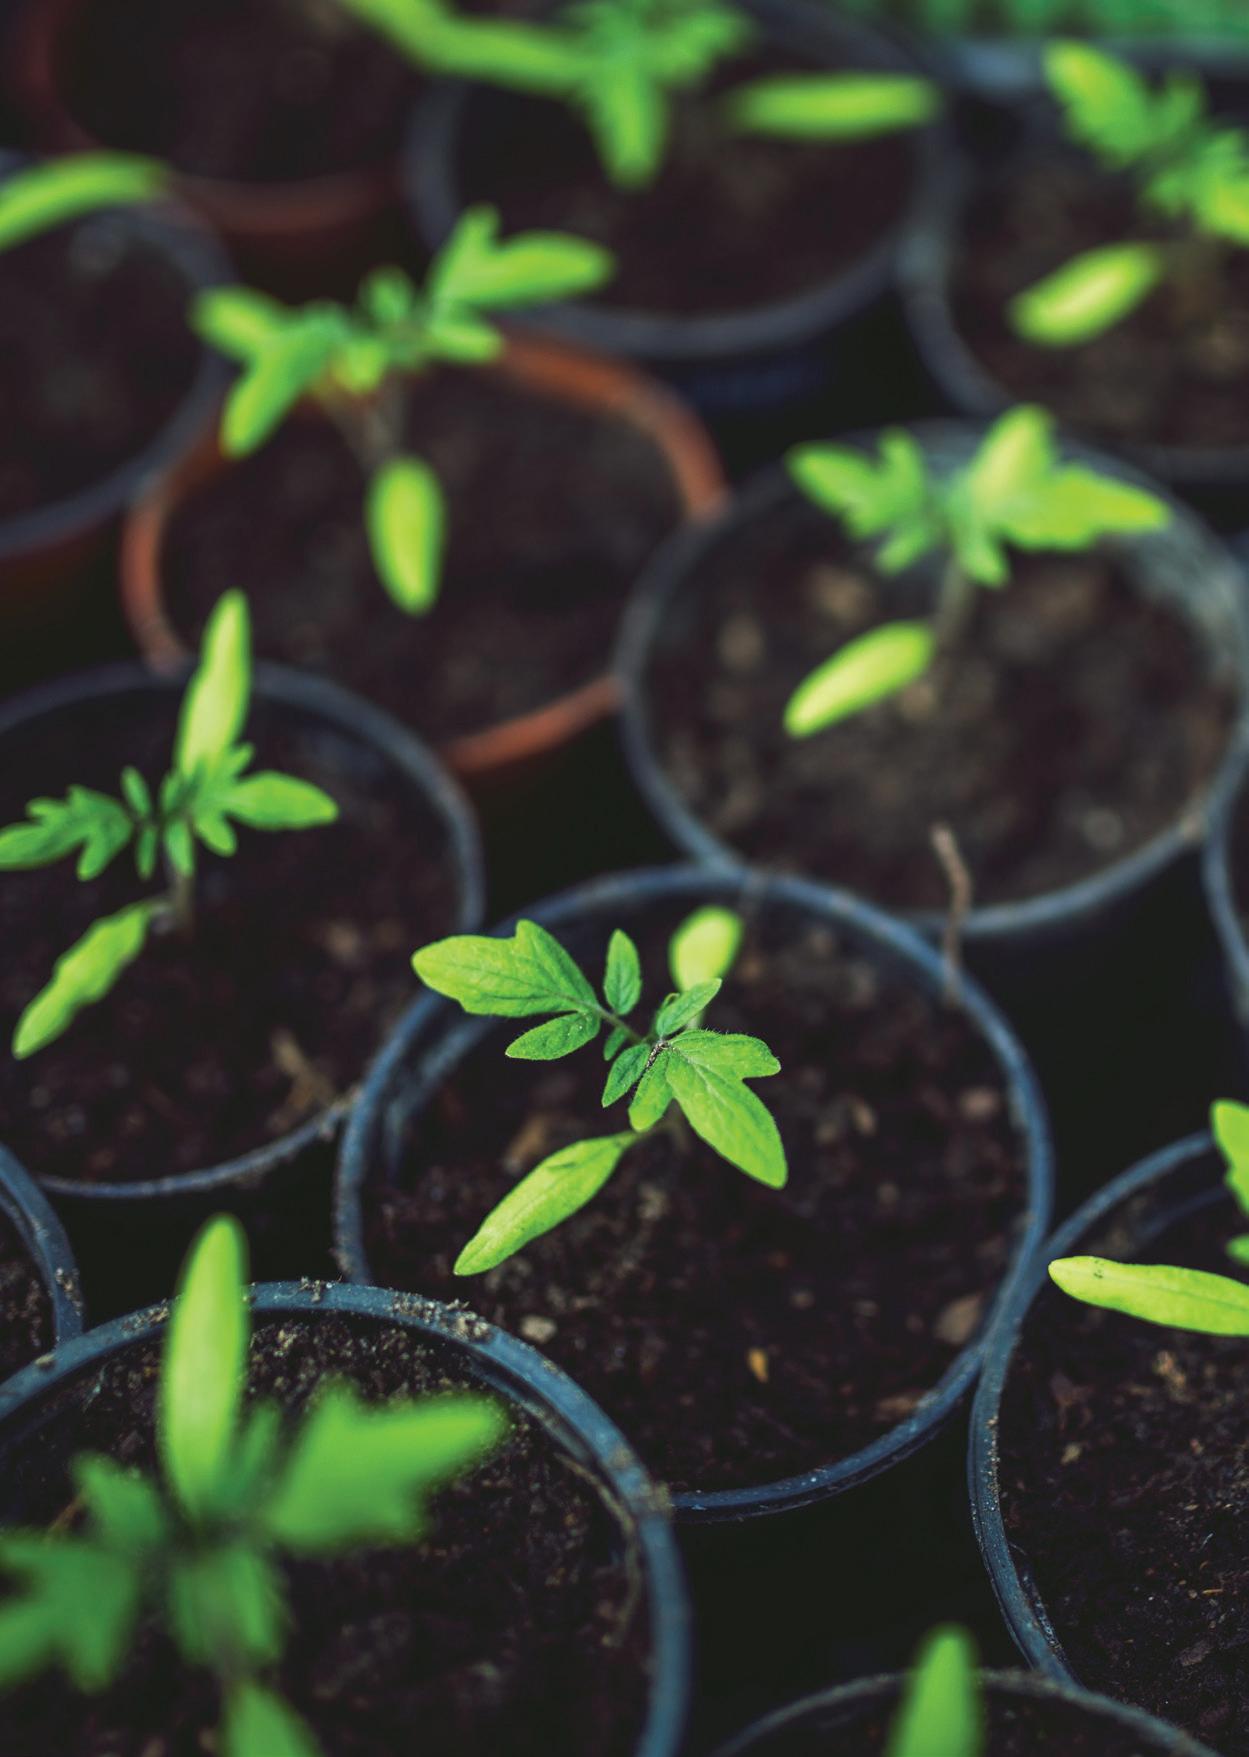
At CANNA, we’ve always known that good health and good food go together hand in hand. And today, more and more research suggests that the healthiest food is organically grown—it’s free of pesticides and herbicides, chock full of vitamins and minerals, and best of all, delicious.
That’s why CANNA has a range of plant based fertilisers, called BIOCANNA, especially developed for cultivation in potting mix and soils. The BIOCANNA range stimulates the microflora around your plant’s roots to help it absorb the necessary nutrients and protect the root environment, creating a heathy ecosystem that


better protects your plant from pests and diseases and results in a vigorous, abundant crop.
BIOCANNA nutrients are organically based, made only from plant products, and they have been tested vigorously in CANNA´s laboratories, ensuring that the right amount of nutrients are available to your plant to ensure healthy growth. Nutrient levels in many organic fertilisers can vary wildly, leading to plant overdose or starvation, but stringent quality control in our formulas means that you
can trust CANNA to provide premium, first-class food for your garden. This makes for a consistent product with exactly the right mineral composition and ingredients. And it guarantees that the substances in BIOCANNA products—such as fruit acids and oligosaccharides—are immediately absorbable and stimulate the plant’s metabolism and resistance.
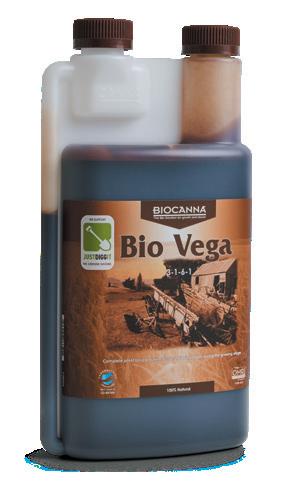
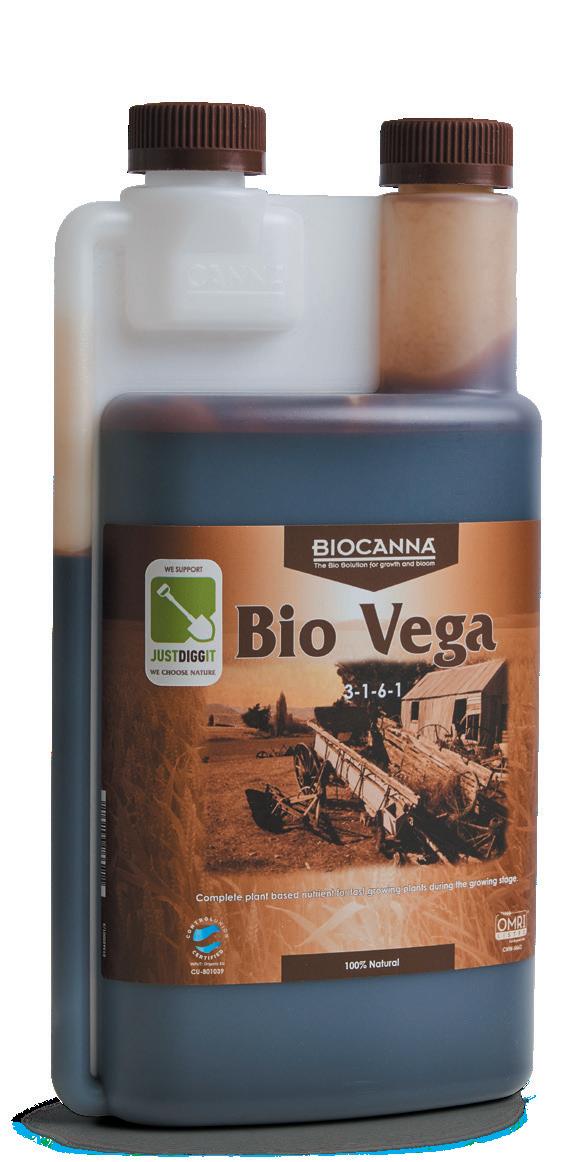
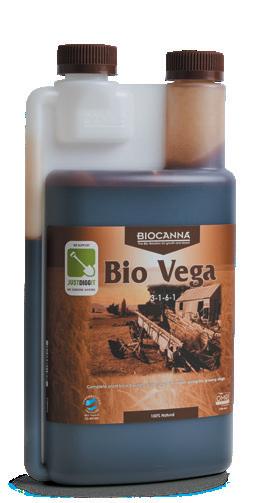
Developed especially for your plants’ growth phase, Bio Vega is rich in highly absorbable betaine nitrogen that is released according to the plant’s needs, stimulating root development and the formation of strong growth shoots.

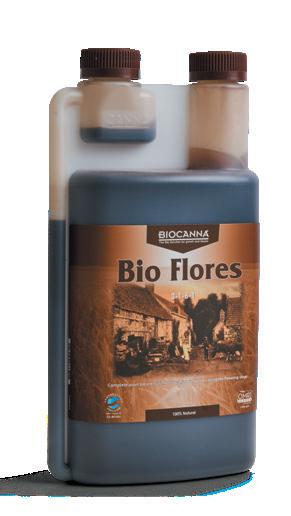
Bio Flores is designed for the blooming phase of fast-growing plants and is an excellent method of stimulating fruit formation— containing all the nutrients plants need during the all-important flowering phase.

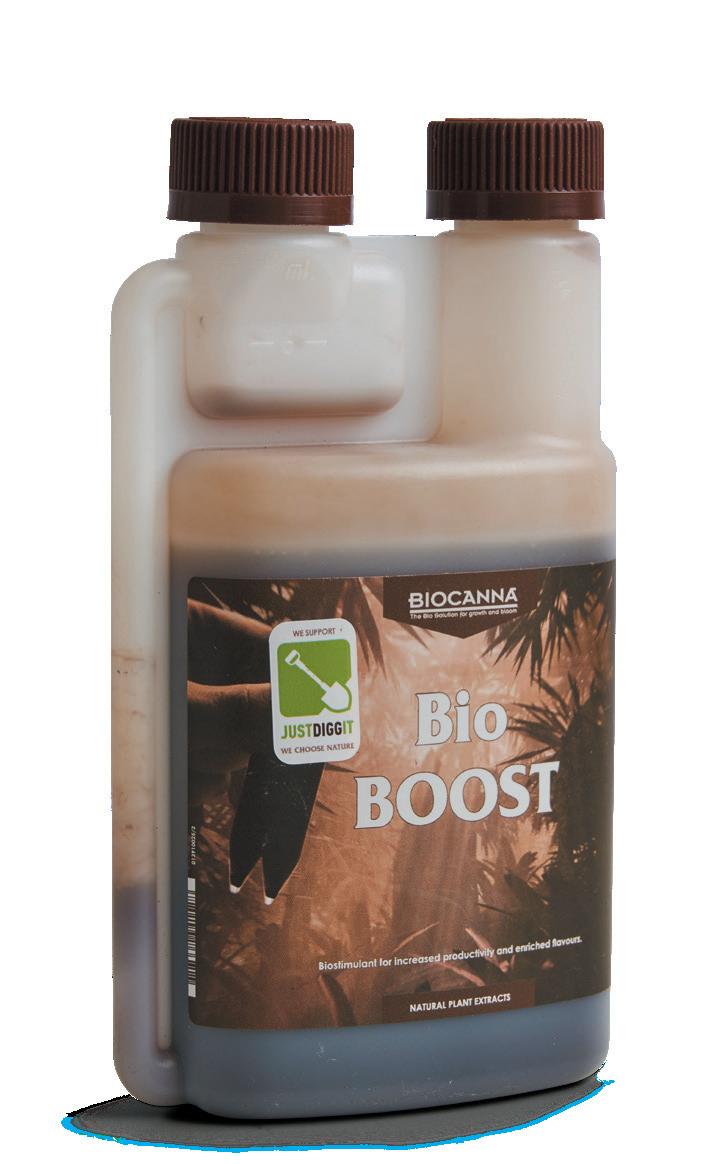
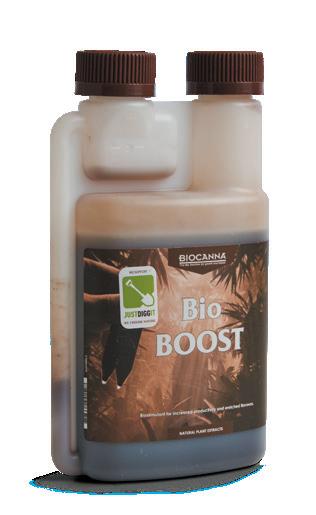
Bio BOOST is a yield increasing agent for all cultivation systems and can be applied in combination with all CANNA’s nutritional lines and additives. Bio BOOST is a natural fermented plant extract with bloom stimulating characteristics that will also result in fuller flavour for your plants. Developed in by CANNA Research from tropical rainforest plant extracts, the bioactive substances in Bio BOOST help your plants metabolise more fructose, becoming healthier, stronger and less vulnerable to diseases. The result is a higher yield with a strong, exuberant, and vital fructification.

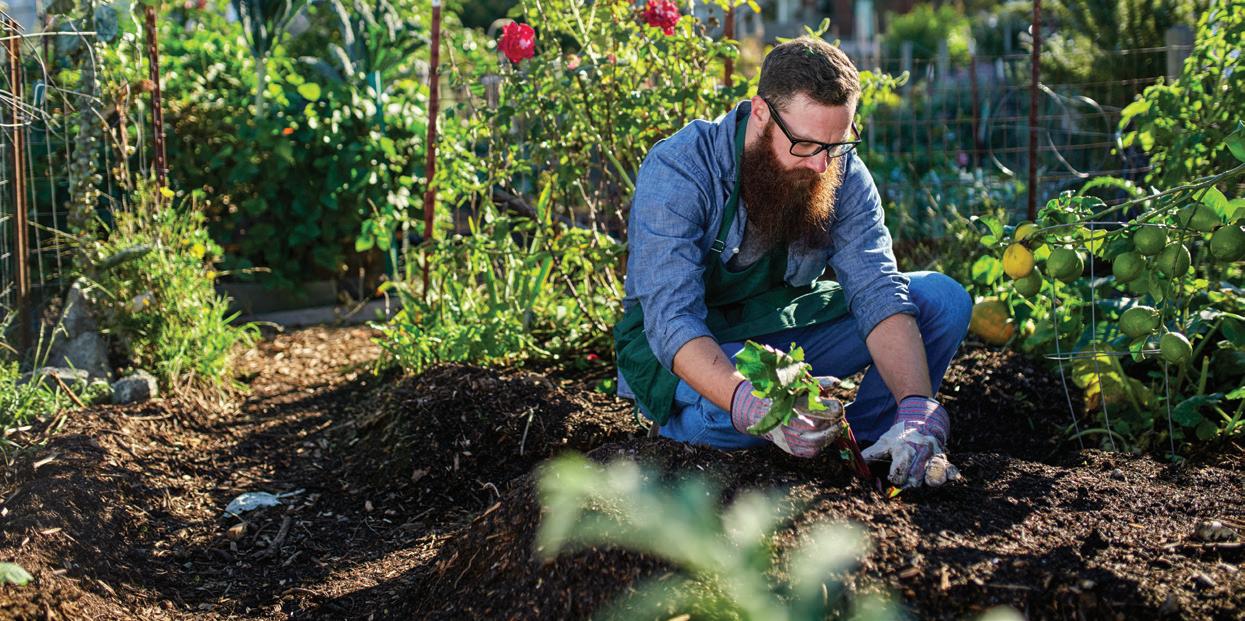
The decision to ‘grow organic’ can seem like a big one—so much modern agriculture seems to rely on synthetic pesticides, herbicides, fertilisers and boosters. Yet organic gardening is a fabulous way to grow your own fresh, delicious and healthy fruits and vegetables, and a sustainable and environmentally friendly approach to gardening that benefits both your health and the planet.
The word ‘organic’ has a multitude of different definitions, but for the home gardener it’s probably best understood as a set of growing practices that include: using no synthetic fertilisers, pesticides, fungicides or herbicides; no GMOs; nurturing soil biology; growing diverse crops; using compost or other types of organic matter; growing only organic, untreated seeds; and planting habitat for pollinators such as bees and birds. Here are a few tips to get off to the right start:
Select a space in your garden that gets at least six hours of sunlight a day and has well-drained soil. Avoid low-lying areas where water accumulates and check the pH of your soil to make sure it is within the acceptable range for the plants you want to grow.
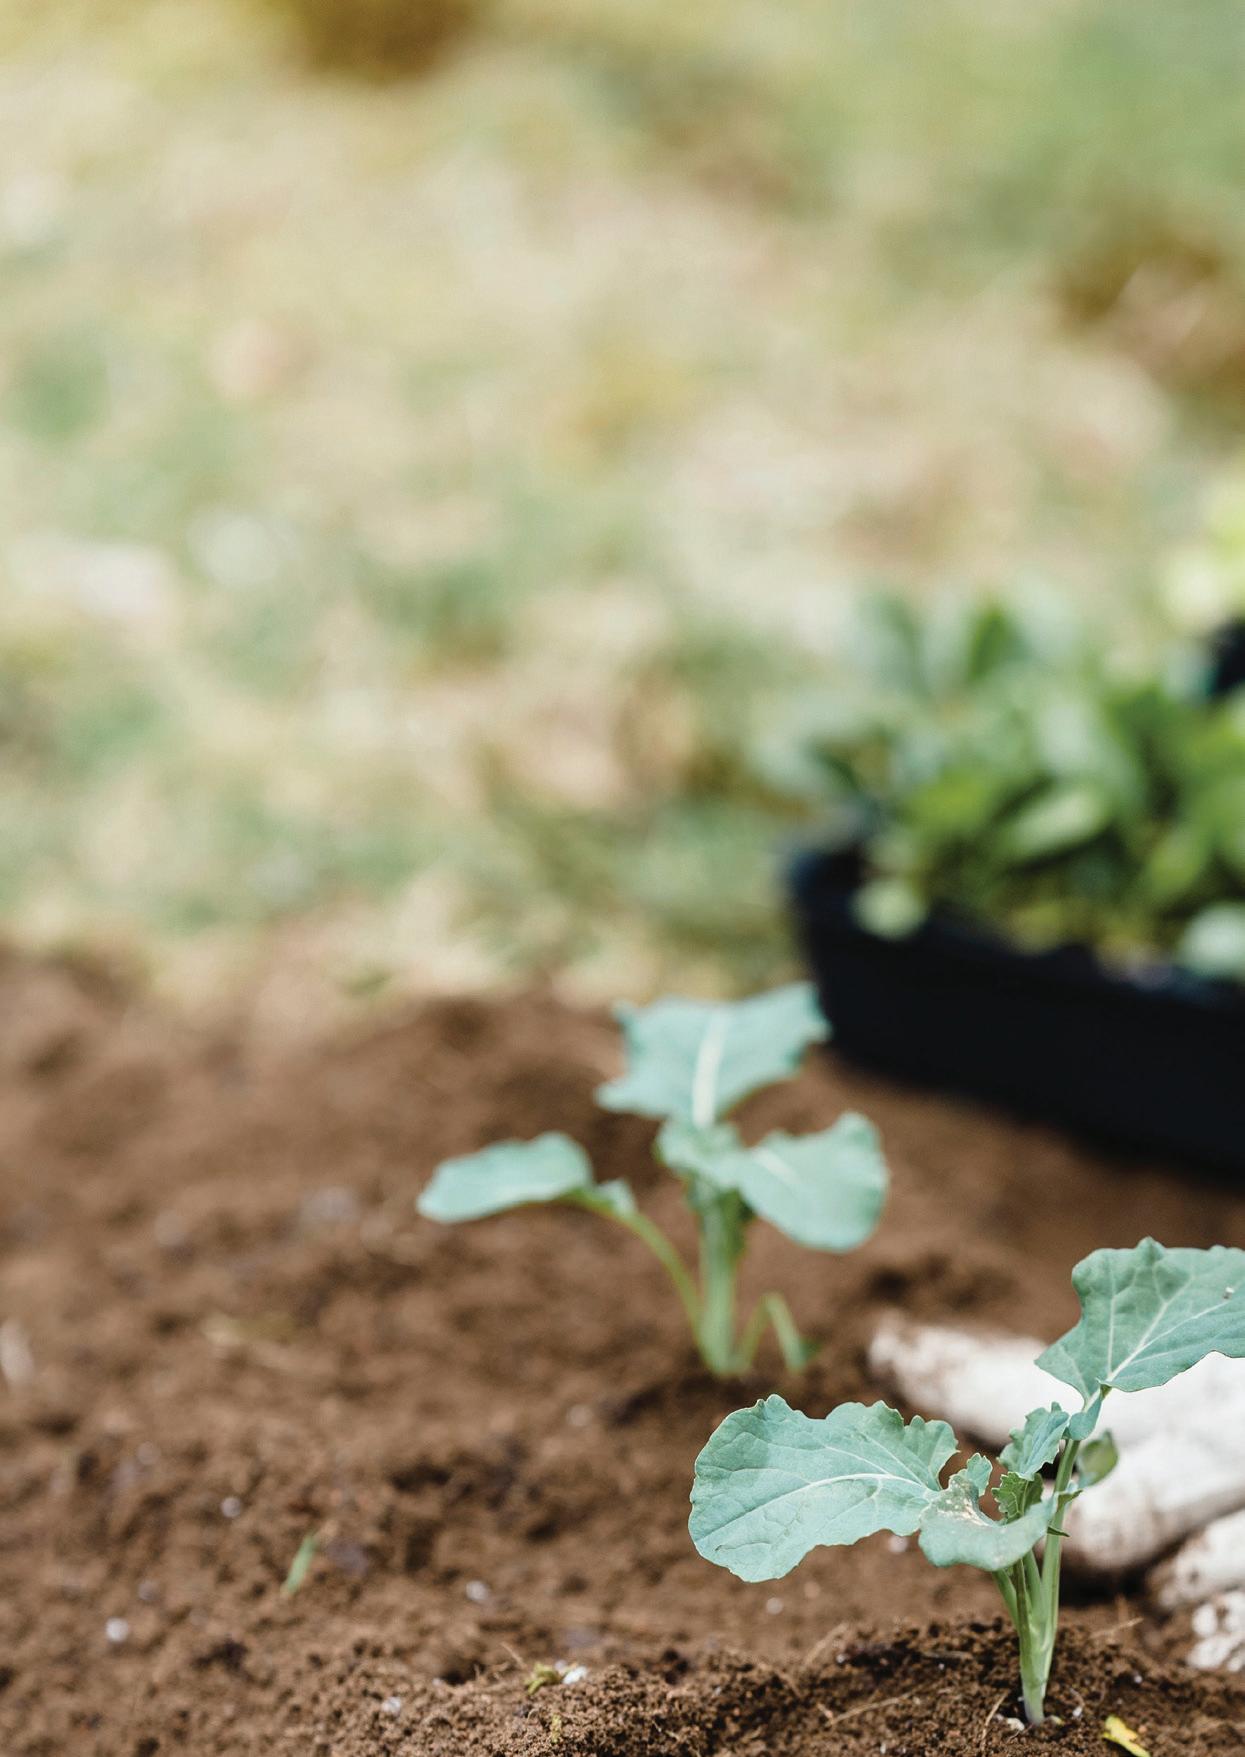
Healthy soil is the foundation of a successful organic garden and will help provide the nutrients your plants need to grow. To prepare your soil, think about the ‘lasagne
approach’, which starts with twigs, sticks, and woody material at the very bottom, then adds straw, leaves, grass clippings and aged manure to the upper layers, before finishing up with a thick layer of high-quality compost or topsoil.
Choose plants that are wellsuited for your climate and soil type and make sure you plant things you like to eat! Consider the amount of sun, wind, frost, and rainfall in your area when selecting plants. Look for diseaseresistant and heat-or-cold tolerant varieties, and make sure to do your research to
see what kind of care and effort each plant requires. Much ado about mulch Mulching is a great way to suppress weeds, conserve moisture, and regulate soil temperature. Spread a layer of organic material, such as leaves or straw, around your plants to create a barrier between the soil and the air and they will thank you for it.
Watering is an important aspect of organic gardening. Make sure to water your plants deeply and regularly, but avoid overwatering, as this can lead to root rot. Consider using drought-tolerant
plants, installing a rain barrel, or using a soaker hose to conserve water.
Companion planting is a great way to encourage healthy fruits and veggies without resorting to synthetic chemicals. For example, planting marigolds or basil near your tomato plants can help keep pests away, while planting beans near corn can provide shade and support for the beans. Keep your friends close
Pests are a natural part of gardening, and there are many ways to control them organically. Encourage beneficial insects like ladybugs, spiders and lacewings by planting flowers they love, and use organic traps and sprays such as slug beer traps to protect plants from pests. You can also plant
beneficial herbs or flowers near your vegetables to deter unwanted visitors.
Organic fertilisers are made from natural materials like compost, bone meal, and blood meal, and provide plants with the nutrients they need to grow. Make sure to follow the recommended application rates and be careful not to over-fertilise, as this can harm your plants.
Organic gardening takes time and patience, but the rewards are well worth it. Don’t get discouraged if something doesn’t work out, and keep experimenting until you find what works best for you and your garden.
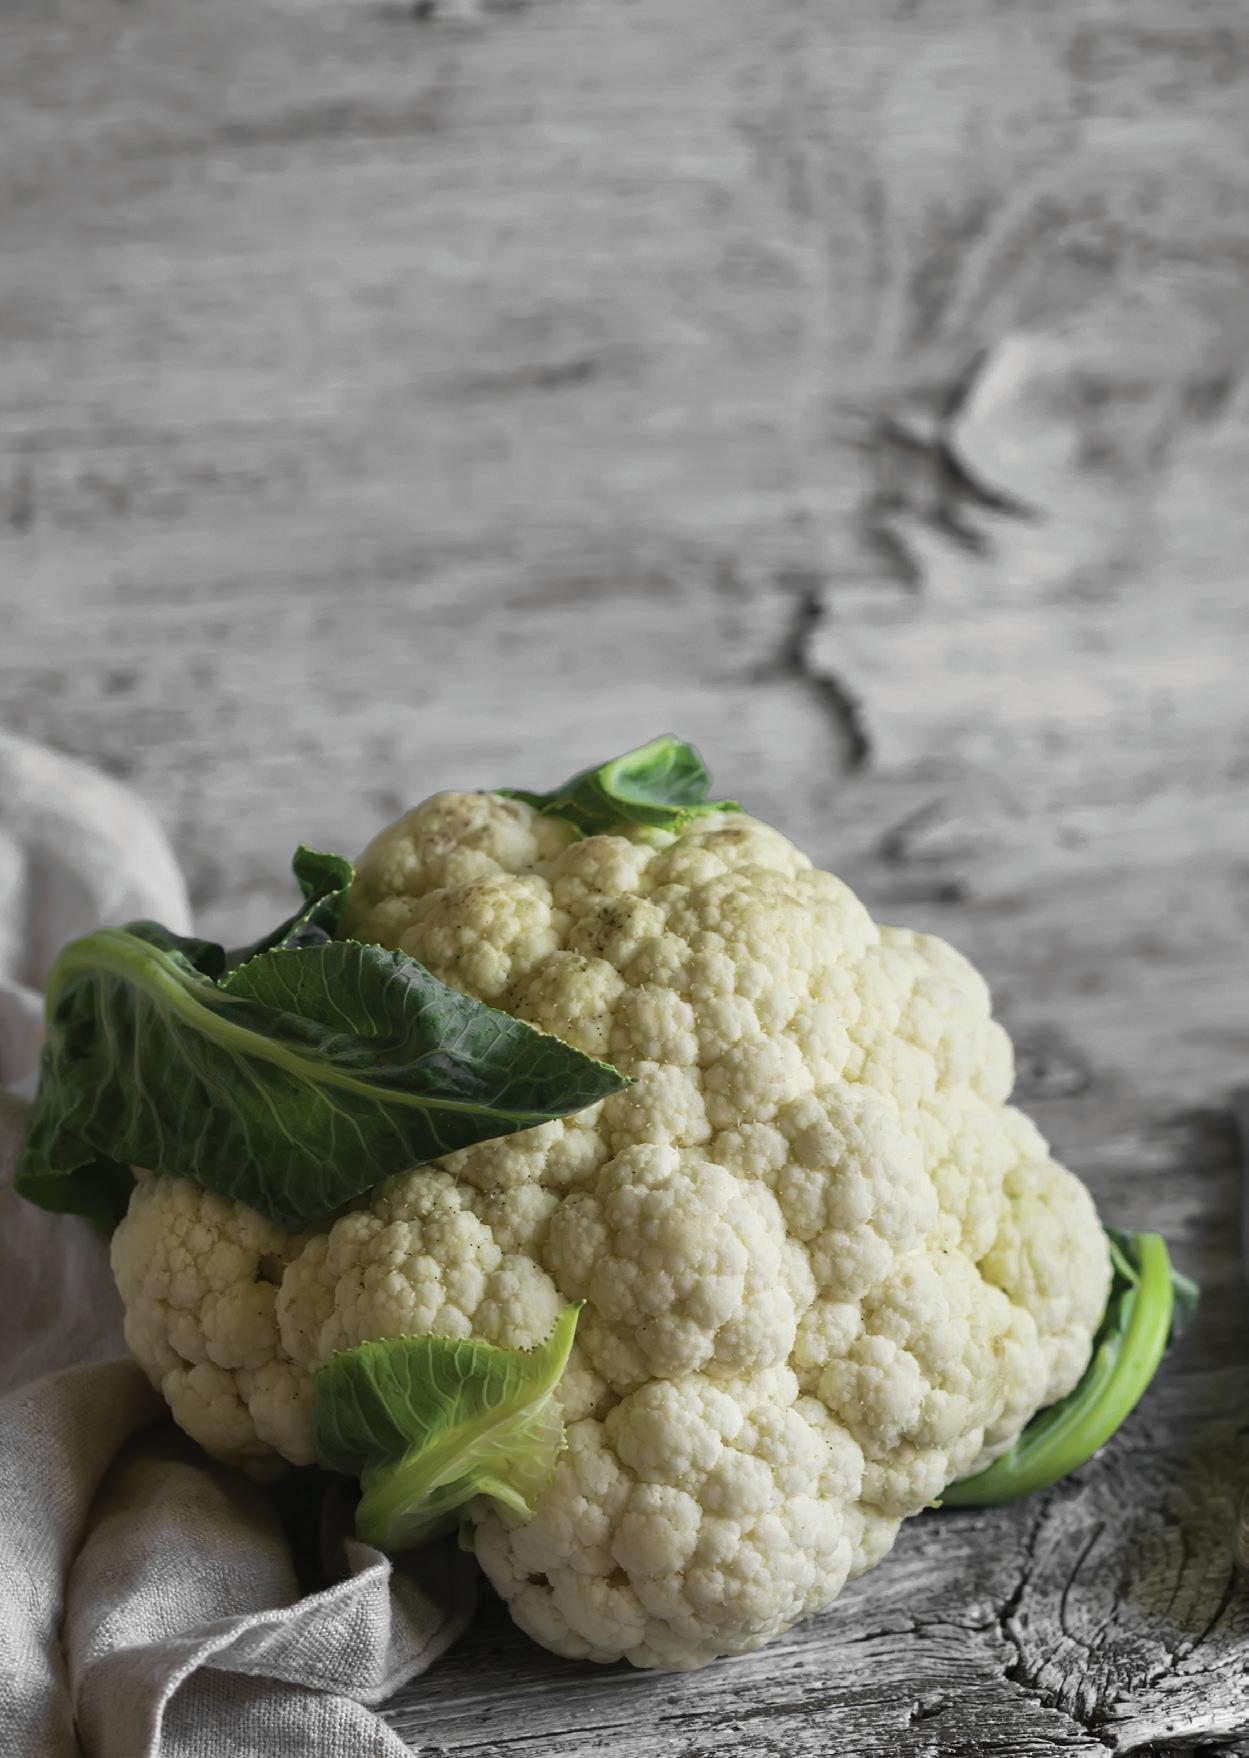
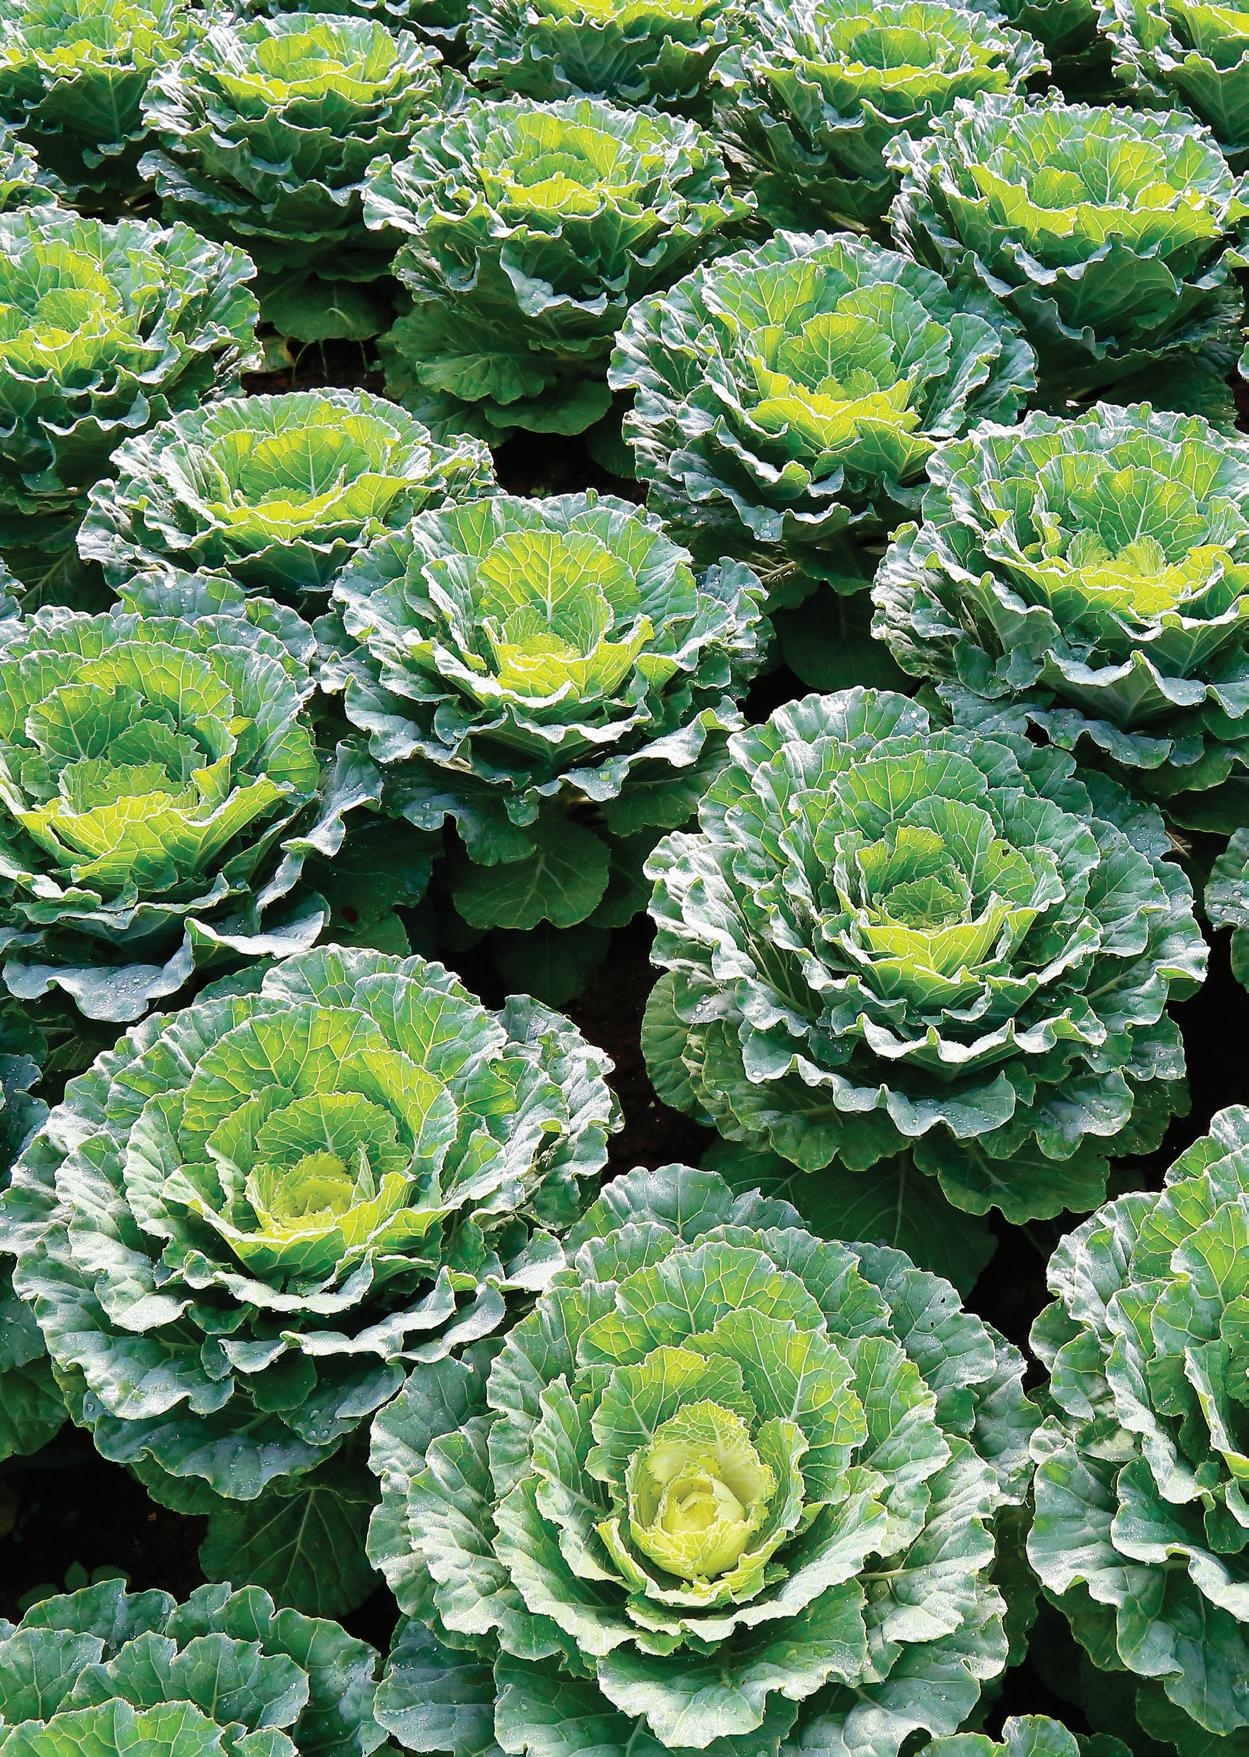
Delicate, intricate, and subtly delicious, the cauliflower, with its elegant white florets, is a staple on dinner tables around the world. Although for many people it’s tempting to simply smother cauliflower with cheese, or push it to one side of the plate, this ancient vegetable deserves a closer look in the kitchen and delivers rich rewards for the home gardener.
Originating in the Mediterranean, where it was first cultivated around 2,000 years ago, the Romans adored cauliflower, both for its taste and its healthy properties.
Roman naturalist and philosopher Pliny the Elder believed cauliflower to be effective in treating everything from fever and headaches to constipation and stomach ulcers—and although this humble veggie is perhaps not quite the cure-all old Pliny thought it was, it is jam packed with vitamins and minerals. If you look closely at a cauliflower head, you can see that the florets replicate again and again in spirals of decreasing

size—or what mathematicians call fractals. Scientists have discovered that this geometric wonder is because of a missing ‘flowering’ gene that forces the plant to multiply its buds in exact patterns which become tiny stems without leaves—forming the incredible and tasty cauliflower head!.
Cauliflower is a member of the brassica family, which includes other popular vegetables like broccoli, kale, and Brussels sprouts—together they are all cultivars of the original wild cabbage plant which grew (and still grows) around the

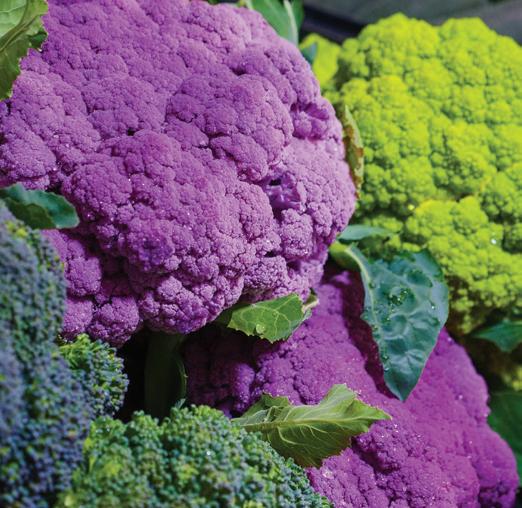
Mediterranean Sea. While white cauliflower is the most common variety in Australia, cauliflower can also be found in shades of orange, green, and purple. The purple variety, in particular, contains anthocyanin pigments that give it its vibrant colour and are also known for their antioxidant properties.
The part of the cauliflower that we eat is called the curd, and it’s made up of undeveloped flower buds. Although it can be bland when poorly cooked, the mild, nutty-tasting cauliflower is an incredibly versatile veggie and can be roasted, grilled, sautéed, or mashed, and used in everything from soups and stews to salads and stir-fries. It is also a popular low-carb substitute for rice or potatoes in many recipes.
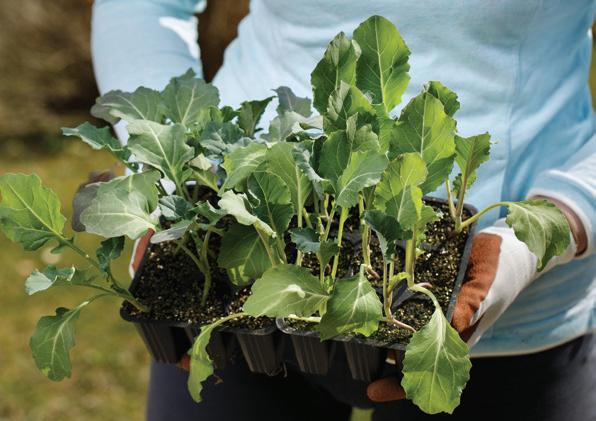
Cauliflower is a cool-season crop that grows best in temperate climates and is typically planted in autumn or winter and harvested in the spring. Depending on the variety, it can take anywhere from 50 to 100 days for a cauliflower plant to grow from seed to harvest,
and seeds can be sown directly in the garden or in trays for later transplanting.
Cauliflowers prefer well-draining soil rich in organic matter. Before planting, work in plenty of compost or aged manure to help provide the necessary nutrients and make sure to place cauliflower seedlings in wide rows with at least 50cm between plants. It’s important to keep the soil weed-free over the plant’s growing period, to avoid competition for nutrients.
Cauliflowers are hungry plants and need regular feeding to grow to their full potential. Use a fertiliser high in nitrogen and phosphorous, such as blood meal, and apply it every three to four weeks throughout the growing season to promote vigorous plant growth and increase yields. Phosphorous is an important nutrient for this veggie, as it aids strong root development and flower formation, vital for big, delicious, cauliflower heads. Adding gypsum or lime can also help attain the right soil pH for caulis and provides a source of calcium to prevent tip burn.
Cauliflowers require consistent watering throughout the growing season, so be sure to water deeply once or twice a week if there isn’t sufficient rain and remember to add compost and mulch to your soil to help retain consistent moisture levels.
• Make the right choice. There are many different varieties of cauliflower. Choose one that is wellsuited to your climate and soil conditions.
• Keep on top of the nasties. Cauliflower is prone to aphids, cabbage worms, and fungal infections. Use natural methods such as companion planting (they love celery, nasturtiums, dill, marigolds and beans) and crop rotation to help control these problems.
• Harvest at the right time. Wait until the heads are fully formed and compact, but before they begin to loosen or yellow.
Cauliflower is not only delicious, but it is also incredibly nutritious. It is low in calories but high in fibre, vitamins, and minerals. It is particularly rich in vitamin C, vitamin K, and folate, all of which are essential for good health. In recent years, cauliflower has become increasingly popular among the health-conscious eater. It is often used as a substitute for high-carb ingredients like rice or potatoes, and is a popular ingredient in many low-carb and keto recipes.


Ingredients
• 1 whole cauliflower
• 4 tbsp olive oil
• 1 tsp paprika
• 1 tsp cumin
• 1 tsp coriander
• 1 tsp garlic powder
• 1/2 tsp salt
• 1/4 tsp black pepper
• 1 lemon, juiced
• 1/4 cup tahini
• 2 cloves garlic, minced
• 2-3 tbsp water
• 1/4 cup parsley leaves, chopped

1. Preheat the oven to 200°C.
2. Remove the leaves and trim the stem of the cauliflower, leaving the core intact.
3. In a small bowl, whisk together the olive oil, paprika, cumin, coriander, garlic powder, salt, and black pepper.
4. Brush the cauliflower with the spice mixture, making sure to coat it evenly.
5. Place the cauliflower on a baking sheet and roast in the oven for 45-50 minutes, or until it is tender and golden brown.
6. While the cauliflower is roasting, prepare the tahini sauce. In a small bowl, whisk together the tahini, garlic, lemon juice, and water, until smooth and creamy.
7. Once the cauliflower is done, transfer it to a serving plate and drizzle with the tahini sauce.
8. Sprinkle with chopped parsley and serve hot.


Easy Grow was first established in 1991 when hydroponic gardening and the use of indoor lighting was just getting started in New Zealand. Now Keith and his friendly staff have been helping people looking to further their gardening knowledge for over 30 years. We aim to provide the best quality products at the least cost to you and are constantly seeking out new and innovative goods to meet the needs of growers throughout New Zealand, working hard to keep stock levels high and prices affordable.
As one of the oldest indoor garden supply stores in New Zealand we have built a loyal customer base of hobby gardeners and commercial growers, while also supplying small independent stores as a wholesaler.
Check out our product range at www.easygrow.co.nz or come into the store and meet our grumpy shop dog Ava.

Just answer some questions on our website. Please scan the QR code below for details.


How well do you know your trace elements? Take the CANNAQuiz to find out!
1. What is the function of trace elements in plants?
b. To produce chlorophyll
a. To enhance growth and overall health
c. To improve seed production
d. All of the above
2. What happens to the plant if it doesn’t get enough trace elements?
a. The plant will grow taller
b. The plant will have a heavy crop
c. The plant will produce more seeds
d. None of the above
3. Which of the following methods is used to correct trace element deficiencies in plants?
a. Fertilisation
b. Soil amendment
c. Watering with nutrient solution
d. All of the above
4. How do excess amounts of trace elements impact the health of plants?
a. The plant will grow more vigorously
b. The plant will suffer from stunted growth
c. The plant will develop symptoms of toxicity
d. None of the above
5. Which of the following is not a macronutrient?
a. nitrogen
b. iron
c. phosphorus
d. potassium

For such a tiny (almost invisible!) insect, thrips can cause a massive amount of damage. There are about 900 species of thrips in Australia, but it’s just a small percentage of these that can cause problems in your garden, including for beans, capsicums, cucumbers, onions, tomatoes, rockmelon, and strawberries—and it’s the kind of problem that can knock out a crop overnight.

Adult thrips are usually about 1-2 mm long, narrow-bodied, and they have two pairs of fringed wings and six legs. Their larvae live on the underside of leaves and suck the sap from leaves, petals, shoots and fruit, often spreading incurable diseases, such as Tomato Spotted Wilt Virus in the process. The symptoms of these sap suckers include an almost transparent or clear discoloration of the leaf with black dots. Usually, the top layer of the tissue is undisturbed, and a window of clear or silvery tissue is seen in the middle of the spotting. In cases of very severe infestation, the leaves may dry up entirely and buds and flowers will shrivel up.
Thrips are notoriously fast breeders and once they’re well established it’s almost impossible to get rid of them. The best prevention is to keep a close eye on your plants, so that you can spot them early and catch the infestation before it gets too severe. A classic method for monitoring for thrips is by


using sticky traps, which should be examined every few days using a magnifying glass to see if any thrips (usually winged adults) have become stuck to them.
Prevention is also important. Remove weeds to reduce breeding sites, prune off and dispose of infested buds and blooms (in green waste rather than compost), and encourage their natural enemies such as Ladybirds, lacewing larvae, minute pirate bugs and predatory mites.
If you do detect thrips, appropriate treatments need to be administered to minimise the risk of an infestation. These treatments include ecological insecticides like potassium soap or plant extracts with pyrethrum. Plants must be sprayed thoroughly all over because the thrips will take refuge under the veins of the leaves, making it difficult for the insecticide to come into contact with them.
Learning to spot the symptoms of thrips in the early stages is the most effective practice for preventing their spread. If you do see the tell-tale signs in your crops, it’s best to go in early and go in hard.
Every gardener knows that for plants to grow well, they need more than just sunlight and water—and just as we must eat a balanced diet to be healthy, plants also need a mix of essential minerals and trace elements to thrive. The three primary macronutrients that plants require also make up the main components of most fertilisers—nitrogen (N), phosphorus (P), and potassium (K)—but these aren’t the only things a plant needs to flourish.
Trace elements, also known as micronutrients, are elements that plants need in small quantities to grow and produce fruit. These elements include iron, manganese, copper, zinc, boron, molybdenum, and chlorine. Without these micronutrients, plants can become stunted, develop yellow leaves, and may not produce any fruit or vegetables.
Take iron for example, it is an essential element for plant growth as it helps with photosynthesis by carrying oxygen in the plant’s cells. Manganese plays a role in photosynthesis as well and

helps with the formation of chlorophyll. Copper is crucial for plant growth and helps with the production of energy and enzymes. Zinc helps with the growth of the plant’s root system and the development of its buds.
Boron helps with cell division and the formation of cell walls, while molybdenum is essential for nitrogen fixation, which is the process by which plants take nitrogen from the air and convert it into a form they can use.
Chlorine helps regulate the plant’s water balance
and is also necessary for photosynthesis.
So how do plants get these trace elements? Well, plants can absorb some of them directly from soil, but many plants need help to ensure they get the right mix of micronutrients. This is where fertilisers come in. Fertilisers contain different combinations of essential nutrients and trace elements that plants need to grow.
Look for fertilisers containing iron chelates if your plant’s new leaves are pale yellow or white with green veins—a symptom of iron


The Great Kiwi Beer Festival made its triumphant return to Christchurch in January this year and CANNA was chuffed to support this epic weekend of music, food, drink and fun. The massive celebration of New Zealand’s vibrant brewing industry and culture featured a home brew competition, over 35 microbreweries displaying their wares, food stalls, and some great tunes, including from CANNA’s own SCROOGE, who helped partiers boogie the day away with their unique mix of riffy, groovy and funky jams.

Q: I’ve noticed that when I fill a pot from a 50L bag of growing medium there seems to be less in the bag than indicated. Am I measuring this correctly?
A: When measuring the volume of any growing medium it’s best to use the international standard (explained below). The volume is calculated from knowing the weight and bulk density of the product at the time of packaging, but with time, transport and storage, moisture content can reduce and the product compacts.
This loss of volume can be easily overcome by loosening up the potting mix when the bag is opened and before using— and this ‘loosening up’ process is also the key to correctly calculating the amount of growing medium in the bag. The following procedures outline the international standards for determining the amount of medium in the bag in litres.
The most important aspect of this process is that you make use of a ‘fall container’ (including a sieve)—with a
measuring cylinder (5.1); m 4 is the mass in grams of the measuring cylinder (5.1) and its contents; V 1 is the volume in litres of the measuring cylinder (5.1) determined to the nearest 10 ml.
collar and a calibrated measuring cylinder of 20 L. Because the mix passes through the sieve and falls down the container the material becomes looser and provides a more accurate and standardised measurement of your substrate’s volume.
Once you’ve taken you’re measurements with the fall container, the formulas needed are as follows:
Calculate the bulk density of the material (D), in grams per litre using the following formula:

where:
m 3 is the mass in grams of the
Calculate the volume of the material (V 2 ) in litres, using the following formula:

where:
m 1 (gross weight) is the mass in grams of the sampled portion plus packaging/lorry; m 2 (tare weight) is the mass in grams of the packaging/lorry; D B is the bulk density calculated in accordance with the previous formula
It can be tricky to understand, but we hope this brief explanation helps. For a more detailed explanation of the procedure, go to www.canna.co.nz/Measuring_ Volume_of_Substrates
Happy Gardening!