12 minute read
Rules for Workbenches


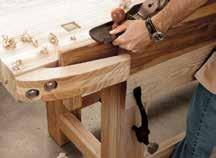
Simple long edge work. This primitive bench still allows you to work on long edges of boards. The crochet (or hook) grips the board. Holdfasts and a scrap support from below. Simple and brilliant. tail vise comes to mind) but the tail vise can be a challenge to install, set, and use.
You can try to cheat (as I have) and install the drawer bank so there is a substantial space underneath the benchtop for holdfasts and clamps. Or you can give your bench a large overhang to allow clamping (as some Shaker-style workbenches did), but then you have to start engineering a way to hold long boards and assemblies on edge. Rule No. 8: Vise Placement on Your Bench Is Important Place your vises so they work with your tools. Vises confuse many workbench builders. They’re bewildering if you’ve never spent much time working at a bench to develop a taste for the peccadilloes of all the idiosyncratic forms. There are a lot of weird configurations in the world, from a table with no vises to the bench with a vise on every corner.
Classic workbenches have some sort of vise at the front left corner of
VISELESS WORKHOLDING
You have probably used benches with vises your entire woodworking career. A face vise and tail vise are pretty much the way to go, right? Maybe. Maybe not.
Once you get the hang of it, viseless workholding becomes very fast and can be liberating and fun. Many of these techniques are quite useful, even if you have a vise on your bench. I find them useful for the entry-level person on a budget as well as for the seasoned woodworker seeking to expand his or her options.
Let’s look at how to accomplish some of the more common tasks at a bench: planing faces, edges and ends of boards; crosscutting and ripping; and sawing a couple of joints.

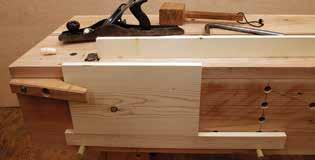
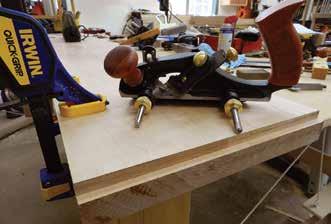
Face planing. Face planing is accomplished by using a planing stop in combination with either battens or a doe’s foot (see p. 172). A holdfast keeps the doe’s foot in place at the corner of the workpiece to push it against a toothed planing stop. The wedge under the workpiece corner keeps a high corner from rocking. Plane toward your stop and the battens, and don’t drag your plane on the return stroke, or the board will pull away from the stop. Flip the doe’s foot over if the angle is wrong for a holdfast hole.
Edge planing. Here are two positions for edge planing: One board is in the crochet and supported by pegs (in holes in the apron) and a batten; the other is supported by the benchtop and held against the planing stop. If the pegs are too far apart, place a batten on the pegs and place the edge of your stock upon that. If the workpiece is narrow and flexes under the plane, or doesn’t reach above the benchtop with the pegs in their highest position, plane the board against the planing stop on the benchtop. If there are hollows under the board, place wedges in them to keep the board from flexing away from the plane. If the board tips over, you are not planing with even pressure. End grain can be planed in the same manner, but to avoid splintering, plane almost to the corner, then flip the workpiece and finish planing.
THE 24-HOUR WORKBENCH
This workbench is sturdy, inexpensive, and doesn’t take a month of Sundays to build.
BY CHRISTOPHER SCHWARZ & KARA GEBHART
Whenever we leave beginning woodworkers to work alone in the shop, it’s a fair bet that when we return to check on them, they’re working on the shop’s floor.
We have at least five workbenches in our shop—not counting the assembly tables—but the new people always seem to prefer the wide expanse of the concrete floor
You can just use a chamfer bit in your plunge router to make this cut. Or you can simply ease the rims using some coarse sandpaper.
We sanded the top by using 120grit sandpaper in a random-orbit sander and called it a day. Break all the sharp edges using 120-grit sandpaper. You don’t need a fancy finish on this bench—just something to protect it from spills and scrapes. We took some off-the-shelf satin polyurethane, thinned it down to three parts poly and one part mineral spirits, and ragged on two coats. Allow the finish to dry at least four hours between coats. (No, the four hours of drying time isn’t included in our total time.)
Then we turned the stopwatch off and checked our time: 23 hours and 2 minutes. We had just enough time left to sweep the floor. ■
PLAN
61"
27"
3⁄4"-dia. bench dog holes
3" 13⁄8"
5"
31"
3" Bench bolt
381⁄2" 10" 10"
6"
23⁄4"
6" 15"
5"
7"
4"
3" 19"
3" 191⁄2"
3"
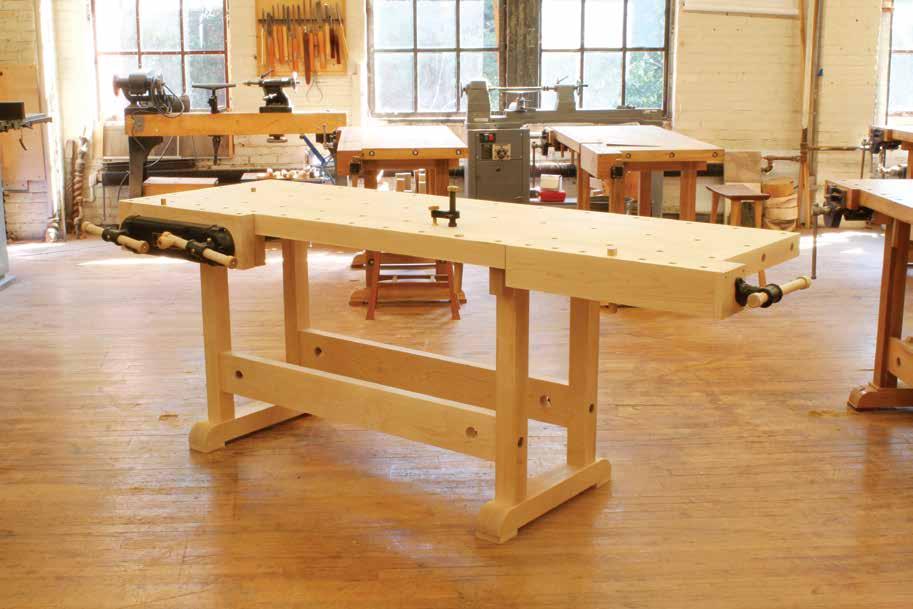
21ST-CENTURY WORKBENCH
This hybrid design holds work any which way you want to.
BY ROBERT W. LANG
Good design is little more than selective thievery. This workbench is a good example of that. A combination of features from several historic forms, ranging from the Roubo to the Workmate, becomes a new form, suited to being the center of a modern woodworking shop. I’ve never seen a workbench that I was entirely happy with. I have love/hate relationships with many common features. I like tool trays, but hate the way shavings and other detritus collects in them. I want to be able to
MASTER CABINETMAKER’S BENCH
This proven design will last a lifetime.
BY ALAN TURNER I have many fine tools in my shop, but the most important one is my bench. It has a classic design, favored by cabinetmakers for generations.
I’ve spent a long time refining the details of this bench. I’ve built 15 of them over the years, simplifying and improving the design each time. At
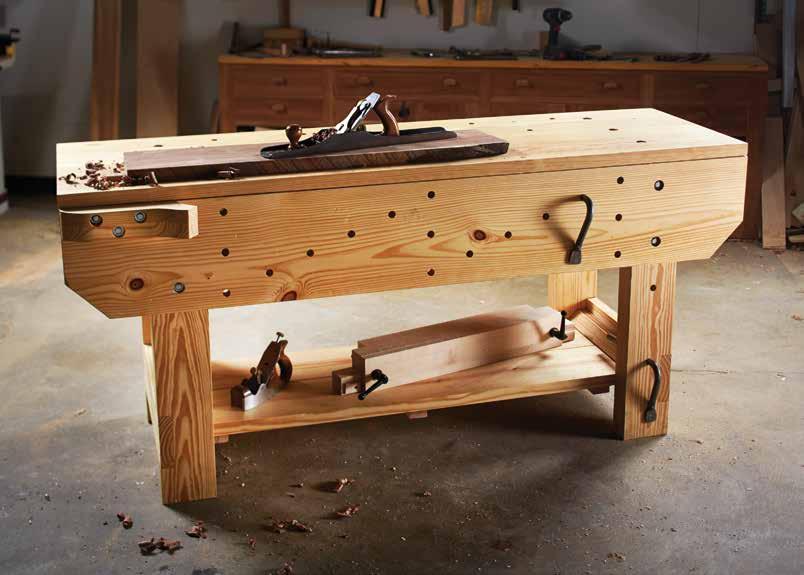
SHAKER WORKBENCH

This stack of drawers and storage under a workbench has Shaker written all over it.
BY GLEN D. HUEY
When I started work at Popular Woodworking magazine, my workbench was a couple storage cabinets on wheels and a cut-off slab of solid-core door. The assembled bench design worked, but then again, it wasn’t sturdy, solid, or anywhere near going to be the bench that I used for an extended period of time. So, it was decided that I should build a workbench. A Shaker-style workbench jumped to the
KNOCKDOWN ENGLISH WORKBENCH
In two days, you can build this sturdy stowaway bench.
BY CHRISTOPHER SCHWARZ
Many knockdown workbenches suffer from unfortunate compromises. Inexpensive commercial benches that can be knocked down for shipping use skimpy hardware and thin components to reduce shipping weight. The result is that the bench never feels sturdy. Plus, assembly usually takes a good hour.
Custom knockdown benches, on the other hand, are generally sturdier, but they are usually too complex and take considerable time to set up. In other words, most knock-
SCANDINAVIAN WORKBENCH
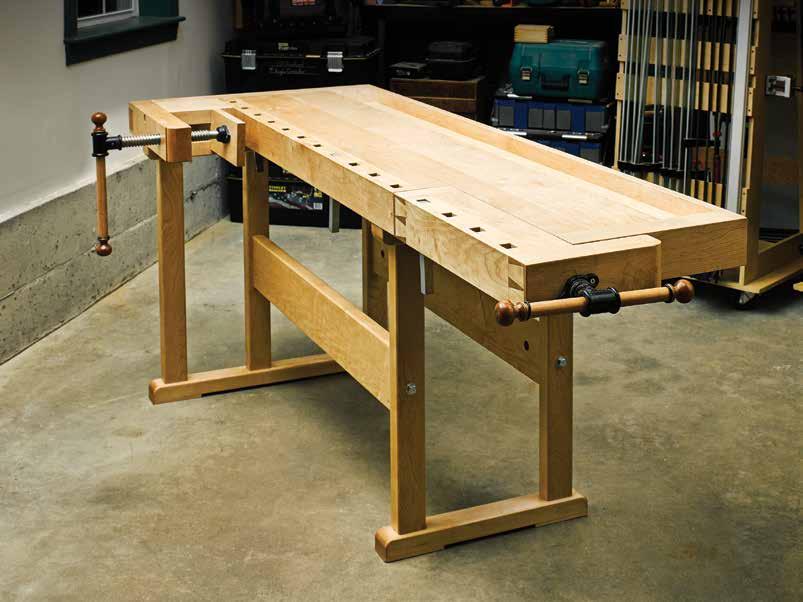
Modern hardware and techniques update this Tage Frid–inspired bench.
BY BILL RAINFORD
Scandinavian- or Continental-style workbenches are the vinyl LP records of the woodworking world. These iconic benches have never left the scene. A few are classics and others are the flavor of the month. Some benches in this style are masterworks and some are poor approximations of an archetypal form. The trick is finding the workbench that hits all the right notes for how you work so you can go on to create your own opus.
Keep it square.
As you glue on the dog-hole assembly, be sure to attach it square and level to the benchtop.
Slice it clean. Make sure to engage the nicker on your rabbet plane when starting this joint and retract it before the joint reaches its full depth (so as not to cut the fibers in the tenon and weaken the joint).
and try to pick clean, clear grain— this will show in the finished bench.
I’ve worked on benches with square dogs, round dogs, or a mixture of both. I prefer square bench dogs because, in my opinion, they’re stronger, taller, have more surface area on the face to engage the wood you’re holding, and are less finicky than round ones. (If you prefer round dogs, you can always add a few well-placed 3⁄4" round holes to your bench for them and the holdfasts.) I chose 8/4 stock and used a shopmade template and plunge router to rout the square holes, which are angled 4° to the right off vertical. Note: The slots in the tail vise lean 4° to the left—the opposite direction to those on the benchtop. Cut these two runs from the same board (with plenty of waste between) and simply flip the jig for the tail-vise portion.
For the 5/4 cap piece that is glued on over the dog holes, choose a clean piece and be careful during your glue-up to avoid getting glue into the slots. I used a pneumatic nailer to shoot a couple of nails into the waste on each of these blanks to ensure things did not move around during clamping. Once the glue is dry, cut the waste off the end of the blank that will be affixed to the benchtop and glue and clamp it to the benchtop. (Here again, I used biscuits to help line everything up.) Make sure to remove any mill marks from the cap.
Once the glue is dry, rip the assembly, at the back edge, to final width (15 1⁄4" for me) and clean up that edge with a handplane.
BENCHTOP JOINERY I used a router bit in a router table to cut the grooves on the end caps. But I turned to my skew rabbet plane to cut the rabbets that form the tenons on the ends of the benchtop blank; that was easier than trying to muscle this large assembly onto machinery. The result was a nice, crisp joint with no tear out. Work carefully and testfit as you go to make sure the end caps fit nicely. At the front of the bench is a spacer block—what Frid called the “left vise filler”—that supports the shoulder vise. To cut the groove for it in the front of the benchtop, after laying out the location with a cutting gauge and knife, I removed the material with a mortising chisel, then

THE RETURN OF ROUBO
An 18th-century French workbench is quite possibly the most perfect bench design ever put to paper.
BY CHRISTOPHER SCHWARZ
In the 18th century it was common for the workrooms and living areas of a home to share the same space. A workbench, for example, would not be out of place in the front room of the house.
This small historical fact has me concocting a plan, which I haven’t yet shared with my family.
My workshop at home is in a walkout basement. I’ve done what I can to make it pleasant, but it’s isolated from the rest of the house. This is on purpose: My planer and jointer sound like air-raid sirens.
During the brutal stock-preparation phase of a project, my shop is perfect. I can run machinery all day and bother no one. But when I get into the joinery of a project, I long for a shop with beams of natural light, wooden floors, and a close connection to the day-to-day of my household.
In other words, I want to claim some space upstairs as a bench room.
Hold tight: This story isn’t just about me. It’s about you, too. A furniture-grade workbench is a great idea for apartment dwellers, or people who need to set up a shop in a spare bedroom of their house. It’s also a fine idea for people like me who plan (read: plan to grovel for permission) to do some woodworking in a living area of their home.
Lucky for all of us, one of the best-looking workbench designs is also the simplest to build and most useful, no matter if you have a love affair with your plunge router or your router plane.
THANK YOU, MONSIEUR ROUBO I’ve built (or helped build) more than a dozen workbenches based on the 18th-century designs of André J. Roubo, a French cabinetmaker and writer. And after years of working on Roubo’s bench, I think it is an ideal bench with almost none of the downsides or limitations I’ve found on other forms.
Its advantages are numerous. Here are a few. ■ Its simple design makes it easy and quick to build, even for beginners. ■ The thick slab top has no aprons around it, making it easy to clamp anything anywhere on it (this feature cannot be overstated). ■ The front legs and stretchers are flush to the front edge of the benchtop, making it easy to work on the edges of long boards or assemblies, such as doors. ■ Its massive parts make it heavy and stout. This bench will not rack or move as you work.
But what about its looks? The first Roubo-style workbench I built was out of southern yellow pine. I think it looks great, but an 8'-long pine behemoth might be best suited to the workbench underworld. And it is probably too big for most living areas.
So I decided to go back to the original text for inspiration. You see, the original bench published in plate 11 of L’Art du Menuisier shows a bench that has beautiful exposed joinery— through-dovetails and through-tenons in the top. And it has a single piece of wood for its top—something that George Nakashima would love (if it had a bit of bark on it).
In other words, the original Roubo bench has a lot in common with furniture of the Arts & Crafts movement (thanks to its exposed joints), Shaker (with its lack of ornamentation), and even contemporary styles (thanks to the clean lines and use of a single-board top). This bench looks like a lot of furniture that contemporary woodworkers enjoy building and will

