10 minute read
The 24-Hour Workbench
POWER TOOL WORKBENCH
This unique project is a traditional workbench, an outfeed table, and an assembly bench—all in one.
BY CHRISTOPHER SCHWARZ
In a world dominated by power tools, it’s a wonder that commercial workbenches are still designed mostly for handwork. These European-style monsters are set up more for planing, mortising, and dovetailing, rather than routing, biscuiting, and nailing.
What’s worse, most traditional benches are too big (most are 6' long) for the handwork necessary in a modern garage shop; and they are too small (usually 24" deep) to assemble sizable projects on. Plus, there’s the high cost.
One of our contributing editors, Glen Huey, found a solution to this problem when he set up his professional cabinet shop years ago. Glen does some handwork, but for the most part, his motto is: “If you can’t do it on a table saw, it isn’t worth doing.”
So Glen set up his bench as part of his table saw. It attached to the outfeed side of his saw and served as: ■ a smaller, traditional workbench for handwork; ■ a spacious and solid outfeed table; ■ an enormous assembly bench (when you take into account the table saw and its platform); ■ and a cavernous place for tool storage in the drawers and on the large shelf underneath the top.
I’ve watched Glen build dozens of projects with this rig—everything from corner cabinets to a drop-lid secretary—and it has never disappointed him.
I took Glen’s great idea and tuned it up a bit with an enormous tail vise, bench dogs, and an extra shelf. I built this bench using southern yellow pine for the top, legs, and stretchers, and I used birch plywood for the tool box. (If you can’t locate yellow pine, substitute fir.) The total cost of the wood, hardware, and vise was less than half the price of an entry-level commercial workbench (at that time). If that’s still too rich, see the story “Build a Bench—Keep the Change” (p. 110) for more ideas to cut the cost.
As shown, this bench is designed for a Delta Unisaw equipped with the short 30" fence rails. By lengthening the bench’s legs up to 3", you can accommodate any table saw on the
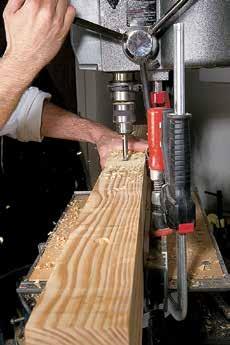
Dog holes first. Drill the 3⁄4"-diameter dog holes into the front edge of your bench before you put the top together. This will save you from making a jig later or having dog holes that wander if you cut them freehand.

I-BEAM WORK ISLAND
This bit of plywood engineering can serve as a stout base for almost any kind of workbench or shop table.
BY NICK ENGLER
Iseem to be setting up a lot of workshops lately. So far, our little band of pioneer aviators have set up two shops in Dayton, Ohio, where we are manufacturing the parts of Wright airplanes and assembling them, and a third shop in Kitty Hawk, N.C., which serves as a repair station to take care
of the inevitable wing-dings these primitive aircraft suffer when you fly them. And because the heart of any good shop is its workbench, I seem to be building a lot of benches as well.
With time and materials at a premium, I’ve developed a simple and economical design for a bench that we use in these shops. It’s strong, true, offers loads of storage, and with the addition of a few casters, can serve as a movable work island. We find this last feature especially important, because we must constantly reconfigure the shops as the Wright airplanes grow during construction.
A SANDWICH OF I-BEAMS The base of the bench is made entirely of 3⁄4" plywood. The plywood parts form three “I-beams,” each beam consisting of two caps and a center beam. The shelves and dividers in the bench make up two small I-beams— the shelves become the caps and the dividers are the beams. These are sandwiched together inside a large I-beam that consists of the two workbench ends (the caps) and a center divider (the beam). The resulting structure is very strong.
It’s also very true; another important characteristic of a good bench. The benchtop should be flat if you are going to use it for precision work. I cut up the plywood sheets so the factory edge—the outside edge of the plywood as it comes from the factory—is the top of the center divider and the top of the two ends. As a rule, factory edges are pretty straight even if they appear a bit rough. When I attach the benchtop to the base and draw it down tight, the factory edges brace the top perfectly flat. to help you assemble and align the parts. Cut the bench ends with three intersecting dados in each—one vertical dado to hold the center divider and two horizontal dadoes to hold the shelves. Make each of these dadoes 3⁄4" wide and 1⁄4" deep. Also make 1⁄4"deep dados in the shelves to hold the shelving dividers. Then rout horizontal dadoes in the center divider, 3⁄4" wide and 1⁄8" deep. You must make these dados on both sides of the center divider—that’s why they’re only 1⁄8" deep.
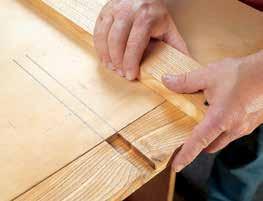
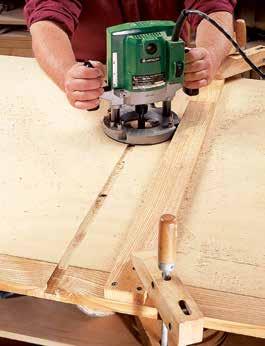
Rout the dados. Use a T-square jig. The one shown here is designed to cut 3⁄4"-wide dados. First mark on your work the location of the dados (above). Line up the dado that’s plowed in the T-square jig with your lines. Clamp the jig in place, set the depth of the cut on your router, and make the dado (right).
MAKING THE SANDWICH The bench can be made almost any size—it’s only limited by the size of the sheet materials you use. The dimensions shown in the plans are just suggestions—make the bench whatever size you need. Most craftsmen, I know, will immediately want to make the top a bit higher—34" is somewhat low for a work surface for most people. But it works for me because I’m a short guy.
Once you’ve decided on the overall dimensions of the bench, cut the plywood parts and rout a few dados
MOBILE ASSEMBLY TABLE
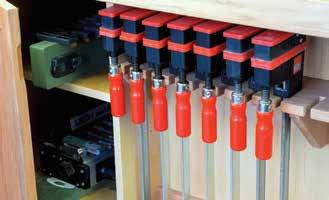
Storage and utility that is just the right size.
BY WILLIE SANDRY
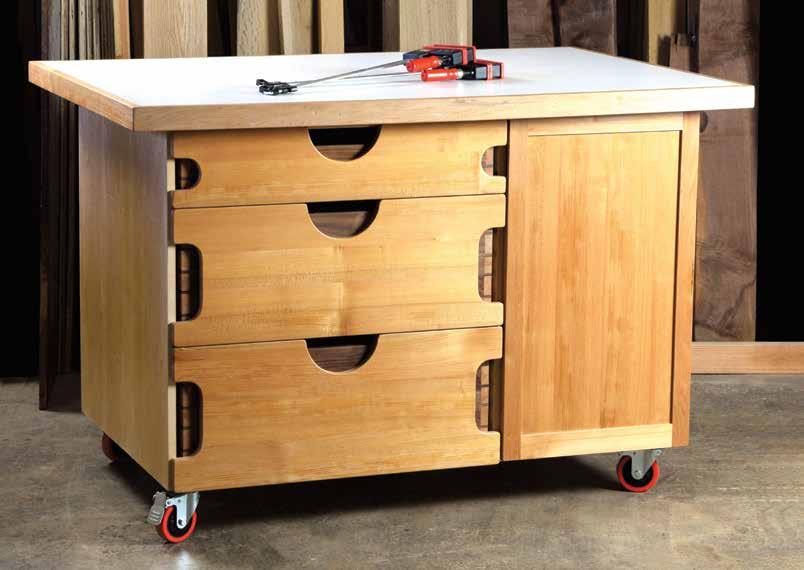
It’s often said that a shop layout is never truly complete. While that may be true, I have discovered a valuable asset in my shop that can move and adapt to changing layouts. I’ve been testing a mobile shop cart over the last several years to make sure it holds up to the rigors of woodworking. The key is middle dividers that act like the webbing of an I-beam. With this tested construction technique, the entire cart forms a rigid base to support the top. The work surface is a double-layer of thick MDF, forming a flat top that can handle daily use and abuse in a shop environment. Special features include pass-through doors, slide-proof adjustable shelves, and a built-in clamp rack for even greater utility.
CONSTRUCT THE BASE Cut plywood parts to size, and complete the basic joinery shown in the detail rendering (p. 121). Start with the bottom panel, which has a dado to receive the middle divider. Cut 6" wide x 3⁄4" notches at the top corners of the middle divider. These notches will eventually receive long cleat strips, which function to lock the dividers square. Install the end panels, which are rabbeted to fit over the bottom panel.
As you install the first end panel, you’ll capture the clamp rack wall in vertical grooves. Add a bead of glue to the bottom of the clamp rack wall component and reinforce this butt joint with screws from the bottom. Now add the other end panel, and glue and nail it in place with 18-gauge brad nails. Finally, add the cleat strips to lock everything in place. The cleats are screwed into the middle divider
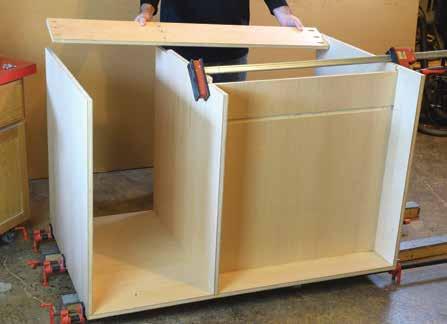
The main case. The end panels are rabbeted to fit over the bottom panel, and the middle divider sits in a shallow dado. The clamp rack wall is also housed in grooves on both sides. Glue the main case together, and add the cleat strips to lock it square.
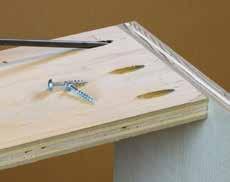
Pocket holes. Secure these long strips flush to the end panels with three pocket hole screws. Add glue to reinforce this butt joint.
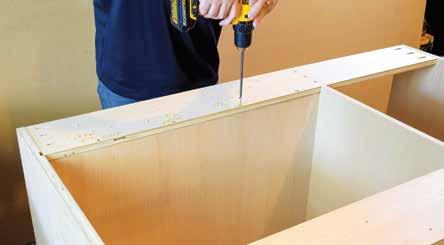
Clamp rack wall is key. The clamp rack wall, designed like the webbing of an I-beam, is key to the cart’s design, and functions to prevent both racking and sagging. Reinforce the connection to prevent both racking and sagging. Reinforce the connection to the cleat strip with glue and 1 1⁄2"-long #8 screws.
THE MILKMAN’S WORKBENCH
BY CHRISTOPHER SCHWARZ
One of the best things about working with hand tools is you don’t need much shop space—often a corner of a bedroom provides enough space. And a complete tool kit fits in a box the size of blanket chest.
As a result, many apartment- dwellers work with hand tools because they are compact, relatively quiet, and fairly easy to clean up after. But there is one huge thing missing from the above—a good workbench.
Woodworking is much easier with a solid workbench that is equipped with vises and bench dogs. Good workbenches are usually massive and enormous, and they might not fit in tight quarters. A big bench can also be intimidating to build for a beginning woodworker. And small commercial benches are generally too spindly for real woodwork.
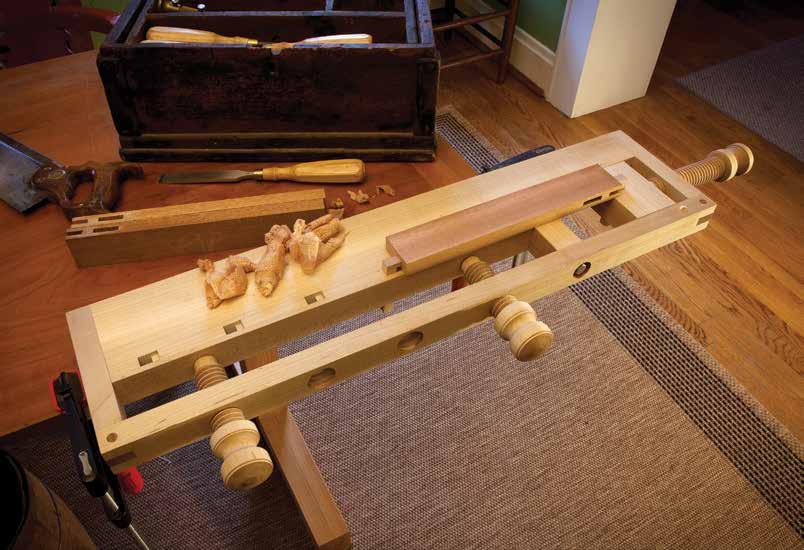
Enter the Milkman’s Workbench—a small, full-featured benchtop that clamps to any solid surface—a dining table, dresser, or kitchen island. And it’s not just for the apartment-dweller. This is a great bench for traveling, demonstrating at woodworking clubs, or even for working in the living space of your home if you have a shop without HVAC.
It offers a lot of features for such a small thing. You can dovetail boards more than 19" wide in its twin-screw vise area. You can pinch boards almost 24" long between dogs, and you have a decent work surface for chopping. Best of all, you can attach it to something sturdy using only two F-style clamps, do your business, then put the bench away in a closet or under a bed.
I first saw a commercial version of this bench on an Australian auction site. At that time, I had a student, Jonas Jensen, whose father owned one. He had bought it from the town’s milkman. I purchased the original from Jonas’ father, studied its construction, and worked with it for months. I concluded it was nearly perfect.
This version is almost identical to the original, with only slight changes to make it easier to clamp to your work surface.
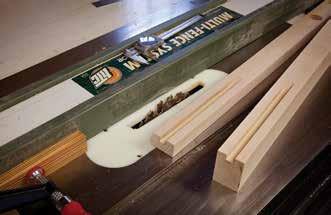
Essential grooves.
Before you do any assembly, cut the grooves for the wagon vise.
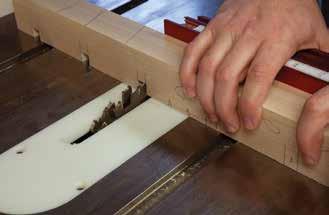
Digging for dogs.
Cutting the dog holes using a dado stack makes for crisp work.
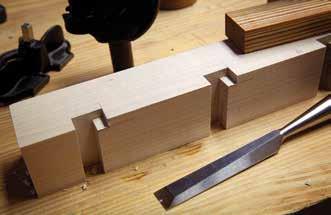
Snouts for dogs.
These notches allow the dogs to rest below the benchtop when not in use.

A BENCH FOR KIDS
Build a small workbench with full-sized features for a budding woodworker.
BY JAMEEL ABRAHAM
The bench is probably the most important item in the workshop.
Those are Charles H. Hayward’s first words in his article “Fitting Up the Workshop: The Bench.” As a woodworking vise manufacturer and bench maker, I couldn’t agree more. Tons of ink has been spilled about workbenches, and I’m one of the guilty parties, so I won’t bore you with design philosophy on this one. OK, maybe a little.


