CERAKANVAS ICE edition Winter 2014-15

Page 1

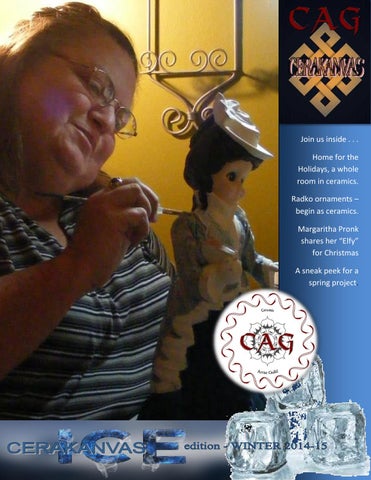
Join us inside . . . Home for the Holidays, a whole room in ceramics. Radko ornaments – begin as ceramics. Margaritha Pronk shares her “Elfy” for Christmas A sneak peek for a spring project.


Good day friends, I hope that you took the time to make your favorite cup of coffee, tea, or hot cocoa (since it’s winter), before settling in to enjoy this special “ICE” edition of CERAKANVAS. Over the course of the last 6 years (CERAKANVAS began in May 2009) it has been my pleasure to be the Master Artisan of the CAG and the senior publisher of CERAKANVAS – The Official Journal of the Ceramic Artist Guild - as well as BLUEPRINT, designed for ceramic business owners and professionals. Together we have watched our readership grow from 5,000 homes per month to nearly a half million homes per month. We jumped in when people said the slip cast industry was dead. We quickly infused many stimulating programs that have caused a bright re-birth of the art form we treasure. Our multitude of social media groups has reunited tens of thousands of artists and hobbyists alike. And from our thrust, many others have formed groups, new clubs, and increased the visual and quality presentation of slipcast ceramics around the globe. I would like to recognize the three first ladies of the CAG, members of our creative team. Without them so much of what we have accomplished would not have been possible. Kat Bailey (CEO – CAG) Kat has been by my side in the ceramic industry for 40 years. We have owned studios and ceramic companies of many shapes and types. She is one of the most talented ceramic artists I have ever met. As most of you know not only do we work together, but we are husband and wife. Kat has been an exceptional wife, mother, partner and most especially friend, always seeing the good in people, no matter what. Thank you Kat! Michele Gotthardt (Copy Editor) Michele came to my rescue some time shortly after we began to publish CERAKANVAS. She is one of the most efficient editors I have ever had work for me. She is also a talented ceramic artist and a very family dedicated individual. I cannot say in words how much I appreciate her help and guidance. Thank you Michele! Rebekah Dodson (Editor) Rebekah started at CAG as a student intern working as an associate editor to both of our publications. She stayed on and served us for 2 years as editor before going to publishing her own magazine (non ceramic related) and publishing several novels and history books. It was a positive experience as we all learned from each other during this time. Thank you Rebekah! In closing, the final decision has been made that the CAG/CERAKANVAS will be going on an extended sabbatical. We do not have any date set at this time for our return. We will be keeping the e-mail and new web portal open during our leave. We hope that you will all keep on enjoying art and creating masterpieces for all time! Tommy Lee - Publisher


Join us in our ICE edition, Winter 2014-15, of CERAKANVAS – The Official Journal of the Ceramic Artist Guild. Learn how those beautiful sheer Christmas ornaments from Christopher Radko start as ceramic pieces, sculpted and then cast before making the glass molds, all in clay. In “Home for the Holidays” we share a whole studio’s work of great artists coming together to bring you a unified look for decorating.

Pg. 05


Last year our CREATIVE TEAM came up with a concept of doing the techniques for a whole room full of ceramic décor. We received a number of ceramic decorated and themed rooms for consideration. After careful consideration we selected a delightful living room setting focused around the fireplace during the Christmas season. We received concepts from teaching studios around the globe. Room concepts included kitchens, dining rooms, family rooms, adult and kid’s bedrooms, rec-rooms, and even bathrooms. While the entire group of project concepts and pieces we received featured some wonderful art works; finished with excellent craftsmanship we finally settled in on the fireplace in the living room. Culturally the hearth of the fireplace is the most traditional point in the home for its members and guests to gather and share quality time with each other. We would like to think that families might sit around the hearth and create ceramic masterpieces. The collection is comprised of eight pieces, by seven different ceramic artists. The group of artists is made of students and teachers from Tammy’s Ceramics from Doothan, Alabama. Tammy and many of her students have been regular contributors to CERAKANVAS over the last couple of years. We give a shout of congratulations to these talented individuals for being selected for this issue of CERAKANVAS – ICE edition, winter 2014-15.


Pg. 07


Join us as we present our first studio project. Seven wonderful ceramic artists, including their teacher, and even a husband and wife team, come together to bring a Living Room full of Christmas cheer and beauty. We call this collection “Home for the Holidays”. The studio is Tammy’s ceramics from Doothan, Alabama.


Participating artists:       

Anna Brown Mellow Keyes Rubene Keyes Kim Turner Tammy Swords Shirley Rainey Sheri Lingo

*Supply Lists are provided at the end of this article for each piece. Pages 22-23

Pg. 09


STEP by STEP: Cleaning: Scrape the seams off the greenware with a cleaning tool. Sand the seams with green grit. Wipe the imperfections off the seam area with a silk sponge that is lightly moistened with water. Replace any detail lost in cleaning with a stylus. Fire cone 04. Painting: Use the size Filbert brush that affords the most control in an area. Paint as follows: 1. Khaki Tan-Faces, hands and boy’s shirt. 2. Burnt Umber-The girl’s hair. 3. Hauser Dark Green-The girl’s nightgown and the Teddy Bear’s overalls. 4. Raw Sienna-The boy’s hair and the Teddy Bear. 5. Antique Maroon-The boy’s pajama bottom, and his cuffs and neckband. Drybrushing: Use the size White Bristle Round Brush that affords the most control in an area. To drybrush, dip the tip of the brush into the paint. Scrub the paint out of the brush on a brown paper bag, cardboard or a coffee filter. Apply the paint by lightly scrubbing the bristles over the area. When drybrushing the paint on the piece, drybrush in the opposite direction of the detail. Drybrush until the color is as intense as you desire. You will need to let the piece dry a few minutes between coats or the paint will start to peel back on the smooth areas: 1. Medium Flesh- The faces and hands. Using the same brush, dip into Gooseberry Pink and blush the cheeks and lips of the children and the nose of the Teddy Bear. 2. Festive Green-The girl’s nightgown and the Teddy Bear’s overalls. 3. Brandy Wine-The boy’s pajama bottom and the shirt cuffs, and neckband. 4. Fawn-Lightly drybrush the girl’s hair. 5. Honey Brown-The Teddy Bear and the boy’s hair. Using the same brush, dip into Fawn and drybrush the Bear’s muzzle, the soles of the paws, and edges of the ears, lightly. 6. Drybrush the boy’s top with Buttermilk. Using the same brush dip into Warm White and drybrush the top until it is as light as desired. Details: 1. Using the Short Liner; paint all of the eyes. 2. Mix Traditional Burnt Umber with water to the consistency of ink. Use this mixture to outline the eyes. 3. Spray the pieces with Matte Spray. 4. Paint the eye’s with Triple Thick Gloss Glaze. 5. Paint the ribbon on the bottom of the girl’s gown with White Pearl. 6. Tie a bow and glue it to the girl’s hair in the back. 7. Glue pearls to the bodice of the girl’s nightgown and the girl’s ear lobes for earrings. 8. Draw a triangle on the front of the boy’s pajama top. Paint it Festive Green. 9. Paint a Fawn square below the tree for a tree trunk. 10. Paint the tree with clear drying school glue, and sprinkle fine green glitter into the glue. 11. Pint the snaps and buttons Shimmering Silver.

Supply list and e-mail contact info located on pages 22-23

Pg. 11


STEP by STEP: Cleaning: Scrape the seams off the greenware with a cleaning tool. Sand the seams with green grit. Wipe the imperfections off the seam area with a silk sponge that is lightly moistened with water. Replace any detail lost in cleaning with a stylus. Fire cone 04. Painting: Everything was painted as follows. Use the size filbert that affords the most control in an area. The nutcracker on the left: 1. Forest Green-The jacket. 2. Victorian Blue-The pants. 3. Lamp (Ebony) Black-The boots, the hat, the sword handle, the belt, and the sleeve caps. 4. Medium Flesh-The face. 5. Traditional Brunt Umber-The hair, the moustache, and the beard. 6. Glorious Gold-The trim on the hat, the trim on the jacket and the stand. 7. Snow (Titanium) White-The teeth. 8. Shimmering Silver-The sword blade. The nutcracker on the right: 1. Victorian Blue-The hat and the pants. 2. Rookwood Red-The jacket. 3. Lamp (Ebony) Black-The belt, the trim on the jacket, The gun barrel, and the boots. 4. Medium Flesh-The face. 5. Fawn-The gun stock. 6. Snow (Titanium) White-The teeth. 7. Traditional Burnt Umber-The hair, the eyebrows, the beard, and the moustache. 8. Glorious Gold-The trim on the hat, the trim on the jacket and the trim on the boots. Let the pieces dry completely. Lightly spray the piece with Matte Spray. Mix the Staining and Antiquing Medium with Soft Black, according to manufacture’s directions. Paint the mixture on in small areas, taking care to work it into the crevices, wipe it back with a clean piece of t-shirt fabric. After this is done, using a sponge that is damp with water further clean the piece. Take care to clean the antiquing off the smooth areas and leave it only in the crevices. This step can also be done with an oil base antiquing. Let the piece dry completely. Lightly spray the piece with Matte Spray. Drybrushing: Use the size White Bristle Round Brush that affords the most control in an area. To drybrush, dip the tip of the brush into the paint. Scrub the paint out of the brush on a brown paper bag, cardboard or a coffee filter. Apply the paint by lightly scrubbing the bristles over the area. When drybrushing the paint on the piece, drybrush in the opposite direction of the detail. Drybrush until the color is as intense as you desire. You will need to let the piece dry a few minutes between coats or the paint will start to peel back on the smooth areas. 1. Drybrush the pieces with the colors that they were previously painted. This will remove the dirty look. 2. Drybrush the cheeks with Rookwood Red. Lightly spray the piece with Matte Spray.



Supply list and e-mail contact info located on pages 22-23

Pg. 13


STEP by STEP: Cleaning: Clean seams off greenware with cleaning tool; sand with green grit lightly to smooth out any blemishes. Take a slightly damp sponge and smooth down areas. Replace any lost detail with a stylus. Fire to Cone 04 Painting: Base coat all pieces with Warm White; brush on the Doc Holliday Colors True Brown (Antiquing Translucent) to give the ceramic bisque an “antique-like” appearance and wipe off with a soft cloth. Painting with Translucents: In this step you will be painting with translucents. The great thing about this is you don’t have to buy all new paints. You will be mixing Anita's Extender with your acrylic paints to make them transparent. The following colors will be mixed with the Anita's Extender, unless otherwise stated. The mixture will consist of 1/3 Anita's Extender with 2/3 paint. Paint the colors on thinly and brush them out, so as not to leave brush strokes. If they are painted on unevenly, it will still show when dry. Each color will usually require two coats. Allow drying time between coats. Many people make the mistake of trying to make the paint look as it does when it is opaque. Take care to leave the paint transparent so the antiquing will show through. 1. Paint each building the color of your choice. 2. Paint the trees with Plantation Pine and the snow on the trees with the Snow Titanium White 3. Paint the water with Baby Blue to give it an icy appearance. 4. Paint the stones on the walkways and chimneys with the colors used on all the other areas. 5. Paint the star with Cadmium Yellow and then with the Champagne Gold Dazzling Metallic. 6. Paint the lamps with Lamp Ebony Black and with the Shimmering Silver Dazzling Metallic. 7. Paint the banner with the Oyster Pearl Dazzling Metallic. 8. Paint the windows with several different colors to create a stained glass look.

Supply list and e-mail contact info located on pages 22-23

Let the piece dry completely and spray the piece with Matte Spray.

Pg. 15


STEP by STEP: Cleaning: Scrape the seams off the greenware with a cleaning tool. Sand the seams with green grit. Wipe the imperfections off the seam area with a silk sponge that is lightly moistened with water. Replace any detail lost in cleaning with a stylus. Fire the piece to cone 04. Basecoating: 1. Paint the candle with Deep Midnight Blue. 2. Paint the candle base with Glorious Gold. Let the piece dry completely. Drybrushing: Use the size White Bristle Round Brush that affords the most control in an area. To drybrush, dip the tip of the brush into the paint. Scrub the paint out of the brush on a brown paper bag, cardboard or a coffee filter. Apply the paint by lightly scrubbing the bristles over the area. When drybrushing the paint on the piece, drybrush in the opposite direction of the detail. Drybrush until the color is as intense as you desire. You will need to let the piece dry a few minutes between coats or the paint will start to peel back on the smooth areas. 1. Sapphire-the entire candle. 2. Avocado-all of the evergreen trees. 3. Espresso-The bark of the trees. 4. Mocha-The walls of the house. 5. Grey Sky-The steps. 6. Raw Sienna-The deer on the back of the candle. 7. Heritage Brick-The chimney and the door. 8. Baby Blue-The snow areas. 9. Snow (Titanium) White-All of the snow areas. The snow should be lighter at the top of the ground area and bluer at the bottom of the ground. Drybrush the white on the tips of the trees and the tops of the bushes. Also, drybrush the wax area at the top of the candle. Details: 1. Paint the window pane’s with Yellow Light. 2. The trim work on the windows and the eve of the house is Baby Blue. 3. The wood work on the porch is Cocoa. 4. Paint the eyes of the deer. 5. Paint Snow (Titanium) White in the crooks of the branches of the brown trees for snow. 6. Draw some Snow (Titanium) White smoke coming out of the chimney. 7. Spray with Matte Spray.



Supply list and e-mail contact info located on pages 22-23

Pg. 17


STEP by STEP: Cleaning: Clean the seams off greenware with a cleaning tool. Sand the seam area lightly with green grit to smooth any blemishes. Take a lightly damp sponge and smooth down area. Use a Stylus to replace any lost detail. Fire to Cone 04 Basecoating-Painting True Red - Santa's Suit and Hat Buttermilk – Face, Hair, Beard and all of the Fur on the Suit and Hat Lamp (Ebony) Black – Gloves, Belt and Boots Antiquing Antique the entire piece with the Equal Parts of the Staining Antiquing Medium and Lamp (Ebony) Black Acrylic Paint. Apply with a paintbrush working in small areas wiping back with the T-shirt material. Allow the piece to completely dry. Drybrushing Load a stiff bristle brush with paint and repeatedly swipe across a paper bag until only a small amount of color comes from the brush. Allowing the paint to completely dry between coats. True Red- Suit and Hat back up to desired Color. Snow Titanium White- All the Hair and Fur until desired color Flesh Tone- Drybrush the Face until the skin has a smooth appearance. Details: Paint eye area with Snow (Titanium) White, Use Ocean Blue for the iris color. Paint the pupils with the Lamp (Ebony) Black and place a small White accent dot in eye. Spray the piece with Matte Spray. Paint the present with Ice Blue and let completely dry. Paint the buckle on belt and the ribbon on present Shimmering Silver. Use Glitter Glue to trace snowflakes while still wet sprinkle Glamour Dust Crystal allow to dry and shake off excess.

Supply list and e-mail contact info located on pages 22-23

Pg. 19


STEP by STEP: Cleaning: Scrape the seams off the greenware with a cleaning tool. Sand the seams with green grit. Wipe the imperfections off the seam area with a silk sponge that is lightly moistened with water. Replace any detail lost in cleaning with a stylus. Fire the piece to cone 04. Painting: Use the size Filbert brush that affords the most control in an area. Paint as follows: 6. Khaki Tan-The Face and hands. 7. Snow (Titanium) White-The top of the hat and the apron, excluding the trim. 8. Hauser Dark Green-The holly on the hat. 9. Rookwood Red-The dress, the berries, and the trim on the hat and apron. 10. Slate Grey-Mrs. Claus’ hair. Drybrushing: Use the size White Bristle Round Brush that affords the most control in an area. To drybrush, dip the tip of the brush into the paint. Scrub the paint out of the brush on a brown paper bag, cardboard or a coffee filter. Apply the paint by lightly scrubbing the bristles over the area. When drybrushing the paint on the piece, drybrush in the opposite direction of the detail. Drybrush until the color is as intense as you desire. You will need to let the piece dry a few minutes between coats or the paint will start to peel back on the smooth areas. Drybrush as follows: 7. Medium Flesh- The face and hands. Using the same brush, dip into Gooseberry Pink and blush the cheeks and lips. 8. True Red-The dress and the berries. 9. Snow (Titanium) White-The trim on the apron and hat and the lace areas of the dress. Also, Mrs. Claus’ hair. 10. Hauser Medium Green-The holly. Lightly spray the piece with Matte Spray. Details: 1. Paint the smooth part of the hat and apron with White Pearl. 2. Paint the heart inserts, the pin, and the shoe with Glorious Gold. 3. Paint the eyes, using the Short Liner. 4. Thin Lamp (Ebony) Black with water to the consistency of ink. Using the Script Liner, outline the eyes with the mixture. 5. Paint the eyes with Triple Thick Gloss Glaze.

Supply list and e-mail contact info located on pages 22-23

Pg. 21


WAITING FOR SANTA (pgs 10-11)

STANDING GUARD (pgs 12-13)

FRIENDLY VILLAGE

GREENWARE or BISQUE Dona’s #D705 A&B Tree Trimmer Girl #D706 Tree Trimmer Boy Colors by Americana / DecoArt DA03 Buttermilk DAO64 Burnt Umber DA067 Lamp (Ebony) Black DA070 Shimmering Silver DA079 Brandy Wine DA093 Raw Sienna DA102 Medium Flesh DA117 White Pearl DA133 Hauser Dark Green DA155 Soft Black DA160 Antique Maroon DA163 Honey Brown DA173 Khaki Tan DA230 Festive Green DA239 Warm White DA242 Fawn DAS13 Americana Matte Spray DS51 Staining and Antiquing Medium TG01 Triple Thick Gloss Glaze Brushes by Royal & Langnickel: Majestic R4160, Filbert size 2, 4, 6 & 8 Majestic Series R4585, Script Liner 10/0 Majestic Series R4595, Short Liner 10/0 Crafter’s Choice Series R9325, White Bristle Round size 0, 2, 4, 6 & 8 Tools by National Artcraft: 271-011-04 Cleaning Tool 271-046-03 Stylus 295-026-06 Sponge 290-118-14 Orton Cones 04 Miscellaneous: Brown paper bag, Small pearl beads, Fine green glitter, Clear drying school glue, Ribbon Contact: Anna Brown Chipb58@yahoo.com

GREENWARE or BISQUE Creative Paradise Mold Christmas Package-3506 Santa Top-3507 Santa Bottom-3508 Colors by Americana / DecoArt DA067-Lamp (Ebony) Black DA537-Glamour Dust Crystal DA078-Flesh Tone DA070- Shimmering Silver DA01-Snow (Titanium) White DA075- Ice Blue DA027-Gooseberry Pink DS88-1 Bead and Glitter Glue DA270-Ocean Blue D551-Staining Antiquing Medium DA03-Buttermilk

GREENWARE or BISQUE Scioto Mold S3332 Village Wreath 16” Colors by DecoArt DA095 Neutral Grey DA242 Fawn DA067 Lamp Ebony Black DA036 True Blue DA042 Baby Blue DA113 Plantation Pine DA039 Victorian Blue DA219 Heritage Brick DA010 Cadmium Yellow DA174 Milk Chocolate DA01 Snow Titanium White DA175 Plum DA034 Lavender DA129 True Red DA202 Champagne Gold Dazz Metallic DA070 Shimmering Silver Dazz Metallic DA203 Oyster Pearl Dazzling Metallic Colors Other AT3 Doc Holliday Colors True Brown (Antiquing Translucent) 11098 Anita's Extender Tools by National Artcraft 271-011-04 Cleaning Tool 271-046-03 Stylus 295-026-06 Sponge Brushes by Royal & Langnickel Royal Crafters Choice R9325 White Bristle Round #0 R9325 White Bristle Round #4 R9325 White Bristle Round #8 RCVP101 Golden Taklon Flat #12 Miscellaneous Supplies Brown paper bag, cardboard, or coffee filter Soft white cloth E-6000 Glue Contact: Kim Miller KT71LARRY@AOL.COM

Tools by National Artcraft 271-011-04 Cleaning Tool 271-046-03 Stylus 295-026-06 Sponge Brushes by Royal & Langnickel Majestic Series 4170 Filberts #4,6,8 Crafters Choice R9325 White Bristle Round #4,6,8 R4585 Scriptliner 10/0 Miscellaneous Supplies Brown paper bag AC-514 Matte Spray Scrap T-shirt Material Contact: Shirley Rainey allmom47@AOL.COM

(pgs 14-15)


THE LAMPLIGHTER (pgs 16-17)

SANTA’S DELIVERY (pgs 18-19)

MRS. CLAUS KITCHEN (pgs 20-21)

GREENWARE or BISQUE Clay Magic Mold #3392 Large candle with house scene #3395 Large candle base #3396 Large candle base handle Americana Colors by DecoArt: DAO1 Snow (Titanium) White DA042 Baby Blue DA053 Avocado DA060 Mocha DA067 Lamp (Ebony) Black DA071 Glorious Gold DA093 Raw Sienna DA099 Sapphire DA111 Grey Sky DA144 Yellow Light DA219 Heritage Brick DA259 Cocoa DA271 Espresso DAS13 Americana Matte Spray Tools by National Artcraft: 271-011-04 Cleaning Tool 271-046-03 Stylus 295-026-06 Sponge 290-118-14 Orton Cones 04 Brushes by Royal & Langnickel: Majestic Series R4160, Filbert size 2, 4, 6&8 Majestic Series R4585, Script Liner 10/0 Majestic Series R4595, Short Liner 10/0 Crafter’s Choice Series R9325, White Bristle Round size 0, 2, 4, 6 & 8 Miscellaneous Supplies: Brown paper bag, cardboard or coffee filter

GREENWARE or BISQUE Creative Paradise Mold Christmas Package-3506 Santa Top-3507 Santa Bottom-3508 Colors by Americana / DecoArt DA067-Lamp (Ebony) Black DA537-Glamour Dust Crystal DA078-Flesh Tone DA070- Shimmering Silver DA01-Snow (Titanium) White DA075- Ice Blue DA027-Gooseberry Pink DS88-1 Bead and Glitter Glue DA270-Ocean Blue D551-Staining Antiquing Medium DA03-Buttermilk

GREENWARE or BISQUE Gare Molds #1445 Mrs. Claus’ head #1446 Mrs. Claus’ apron #1447 Mrs. Claus’ body Colors by Americana / DecoArt DAO1 Snow (Titanium) White DA067 Lamp (Ebony) Black DA068 Slate Grey DA071 Glorious Gold DA 097 Rookwood Red DA102 Medium Flesh DA117 White Pearl DA129 True Red DA132 Hauser Medium Green DA133 Hauser Dark Green DA155 Soft Black DA173 Khaki Tan DAS13 Americana Matte Spray DS51 Staining and Antiquing Medium TG01 Triple Thick Gloss Glaze

Contact: Tammy Swords Tammy59@graceba.net

Tools by National Artcraft 271-011-04 Cleaning Tool 271-046-03 Stylus 295-026-06 Sponge Brushes by Royal & Langnickel Majestic Series 4170 Filberts #4,6,8 Crafters Choice R9325 White Bristle Round #4,6,8 R4585 Scriptliner 10/0 Miscellaneous Supplies Brown paper bag AC-514 Matte Spray Scrap T-shirt Material Contact: Shirley Rainey allmom47@AOL.COM

Tools by National Artcraft: 271-011-04 Cleaning Tool 271-046-03 Stylus 295-026-06 Sponge 290-118-14 Orton Cones 04 Brushes by Royal & Langnickel: Majestic R4160, Filbert size 2, 4, 6 & 8 Majestic Series R4585, Script Liner 10/0 Majestic Series R4595, Short Liner 10/0 Crafter’s Choice Series R9325, White Bristle Round size 0, 2, 4, 6 & 8 Miscellaneous Supplies: Paper bag, cardboard, or filter Contact: Sheri Lingo

Pg. 23


Cecillia Matamoros One Clay Bead

Beautiful hand built floral bowls with a cascade effect float glaze subtly blending the colors.


Pg. 27


Ron Dahline artist Ron Dahline’s work draws you to a place of ebb and flow, like the tides on the beach. His design and glazing choices seem to flow with nature effortlessly.


If you are looking for fantastic Holiday ceramic projects, check out our past Holiday editions, 2009, 2010, 2011, 2012 and 2013. Now available by purchasing the CERAKANVAS library at www.cerakanvas.com

Pg. 29


The CERAKANVAS editorial team just couldn’t resist sharing one of our favorite artist’s newest works, “Elfy”. Margaritha Pronk continues to create patterns, sculpt outstanding whimsical pieces in ceramics. Margaritha has been featured on several occasions in CERAKANVAS and even had the honor of getting a cover story last year. Visit Margaritha’s facebook page “Margaritha Fun Art” https://www.facebook.com/ groups/1520114754794759/ What an incredible and out of the box ceramic artist. And now we know where that little “Elf on the shelf goes when he vacations in the off season.”


Pg. 31


Dora Anderson Every Monday ceramic artists and craftsmen post great shots of a favorite mug they crafted. From the wheel, hand built or slipcast, they come in all shapes, styles and finishes. We caught this “mug shot� by Dora Anderson in the prefinished stage.


Check out the facebook group CLAY BUDDIES for Mugshot Mondays and hundreds of other interesting projects and discussions on creating and finishing ceramic pieces. Connect at: https://www.facebo ok.com/groups/5031 56473036283/

Pg. 33


Elise Winters artist Elise has created a powerful flowing rainbow ribbon of color and texture. This would make a beautiful addition to anyone’s home dÊcor, anytime during the year.


If you are looking for rock solid business tips, show planning ideas, government rules and business how-tos, check out our past BLUEPRINT editions. Now available by purchasing the CERAKANVAS library at www.cerakanvas.com

Pg. 35


Pg. 37


STEP by STEP: SUPPLIES NEEDED: Mold or Bisque Creative Paradise 3662 Friendly Snowman Paints: Deco Art /Americana Paint DA237 Soft Lilac DA023 Peaches and Cream DA190 Winter Blue DA01 Titanium White DA206 Limeade DA235 Citron Green DA06 Pineapple DA164 Light Buttermilk DA163 Honey Brown DA065 Dark Chocolate DA067 Lamp Black DA190 Asphaltum DA042 Baby Pink DA014 Cadmium Orange DA016 Burnt Orange DA197 Violet Haze TG01 Triple Thick Gloss sealer Royal Brushes Aqualon Series R2150-8 Shader Aqualon Series R2150-4 Shader Aqualon Series R2150-2 Shader Majestic Series R4585-20/0 Script Liner Aqualon Series R2250-4 - Round Aqualon Series R2250-8 - Round 2160-1/4 Aqualon Angle Crafters Choice Series R9325 White Bristle Round #4, #6, #8 National Artcraft 290-118-14 Orton 04 cones 271-011-04 Cleaning Tool 309-005-00 Green Grit Pad 295-026-06 Sponge 271-046-03 Stylus 311-020-09 Double Tip Texture Tool

1. If purchased in greenware, scrape the seams off the greenware with a cleaning tool. Sand the seams with green grit. Wipe the imperfections off the seam area with a silk sponge that is lightly moistened with water. Replace the texture on the penguin fur with a Double Tip Texture Tool. Replace any detail lost in cleaning with a stylus. Fire the pieces to cone 04. 2. Base coat the snowman with Winter Blue. Drybrush him with Wicker White, letting the blue show in the creases and crevices. 3. 3. Base coat the hat, but not the hat band and the mittens with Violet Haze. Then dry brush with Soft Lilac. Paint the inner circle of button with the point of the round brush using Soft Lilac. 4. Paint the ear muffs, the hat band, and the outer edges of the buttons with Peaches ‘N Cream. When buttons are dry, use the liner brush and paint the thread on the buttons with mixture of 1 part Limeade to 1 ½ part Citron Green. 5. Base coat the solid part of the scarf with the Limeade Citron Green mixture. Paint the dashed part with Peaches ‘N Cream and use the liner brush to make stripes on the Limeade part on top and bottom of the dashed area. 6. Paint the snowman’s eyes Lamp Black and add a Snow White highlight dot in them. Paint the nose with a 1:½ mixture of Cadmium Red and Burnt Orange.


7. Dip the Bristle brush into Baby Pink and brush the cheeks on the Snow Man. If you determine the color is too bright, dip back into the Snow White and gently brush over the Baby Pink to soften the color on the face. 8. Base coat the birdhouse roof with Asphaltum. Let dry and dry brush the roof with Honey Brown. Base coat the birdhouse with Dark Chocolate. Let Dry. Dry brush Pineapple over the birdhouse. Dry brush the shutters with Light Buttermilk. Paint the openings and the perch with Lamp Black. 9. Base coat the birdhouse Base coat with Asphaltum. Then with Dark Chocolate and finally dry brush it with Honey Brown. Paint the sign Lamp Black. Dry brush the sign with Dark Chocolate mixed with some Snow White. Add a little more color on the sign by mixing Lamp Black and Snow White to make a gray and dry brush a little on the sign. If the wording on the sign get colored in, Take Lamp Black or Asphaltum and the liner brush and paint the letters in. 10. Base coat the next with Dark Chocolate and dry brush with Honey Brown. Base coat all the birds Snow White. Mix Honey Brown and Snow White 1:1 and using small shader and make feather strokes on the breast area. Paint the rest of the bird with Pineapple. Make the eyes on the bird with Asphaltum. Add highlight dot with Snow White on liner brush. Paint the beaks with Honey Brown.

Contact the artist at: Roses4ever77@yahoo.com Royal and Langnickel Brush Company 515 W. 45th St Munster, IN 46321 US www.royalbrush.com Ph: (219) 660-4170 Fax: (219) 660-4181 DecoArt, Inc. P.O. Box 386 Stanford, KY 40484 www.decoart.com National Art Craft 300 Campus Drive Aurora OH 44202 888-937-2723 www.nationalartcraft.com Creative Paradise Inc. P O Box 734 415 Industrial Goddard KS67052 www.creativeparadise.biz

Pg. 39


GARE Ceramics http://www.gare.com A cute combining idea from GARE ceramics combining a square box piggy bank and delightful Santa’s helper elf on top.


Decorating for the Christmas Holidays is one of the most universal traditions of any. A part of that tradition is focusing on the placing of beautiful glass Christmas ornaments on the family tree. Through the last two centuries this tradition has grown from the German Krugels, to the Shiny Brite baubles of the WWII era to today’s most elegant ornaments made by Christopher Radko Ornament Company. We wanted to share with you the role slip cast ceramics and clay sculpting has in creating these beautiful heirloom designs.

Pg. 43


A Week Long Process (Retrieved from: http://www.christopherradko.com/collectors-corner/creating-an-ornament/)

Millions of Americans have discovered and fallen for our ornaments, and it’s no wonder: the extraordinary radiance and originality of design that goes into each piece makes Christopher Radko ornaments more works of art than ordinary holiday decorations. It’s no wonder that Christopher Radko ornaments are among the fastest growing collectibles in the United States.

Each ornament is crafted by hand using centuries-old processes that require seven days to complete. Cottage workshops in three countries-Poland, Italy, and Germany-produce the ornaments, finials, and garlands that comprise the Christopher Radko collection. More than 3,000 craftspeople skilled in glassblowing, carving, mold making, and hand painting contribute their time, dedication, and talents to the contents of each year’s catalog.

Once a design is conceived on paper, it is submitted to a carver who then works in clay or plaster to bring the concept to life in 3D. An approved sculpture-a “sculpt”- then goes from the carver to a mold maker. Using a technique that dates all the way back to the Renaissance, that mold maker creates a sand-cast mold from molten metal. This becomes the mother mold and the production process officially begins.


DAY 1 - On the first day of production, the glassblower creates the ornament using clear tempered glass, which is preferred for its notable strength. Other ornament makers have used lower-grade glass, increasing the risk of breakage. There is a noticeable difference in the weight of a Radko® ornament, making it more solid to the touch. DAY 2 - On the second day, the ornament is injected with liquid sterling, another process done by hand. This “silvering” is part of what gives the ornaments their luminescence and sets them apart from other glass decorations. DAY 3 &4 - On the third day, a base coat of matte lacquer is hand applied-the white on a snowman, for instance, or the red on a Santa. On the fourth day, a second-coat application of lacquer is applied and the ornament’s additional colors are added. DAY 5 - On day five, the fine details tackled. This includes parts such as the eyes on a snowman or Santa or the tiny seeds on a strawberry. It’s an incredibly painstaking process; these personalized touches create the charming variations in each ornament making them one-of-a-kind heirlooms. No two ornaments are ever exactly alike and it’s easy to see why. DAY 6 - On the sixth day, glitter and other “extras” are added to lend a bit more sparkle. DAY 7 - On the seventh and final day, ornaments are inspected to ensure the highest standards of workmanship. Finally, the golden Radko charm and custom-designed R-A-D-K-O ornament crown, are put in place. The ornaments are then tagged and carefully packed for shipment to Christopher Radko’s offices and warehouses in the United States. (end)

“I have been an ornamentologist since I started collecting ornaments in the late 1970’s. Getting a chance to meet Christopher Radko at a private collector’s event was a true delight.” Tommy Lee - Publisher

Pg. 45


Spring-time Blossoms Bisque MB1307 Handled Platter

C o lo r SC-1 Pink-A-Boo SC-14 Java Bean SC-24 Dandelion SC-26 Green Thumb SC-34 Down To Earth SC52 Toad-ily Green SC-63 Popeye’s Favorite SC-89 Cutie Pie Coral SG-405 Brown Designer Liner FN-001 White FN-008 Brown

Decorating Accessories

Designer: Bob Moreni Skill Level: Basic Estimated Duration: 2.5 hours

CB-106 #6 Script Liner CB-110 #10/0 Liner CB-310 #10 Flat Shader CB404 #4 Pointed Round CB406 #6 Pointed Round CB604 #4 Soft Fan BT-910 Synthetic Sponge AC230 Clay Carbon Paper

Additional Materials Pencil Project Pattern

Instructions 1. Begin with properly fired shelf cone 04 bisque. Moisten a clean sponge and wipe bisque to remove any dust. 2. Using a CB-604 #4 Soft Fan, apply 2 coats of FN-001 White to the top surface of the platter. Allow to dry. 3. With a pencil and AC-230 Clay Carbon Paper, trace on the pattern (just the outline not the detail). You will need to extend the pattern on the one side. 4. Using a CB-406 #6 Pointed Round and a CB-404 #4 Pointed Round, apply 2-3 coats of SC-1 Pink-A-Boo to all flowers and buds. Allow to dry. 5. If needed re-trace the just the flower pattern outline. 6. Using a CB-310 #10 Flat Shader, shade all flower petals and buds with SC-89 Cutie Pie Coral. 7. With the end of a brush handle, place a dot of SC-24 Dandelion in the small flower centers. 8. Using a CB-406 #6 Pointed Round, apply 3 coats of SC-52 Toad-ily Green to all the leaves. 9. Using a CB-310 Flat Shader, Shade the one side of the leaves with SC-26 Green Thumb and the other side with SC-63 Popeye’s Favorite. 10. Using a CB-106 #6 Script Liner and a CB-110 #10/0 Liner apply 2 coats of SC-14 Java bean to all stems and branches. Apply a third coat with the brush loaded with SC-14 Java Bean and side load with SC-34 Down to Earth to shade the stems and branches.


11. Using a CB-110 #10/0 Liner, outline and detail all flowers, buds and leaves with SG-405 Brown Designer Liner.

Allow to dry. 12. Using a CB-604 #4 Soft Fan, apply 1 coat of S-2101 Crystal Clear Brushing to the top of the platter. Allow to dry. 13. Using a CB-604 #4 Soft Fan, apply 3 coats of FN-008 Brown to the back of the platter. Allow to dry. 14. Stilt and fire to shelf cone 06/05. 15. Using a CB-106 #6 Script Liner and a CB-110 #10/0 Liner apply 2 coats of SC-14 Java bean to all stems and branches. Apply a third coat with the brush loaded with SC-14 Java Bean and side load with SC-34 Down to Earth to shade the stems and branches. 16. Using a CB-110 #10/0 Liner, outline and detail all flowers, buds and leaves with SG-405 Brown Designer Liner. Allow to dry. 17. Using a CB-604 #4 Soft Fan, apply 1 coat of S-2101 Crystal Clear Brushing to the top of the platter. Allow to dry. 18. Using a CB-604 #4 Soft Fan, apply 3 coats of FN-008 Brown to the back of the platter. Allow to dry. 19. Stilt and fire to shelf cone 06/05. 20. Using a CB-106 #6 Script Liner and a CB-110 #10/0 Liner apply 2 coats of SC-14 Java bean to all stems and branches. Apply a third coat with the brush loaded with SC-14 Java Bean and side load with SC-34 Down to Earth to shade the stems and branches. 21. Using a CB-110 #10/0 Liner, outline and detail all flowers, buds and leaves with SG-405 Brown Designer Liner. Allow to dry. 22. Using a CB-604 #4 Soft Fan, apply 1 coat of S-2101 Crystal Clear Brushing to the top of the platter. Allow to dry. 23. Using a CB-604 #4 Soft Fan, apply 3 coats of FN-008 Brown to the back of the platter. Allow to dry. 24. Stilt and fire to shelf cone 06/05 Using a CB-106 #6 Script Liner and a CB-110 #10/0 Liner apply 2 coats of SC-14 Java bean to all stems and branches. Apply a third coat with the brush loaded with SC-14 Java Bean and side load with SC-34 Down to Earth to shade the stems and branches. 25. Using a CB-110 #10/0 Liner, outline and detail all flowers, buds and leaves with SG-405 Brown Designer Liner. Allow to dry. 26. Using a CB-604 #4 Soft Fan, apply 1 coat of S-2101 Crystal Clear Brushing to the top of the platter. Allow to dry. 27. Using a CB-604 #4 Soft Fan, apply 3 coats of FN-008 Brown to the back of the platter. Allow to dry. 28. Stilt and fire to shelf cone 06/05.


Spring-time Blossoms

Pattern


Turn static files into dynamic content formats.

Create a flipbook
Issuu converts static files into: digital portfolios, online yearbooks, online catalogs, digital photo albums and more. Sign up and create your flipbook.