

GENERAL SAFETY RULES
Risk Assessment
A risk assessment MUST be carried out before using any access equipment or work at height. Always wear the correct PPE as identified by the risk assessment.
1. Check instructions before use. Mobile access working towers may only be assembled and dismantled by persons familiar with these instructions before use.
2. Do not use any scaffold tower which is damaged, which has not been properly assembled, which is not firm and stable, and which has any missing or damaged parts.
3. Do not assemble a scaffold tower on unstable ground or objects such as loose bricks, boxes or blocks. Only a sound rigid footing must be used.
4. Ensure that the scaffold tower is always level and the adjustable legs are engaged. Check that you have taken all necessary precautions to prevent the tower being moved, or rolling away. Always apply all castor brakes or use base plates.
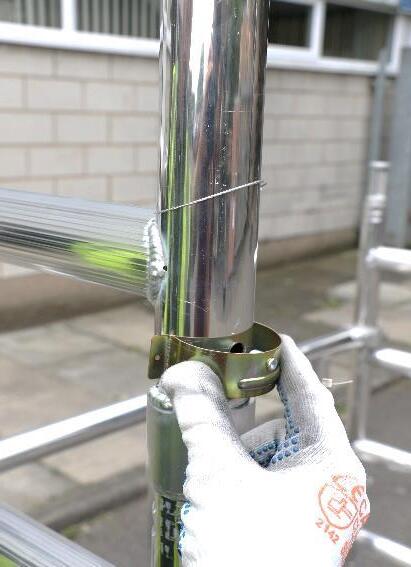
5. Ensure that all frames, braces and platforms are firmly in place and that all locking hooks are functioning correctly. Ensure that all frame locking clips are engaged. If any are missing, replace them.
6. Ensure that the scaffold tower is within the maximum platform height stated, and that the appropriate stabilizers are fitted.
7. Outdoor scaffold towers should, wherever possible, be secured to a building or other structure. It is good practice to tie in all scaffold towers of any height, especially when they are left unattended, or in exposed or windy conditions see Pasma Guidance Note Tying Mobile Access Towers for further information.
8. A scaffold tower must not be used in winds stronger than 7.7 meters per second. Beaufort scale 4. Be cautious if erecting or using the tower in open places, such as hangers or unclad buildings. In such circumstances the wind forces can be increased, as a result of the funnelling effect.
9. Do not use sheeted towers.
10. Do not assemble or use a scaffold tower near un-insulated, live or energised electrical machinery or circuits, or near machinery in operation.
11. If an overhead hazard exists, head protection should be worn.
12. Do not lean ladders against the tower, or climb the outside of the tower. Whatever your intended access system, it should only be used inside the tower.
13. Never climb on horizontal guardrail frames. Do not gain access or descend from the working platform other than by the intended internal access system.
14. Do not work from ladders, they are a means of access only.
15. Guardrails and Toeboards must be fitted to the working platform and to any platform where materials/equipment is stored.
16. Never jump on to or off platforms.
17. DO not exceed the safe working load of the platform or structure by accumulating debris, material or tools on platforms; these can be a significant additional load.
18. If you must move a tower, remove all materials, personnel and break the tower down to below 4m. When moving a scaffold tower, force must always be applied from the base. The tower should only be moved manually on firm, level ground which is free from obstacles. Normal walking speed should not be exceeded during relocation. The ground over which a tower is moved should be capable of supporting the weight of the structure.
19. Should you require additional platform height, add further frames keeping to the kit list limits. NEVER extend your adjustable legs to achieve extra height, these are for levelling only. NEVER use a ladder or other objects on the platform to achieve additional height.
20. It is not permissible to attach and use hoisting facilities on towers, unless specifically pro vided for by the manufacturer. It is not permissible to attach bridging sections between a scaffold tower and a building.

INSTRUCTION MANUAL
(Platform Heights 1.1m, 2.1m, 3.1m & 4.1m)
–
Frame
Rung Frame


MAX SAFE
550KG MAX SAFE
WORKING LOAD FOR STRUCTURE:
WORKING LOAD FOR PLATFORM: 150KG
Manufactured in the UK by Euro Towers Ltd REV
Aug15 K5CR
1.2
- Castor / KALA - Adjustable Leg EOTF –4
EOGF
Guardrail
EOTP – Trapdoor Platform EOST -
Stabilizer
EOTBToeboard
Version A
EOAB –Assembly Bracket
EURO ONE TOWER KITTING LIST


BEFORE YOU START, WHICH HEIGHT DO YOU REQUIRE?


PAGES 3-5


PLEASE REFER TO PAGES 3-5 FOR THE 1.1M AND 3.1M BUILD SEQUENCE.
The bases shown are prior to stabilizers being added.

Please note that the assembly procedures differ subject t o your required platform height (1.1m and 3.1m) (2.1m and 4.1m) See guide below: The Euro 1 Tower can also be used as a trolley for transport purposes.

PAGES 6-8
PLEASE REFER TO PAGES 6-8 FOR THE 2.1M AND 4.1M BUILD SEQUENCE. The bases shown are prior to stabilizers being added.

PLEASE NOTE: DISMANTLING IS THE REVERSE OF ASSEMBLY
SPECIFICATION PLATFORM HEIGHTS 1.1m, 2.1m, 3.1m, 4.1m TOWER HEIGHTS 2.3m, 3.3m, 4.3m, 5.3m WORKING HEIGHTS 3.1m, 4.1m, 5.1m, 6.1m PLATFORM LENGTH 1.3m PLATFORM WIDTH 0.70m TOWER WEIGHT 130 Kgs SAFE WORKING LOAD 150 Kgs per Platform CODES EURO ONE KIT LIST 1.1m 2.1m 3.1m 4.1m K5CR CASTOR 4 4 4 4 KALA ADJUSTABLE LEG 4 4 4 4 EOTF 4 RUNG FRAME 4 6 8 10 EOGF GUARDRAIL FRAME 3 4 6 7 EOTP TRAPDOOR PLATFORM 1 1 2 2 EOST STABILIZER 4 4 4 4 EOTB TOEBOARD 1 1 1 1 EOAB ASSEMBLY BRACKET 0 1 2 2 2.1m Tower Set Up 4.1m Tower Set Up BASE SET UP FOR 2.1M & 4.1M
BASE SET UP FOR 1.1M & 3.1M
Page 2
1.1m Tower Set Up 3.1m Tower Set Up
EURO ONE TOWER ASSEMBLY GUIDE (1.1m &
3m Build Sequence)


1. Insert legs and castors into a pair of frames.

6. Ensure that the tower base is level at this point.

2. Fit a guardrail frame to the vertical member above the 3rd rung with the hooks facing outwards.

7. Fit a guardrail frame to each side of the platform (hooks facing outwards) Top hook above the top rung of the end frames. (Refer to labelling to ensure that the frame is the correct way up)

3. Fit 1 set of frames to each end of the tower.

8. Ensure that all frames are securely fitted and that they are located the correct way up (use labelling as a reference)
4. Ensure all interlock clips are engaged.

9. Fit toeboard by unfolding the set above the platform (please use labelling as a reference to ensure that the toeboard is the correct way up.

5. Fit platform on the 4th rung as shown.

10. Access the platform using the trapdoor as shown and begin work.


Page 3
1.1m Build Complete
1.1m Assembly
EURO ONE TOWER ASSEMBLY GUIDE (1.1m
& 3.1m Build Sequence)


Continue for 3.1m


shown (side and front)


Page 4
11. Remove toeboard and fit 2 assembly brackets in the position
12. Assemble the frames in pairs as shown.
13. Engage interlock clips.
14. Stow 4 frames (2 pairs) on the side assembly bracket.
15. Stow 3 guardrail frames on the front assembly bracket.
16. The platform can be located on the opposing side of the tower from the frames.
17. The toeboard can be located over the platform hook using the dedicated hanging strap.
18. Before fitting stabilizers, release the pin to enable extension.
19. Fit 4 stabilizers, one on each upright of the tower.
20. Access the platform by passing under the side frame and via the trapdoor platform.
EURO ONE TOWER ASSEMBLY GUIDE (1.1m

21. Retrieve a set of frames from the side assembly bracket and fit.


22. Repeat this process for the opposing side, ensuring that all interlock clips are engaged.

& 3.1m Build Sequence)

23. Retrieve a side guardrail frame from the front assembly bracket and locate it as shown.


24. Relocate the side “empty” assembly bracket on the front of the tower (top rung of the tallest guardrail frame as shown)

29. Relocate the toeboard assembly from the lower platform to the higher level, ensuring that it is positioned on the plain section of the platform as shown.

25. Retrieve a side guardrail frame from the front assembly bracket and locate it as shown.


Page 5
Build Complete
3m
26. Temporarily locate the toeboard assembly on the platform to allow access to the additional platform that is stowed.
27. Fit the platform, 1 rung above the side frame location as shown.
28. Fit 2 guardrail frames, with the top hook (facing outwards) set above the top rung of the frame.
30. Access the platform using the trapdoor and unfold the toeboard.
EURO ONE TOWER ASSEMBLY GUIDE (2.1m
& 4.1m Build Sequence)

2m
Assembly
1. Insert legs and castors into a pair of frames.


4.


5. Fit 1 guardrail frame above the 7th rung Hooks facing outwards. (Refer to labelling to ensure that the frame is the correct way up)

Page 6
2. Fit a guardrail frame to the vertical member above the 3rd rung with the hooks facing outwards.
3. Connect 2 frames together and fit onto the base section at each end.
Engage interlock clips.
6. Fit the platform, 1 rung above the side frame location as shown.
7. Fit 4 stabilizers, one on each upright of the tower.
8. Fit an assembly bracket on the side of the tower.
9. Fit the additional assembly bracket on the front of the tower as shown.
10. Stow the frames on the side assembly bracket
EURO ONE TOWER ASSEMBLY GUIDE (2.1m
& 4.1m Build Sequence)

11. Stow the guardrail frames on the front assembly bracket.

12. Relocate the toeboard assembly from the lower platform to the higher level, ensuring that it is positioned on the plain section of the platform as shown.

13. Fit 2 guardrail frames, with the top hook (facing outwards) set above the top rung of the frame.

14. Fit toeboard by unfolding the set above the platform (please use labelling as a reference to ensure that the toeboard is the correct way up.

15. Access the platform using the trapdoor as shown and begin work.

2.1m Build


Complete
Page 7
Continue for 4.1m
16. Remove toeboard. 17. Retrieve a set of frames from the side assembly bracket and fit. 18. Repeat this process for the opposing side, ensuring that all interlock clips are engaged.
19. Retrieve a side guardrail frame from the front assembly bracket and pass upwards as shown.
20. Fit 1 side guardrail the 3rd rung above the existing as shown.
EURO ONE TOWER ASSEMBLY GUIDE (2.1m
& 4.1m Build Sequence)

21. Relocate the “empty” assembly bracket from the side of the tower.


22. Place the removed bracket on the top rung of the tallest guardrail frame as shown.


23. Retrieve 2 stowed side guardrail frames from the lower assembly bracket (front) pass them up to be relocated on the higher assembly bracket.


24. The frames are relocated as shown.


25. Temporarily locate the toeboard assembly on the platform to allow access to the additional platform that is stowed.

Complete
4.1m Build
26. Remove the remaining platform from the lower section of the tower and pass up through the side frame. frame.
27. Fit the platform, 1 rung above the side frame location as shown.
29. Fit 2 guardrail frames, with the top hook (facing outwards) set above the top rung of the frame.
30. Fit toeboard.
28. Relocate the toeboard assembly from the lower platform to the higher level, ensuring that it is positioned on the plain section of the platform as shown.