4 minute read
BOATBUILDER’S NOTES


By Robin Gates
2

Making dowels
BY ROBIN GATES
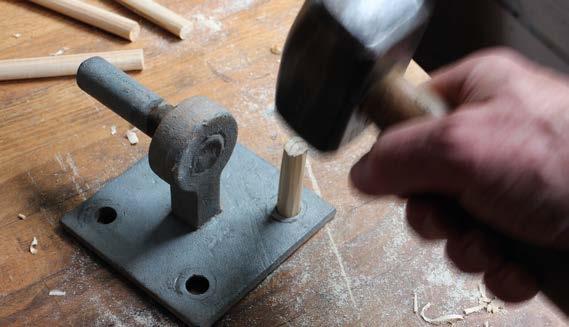
A sure way of ensuring dowels are a good fit is to make them using a dowel plate, if you can find one of the right size. Lie-Nielsen make both metric and imperial plates (costing around £70) but lacking a hole for the 7/16in (11.1m) dowels favoured by some joiners. An alternative is to bore a plate to the size you need, or better still find one already bored for another purpose. For 7/16in dowels the mounting holes in a sturdy field gate hook (costing £7) were spot-on. For strong dowels use dry straight-grained wood which can be rived into square-sectioned blanks (1). The blanks are approximately rounded using a plane inverted in the vice (2), aiming for slightly greater than final diameter. Next position the plate over a dog hole in the bench and hammer the over-sized blanks through the hole (3). You might need to experiment; some find the plate works better if the hole is tapered on the exit side, but I achieve better results with a taper filed at the top of the hole (4). The blanks are easier to start if pointed slightly with a knife.
So that surplus glue can escape as the dowel is knocked home, the sides are grooved from top to bottom. There are several ways of doing this but I find a tenon saw effective, using a shop-made slotted jig to guide the blade (5). Next cut the dowels to length, for which a bench hook is useful, and lastly bevel the ends to ease fitting, for which I use an inverted Surform block plane – a tool with a blade like a cheese grater (6). Where boards are glued edge-to-edge, well-fitting dowels reinforce the chemical bond with considerable physical strength
(7).

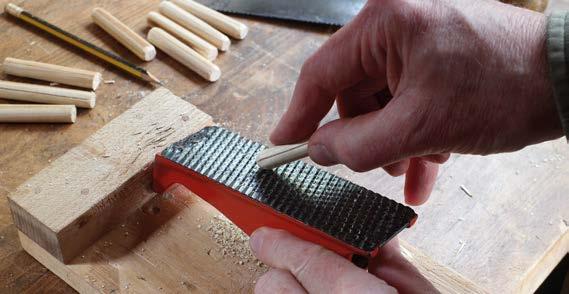

1 7 1 Riving blanks from straight-grained timber 2 Using an inverted plane to round corners 3 Hammering a blank through the dowel plate 4 A fistful of dowels ready for grooving 5 The grooving jig guides the saw 6 Bevelling ends to ease fitting 7 Preparing the joint for assembly


3
4
5
6
ALL PHOTOGRAPHS ROBIN GATES
Boatbuilder’s Notes Traditional Tool
By Robin Gates
DOWELLING JIG
In our world increasingly dominated by impersonal machines, the minor irregularities in work done with hand tools are often prized as evidence of the human touch. Aboard boats this is especially true of interior surfaces and decoration, the texture of surroundings we like to examine and touch. Tiny imperfections imparted to the wood by a moulding plane or fret saw steered by the feeling hand give life to the wood. But in those hidden parts making up the skeleton of the structure – the carcase of a drawer unit, desk or lockers – it’s more important that the fit is accurate if doors and drawers are to open and close smoothly. Only once that’s achieved can we afford to indulge in the looser tolerances of tools guided by observation, skill and muscle. Even so we needn’t abandon basic joinery to the robots. Happily, there are jigs.
The Stanley 59 dowelling jig is a delightfully engineered device providing precision in placing dowels. Dowels join components in a variety of ways but chiefly at corners and edges. In essence they are the loose tenons of round mortise-and-tenon joints, akin to the technique used by ancient Egyptians to join the planks of their large wooden hulls.
A dowelling jig can be as simple as one or more holes in a block or metal plate, but for use across a range of widths, spacings and dowel sizes, the Stanley 59 (and others) offers great advantages. Not least is the range of six bevelled guides matching bit diameters from 3/16 – 1/2in (4.812.7mm), ensuring dowel holes are bored vertically and to consistent depth.
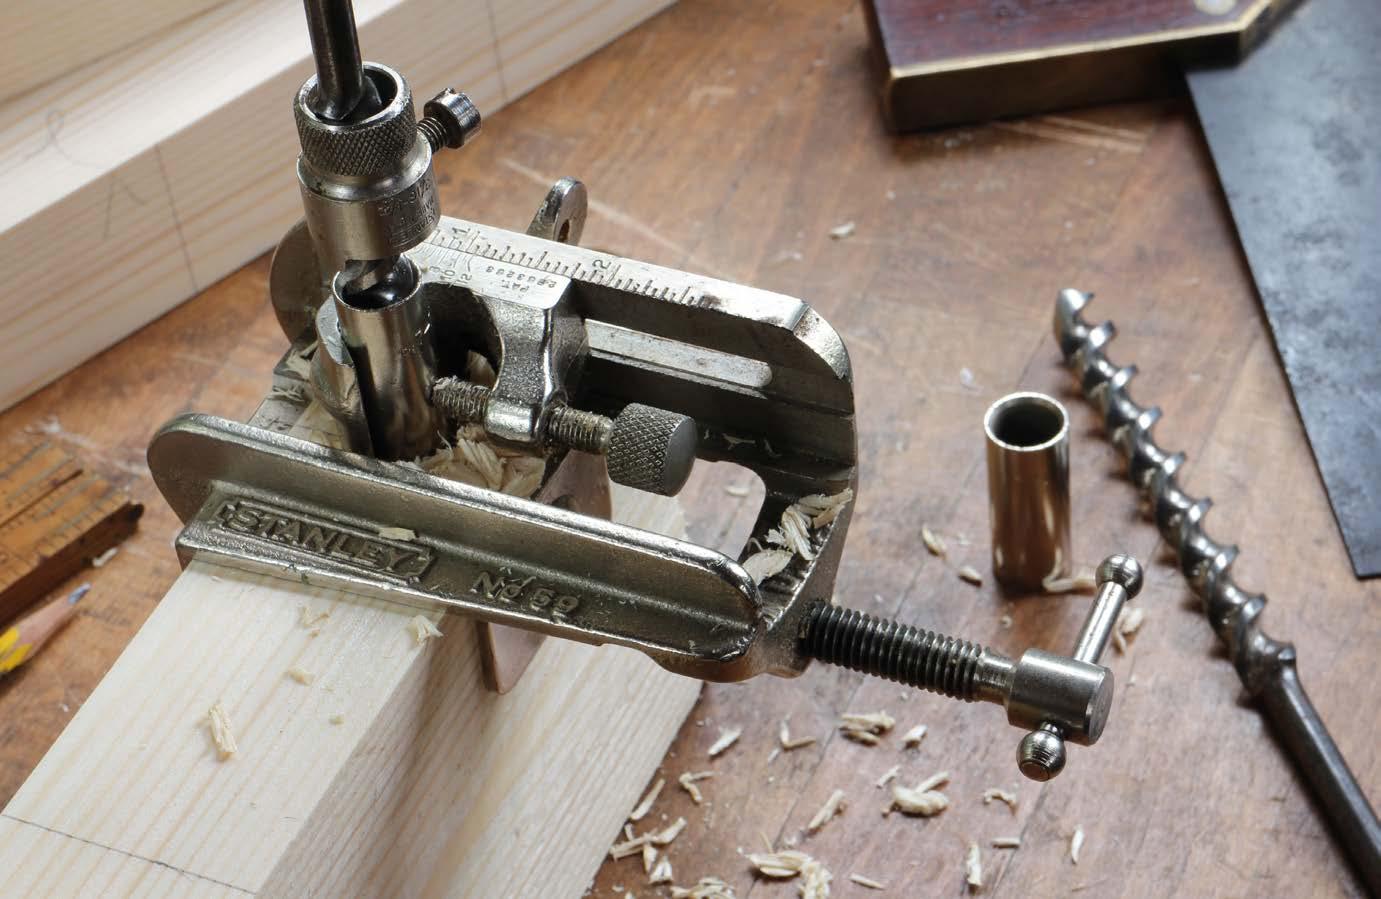
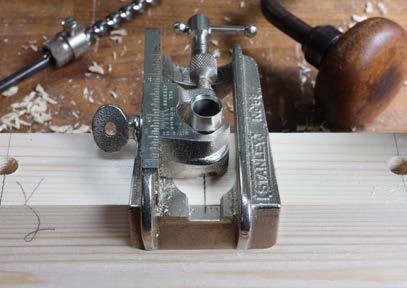
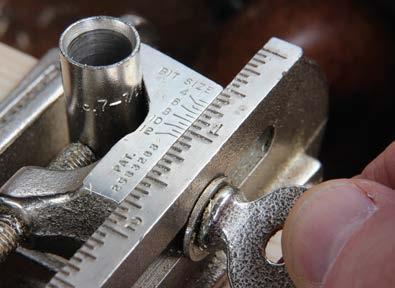
Having paired the guide with the bit – in this instance guide No7 for a 7/16in bit – it is clamped into the jig and centred on the spot marked for boring. Here you can see that 7 on the scale of the guide clamp aligns with 7/8in on the jig frame, setting the distance from the face side of the wood. The jig is next clamped in position and the hole bored, the depth being limited by a gauge screwed to the flutes of the bit. Repeating this procedure on the adjoining component ensures the joint will assemble squarely and close fully.
Clockwise from above: Boring the hole for a 7/16in dowel; Setting the No 7 guide at 7/8in from the edge; A mark on the jig aligns with the mark on the wood
NEXT MONTH: Stair saw
ROBIN GATES


