Rules of Play


Introduction
1.0 Game Components
1.1 Map 3
1.2 Charts and Tables 4
1.3 Counters and markers 5
1.4 Counter Abbreviations and Game Abbreviations 5
1.5 Dice 6
2.0 Game Setup
3.0 General Concepts
6
8.3: Victory Check Segment: 23 8.4 Politics Phase: ................................................... 23 8.5 Time Phase: 23 9.0 Infrastructure and Supply Phase
23 9.1: Spend Supply Points 23 9.2 Supply Costs 24 9.3: Adjust Supply Track 24 10.0 The Air Game
6
3.1 Sides 6 3.2 Forces 6
3.3 Condition of Forces 7
3.4 Movement 7
3.5 Stacking 7
3.6 Lines of Communication (LOC)
3.7 Zones of Control 9
3.8 Infrastructure and Supply 9
3.9 Control of Hexes
9
3.10 Random Events 9 3.11 Weather 10 3.12 Turn Structure
10 3.13 Sequence of Play 10 3.14 Victory 11
4.0 The Strategic Phase
11
4.1 Check Weather 11 4.2 Check Communications 11 4.3 Place Arriving Reinforcements 11 4.4 Air Allocation Phase 11 4.5 Resolve all SSM attacks 12 4.6 Supply and Infrastructure Phase 12 4.7 Strategic Air Mission Resolution 12 5.0 Warsaw Pact Activation Phase
24 10.1: The Air Allocation Phase 24 10.2 Air Forces Commitment Phase 24 10.3 Strategic Air Resolution Phase ......................... 25 10.4 Tactical Mission Resolution 27 10.5 SAM Fire 29 11.0 Morale
30 11.1 Disrupted Units 30 11.2 Routed Units 30 11.3 Low Morale 30 12.0 Headquarters and Cadres ����������������������������� 30 12.1 Communication Trace 30 12.2 Cadres ............................................................. 30 12.3 HQ Displacement 31 13.0 Markers
of Snafu Markers
Game markers
Markers
Markers
Markers
A history of perceived humiliation, after all, lurks behind many acts of terror. And the competing narratives of victimhood and insults sustain conflicts in the Balkans, the Caucasus, the Middle East and many other regions.
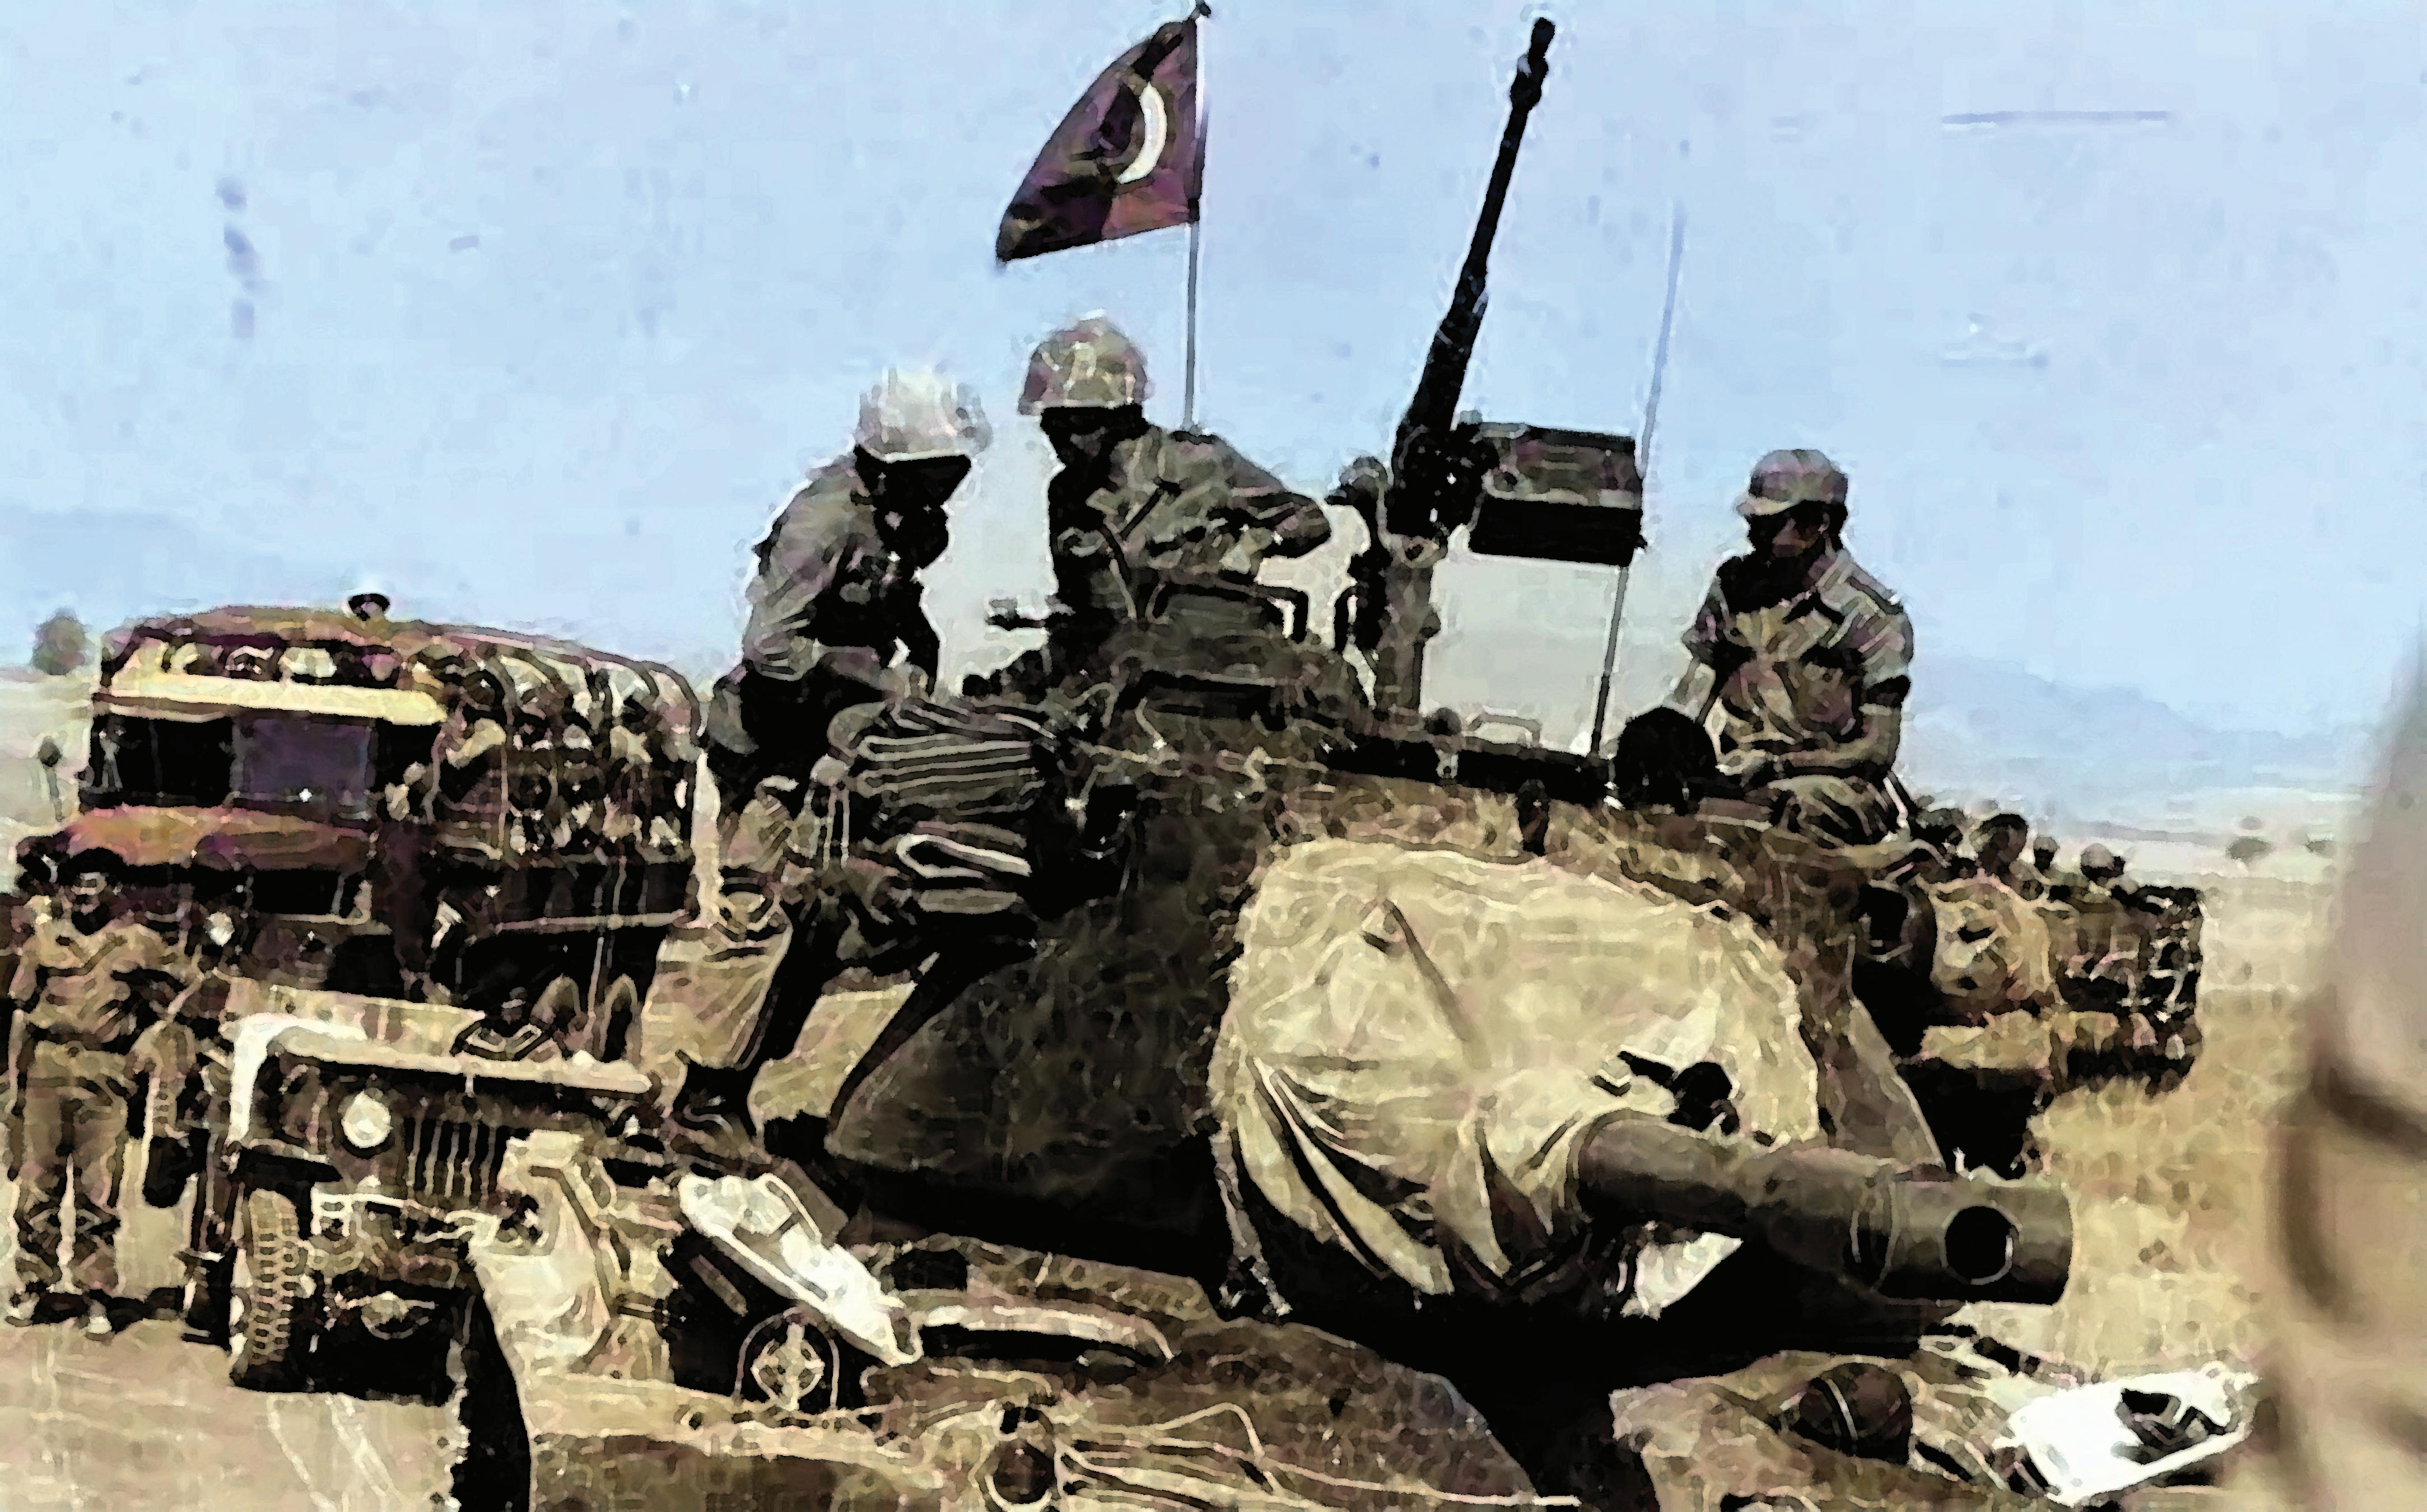
-Serge SchmemannThe Balkans have always been a place of discord and unpredictability and in 1985, things were no different. With Tito gone, Yugoslavia was barely holding together. Hungary, Romania, and Bulgaria were key parts of the Soviet strategy to attack the southern front of NATO. It was essential that pressure on these fronts, especially on Italy, be maintained to keep NATO from reinforcing the main effort in Germany. Would these countries stay in the fold, and do as they were told? While Soviet control over the Warsaw Pact allies had improved with this alternate history, there was still doubt about their wherewithal to fight for the Soviet dream of hegemony. And as the Russian bear had desired for centuries, the capture of the Bosporus offered the unfulfilled dream of access to the Mediterranean.
Things weren’t clear cut on the NATO side either. Greece and Turkey hated each other at least as much as they hated the communists. And Italy was not governed with a steady hand. What would they do if faced with war?
The Doomsday Project, Episode 2 covers this key theater. As with all future Doomsday projects, new rules that can be retrofitted into the previous games will be introduced. Here we have, as befits the Balkans, the introduction of politics. NATO and the Warsaw Pact will have to keep a wary eye on their allies to make sure they stay in the war while the opposing side will do everything they can to cause ruptures in the enemy alliance.
These rules will have errata and clarifications marked for use both here and in the Germany game. These are the basic errata for the series and would apply to both games. There are some rules that correct or change rules just in the Germany game. There will be new rules only used in this game. Lastly, there will be new rules, if you own both games, to be used in either a combined game or either game alone.
They will be marked as such:
Errata / Clarification; applies to both Germany-only rule Balkans-only rule
1.0 Game Components
The 4 large maps and 2 smaller maps in The Battle for the Balkans includes the entirety of the Balkans and Northern Italy. Each map is named. The map points directly north. The hex scale on the map is about 12 kilometers per hex.
1�2�1�2: Each country has a Support Level Track with markers for each type of Combat Support available. These represent the various types of equipment that might be used by a unit or side during the play of the game. Some units have both a primary type of equipment and a secondary type of equipment. The owning player may usually







Lastly, it also contains some game rules summaries for easy reference.
There is also a Terrain Effects Chart (TEC) and a new display for the series, the Leader Tracks. The Leader Track is used for military commanders and their impact on play as well as the current governments and current national status (allied, leaning, or neutral) in the game.

AB: Airborne
AC: Army Corps
AMF: Allied Command Europe; Mobile Force


AmTrCmd: Amphibious Troops Command
Arm: Armored
AvnB: Aviation Brigade
BCMC: Belgrade Defense Force
Cdr: Cadre
F-BR: Fighter-Bomber
FC: Frontal Command
FD: Fighter Division
Flgr: Flieger
FR: Fighter Regiment
FBR: Fighter Bomber Regiment
GAD: Guards Airborne Division
Gd: Guards
GdCCC: Guards Combined Arms Army
GFD: Guards Fighter Division
GHQ: General Headquarters
GMMAD: Guards Maritime Missile Aviation Division
GMRD: Guards Motorized Rifle Division
HADC: Homeland Air Division Corps
IGLAB: Independent Guards Landing Assault Brigade
IGNIB: Independent Guards Naval Infantry Brigade
Inf: Infantry
INIB: Independent Naval Infantry Brigade
Jgr: Jaeger
KK: Corps Command
LoC: Line of Communication
Lwr: Landswehr
MD: Military District
Mech: Mechanized
MID: Mechanized Infantry Division
MK: Military Command
Mot: Motorized
MRD: Motorized Rifle Division
Mtn: Mountain
OpGrp: Operation Group
OOC: Out of Command
Part: Partisan
Prol Gd: Proletariat Guard
PzGr: Panzer Grenadier
SF Grp: Special Forces Group
SGF: Southern Group of Forces
TD: Tank Division
TKB: Tank Brigade
VA: Attack Squadron
VAW: Carrier Airborne Early Warning
VFA: Strike Fighter Squadron
VMA: Marine Attack Squadron
ZOC: Zone of Control
Each player has a six-sided die (D6) and a ten-sided die (D10). Sometimes the use of a specific die is indicated in the rules; sometimes the player has a choice. Whenever you roll the D10, a “0” result is always a ten (10), not a zero. Whenever rounding, always round down to the nearest whole integer.
Details for setting up the game are found in the scenario descriptions at the end of these rules.
Players will also need 4 opaque containers to allow random drawing of markers during play.
• All Cup of Snafu markers (see 13.1)
• All Objective markers (see 13.6)
• All Meeting Engagement/Hasty Attack Combat Chits (+5 Night Battle markers) (see 13.5)
• All Prepared Attack/Deliberate Attack Combat Chits (+3 Night Battle Markers) (see 13.5).
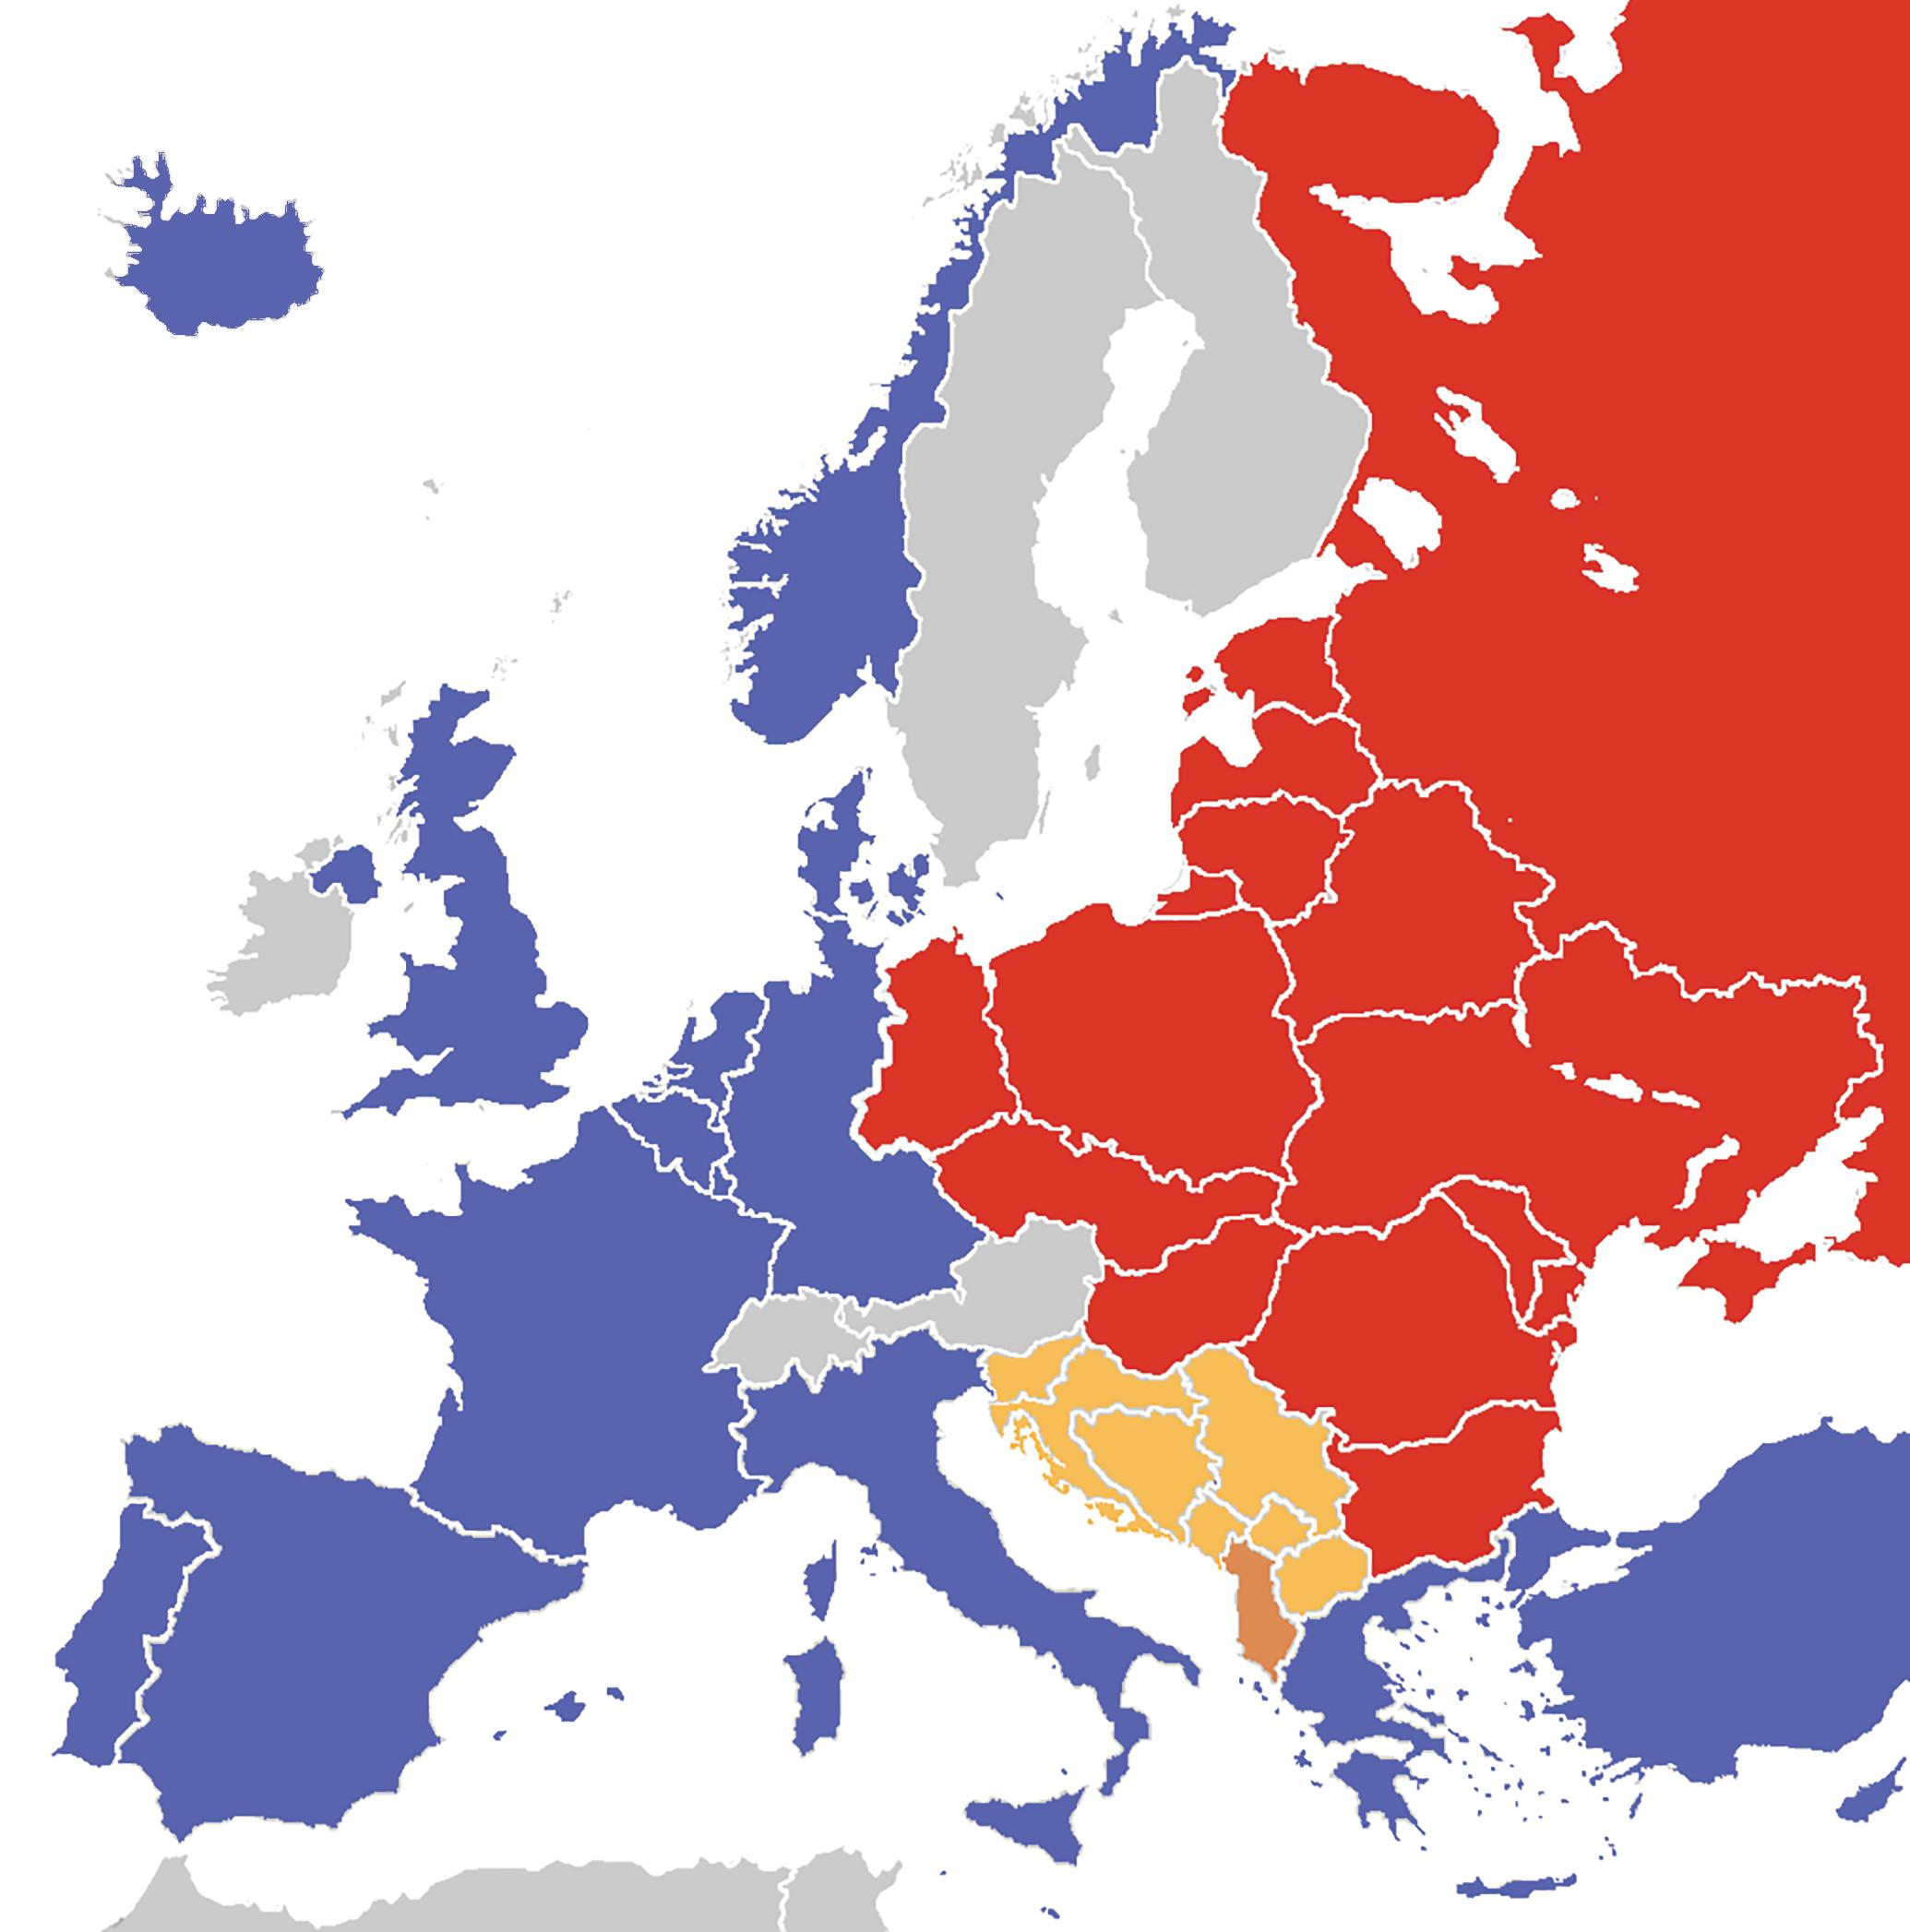
The Warsaw Pact is a coalition of forces that initially consists of the Soviet Union, Hungary, Bulgaria, Romania, and Yugoslavia. NATO is a coalition of forces that generally consists of the United States, Italy, Greece, Turkey, and Spain. In addition, there are neutrals in the game consisting of Albania and Austria. The Warsaw Pact and NATO forces are on opposite “sides” in the game. The countries that make up the “sides” can change as the game is played.
The game’s counters represent the forces available to both sides in the war. Both players have Headquarters (HQs) and Units as land forces, along with Aircraft.
3�2�1: HQs represent the command, control, and logistics resources of the forces on the ground in southern Europe. HQs can move, but they cannot fight. Instead, HQs activate Units to move and fight and provide communications support. Positioning HQs carefully is important because it determines which Units can be activated. HQs are not Units.
3�2�2: Units are the fighting forces on land. Units in the game are unusual in not having combat strengths and movement allowances printed on their counters. Movement rates depend on the type of movement being used.
3�2�3: Cadres are Units in all ways with an additional limited ability to activate other units under their command and to allow for tracing communications to units under their command (see 7.3)
3�2�4: Aircraft represent wings or divisions (or other groupings of planes) of the same type. Aircraft counters are used to track the air strength each player assigns to various Strategic and Tactical Missions over the theater. Aircraft can, among other Missions, fight in air-to-air combat, support ground units engaging the enemy, and attack the enemy’s warfighting Infrastructure.
56 BD
Condition is the state of a given unit or HQ in the game. It is indicated by the face-up side of a counter, by markers placed on the counter, and by a counter’s position in boxes on the map, player aid card, or air display. Changes in the condition of your forces are caused by their activities, the results of combat, or the amount of resources available to your side on a given turn.
3�3�1: Land forces on the map are either Fresh or Spent. Fresh Units have a lot more options than Spent Units, as explained in the rules below. Fresh units are the fronts of the counters. The backs of the counters show the spent side. These spent units have a diagonal stripe across the counter face for easy identification. Once a fresh unit has been active, it becomes spent.
Units may also have different morale states: Disrupted, Routed, or may have Low Morale Morale states are generally adverse and caused by retreats after losing a combat. Land forces can also:
• Be Low/ No fuel or Ammo,
move, they need not be in either mode in order to spend movement points – deployed units can spend movement points to place combat chits.
The cost to deploy in each terrain type is listed on the Terrain Effects Chart. If you have not deployed in a specific type of terrain (and thus marked with either an “In Primary Terrain” or “In Secondary Terrain” marker), you are always considered deployed in clear terrain.
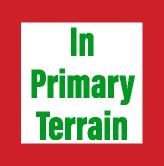
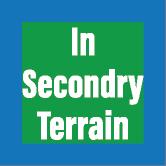
Each hex in an enemy ZOC costs +1 MP to enter (see 3.7). Friendly units negate enemy ZOCs for all game rules. Generally, an HQ or Unit may not enter a hex if it does not have enough movement points remaining to pay the terrain cost.
In addition, as this section of Europe does not have the road coverage of West Germany, this game introduces Restricted Terrain hexes (see TEC). These hexes subtract 2 from the 5 base movement allowance if the unit starts in or enters a “restricted hex” during its move.
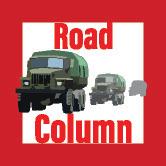
3�4�2: All units must be in either Road Column mode, Cross-Country mode, or Deployed.
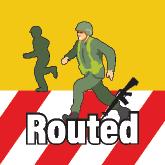
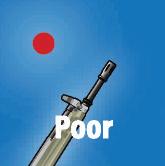
• Be a Poor/Elite Unit (NATO), or a Penal/Guards Unit (Warsaw Pact), and/or
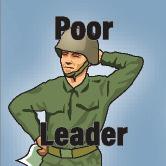
• Have a Great or Poor Leader.
3�3�2: When a Unit is eliminated (sent to the Replacements Box), remove all markers from it.
11 TD 5 11 TD 5 xx 56 BD 56 BD
3�4�3: An HQ or Unit may move one hex, and only one hex for its entire movement, if it does not have sufficient MPs to make the move. The HQ or Unit must be able to enter the hex normally. This one-hex exception is not allowed if the move would be from one enemy ZOC to another enemy ZOC, if the hex is prohibited for entry per the Terrain Effects Chart, or to deploy in the hex. Note: this rule allowing one hex of movement with insufficient MPs does not apply to Exploitation Movement (7.7.12).
3�5�1: Players may stack an unlimited number of Fresh Units in each hex but only up to 6 size points of units that are Spent. Both Fresh and Spent units may stack in the same hex.
Reduced
3�3�3: Aircraft are either fullstrength or reduced, depending on the counter side showing. The front side of the counter represents a full-strength Aircraft. The back side of the counters represent reduced aircraft and have a diagonal stripe across their face. Aircraft are also either damaged or undamaged, indicated by the box they occupy on their Air Display. These conditions are not dependent on each other—an Aircraft can be reduced and undamaged, or full-strength and damaged.
3�4�1: Movement is from hex to hex, paying one movement point, if they have transport or equipment, (regardless of terrain in the hex) to enter each hex as you go.
Leg units (units without any form of transport) pay 2 movement points per non-road hex entered. Units in Road Column may also use the faster road movement rates (including Leg units).
While all units must be in either Cross-Country or Road Column to

Important exception: a player may always stack all units of a single division in a hex without exceeding stacking limits (thus a cadre plus all component units of a division may always stack in a single hex without penalty).
Stacking is enforced during the Check Stacking Segment of each friendly Activation sequence. If your Units are overstacked when checked, you must remove Units (of the owning player’s choice) and place the removed units in the replacement box until the stacking limit is met. This means that you can stack Spent Units to gain an advantage in combat from supporting Units, but you risk eliminating them if they remain stacked at the end of the Activation when stacking is checked.
3�5�2: HQs and markers are not Units and do not count against the stacking limit. Cadres are Units and do count towards stacking.
3�6�1: A Line of Communication (LOC) represents communication links between each player’s cadres, the HQs and Units in the field, and the supply lines between them. HQs and Units in The Doomsday Project must have an LOC to perform many of the game’s actions. This is usually a chain from one level to the next, and then to a final Supply Source marked on the map. A friendly supply source is one controlled by the originally owning player at the time is used. Unlike many other games, the range on an HQ or Cadre is the range a subordinate unit or HQ traces to that unit. So, if an HQ has a range of 15, a unit tracing to that HQ, must be within 15 movement points. The 15 range HQ might trace to another HQ but must trace using the range to which it is tracing – not the range on the HQ doing the trace.
3�6�2: An HQ or Unit must have an LOC to a Supply Source for its side to perform many game actions, including:
• Refreshing HQs and Units (flipping the counter from its Spent to its Fresh side),
• Receiving Corps or Army level Support in combat, and
• Taking combat losses from your Replacements Track
• Activating a Unit/HQ
Units and HQs can also treat a Supply Source as an in-communication non-banded/non-striped HQ with a communications range of 30.
Note that to activate an HQ and units both the HQ and unit(s) will need an LoC but the activating HQ does not need to be the HQ used for LoC. For example, the Odessa MD HQ is used to activate 4 Hungarian units. The Hungarian units must have an LoC and the Odessa MD HQ must have an LoC – but these will not trace the same LoC.
3�6�3: Supply Source hexes are final Supply Sources for specific countries. These appear on the map in several hexes and are marked by which country may use each specific supply source. Only forces of listed countries may use that supply source. Supply Source hexes are always considered to have an Army HQ (for NATO) or an Army Group HQ (for Warsaw Pact) in the hex to allow an LOC to be traced for any unit of that supply source country.
3�6�4: A Line of Communication (or LoC) is a path of hexes that is traced from the lower-level unit to the higher level one. You must complete the entire chain to be in Communications. HQs and Units that are out of communications during the Communications Phase are marked with an “Out of Contact” marker and they remain Out of Contact until the next Communications Phase in which they are in contact again. There are other times when the LoC is
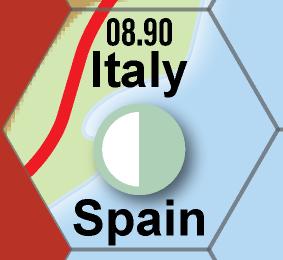
checked, and this is always done at the moment it is called for – but if out of communications at that time does not receive an Out of Contact marker – it just will not be able to perform that action requiring the communications check. All Cadres and HQs have ranges printed on their counter to show how far they can trace their LoC.
3�6�5 The Communications Chain (from lower level to higher level)
• Units that are part of a division must be within range of their cadre, and their cadre must be in communications.
• Cadres, Units not part of a division, and independent units that have a corps or army stripe must be within range of their Corps (for NATO) or their Army (if Warsaw Pact). Which corps (for NATO) or Army or Army Group (for Warsaw Pact) is shown by the thin band on each counter/HQ.
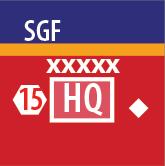
Example: an orange stripe on the 19th GTD shows that the 19th Guards Tank Division belongs to SGF HQ (which also has an orange stripe). The 19th GTD unit may not trace communications to the Odessa MD HQ as it has a purple stripe. It must trace communication only to the Soviet SGF HQ.
• Units without both a Corps/Army Stripe may trace to any HQ of the same country or supply source of that unit’s country. Most breakdown units will need to trace this way.
Another Example: The Greek 32 Marine has no stripe or band – it must trace its LoC to any Greek HQ to have a Line of Communication.
• NATO Corps HQs and NATO striped Army HQs must be within range of their correct non-banded/non-striped HQ or a supply source to be in LoC.
• NATO non-banded, non-striped HQs must trace no more than three hexes to a road or Autobahn hex – and from there trace to a Supply Source. This trace can be of unlimited length but unlike other traces in the chain, this line may not enter any enemy ZOCs.
• The Warsaw Pact traces their Army HQs back to supply sources. This trace must be no more than three hexes to a road or Autobahn hex – and from there trace to a Supply Source. This trace can be of unlimited length but unlike other traces in the chain, this line may not enter any enemy ZOCs.
Trace is always from the lower level to the next higher level.
3�6�6: An LOC is blocked by terrain which a HQ in Road Column could not normally enter.
3�6�7: An action which requires an LoC may be blocked by enemy Aircraft on Interdiction Missions (10.4.2).
3�6�8: Always use a hypothetical unit in road column to trace communications. Each hex used in a trace cost is one movement point or the road movement rate per hex of the trace (ignore restricted terrain for this purpose). Enemy ZOCs cost an additional one movement point to enter unless negated. You cannot trace through enemy units or HQs.
Player’s Note: While a unit must have a Line of Communication to be active, the HQ activating it does not have to be part of the active unit’s LoC. The unit activated would need to be within Activation range of the activating HQ as well as have a Line of Communications to be activated.
Example of an LOC Trace:
3�7�1: All Units have a Zone of Control (ZOC), unless limited by condition markers (11.2, 13.1.2). The ZOC consists of the six hexes immediately adjacent to a Unit, but only for hexes the Unit can legally enter. Additional friendly Units that also have a ZOC in a hex give no additional benefit. HQs (not being units) do not have ZOCs.
3�7�2: Friendly Units negate enemy ZOCs in the hex they occupy for all game rules.
to enter.
In addition, friendly HQs and Units suffer a penalty if they retreat into enemy ZOCs (see 7.7.10).
Infrastructure is the overall industrial ability of a side to support its combat forces. It includes the state of industry in the area and the road network. Infrastructure can rise with improvements to readiness (as represented by reinforcement increases in the scenario), the spending of supply, and be decreased by airstrikes. Infrastructure provides Supply (tracked as Supply Points) to the armies.
Supply Points are used for many things in the game—see Table 9.2 for a full list. For any Unit or HQ to be able to expend Supply Points, it must be able to trace an LOC.
Hexes are always controlled by one player. Players begin the game by controlling the hexes on their side of the border.
Hexes in neutral countries are controlled by neither player – although the moment a neutral country joins a side, that side controls all the hexes in that country.
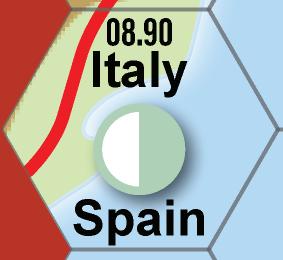
As forces move, control changes as the enemy enters a hex. Once the game is under way, a player controls a hex if he was the last player to enter the hex. His forces do not have to remain in the hex to retain control—the last player to have an HQ or Unit in the hex has control. A ZOC is not sufficient to claim control of a hex; an HQ or Unit must actually enter a hex to claim control.
Note that claiming Victory Hexes does require a friendly unit in the hex to claim the Objective marker.
Battle never goes entirely as planned. During combat, there is a chance that a Random Event will occur, changing the conditions of battle. A Random Event happens when called for on a chosen Combat Chit. When a Random Event occurs, roll on the Random Event table to see the effect of the Event. Note that Random Events occur immediately when the Combat Chit is drawn, and all effects are determined at that time – these may influence the upcoming combat in that hex in some way.
3�7�3: Enemy ZOCs cost +1 MP for friendly HQs and Units
The weather can inhibit air operations but has no additional effect (see 4.1.2).
The Doomsday Project is played in a series of turns with each turn representing a 24-hour day. The following is the game’s sequence of play. Perform all of the listed actions in the order presented. At the completion of all of the listed actions, check to see if victory has been achieved and if so, end the game and crown the victor. If not, perform the next turn using the same actions as listed again.
1. Check weather (4.1) – roll a D10; 1-6, it is clear, 7-10, it is raining (+1 if it was raining last turn)
2. Communications Phase (4.2)
3. Check Lines of Communications (12.1)
a) Place or remove Out of Contact markers
b) Use Transport Support to negate OoC markers. If marked OoC (or still OoC), draw from the Cup of Snafu.
4. Reinforcements and Replacements Phase (15.0)
a) Place arriving reinforcements per the scenario instructions (15.1)
b) Spend replacement points to return units in the replacements box to the map (15.2)
c) Spend replacement size points to replace losses to units from Cadres (15.2)
5. Air Allocation Phase (10.1)
a) Determine AWACS advantage (4.4)
b) Attempt to repair damaged aircraft (10.1)
c) Fly aircraft from airfields and place on missions (10.2.3)
6. Resolve SSM Attacks
a) The Warsaw Pact followed by NATO may attack using SSMs (16.2)
b) Remove all Chemical Weapon markers from the map (18.1)
c) Attempt to remove Persistent Chemical markers from the map (18.1)
7. Supply and Infrastructure Phase (9.0)
a) Spend Supply on 9.2 items
b) Place Supply marker on the Infrastructure
marker (9.3)
c) Reduction of Infrastructure from Refugees (14.5)
d) Remove all HQ interdicted markers (10.4.2)
8. Strategic Air Mission Resolution Phase (10.3)
a) Resolve the Air Superiority Combat (10.3.1)
b) Resolve Strategic Missions (10.3.2-10.3.5)
c) Resolve Bounce box Combat (10.4.1)
d) Perform Transport of units from Airfield box to the map (16.1.2)
Warsaw Pact Player Turn:
A. NATO Refresh Phase (3.6.2)
B. Warsaw Pact Activation Phase (7.0)
1) Warsaw Pact may fly Transport missions to remove Low and No Fuel and Ammo markers and to land airmobile forces (16.1)
2) Warsaw Pact Player activates an HQ and units and places Combat Chits (7.1; 7.4)
3) NATO performs reserve movement (7.5)
4) Warsaw Pact Player performs bonus movement (7.6)
5) Warsaw Pact Player resolves combat (7.7)
6) Warsaw Pact Player performs after combat movement (7.7.11)
7) Check stacking; remove excess units go to the Replacements box (3.5)
8) If the selected HQ has completed all activations, all units that are not deployed, now Bivouac (7.11)
NATO Player Turn:
A. Warsaw Pact Refresh Phase (3.6.2)
B. NATO Activation Phase (7.0)
1) NATO may fly Transport missions to remove Low and No Fuel and Ammo markers and to land airmobile forces (16.1)
2) NATO Player activates an HQ and units and places Combat Chits (7.1; 7.4)
3) Warsaw Pact performs reserve movement (7.5)
4) NATO Player performs bonus movement (7.6)
5) NATO Player resolves combat (7.7)
6) NATO Player performs after combat movement (7.7.11)
7) Check stacking; remove excess units go to the Replacements box (3.5)
8) If the selected HQ has completed all activations, all units that are not deployed, now Bivouac (7.11)
End Phase
A. Eliminate Friendly Units Phase
1) Eliminate Friendly Units (8.1)
2) Remove Night Marker if still present (13.6)
B. Victory Check Phase (8.2)
1) Award revealed Objective markers to owning player (8.2.3)
2) If one player controls all the enemy supply sources, they win the game (8.3)
3) If a player has 21 Victory Points and his enemy has 0, he wins the game (8.3)
C. Politics Phase (17.0)
1) Request nuclear weapons (18.2)
2) Voluntary relief of commanders (14.4)
3) Perform the Politics Phase (17.0)
D. Advance the turn marker
To win the game, one player must have 21 or more victory points and his opponent must have 0. Should this occur, the game ends and that player is the winner. Otherwise, the player with the greater number of victory points during the final victory check phase is declared the winner. Should the points be equal during this final Victory Point Check Phase, the NATO player is declared the winner.
The main source of Victory Points is Objective markers. These markers can either be hidden (face down) or revealed (face up). When instructed to reveal an Objective Marker, flip it face up.
If one side has Victory Points and the other does not, any Victory Points lost for the side that has none is added to the total of the side that does have them.
Most turns will begin with the Strategic Phase. The rules below explain the procedures and options players need to perform each Strategic Phase and are presented in the order you will encounter them during the sequence of play.
4�1�1: On every turn except the first turn, one player will roll a D10 to see what the weather is for that turn.
Roll
Weather

1-6 Clear 7-10 Rain
If it rained on the last turn, add one to your die roll this turn.
4�1�2: Effect of weather Clear: No effect
Rain: On all Rain turns, Warsaw Pact air values are reduced by two and all NATO air values are reduced by one.

4�2�1 The Warsaw Pact player and then the NATO player check all of their HQs and units to check their communications status. Refer to the Communications rules (see 3.6). Any HQ or unit that is found to be out of communications (OOC) has an “Out of Contact” marker placed on it (however, see 16.1.1). Once placed the marker remains with the unit or HQ (and the effects of the marker) until a Check Communications Phase in which the unit or HQ is no longer out of communications.
4.2.2 After Communications have been checked, spend supply as applicable (see 9.2) to refresh spent HQs.
Place all incoming reinforcements as per the Scenario schedule. See 15.1 for more information regarding reinforcements.
4�4�1: Determine which player has the AWACS advantage for the turn. First the NATO player rolls to see if he has the advantage by rolling equal to or less than the value of his AWACS support. If he succeeds, the NATO player has the AWACS advantage for the turn. Should he fail the roll, reduce his AWACS Support value by one and then the Warsaw Pact player rolls to see if he rolls equal to or less than his AWACS support. Should he succeed in his roll, the Warsaw Pact player has the AWACS advantage that turn. Should he fail his roll, reduce his AWACS support number by one.
Should neither player succeed in his roll, NATO is considered to have the AWACS advantage that turn.
If the NATO player decides to not roll for his advantage, increase his AWACS support by one (not to exceed his maximum allowed value of 7).
If the NATO player either chooses to not roll or should he fail his roll, the Warsaw Pact player may choose to not roll
and if he does, increase his AWACS support by one (not to exceed his maximum value allowed value of 3).
In the Balkans game, AWACs support is far more limited. The Warsaw Pact has no AWACs support and the NATO player only has the limited USN AWACs. To see which player has the initiative in the air (effects are the same as AWACs advantage) both players roll a die. The higher roller has the advantage for that turn. If the roll is tied, NATO has the advantage for the turn. If the USN AWACs is in play, the NATO AWACs Support value becomes a 6 and this value is rolled against normally. The USN AWACs remains in play unless the 6th Fleet is forced to withdraw (see scenario rules). Should the NATO player roll higher than the support value, reduce the AWACs support by one and the Pact has the advantage for the turn. The NATO player can choose to not roll for AWACs if he wishes.
4�4�2: First the player without the AWACS advantage places all his available aircraft on the Air Display to whichever available missions he chooses for the turn. After this is completed, the other player, after reviewing all of his opponent’s allocations, may allocate his available aircraft to available missions as he desires.
Both players, Warsaw Pact player first, followed by the NATO player, may use their SSM (Surface-to-Surface Missiles) to attack their opponent. See 16.2 for additional information.
Both players, Warsaw Pact player first then followed by the NATO player, may spend supplies as they wish from the remaining Supply Points available (see 9.2). After that is done, place the Supply marker on the Infrastructure marker. Each player may spend that number of Supply Points until this phase occurs again.
Resolve all Strategic Air Missions. First perform Air-to-Air combat in the Air Superiority Box, then resolve all other strategic air missions in the order desired by the AWACS advantage player (see 4.4.1). Place successful Reforger reinforcements as applicable (if you’re playing the Germany game).
5�1 The NATO player refreshes all his spent units that have a Line of Communications.
5�2: During this phase, the Warsaw Pact Player activates Fresh HQs and Units, following the Activation Sequence (7.0) below for each activated HQ. It is possible to activate an HQ more than once if it is refreshed at the end of the sequence.
5�3: Soviet HQs (red background) can activate any Warsaw Pact Units (regardless of nationality), but other specific nation HQs can only activate units that belong to that specific nation.
5�4: During each HQ’s Activation, the HQ may generally activate up to four Fresh Units (although see Military Leaders).
5�5: An HQ’s Activation range is 10 MPs (regardless of what LoC value is on the counter). Trace a path of up to 10 MPs from the HQ to the selected Unit, using the movement costs for a Road Column unit on the Terrain Effects Chart. The path may enter a hex containing an enemy ZOC at the normal cost of +1 MP.
Restricted terrain limitations do not apply to this trace.
5�6: Activated Warsaw Pact Units move and engage in combat during this phase. The NATO player may perform Reserve Movement as well. Once all Unit movement and combat is completed, your active HQ may move or pay Supply Points to refresh itself. See 9.2 for details.

5�7: The Warsaw Pact may always choose to activate one “Out of Contact” unit as one of his activations.
This unit may move one hex only and may not place a Combat Chit. It may not move this one hex if it would be from enemy ZOC to enemy ZOC.
6�2: The Warsaw Pact player refreshes all his spent units that have a Line of Communications.
6�3: During this phase, the NATO Player activates Fresh HQs and Units, following the Activation Sequence (7.0) below for each activated HQ. It is possible to activate an HQ more than once if it is refreshed at the end of the sequence.
6�4: A NATO HQ can only activate Units of its same country. For purposes of this rule, NATO’s AMF is a separate NATO country.
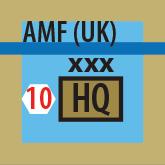
6�5: During each HQ’s Activation, the HQ may generally activate up to four Fresh Units.
6�6: An HQ’s Activation Range is 10 MPs (regardless of what LoC value is on the counter). Trace a path of up to 10 MPs from the HQ to the selected Unit, using the movement costs of a hypothetical unit in Road Column. The path may enter a hex containing an enemy
ZOC at the additional cost of +1 MP. Enemy units may not be traced through.
Restricted terrain limitations do not apply to this trace.
6�7: Activated NATO Units move and engage in combat during this phase. The Warsaw Pact player may perform Reserve Movement as well. Once all Unit movement and combat is completed, your active HQ may move or pay Supply Points to refresh itself. See 9.2 for details.
6�8: The NATO player may always choose to activate one “Out of Contact” unit as one of his activations.
This unit may move one hex only and may not place a Combat Chit. It may not move this one hex if it would be from enemy ZOC to enemy ZOC.
The Doomsday Project uses an innovative Activation system that combines movement, combat, and enemy reaction into one phase. It is important to understand the order, or Activation Sequence, in which different kinds of movement and combat occur. The Activation Sequence must be followed precisely for the game systems to function properly.
The Activation Sequence is divided into several segments:
• HQ Activation Segment (7.1)
• Unit/Cadre Activation Segment (7.2, 7.3)
• Cadre Segment (7.3)
• Initial Movement and Combat Declaration Segment (7.4)
• Reserve Movement Segment (7.5)
• Bonus Movement Segment (7.6)
• Combat Segment (7.7)
• After Combat Loss Segment (7.8)
• Check Stacking Segment (7.9)
• HQ Movement and Refresh Segment (7.10)
Select any Fresh HQ with an LOC and activate it by flipping the counter to its Spent side. If you have no Fresh HQ, your Activation Phase ends. Additionally, if you have no more fresh units to activate, your Activation Phase ends.
You must complete all activations with one HQ before you activate another HQ.
One (only) Out of Contract unit may be activated and moved in lieu of an HQ activation.

These units may only move one hex (and not enemy ZOC to enemy ZOC) and may not place a combat chit.
Select up to (usually) four Fresh Units or Cadres within the HQ’s Activation range of 10 MPs and flip the counters to their Spent sides.
If a Player activated a Cadre, he may activate some or all Units from the same division that are within the command range of the Cadre (remember the +1 MP cost for each hex with an enemy ZOC, and that friendly units in a hex negate the enemy ZOC) and consider that an activation of just one against his (usually) 4 limit – even if the cadre also activated one or more additional units.
7�4�1: During this segment, you can move each of your active Units or Cadres (but not HQs) up to 5 MPs. You decide in what order your Units move. One Unit must complete its movement before another Unit begins its movement.
Only one unit may place a Combat Chit for combat to occur in that hex (and only one combat chit may be placed in a hex).
Other units that move adjacent and participate in the combat do not need to spend additional movement to be “in the combat”.
7�4�2: Transported and equipped Units may only move if they are in “Cross Country” or “Road Column” modes. Only units in Road Column may use road movement (which is 1/3 movement point on the autobahn and ½ a movement point on all other roads). If not along a road, all hexes, when in either Cross Country or Road Column, cost 1 movement point to enter. Place the appropriate marker to show the type of movement the unit is performing. There is no cost to enter either of these movement modes but once chosen, it cannot change throughout the unit’s activation. It costs the movement allowance of the terrain to deploy in any terrain other than clear. You must have the movement points available to enter deployment if you wish to deploy in any other type of terrain. Once you deploy a unit in terrain, it may not move any farther in that activation phase.
While a unit must spend movement point to place a combat chit, if it does not move, it does not need to be in either Road Column or Cross Country movement – it may stay Deployed if it does not move.

A unit may leave Cross Country or Road Column movement by spending the appropriate amount of movement points (as shown on the Terrain Effects Chart) to “deploy” in the terrain in the hex. Units without a In Primary Terrain, In Secondary terrain, a Cross Country, or a Road Column Marker are considered to be deployed in clear terrain (even if there is no clear terrain in the hex). If there is one type of terrain in the hex (other than clear), place an “In Primary Terrain” marker to show it is in that type of terrain (no marker would mean it is deployed in Clear). If there are two types of terrain in the hex, the owning player may choose which type of terrain in which they are deployed by using the “In Primary Terrain” marker (for the terrain that sits higher on the Terrain Effects Chart) or “In Secondary Terrain” (for the terrain type that sits lower on the Terrain Effects Chart). Any graphic depiction of terrain in the hex is a terrain in which you may deploy (even if just a small amount of the hex has this terrain type).
7�4�3: When a moving Unit is adjacent to an enemy Unit, the moving Unit may declare combat. The hex in which the enemy is to be attacked is called “The Combat Hex”. The Combat Hex must be a hex the Attacking Unit could enter normally. Combat Declaration must be paid for using movement points. (Note for clarity: you pay the cost of the Combat Declaration, not the cost of entering the target hex). There are four types of combat, and the cost of each type of Combat Declaration is listed below:
Meeting Engagement 1 MP if Cross Country or ½ if in Road Column
Hasty Attack 2 MPs if Cross Country or 1 MP if in Road Column
Prepared Attack 3 MPs if Cross Country or 2 MPs if in Road Column
Deliberate Attack All MPs (may not be in Road Column)
Since a Deliberate Attack requires a Unit to spend all of its MPs, the Unit must begin the segment adjacent to its target.
Only one Combat Chit may be present in a hex at any one time.
7�4�4: When combat is declared, randomly draw a Combat Chit from the cup containing chits matching the type of combat and place the marker in the hex with the defending unit. This is the “Combat Hex”. If there is a random event, determine the random event and apply any results of that random event.
Important: If a Meeting Engagement is declared, pause the Initial Movement and Combat Declaration Segment and resolve the Meeting Engagement combat immediately. Once the
Meeting Engagement (including any Exploitation Movement) is resolved continue the Initial Movement and Combat Declaration Segment (if you have additional active Units to move). The unit that conducted the Meeting Engagement may perform exploitation movement but may not normally move after placing the Meeting Engagement Combat Chit.
7�4�5 HQs move as if always in Road Column.
7�4�6 Active Units that are deployed and participate in the combat (placed the combat chit or provided support may switch to Cross Country mode to be able to advance after combat – and then move as allowed by advance after combat). Non-active units that provided support may not advance after combat and remain deployed.
7�4�7 Several units in the game have no organic equipment and if the owning player chooses to not use Transport Support, these are “Leg” units. Leg units pay 2 movement points to enter a hex. If they are in Road Column and traveling along a road, they pay 1 MP per road hex moved. Leg units do not suffer a movement penalty for moving through “restricted terrain”.
7�4�8 On the TEC, there are several types of terrain that are labeled restricted terrain. If a non-leg unit starts its activation in such a hex or moves into such a hex during its movement, it immediately loses 2 of its 5 movement points. This reduction occurs immediately. This may prevent a unit from entering a hex if the hex is restricted and its movement points would be reduced to less than 0.
7�5�1: During this segment, the non-phasing player may activate one Fresh HQ and up to (usually) 4 Fresh Units for movement of up to 5 MPs. The Activation range for the HQ is 10 MPs. If a Player activates a Cadre, it may activate some or all the Units from the same division within the command range of the Cadre at the cost of 1 unit.
7�5�2: There are restrictions on which HQs and Units may be activated for Reserve Movement.
• The HQ and units must be Fresh.
• The HQ and Units must all have an LOC at the time of activation.
• Neither the HQ nor the Units may be activated if they begin the segment in an enemy ZOC. Once activated, they may move through an enemy ZOC at the normal cost of +1 MP added to the terrain cost.
7�5�3: HQs and Units using Reserve Movement become Spent. Flip the counters to their Spent sides before moving. You must change to Cross
Country mode (you may not use road column when moving in the reserve phase) to move in the reserve movement segment. You may deploy in non-clear terrain if you have the movement allowance remaining. All normal rules for movement apply (restricted terrain reductions and leg movement costs).
7�5�4: Reserve Movement limits forces as follows:
• Units using Reserve Movement may not declare combat but may support a combat
• NATO HQs and Units may not move east of the hex row already occupied by the easternmost NATO HQ or Unit.
• Warsaw Pact HQs and Units may not move west of the hex row already occupied by the westernmost Warsaw Pact HQ or Unit.
In the Balkans game, the following restrictions apply:
• All forces may not move any hexes farther away from any one friendly supply source than the friendly unit that is currently farthest away from a friendly supply source.
7�5�5: When the Reserve Movement of all activated forces is complete, if the reserve movement activated HQ did not move and has an LOC, the non-phasing player may spend Supply Points to refresh the active HQ. The cost is:
Player HQ is in: Supply Cost:
NATO In any initially controlled WP Country 3
NATO In any other country 1 Warsaw Pact In any initially controlled WP country 2
Warsaw Pact In any other country 4
Note: Neutrals that might join later in the game do not count as initially controlled countries.
All of the phasing player’s active Units that are not in an enemy ZOC AND did not participate in a Meeting Engagement may move an extra 3 MPs. These Units may not enter an enemy ZOC at any time during this movement. Remember that a friendly Unit in a hex negates an enemy ZOC in that hex for all game purposes (including this).
Bonus Movement is available even if the active Units are Spent. These units may spend movement points to deploy in non-clear terrain.
7�7�1: Combat in The Doomsday Project is a multi-step process and unusual because Units do not have attack or defense strengths. Combat is resolved by comparing die
rolls, modified by several factors. Once combat has been declared, it must occur. You cannot cancel an attack you have previously declared. A target hex may be the Combat Hex in multiple combats per Activation Phase, but there can only be one Combat Chit at a time in any given hex.
7�7�2: The Combat Segment occurs in several steps for each placed combat chit placed. Complete the combat steps for each combat chit before beginning steps for the next combat chit.
Step 1*: The opposing player performs any Reserve Movement (see 7.5)
Step 2*: The Phasing Player may perform Bonus Movement (7.6)
Step 3: Both sides (attacker first) declare their types of support (which equipment will be used, and if artillery, ground support and/or helicopter support will be attempted)
Step 4: Examine the Combat Chit (7.7.3)
Step 5: Resolve Random Events (if they occur; 7.7.5)
Step 6: Determine Combat DRMs (7.7.4)
Step 6A: Size and Terrain Support
Step 6B: Unit Equipment Support
Step 6C: Artillery Support
Step 6D: Air Support
Step 6E: Helicopter Support
Step 7: Add any Other DRMs
Step 8: Roll Combat Die Rolls, place Elite/Guards, Poor/ Penal markers if applicable (7.7.8)
Step 9: Determine Winner and Combat Spread (7.7.9)
Step 10: Honor Spread (7.7.10)
Step 11: Advance after Combat (7.7.11)
Step 12: Exploitation Movement (7.7.12)
Step 13: Resolve After Combat losses (7.8)
Step 14: Check Stacking (7.9)
Step 15: HQ Movement or HQ Refresh Segment (7.10)
Step 16: Bivouac Segment (7.11)
*Steps not performed if this is a Meeting Engagement
7.7.3 Examine the Combat Chit: The Combat Chit in the Combat Hex contains valuable information for combat resolution. It is read as follows:
• The top center entry and background artwork tell you the type of die to roll—D6 or D10.
• In parentheses on the top left are, any attacker Die Roll Modifiers (DRM). Example: D6 (+1) means roll a sixsided die and add 1 to the attacker’s roll. The defender uses a D10 if Fresh (and they become Spent) or a D6 (if Spent or if they are Fresh and wish to stay that way).
• The upper right corner (RE) tells you if there is a Random Event and if so, what Random Event Table to use.
• The lower left corner (Spt) tells you how much artillery, ground support (from aircraft), or attack helicopter support the attacker will have from the upcoming combat. A is the worst support level; while D is the best level. The defender’s values are based on the type of combat declared.
• The lower right corner (Adv) tells you how many MPs the attacker gets for Exploitation Movement following any Advance after Combat.
A. Size DRMs: The owning player of any friendly Units— Fresh or Spent—adjacent to the Combat Hex but not in a hex currently with a Combat Chit, may add to the size of the Attacking or Defending Unit. Each player determines which of his adjacent Units will be adding their value to a combat. A unit does not need to have a Line of Communication to add to the size of the combat but must be able to legally enter the combat chit hex using cross-column or road column movement. Any units used this way are considered “in the combat” and are susceptible to combat losses in the upcoming combat.
• The unit that was used to declare combat and all units stacked in the same hex as that unit must add their size if allowed. All units that are defending in the combat hex also must provide their size to the combat. Any additional units adjacent to the combat hex may provide their size to the combat at the owning player’s choice.
• Exception: Units in road column may never add adjacent units into the Combat. Only units stacked in the hex with the combat-declaring Road Column Unit may add their size to the combat.

7.7.4 Determine Combat DRMs:
Generally, in a combat, both sides will roll a die to determine the winner of the combat. Added to the combat roll are die roll modifiers that will determine the final result. These are totaled and tracked using the NATO and WP DRMs marker (for terrain, size primarily - and anything other than equipment support), and the NATO and WP Support Marker (for equipment and support benefits) on the Combat Die Roll Modifier track on the General Game Display. There are two types of Combat DRMs, those for size and terrain (use the DRM marker for this), and those that are affected by types of equipment and support (use the Support marker for this).
Add both of these markers together to get a final modifier to your die roll.
Note: these markers are separate to make changes to the values from random events or other game functions as the sequence progresses easier to adjust during play.
• Fresh Units adding their size during a Meeting Engagement become Spent. Fresh Units providing their size in any other type of combat remain Fresh.
• After determining the size of both the attacking force and the defending force, form a ratio of the attacker’s size to the defender’s size and round down to the nearest whole integer. Add the following value to the DRMs marker on the Combat Modifier track. Note that the size value can be modified by the type of combat and the deployment status of both the attacker and the defender.
Odds
Special Rule: Attacking a 0-size unit
If one side has 0-size and the other has at least 1 size, the side with at least 1 size gains a +4 modifier.
If defender has a total 0-size modifier, and the attacker has at least 1 size modifier, combat can be resolved normally if the attacker wishes but the attacker may also resolve the combat as follows:
The attacker may spend 1 movement point and roll a D6, or 2 movement points and roll a D10. There are no modifiers to this attack (for either the attacker or defender) and after this attack, the attacking player’s unit may continue to move normally. The rolled value is the spread (normal maximums apply to this spread) and the defender resolves but can only retreat hexes to honor the spread (thus a result of 4 or more will eliminate the 0-size unit). There is no advance after combat in this type of combat, but the attacker may continue to move with its remaining Movement Points. Troop quality is not changed in this special combat if either or both players roll a 1 or a 6 (d6) or 10 (d10).
If both sides have a total of 0 size, the attack must be resolved normally.
If it is a deliberate attack, double the size value of all attackers “in the combat”.
attacker will be using. Any units that are “in the combat” may be used to choose the type of equipment used.

Only one type of equipment may be declared in a combat for each side regardless of the number of Units in the combat.
Each type of equipment has a value marked on their NATO (for NATO equipment) or their Warsaw Pact (if Warsaw Pact equipment) on their respective Player Aid. This is called Equipment Support. Note that this value on the chart never changes. Losses are tracked by individual units that may not be able to use all of the value as noted on the Terrain Effects Chart.
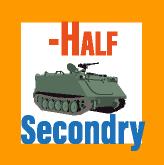
For example, if the M60 value on the chart is 6 and a primary equipped M60 unit has a -2 Primary Support marker on it, that unit (alone) may roll to see if they roll a 6 or less but will check on the Terrain Effects Chart to see what equipment modifier is given to the unit in combat with that loss marker against a unit in that type of terrain. A secondary equipped M60 that has a Half Secondary marker on it still rolls to see if it gets a 6 or less to be able to use its equipment. It looks at the Secondary Equipment column
Status markers on Units which are adjacent but not supporting (because you held them out of the combat) do not affect the combat. For example, one adjacent unit has a “Poor” marker on it, and another has “Elite” on it, the owner may choose to only include the “Elite” marker to apply to the combat. Markers in the Combat Hex and on the attacking Unit(s) always apply to the combat. All supporting Units, along with the Attacking and Defending Units, are eligible to receive any markers drawn from the Cup of SNAFU (13.0) during the combat—the choice of which side of the marker and upon which Unit the marker is placed belongs to the player who drew the marker.
B� Terrain Modifier: For the defender to receive a terrain modifier, it must be deployed in that type of terrain. Units in clear terrain do not receive a terrain modifier. The Terrain Effects Chart has the terrain modifier for each type of terrain in which a unit is deployed. “Dug In” and “Entrenched” markers are used as extra losses that may be applied in combat without affecting the defending player (see 7.7.10).
Add these two values together and mark the total using the NATO/WP DRM value on the Combat Modifiers Chart on General Display Chat.
7.7.4.2:
All units in the game will have either both Primary and Secondary Equipment, just Primary Equipment or just Secondary, or no equipment. Equipment may allow you to add an additional modifier to your combat die roll. If you have both primary and secondary equipment in a unit, the owning player may choose which equipment to use. A player may choose to not use equipment at all if they wish. The attacker always announces which if any equipment he will use in a combat the defender may then choose his equipment to use in the upcoming combat after learning what the
The type of terrain in which the Combat Chit is located determines the type of terrain for equipment support.
Designer Note:

The game allows for very easy changes in the values here. If you disagree with my values, just change the value on the chart to what you think works better for you.
To use your equipment, roll a D10 and compare the roll to the equipment support. If the roll is equal to or less than the equipment support value, the modifier for the terrain type of the combat hex (as shown on the Terrain Effects Chart) for that type of equipment is placed on the Combat Modifier chart on the display. This is called the Support Modifier. You roll the Equipment Support value or less to then receive the modifier for equipment based on that type of terrain. Remember, the defending unit must be deployed in that type of hex to gain that modifier. A deployed (but with no In-Primary or In-Secondary Terrain marker) is considered in clear terrain.
If you are using econdary equipment, use the secondary equipment modifier on the Terrain Effects Chart using the same procedure but the applicable column on the Terrain
Effects Chart. There are two general classes of equipment, Tanks and APCs/IFVs. Either may be Primary or Secondary. 7.7.4.3 Artillery
Artillery is tracked by Corps (for NATO) and Army Group (for the Warsaw Pact). Just like units, the value on the support track is always the same (per nation), but the individual corps/Army Group HQ may suffer losses and is marked with a -1/-2/Half/No marker on the HQ to offset the track value. This is different from equipment in that the loss marker is deducted from the roll needed to add artillery support. Only units of that Corps/Army Group may use that Corps/Army Group artillery – and a unit of that Corps/Army Group must be present “in the combat” to allow use of that Corps/Army Group artillery. Only one Corps/ Army Group may provide artillery support in a combat.
The Support level on the Combat Chit determines the effect of the Corps/Army Group artillery. Each player that declared artillery support rolls a D10 and compares it to the (possibly modified from losses) Corps/Army Group Artillery value and if a player rolls equal to or less than the value, the following is applied at the appropriate Support Level. If both players declared Artillery Support and one passed the roll and the other did not, the player that failed the roll takes one Artillery loss from the Corps that provided the artillery (representing counterbattery fire).
This procedure is performed prior to rolling dice to determine the final combat. Losses are applied immediately and can alter the support value. Combat Chit Support Levels for the attacker and result if the attacker is successful in his artillery support roll:
three to the Attacker’s support value.
Add four to the attacker’s support value.
any Dug In markers in the Combat Chit hex. The defender in the hex, should he lose, must pay a Size step as his first loss in the combat.
D. Add four to the attacker’s support value and remove any Dug In or Entrenched markers in the Combat Chit hex. The defender in the hex, should he lose, must pay a Size step as his first loss in the combat and then may only use retreats as losses (up to 3) for the remainder of losses (thus he may not use replacements or victory points to honor the spread).
The Terrain in the Combat Chit hex may modify this value as well. Add the final total to the attacker’s Support marker (added in addition to the player’s equipment modifier determined in rule 7.7.4.2).
Use the type of combat to determine the result if the defender is successful in his artillery support roll:
• Meeting Engagement – Add 3 to Defender’s Support value and reduce the exploitation value on the combat chit by 1 (less than 0 stays 0).
• Hasty Attack – Add 4 to Defender’s Support value, reduce the exploitation value on the combat chit by 2 (less than 0 stays 0), and one size loss is suffered by one attacking unit in the combat.
• Prepared Attack – Add 4 to Defender’s Support value, reduce the exploitation value on the combat chit by 2 (less than 0 stays 0), one size loss is suffered by one attacking unit in the combat.
• Deliberate Attack – Add 5 to Defender’s Support value, reduce the exploitation value on the combat chit by 2 (less than 0 stays 0), and one size loss is suffered by one attacking unit in the combat.
A player that declared ground support for the upcoming combat must roll against their ground support value (as shown on the Player aid). At least one unit of one country involved in the combat must be present in the Ground Support box on the Air Display to allow ground support by that country. Only one country may perform ground support in any one combat.
If they roll equal to or less than the Ground Support value on the Player Aid, perform ground support for the combat. Take one or two aircraft out of the Ground Support box, perform any applicable interception combat (10.4.3) then perform SAM combat (10.5) and if the aircraft survives both, add the total plane value of the one or two aircraft to the support value marker for the upcoming combat. The Ground Support value on the Player Aid does not decrease as planes from the Air Display are used in a combat. See
rule 7.7.4.4 for additional information.
• Support Level A or B: one plane may be added
• Support Level C or D: two planes may be added
The defender, if he rolls equal to or less than his Ground Support value on the Player Aid, may add one plane if a Meeting Engagement and up to two if any other type of attack. He follows the same procedure as the attacker in adding plane support values to the combat.
A player that declares helicopter support must roll against his Helicopter Support Value as shown on his player aid. At least one unit of a country must be present to roll against that nation’s Helicopter Support value and only one country may use helicopter support.
Helicopter Support is received if you roll equal to or less than your current Helicopter support value. If a player rolls equal to or less than this value, one loss is applied to the equipment used in the attack by the opponent. If no equipment was used, no loss is applied. If a player failed the roll, subtract one from the Helicopter Support Value for that nation.
If the drawn Combat Chit has a random event, check the letter that applies and either play rolls a D10 on the appropriate table (A, B or C). Apply results immediately after determining the random event. Any impact from the event will apply to the upcoming combat.
The attacker rolls a D6 or D10, as indicated on the Combat Chit. The defender rolls a D10 if the Defending Unit is Fresh or a D6 if it is Spent. If the Defending Unit is Fresh and chooses to roll a D10, it becomes Spent.
1 Reporters present - add a revealed Objective in the hex.
2 Defender draws from the Cup of SNAFU (attacker chooses marker type; must be placed)
3-6 Attacker draws from the Cup of SNAFU (defender choosers marker type; must be placed)
7-9 Lost marker is placed by the NATO player on any Warsaw Pact Unit in the combat. If no unit applies, the event is ignored.
10 Lost Marker is placed by the Warsaw Pact player on any NATO in the combat. If no unit applies, the even is ignored.

1-2 Reporters present - add a revealed Objective in the hex.
3-4 Defender draws from the Cup of SNAFU (attacker chooses marker type; must be placed)
5-6 Attacker draws from the Cup of SNAFU (defender choosers marker type; must be placed)
7-8 Lost marker is placed by the NATO player on any Warsaw Pact Unit in the combat. If no unit applies, the event is ignored.
9-10 Lost Marker is placed by the Warsaw Pact player on any NATO in the combat. If no unit applies, the even is ignored.
7.7.9 Determine Winner and Combat Spread: The player with the highest modified die result wins the combat. In case of a tie, the defender wins.
7�7�9�1: Units participating in the combat are the Attacking Unit (which declared the combat), the Defending Unit, and supporting Units of both sides.
7�7�9�2: The Combat Spread determines how many losses the losing Units must take. The Combat Spread is the difference between the two modified die results. In case of a tie, the Combat Spread is considered to be 1 against the attacker.
1-3 Reporters present - add a revealed Objective in the hex.
4 Defender draws from the Cup of SNAFU (attacker chooses marker type; must be placed)
5-6 Attacker draws from the Cup of SNAFU (defender choosers marker type; must be placed)
7 Lost marker is placed by the NATO player on any Warsaw Pact Unit in the combat. If no unit applies, the event is ignored.
8-10 Lost Marker is placed by the Warsaw Pact player on any NATO in the combat. If no unit applies, the even is ignored.
Note: Leaders gained through random events may allow players to re-roll their combat dice.
7.7.7 Apply Modifiers: Add your total DRM to your die roll to get your modified die result.
7.7.8 Check for Unit Quality: Some units begin the game with a troop quality. These units are treated exactly as if they had the same type of marker on them. If you roll a natural 1, place a Poor/Penal Unit marker on one of your Units in the combat. If you roll a natural 10 (on a D10) or natural 6 (on a D6), place an Elite/Guards Unit marker on one of your Units in the combat. You can place a Poor/Penal Unit marker or an Elite/Guards Unit marker on any Unit participating in the combat as Attacking Unit, Defending Unit, or supporting Unit, but no Unit may receive a second quality marker, unless all participating Units on your side already have one (or are so marked on their counter). If all Units from your side in the combat already have quality markers (or are so notated on their unit), you must replace an existing quality marker with the one just drawn. Sometimes weak Units surprise you; sometimes stalwarts fail.
7�7�9�3: Should the attacking player (only) have the higher total support value, and they lose the combat (only – meaning they lost the die roll comparison), they may choose to “Press their Attack”. To do this, apply the used equipment losses to the attacker. For each equipment step lost, 2 may be added to his already rolled value up to a maximum of the difference of the two equipment values. You can’t lose more equipment than you have.
For example, the attacker has a +6 equipment modifier for the combat and the defender has +3. The attacker may choose to add 2 to his roll if he takes one equipment step loss or 3 to his roll if he takes 2 equipment losses.
7�7�9�4: The Combat Spread has a Maximum. Normally, the Maximum Combat Spread is 5.
The Maximum Combat Spread is adjusted if Units of high or low quality participate in the combat. The adjustments are cumulative, yielding a range of 3-7 for the Maximum Combat Spread. Use the following rules to adjust the Maximum Combat Spread:
• If any participating Unit (or Units) on the winning side has a Poor/Penal marker on it, subtract 1 from the Maximum Combat Spread.
• If any participating Unit (or Units) on the winning side has an Elite/Guards marker on it, add 1 to the Maximum Combat Spread.
• If any participating Unit (or Units) on the losing side has a Poor/Penal marker on it, add 1 to the maximum Combat Spread.
• If any participating Unit (or Units) on the losing side has an Elite/Guards marker on it, subtract 1 from the maximum Combat Spread.
Example: In a combat, the modified die rolls differ by 8. The NATO Player wins and has an Elite Unit in the combat, which increases the Maximum Combat Spread from 5 to 6. The Warsaw Pact Player takes 6 losses.
Note: you don’t change the spread determined by comparing die rolls – you only change the maximum possible spread of the combat. If the rolled spread is 1 and elite units are present on one side, it would still be a spread of 1.

7�7�9�5: Changes to the Maximum Combat Spread due to troop quality are enforced even if the marker was just placed as a result of die rolls in this combat.
7.7.10 Take Losses: Units from the losing side must take losses using the following rules.
If the losing side cannot take the required losses, all losing Units are eliminated (sent to the Replacements Box). Fortunately, there are several ways to take losses. The losing side may usually take its losses using any combination of these methods. However, see Artillery support (7.7.4.3) and the Leader rules (14.4).
A. Retreat a Unit or Units 1-3 hexes: retreating one Unit satisfies a loss for each hex retreated. Multiple units (all must be part of the combat to be eligible) may retreat to satisfy this, and each unit retreated one hex counts as one towards the spread. A Fresh Unit which retreats becomes Spent. A unit must retreat towards a friendly supply source. Each hex retreated into must be further away from the Combat Hex and closer to the friendly supply source, and if it retreats though an enemy ZOC, losses are applied as it retreats. No one unit may retreat more than 3 hexes. Immobile units cannot retreat.
B� Pay a Replacement Point: If your commander allows it, you can pay Replacement Points from your Replacements, Infrastructure, and Supply Track to satisfy losses if this is a Meeting Engagement or a Hasty Attack. You must have an LOC for at least one unit in the combat (for the attacker) or from the combat hex (for the defender) to satisfy losses with a Replacement Point(s). 0 size units may not receive Replacements in combat.
If any Unit…
Then…
C. Spend Size: you can may spend one size value for each loss.
D. Spend Dug In markers: A Dug In marker in the combat hex can be removed for up to two losses.
E� Spend Entrenched markers: An Entrenched marker in the combat hex can be removed for up to three losses.
F� Spend Victory Points: If your commander allows it, you may spend victory points to honor losses.
G� Eliminate all Units participating in the combat. You may always choose to eliminate all of your Units participating in the combat. This satisfies all required losses. If you only have one Unit in a combat, eliminating that Unit still satisfies all losses.
7.7.11 Advance after Combat: If the attacker won the combat, and the defender has vacated the Combat Hex, the attacker may Advance after Combat.
7�7�11�1: The attacker may move active Units that participated in the combat (both the declaring Unit and any active supporting Units) into the Combat Hex, ignoring stacking for a moment. This costs no movement.
7�7�11�2: Non-active Units may not Advance after Combat, even if they provided Combat Support.
7�7�11�3: Defending Units may never move after combat, except to retreat.
7.7.12 Exploitation Movement: All Units that advanced into the Combat Hex after combat may now conduct Exploitation Movement. The number of MPs available for
...retreats two hexes place a Disrupted marker on it at the completion of the retreat and opponent draws from the Cup of SNAFU for the retreating Unit, after the retreat is completed. If the retreating player used artillery support, the Corps that provided support takes one artillery loss as well. Enemy units have overrun the friendly unit’s artillery park in the retreat.
...retreats three hexes place a Routed marker on it at the completion of the retreat and opponent draws twice from the Cup of SNAFU for the retreating Unit, after the retreat is completed. If the retreating player used artillery support, the Corps that provided support takes two artillery losses as well. Enemy units have overrun the friendly unit’s artillery park in the rout.
Is 1) Disrupted or Routed and 2) enters or passes through an enemy ZOC after a combat when enemy Artillery Support was used
For the first enemy ZOC retreated into:
For the second and each additional enemy ZOC retreated into:
Reduce the size value by 1 for each unit that retreats into a hex with an enemy ZOC
Reduce the Primary Equipment Level by 1 (if Disrupted) or 2 (if Routed). Reduce Secondary equipment by 1 (if Routed).
Reduce Primary Equipment by 2 (if Disrupted) and 3 (if Routed). Reduce Secondary Equipment by 1 (if disrupted) and 2 (if routed)
Note: If your opponent draws a SNAFU marker which cannot apply to your retreating Unit, ignore the marker and return it to the Cup of SNAFU. While the Disrupted or Routed marker is placed at the end of the retreat, a unit that will receive this marker is considered disrupted or routed the moment it starts its retreat.
an exploitation move is the “Adv” number on the Combat Chit. All normal movement rules apply. Once all Exploitation Movement is complete, stacking rules are again enforced.
7.7.13: Clean Up: Return the Combat Chit to its cup. It can be drawn again in the next declared combat.
If the following situation occurred in the previous combat, apply as follows:
• If both sides used Tanks as their equipment support (either successfully or not), the side with the lower Tank Support value takes one Tank Equipment loss. If the values are even, the Warsaw Pact takes one equipment loss. Use the unmodified value for the Tank on the support track and disregard any markers on the unit.
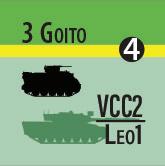

Example: A T-64 attacks an M-60 and both use tank support for the battle. The M-60 is the unit’s secondary equipment and has a “Half Secondary” marker on it. The T-64 would still take a loss after the combat for a Warsaw Pact tank equipment of the same value as the NATO tank.
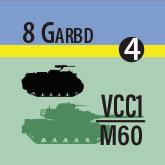
• If one side used APCs/IFVs as their equipment support and the other side used tanks as theirs, the side that used APCs/IFVs takes one equipment loss (Primary or Secondary).
• Apply equipment losses from the terrain attacked per the TEC during this stage. These losses are all cumulative, if applicable.
Check to see if any Units are overstacked and send overstacked Units to the Replacements Box.
The activated HQ may now move up to 10 MPs. If the HQ does not move and has an LOC, the owning player may instead pay Supply Points (see 9.2) to refresh the HQ. If you do this, you can activate the HQ again immediately or save its next Activation for later. To be clear, HQs can activate more than once per Activation Phase as long as they are refreshed at the end of their Activations. A refreshed HQ again has its full capacity to activate Units and move up to 10 MPs during a subsequent Activation. The cost to refresh the active HQ is listed in 9.2.
At the completion of the activation and after the HQ is refreshed or not, remove all Road Column and
Cross-Country markers from all just active units. These units are now deployed in clear terrain until they are active again. They have gone to bed for the night.
If Night Battle comes up as a Combat Chit draw, the combat routine changes to the following:
Roll the die to see which side has the advantage in the upcoming combat.
1-5: NATO 6-10 Warsaw Pact
Subtract 2 from the roll if any US, West German, or British forces are “in the combat”.
Subtract 1 from the roll if the combat takes place in the home country of any forces “in the combat” if in a NATO country.
Add 1 if the combat takes place in the home country of any forces “in the combat” if in a Warsaw Pact country.
These are cumulative.
Should a Night Battle combat occur, remove the current combat chit and place the Night Battle marker on the same hex (if the attacker has the advantage) or on the Attacker’s unit that placed the chit if the defender has the advantage. The side without the advantage loses two equipment levels from his declared equipment support and no forces other than the units in the original combat chit hex and the unit that placed the combat chit may be in the combat. The rest of the combat proceeds as normal.
Optional rule: players may dim the lights at the game table for a night battle to make it harder for their opponents to see their die rolls.
First the Warsaw Pact Player, then the NATO Player, may move friendly Units from the map to the Replacements Box. This is an opportunity to reclaim Units which can no longer be activated due to distance or being surrounded by enemy ZOCs. Remove all Radio-Out markers (13.1.2).
Note: Either Player wins the game immediately by controlling all his opponent’s Supply Source hexes (3.6.3) at the end of any game turn. Otherwise, determine victory as described below.
During the Victory Check Phase, players may claim Objective markers. A player claiming an Objective marker gains
the VPs shown on the marker. During this phase, there may already be Objective markers on the map from previous turns or from Random Events that have not been claimed.
8�2�1: If a player has 21 points and gains victory points, those points are deducted from the enemy total. If a player has fewer victory points and what they might lose in victory points through play, the remaining victory points that cannot be lost are instead added to their opponent’s total.
Players may “pay” victory points to do several game actions. They may do this even if they have 0 points but by adding the victory points to his opponent’s total.
8�2�2: It is possible to accumulate more than 21 VPs.
8�2�3: Objective markers are placed per the scenario instructions and are always placed without the victory point value revealed. Neither player should know what an unrevealed marker is worth. Objective markers are revealed when an enemy unit enters the hex or if placed by random event (in which case, they are revealed immediately.
Check whether either player has reached 21 or more VPs and his opponent has 0. If so, he wins the game.
Players will claim revealed Objective markers in this step. To claim a revealed Objective marker, you must have a friendly unit on the hex and that unit must have an LoC. Note that while an enemy might reveal the value of the marker, either player may claim the marker and add it to his total in this step should they have a unit on the marker and that unit has an LoC. Once claimed, add the value of the marker to the owning player’s total and
place the Objective marker back in the cup (so it can be drawn again as needed).
Players may perform political actions during this phase. This includes attempting to change the status of nations, force political leaders to be removed from play, and relieve military leaders. See 17.0 for more information
Advance the turn marker.

Both players have an Infrastructure marker and a Supply marker. The infrastructure marker is used to show the state of that side’s capability to supply his forces (the state of the road network and ability to send supplies to their armies). The Supply marker is used to show what supplies are available to spend.

First the NATO Player, then the Warsaw Pact Player, may spend Supply Points they have remaining to perform several actions as listed on the 9.2 Supply Point Expenditure Table. Supplies can also be spent during other phases for different things, but this is the one phase in which the following actions in the chart may be performed.
9�1�1: The Infrastructure value has a maximum value as shown on the chart. The minimum
1 The Warsaw Pact Player flips a Spent HQ with an LOC that is in any country that started friendly to his side, or in the owning country of the HQ, at the start of play to its Fresh side. This can occur both during the activation phase and in the Supply and Infrastructure phase.
2 The Warsaw Pact Player flips a Spent HQ with an LOC that is currently in any other country to its Fresh side. This can occur both during the activation phase and in the Supply and Infrastructure phase.
1 The NATO Player flips a Spent HQ with an LOC that is in any country that started friendly to his side, or in the owning country of the HQ, at the start of play to its Fresh side, during the Activation or Supply and Infrastructure phases.
3 The NATO Player flips a Spent HQ with an LOC that is in any other country to its Fresh side. This can occur both during the activation phase and in the Supply and Infrastructure phase.

1 The NATO player may remove one Refugee Marker from the Refugee box.
2 Either player wishes to improve their Infrastructure by 2 points (may only be done once per Supply and Infrastructure Phase and cannot exceed the maximum value allowed).
1 Either player wishes to place a Dug In marker on one of its deployed Units.
2 Either player wishes to place an Entrenchment marker on one of its deployed Units.
1 Flip a Suppressed SAM marker to its Unsuppressed side. Recompute SAM Support Value.
value for Infrastructure for both sides is 2. It may never be reduced to less than this value nor to more than the maximum value for each side. Unless otherwise listed, these actions may only be performed during the Supply and Infrastructure Phase of the game turn.
See the 9.2 Supply Point Expenditure Table on the preceding page for the costs of various actions.
After spending any Supply in this phase, place your Supply marker on top of your Infrastructure marker on the Player Aid Track. This is the amount of Supply Points you will have for the turn until this phase occurs again.

Note that Supply does not accumulate from turn to turnit resets each turn.
After this is done, the NATO player must reduce his Infrastructure value by one for each two Refugee markers in the Refugee box (round down – three Refugee markers would reduce the Infrastructure value by 1). The NATO player may, if he chooses, not pay this cost and instead give one Victory Point to the Warsaw Pact player for each 2 Refugee markers that were not used to reduce his Infrastructure value.See 14.5 for more information on Refugee markers.

Note: If you reduce the Infrastructure value, the Supply marker does not reduce with the Infrastructure marker. The Supply marker stays where it is on the track until the next Supply and Infrastructure Phase when they join up again.
Both players perform the following actions in this order during the Air Allocation Phase of the Game Turn.
1) Both players return friendly Aircraft that are still in Air Mission Boxes to their respective Available Aircraft Boxes
2) First the NATO Player, then the Warsaw Pact Player, attempts to repair damaged Aircraft.
a. Roll a D10 for each Aircraft in your Damaged Aircraft Box on the Air Display. Each country has the required roll to repair aircraft on the Air Display. If you roll this number or less, the Aircraft is repaired.
b. Repaired Aircraft move from your Damaged Aircraft Box to your Available Aircraft Box. If at reduced strength, the counters are not flipped to their full-strength sides.
10�2�1: Use your Air Display to assign your Aircraft to Missions. You may only assign Aircraft in the Available Box to Missions. In addition, each Aircraft must be assigned an Airfield from which to launch.
10�2�2 There are several NATO airfields printed on the Doomsday-Germany map. If a Warsaw Pact unit enters a hex with an airfield symbol, permanently remove one airfield marker from the West German Airfields box. If a Warsaw Pact unit enters hex 15.38 on the Doomsday-Germany map, remove two airfield markers from the West German Airfields box.
10�2�3: Each NATO undamaged airfield in an Airfields box can launch up to 5 aircraft per Airfield. Each undamaged Warsaw Pact Airfield can launch up to 4 aircraft. This number can be reduced by Spetsnaz raids, SSM attacks and/or Chemical Attacks on an Airfields box, by the Scenario instructions, or by notes in the Airfields box itself. The owning player chooses which aircraft use which airfields to fly.
Note: there are restrictions on which nation’s aircraft can fly from which Airfields boxes listed on the Air Displays.
A Harrier Aircraft does not need an Airfield to fly and may always fly missions.
Aircraft that use an airfield to fly may perform missions. If there are not enough airfields for all aircraft to fly, the remaining aircraft stay in the Available Aircraft box for the turn and are not available for use.
10�2�4 To assign your Aircraft, follow these steps:
A. Move the counters from the Available Aircraft Box and place them on top of your available airfield counters. The limit is up to 5 aircraft counters per airfield counter for NATO, and up to 4 aircraft per airfield counter for the Warsaw Pact.
B. Move your Aircraft counters from your Airfields to their assigned Mission Boxes.
10�2�5: You may assign Aircraft to the Missions shown on the table on the facing page.
10�2�6: Resolve Strategic Missions during the Strategic Air Mission Resolution Phase. Tactical Missions are resolved during the Activation Phase.
10�2�7 Add up all the Tactical Mission ratings for Aircraft placed in the Ground Support Box for each Nation and place the Ground Support marker on that value on the Player Aid. The marker value cannot exceed 9 although Aircraft

A. Select one Strategic Mission Box containing enemy Aircraft.
B. For each Aircraft you have in the Air Superiority Box, target one enemy Aircraft in the selected box.

C. Each of your Aircraft fires only once.
D. Apply the following modifiers to the Aircraft’s ability:
• +2 if the Attacking Aircraft has an Ace
• -1 If the weather is rainy for NATO, -2 if the weather is rainy for Warsaw Pact.
• -1 if it the aircraft is reduced
Roll a D10. If the result is equal to or less than your Aircraft’s Air-to-Air Ability, the target is damaged. If the target Aircraft is at full strength, flip it to its reduced side and place it in its Damaged Aircraft Box. If the target Aircraft is already reduced, remove it from play.
Free Attacking Aircraft may not be fired upon. When all Free Attacking Aircraft have fired, return them to their Available Aircraft Box.
10.3.2 Infrastructure Strikes:
1. Perform enemy SAM fire on the striking aircraft (see 10.5)
2. For each Aircraft in the Infrastructure Strike Box, roll a D6 and compare the result to your aircraft’s Strategic Missions Ability.
Apply the following modifiers to your aircraft’s Ability:
• -1 if the weather is rainy for NATO aircraft, -2 if the weather is rainy for Warsaw Pact aircraft.
• -1 if it the aircraft is reduced
• +2 if the aircraft has an Ace
Note if the value for an Aircraft is less than 1, it may still fly the mission but must roll a 1 to succeed and the hit will be less valuable than a 1 rolled with other aircraft.
Compare the strike’s roll to the results on this table:
≤ Aircraft’s Strategic Missions Ability, but greater than 1.
Reduce the enemy Infrastructure value by 1.
Modified roll of 1 Reduce the enemy Infrastructure value by 2.
If the Aircraft had a modified value less 1 and rolled a natural 1
Reduce the enemy Infrastructure value by 1.
Otherwise, the strike has no effect. When Infrastructure
airfields in this box are affected.
For each aircraft in the Airfield Strike Box, roll a D6 for each of your attacking Aircraft and compare the result to each of your aircraft’s Strategic Missions Ability.
Apply the following modifiers to your Aircraft’s Ability:
• -1 If the weather is rainy for NATO Aircraft, -2 if the weather is rainy for Warsaw Pact Aircraft.
• -1 if it the aircraft is Reduced
• +2 if the aircraft has an Ace
Note if the value for an Aircraft is less than 1, it may still fly the mission but must roll a 1 to succeed and the hit will be less valuable than a 1 rolled with other aircraft.
Compare the strike’s roll to the results on this table:
≤ Aircraft’s Strategic Missions Ability Damage an Airfield in the targeted Airfield box. Flip the Airfield to its Damaged side. Modified roll of 1 Damage two target Airfields in the targeted Airfield box. Flip both Airfields to their damaged side.
If the Aircraft had a modified value less 1 and rolled a natural 1
Damage the targeted Airfield. Flip the Airfield to its Damaged side.
Otherwise, the strike has no effect. When Airfield Strikes are complete, return the Aircraft in the Airfield Strikes Box to their Available Aircraft Boxes.
1. Perform enemy SAM fire on the Striking Aircraft (see 10.5)
2. For each Aircraft in SAM Suppression Box, roll a D6 and compare the result to your Aircraft’s Strategic Missions Ability.
Apply the following modifiers to your Aircraft’s Ability:
• -1 If the weather is rainy for NATO Aircraft, -2 if the weather is rainy for Warsaw Pact Aircraft.
• -1 if it the aircraft is reduced
• +2 if the aircraft as an Ace
Note if the value for an Aircraft is less than 1, it may still fly the mission but must roll a 1 to succeed and the hit will be less valuable than a 1 rolled with other aircraft.
≤ Aircraft’s Strategic Missions Ability, but greater than 1.
Suppress two SAM markers. Flip two over to their suppressed side. Recompute that side’s SAM Support and adjust the marker immediately.
Modified roll of 1 Suppress four SAM markers. Flip four over to their Suppressed side. Recompute that side’s SAM Support and adjust the marker immediately.
If the Aircraft had a modified value less 1 and rolled a natural 1
Suppress two SAM markers. Flip two over to their suppressed side. Recompute that side’s SAM Support and adjust the marker immediately.
Determine the target of the Nuclear Strike. You may choose one of the enemy’s Airfields boxes, the enemy’s Infrastructure marker or a hex on the map. You can only use Aircraft with Nuclear capability to launch nuclear strikes. There is no roll for this nor is there SAM fire; effects are automatic.
When a Nuclear Strike is complete, return the aircraft to the Available Aircraft Box.
See the 10.3.5 Nuclear Strike Options Table below for target strike effects.
See 18.2 for additional information on Nuclear Attacks and their effect in the game.
Target Striking Player may:
An Airfields Box (max of one attack is allowed per Airfields box)
A hex
Infrastructure Marker
The NATO player may have, as reinforcements, Reforger aircraft available. These are the only aircraft that may fly this mission and the turn the Reforger aircraft arrives is the only turn in which the Reforger mission can fly. Reforger aircraft are always available on the turn they arrive (there is no countermix limit on these nor do losses eliminate them from future use).
To perform a Reforger mission, the aircraft is placed in the Reforger Mission box and if it survives any interception from the Air Superiority box, it automatically succeeds when the mission is completed. There is no SAM fire on Reforger missions.
During this phase, players determine who controls the skies over the battlefield—if anyone. The Bounce Box Airto-Air combat is performed as the first step of the Tactical Air Mission Resolution Phase. All other missions occur as the owning player wishes when the conditions for the mission are met. Once the mission has been completed, return all used aircraft to the Available Missions box for use on the next game turn.
10.4.1 Bounce Box Missions
10.4.1.1 Resolving Bounce Box Air-to-Air Combat: Determine which players have Aircraft in their Bounce Box. This includes Aircraft moved from Air Superiority to Bounce during the Strategic Air Missions Phase.
• If neither player has Aircraft in their Bounce Box, the phase is complete.
• If both players have Aircraft in the Bounce Box, conduct Air-to-Air Combat.
• Remove 1 Airfield marker from the chosen box. Place it back in the pool of counters, not in the Damaged Airfields box.
• Remove 2 Aircraft from the Available or Damaged Aircraft boxes (owning player choice).
• Place a Fallout marker in the targeted Airfield box.
• Airfields in that box have their fly-per-airfield capacity reduced by one.
• Move any Units in the hex to their Replacements Box
• Place a Nuclear Fallout marker in the hex.
• Any HQ entering the hex will be Displaced.
• No Unit may end its movement in the hex.
• The hex no longer has any roads of any type running through it.
• Reduce the enemy Infrastructure marker by 4.
• If only one player has Aircraft in their Bounce Box, those Aircraft may be used to intercept enemy Aircraft on other Tactical Missions.
10.4.1.2 Air-to-Air Combat: (This is very similar to the Airto-Air Combat to resolve Air Superiority Missions).
A. Determine the Air-to-Air Ability of each aircraft in the box. Remember to add 2 to the ability if an Ace is with the attacking aircraft, 1 from all NATO Aircraft and 2 from Warsaw pact aircraft in rainy weather, and 1 from all reduced Aircraft.
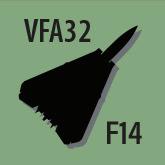
• The Aircraft with the highest modified Air-to-Air Ability fires first.
• If there are multiple Aircraft with the same Air-toAir Ability, take turns firing from those Aircraft, with the player with the AWACS advantage firing first.
B. Proceed through the other Aircraft in the box in order of Air-to-Air Ability, highest to lowest.
When your Aircraft fires, select an enemy Aircraft to target and roll a D10. If the result is equal to or less than your Aircraft’s Air-to-Air Ability, the target is damaged. If the target Aircraft is at full strength, flip it to its reduced side and place it in its Damaged Aircraft Box. If the target Aircraft is already reduced, remove it from play.
10�4�1�3: One significant change from the Air Superiority Box is that no VP is awarded for eliminating all enemy Aircraft in the Bounce Box and no Aces are created.
10�4�1�4 If either player still has Aircraft in the Bounce Box at the end of Air-to-Air Combat, those Aircraft remain in the Bounce Box and are eligible to intercept Tactical Missions. If both players have Aircraft remaining in the Bounce Box, both players’ aircraft are eligible to intercept Tactical Missions.
An Interdiction is an attempt by aircraft to prevent enemy ground forces from taking actions requiring an LOC.
Interdiction Missions may happen during several different phases of the game. See the following table for the types of targets or enemy actions which are vulnerable to an Interdiction Mission.
When the enemy actions listed are attempted, you may first attempt an Interdiction with Aircraft in your Interdiction Box. You may only attempt one Interdiction, with one Aircraft, per enemy unit or HQ, per enemy action, and only after surviving any enemy attempts to intercept your Interdiction mission (10.4.2.2).
10.4.2 Interdiction Mission Results
If the enemy… A successful Interdiction means…
Attempts to moves an HQ or refresh an HQ during the Activaiton Phase
Attempts to flip a Spent Unit to its Fresh side
Calls for Artillery, Ground, and/or Helicopter Support during a combat
Uses Replacements to pay for combat losses
Moves a unit into a new hex using Road Column
The target HQ or Unit cannot use Movement or refresh this turn. Place a HQ Interdicted marker on the HQ.
The target Unit cannot be flipped to its Fresh side this phase.
No Support is available in this combat for the interdicted side.
Replacements may not be used by the interdicted side to pay for losses from the current combat.
Must either Deploy or take an infantry loss
10�4�2�1 Procedure: The Interdicting player announces the Interdiction Mission and selects one (only) Aircraft from his Interdiction Box to perform it. If the other player has units in their Bounce Box available, he may then announce an attempt to intercept the Interdiction Mission (10.4.2.2).
10�4�2�2 Resolution: To resolve an Interdiction Mission:
• Determine whether your opponent wishes to intercept the Interdiction attempt. If so, resolve the Interception first (10.4.2.2).
• Perform SAM Fire (see 10.5)
• If your opponent does not attempt to intercept, or if his Interception fails, roll a D6 Apply the following modifiers to your aircraft’s Ability:
• -1 if the weather is rainy for NATO aircraft, -2 if the weather is rainy for Warsaw Pact aircraft.
• -1 if it the aircraft is reduced
• +2 if the aircraft has an Ace
If the result is equal to or less than the Tactical Missions Ability of the Aircraft, the Interdiction is successful. Apply the result per the table in 10.4.2.
10.4.2.3 Intercepting an Interdiction Mission:
Procedure: If your opponent attempts an Interdiction Mission and you have Aircraft in your Bounce Box, you may attempt to intercept the Interdiction. Your opponent’s Interdiction Mission will consist of only one Aircraft. You may intercept with as many Aircraft as you have in your Bounce Box, but each intercepting Aircraft may fire only once.
10.4.2.4 Resolution: To resolve an Interception against an Interdiction Mission:
• The intercepting player selects one or more Aircraft from his Bounce Box for the Interception attempt.
• For each Aircraft making an Interception attempt:
o The intercepting player rolls a D10.
o Add 2 if the Aircraft has an Ace.
o Subtract 1 from NATO aircraft Tactical Missions ability and 2 from Warsaw Pact aircraft if the weather is rainy.
o Subtract 1 from the Interdicting Aircraft’s Tactical Missions Ability if reduced.
o If the result is equal to or less than the Airto-Air Ability of the intercepting Aircraft, the intercepted Interdiction Mission has failed. Flip the Interdicting Aircraft to its reduced side and place it in the Damaged Aircraft Box. If the target Aircraft is already reduced, remove it from play.
o If the result is greater than the Air-to-Air Ability of the intercepting Aircraft, the Interdicting Aircraft avoided Interception by this Aircraft.
o Whether successful or not, the intercepting Aircraft are done for the turn and placed in the Available Aircraft box.
10.4.3.1 Procedure: If your opponent attempts to call for Air Support (7.7.4.4) for his ground combats and you have aircraft in your Bounce Box, you may attempt to intercept the enemy aircraft on their Ground Support Mission. Your opponent’s Ground Support Mission will consist of one or two Aircraft. You may intercept with as many Aircraft as you have in your Bounce Box, but each intercepting Aircraft may fire only once, at a single target.
10.4.3.2 Resolution: To resolve an Interception against a Ground Support Mission:
• The intercepting player selects any number of Aircraft from his Bounce Box for the Interception attempt.
• For each Aircraft making an Interception attempt:
o The intercepting player identifies a target enemy Aircraft providing Ground Support in the current combat.
o The intercepting player rolls a D10
o Add 2 if the intercepting player has an Ace
o Subtract 1 from NATO aircraft Tactical Missions ability and 2 from Warsaw Pact aircraft if the weather is rainy.

o Subtract 1 from the Interdicting Aircraft’s Tactical Missions Ability if reduced.
o If the result is equal to or less than the modified Air-to-Air Ability of the intercepting Aircraft, flip the target Ground Support Aircraft to its reduced side and place it in the Damaged Aircraft Box. If the target Aircraft is already reduced, remove it from play.
o If the result is greater than the Air-to-Air Ability of the intercepting Aircraft, the Ground Support Aircraft avoided Interception by this Aircraft.
o Whether successful or not, the intercepting Aircraft are done for the turn and placed in the Available Aircraft box.
Note: the Ground Support marker on the Player Aid does not reduce in value when Aircraft are used for Ground Support or when successfully intercepted by the enemy.
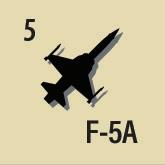
10.4.4.
There are a few NATO reconnaissance Aircraft. These Recon aircraft can only fly recon missions – but all NATO aircraft can fly a recon mission instead of any other mission.
To perform a recon mission, declare the mission is taking place and place one aircraft on a hex the NATO player wishes to recon. The enemy may attack the recon aircraft using any available aircraft in the Bounce box. If the aircraft is a reconnaissance aircraft, there is no SAM fire from the enemy on this mission. If the aircraft is a regular NATO aircraft performing a recon mission, SAM fire is normal.
If the aircraft survives the bounce, it automatically recons the hex on which it is placed. Successfully reconned hexes allow the NATO player to draw an extra Combat Chit and decide which one to use in all combats. This additional draw is added to any other allowed additional draws that might be allowed from other sources. If the Warsaw Pact player is allowed additional draws, this cancels that out –and no extra draws are permitted by either side. If NATO is allowed additional draws from another source, a successful recon allows a maximum of three Combat Chits to be drawn with the NATO player choosing one.
Note that many aircraft used for reconnaissance and in the order of battle for both sides are not present in the counter-mix. These are in the game system to allow for SSM targeting and for reconning hexes for helicopter drops and other game functions.
Both players have several SAM markers that will be placed in the SAM box on their Air Display per the scenario instructions. When allowed SAM fire, total the number of SAMs in the SAM box and divide this number by 3 and round down – this is the base SAM fire
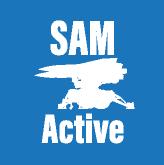
for each player. Mark this value on the Player Aid with that side’s SAM Support marker for use in play. On the Air Display and for each mission, check for a SAM modifier for that type of mission. Subtract that modifier from the SAM Support value and roll a die to resolve SAM fire. Should you roll that number or less, the Aircraft does not complete that mission, is reduced (or eliminated if already reduced) and is placed in the Damaged Aircraft box.
There are three morale states which can adversely affect Units.
Units become Disrupted after retreating 2 spaces following combat.
A unit is considered “Disrupted” the moment it starts a retreat of 2 hexes – even if the marker denoting this isn’t placed until the unit completes its retreat.
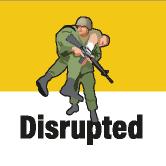
• Cannot retreat in combat,
• The unit’s size may not be counted in combat
• Cannot use Artillery Support if it is the defending Unit in a Combat Hex,
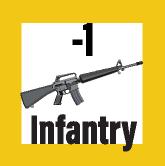
• Remains Disrupted even if flipped to its Fresh side, and
• Removes the marker when an HQ activates it, but the Unit does nothing except remove the marker. This spends the unit.
Units become Routed after retreating 3 spaces following combat.
A unit is considered “Routed” the moment it starts a retreat of 3 hexes – even if the marker denoting this isn’t placed until the unit completes its retreat.
• Cannot retreat in combat,
• Cannot attack or provide Combat Support,
• The unit’s size may not be counted in combat
• Cannot receive any Combat Support of any kind when defending,
• Has no ZOC,
• Removes the marker when an HQ activates it, but the Unit does nothing except remove the marker (this Spends the unit), and
• Gets a Low Morale marker when the Routed marker is removed.
Units that are Routed gain a Low Morale marker when their Routed markers are removed. A Unit with a Low Morale marker:

• May not declare a Prepared or Deliberate Attack until the marker is removed,
• Adds 1 MP to the cost of each hex entered during Exploitation Movement, and
• Removes the marker when it participates in a combat won by its side.
A Unit may have a Low Morale marker and a Disrupted/ Routed marker at the same time if it retreats while having Low Morale. A unit with Low Morale that receives another Low Morale marker is unaffected.
Headquarters (HQs) allow for activation of units throughout the game. Any HQ can activate units (although the activated units must have an LoC to be activated). The Activation Phase ends when all HQs are spent.
HQs and Cadres also provide for a Line of Communications (see 12.1). Both of these types of counters have command ranges displayed on the counter. Range is always traced from the unit attempting to be in communications using the range on the HQ or Cadre to which the unit or HQ is tracing. Line of Communications trace is always done using a hypothetical unit in Road Column mode. Trace cannot be through enemy units and all enemy ZOCs traced through costs an additional movement point.
Exception: Non-banded and non-striped Army HQs must be within 3 hexes of a road hex and from there may trace a line of unlimited length to a supply source. This trace may not be through any enemy ZOCs.
While Cadres are units in all ways, HQs are not considered units. Cadres can be eliminated in combat like any other unit.
See 3.6 for a notional example of a trace.
Cadres represent all the divisional assets and divisional reserves.
12�2�1 Cadres may be used as “replacements” to satisfy losses in a combat. This does not increase the amount of replacements that can
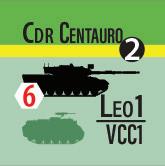
be used to satisfy losses but may be used instead of Replacements on the Replacements track. To use this ability, the Cadre must be able to trace a Line of Communications to the combat hex and if used, one size loss is applied to the Cadre.
Cadres can also be used during the Reinforcement and Replacements Phase to add size value to units of its division and/or to replace equipment losses. To do so, the unit receiving either one must be in communications range of the Cadre. For each size value given, add one size to the receiving unit and subtract one size from the Cadre. For each type of equipment gained by the receiving unit, reduce the equipment of the Cadre. Cadres can replace both primary and secondary equipment values equally (even though the Cadre might be replacing primary equipment with its secondary equipment).
Should the cadre not have the same equipment as any of the component units of its division, it can still replace either of the receiving unit’s tank or IFV/APC equipment type (even if not the same equipment).
You can’t give all a Cadres size value away as replacements (just up to two may be used), but you can give all of your equipment away to brigades of that division.
For example, the Cadre of Italy’s Centaruo division has Leo1s as its primary equipment and VCC1s as its secondary equipment. It may replace the Centauro 3rd Gioito brigade’s secondary Leo1 tanks and its primary VCC2 IFVs at the same rate.


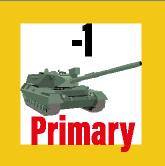
12�2�2 Cadres that are eliminated do not go the Replacements box as any other normal unit but may be immediately replaced when eliminated using the same rules as any other unit would during the Reinforcement and Replacements Phase (see 15.0). Remember, all markers are removed from a unit when a unit is eliminated (the Cadre is reequipped when it returns to full strength). If there is no other unit in the Replacements box to use to bring the Cadre back into play, they are placed in the Replacements box like any other unit and may be replaced normally. If there is no Cadre for the units of a division to trace to during the Communications Phase, or the Cadre is out of communications range, all those units of that division will have an Out of Contact marker placed on them. If they require a Line of Communications to perform a game function, they will not be able to do so until the Cadre is able to provide a Line of Communications again.
If an enemy Unit enters the hex occupied by a friendly HQ, immediately displace the HQ. The enemy unit pays no additional movement cost to
do this. The owning player moves the HQ at least five hexes away from the enemy Unit that displaced it but may move it as far away (unlimited MPs) as the owner wishes while following normal movement rules. The final hex placement may not be in an enemy ZOC. Displaced HQs must be moved such that each hex they are displaced is closer to one of their supply sources (owner may choose which source). A Fresh HQ which is Displaced becomes Spent.
Headquarters that are fresh may be voluntarily displaced as an action (it may not activate units when doing so). The HQ becomes spent after this.
Headquarters can also be voluntarily displaced during the Eliminate Friendly Units phase as well. They may be spent or fresh when they do this and may refresh normally during the Supply/Infrastructure Phase of the Game Turn.
Headquarters can’t retreat nor be used to satisfy losses. If it is in a hex from which units retreat and enemy units enter the hex, the HQ is immediately displaced.
Important: HQs can never be eliminated. If displacement would force an HQ off the map, it arrives in a friendly supply source hex the next turn as a reinforcement.
At the start of a scenario, put all the Cup of Snafu markers into a cup to allow for random drawing. The Cup of Snafu markers are colored differently from all other markers. The NATO markers are light blue while the Warsaw Pact markers are purple. The NATO markers affect NATO units (for good or bad) while the Warsaw Pact markers affect the Warsaw Pact units (for good or bad).
13�1�1 The Cup of Snafu is used three times in the game. They are used when a unit gains an Out of Contact marker, when a unit is disrupted or routed, or if a random event occurs in combat. In the first two cases, draw the correct number of markers (one if Out of Contact, one if Disrupted, or two if Routed). The enemy player performs the draw in this case. The enemy player may examine the marker and place the marker in the side he prefers (in all cases, the enemy should choose the worse state of the two sides if there is a choice. If he chooses a Low Ammo/No Ammo marker, there is no reason to not place the No Ammo marker on his enemy). Or, if it applies to his units, he can decline to place the marker and put it back in the cup. In the case of a routed unit, he may only place one marker of his choice and returns the extra draw to the cup.
If a Random Event occurs that requires placement, in this case, the marker must be placed on one of the player’s units. The player who is drawing the marker (as stated in the random event) chooses which side to place on a unit.

Example: The Soviet Player is placing a Cup of Snafu marker when a NATO unit is routed. He draws two markers from the cup and sees a Warsaw Pact Low/No Fuel marker and a NATO Great/Poor Leader. The only marker that hurts his opponent is the Poor Leader marker. He places that one on the routed NATO unit.
Example 2: A random event has come up that requires the NATO player to draw from the Cup of Snafu. He chooses one marker and gets a NATO Low/No Fuel marker. He must place this marker, so he chooses one of the units in the combat and places the marker on its Low Fuel side. If he had chosen a Warsaw Pact Low/No Fuel marker instead, he could place the marker on any Warsaw Pact Unit in the combat and would place the marker on its No Fuel side. If there are no markers remaining in the Cup of Snafu, no draw is made and there is no additional effect.
• Low Fuel: A unit that has this marker may not perform Bonus Movement (7.6) or Exploitation Movement (7.7.12). It may also not enter Road Column. If it is in Road Column when the marker is chosen, it automatically deploys in the hex. The marker is removed and placed back in the cup during the Supply and Infrastructure Phase if supply points are spent. Units without any equipment ignore this result and the drawn marker is placed back into the cup for a future draw.
• No Fuel: A unit that has this marker may not move nor spend any movement points. It stays in the hex it is in until the marker is removed. If the unit is in Cross-Country or Road Column, remove the marker and the unit automatically deploys. Units without any equipment ignore this result and the drawn marker is placed back into the cup for a future draw. The marker is removed and placed back in the cup during the Supply and Infrastructure Phase if supply points are spent.

• Low Ammo: A unit that has this marker may not provide size support to an adjacent combat and can only use its primary equipment in combat. If used, this primary is always considered Secondary equipment on the Terrain Effects Chart. The marker is removed and placed back in the cup during the Supply and Infrastructure Phase if supply points are spent.
• No Ammo: A unit with this marker has no ZOC and cannot use its equipment (of either type) in a combat. The marker is removed and placed back in the cup during the Supply and Infrastructure Phase if supply points are spent.

• Radio Out: This unit may not receive any Artillery, Helicopter, or Air Support in a combat. It cannot be in a
combat unless it is in the combat hex. If it is in the combat hex, no adjacent units can be added to the combat. Remove the marker during the Voluntary Unit Elimination Phase of the game turn.
• Key Leader Casualty: A unit that has this marker chosen for it has an OOC marker placed on it (with all effects of that marker – meaning another draw from the Cup is needed but as called for by the OOC marker). In addition, if the unit has a Great Leader, it is removed and placed back in the cup. The marker is returned to the cup after adding the OOC marker. If another Key Leader is drawn, ignore it and return it to the cup.
• Great Leader: A unit with this marker allows the owning player to reroll his dice in any combat. If the enemy has a Poor Leader in the combat, the owning player could reroll his and his opponent’s dice. This is optional. Only one Great or a Poor Leader would apply to each side in a combat. A Great Leader marker is only removed if the “Key Leader Casualty” marker is chosen or the unit is eliminated from play (in which case, all of its markers would be removed). Place the marker back in the cup if removed in these ways.
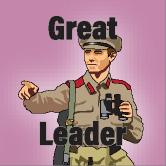
• Poor Leader: A unit with this marker allows the opposing player to reroll your dice in any combat. If the enemy has a Great Leader in the combat, the opposing player could reroll his and his opponent’s dice. This is optional. Only one Great or a Poor Leader would apply to each side in a combat. A Poor Leader marker is only removed when the unit so marked is eliminated (in which case all markers with the unit are removed). Place the marker back in the cup if it is removed in this way.

Lost: The opposing player may move one unit to which this marker would apply up to two hexes (within the rules of movement), stopping at the first eZOC. If this occurs in a combat, any unit in the combat may be moved.
Surprise: The opposing player may immediately apply one (his choice) Primary equipment loss level and/or one Secondary equipment loss level to any enemy units in the combat or to which this marker would apply.

Desertion: One size step is lost from a unit to which this marker would apply.
Initiative: The player to whom this marker applies may activate one HQ and up to four units (normal activation rules apply) and immediately perform that activation. No combat chits can be placed during this activation

The Cup of Snafu markers are limited to the countermix and no additional markers may be made.
Loss markers are used to show losses to Infantry (size), equipment, or artillery. These markers have graphics for each side but they can be used interchangeably.

13�2�1 Equipment Losses are tracked using the -1, -2, Half, and No markers for both Primary (if the unit has) and (if the unit has) Secondary Equipment. With each equipment loss, increase the value of the marker by one. The marker can be reduced or removed by the use of the Cadre’s equipment (see 15.2), or if equipment arrives on the reinforcement schedule in the scenario. The effect of equipment loss is shown on the Terrain Effects Chart as a reduction in a modifier to a combat.
Example: The Hungarian 11th Tank Division has full equipment (no marker placed on it) and takes 3 Primary Equipment losses. It would gain a -1 Primary Equipment loss for the first, a -2 Primary Equipment loss for the second and end up with a Half Primary Equipment marker on it for the third loss.
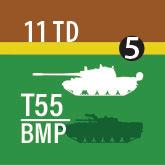
13�2�2 Infantry (size) losses are tracked using the -1 and -2 Infantry size markers. There are no Half and None markers for infantry. If the -1 or -2 marker is placed on the unit, reduce the printed size of the unit by that amount for all game rules. This would include size for combat and stacking. If a unit receives a loss that would increase the marker to more than -2, the unit is eliminated and placed in the Replacements box. 0 and 1 step units are removed from play and put in the replacements box if they lose one size. 2 step units are removed from play and put in the replacements box if they lose 2 steps.
Design note: the Warsaw Pact units are often “6” in size and can be eliminated when they reduce to “3” in size. This is intentional and represents the predicted lower “staying power” of the Warsaw Pact units.
13�2�3 Artillery loses are tracked a little differently than unit equipment losses. These losses are tracked by placing the loss marker on the Corps that was involved in the combat. This will reduce the needed value on the player aid by the losses on the HQ for all artillery support used by units of that Corps. Remember, the value on the Player Aid does not reduce – only modify that number on the Player Aid by the loss marker on the Corps for all calls for artillery support by units of the Corps with the loss marker. Artillery losses can only be replaced by reinforcements listed on the schedule.
For example, the Turkish III Corps supports a combat and, in the combat, takes an artillery loss. Place a -1 Artillery on the III Corps HQ. For all future combats, Artillery Support
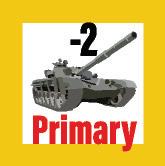
by III Corps must roll the Artillery Support value minus one to provide Artillery Support in a combat.
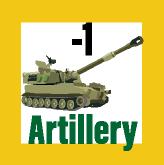

Players can make more of these markers if needed in the game. They are not limited by the countermix.
13.3.1 Airfield markers are color coded for each player and are used for flying missions with the owner’s aircraft. Generally, NATO airfields can fly up to 5 aircraft per airfield and Warsaw Pact airfields can fly up to 4 aircraft per airfield. This number can be reduced by chemical warfare (see 18.1) and by SSM strikes (see 16.2). Aircraft can also be eliminated by, for NATO only, Warsaw Pact occupation of an Airfield hex (2 are eliminated by occupation of hex 15.38 on the Doomsday Germany map) and by Nuclear Strikes on the Airfield box (see 10.5.3 and 18.2). Airfields can never move to another Airfield box (you can’t move an airfield from France’s Airfields box to the United Kingdom’s box) and they can never be returned to play if eliminated.

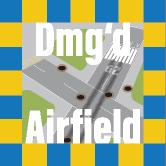
13�3�2 SAM markers are covered in rule 10.5.

13�3�3 Ace markers arrive by the reinforcement schedule in the scenario. Aces add 2 to the value of the plane performing a mission. Once added to an aircraft, that Ace cannot move to another aircraft and are eliminated from play if the aircraft to which they are assigned is eliminated.

All Air Game markers are limited by the countermix.
Status markers are always placed on units and impact the unit in various ways as listed below.
• Road Column markers are placed on a unit when active and the owning player wishes to move the unit. These are removed when the unit bivouacs or the unit deploys. All hexes entered by a unit with a Road Column marker cost one movement point. Enemy ZOCs costs an additional one to enter. Roads may be used at the cost of ½ a movement point per hex. Autobahn roads cost 1/3 a movement point to enter. Bridges may also be used by these units. Combat chit placement costs are lower for units in Road Column and units in Road Column may not use friendly units that are adjacent to a combat hex to join in the combat.
• Cross-Country markers are placed on a unit when active and the owning player wishes to move the unit. These are removed when the unit bivouacs or the unit deploys. All hexes entered by a unit with a Cross-Country marker cost one movement point. Enemy ZOCs costs an additional one to enter. Units with a Cross-Country marker cannot use roads to move nor cross rivers are canals using a bridge.

• Disrupted markers are placed on units that retreat 2 hexes from a combat. See 11.1 for additional information.
• Routed markers are placed on units that retreat 3 hexes from a combat. See 11.2 for additional information.
• Dug In may be purchased during the Supply and Infrastructure Phase of the game turn and when purchased, may be placed on any hex that has a friendly unit in it. Dug In markers stay in a hex as long as there is a friendly unit in the hex or when used in a combat by the owning player (7.7.10-D). They are removed from play when this is no longer the case. These markers are color coded for side although either player may use any available markers.

• Entrenched may be purchased during the Supply and Infrastructure Phase of the game turn and when purchased, may be placed on any hex that has a friendly unit in it. Entrenched markers stay in a hex as long as there is a friendly unit in the hex or when used in a combat by the owning player (7.7.10-E). They are removed from play when this is no longer the case. These markers are color coded for side although either player may use any available markers.
• HQ Interdicted markers are placed on a unit when it has been successfully interdicted by an air mission. When placed on a HQ, that HQ is spent. It may not refresh until the next Supply and Infrastructure Phase of the game turn.

• In Primary Terrain marker is placed on a unit that is in a hex with terrain other than clear and the unit has paid the movement points to deploy in that type of terrain.


• In Secondary Terrain marker is placed on a unit that is in a hex with terrain other than clear, that has more than one type of nonclear terrain in the hex and the unit has paid the movement points to deploy in that type of terrain. Secondary terrain is defined as the terrain in the hex that is lower in the TEC than the other type of terrain present in the hex.
• Low Morale is placed on a unit that has routed but the routed marker has been removed from the unit. See 11.3 for details.

• Elite/Guards markers are placed on units in which a 10 (if on a 10 sided die) or a 6 (if on a six-sided die) is rolled in combat. Some units in the game can begin the game as elite/ guards as well. These units are treated as if they have the same marker on them.

• Poor/Penal markers are placed on units in which a 1 is rolled in combat. Some units in


the game can begin the game as poor/penal as well. These units are treated as if they have the same marker on them.
• Out of Contact markers are placed on units that do not have a line of Communications during the Communications Phase of the game turn or if the Key Leader Casualty Snafu marker is drawn from the Cup of Snafu. These markers are only removed if the unit has a Line of Communications in the next Communications Phase. Fresh units with an Out of Contact marker may move one hex if active but become Spent after that. See 12.2.2 for additional information.

Color codes are provided for flavor and ease of identification but there is no functional reason both markers can’t be used by both players. There are excess Road Column and Cross-Country markers for team play. In all cases for the Status markers above, players may make more markers as needed.
At the beginning of every scenario, place all Meeting Engagement/Hasty Attack markers in one cup. Place all Prepared Attack/Deliberate Attack markers in another cup. These are used when combat is declared.
• Turn is used to show what day the game is on on the General Player Display.
• Weather in the game is either Clear or Rain and is noted on the General Player Display.

• Night Battle can occur if the Night Battle is drawn from the Combat Chit cup. See 7.11 for details on how this combat works.

• NATO and Warsaw Pact Support is used on the General Player Display to record equipment support (as well as Artillery) for modifying an upcoming combat.

• NATO and Warsaw Pact DRMs is used on the General Player Display to record size and terrain benefits each side receives in an upcoming combat.
• Refugees are placed on the General Game Display to record the number of Refugees in play. See 14.5 for more detail.

• Nuclear Attack/Nuclear Fallout are placed in hexes and boxes that have been struck by Nuclear Weapons. See 18.2 for additional information.
• Chemical Attack/Persistent Chemical are placed in hexes and boxes that have been attacked by Chemical weapons. See 18.1 for additional information.
• NATO/Warsaw Pact Infrastructure is placed on the Replacements, Supply, and Infrastructure track on the Player Aid.
• NATO/Warsaw Pact Supply is placed on the Replacements, Supply, and Infrastructure track on the Player Aid.
• NATO/Warsaw Replacements marker is placed on the Replacements, Supply, and Infrastructure track on the Player Aid.
These units start the game setup or placed in the Breakdown Regiments or Battalions Available box on the Player Aid. Those that start the game in Airfield boxes can be used as airmobile forces (16.1.2). Additional Regiments and Battalions can be made using WP Divisions (size value of 6) and US, West German, British, or Italian Cadres. To create one of these units, deduct one size value from an active Division or Cadre and place a spent breakdown unit in the hex in which the Division or Cadre is currently located. (Anytime) These become independent units and may be activated normally. Once detached, they may never reattach to a Division or Cadre. The units in the respective Available Units box on the Player Aid are the maximum number of Regiments or Battalions that can be created. Eliminated units are not placed back in the Available Units box nor are they placed in the Replacements box. Once eliminated, breakdown units never return to the game. Not all nations can create breakdown units.
Note: WP Regiments while a size of 3 only deduct 1 size point from WP Divisions because of the large quantity of independent regiments in the Soviet Army but not represented in the game.
West German VKK units represent various types of pseudo military units available to the NATO player. These can be anything from border guards to city police forces. These are independent units and several of these units can start in play. Additional units are possibly created during play. As soon as a Warsaw Pact unit enters a hex adjacent to a West German city hex, roll a D10. If you roll equal to or less than the current game turn, place
a fresh VKK unit in the city hex that is adjacent to the Warsaw Pact unit. If it is after the 9th turn, placement is automatic. Eliminated VKK units are not placed in the Replacements box but unlike Regiments and Battalions, may be recycled for future use.
If there are no VKK units available to be placed, no VKK roll is made and no VKK unit is placed.
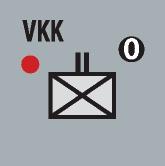
Spetsnaz are Soviet Commandos and the scenario will stipulate how many are available at the start of play. The Soviet player will attempt to place these units at the start of the scenario. to play havoc behind the lines. Successful placement in the desired hex is dependent on passing a die roll with a D6 as follows:
On an Airfield Hex: roll of 1 (if successful, eliminate one airfield from the West German Airfields box. If this hex is entered again by the Warsaw Pact, no additional airfield is lost)
• On a hex with an HQ or POMCUS: roll of 1-2 (if successful, the HQ is displaced; the POMCUS site is destroyed – see 15.1.2)
• On a hex in an enemy ZOC: roll of 1-3
• On a hex not in an enemy ZOC: 1-4. If the Spetsnaz unit fails the placement roll, it is eliminated from the game.

After successful placement, the Spetsnaz unit is Spent. It may refresh normally as an independent unit and is now a unit in play as any other. If eliminated, it is removed from the game and not placed in the Replacements Box.
Military leaders may be used in either Episode 1 (if a campaign game) or 2, or if the combined game is being played. The two NATO commanders and their relief have values of 0 (just use the leaders provided in those games). The Soviet Commander in the Germany game now has the values as indicated on their new counter included in this game.
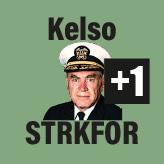
If a scenario instructs you to do so, roll for the military ability of a leader. To do so, roll a D10, add or subtract the value on the leader from the roll and place the leader in the box for that roll in the Military Leaders track on the Leader Track display.
For example, for Ogarkov, if you rolled a 6 with a D10, the leader counter has a +2 to modify the roll to 8. Ogarkov would be placed in the “Aggressive” box, and all forces that he commands would
be impacted by his aggressiveness. The military abilities and play impact of leaders is as follows:
Pensive Leaders:
• May activate up to 3 units per HQ activation
• May use up to 2 replacements and 2 victory points to honor spreads in combat
• Poor Leaders that apply to his side when drawn from the Cup of Snafu are ignored
• If defending a hex that is being attacked by either a prepared attack or a deliberate attack, the defender may subtract 2 from their support rolls
• May only advance up to 2 hexes in combat (even if the combat chit allows more advance)
Deliberate Leaders:
• May activate up to 3 units per HQ activation
• May use 1 replacement and up to 2 victory points to honor spreads in combats
• If defending a hex that is being attacked by either a prepared attack or a deliberate attack, the defender may subtract 2 from their support rolls
• May only advance up to 3 hexes in combat (even if the combat chit allows more advance)
Prudent Leaders:
• May activate up to 4 units per HQ activation
• May use 1 replacement and 1 victory point to honor spreads in combats
• May only advance up to 4 hexes in combat (even if the combat chit allows more advance)
Aggressive Leaders
• May activate up to 5 units per HQ activation
• May use 1 replacement but 0 Victory Points to honor spreads in combats
• If attacking, all support rolls by his forces may subtract 1 from their rolls
• If defending a hex that is being attacked by either a prepared attack or a deliberate attack, the attacker adds 1 to their support rolls
• May draw 2 Combat Chits when attacking and choose which one to use
Reckless Leaders
• May activate up to 6 units per HQ activation
• May not use replacements or victory points to honor spreads in combats
• If attacking, all support rolls by his forces may subtract 2 from their rolls
• If defending a hex that is being attacked by either a prepared attack or a deliberate attack, the attacker adds 1 to their support rolls
• May only advance one more hex than is on the combat chit
• May draw 3 Combat Chits when attacking and choose which one to use
• Great Leaders that apply to his side when drawn from the Cup of Snafu are ignored. Military Leaders may be relieved during the political phase. If a player wishes to do so, flip the leader to his relief side, subtract 1 from the Political Leader from the nation to which he belongs and roll a D10 to determine his relief’s ability. Leaders that have relieved leaders may not be relieved.
Command of air units (for the AIRSOUTH and SGF Commands) works as such:
Pensive: Subtract one from all commanded aircraft air ratings; improve the needed the repair die roll by 2
Deliberate: Subtract one from all commanded aircraft air ratings; improve the needed repair die roll by 1 Prudent: No effect
Aggressive: Add one to all commanded aircraft air ratings; reduce the repair die roll by 1
Reckless: Add one to all commanded aircraft air ratings; reduce the repair die roll by 2
14.4.2 Military Leaders Commands:
Players may choose any unit in the combat to determine the military leader in a combat.
Geographical
NATO:
Northag: All area above the Northag/Centag demarcation line and all non-US aircraft on the Battle for Germany Air Display
Centag: All area below the Northag/Centag demarcation line that is in West or East Germany, and all US aircraft on the Battle for Germany Air Display
STRKFOR: Commands any AMF designated units and HQs; commands all US Aircraft not on the Battle for Germany Air Display.
AIRSOUTH: Commands all non-US, non-Greek and non-Turkish aircraft not on the Battle for Germany Air Display
AFSOUTH: Commands all forces in Italy, any Italian or
Spanish forces in other countries, and any units and HQs that are not covered by other commands
LAND-SE: Commands all forces in Turkey, all Turkish aircraft, and any Turkish units and HQs in other countries
LAND-S: Commands all units and HQs in Greece, all Greek aircraft and any Greek units and HQs in other countries
GSGF: All units and HQs in on the Germany map (excluding any forces in Italy or Austria) and all air units based on the Germany game Air Display
SGF: Commands all units and HQs of and in Hungary, Austria, or Italy and all air units not in play on the Battle for Germany Air Display
W.Dir: Commands all units and HQs of and in Yugoslavia, Albania and Bulgaria
SW. Dir: Commands all units and HQs of and in Romania and those Soviet units/HQs not covered in SGF

There are 6 Refugee markers in the game. Refugees are created when one of three things happen: a Combat Chit is placed in a city hex, a Nuclear Attack marker is placed anywhere, or a Chemical Attack marker is placed anywhere. When one of these things happen, place a Refugee Marker in the Refugee box of the NATO Player Aid. If there are no remaining Refugee markers, no additional markers are placed.
During the Supply and Infrastructure Phase of the game turn, the NATO player may spend Supply to remove these markers from play. These markers are not recycled for use later but are removed from the game. For each two refugee markers still in the Refugee box, reduce the NATO infrastructure value by one (rounding down).
15�1�1 Most reinforcements arrive in Supply Source hexes during the Reinforcement and Replacements Phase of the game turn. These arrive in their nation’s supply source Fresh. If there is no Supply Source in which they can be placed due to the presence of enemy units in the supply source hex, they do not arrive but are placed on the Game Turn track and may arrive whenever an eligible supply source is controlled by friendly forces once again.
15.1.2 Reforger Reinforcements are listed on the reinforcement schedule as “Reforger” reinforcements. When the units arrive, place
the entire division in the Reforger box of the Air Display. These will arrive via the Reforger Aircraft. These aircraft are added to the Available Aircraft box on the turn they arrive. During the Air Allocation Phase, the Reforger Aircraft may be placed in the Reforger Mission box. If the Aircraft complete their mission, place one full division from the Reforger box on their respective POMCUS marker (and remove the POMCUS marker from play). These arrive Fresh and ready to rumble.
Any Reforger units that have not arrived due to the Reforger aircraft being damaged or shot down may be brought in the next time a Reforger aircraft is available (more than one division may arrive per turn).

At the end of the Strategic Air Mission Resolution Phase, remove the Reforger Aircraft from play.
If the POMCUS marker that represents that division has been entered by a Warsaw Pact unit, remove the POMCUS marker. The Division that arrives at that POMCUS marker does not arrive during the game and is removed from play.
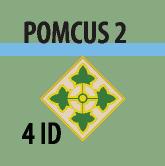
Add 4 Replacements to the NATO Replacements pool when the Division is due to arrive instead.
15�1�3 Aircraft Reinforcements are placed in the Available Aircraft box when they arrive as reinforcements.
15�1�4 West German Territorial Reinforcements arrive on the reinforcement schedule in specific hexes. If that hex is currently occupied or in the ZOC of a Warsaw Pact unit, they arrive instead on the next turn in the hex with the West German HQ mentioned in the scenario instructions.
Both players start with Replacements marked on their Player Aid in the Replacements, Infrastructure, and Supply track. These can be increased through reinforcements and through specific game events. How these are used to satisfy combat losses has been covered (see 7.7.10 and 14.4). These Replacements can also be used during the Reinforcements and Replacements Phase of the Game Turn as follows:

You may spend a value equal to the size value of a unit in the Replacements box to bring that unit back into play. After spending the points, return any unit in the owning player’s box and place the unit fresh on any Corps or Army HQ of the same nationality as that unit.
Warsaw Pact units that return to the map after spending one replacement point arrive with a -2 step loss marker placed on them.
You may also use replacements to re-equip divisions or cadres but this occurs when the unit receiving the replacements are active.
Each Replacement point can replace one level of lost equipment. To receive the equipment, the unit must have a Line of Communications at the time it is activated. It must not do anything other than receive equipment. After it receives it, the unit is spent.
These rules cover the Support Assets that were not mentioned in the combat rules. In all cases here, when you wish to use the asset, you will roll a D10 to see if the support mission was successful. In all cases in which you fail the roll, reduce the Support value by one. If the Support Value is at 0, no more support of that type may be offered.
Support may only be used on units of the owning country of that support – or if there is a unit of that country “in the combat”.
You may only use one country’s support for any specific use of that support.

16�1�1 Any unit that would qualify for an Out of Contact marker (4.2.1) may be resupplied by air. Roll against the Transport Support value of the nation that the Out of Contract marker is to be placed. If you pass, no marker is placed.
Exception, NATO units in Berlin may not be chosen for this rule.


Transport Support can also be used to remove Low/No Fuel markers and Low/No Ammo markers. When the unit with the marker is first active during either the Activation Phase or the Reserve Movement Segment, roll a D10 against the nationality’s Transport Support value. If you are rolling for a Low Fuel/Ammo marker, if you pass, the marker is removed. If you are removing a No Fuel/No Ammo marker, add one to your die roll to remove the marker.
If you fail a Transport Support roll, reduce the Transport Support marker by one.
16�1�2 Some breakdown units will start play in one of the Airfields boxes. These are airmobile forces that can be used by the owning player. To use these regiments and battalions, place the unit on any hex on the map and roll a D10 to see if they land. If you roll equal to or less than your modified Transport Support value, place the unit on the desired hex. If you roll more than your modified Transport Support value, the landing has failed - the Unit is returned to its Airfields box and the Transport Support value is reduced by 1. You must use the transported Unit’s national Transport Support value. You cannot land on an enemy Unit (although an HQ is fine - this
If the target is an HQ, roll a D6. If you roll a 1, the HQ is Spent and place a HQ Interdicted marker on it (13.4); 2-6, there is no effect.

If the target is the Infrastructure marker, roll a D6. If you roll a 1-3, reduce the Infrastructure marker by one; 4-6, there is no effect.
If you use Chemical weapons, subtract one from your roll.
Nuclear attacks happen when their delivery method is performed. Only aircraft and SSMs may deliver nuclear weapons. As before, when you roll for using a nuclear weapon and roll a number greater than the Nuclear Support value, there is no attack and reduce the Nuclear Support value by 1. See 18.2 for additional information on how to use nuclear weapons.
Engineering Support may be used for the following. If any attempt to use Engineering Support fails, reduce the Engineering Support value on the Player Aid by one. Once the value is at 0, no more Engineering Support may be attempted.
16�4�1 Repairing Airfields – roll a D10 against your Support Value and subtract 2 from your roll, and if you roll the modified Engineering Support value or less, airfield is repaired. Only countries that may use the airfields in the airfields box may roll against their Engineering value and only one roll per phase may be attempted. If you roll greater than the Engineer Support value, reduce the value by one. This is performed during the Reinforcements and Replacements Phase of the game turn. Only one attempt per airfield is allowed and the following are limits as to which nation can use their Engineering Support on which Airfield Boxes:

USSR Airfield Box: Soviet Union
Albania Airfield Box: Albania only
Bulgaria Airfield Box: Bulgaria or Soviet Union
Hungary Airfield Box: Hungary or Soviet Union
Romania Airfield Box: Romania or Soviet Union
Yugoslavia Airfields: Yugoslavia only
Italy: Spain, US, or Italy
Austria: Austria only
Greece: US or Greece
Turkey: US or Turkey
16�4�2 River/Canal Crossing – when a unit of a nation attempts to move over a minor river or canal, roll a D10 and should you roll the Support Value or less of the nation to which the unit belongs, there is no additional movement cost to cross the minor river or canal. You may attempt to do the same over a major river but if successful, you will still pay one additional movement point (and not the full cost per the TEC). If you are moving into an enemy ZOC when crossing the river or canal, add 1 to your roll. Only one attempt to provide this support may be made when the unit is attempting to cross the river or canal. Should you roll over that value, reduce the Engineering Support value by one; the unit fails to cross and becomes Spent.

16�4�3 Attacking City hexes: if a nation has units attacking a defending unit deployed in a city hex, Engineering Support may be used to negate the terrain value of the city in defense. Roll
a D10 and add 1 to the roll. You must use the national Engineering value of one of the units in the combat. Should you roll equal to or less than your Engineering Support value, the City offers the deployed defender no terrain modifier in combat. Should you roll over that value, reduce the Engineering Support value by one.
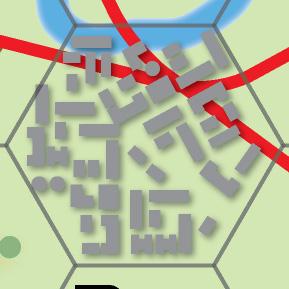
16�4�4 Removing Persistent Chemicals markers may be removed by only using Engineering Support. Roll a D10 and if the roll is equal to or less than the Engineering Support value, remove the Persistent Chemical marker. If you roll over the Engineering Support value, reduce the Engineering value of the nation used by one. If the Support value is at 0, no more Engineering Support attempts may be made.
The political aspect of The Doomsday Project has been enhanced in this game and these rules govern both games campaign game as well as a game played with both games. All future games in the series will also offer these rules. Players now have the actual leaders from all the nations involved in the conflict and may influence both the leader in charge as well as the current stance the country is taking towards the war. As a side note, France is much more likely now to enter the war with these new rules. The scenario instructions will give the current political status for each leader and their current value (a quantification of the steadfastness of that country’s leader) and the marker representing that leader will be placed in the appropriate box on the Political Leaders track. The political stance and their impact on the game are as follows:
Neutral:
If Neutral at the start of play: Neither player may enter hexes of a neutral country and no units or HQs of the neutral nation may be moved by either player while the country remains neutral. LoCs may not be traced through neutral countries.
If a country becomes Neutral from a Status change: remove all of the now neutral forces from play. Both sides may freely move through the now neutral country and may trace LoCs through its hexes. When a country becomes neutral during the game, a regime change takes place (if it hasn’t already) and the leader’s marker is placed in the 0 space. Countries with leaders in the 0 space will be neutral for the rest of the game.
If Leaning at the start of play: Neither player may enter hexes of a leaning country. The side to which the country is leaning may move that country’s units and HQs (staying
within the country’s borders) freely. The nation to which it is leaning may also trace LoC through hexes of that country.
If a country becomes Leaning from a Status change: Other than the now leaning country, both sides have one turn (checked at the next Political Phase) to withdraw all forces from that country (voluntary elimination might apply here). Should the side that it is leaning towards not remove its forces from the country, that country becomes neutral (as above from a status change). Should the side to which the country is not leaning have units in that country at the next political phase, the country returns to being at war against that side and add 2 to the leader’s current value.
At war with NATO or Warsaw Pact:
The side that has this nation on its side may now use all the forces of this country as he chooses.
A country’s Status can move up or down as the opposing sides influence the leaders of that country.
A country automatically is moved to the At War box of the opposing side (keeping the same value on the table) when either other side’s units or HQs enter any hex of the country or attack any unit belonging to that country. One exception to this is if the French unit in Berlin is attacked. This does not cause France to go to war.
A country will change one status if their leader is on the “4” space for the Leader value. They will change one status in favor of the country that rolled the die and succeeded in a value roll against that leader. Note that the country may be reduced to less than 4 in certain circumstances, and this too will cause a status change.
Should the country be leaning towards a player and that player rolls greater than the leader’s value, that country is moved to the “at war” track.
If a leader’s marker is on the 0 space, that country becomes neutral.
A leader’s value can never be less than 0. Once at 0, it will stay at 0 for the rest of the game.
For example, the Bulgarian leader Kadar is on the 5 space in the At War with NATO track. NATO rolled for Bulgaria and succeeded in lowering the status to “4”. Bulgaria, if at war with NATO currently, would then be moved to leaning Pact track and his track value would stay 4.
17.1.2 Attempting to change a political leader’s value:
During the political phase of the game turn, first NATO then the Warsaw Pact may spend victory points to roll against the wherewithal of a country’s leader. Each side may spend one (only) victory point to allow a roll for a leader. More than one leader may be rolled for as well.
If the leader is neutral, leaning towards the other side, or at war with the rolling player, should the rolling player roll
a D10 with equal to or less than the value of the leader, reduce the value of that leader by one.
If the leader is leaning towards the rolling player, should that player roll a D10 that is greater than the value of that leader, increase the leaders value by one and invoke a status change to at war against the opposing player.
Should either player roll a “0” on the die, a regime change occurs in that country. Flip the leader to the other side and that leader is now in play. Reduce or add the leader on the track by the number on the new leader. For example, if Bulgaria has a regime change and is currently on the 7 space, a Revolutionary Council has taken over and the Bulgarian leader is placed on the 2 space (and a status change is invoked).
Optional rule: Players will notice that on the US and British replacement leaders, there are two values. If you are a liberal politically, use the +4, if you are a conservative, use the -4. If you don’t wish to use this optional rule, the track change value for both leaders is 0.
Should the Yugoslavian leader be on the 4 space, the country splits into Croatia and Yugoslavia immediately. Place the GHQ marker in hex 63.79. This is now the non-striped, non-banded HQ for Croatia. The Yugoslavian leader Vlajkkovic is placed in the At War with NATO box (on space 6) and place the Croatian Leader Markovic into the At War with Warsaw Pact box (on space 7). These two countries are now treated as separate countries in all ways. All supply sources within Croatia are now Croatian Supply Sources (only) and all supply sources in Yugoslavia are Yugoslavian supply sources only. Blue banded units and HQs are now Croatian and brown banded units and HQs are Yugoslavian. All aircraft remain with Yugoslavia but remove one airfield from the Yugoslavian Airfield box. Artillery support, Engineer support, Transport support, and helicopter support is reduced by 2 and may be used by both countries. Remove the Yugoslav SSM support marker.
Neither player may enter any hex of Switzerland.
This game assumes that both sides are attempting to limit the use of these weapons to prevent the war from becoming a worldwide nuclear conflict.
The Warsaw Pact player (only) may use chemical weapons in the game. Chemical weapons can be used with SSM attacks (subtracting one from an attack die roll). The SSM attack is resolved as normal but with the following additional effects. For each attack

that uses chemicals, the NATO player receives one Victory Point. For each Persistent Chemical marker placed, NATO receives an additional Victory Point. This is the only way Chemicals can be used in the game.

• If the target is a unit or an HQ and the attack was a success, the Warsaw Pact player places either a Chemical Attack or a Persistent Chemical marker on the hex. If a Chemical Attack marker is placed, the unit must spend 3 movement points to leave the hex. After these movement points are spent, remove the Chemical Attack marker. All Chemical Attack markers are removed during the next SSM Attack Phase.
If the Warsaw Pact chooses to place a Persistent Chemical marker, the marker stays on the map until removed automatically by Engineer Support (Only the country in which the attack is made may use its Engineering support value to remove the marker) or, if present during the next SSM Attack Phase, roll a D6: a roll of 1-3 removes the marker; 4-6 the marker stays. If the target is an Airfields box, and the attack is a success, choose an Airfield box and place either a Chemical Attack marker or a Persistent Chemical marker. A Chemical Attack or a Persistent Chemical marker reduces the aircraft that can fly from all Airfield markers in that Airfields box by one.
• If the target is the Infrastructure marker, you must use Persistent Chemicals. If the attack is successful, reduce the NATO Infrastructure value by 2 instead of 1. Chemical weapons also create Refugees. See 18.1.
Designer Note: The game assumes that unlike the historical doctrines that were in place in 1985, both the major nuclear powers are deeply committed to restricting the use of nuclear weapons to
Target Striking Player may:
An Airfields Box
(max of one attack is allowed per Airfield box)
A hex
Infrastructure Marker
keep the conflict regional. The players in the game represent commanders below the levels of leadership that would authorize release these weapons on the battlefield. In the game, players are requesting the use of these weapons and with each request, the decision makers for authorization become less and less patient to allow use. That is why with each failed request, the likelihood of more successful requests is reduced.
During the Politics Phase, the Warsaw Pact player may request the use of nuclear weapons. To request a nuke, roll a D10 and if you roll equal to or less than the Nuclear Weapons Support marker, place a “Nuclear Attack” marker in either the Nuclear Strike box or the SSM Nuclear Weapons box on the Air Display. Should you fail the above roll, reduce the Nuclear Weapons support value by one. Only one roll per Politics phase is allowed.
Nuclear weapons can be delivered by either SSMs (during the SSM Attack Phase) or by nuclear capable aircraft (during the Strategic Air Resolution Phase). To use a Nuclear Weapon, you must use SSMs or Aircraft with the Nuclear Capable symbol on the marker or aircraft. The owning player rolls against his Nuclear Support value. If he passes, he may launch one attack with either SSMs (if rolled in the SSM Attack Phase) or in Air Allocation Phase (to place a nuclear armed aircraft in the Nuclear Strike box).
The NATO player may not use nuclear weapons in The Doomsday Project Episode 2 The Battle for the Balkans, but may do so in Episode 1 The Battle for Germany.
Each attack causes the damage noted in the 18.2 Nuclear Strike Options table (which is the same as that shown in 10.3.5).

Victory Points are awarded to the targeted player for Nuclear Weapon use as follows:
• Asking for a weapon: 1 Victory Point to your opponent
• Failing the roll to get a weapon: 1 Victory Point to
• Remove 1 Airfield marker from the chosen box. Place it back in the pool of counters, not in the Damaged Airfields box
• Remove 2 Aircraft from the Available or Damaged Aircraft boxes (owning player choice).
• Place a Fallout marker in the targeted Airfield box.
• Airfields in that box have their fly-per-airfield capacity reduced by one.
• Move any Units in the hex to their Replacements Box
• Place a Nuclear Fallout marker in the hex.
• Any HQ entering the hex will be Displaced.
• No Unit may end its movement in the hex.
• The hex no longer has any roads of any type running through it.
• Reduce the enemy Infrastructure marker by 4.
your opponent
• Striking a target with an SSM: 2 Victory Points to your opponent
• Striking a target with an Aircraft: 2 Victory Points to your opponent
Rules Proofreading: Greg Sarnecki and Pierre Miranda
Playtesting: Ben Starkweather, Greg Sarnecki, Pierra Miranda, Dave Ruiz, Dave Nighswonger
Historical Consultant: Greg Sarnecki
VASSAL Module Creation: Nigel Rabbits
Time Management Consultant: Sonia Starkweather and Sam Starkweather
Special Thanks: Bill Thomas and Billy Thomas Produced by: Bill Thomas for Compass Games, LLC.
The Doomsday Project will return with Episode 3: The Battle for the North

1. Check weather (4.1) – roll a D10; 1-6, it is clear, 7-10, it is raining (+1 if it was raining last turn)
2. Communications Phase (4.2)
a. Check Lines of Communications, placing or removing Out of Contact (OoC) markers as applicable (12.1)
b. Use Transport Support to negate OoC markers (16.1). If marked (or still) OoC, draw from the Cup of SNAFU for each OoC unit (13.1)
3. Reinforcements and Replacements Phase (15.0)
a. Place arriving reinforcements per the scenario instructions (15.1)
b. Spend replacement points to return units in the Replacements box to the map (15.2)
c. Spend replacement size points to replace losses to units from Cadres (15.2)
4. Air Allocation Phase (10.1)
a. Determine AWACS advantage (4.4)
b. Return aircraft to Available Aircraft Boxes
c. Attempt to repair damaged aircraft (10.1)
d. Fly aircraft from airfields and place on missions (10.2.3)
5. Resolve SSM attacks
a. Warsaw Pact first, followed by NATO (16.2)
b. Remove all Chemical Weapon markers from the map; attempt to remove Persistent Chemical markers from the map (18.1)
6. Supply and Infrastructure Phase (9.0)
a. Spend Supply on 9.2 items
b. Place Supply marker on the Infrastructure marker (9.3)
c. NATO reduction of Infrastructure from Refugees (14.5)
d. Remove all HQ Interdicted markers (10.4.2)
7. Strategic Air Mission Resolution Phase (10.3)
a. Resolve the Air Superiority Combat (10.3.1)
b. Resolve Strategic Missions (10.3.2-10.3.5)
c. Resolve Bounce Box Combat (10.4.1)
d. Perform Transport of units from Airfield box to the map (16.1.2)
Warsaw Pact Player Turn:
A. NATO Refresh Phase (3.6.2)
B. Warsaw Pact Activation Phase (7.0)
1. Warsaw Pact may fly Transport missions to remove Low- and No-Fuel/Ammo markers (16.1) and to land air-mobile forces (16.1)
2. Warsaw Pact Player activates an HQ and units and places Combat Chits (7.1; 7.4)
3. NATO performs reserve movement (7.5)
4. Warsaw Pact Player performs bonus movement (7.6)
5. Warsaw Pact Player resolves combat (7.7)
6. Warsaw Pact Player performs after combat movement (7.7.11)
7. Check stacking (3.5); excess units go to Replacements
8. If the selected HQ has completed all activations, all units that are not Deployed, now Bivouac (7.11)
A. Warsaw Pact Refresh Phase (3.6.2)
B. NATO Activation Phase (7.0)
1. NATO may fly Transport missions to remove Low- and No-Fuel/Ammo markers (16.1); and to land air-mobile forces (16.1).
2. NATO Player activates an HQ and units and places Combat Chits (7.1; 7.4)
3. Warsaw Pact performs reserve movement (7.5)
4. NATO Player performs bonus movement (7.6)
5. NATO Player resolves combat (7.7)
6. NATO Player performs after combat movement (7.7.11)
7. Check stacking (3.5); excess units go to Replacements
8. If the selected HQ has completed all activations, all units that are not Deployed, now Bivouac (7.11)
A. Eliminate Friendly Units Phase
1. Eliminate Friendly Units (8.1)
2. Remove Night Marker if still present (13.6)
3. Remove Radio-Out Markers (13.1.2)
B. Victory Check Phase (8.2)
1. If one player controls all of the enemey supply sources, they win the game (8.3)
2. If one player has 21 VP and ther has 0 VP they win the game (8.3)
3. Award Objetive Markers if the unit on the marker has an LoC (8.3)
C. Politics Phase (17.0)
1. Request Nuclear Weapons (18.2)
2. Voluntary relief of commanders (14.4)
3. Spend VPs an roll for Leader political value; change status if needed (17.0)
D. Advance the Turn marker