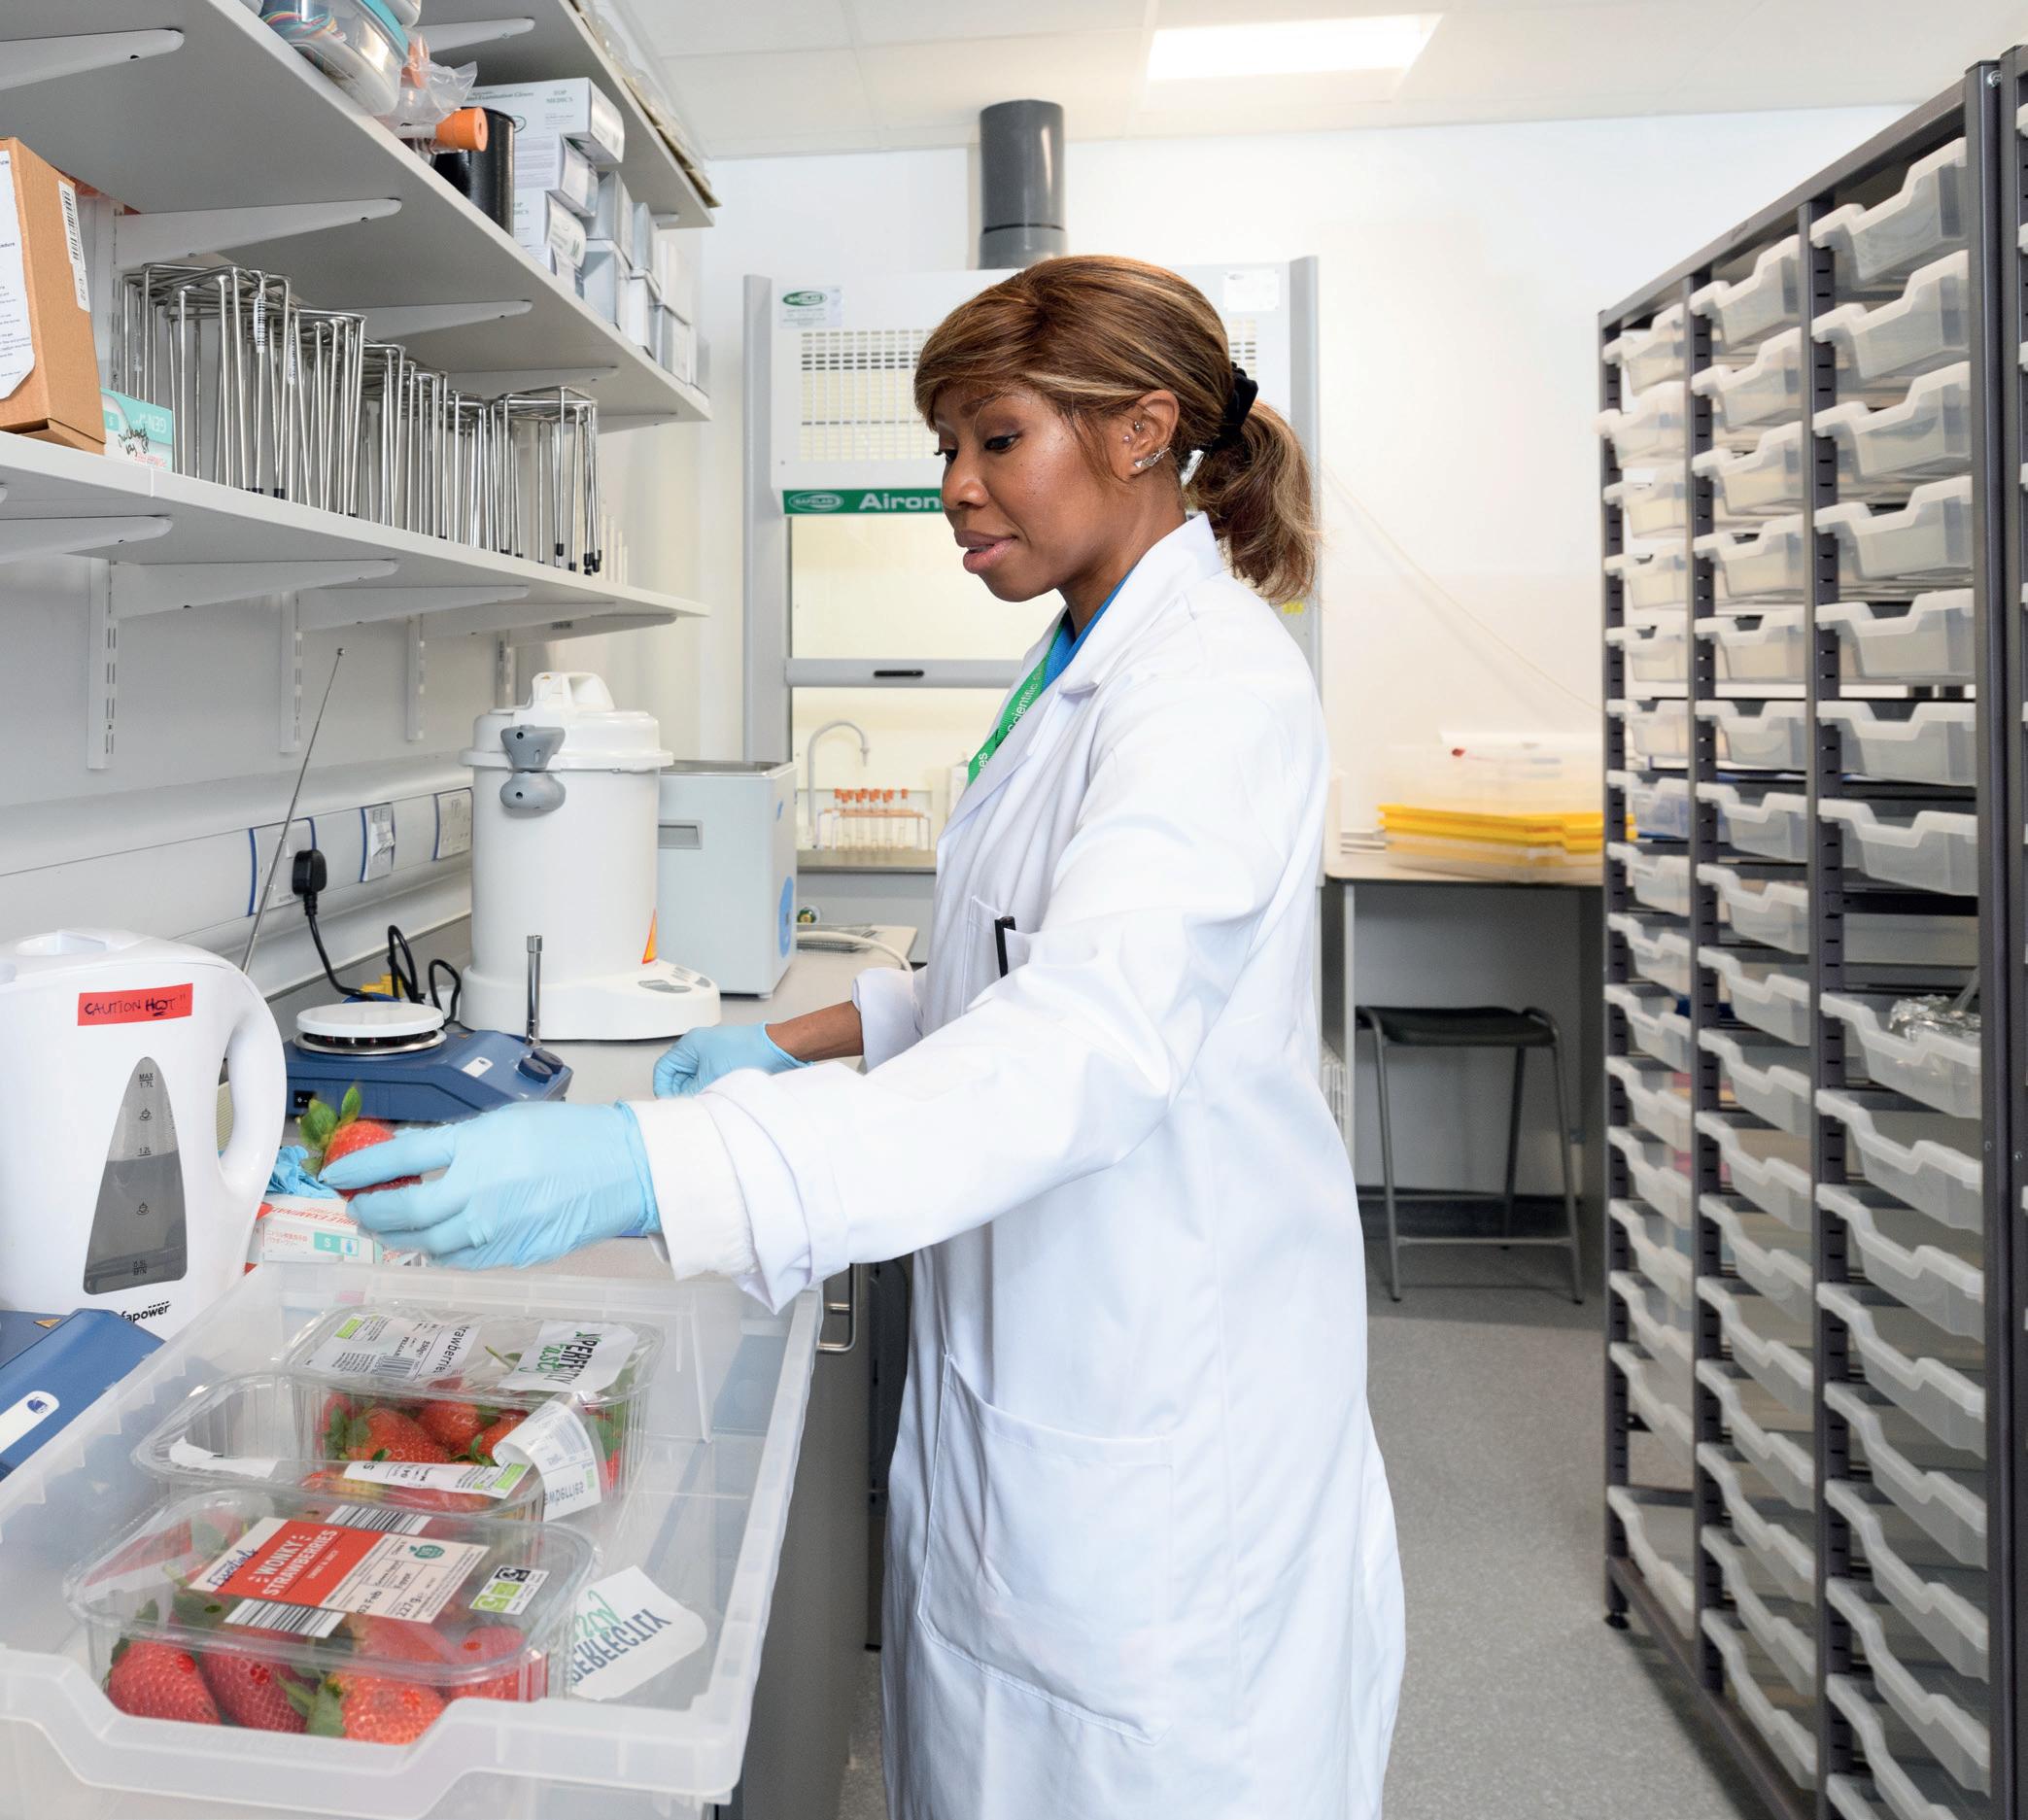


INSPIRING TOMORROW’S SCIENTISTS THROUGH PRACTICAL SCIENCE VISIT OUR RESOURCE HUB, FULL OF USEFUL IDEAS AND INSPIRATION shop.wf-education.com/science This is for you! Take a look inside and see what you think! Looking for something different from your supplier? Try Timstar! Highlights... Product recommendations NEW technician training Troubleshooting tips Helpful experiments Tried and tested recipes Help and support Design it, fit it, fill it, with Timstar! Shop now to save! Use AUTUMN10 to save 10%, online orders only*.
Delivery charges
FREE delivery on all orders* of £75 and over. Orders of less than £75 are subject to a £7.50 delivery charge (within UK mainland).
We aim to dispatch all stocked items ordered before 11am, on the same day.


* Delivery to Scottish Highlands and Islands is subject to a surcharge. Please, contact Customer Support for an estimate.
Carriage Surcharges

Certain chemicals e.g., lithium, potassium, methanol, bromine etc, may now only be transported by ADR vocationally trained drivers. As such, we have implemented a carriage surcharge of £12.50 if an order contains these chemicals.
All chemicals with the surcharge are clearly highlighted online. Any over-sized or weighted items may be subject to specific delivery charges, for help and advice email us at customer.support@wf-education.com

Need advice?
Please, call our friendly Customer Support team (Mon - Fri, 8.30am - 5pm, excl. Bank Holidays) on 01743 812 200 for advice on your delivery options, prices, and product selection. We o er additional delivery options including guaranteed next day.
We also have an experienced Technical Team to answer all your questions regarding our products, troubleshooting, or any health and safety queries.





The important bit… T&C’s: All prices shown in this brochure are ex. VAT. 10% discount valid until 31/10/2023. Online orders only, framework and overseas customers excluded. Listed prices valid until 31/12/2023. Timstar reserves the right to stop or amend any promotions at any time. Items marked as CX incur additional delivery charges. All hazardous goods, chemicals (incl. live cultures/media) are non-returnable. Accurate at the time of print. For full and most up-to-date terms and conditions, please, visit wf-education.com/terms-and-conditions These mailers are 100% recyclable Datalogging 4 NEW technician training modules 8, 10, 26 Microscopy 12 Investigating a root tip squash 18 Making limewater 20 Reverse osmosis 21 Microbiology 24 Vegetable science 30 Chromatography 36 Open evening inspiration 44 Gas preparation 48 Chemistry demonstration 52 Some of our Highlights... Timstar doesn’t just provide education-ready furniture, equipment and resources. We have an experienced in-house team to support the delivery of new build and lab refurbishment projects. Design it, fit it, fill it…with Timstar! Download our LaboratoriesDesigningGuide! Read more on page 14
Design it, fit it, fill it... ...with Timstar!
Having worked alongside third party lab fit-out companies, Timstar wished to be able to offer customers a comprehensive in-house service – dealing with one friendly team, from render to reality.
We are an expert ISO 9001 accredited team, drawing expertise from our in-house space designers, layout and space planners, and education sector health and safety specialists as well as consulting regularly with teachers and technicians.


We can provide fit-for-purpose science spaces, either for new build or the renovation of existing spaces.


We’ll work with you to create an inspirational new science laboratory. Our specialist design team will consult with you and your colleagues to make layout suggestions that will maximise your space and budget.
We have taken care that the elements we offer are robust and appropriate for school use and place importance on providing quality furniture and equipment that will stand the test of time.


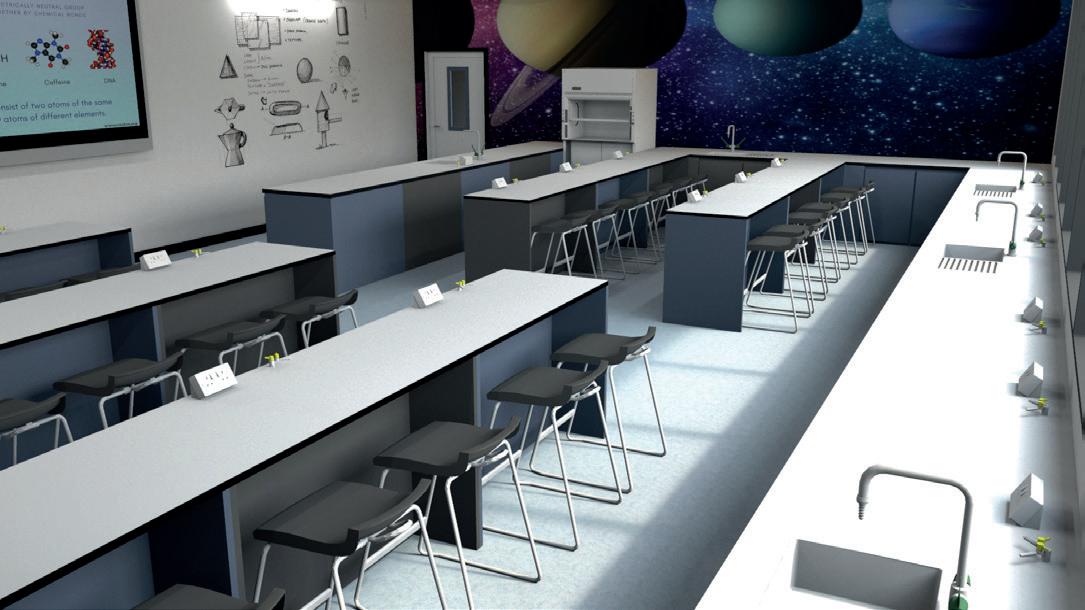
For full fit-out projects or multiple spaces we will illustrate our ideas using CAD drawings and if appropriate 3D colour renders to help you visualise the proposed space.
Do you have a project in mind?
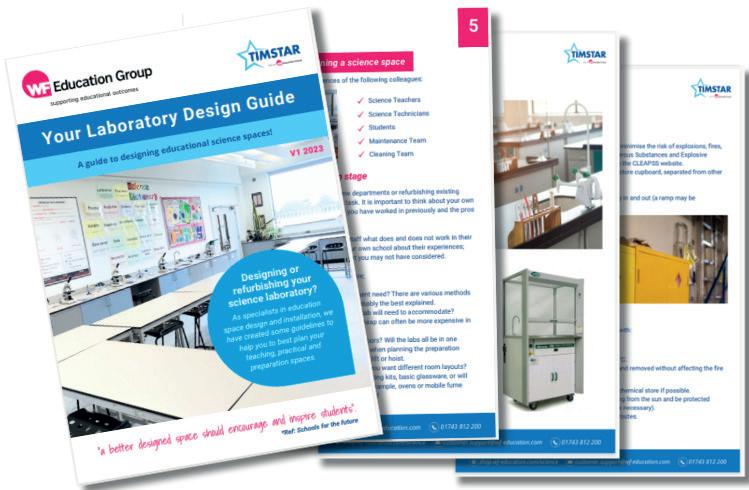
If you are designing or refurbishing your science laboratory – this is the guide for you. As specialists in education space design and installation, we have created some guidelines to help you to best plan your teaching, practical and preparation spaces. For more information, see page 14.

Visit: shop.wf-education.com/science 01743 812 200 customer.support@wf-education.com Discuss a space with us! We can help you with: Design and consultation Space planning Project management and installation Budget optimisation All delivered by one friendly team!
Scan to download your copy.
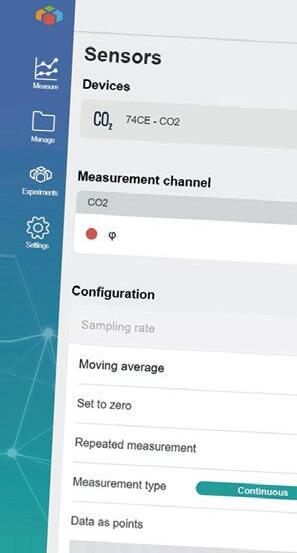
Today's dataloggers are very simple to use and usually consist of a variety of different sensors which link to phones, tablets or PCs via Bluetooth or USB. The Phywe Cobra system includes free measureAPP software which then allows measurements to be easily recorded and graphically displayed.
If you are new to datalogging or have members of staff who haven’t used your datalogging equipment before, here are some simple ideas of how to get started.
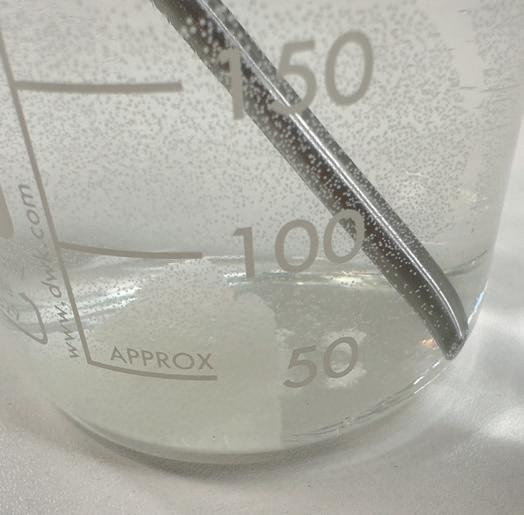
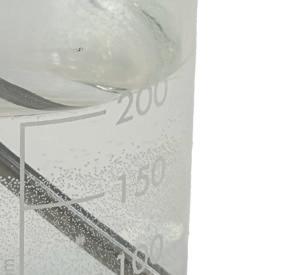
1. Put 200 mL of room temperature water into a beaker.

2. Place a temperature sensor into the water and allow the reading to settle.
3. Add one sugar cube to the water and start recording.
4. Using a stirring rod (not the temperature probe) stir until the sugar cube has completely dissolved.
5. Record the starting temperature and the time taken for the sugar cube to dissolve.
6. Repeat with warm and cold water and compare the results.
Cobra SMARTsense Temperature Sensor
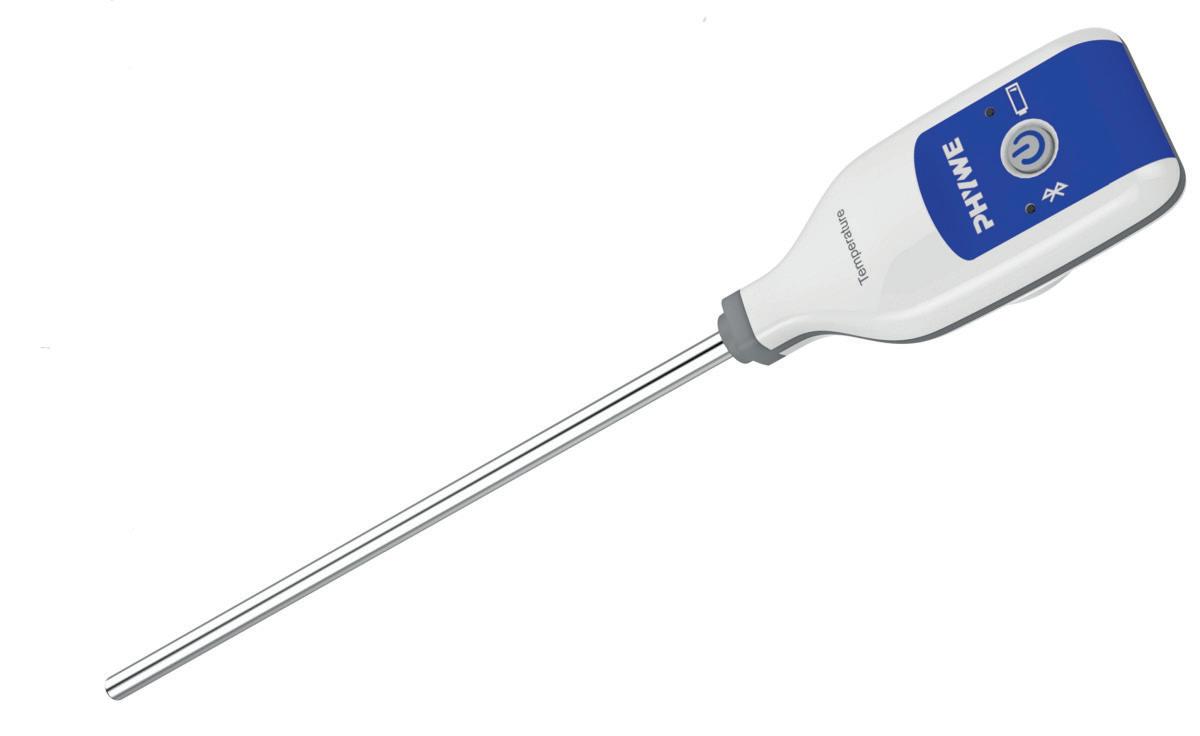
• Quick and easy connection via Bluetooth and the free measureAPP software


• Contains a USB-C rechargeable lithium polymer battery
• Up to 50 hours use on one battery charge
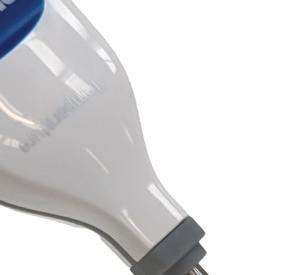
• Range: -40 - 120 °C
• Resolution: 0.01 °C


• Sample rate: 10 Hz
• Water resistant to IP67.
Code: DA220030 £78.50
Scan to see the full range of Phywe datalogging
4 | Where to begin with datalogging
Datalogging can seem quite daunting to many people but these days doing basic experiments is really simple.
How temperature affects the rate at which a sugar cube dissolves
Use AUTUMN10 to save 10% online orders only*.
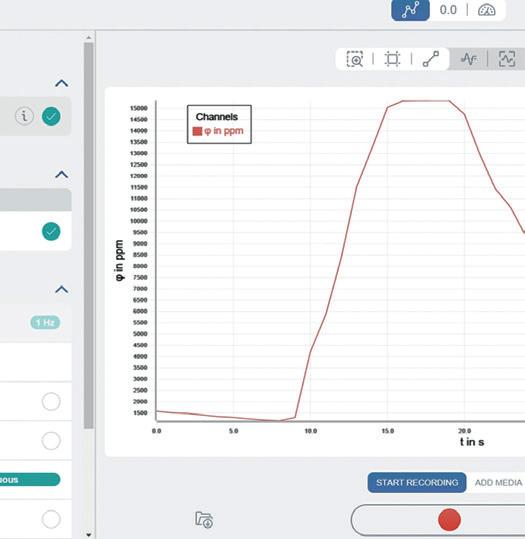
1. Place a CO2 sensor and one end of a length of silicone tubing underneath an upturned pneumatic trough.
2. Start recording and take a long breath out into the silicone tubing.
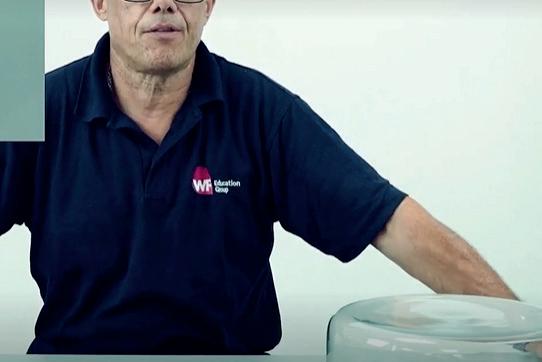

3. Once you have breathed out, slowly lift one side of the trough and watch what happens to the CO2 level.

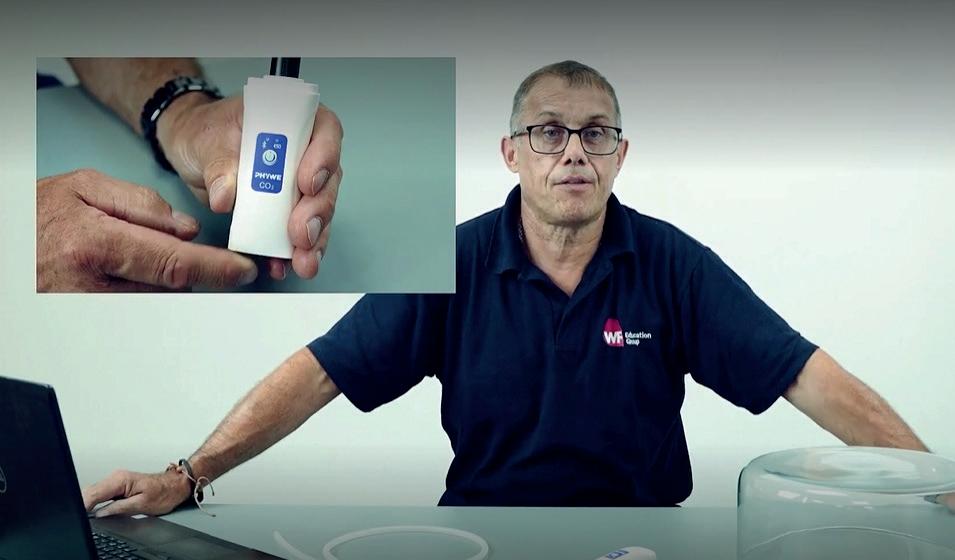
Cobra SMARTsense CO2 Sensor




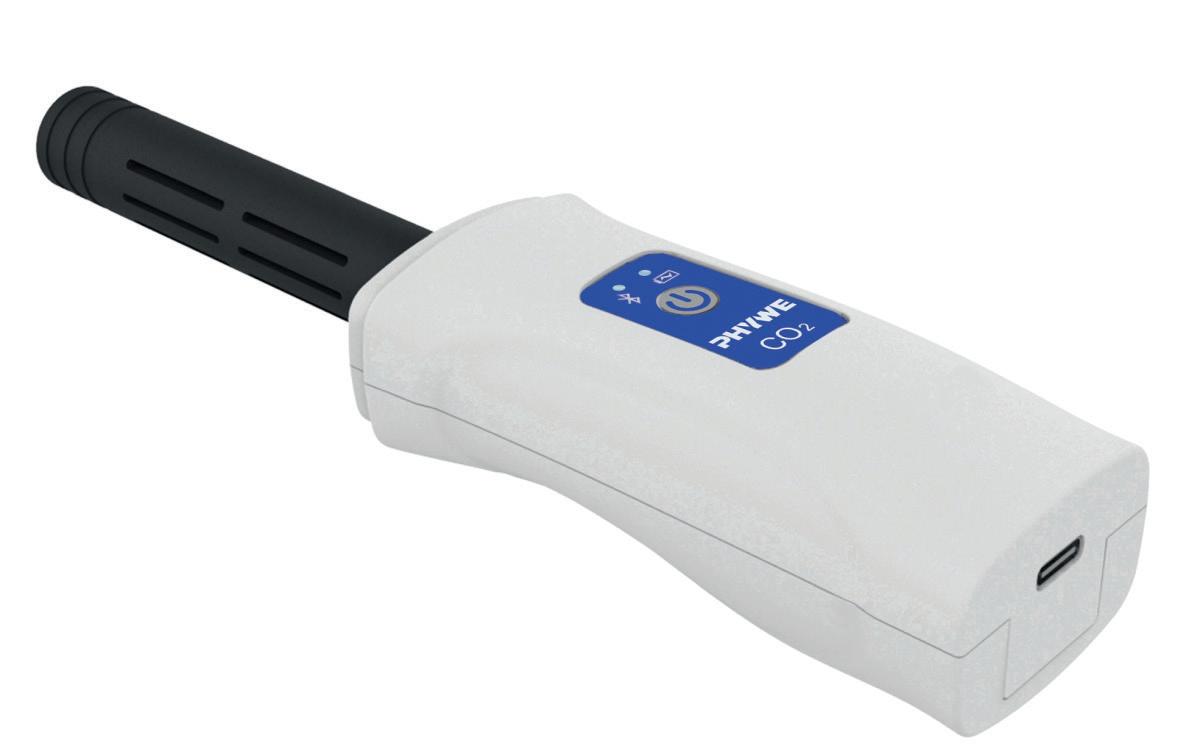
• Range: 0 - 100000 ppm

• Resolution: 2 ppm


• Sample rate: 1 Hz
Code: DA220100 £339.90


| 5 Visit: shop.wf-education.com/science 01743 812 200 customer.support@wf-education.com
Blake Product Specialist Interested in datalogging? Book a free demo with one of our product specialists. Contact us Measuring CO2 levels in a confined space
Matt
have created some simple ‘How to’ videos to help you get started with your Phywe sensor and use the FREE MeasureApp software. Scan the code to view! Download our Measuring CO2 using the Phywe Carbon Dioxide Sensor worksheet! Search ‘datalogging’ online datalogging
We
Calibration is the process of checking the accuracy of your balance.
To properly calibrate a balance, you need to use a weight of a known value, this weight will be different depending on the model of the balance.
Types of calibration
Manual calibration requires adjusting a screw, this is not required on any of the OHAUS electronic balances.

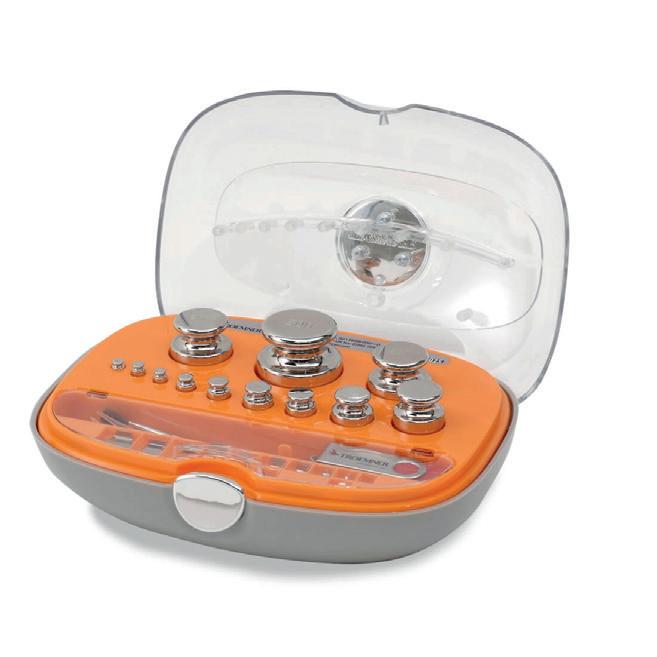
External calibration – the user is prompted by the balance to place a calibration weight onto the balance platform and the balance will then adjust itself to the correct displayed value.
Span calibration uses two calibration points, one at zero and the other at the specified calibration weight.

Linearity calibration uses three calibration points, one at zero and then two further specified weights.
Why do I need to calibrate my balance?
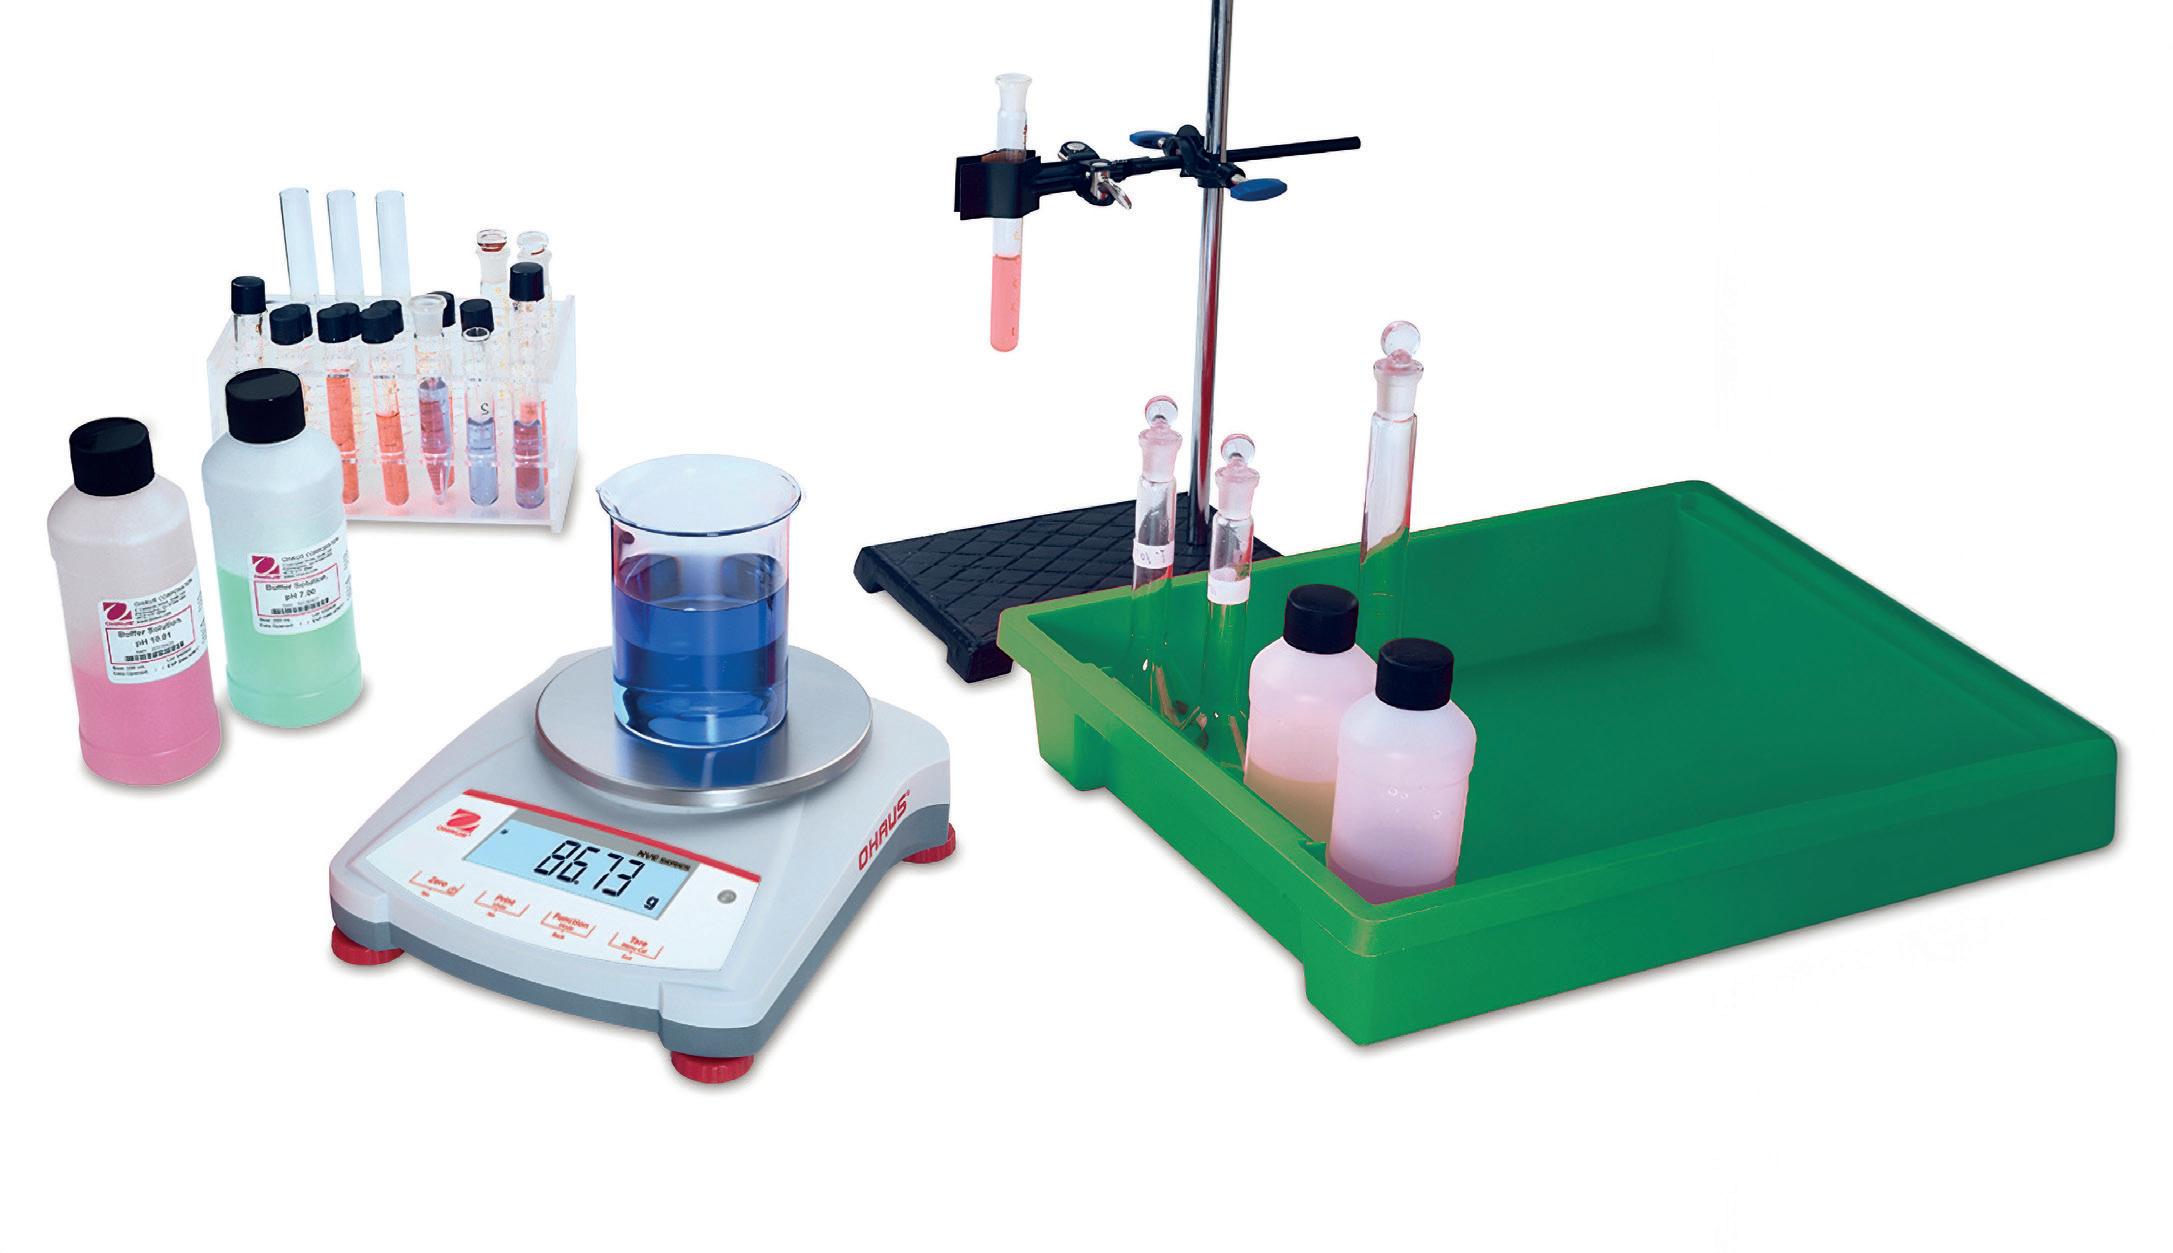
Calibration is essential if you want to be confident in the weighing results from your balance.
When do I need to calibrate my balance?
When first purchased and delivered. Before first use and after any storage or movement. Regularly if you are using them every day.
Search ‘balances’ online balances
6 | Calibrating your OHAUS balance
Calibration means adjusting a measuring instrument to a reference point.
Scout SKX balance calibration
When the balance is operated for the first time, a span calibration is recommended to ensure accurate weighing results. You can find which calibration weight is required by checking in your manual.
Ensure that the Security switch is set to the unlocked position.
Press and hold Menu until [mMeNU] (Menu) is displayed. When the button is released, the display will show [C.A.L].
Press Yes to accept. [SpaN] will then be shown.
Press Yes to begin the span calibration. [--C--] will be displayed while zero reading is stored.
Next, the display shows the calibration weight value (press No to toggle value).
Place the specified calibration mass on the pan. [--C--] will be displayed while the reading is stored. The display will show [done] if the calibration was successful. The balance returns to the previous application mode and is ready for use.
Navigator NVE balance calibration
Press and hold Menu-Cal until [mMeNU] (Menu) is displayed. When the button is released, the display will display [.C.A.L.].
Press Yes to accept, [SpaN] will then be shown. Press Yes again to begin the span calibration. [--C--] blinks while zero reading is stored. Next, the display shows the calibration weight value. Place the specified calibration mass on the pan. [--C--] blinks while the reading is stored. The balance returns to the previous application mode and is ready for use.
OHAUS Scout balances
Designed for education applications, the OHAUS Scout with large backlit LCD backed by education software is the ideal balance for your classroom. It is built to endure demanding classroom applications with superior overload protection. Features including, faster stabilisation time, increased capacity, multiple connectivity options and stackable design make Scout the best weighing experience for the next generation classroom.
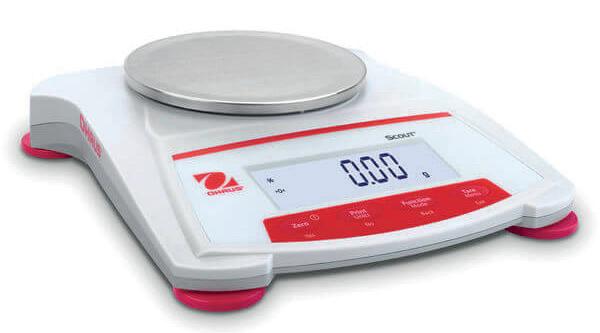
Code: BA160000 SKX123 120g x 0.001g £295.00
Code: BA160002 SKX222 220g x 0.01g £165.00
Code: BA160004 SKX422 420g x 0.01g £199.95
Code: BA160008 SKX622 620g x 0.01g £207.50
Code: BA160012 SKX1202 1200g x 0.01g £252.95
Code: BA160014 SKX2202 2200g x 0.01g £308.95
OHAUS PR series balances
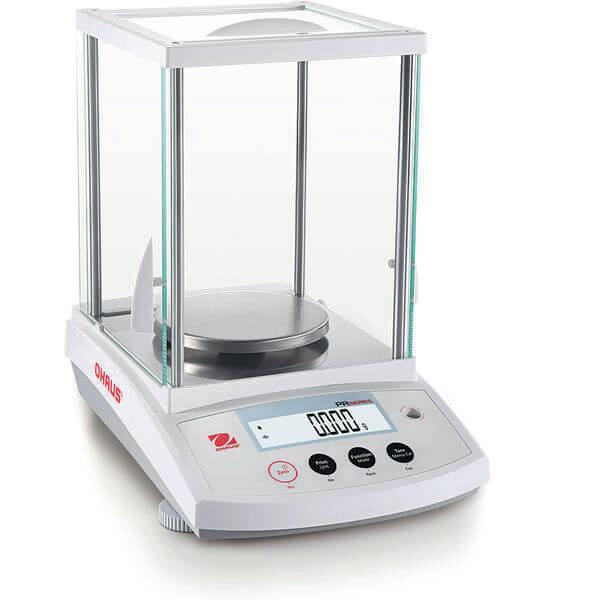
Offering accuracy and repeatability in essential weighing applications in education settings, PR balances deliver competitive performance at an economical price. Featuring RS232 connectivity for easy communication, and a backlit display and a simple interface for uncomplicated operation, the PR is perfectly designed for your prep room.
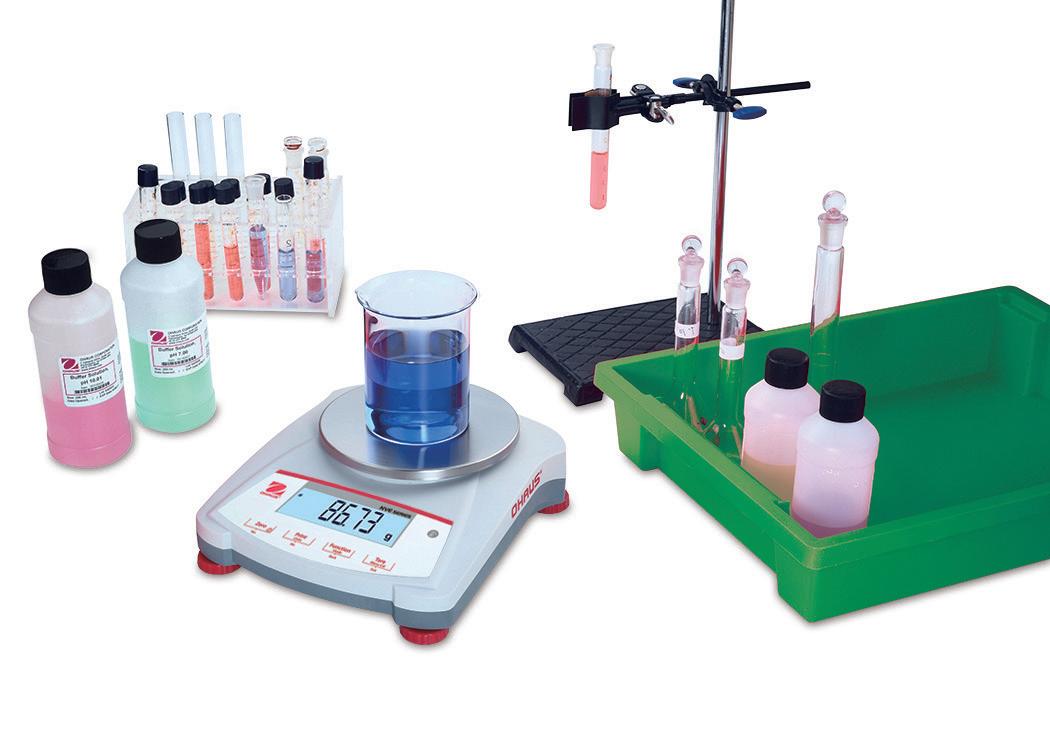
OHAUS Navigator balances
Durably constructed and multifunctional, the Navigator NVE portable balances have been specifically developed for demanding classroom applications with features such as superior overload protection and a stackable design. They have an excellent battery life of 270 hours if using disposable batteries.
Code: BA210000 NVE612UK 620g x 0.01g £86.25
Code: BA210005 NVE2102UK 2200g x 0.01g £136.00
Calibration weights
Refer to your balance manual for the correct weight required.
Code: BA230100 100 g for Scout balances £26.75
Code: BA230110 200 g for Scout balances £30.50
Code: BA230120 1 Kg for Scout balances £77.40
Code: BA230130 2 Kg for Scout balances £123.50
Code: BA230140 100 g for Navigator balances £45.80


Code: BA230150 200 g for Navigator balances £63.20
Code: BA230160 1 Kg for Navigator balances £140.50
| 7 Visit: shop.wf-education.com/science 01743 812 200 customer.support@wf-education.com
PR balances until 31st December 2023!
20% off
Was price Now price Code: BA190300 PR124/E 120 g x 0.0001 g £735.00 £588.00 Code: BA190304 PR423/E 420 g x 0.001 g £586.00 £468.80 Code: BA190306 PR2202/E 2200 g x 0.01 g £602.00 £481.60 Code: BA190308 PR4202/E 4200 g x 0.01 g £635.00 £508.00 £586.00 £602.00
Making solutions
One of the things a chemistry technician will be asked to do on a daily basis is to make a solution.
This can be diluting a higher concentration solution down to the lower one required for the practical or making a solution from a solid. You may be asked for a concentration in moldm-3 (M), %, vol (hydrogen peroxide units of concentration).

Diluting concentrated solutions.
The golden rule here is always add acid to water and never water to acid
So, always add the more concentrated solution to the less concentrated one. The reason for this is that water with concentrated acid reactions are very exothermic (generate a lot of heat), and they can erupt from the flask causing burns and damage, for example, adding water into concentrated sulfuric acid.



DO NOT: Add water to acid DO: Add acid to water
If you add concentrated acid into water, you are immediately diluting it many times, so the reaction will be mild(er). If you add a small amount of water to a concentrated acid the amount of dilution is tiny, so the reaction will be large.


The mathematics of making solutions:
Making a solution from a higher concentrated stock solution. A simple method for working out how much solution you need to add to dilute it to the required concentration is to use the following formula:


concentration you want concentration you have got
X what you need (Total volume) = the volume you add
If all the units for concentration are kept the same this equation can be used for any dilution.


Example 1: making 2000 mL of a 1 M solution, from a 5 M stock solution:

• Concentration you want: 1 M
• Concentration you have: 5 M



• Total volume you want to make up (what you need): 2000 mL


So:
Example 2: you have a 20 % stock solution, but the practical requires 0.5 %. You want to make 100 mL:

• Concentration you want: 0.5 %


• Concentration you have: 20 %
• Total volume you want to make up (what you need): 100 mL


So:
0.5 20 X 100 = 2.5 1 5 X 2000 = 400
You will need to add 400 mL of the (5 M) stock solution to 1600 mL water, to make a final volume of 2000 mL (2 L).

You will need to add 2.5 mL of the (20 %) stock solution to 97.5 mL water, to make a final volume of 100 mL.

8 | NEW technician training modules
Making a solution from a solid:

To make a solution ‘from scratch’ you need to know the molecular weight of the solid (Mr or MW)
This will be given on the bottle containing the chemical:

To make a 1moldm-3 (1 M) solution of the stock, you add the Mr (in g) into the required solvent (usually water) up to 1 L:

So, the Mr in 1 L = 1 M
An easy way for the non-mathematical among us to make different concentrations is to use the following equation, see examples:
Using Mr = 97
Example 1: if 97 g of chemical in 1000 mL water = 1 M, how much chemical is needed for 2 M (in 1000 mL)?
97 g in 1000 mL = 1 M
X g in 1000 mL = 2 M
Ignore the 1000 mL as it’s the same both times.
So: 97 g = 1 M
X g = 2 M

So, 194 g of chemical in 1000 mL water = 2 M
Example 2: 97 g of chemical = 1 M in 1000 mL of water. How many g of chemical do I need in 500 mL (for 1 M)?
97 g in 1000 mL = 1 M
Y g in 500 mL = 1 M
Remove 1 M as it’s the same.
So: 97 g = 1000 mL
Y g = 500 mL
So, 48.5 g in 500 mL = 1 M
Of course, it might be obvious to you that you just dilute this 2 times or add half as much, but things rarely stay that simple and this way of rearranging the equation is fool proof and is a good way of checking your mental maths back.
Scan to browse our Chemicals category online.


| 9
Visit: shop.wf-education.com/science 01743 812 200 customer.support@wf-education.com
2 1
194 X =
97 X
=
97 X 500 1000 = 48.5 Y =
Making solutions continued...
Percentage solutions:
Usually, a percentage solution is needed for biology experiments using enzymes and making starch solutions. A percentage means ‘out of 100’.
If you are starting with a liquid solution (e.g., commercially bought liquid enzyme), you can consider it to be a 100% solution of the enzyme.


You do not need to use the Mr when making a % solution from a solid.


Example: 1 % solution of enzyme in 10 mL: 1 % would be 1 mL in a final volume of 100 mL. (This is equivalent to 0.1 mL in 10 mL)
Example 2: 2 % glucose solution in 100 mL water:
Add 2 g glucose to a beaker, make up to a final (total) volume of 100 mL with water. Take care not to add too much water initially, until all the glucose has dissolved, or the final volume will be greater than 100 mL and thus the concentration will be less than 2 %.
Once you have made your solution, whatever it is, you should transfer it to a suitable container with the appropriate label and GHS symbol (if necessary).
Saturated solution:

A saturated solution is one in which the solvent can hold no more solid, a bit like a saturated sponge.
When making a saturated solution it’s good to know how soluble the solid is in the first place. One that is highly soluble (i.e., will easily dissolve) will need a lot more solid:liquid compared with a solid of low solubility. For example, calcium nitrate (tetrahydrate) is extremely soluble in water. It has a solubility of 1290 gL-1 (this means that 1 L of water will dissolve a huge 1290 g of solid at 20°C), barium sulfate on the other hand, has a very low solubility: 1 L of water will only dissolve 0.00115 g of solid).
So, to make a saturated solution it is best to start with a small volume of water, add some solid to it and stir to dissolve, increase the amount of solid slowly, and increase volume of water accordingly. The solubility will be higher at warmer temperatures, so you might need to warm the solution to get saturation.


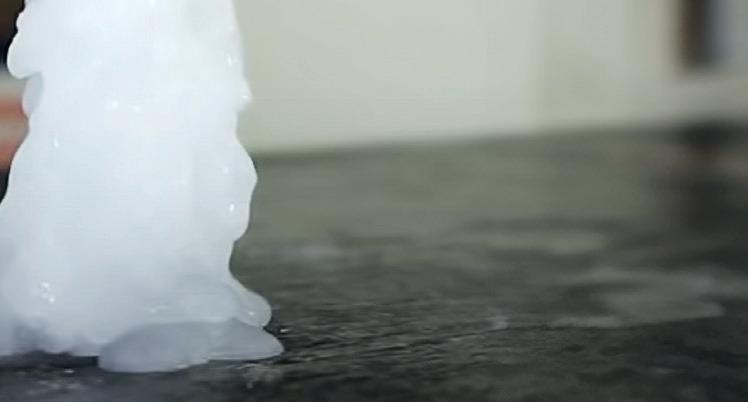
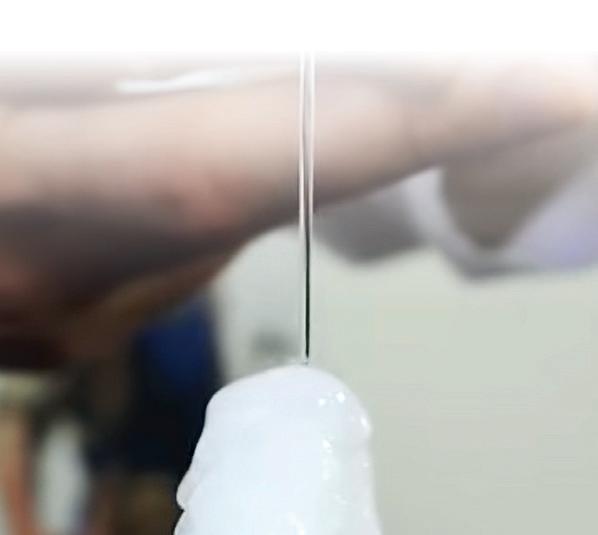
(Note: a supersaturated solution is one where you have more than the maximum amount of solid that is normally able to be dissolved, in solution. In these cases, adding a crystal ‘seed’ into the solution will make the solid come back out of solution (recrystallize). The ‘hot ice’ demonstration uses the supersaturation of sodium acetate to make the magic happen).

10 | NEW technician training modules
Why not scan and download our printable ‘Making Solutions and Dilutions’ guide...
Spillages:
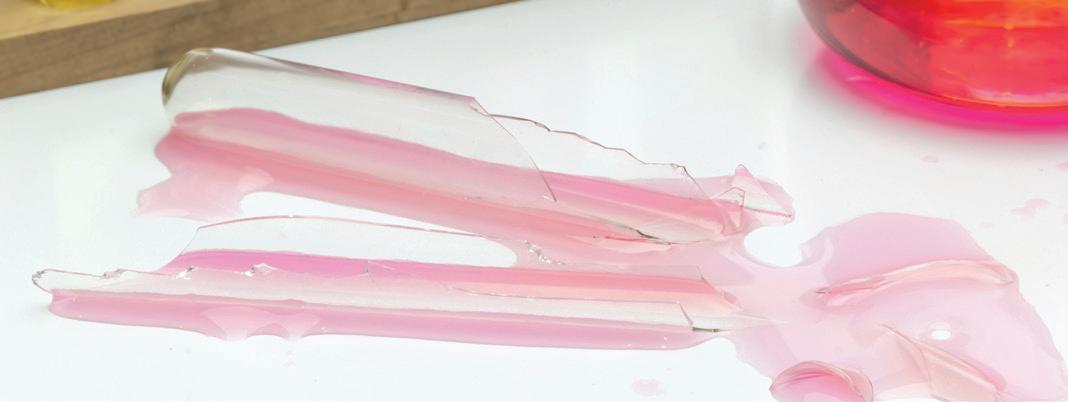
Spilling solutions is an obvious hazard in the prep room as you are working with them so often. Always be aware of what chemicals you are using and what other chemicals are in the room.
Know how to deal with different spillages (mercury will be dealt with very differently to hydrochloric acid).
If you are a member of CLEAPSS/SSERC then the ‘hazcard’ will detail spillage procedures, so it’s good to be familiar with these before you start working.
Make sure you have researched the hazards and spillage procedures of the chemicals you are dealing with. Most classes will be using dilute acids and alkalis and spills from these can be easily dealt with by having a spill kit in each laboratory.
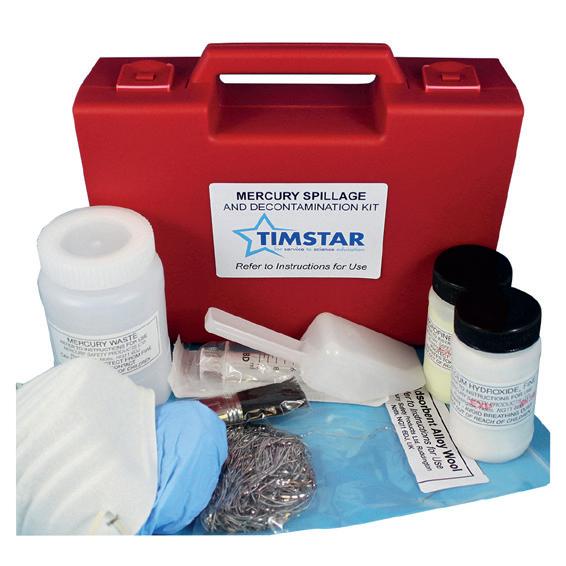
Mercury spillage kit


Using unique alloy wool absorbent, this kit is designed to cope with mercury spillages on almost any surface, including flooring and carpet. It contains all you need to quickly and easily deal with spillages, and full, easy to read instructions.
Code: SA160700 £54.60
Mercury:


You will need a more specialist approach, and it is good to organise a mercury spill kit (gloves and mask, various syringes, and glass screw top bottles). A 1:1 mix of flowers of sulfur/calcium hydroxide should be available and it’s useful to have paint brush/paper towel to hand.
• Evacuate the area.
• Put on gloves and a face mask (mercury vapour is toxic).

• Use the syringe to suck up the main pool of mercury and transfer it to the glass bottle.
• Be aware of any escaping beads of mercury rolling away.

• Take some of the sulfur/calcium hydroxide mix and heat with a little water to make a slurry/paste and apply this to any remaining mercury and allow to dry.
• Once dry add this to the mercury waste bottle.
• Label the bottle and store securely until it can be collected by a registered waste carrier.

• Wash any used equipment and restock the mercury spill kit.

Use






10%
Chemical spillage kit
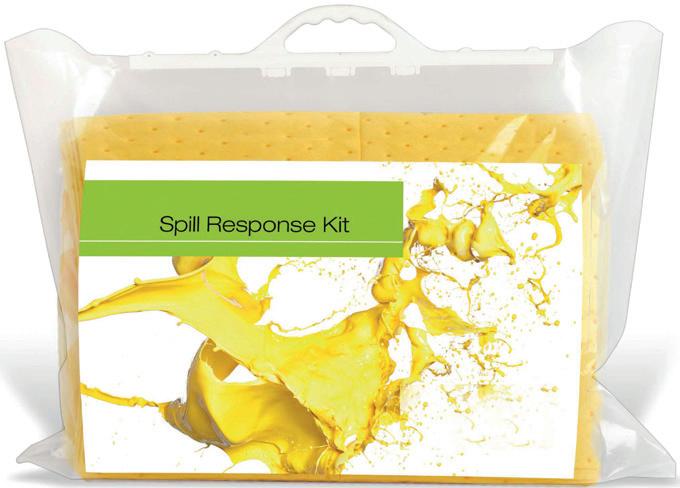
This 15 litre kit is supplied in a plastic bag with handle.
• Ideal for science departments.
• Contents absorb up to 15 litres of aggressive liquids.
Code: SA130600
£42.00
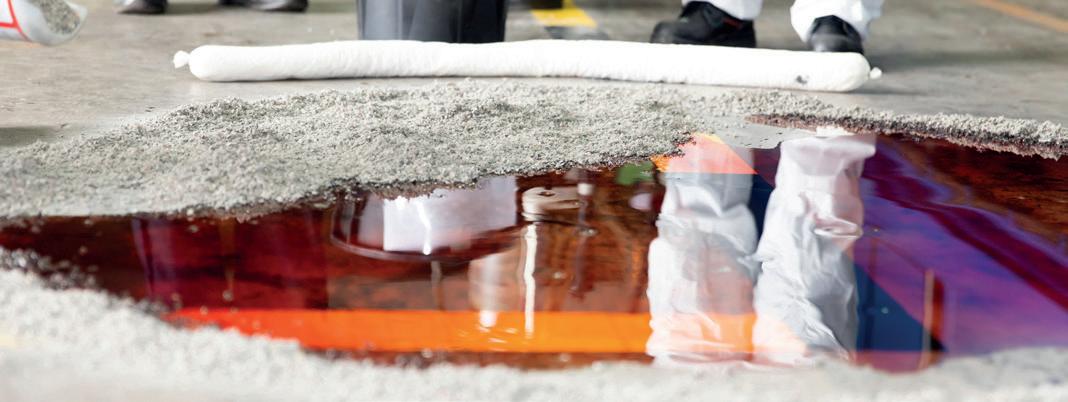
Spillage granules

Spilkleen Plus loose absorbent cellulose granules. Highly absorbent, lightweight granules suited for indoor use, specifically formulated for the absorption of oil, fuel and water based spillages.

| 11 Visit: shop.wf-education.com/science 01743 812 200 customer.support@wf-education.com
AUTUMN10 to save
Code: SA96064 £10.00 online orders only*.
General care of your microscopes
Here are some simple tips that will help you to maintain your microscope in perfect condition and avoid possible repairs.
Never attempt to disassemble any part of the instrument, other than the ones described in the manual. Dust and dirt are two of the main causes for malfunction in a microscope. Avoid placing the instrument in any location exposed to direct sunlight, dust, vibration, high temperature, high humidity and where it is difficult to unplug the power supply cord.
Place on a clean, stable, and uniform surface.

How to avoid repairs before using your microscope:
Do not force any mechanical components, such as the focusing knobs. Do not rotate either the left or the right knob while holding the other. Do not turn the coarse and fine focusing knobs exceeding their limit. Do not touch any of the lenses with bare fingers.
Immersion oil must be used sparingly, a single drop is enough. Correct use will avoid getting other components of the instrument dirty. Once the activity is finished, the oil should be wiped off the objective using a lens cleaning tissue, and the residual film removed with soft cloth moistened with absolute alcohol. The same procedure should be repeated on the specimen slide. By doing this you will avoid dirtying (and damaging) other objectives, especially the ones of high magnification.
After use:
Adjust the light intensity control to minimum before switching it off, this way when the light is turned back on, the bulb does not suffer a power surge. This will help prolong the life of the bulb.
Place the objective with the lower magnification on the optical path, it is the shorter one. This will avoid any contact with the stage, condenser or slide when using it again. Cover the instrument with a vinyl dust cover.
When you are not using the microscope for a long period of time:
Store the microscope in a place with low humidity level, where mould is not likely to form, protected by its dust cover and - if possible - inside its transport box. Store the objectives, eyepieces and filters in a container or desiccator with a drying agent.
Catherine Mellor Product Specialist

Our product specialists are happy to demonstrate our range of microscopes. Contact us

12 | Microscopy
Scan to take a look at our ‘Parts of a Microscope’ annotated diagram!
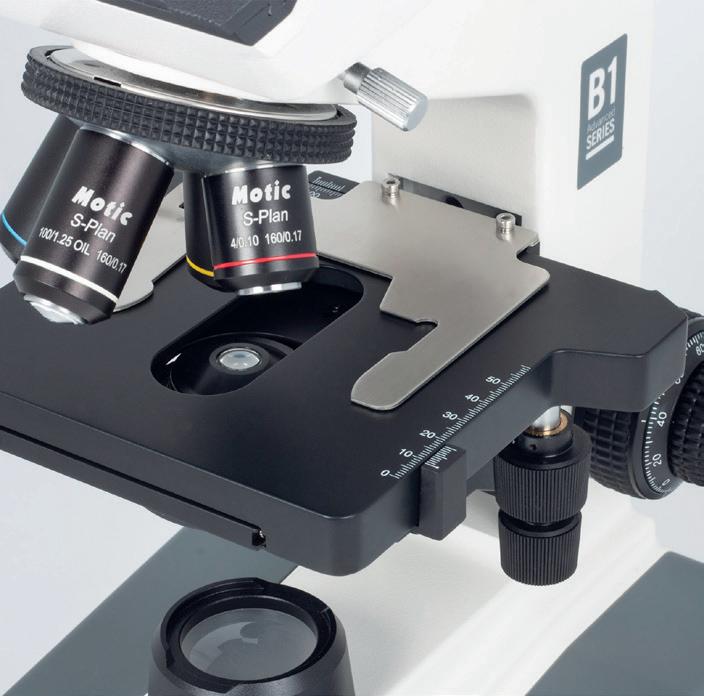
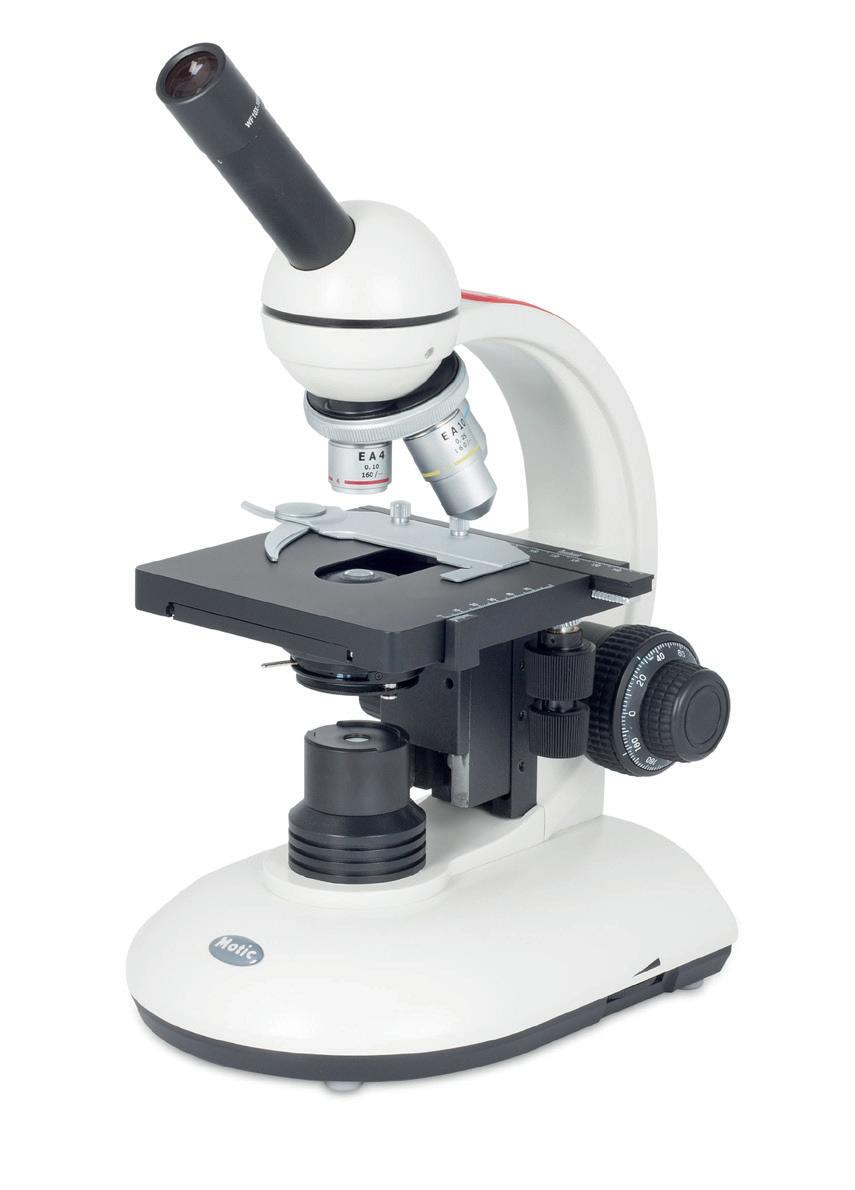
B1 Microscopes
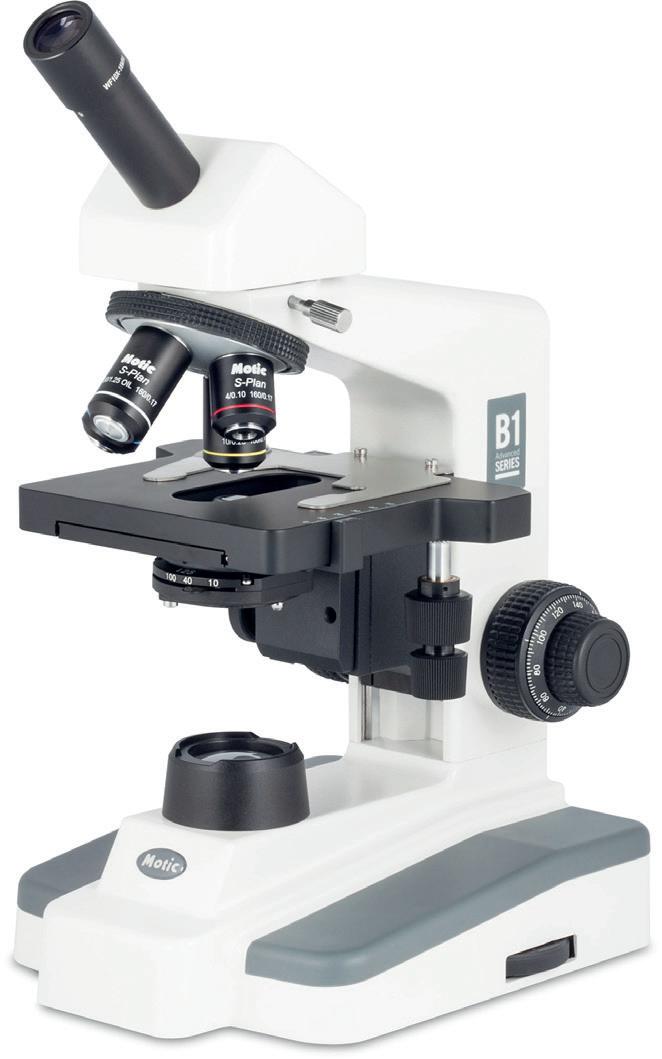
“The B1 range features:
• x4, x10, x40, x100 Semi-Plan achromatic, DIN objectives
• Built-in rackless mechanical stage
• Coaxial coarse and fine focusing
• 1.25 NA Abbe condenser with iris diaphragm
• 3 W LED illumination
Available as monocular, binocular and trinocular.
Code: MI180100 Monocular £400.00
Code: MI180200 Binocular £530.00
Code: MI220000 Trinocular £619.50
Best Seller!
2802 LED Cordless Microscope
A monocular LED microscope featuring:
• x4, x10, and x40 objectives
• Coaxial coarse and fine focusing
• Mechanical stage
• Focusable Abbe condenser
• Rechargeable battery pack allowing cordless usage
Code: MI230110 £285.00
Best Seller!
SFC-100FLED Microscopes
A robust and easy to handle microscope.
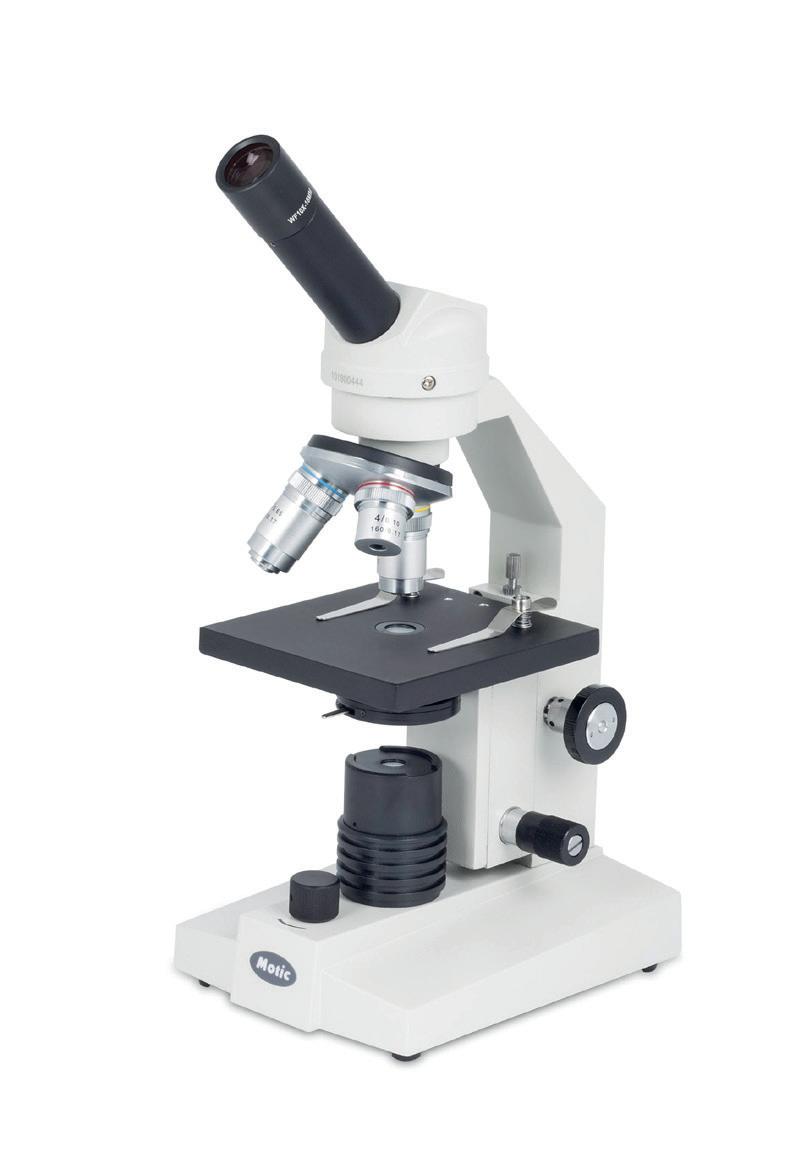
• x4, x10, and x40 (R) DIN objectives
• Coarse and fine rack and pinion focusing
• 0.65 NA condenser
• LED 3.5 V/70 mW illumination with intensity control
Available with fitted eyepiece graticule.
Code: MI55310 Standard £127.50
Code: MI55310/10 Standard, Pack 10 £1,250.00
Code: MI180312 With eyepiece graticule £190.00
Code: MI180312/10 With eyepiece graticule, Pack 10 £1,795.00
LED illumination offers cool, natural colour light. It also uses less power and the bulbs will last longer than halogen alternatives.
| 13 Visit: shop.wf-education.com/science 01743 812 200 customer.support@wf-education.com
NEW!
Use AUTUMN10 to save 10% online orders only*.
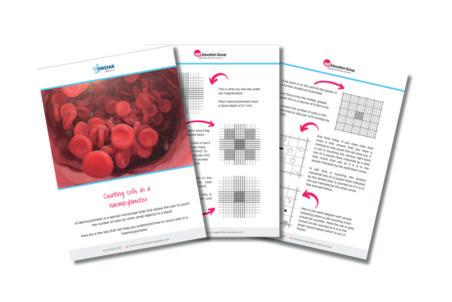
Why not download our guide to see how to use the haemocytometer under a microscope...
Designing laboratories guide







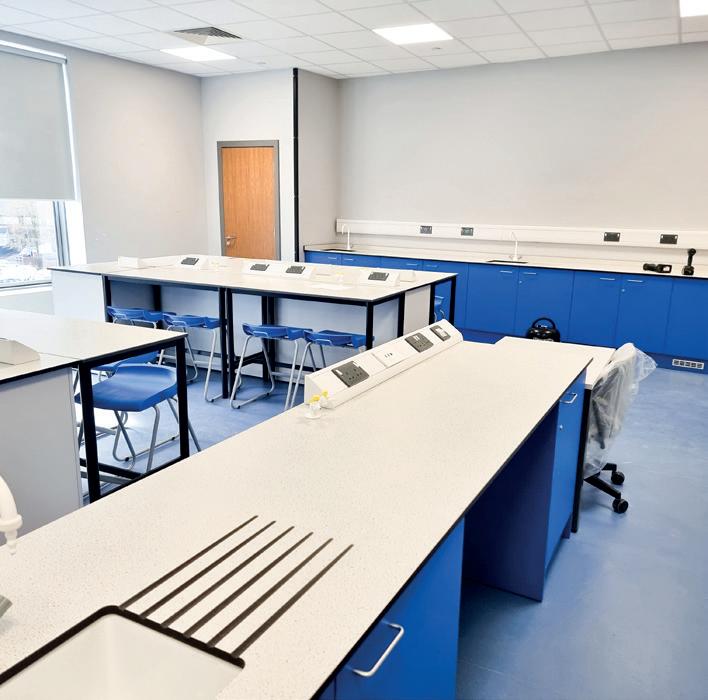
If your school or college is refurbishing or creating new science teaching or preparation spaces, this guide is for you.

“Your Laboratory Design Guide” has been written specifically for departmental staff, facilities management, and school leadership to support decision-making alongside architects and space planners and help ensure you have a facility that is fitfor-purpose for years to come.




Scan the QR code to download your copy today...
Don’t just take our word for it!
“Timstar’s service was excellent, communication was very good between the project manager, me and our site team who worked on the refurbishment of the new lab. We’re delighted!”
 Wendy Thorburn, Lead Science Technician, Kingdown School
The Association for Science Education


Insights include...
What to consider when designing



Laboratory facilities
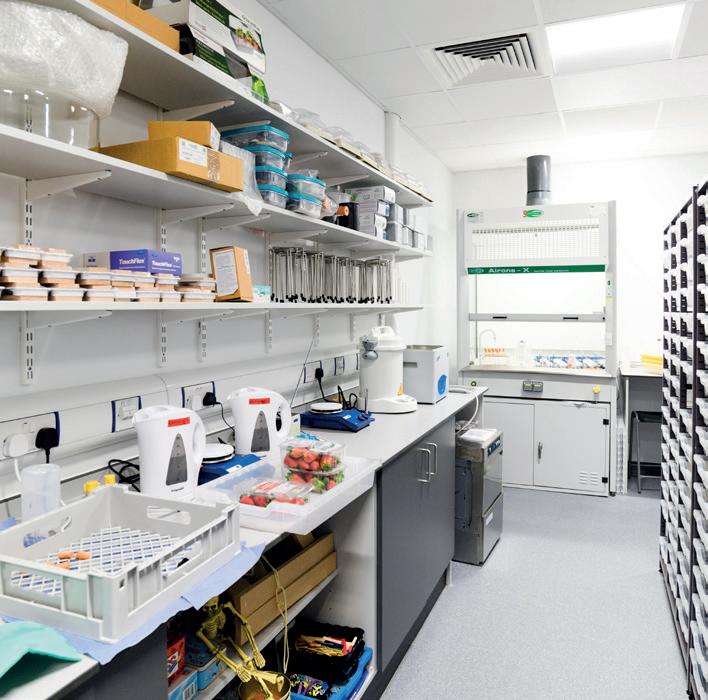
The prep room
Storing hazardous materials
Fume cupboards
Technical information
“Timstar have been very supportive and honest in the advice we received.”
Andrew Nalborczyk, Head of Science, Burnley High School
“Timstar offered both value for money and fabulous customer service. The team were really great at rolling up their sleeves and helping us get ready in the new build.”
Sonia Allen, Project Director, Humber
14 |
UTC
“School science laboratories are an expensive investment and are expected to last for many years. A poor design will impact on generations of pupils, teachers, and technicians.”
We understand that for most staff, redesigning an educational space may only happen a few times during a career. For us it’s our passion and we will happily support you and share our expertise to create spaces that work. A Timstar lab provides space for a mixture of practical and non-practical activities and includes consideration of demonstrations, presentations and discussion, individual, small group, and class work, experimentation, and research.
We create attractive, engaging laboratory spaces to stimulate pupils’ learning, alongside well-planned preparation areas for teaching and technical staff.
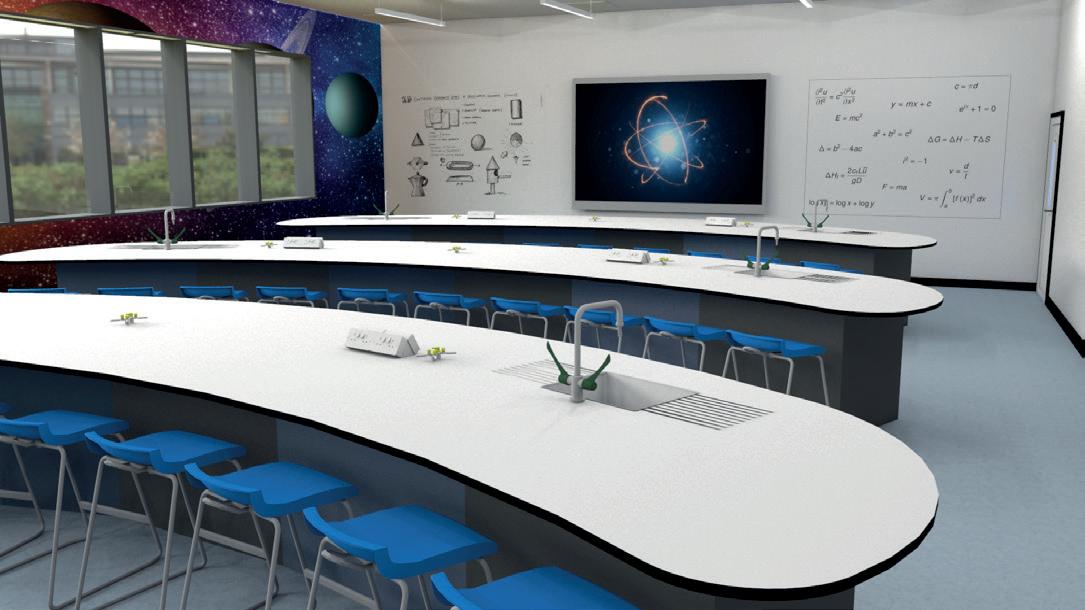
CUSTOMISED LAB DESIGN

We’ll work with you to create an inspirational new science laboratory. Our specialist design team will consult with you and your colleagues to make layout suggestions that will maximise your space and budget. We have taken care that the elements we offer are robust and appropriate for school use and place importance on providing quality furniture and equipment that will stand the test of time. For full fit-out projects or multiple spaces we will illustrate our ideas using CAD drawings and if appropriate 3D colour renders to help you visualise the proposed space.
A COMPREHENSIVE SERVICE
Once a design is approved, we will then discuss programming the work at a time to suit you and hand-over to our Project Management team.
Our team can coordinate the supply & installation of your school science laboratory furniture and equipment. Our solution includes the coordination of all trades – an invaluable service for busy school staff.
When your space is complete, and if desired, our team can unpack and stock your space with essential items from the Timstar range.
Uniquely, Timstar can offer a complete chemical store service. Our in-house expert can assist you with ordering all that you will need to stock your store, and then unpack and put away all chemicals following all Health and Safety requirements.

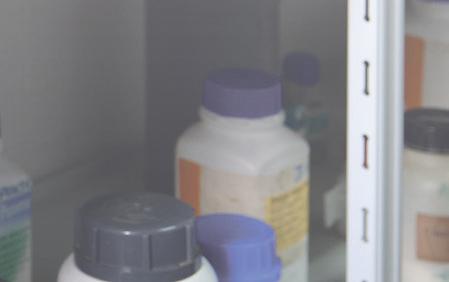
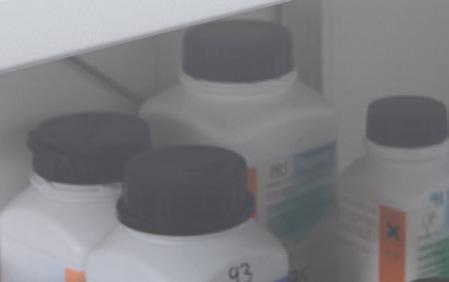

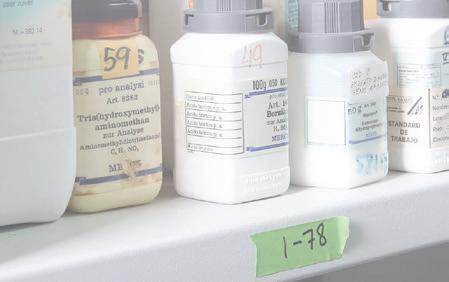



Our experienced team will pay attention to all aspects of your space including:


| 15 Design it, fit it, fill it…with Timstar
And much, much, more...! D of E requirements Plumbing and water supply Ventilation Gas and extraction Fixed and mobile furniture Acoustics and sound proofing Power and data cabling Storage Focus walls
Visit: shop.wf-education.com/science 01743 812 200 customer.support@wf-education.com
If you would like to discuss a project, scan the code and complete the form!
A rotational force, similar and stronger to that of gravity!
What is a centrifuge?
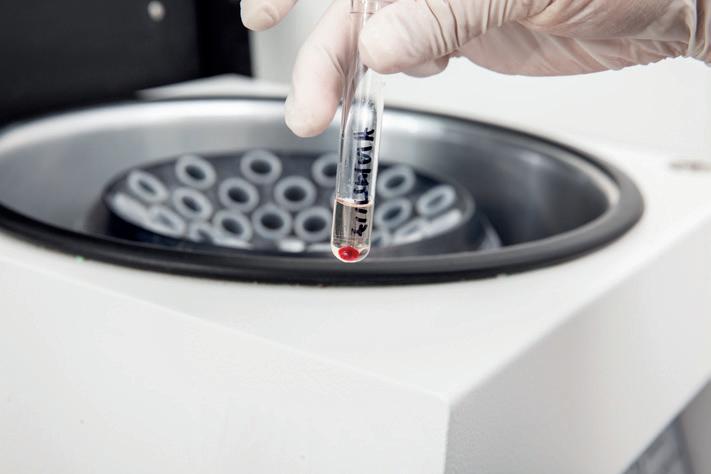
• A centrifuge is used to separate solids and liquids, by forcing heavier/denser particles to the bottom of a tube.
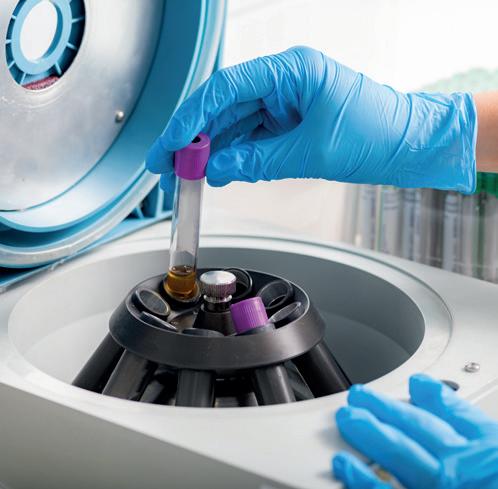
• Over time, particles in a liquid will settle out, due to the force of gravity acting on them (like sand in a beaker of water). However, if the particles are extremely low mass this can take many, many hours. A centrifuge is able to apply a much larger force on these particles and thus they will settle out faster.
• When objects spin around a fixed point, a force acts (traditionally this was described as an outward force: centrifugal force) and molecules will be pulled outwards.
• However centrifugal force is an artificial construct used to describe a force ‘feeling’ which is actually the result of inertia (tendency of a mass to resist changes in its motion).
• The actual force causing the movement is centripetal force which is directed towards the centre of the circular path, and at 90° to its velocity, with the formula:
mv2 r Fc =
Where:
Fc is centripetal force (N)
m is mass (kg)
v is velocity (ms-1)
r is the radius of the circle (m)
• Centripetal force is described in rotational motion in A level physics.
Imbalanced masses cause unbalanced forces
As the fairground ride spins about a central point, the people are ‘forced’ outward (away from the centre). In this fairground ride image, the movement in relation to the size of people is slow, which means that instability or imbalance will not pose a problem, and people can sit anywhere on the ride.

However, with the much faster speeds that you see in a centrifuge, imbalances in mass can pose a threat to the stability of the centrifuge itself:
The force acting on the smaller person is much larger than that acting on the bigger person and the smaller one is pulled out of balance.

In the centrifuge:
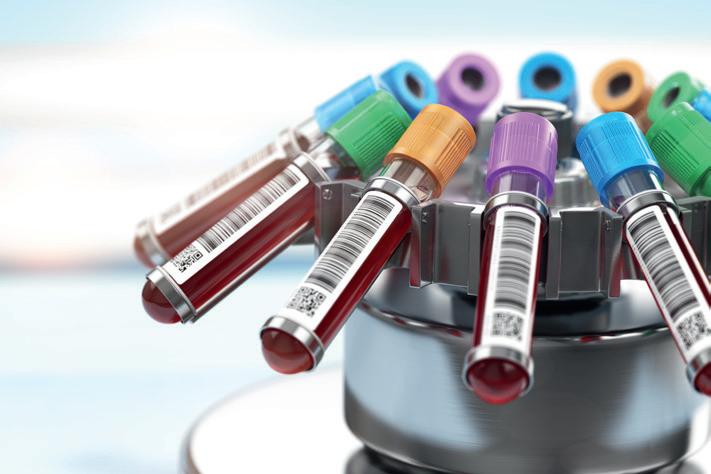
For the forces to be balanced the masses of liquids should be near equal and placed equidistant around the central core.
16 | Centrifugal force
fairground ride
Spinning
Always balance the centrifuge.
Size of the force
If you are interested to know how much relative force is applied to your spinning samples, the relationship between the rotational speed and relative centrifugal force is given by the equation:

g = R x S2 x (1.118 x 10-5)
Where:
R is the radius (centre of rotor to sample), cm S is the speed of the centrifuge, RPM g is centrifugal force, xg
1.118 x 10⁻⁵ is the RCF factor (a constant)

*Note the units in this equation are not the standard SI units*
So, for example, for a 7 cm rotor, and a speed of 5000 RPM, the force applied will be:
g = 7 x 50002 x (1.118 x 10-5) = 1.957 xg
So, 1.957 times the force of gravity
If the radius or speed is increased the relative centrifugal force will also increase:
e.g.: A 14 cm rotor, with a speed of 5000 RPM:


g = 14 x 50002 x (1.118 x 10-5) = 3913 xg
And a 7 cm rotor with a speed of 10000 RPM:
g = 7 x 100002 x (1.118 x 10-5) = 7826 xg


So, what seems like fairly small changes in radius or speed can effect huge changes in relative force.
• Because of the large forces acting on the spinning tubes it is particularly important to choose the correct bottles and tubes to use in the centrifuge, to prevent breakages inside the machine, which can lead to imbalances and a broken centrifuge.
• Centrifuges are important in molecular biology to separate DNA and RNA from solutions and will be used in school when doing PCR (Polymerise Chain Reaction) and DNA fingerprinting experiments.
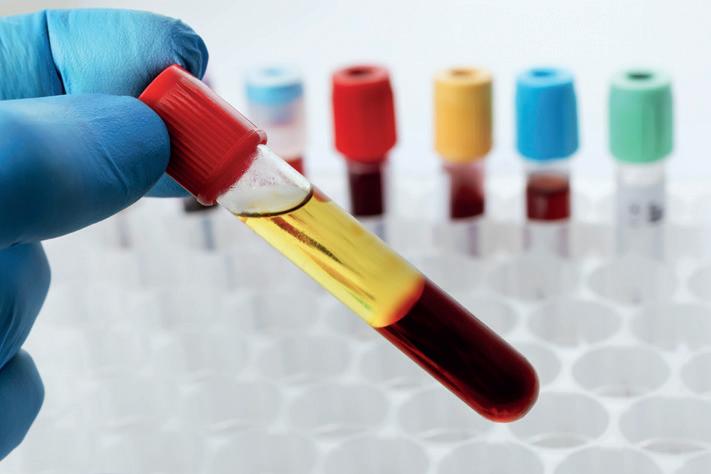
• They are extensively used in research, both chemical and biological, and in medical diagnostics to separate out the different components of blood.
Ohaus Frontier™ 5306 mini centrifuge

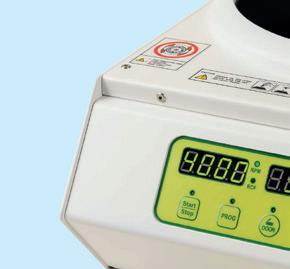
The OHAUS Frontier™ 5306 is a small but powerful mini centrifuge for simple and quick liquid separation. With an 8-place 1.5 mL or 2 mL tube rotor as well as 4 place PCR 8-strip tube rotor, the Frontier™ 5306 can accommodate 0.2 mL 8 strip tubes or 32 individual PCR tubes.
Was price Now price
This high-quality centrifuge is compact and robust, making it ideal for routine low-speed centrifugation. The Targa Centrifuge (model NE 010G) from Clifton spins at up to 4000 rpm, with an acceleration/deceleration time of approx. 20 seconds. Complete with lid lock safety and lid drop protection.
Code:

| 17
£194.00 £155.20
Seller!
Code: CE180100
Best
and
Visit: shop.wf-education.com/science 01743 812 200 customer.support@wf-education.com 20% off until 31st December 2023!
CE180900 £865.00 Scan here for our full range of centrifuges
tubes!
Part of the A level biology specification is being able to identify the stages of mitosis, and a root tip squash to see these dividing cells forms part of the practical assessment element of the exam.
Mitosis is the part of the cell cycle where division takes place, and 2 daughter cells, identical to each other and the parent cell are formed. This is different from meiosis where the daughter cells are significantly different from each other and the parent cell.
The root tip


In plants the roots elongate as they grow, adding cells on to the tips of the roots, and this is where mitosis will be actively occurring, most of it in the meristem, just behind the very tip (end cap) of the root.
The aim is for the students to remove the growing tip of the root, and stain the cells inside, in order to see the stages of mitosis.
Growing the garlic
Roots
It will take a few days to grow the garlic so that there are roots available for students to use.
The roots should ideally be about 1 cm long when the students remove them. This can take anywhere from a few days to a week, depending on the garlic. There is no definitive time length, and sometimes the roots don’t grow at all (so always grow more than you might need).


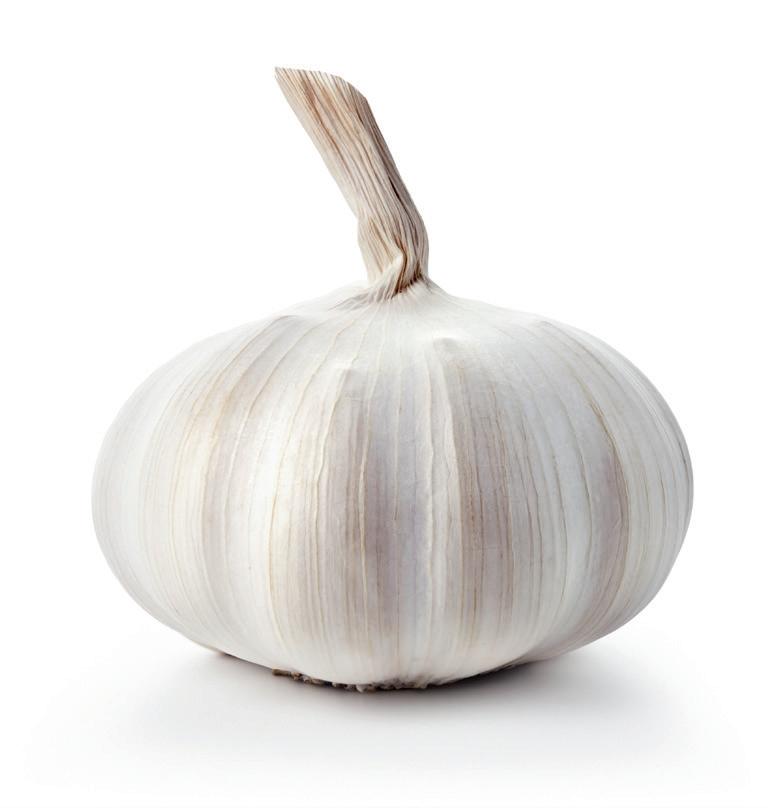
1 Obtain a garlic bulb (supermarket has been shown to work, as has organic and home grown, none appear to be consistently better than any other).

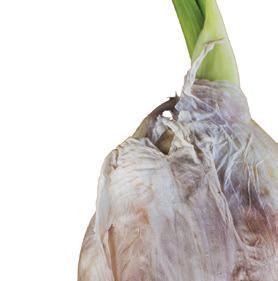
2. Split the bulb into cloves.
3. Using a toothpick, skewer the clove through its middle. You do not need to peel the clove.



4. With the rough (flat) side down and pointy end up, balance the skewered clove over some water (this can be a boiling tube, beaker, or any suitable container). You want the bottom of the bulb to be sitting in the water, but not touching the bottom of the container.
5. Leave in a bright position (window ledge is ideal), until roots are the desired length.

Base of root (attached to stem)

Meristem: (rapid mitosis)

Tip of root
Root cap
Garlic bulb (containing many cloves)
Skewer through here
18 | Investigating a root tip squash for mitosis
Stem Garlic clove
Top Base
Preparing the root tip
You can give the complete cloves, with roots, to the students for them to remove their own root tip, or you can cut and fix the tips first, this will preserve them for later use and ‘fix’ the mitotic process, so you should still be able to see the stages of mitosis.
If you choose to leave the whole clove with the class, care should be taken to remind the students to each remove a complete root. They can cut the tip and discard the rest later. This way they won’t leave tip-less (and therefore mitosis free) roots for others to (unsuccessfully) stain.
If you need to cut and preserve the roots for later use, it is harder to then identify which end is tip and which is root base, the only defining feature is that root tips are pointed, although good eyesight or a magnifier is needed to confirm. You can try marking one end (but the mark will likely be lost in the fixative solution) or nicking the root near the base, but this is fiddly.
However, if you do fix the roots this is the process:
Ingredients:
• Absolute ethanol (ethyl alcohol)
• Glacial acetic acid
• Measuring cylinder
• Small screw lid bottles
Method
1. Mix 3 parts absolute ethanol with one-part glacial acetic acid.
2. Add to screw lid bottle (appropriately labelled, see hazard warning signs above).
3. Cut the roots from the garlic clove (1.5-2 cm length is sufficient) and submerge directly into the fixative.
4. Leave for a minimum of 2 hours before staining. Fixed roots can be kept for at least 2 weeks. You do not need to wash the roots after fixing and before the staining procedure.
Dividing garlic root cells are squarish in shape and will have lots of obvious nuclei. If the cells look long (rectangular) then they are elongated cells from further back in the root (away from the tip) and are no longer dividing).
Toluidine blue:
• This stains acidic tissue components such as sulfates, carboxylates, and phosphate radicals, it has an affinity for nucleic acids and stains DNA and RNA well.
• You can obtain this from Timstar.
• You can make it up in water to a 0.5 % solution, or for longer term storage (greater than 1 year) make it up in a citrate phosphate buffer.
Citrate phosphate buffer:
Citric acid monohydrate, 0.1 moldm-3
Disodium hydrogen phosphate-12-water (sodium hydrogen phosphate), 0.2 moldm-3
Add 61.45 mL citric acid monohydrate to 38.55 mL disodium hydrogen phosphate-12-water to make 100 mL buffer (the buffer solution is low hazard).
Alternatively, you can use acetic orcein stain, available from suppliers as ready-made solution, although this is corrosive when made and staining results can be variable.
For our full root tip squash staining worksheet, visit our Resource Hub!
| 19
Visit: shop.wf-education.com/science 01743 812 200 customer.support@wf-education.com
chemicals for mitosis Code: TO6298 Toluidine Blue, 5 g £9.40 Code: CI2130 Citric Acid Monohydrate, LR, 500 g £4.60 Code: OR4430 Sodium Hydrogen Phosphate, LR, 500 g £11.30 Code: SO5626 Orcein Acetic Solution, 100 mL £11.00
For more information about mitosis and growth in plants visit https://SAPS.org.uk Ref: GTAC mitosis root tips lab preparation https://gtac.edu.au Search ‘chemicals’ online chemicals
Required
Making limewater
Used as an indicator for the presence of carbon dioxide, limewater is a staple of the chemistry classroom, and is used extensively in chemistry and biology practical lessons.


•Limewater is actually a saturated solution of calcium hydroxide, and turns milky /cloudy in the presence of carbon dioxide
•Over time limewater will absorb carbon dioxide from the air and will then not work as well (or at all) during the practical.
•To keep a ‘clean’ stock of calcium hydroxide available for practical use, it is a good idea to make a continuous supply, with a carbon dioxide absorber to prevent cloudiness before use. Since this is a saturated solution, it will need time to settle before decanting into bottles for student use. It is best to make this where the bottle will remain in place and allow the contents time to settle to the bottom of the container.
•Absorption tube or thistle funnel to fit bung
• Distilled water
Ingredients:
•Aspirator (large container with tap)


•Bung to fit top of aspirator with hole (or add an appropriate sized hole to the middle of the lid of the aspirator)
•Calcium hydroxide
•Soda lime granules
1. Ensure the tap on the aspirator is closed.
Method:
2.Fill the aspirator about ½ way with distilled water.
3.Add approximately 100 g calcium hydroxide (for 10 L aspirator).
4.Mix and top up the aspirator with distilled water.
5.Fix the absorption tube into the holed bung/lid.
6.Fill the absorption tube with self-indicating soda lime (you may need to add a little gauze if the soda lime falls straight through the tube).
7. Fix the bung/lid onto the top of the aspirator.
8.Leave to allow the calcium hydroxide to settle before decanting the limewater into labelled bottles for use.
9.When necessary, top up the aspirator with water and more calcium hydroxide (make sure the level of solid never exceeds the height of the tap).
10.Appropriately label the bottle. Limewater is low hazard. necessary, aspirator calcium the
20 |
Helpful chemistry recipe
Soda
Code: FU08485 200
£13.15 Code: FU08490 300 mm £16.25
Thistle funnels
glass thistle funnels, with straight stem.
mm
Robust polypropylene bottles, graduated in litres. Code: AS00830 5 litre £13.15 Code: AS00835 10 litre £16.25 Code: AS00840 25 litre £27.20 Use AUTUMN10 to save 10% online orders only*.
Aspirator bottles
Reverse osmosis, the greener option










Want to find out more about reverse osmosis? See our Resource Hub for more content.




We already know that a reverse osmosis system will offer electricity savings for your school.*


*Based on current prices (July 2023) the average UK electricity price = 34p per kWh. The average traditional water still requires an electricity supply of 3 kW/hour. Running a traditional water still for 7 hours per day would use 21 kW of electricity at a total cost of £7.14 (0.34 x 3) x 7).
If, for example, in a busy prep room, the still is on for 3 days per week, then the electricity cost to run it would be £7.14 x 3 days which is:


£21.42 per week, £85.68 per month (based on a 4-week month).


There is already a reduction of around 20% in wastewater usage for an RO system compared to a traditional water still. But why does water get wasted in the first place?
Reverse osmosis uses membrane technology to filter dissolved impurities out of the water, any impure water that is filtered out is what we refer to as wastewater.
How can we use this water to avoid it going down the drain?
It’s great for watering plants, indoor and outdoor.

It’s fine for handwashing.
It can be used for surface cleaning and floor mopping. So now RO offers an even greener solution!

Code: WA220000 £299.00


Filter Pack for Reverse Osmosis System


6 Month replacement filter pack for Reverse Osmosis System WA220000.
Code: WA220010 £45.00

| 21 Visit: shop.wf-education.com/science 01743 812 200 customer.support@wf-education.com
Making your reverse osmosis system even more environmentally friendly.
Reverse Osmosis Water Filter System, Non-Pumped
The ultimate in water filtration. Crystal clear pure refreshing water on tap. Using a five-stage water filtration system the RO5D150 reverse osmosis delivers unrivalled quality in water filtration.
Use AUTUMN10 to save 10% online orders only*.
A reverse osmosis unpumped system uses NO electricity.
What is a ripple tank?
A ripple tank is a shallow tank with a clear base which can be filled with water, whilst a light shines on the water, often from above.
Ripples are made in the water by means of a vibrating bar, suspended from clamp stand type arrangements, which is just low enough to break the surface of the water. The light shining on the water makes the ripples more visible. Various objects are then placed in the water to deflect the ripples.


What is it used for?
The ripple tank is used in physics to look at wave formation and patterns of transverse waves, and as an aid to understanding how the wave patterns change through reflection, refraction and diffraction. Students can measure frequency, wavelength and (thus) wave speed using a ripple tank (required practical in GCSE)

Once you have set up the ripple tank, you will need to change the voltage on the power supply in order to change the speed of the vibrations, and thus the frequency of the waves.
Frequency, wavelength, and speed are related in the following equation:

wave speed (ms-1) = frequency (Hz) x wavelength (m)
Rearranged this looks like:
speed wavelength frequency =


Which shows that (for a fixed speed) frequency is inversely proportional to wavelength, so as you decrease the frequency the wavelength increases and under the light of the ripple tank the waves will be more visible, however they can still be hard to measure.
You can measure wavelength by taking photographs of the waves, remembering to include a ruler in shot, and then use this image to work out wavelength (distance from peak to peak). Remember to convert ruler measurements into metres. Frequency is the number of waves per second. If you video the waves as they are rolling past, and include a (running) stop clock, you can then play back the recording in slow motion, counting the number of waves per 10 s (and dividing by 10 to get the number of waves per second, frequency (Hz)).


Since you are able to work out the wavelength and frequency, you can then use the equation to work out the wave speed, in ms-1

22 | Ripple tanks
Search ‘ripple tanks’ online ripple tanks
Adding different obstacles into the water will affect how the waves behave, and thus properties of waves can be studied:

Refraction

Waves appear to ‘bend’ as they move past an obstacle, as the depth of water changes. Wave speed is altered.
Reflection
Waves are ‘bounced back’ from the obstacle forming new wave patterns depending on the interaction with the incoming wave front.
Diffraction Interference
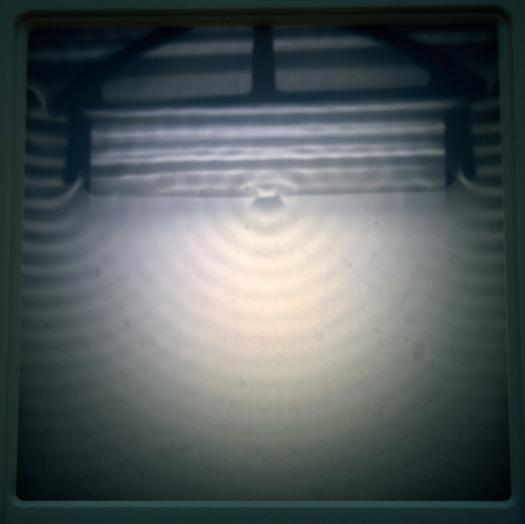
Waves spread out as they pass through the opening (also happens at the edges of the obstacle).


Waves ‘interfere’ and form new wave patterns depending on the interaction between them.

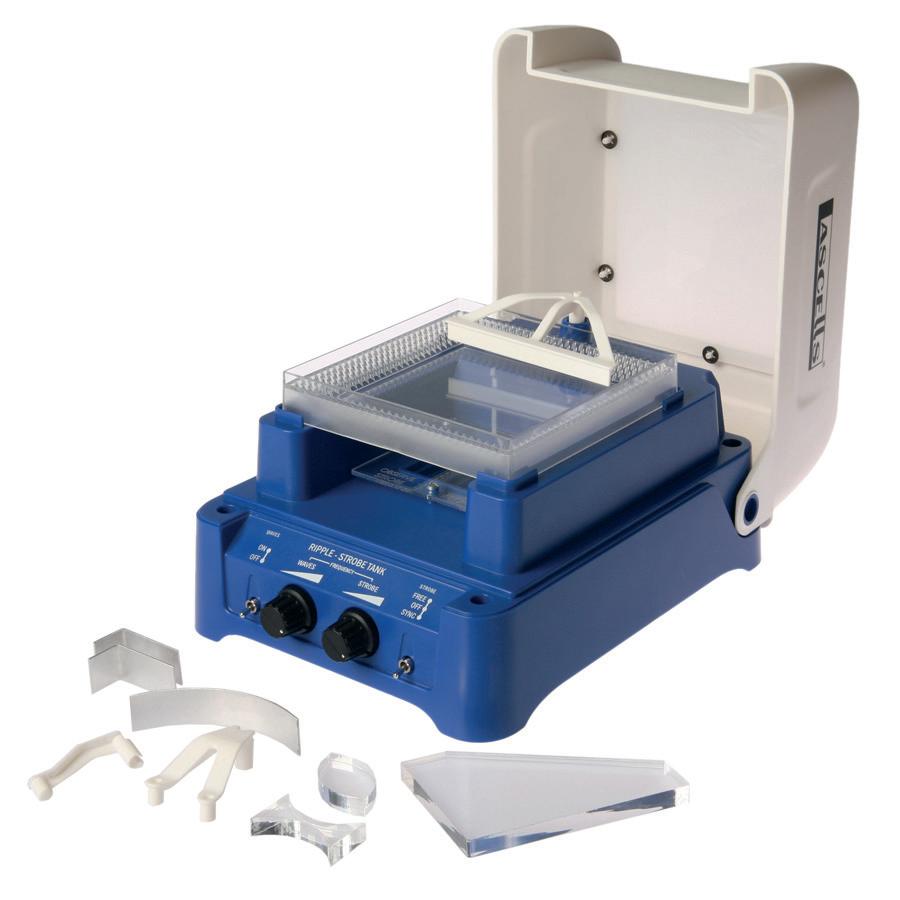
Mini ripple tank
This compact unit from Lascells provides an elegant method of demonstrating the wave phenomena of reflection, diffraction, refraction and interference with none of the setting-up problems usually associated with ripple tanks.
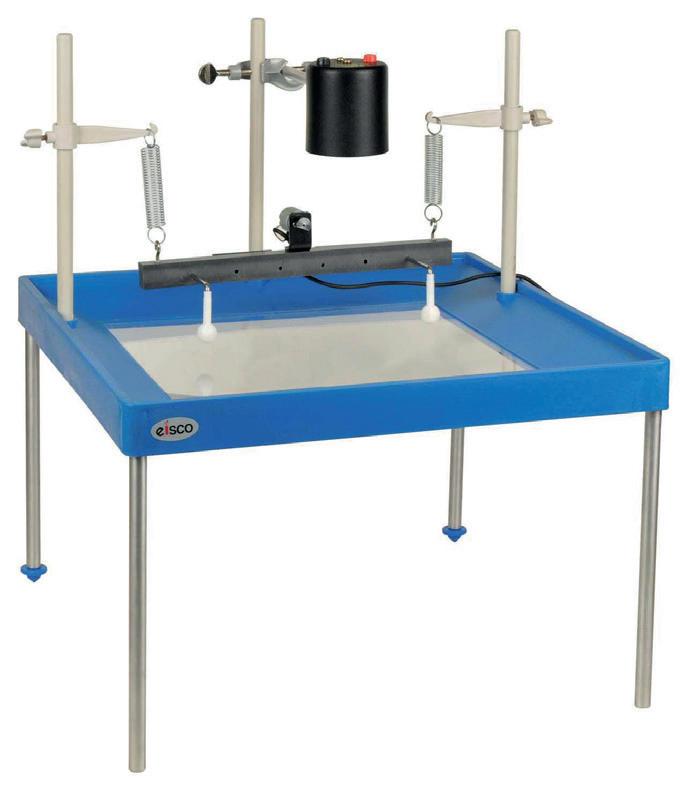
Code: SO220000 £124.95
Irwin premium ripple tank
Specifically designed to demonstrate wave theory to secondary and tertiary education.
Code: SO230000 £549.00
Best Seller!
Economy ripple tank
An overhead projector type ripple tank for demonstration of various wave phenomena, including reflection, refraction, diffraction, and interference.

Code: SO180320 £92.35

| 23
Visit: shop.wf-education.com/science 01743 812 200 customer.support@wf-education.com
(Mini ripple tank images courtesy of Lascells Ltd.)
Direction of wave front Direction of wave front Direction of wave front Direction of wave fronts
Use AUTUMN10 to save 10% online orders only*.
Microbiology features in GCSE and A level spec for biology
In order for students to be able to do experiments in microbiology, technicians need to do several things:
• Sterilise equipment

• Prepare solid (agar) and liquid (broth) media
• Organise and sustain (subculture) bacteria cultures
Being sterile includes:

The overriding principle for good and safe microbiology is sterility (aseptic technique). All equipment and media that is involved with any aspect of microbiology preparation must be sterile, to avoid anything unwanted growing alongside the desired cultures.


Wiping down the preparation area with anti-bacterial/fungal/viral solution, or 70% ethanol (this will destroy all the above). Whatever you use you need to wait for it to fully dry before starting work. 70 % ethanol is flammable.
Working alongside a blue Bunsen flame to help draw any airborne particles that could contaminate your preparations upwards and away from your working area in a convection current. Autoclaving (sterilising) media and glassware that you will be using.
Neutralising and removing spills (and then re-sterilising the site before continuing).
Not cross contaminating solutions or equipment: sterilising (metal) inoculating loops between uses or using single use loops and spreaders for transferring bacteria.


The autoclave:
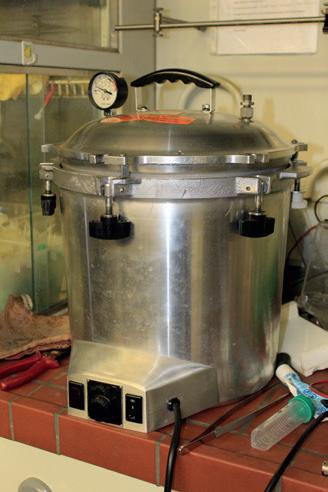
Vital in the microbiology lab, necessary for proper sterilisation of media and equipment, and essential for destroying used media/bacterial plates and preparations. You should not be doing microbiology if you cannot destroy used/contaminated media by autoclaving. For sterilising media and equipment (not plastic) you need a temperature of 121 °C, at 15 psi for 15 minutes *(for average volumes up to 1 L). Too long and you will destroy the nutrients in a nutrient media. For destruction of bacteria contaminated plates/solutions, the above conditions will generally also be appropriate, although you can leave them for longer if you prefer (20 mins).
*This is a general set of parameters covering most media and autoclaves. Check with manufacturers if unsure.

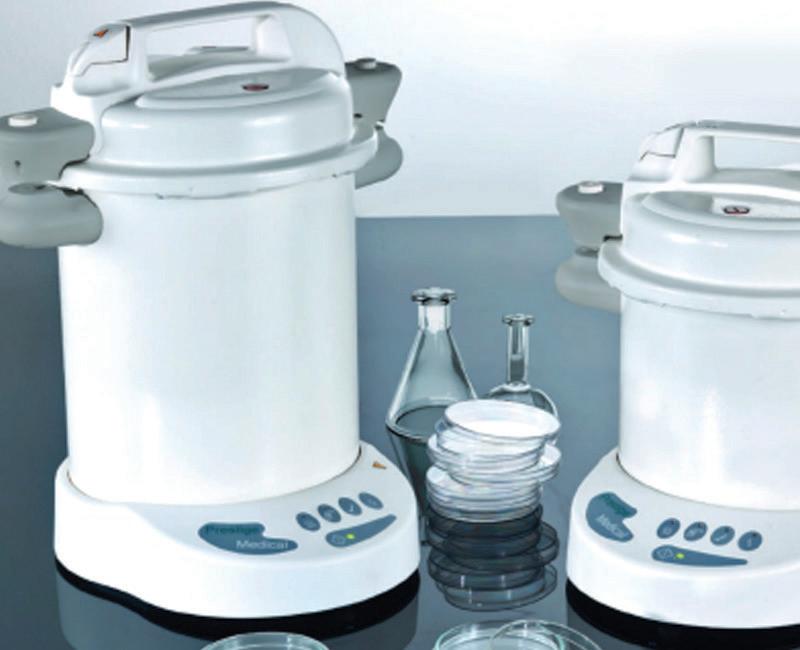
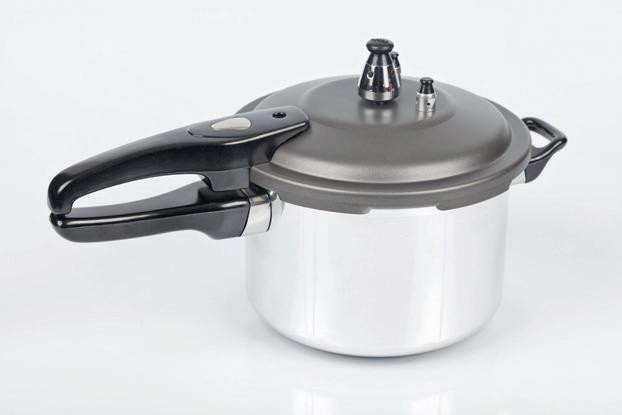
• All of the autoclaves shown here should reach 121°C and 15 psi. The autoclave in image A will have preset programs to use, B and C rely on external timings (but this does mean that you can extend the time if you desire). The capacity of B is much larger than the others.
• To be sure of reaching the desired sterilising conditions you can add a TST strip (this will show that correct temperature and pressure has been reached) or use autoclave tape (which will show that the correct temperature has been reached).
24 | Microbiology
See the Resource Hub for more information on autoclaves! A B C
Media:
• Most school microbiology practicals will require a general nutrient media, both liquid and solid.
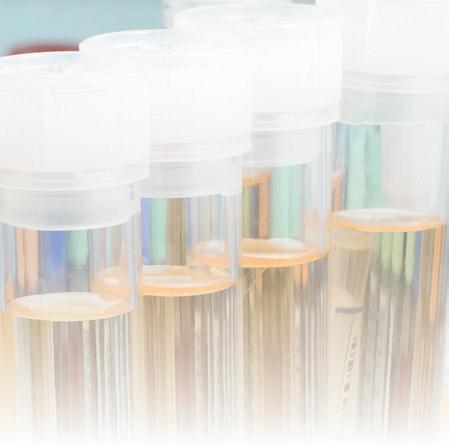
• Liquid media (broth) is used to grow bacteria in a liquid environment. This is then used for spreading onto solid nutrient media plates and used in experiments such as the effects of antiseptic or antibiotic on bacterial growth.
• Liquid broth is a nutrient mix that does not contain a setting agent (Luria broth, or LB is a generalpurpose nutrient broth). Supplied in powder form, made up in distilled water and sterilised before bacteria is added, and then incubated.
• Broth powder looks the same as nutrient agar powder, so double check before preparation.
• Solid media (nutrient agar) is used in petri dishes for bacteria to be added from a liquid culture, or a solid colony stock and is then incubated to allow the bacteria to grow.
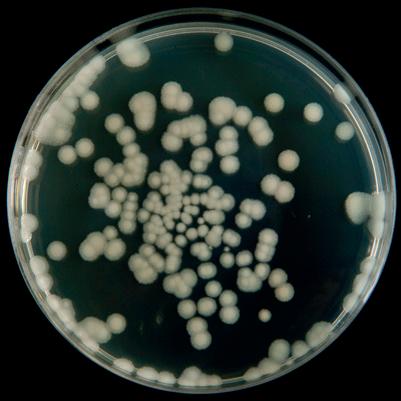

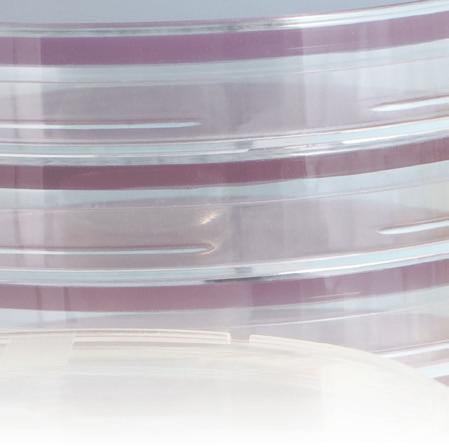
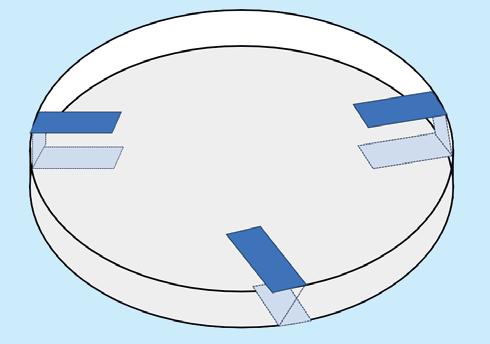
• Once bacteria have been added to a plate it should be taped closed to stop bacteria escaping if the plate was accidentally opened but not taped tightly as this will encourage growth of unwanted anaerobic bacteria. Three taped positions will be sufficient to keep the lid closed and allow air flow for the bacteria.
As an introduction to hygiene and cleanliness some schools use nutrient agar plates and ask students to place their handprints onto them, or (using a cotton bud) swab various heavily used items: door handles for example and wipe the swab onto a clean nutrient agar plate. These plates are then taped closed and incubated to see what grows. The results can be enlightening!
Once inoculated, nutrient agar plates are left for a few days either in an incubator (30 °C) or in a warm room for the bacteria to grow. They should not be opened again after inoculation (including when you are autoclaving for destruction at the end of the investigation).
Bacteria:
There are many strains of bacteria on offer for school microbiology. Most will pose no great health hazard to users, although it is good practice to wash hands after doing any microbiology work and clean up any spills effectively.
Destruction:
After all investigations used and unwanted plates and broth should be autoclaved to destroy the bacteria. Do not remove the solid agar from the petri dish, put all the plates into an autoclave bag and loosely seal. Autoclave the whole unit and allow to cool (the agar will set in the bag) and then the bag with contents can be disposed of in the general waste.
Some nice bacteria to use that give large or clearly coloured colonies are:

See our Resource Hub for lots of information about microbiology
Best Seller!
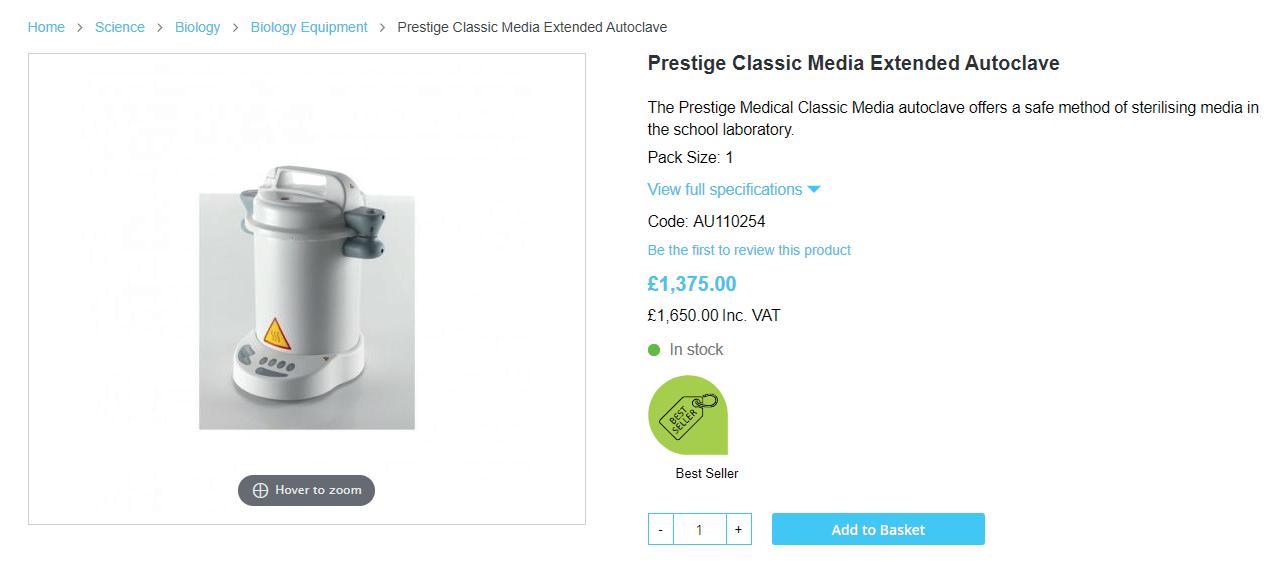
Prestige classic media extended autoclave

The Prestige Medical Classic Media autoclave offers a safe method of sterilising media in the school laboratory.
Code: AU110254
£1,375.00
Always shake the bottle of nutrient agar and allow time for the dust to settle before opening this will ensure an even mix of nutrients through the agar (agar is heavy and will sink to the bottom of the pot over time).
| 25 Visit: shop.wf-education.com/science 01743 812 200 customer.support@wf-education.com
Esherichia coli (E.coli) Micrococcus luteus
Bacillus subtilis
Know your hazard symbols
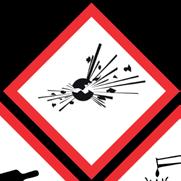
These common symbols will be displayed on many chemicals in your store, but what do they mean and how do you handle them?





Symbol image
GHS01 Explosive
Name Example (not exhaustive list)
Tollen’s reagent 2,4-dinitrophenylhydrazine*
Ethanol
Universal indicator solution
GHS02 Flammable

Sodium 2,4-dinitrophenylhydrazine*
Old symbol
GHS03 Oxidising
Copper nitrate, lead oxide, sodium chlorate
GHS04
Compressed gas (under pressure)
Oxygen, carbon dioxide

GHS05
Corrosive
GHS06 Toxic (acute)
Sodium hydroxide, silver nitrate
Sodium dichromate, mercury
GHS07
Hazard (moderate) e.g., harmful by inhalation/ contact with skin or eyes
Phenyl salicylate, mineral wool, lithium chloride
GHS08
Health hazard e.g., respiratory sensitisers/ carcinogens
Benzoic acid, paraffin liquid
GHS09
Environmental hazard (and danger to aquatic life)
Copper sulfate, zinc carbonate
GHS05
Radioactive (Symbol shown is transport label)
There is no GHS for radioactive material. Most will be covered by other GHS codes.
*explosive when dry. (old classification was explosive, new classification is flammable)
26 | NEW technician training modules
GHS
This is the Globally Harmonized System and ensures that no matter where in the world you are, the hazard will be represented in the same way. The GHS system replaces the old hazard symbols (on the right of the table), although you may still find these labels on old bottles of chemical in the chemical store.
The symbols will come with other ‘signal’ words: Danger/warning for example, if appropriate. There will also be a statement detailing the hazard presented by the chemical, along with handling and transporting advice.
How should chemicals be stored?
A dedicated storeroom is the best option for storing a broad range of chemicals, one that has mechanical continuous ventilation to the exterior of the building, that can be locked and is big enough to accommodate a range of storage solutions would be ideal.
CLEAPSS has some good documentation on chemical storage solutions.
How you arrange the store is up to you, as long as the requirements of each chemical category are followed:
Flammables: Must be stored in a safe and secure way, and never near radioactive substances or gas cylinders. (As a general rule of thumb most organic liquids will be flammable). This storage can be within a larger chemical store.
Radioactive materials: must be stored in a metal lockable cabinet, away from working areas (minimum of 2 m) and in a separate room from flammable material.
Corrosive materials: should be in a ventilated area, preferably near the floor and in a secondary spill tray in case of leakage (sand in the tray is helpful to absorb any spills).
Oxidising chemicals: should be stored together but away from flammables. Some people like to have these in their own cabinet, but it is not essential.
Toxic chemicals: do not need a separate store if the room/cupboard they are in is secure. Gas cylinders: should be stored elsewhere, in a secure place. If you only have one ‘in use’ gas cylinder it can be stored in the prep room or a laboratory as long as it is secure and tamper proof (e.g., don’t leave the cylinder spanner with it if it is stored in a laboratory).
More information on chemical safety and storage can be found at https://www.cleapss.org.uk or https://www.sserc.org.uk
Hazard labels
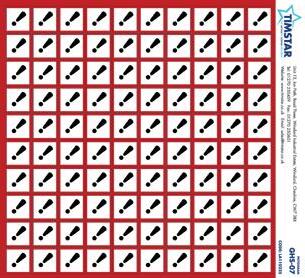
Self adhesive label, white background and black pictogram bordered by red diamond. Dimensions: 20 x 20mm. Supplied in packs of 100.


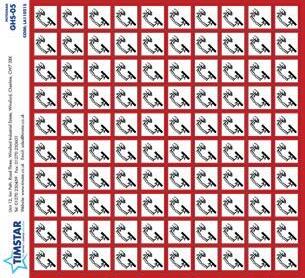
Code: LA110195 GHS-01 Explosive substances labels £5.20
Code: LA110200 GHS-02 Flammable substances labels £5.20
Code: LA110205 GHS-03 Oxidising substances labels £5.20
Code: LA110215 GHS-05 Corrosive substances labels £5.20
Code: LA110220 GHS-06 Acutely toxic substances labels £5.20
Code: LA110225 GHS-07 Harmful/irritant labels £5.20



Code: LA110230 GHS-08 Substances causing long term health problems labels £5.20
Code: LA110235 GHS-09 Environmentally toxic labels £5.20


CoSHH /chemical storage cupboards
These CoSHH cupboards help schools to comply with the control of hazardous substances as demanded by the CoSHH regulations when in the workplace. They have a robust all-steel construction.

• ‘No snag’ handles with 2-point locking.
• Warning stickers supplied as standard.
• Adjustable spill-retaining galvanised shelves for superior spill management with a UDL of 50 kg.
• Integral liquid-tight sump encourages the correct handling of spills through the use of absorbent cleaning materials.
• Powder-coated graphite grey with Germ Guard Active Technology paint.

• Reaction to Fire Classification EN 13501-1.
Code: ST150400 700 x 350 x 400 mm £210.00
Code: ST150415 700 x 900 x 460 mm £302.40
Code: ST150420 900 x 900 x 460 mm £325.50
Code: ST150425 1800 x 900 x 460 mm £472.50
| 27 Visit: shop.wf-education.com/science 01743 812 200 customer.support@wf-education.com
AUTUMN10 to save 10% online orders only*.
Use
Timstar – Always here to help…


Timstar, as part of the WF Education Group, is committed to excellent customer service. We are constantly reviewing and adding to our services to make working with us as straightforward as possible. We are experts in our field and have a wealth of experience in providing a wide range of over 3,900 curricula aligned products to schools, colleges, and universities across the globe. We’re here to help! If you have a product query, want to know more about our services, or have a technical question (we love those!), please, contact us. When you become a Timstar customer, you have access to all of our additional services including:
• Large order unpack service*
• Chemical store – advice and unpack*

• Space planning and design consultation
• Product demonstrations**
• Local Product Specialist visit

• Access to Resource Hub


• Priority booking on all Timstar events and tech meets
The Timstar website has a number of features to make shopping online, easy!
1: Delayed delivery option
Did you know that you can request a specific delivery date when you order online? This option can be selected on the checkout page. When your order comes through to the team, we will delay shipping until the date you have selected. This is a brilliant way to schedule larger orders.
2. Traffic light system

We have a simple system on our website to indicate live stock levels. If an item is showing out of stock, we will be able to place this on back order and fulfil your request as stock levels are replenished.


Go - Excellent stock levels of the product Steady - For direct delivery items with a lead time Stop – Out of stock and we will back order for you


3. Live web chat

Our Customer Support team are available via live web chat Monday – Friday, 8.30 am – 5 pm. They can quickly assist you with any issues regarding your account, checkout or product details.


4. Share basket online
You have several items in your basket and you want to share them with a colleague or request approval? It is now possible to share it via email! On the ‘My Basket’ page, click on the ‘Share Basket’ button, an e-mail will be sent to your contact with the items in your basket listed!
28 |
*This service applies to large orders only, with a minimum order value ** It is not possible for us to practically demonstrate every item in our range so contact us to discuss your specific requirements in more detail.
science equipment?
Need to weigh up the pros and cons of purchasing for your school? Contact us to request an in-person or a remote demonstration of larger or more complicated equipment, such as Microscopes, Datalogging, Cameras/Visualisers...and more!
Meet the Timstar team…

We have a team of talented Product and Technical Specialists, who between them, are able to answer any query you may have.
Lucienne McCallum - Product Specialist
Lucienne has an honours degree in microbiology and immunology. She initially worked in a laboratory environment before entering the science education industry.
For the past 20 years, Lucienne continues to infect all with her enthusiasm and passion for science and has built strong relationships with her customers and is well known for delivering engaging and exciting sessions on DNA fingerprinting all over the UK and predominantly in her own territory, Scotland.


Catherine Mellor - Product Specialist
Catherine has an applied chemistry degree relating to textile colouration. She has always worked in science and has been involved in education for 20 years.
She covers all branches of science working at GCSE and A level and has a broad knowledge of what you need to teach practical science, what experiments are required and are taught regularly. Catherine can help you by acting as the link between you and us, if Catherine can help, she will!
Matt Blake - Product Specialist
Beginning his career in engineering and the world of optics, Matt moved into the educational science equipment arena over 14 years ago.
His experience and longstanding customer relationships, working with schools across the UK have given him a broad awareness of the requirements of modern science educators. He regularly demonstrates classic and new equipment and practical science experiments.

Amanda Kingsnorth - Technical Specialist
Amanda worked previously as a Senior Science Technician at a school in Norwich, her speciality is chemistry but she is a biologist by training.
After graduating from Queen Mary College in London with a BSc in animal physiology, Amanda worked in a diabetes genetics laboratory looking for the genes involved in Type I diabetes, before moving to Cambridge Antibody Technology (now MedImmune) in their DNA sequencing team, before leaving to do a PGCE in teaching at Cambridge University. With a wealth of knowledge and experience, Amanda supports customers with their technical queries and offers advice and health and safety considerations.
| 29
Contact us to Request a Rep or Book a Demo! To contact any member of our Customer Support, Product or Technical team, please, use our simple form… Visit: shop.wf-education.com/science 01743 812 200 customer.support@wf-education.com
Want to take a closer look at a piece of practical
Cauliflower cloning
Fruit and vegetables are always useful tools in science. In our last brochure we showed you some practicals using fruits, well now it’s the turn of the humble vegetable!
Cauliflower cloning is in the A level specification (in genetics and stem cells).

Cloning is the process by which cells divide to produce new and identical cells. Mitosis is cell cloning that body cells undergo during growth.
Stem cells are cells that have the capacity to develop into any type of cell, depending on the environment they are placed in (place a stem cell into the eye and it will become an eye cell, but place it in the liver and it will become a liver cell).
In animals totipotent (embryonic) stem cells are only found in early embryonic development (at the first few stages of division). Animals have stem cells in the bone marrow (adult stem cells) which are multipotent –can give rise to many different types of cells (but not all) in the adult. In many plants, however, totipotent cells are found more frequently, meaning that cuttings will produce clones of the entire parent plant.
Totipotency – the ability to regenerate the whole, lends itself to tissue culture, the branch of biological research involved with building up viable cell lines from single cells.

In A level biology, tissue culture and cloning come together in the cauliflower cloning practical.
Briefly:
Using aseptic (sterile) techniques you will need to prepare the specific growing (agar) medium in sterile pots and provide sterilising solution for the students to use.
The students will then micro propagate small pieces of cauliflower (explants) onto this medium and allow it to grow.
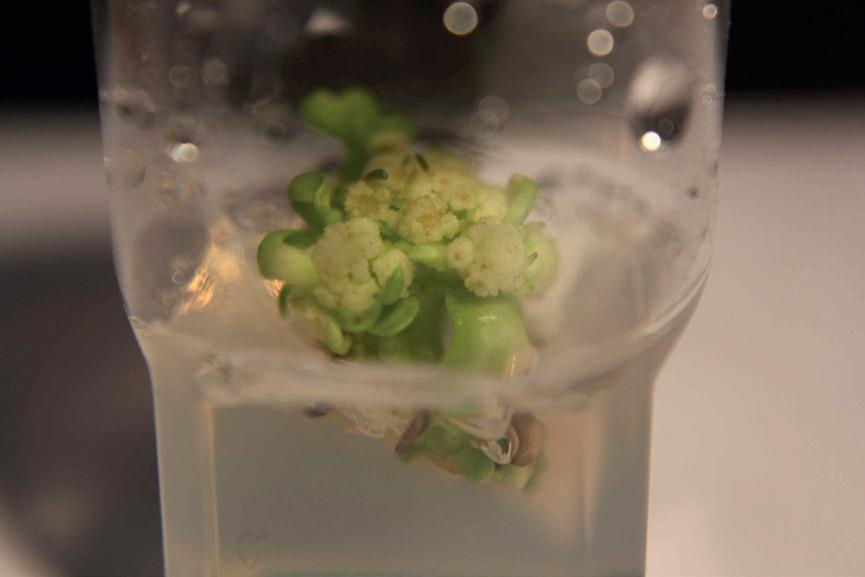
The protocol was originally designed to save endangered species of plants, and plants have been cloned from almost every part of the plant, leaf to root, and is based on methods developed by botanists at the royal botanic gardens in Kew Gardens in London.
Cauliflower cloning kit
This kit provides the media, equipment and instructions for propagating small cauliflower plantlets from cauliflower curd, by the process of meristem culture. The process is relatively quick and simple and no special facilities are required. Plantlets, which should be visible in 6-8 weeks, can later be transplanted into compost and grown-on.
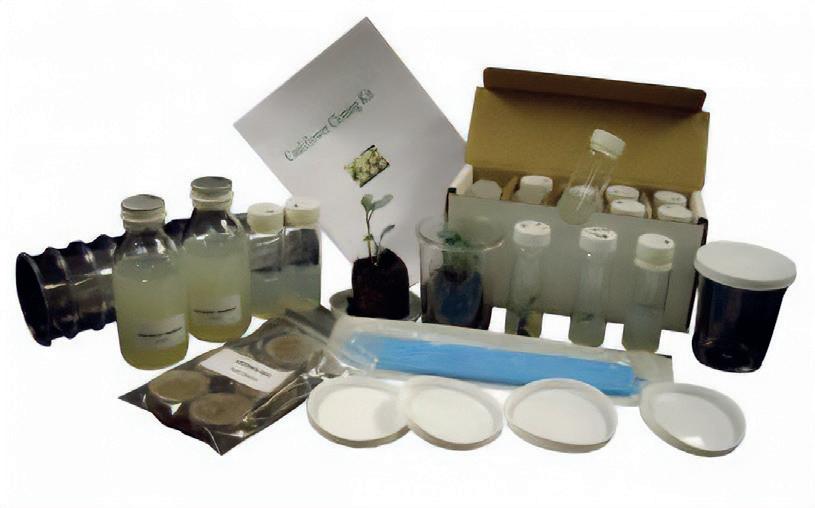
Code: PL95166 £94.95

30 |
Vegetable science
See https://www.SAPS.org for a full protocol
Cloned cauliflower (science and plants for schools)
Red cabbage/onion/beetroot indicators
Vegetables have been used for 100s of years as fabric dyes, some of these vegetables also show remarkable effects when added to acidic or alkaline solutions; changing colour.
We use this to teach indicators to younger year groups, typically KS3.
Equipment:
• Around a quarter of a small red cabbage
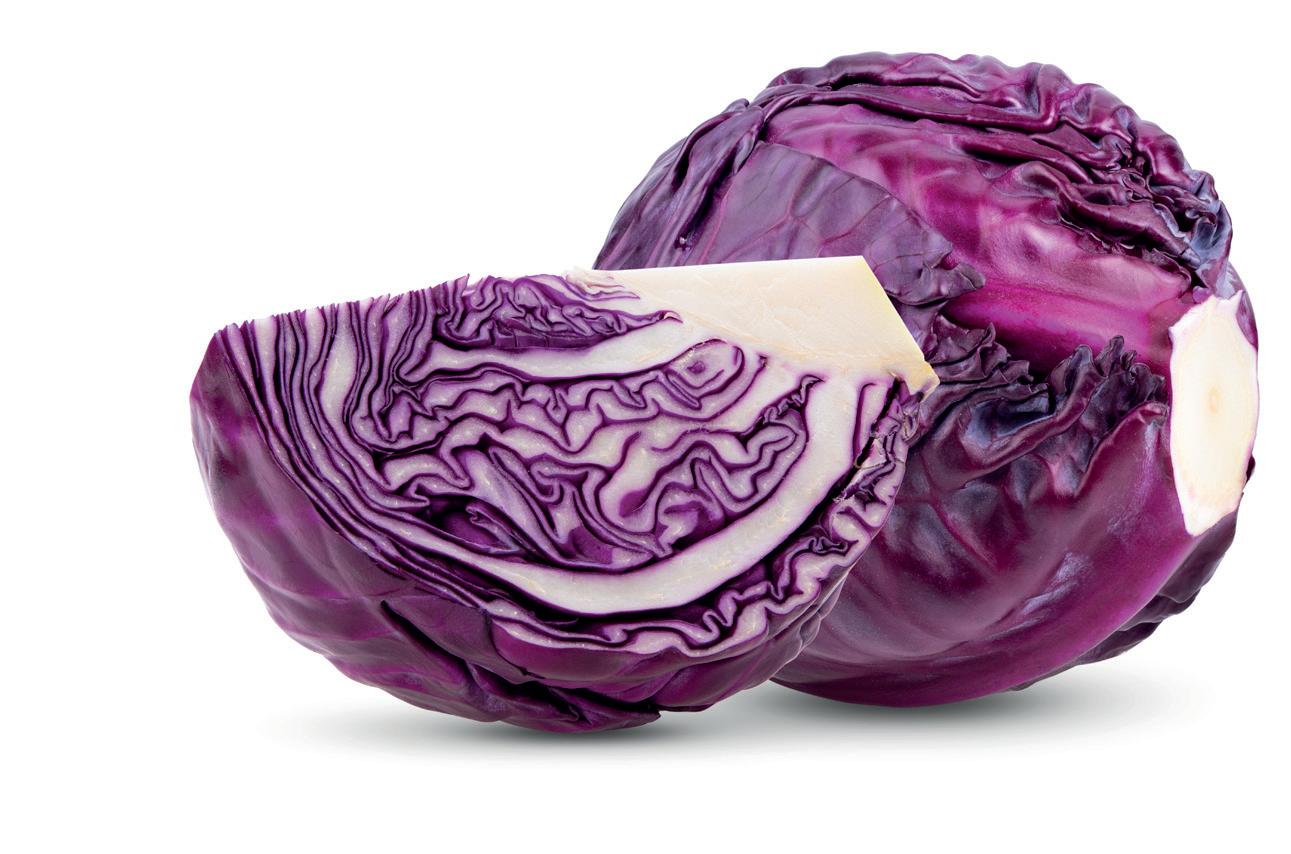
• Large beaker x2
• Knife or scissors, and chopping board
• Bunsen burner, heatproof mat, tripod and gauze and heat proof gloves
Method:
1. Using the scissors or a knife, chop the red cabbage into small pieces and add to the large beaker.
2. Add enough water to cover the chopped cabbage.
3. Place the beaker onto the Bunsen, tripod and gauze set up.
4. Heat the red cabbage to boiling, allow to boil for about 5-10 minutes (the water will change colour to blue/green).
The science bit...
• Plastic pipettes
• Solutions to test in small beakers. Try: lemon juice, bicarbonate of soda (in solution), tap water
• Test tubes and test tube rack
• Distilled water
5. Allow the solution to cool and pour off into a clean beaker.
6. Label the test tubes according to your chosen solutions and place in a test tube rack.
7. Add 1-2 mL of each test solution to the relevant test tube.
8. Add a few drops of red cabbage solution to each test tube in turn and see the colour change.
• Most indicators are weak acids that are also natural dyes.
• In solutions more acidic than the indicators’ neutral zone (pKa), with an excess of hydrogen ions (H+), the indicator acquires H+ and changes colour.
• In solutions more basic than the pKa of the indicator, the indicator loses H+ and changes to a different colour.

• For universal indicator the pKa is at pH7. Below 7 (more acidic) the indicator picks up H+ and turns redder, above pH7 the indicator loses H+ and turns more purple. However, the water-soluble pigments in red cabbage, anthocyanins, pick up OH- in basic solutions and lose them in more acidic solutions, changing colour each time (the opposite of above).
• In neutral solutions red cabbage (anthocyanin pigments) is purple/blue.
• In acidic solutions the solution turns red.
• In basic solutions the solution will be yellow. Red cabbage pH scale
• Other vegetables you can try are red onion skins, beetroot or blackcurrants.
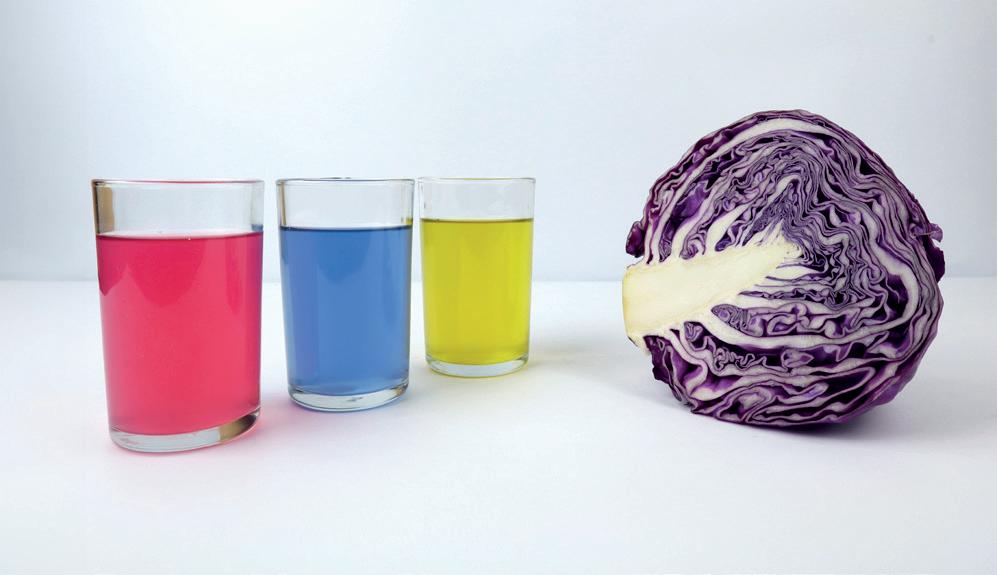
| 31 Visit: shop.wf-education.com/science customer.support@wf-education.com 01743 812 200
pH 1-2 3-4 5-6 7 8-9 10-11 11-12 13-14 Colour (representation only) pH 4 pH 5 pH 6 pH 7 pH 8 pH 9 pH 10 Universal Indicator pH Colour Chart
Red cabbage indicator
Acidic Neutral Basic
A relatively small structure in the body which is capable of absolute magic. Along with the brain, the eye is able to convert light into images that we are able to recognise as distinct shapes and pictures.

• Light enters the eye through the pupil, a round hole in the outer coating of the eye. The pupil is covered by a flexible lens and a protective, clear cornea which can become thicker or thinner, thus refracting (bending) the light entering to focus on the retina, the back inner layer of the eyeball.


• The retina itself is covered in specialised cells called rods and cones. When the light lands on these cells they are able to transmit the light signals into chemical and electrical signals that travel along the optic nerve to the brain, which then interprets the image and allows us to make sense of what we are seeing.

• The light ‘image’ makes an upside-down image on the retina, it is the brain that switches this the right way up for us to be able to see properly. The pupil can be made bigger or smaller by action of the iris, the coloured band of material surrounding the pupil. This prevents too much light ‘bleaching’ the sensitive rods and cones, protecting the retina, and allows maximum light to penetrate the eye when light levels are low at nighttime.
• Two features at the back of the eye are the fovea, and the blind spot:





The fovea has the highest concentration of light sensitive (photoreceptor) cells, and this is where the best focus of the image will be, it is surrounded by a yellow spot (macula).


The blind spot is directly at the point where the optic nerve enters the eye and is so called as there are no photoreceptors (rods/cones) here. Also called the optic disc.


• The eye is kept in shape with a filling of vitreous humor (jelly like substance) behind the lens and aqueous humor (thin watery substance which keeps the surface of the eye moist and provides nutrients to the surface). The balance of these 2 substances regulates the fluid pressure in the eye.


Best Seller!
Functional eye model
This innovative functional eye model is an open design model, offering high visibility, which does not involve the injection of liquid. It is composed of a flexible lens with an adjustable focal length, which constitutes the crystalline lens for comprehensive visualisation.
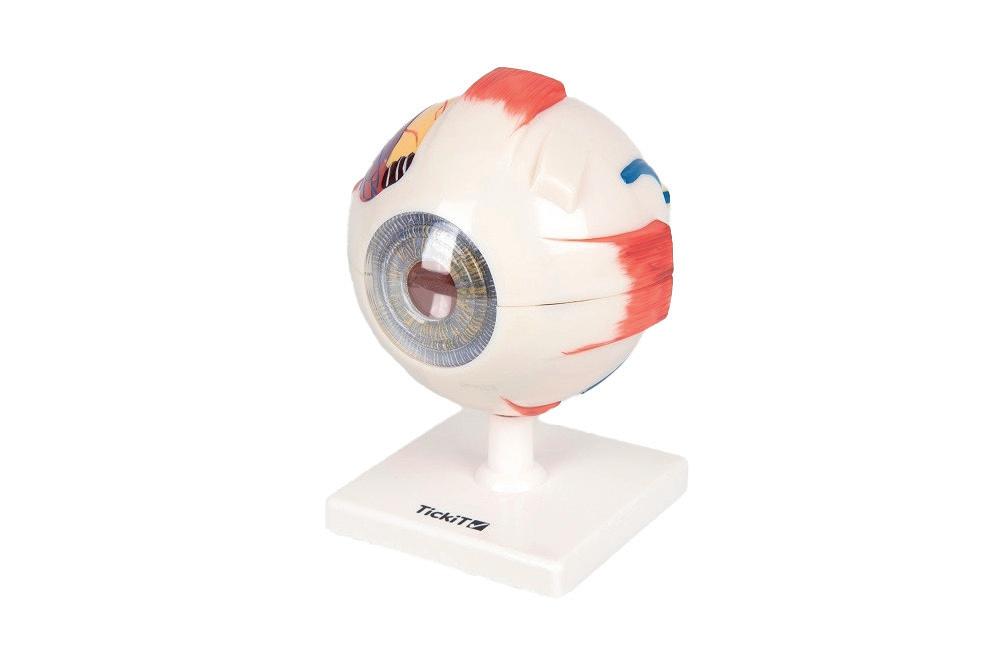
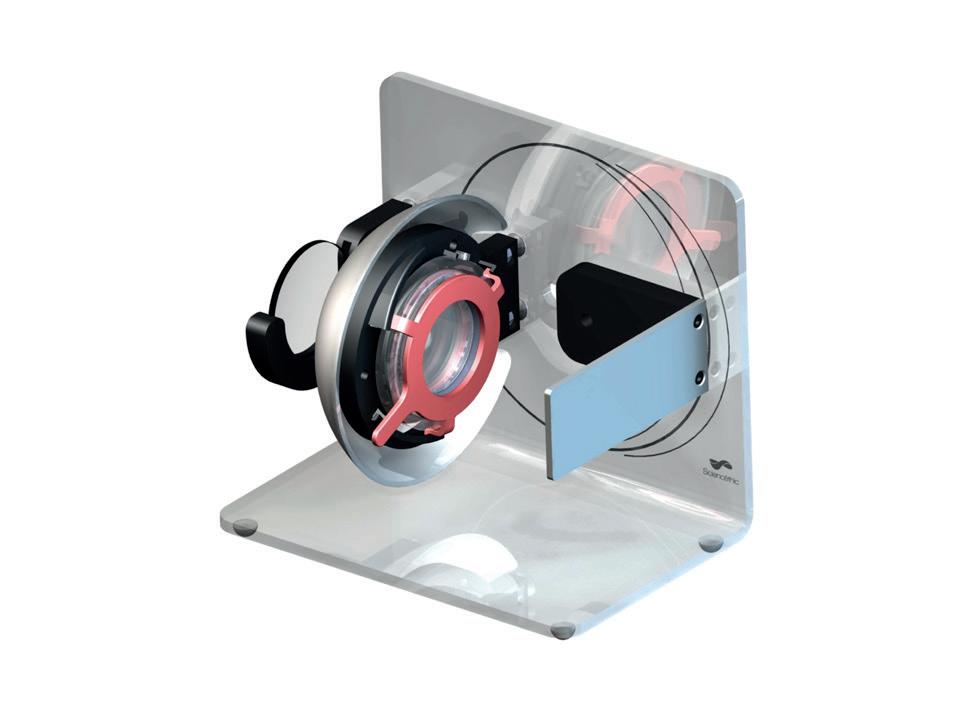
Code: MO120100 £170.40


Best Seller!
Code: MO104234 £41.95

32 |
The eye
Eye model
A classic model of the human eye with highly accurate and detailed colourful components which dissects into 6 parts.
Timstar has a full range of biological models, view them all here!
Cows eye (intact)


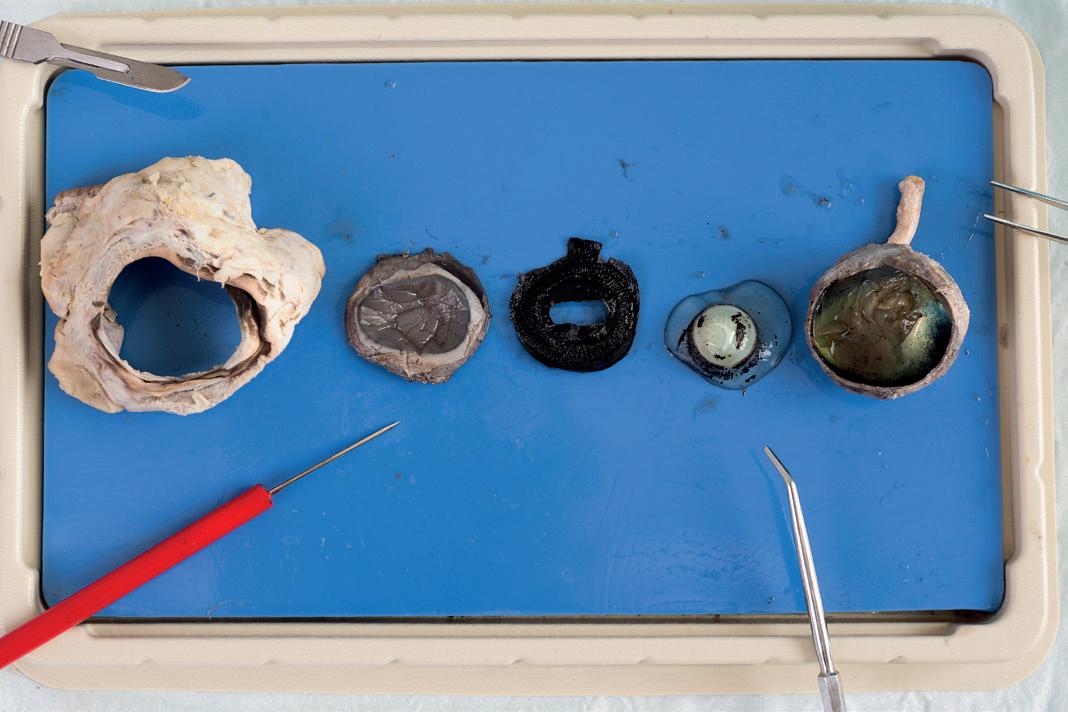
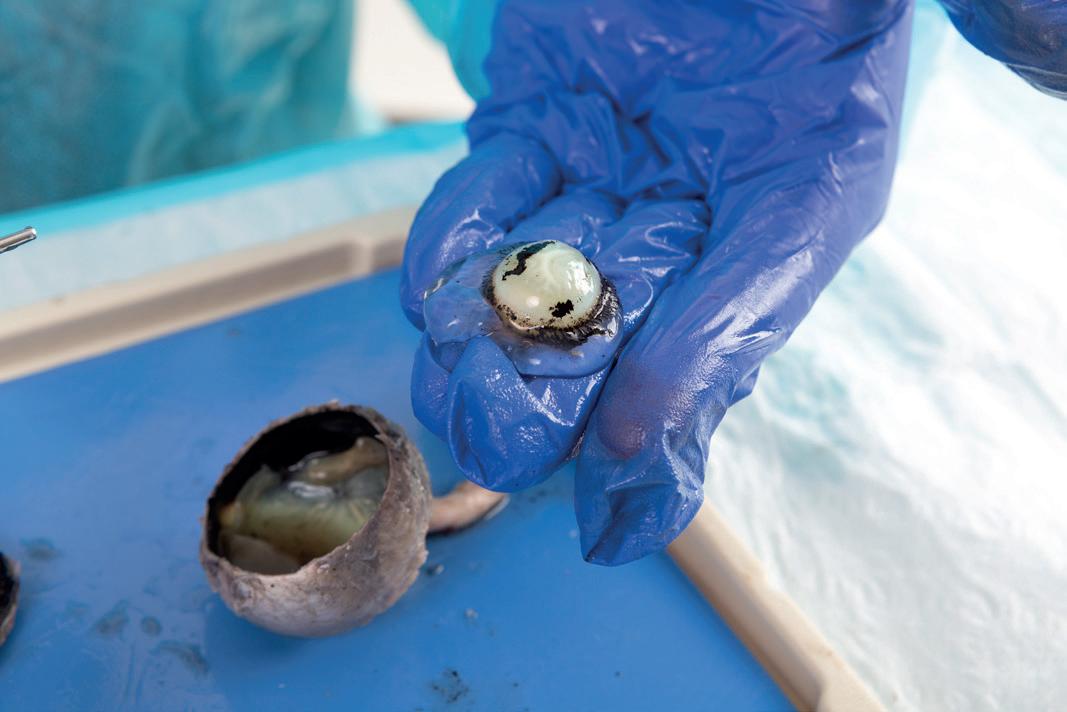
Optic nerve
Lens
Floaters are usually little pieces of (detached) vitreous humor which should disappear as you focus the eye. Floaters tend to increase as you age over 50, and the vitreous humor changes consistency.
Cornea
Iris and ciliary body
Optic nerve
Search ‘dissection’ online
• Humans have two working eyes at the front of the face; this helps with visual acuity (clarity) and is a feature of hunting animals.
• The fact that we have two eyes is also an advantage, as it gives depth perception, the ability to see in 3D and understand an object’s distance from you. If one eye is lost, depth perception is impaired, although not lost totally as the brain will make compensations for it.
• Depth perception works because each eye sends a slightly different version of the image to the brain, which once put together, forms the 3-dimensional whole (a bit like 2 slightly out of focus images coming together to become one clear image, but with added depth).
You can test your depth perception by holding your finger up in front of your face between your eyes and a further away object.
If you focus on your finger with one eye closed, then switch to the other eye closed (don’t move your finger), you will notice that your finger seems to’ jump’ from one side of the further away image to the other, indicating that each eye sees a different view of your finger.
The eye is studied under the ‘nervous system’ topic, and it can be useful when learning about muscles and diffusion of gases, as well as convex and concave lenses and the images they produce. It is also covered in the A level specification.
| 33 Visit: shop.wf-education.com/science customer.support@wf-education.com 01743 812 200
Eye dissection
Sclera Cornea
Lens Retina
Lens
Retina with photosensitive cells
Sclera
Optic nerve
dissection
Timstar – Your biology partner!
The team at Timstar has had a busy time during the summer holidays. We have performed a thorough review of our biology products to ensure that we can supply everything that you would need to fulfil the requirements of the National Curriculum from Key Stage 3 to Key Stage 5!


NEW products:
Botany

Cultures
Microbiology
Dissection
Models
Biotechnology
Zoology
And so much more… Check out everything Biology on the Timstar web site
Helpful and informative content: We have enhanced the content on our Resource Hub with lots of information, ideas and support for your biology practicals and how to get more from your biology equipment. Even more will be coming over the next few months too, so keep checking. Read online or download your own copy to refer to whenever you need.
Looking for a biology workshop?
Contact our Product Specialists. They are skilled at delivering workshops on DNA, Mitosis, Microbiology and more.
Look out for lots of NEW biology products on our website

Interested in datalogging for biology?
Book a free demo with one of our product specialists.

Contact us

34
|
Matt Blake Product Specialist
Catherine Mellor Product Specialist
Lucienne McCallum Product Specialist
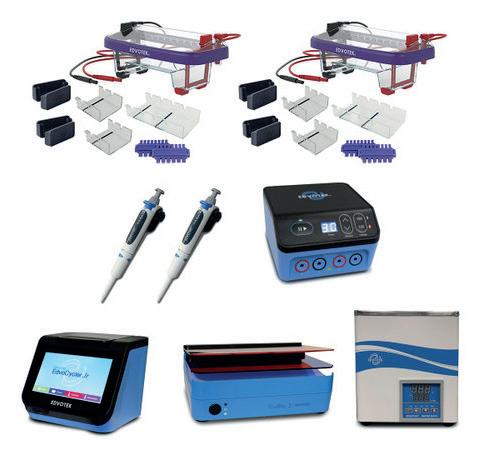
Personal PCR LabStation™
The Personal PCR LabStation™ includes the following:
1 x Edvocycler™ Jr. (16 x 0.2 mL)
2 x M12 Complete™ Package (14 x 7 cm Tray & 7 x 7 cm trays)
1 x DuoSource™ Power Supply (100 or 150V, for 1 to 2 units)
2 x Variable MicroPipette (5 - 50 µl)
1 x TruBlu™ LED Transilluminator
1 x 3 L Water bath
Code: BT230020
£1,895.00
EDGE™ Classroom PCR LabStation™
The EDGE™ Classroom PCR LabStation™ includes the following:
1 x Edvocycler™ 2 PCR Machine (48 x 0.2 mL)
6 x EDGE™ Integrated Electrophoresis System


6 x Variable MicroPipette (5 - 50 µl)
1 x 3 L Water bath
Code: BT230030
£3,550.00
Moticam BTI
The Moticam BTI consists of a Wi-Fi microscopy imaging camera with a built-in adjustable bracket that allows you to mount your own tablet (up to 10”) onto it. The Moticam BTI will help microscope users visualise, edit and share microscope images, enabling computer-free digital microscopy

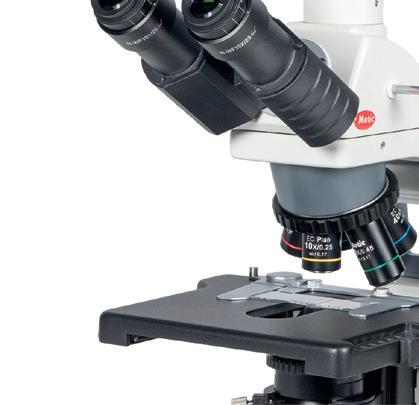

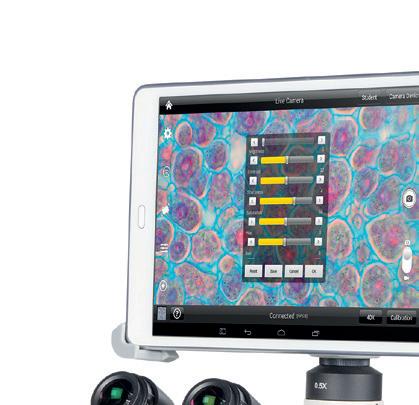
See online for the full specification.
Code: MI230200 £452.50
Human torso 21 part model
Torso without open back. Life size showing the head with nasal and buccal cavity, half brain, eye with optic nerve. Removable 2-lung halves, heart in parts, liver with gall bladder, 2-part stomach, large and small intestines with appendix flap opening and cover, and half of Kidney. Male genital organs in 4-parts and female genital organs in 2-parts with embryo in the 3rd month of pregnancy.
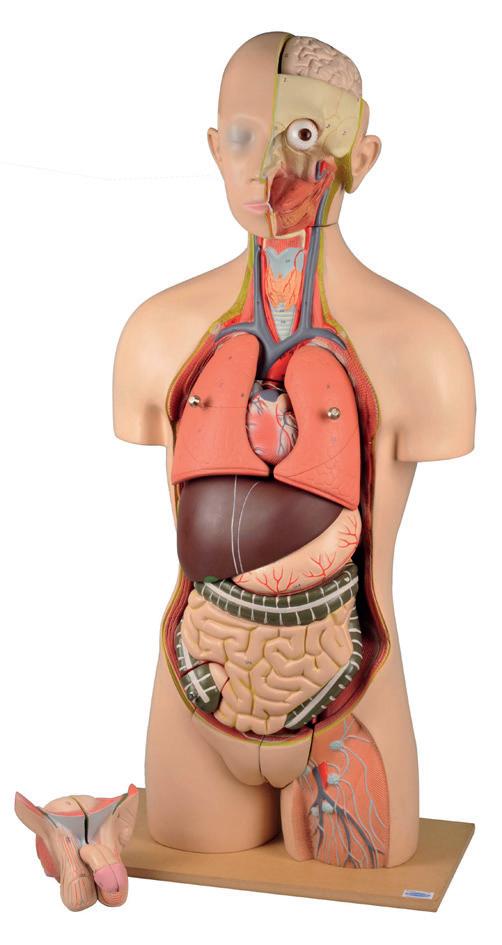
Was price Now price
Code: MO130545 £369.95 £250
Cobra SMARTsense pulse sensor
Continuously monitor the heart rate before, during and after exercise. This Cobra SMARTsense Pulse sensor can be used to conduct various student experiments in the field of human and electrophysiology.

Code: DA220120

£132.70

Clifton spirometer
For investigating tidal volumes, respiratory rate, pulmonary ventilation, reserve volumes and vital capacity. Oxygen consumption can also be measured which is useful in metabolic rate studies. For the full specification see online.
Code: HE63100 £1,075.00
| 35 Visit: shop.wf-education.com/science customer.support@wf-education.com 01743 812 200
What is chromatography?









It is a way of separating components in a mixture. The mixture is carried in a ‘mobile phase’ (liquid or gas) and each component moves with a different speed depending on its size and mobility (in the liquid or gas) and how long it is ‘held’ on the stationary phase (sheet, column, tube).
It is used extensively in industry and research for purification and analysis of chemical components. There are many ways of separating mixtures using chromatography: paper, thin layer, gas, gel, column (bead), ion exchange, affinity - to name a few.


In education students need to be aware of the different types of chromatography, in particular: thin layer and paper, column, gas (sometimes called gas-liquid).
Paper chromatography: Used extensively at KS3 and GCSE for biology and chemistry.





Practicals include: separating dyes in felt tip pens or food colours, (GCSE) and looking at the colours in sweets (KS3).
TLC (Thin Layer Chromatography): Required practicals in both biology (leaf pigments) and chemistry (separation of species).
There are no practicals for gas or column chromatography, but students need to be aware of the processes and know how gas chromatography works.
What is a TLC plate? and how is it different from paper:
Paper TLC
Uses water as the mobile phase
Cellulose paper stationary phase
Solvent mobile phase


Silicon onto acrylic or glass stationary phase





















Cannot separate volatile substances Used for separating volatile substances



Not as accurate


Easy to see spots
More accurate
Hard to visualise spots: use UV or bromine/ iodine/ninhydrin – more hazardous
Limited heating Can be heated to expose spots
36 | Chromatography
Search ‘chromatography’ online
chromatography
TLC chromatography: separation of species
Equipment:
• Pestle and mortar
• 25 or 50 mL beaker, or short test tubes x 5
• TLC plate, capillary (melting point) tubes x 5
• Beaker (to fit plate) and watch glass or chromatography tank with lid
• Pencil, ruler
• Ethanol (0.5 mL per tablet)
• Ethyl ethanoate (ethyl acetate)
• UV lamp
• Tablets: aspirin, caffeine, paracetamol, ibuprofen, Anadin® (or other equivalent ‘cold & flu’ tablet: Hedex® extra, paracetamol extra) *
Anadin® contains aspirin paracetamol and caffeine. Hedex® extra and paracetamol extra contain caffeine and paracetamol. The other tablets mentioned above are all “pure” (for the purpose of this practical).
Method:
1. Label 5 beakers/test tubes with the appropriate tablet.
2. Crush the first tablet to a fine powder in the mortar and dissolve 0.1 g of this powder in 0.5 mL ethanol, in an appropriately labelled beaker.
3. Repeat for the other 4 tablets, cleaning the pestle and mortar between each one.
4. Handling a TLC plate by the edges, mark the baseline and positions of the 5 spots, in pencil.
5. Using the capillary tubes, place a spot of the first tablet solution onto its representative pencil mark on the baseline. Once dry, repeat the process 5-10 times.
6. Repeat for all the remaining tablet solutions.

7. Add enough ethyl ethanoate to the chromatography tank to cover the bottom of the plate but not to be above the baseline or spots.
8. Add the TLC plate to the tank and cover with a lid to prevent loss of solvent and ensure a solvent filled atmosphere.
9. Remove the plate when the solvent line has reached about 1 cm before the top of the plate and mark the solvent front.
10. Observe the spots under UV or place the TLC plate into a jar containing iodine crystals and the spots will be stained darker; do this in a fume cabinet. Mark the spot positions before they fade.

Identify common components of the tablets by comparing Rf values.
The Rf value (or retention factor) is a ratio measurement of the spot compared to the solvent. It should always be less than 1 since the solvent front will always be greater than the spot front.
Principles of thin layer chromatography kit

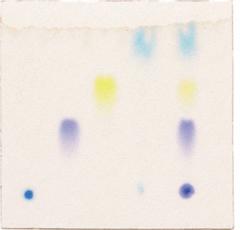










This experiment introduces chromatographic theory and methods of thin layer chromatography. A mixture of dyes are separated on cellulose-based TLC plate using two different solvent systems.
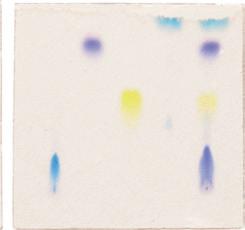
Code: BT140316 £89.65
TLC plates
Can easily be cut with scissors forming smaller plates which may be used to facilitate the further development of given spot. The plates can be rolled to fit into chromatography cylinders.
Code: CH44017 80 x 40 mm £54.60
Code: CH44018 50 x 200 mm £89.20
Rf = distance travelled by spot distance travelled by solvent

Chromatography paper sheets


Whatman Grade 1, supplied in a pack of 100 sheets.
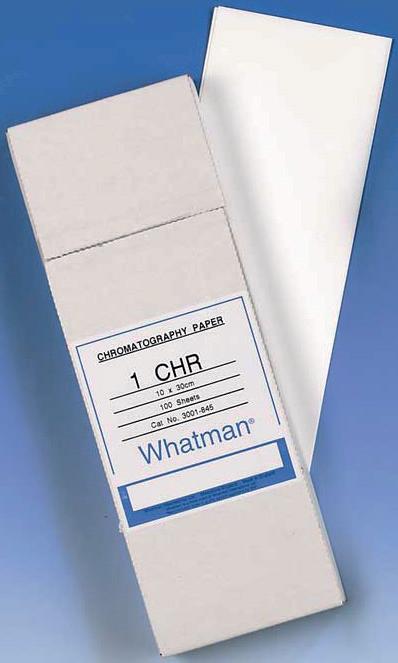


Code: CH04020 100 x 300 mm £61.20
Code: CH04025 200 x 200 mm £68.40
Code: CH04060 115 x 213 mm £93.95
Chromatography paper reel


Whatman Grade 1, supplied in 100 metre reels.
Code: CH04096 10 mm x 100 m £22.95
Code: CH04098 20 mm x 100 m £37.10
Code: Ch04100 30 mm x 100 m £50.95
Code: CH04105 40 mm x 100 m £56.80
Code: CH04110 50 mm x 100 m £68.70
Code: CH04120 100 mm x 100 m £130.80
Code: CH04130 150 mm x 100 m £166.30
| 37 Visit: shop.wf-education.com/science customer.support@wf-education.com 01743 812 200
Rf
Glass; giving you a clearer understanding
There are several types of glass that you will come across in the prep room, but what are the differences between them, and which should you choose for your application?
Soda-lime glass
Soda-lime glass is the most common type of glass. Around 90% of all glass manufactured throughout the world is soda-lime. Its component materials are soda, or sodium oxide, and lime, or calcium oxide, mixed with silica.
What is borosilicate glass?
Borosilicate glass has two main building blocks – silicon oxide and boron oxide. This gives it a densely linked glass network which offers higher chemical durability and thermal resistance compared with soda-lime glass.
The different types of borosilicate glass:

The different types of borosilicate are achieved by the mixture of boron oxide and silicon oxide along with the addition of sodium and aluminium oxides (alkaline/alkaline earth). If the borosilicate glass has a low alkaline and alkaline earth content, then it will offer higher chemical durability and a low coefficient of thermal expansion (CTE). The % of boron oxide will be between 5% and 13% of the makeup of the glass. Depending on this %, borosilicate glass can have a CTE between a half to a third as much as soda-lime glass.
What is thermal shock?
If an item of glassware is heated on one side only, then the glass will expand at different rates and strain will be put on the material. When it exceeds its tensile strength then it will crack. Because borosilicate glass has a low coefficient of thermal expansion this means it will withstand thermal shock better than soda glass.
38 |
Why not download our handy ‘Glassware Guide’! Search ‘Labware’ online Labware
What are the best uses for each type of glass?
Soda-lime glass (contains 67-70% silicon, 1-5% boron, around 12% sodium 6% aluminium 5% calcium and some potassium, barium and magnesium).
CTE around 8-9
Suitable for storing dry powders and general storage applications. Not autoclavable.
Suitable for general lab work and can withstand moderate warming but NOT direct heat.
Neutral borosilicate glass (around 10% boron, 70-75% silicon, 5-6% sodium, 6-7% aluminium and around 1% calcium).

CTE around 5
Chemically resistant and is suitable for use with general acidic, neutral and alkaline products. Can be autoclaved.
Can withstand moderate heat but should not be used straight from cold to a hot Bunsen flame without being warmed up (e.g., by moving in and out of a Bunsen flame).
Borosilicate 3.3 glass (around 13% boron, 80% silicon, 4% sodium, 2-3% aluminium).

CTE 3.3
Highly resistant to water, acids, salt solutions, halogens and organic solvents. It can be corroded by hot concentrated hydrofluoric acid, hot concentrated phosphoric acid and strong alkaline solutions. (This should not be a problem in schools).
Can be autoclaved.
Suitable for heating samples up to boiling point.

| 39
Glass Type Coefficient of expansion Softening point temperature Working point temperature Pyrex (borosilicate 3.3) 33 x 10-7 821°C 1252°C Simax (borosilicate 3.3) 33 x 10-7 820°C 1260°C Kimble (neutral borosilicate) 49 x 10-7 785°C 1165°C Soda-lime 93.5 x 10⁻⁷ 696°C 1005°C
Iodine for starch testing

• Sometimes known as Lugol’s reagent.
• Used extensively in biology practicals for testing for the presence of starch, a 0.01 M concentration of iodine solution is used. One component of starch is amylose, a polysaccharide made of straight chains α-D-glucose units arranged in a helix. The iodine molecules fit inside the helix and bond with the starch polymer. The brown/orange of the iodine solution is absorbed and blue/black is what is reflected back and hence what we see.
• Iodine is hardly soluble in water, so solutions are generally prepared with potassium iodide (KI).
• For iodine to dissolve in water the KI has to dissociate and provide an iodine ion for the iodine molecule to bond with (forming the triiodide ion) which then dissolves more readily.
• Because the formation of I3- is in equilibrium (moving back and forth between KI and I3-) more KI is needed than you might assume, to keep pushing the formation of I- that the I2 can combine with.
CLEAPSS use 8 g of KI in a 1000 mL solution (0.48 moldm-3 ) to keep this reaction driving forward, allowing maximum formation of I3- when the required amount of iodine is added, but the amount of KI is not critical, as long as it is enough to keep the iodine dissolved.

Ingredients:
• Potassium iodide (KI, Mr = 166) Timstar code PO4976

• Iodine (I, Mr = 253.8) Timstar code IO3140
• Distilled water
Method:
1. Add 8 g potassium iodide into a beaker.
2.Add a little water to dissolve the potassium iodide.
3. Add 2.54 g iodine to the beaker.
4.Add more water to dissolve the mixture.
• Beaker (1 L)
• Magnetic stirrer and follower
• Balance, spatulas and weigh boats
5. Make the solution up to 1000 mL with water and stir to ensure all the iodine has dissolved.
6.Store in an amber bottle, with appropriate labelling. The solution is low hazard.
Notes/tips:

The concentration will slowly decrease over time, so it is worth periodically testing that the iodine solution works.
Lugol’s reagent is also used for gram staining when looking at bacteria, along with crystal violet, it will stain for gram positive bacteria.

40 | Helpful biology recipes
KI → K+ + II2 + I- I3-
Academy beakers
Squat form borosilicate glass beakers.
Code: BE42079 50 mL £6.00
Code: BE42080 100 mL £6.00
Code: BE42081 250 mL £7.30
Code: BE42082 400 mL £9.80
Code: BE02083 600 mL £7.00
Code: BE02084 1 litre £15.10
Glassware
Academy heavy duty conical flasks
Borosilicate glass, graduated, narrow-mouthed, heavy duty conical flask.


Code: FL190800 100 mL £15.30
Code: FL190802 250 mL £10.20
Simax beakers
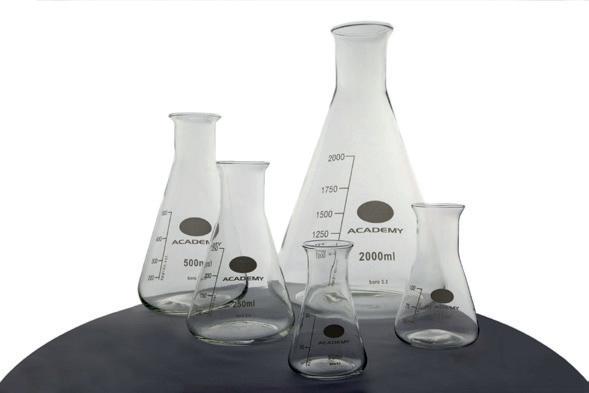
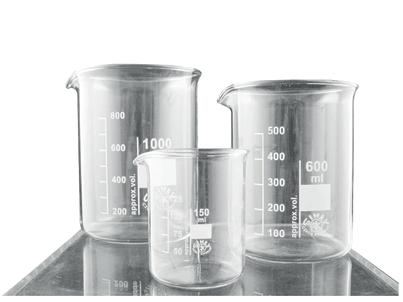

Squat form borosilicate glass beakers.
Code: BE02169 50 mL £10.80
Code: BE02170 100 mL £10.20
Code: BE02175 250 mL £11.20
Code: BE02180 400 mL £17.30
Code: BE02185 600 mL £19.90
Code: BE02190 1 litre £35.70
Code: BE02195 2 litres £6.50
Simax conical flasks, narrow mouth

Borosilicate glass, narrow-mouthed, graduated conical flask.
Code: FL07900 100 mL £15.80
Code: FL07905 250 mL £17.30
Code: FL07910 500 mL £29.00
Kimble soda lime glass test tubes
Code: TE150100 Light wall, 50 x 6 mm £24.50
Code: TE150110 Light wall, 75 x 10 mm £28.50
Code: TE150115 Light wall, 75 x 12 mm £12.30
Code: TE150130 Light wall, 125 x 16 mm £19.00
Code: TE150135 Light wall, 125 x 18 mm £18.90
Code: TE150140 Light wall, 150 x 16 mm £18.90
Code: TE150145 Light wall, 150 x 18 mm £19.95
Code: TE150150 Light wall, 150 x 24 mm £16.50
Code: TE150155 Medium wall, 125 x 16 mm, rimless £20.00
Code: TE150160 Medium wall, 150 x 24 mm, rimless £21.50
Kimble neutral borosilicate glass test tubes
Code: TE150175 Light wall, 125 x 16 mm £21.40
Code: TE150185 Light wall, 150 x 18 mm £27.50
Code: TE150190 Light wall, 150 x 24 mm £19.00
Code: TE150195 Medium wall, 75 x 10 mm £15.50
Code: TE150210 Medium wall, 100 x 16 mm £26.00
Code: TE150215 Medium wall, 125 x 16 mm £27.00
Code: TE150220 Medium wall, 150 x 16 mm £31.00
Code: TE150225 Medium wall, 150 x 18 mm £38.00
Code: TE150230 Medium wall, 150 x 24 mm £26.00
Academy conical flasks, wide mouth
Borosilicate glass, graduated, easy pour rim, wide-mouthed conical flask.
Code: FL190750 100 mL £10.20
Code: FL190755 250 mL £13.30
Simax borosilicate 3.3 glass test tubes
Code: TE150235 Medium wall, 75 x 10 mm £26.00
Code: TE150240 Medium wall, 75 x 12 mm £28.60
Code: TE150250 Medium wall, 100 x 16 mm £40.00
Code: TE150255 Medium wall, 125 x 16 mm £39.00
Code: TE150260 Medium wall, 150 x 16 mm £46.00
Code: TE150265 Medium wall, 150 x 18 mm £72.00
Code: TE150270 Medium wall, 150 x 24 mm £30.00
Simax conical flasks, wde mouth
Borosilicate glass, wide-mouthed, graduated conical flask.
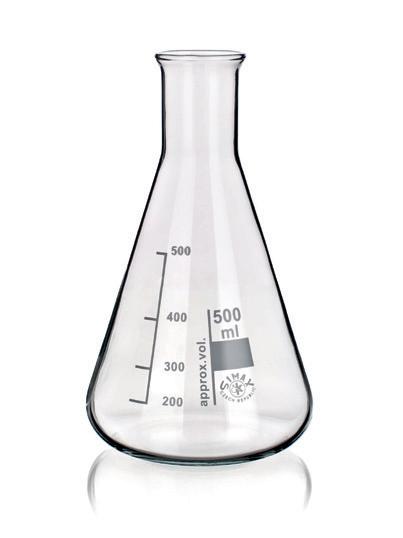
Code: FL07946 100 mL £19.40
Code: FL07947 250 mL £22.40
Code: TE150275 Heavy wall, 75 x 10 mm £33.00
Code: TE150280 Heavy wall, 125 x 16 mm £83.00
Code: TE150290 Heavy wall, 150 x 18 mm £100.00
Code: TE150295 Heavy wall, 150 x 24 mm £53.00
| 41 Visit: shop.wf-education.com/science customer.support@wf-education.com 01743 812 200
Use AUTUMN10 to save 10% online orders only*.
The Bunsen burner
A simple and efficient way of heating solutions or solids in the laboratory, either in a beaker (solution), a heat resistant test tube (solution or solid), or a crucible (solid).
The usual way to represent heat in a scientific diagram is simply an upward arrow:
Type of gas and compatible burners:
Air vent
Flame leaves here
Chimney (barrel)
Collar (for adjusting airflow)
The type of gas used with the burner above is piped natural (mains) gas. If you are using LPG in your school the burner looks the same, but the chimney will be a different diameter. Check that it is compatible when you are buying.
If you have no piped gas in your school, you will have to use an alternate source.
Mini gas burners:
CLEAPSS advises mini gas burners such as these:
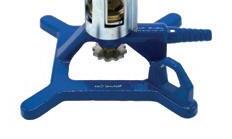

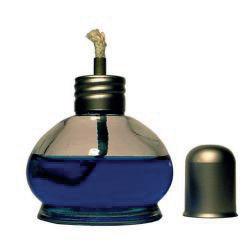
• When using this type of burner, it is important to note that there is no yellow flame, so the flame can be difficult to see.
• The butane gas used has only a very faint smell to it unlike natural (mains) gas and LPG and thus it can be hard to determine if the burner is left ‘open.’
• Care needs to be taken that these burners are used correctly and that they do not get taken during the lesson as they are complete units and are small enough to ‘disappear.’
• The flame produced is good enough for general science work, but not really hot enough for glass bending work by the technician.
Spirit burners:
Although useful in some calorimetry and microscale experiments, these are NOT recommended as substitutes for Bunsen burners. They are full of flammable liquid, can be knocked over by students and if the liquid is not to the top of the bottle, a flammable gas layer is formed which can ignite.
Camping gas cylinders:
CLEAPSS and IGEM (Institute of Gas Engineers and Managers) advice is: Do not use these as they are not designed to take Bunsen burner heads. These then cause damage the cylinder.
Meker burners:
These burn with a hotter flame than standard burners and are useful for glass working in the prep room. These are NOT suitable for student use.
42 |
inlet
Gas
Base
Burner head
Fuel tank (liquid butane)
‘burners’ online burners
Control valve and starter
Search
Tubing (gas inlet);
• The tubing generally used for standard Bunsen burners is N8 (8 mm bore) and 2 mm wall thickness. Beware of kinking when it is in use.
• Neoprene (black or blue) is preferable over rubber (usually red) as it is more resistant to the hydrocarbons in the gas supply.
• Neoprene tubing with moulded end pieces is available. These come in different lengths and are easy to fit to the Bunsen inlet and the gas tap. Be careful that you opt for moulded not glued ends as the glue will easily perish and gas will escape.
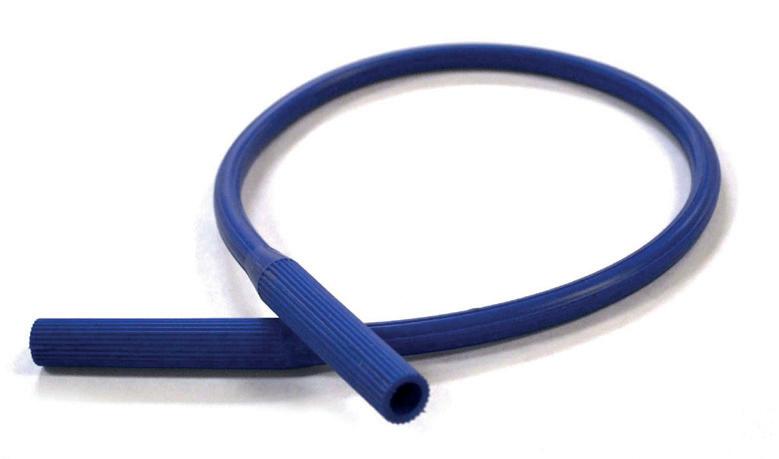
Maintenance: how to care for your Bunsen burners:
1. Tubing: check tubing for signs of perishing and general damage, replace as necessary.
2. Check that the tubing fits tightly onto the burner and the gas tap.
Starting from the base of the burner:
Burner tubing
Superior neoprene tubing, with flared end pieces to fit onto burner and gas tap nozzles. Single moulding that cannot be pulled apart easily.
Code: TU180930 Length 450 mm £4.60
Code: TU180932 Length 600 mm £5.75
Code: TU180934 Length 900 mm £6.90
1. Check that the air vent collar moves freely and that the air inlet hole can be closed and opened easily.
2. Look inside the air inlet at the gas inlet (jet): check to see if it is blocked or not, you may need a piece of appropriately sized wire to remove any debris from the inlet. With most Bunsen burners the chimney can be removed to give access to the jet and then these can be cleaned with wire brush. Some economy burners have a fixed chimney so you may need to be a bit dextrous to clean the jet.
3. Check the chimney is firmly screwed to the base.
4. Check the top of the burner for signs of blockage (common after many rounds of flame testing), use a wire brush to remove what you can. You may be able to burn off any remains.
5. Finally re-attach the Bunsen to the gas tap and check that it works (you may need to check the gas tap itself for obstructions if you are not getting any gas through the (now clean) burner).
Set up in the laboratory:
Bunsen burners are usually used in conjunction with a tripod and gauze, or tripod and clay triangle if you are heating a crucible.

• Make sure the tripod is the correct height: too high and it will take ages for the beaker/crucible to heat, too low and there won’t be space between the top of the Bunsen and the gauze.
• When using mini burners, you will need shorter tripods. For additional guidance on the use of Bunsen burners see CLEAPSS or SSERC
Bunsen burners, standard range
These burners are manufactured with a pressed die-cast base (80 mm diameter) and rifled gas inlet tube. The nickel-plated burner tube comes with a rotatable air regulator.
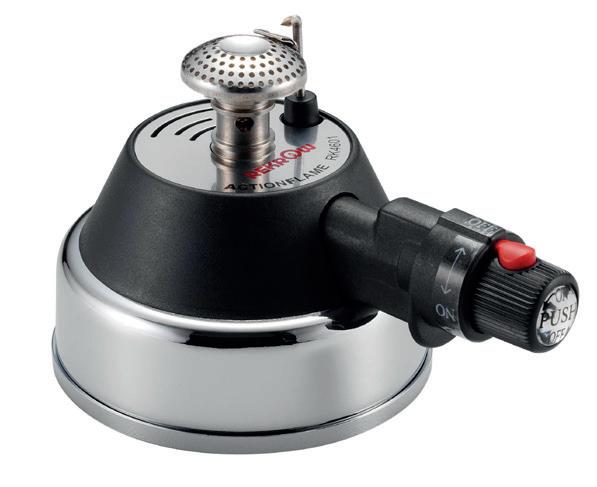
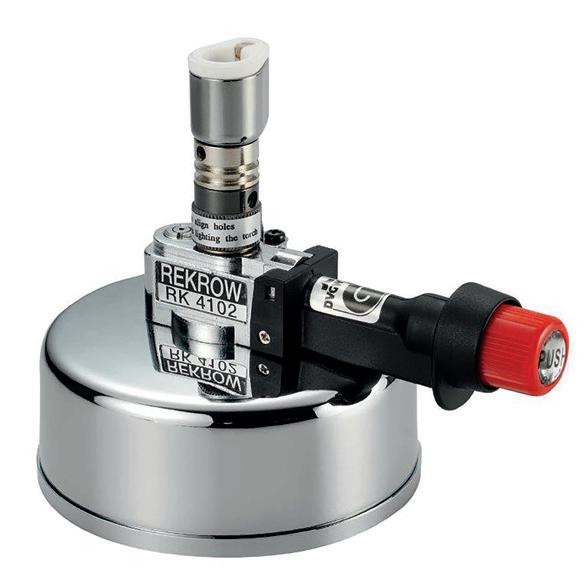
Code: BU03780 N.G., 11 mm £8.20 Pack of 1
Code: BU03781 N.G., 11 mm £72.50 Pack of 10
Code: BU03790 N.G., 13 mm £9.20 Pack of 1
Code: BU03791 N.G., 13 mm £81.00 Pack of 10
Code: BU03785 L.P.G., 13 mm £10.50 Pack of 1
Code: BU03786 L.P.G., 13 mm £92.50 Pack of 10
Rekrow RK4601 portable gas burner
Recommended by CLEAPSS’ guide GL240, a high-quality burner with refillable gas tank and thumb-operated electric ignition. It provides stable, controllable flame. The housing stays cool enough to touch even after sustained use.
Code: BU190000 £39.70 Pack of 1
Code: BU190000/10 £351.80 Pack of 10
Rekrow RK4102 laboratory burner
Recommended by CLEAPSS’ guide GL240, a highquality portable laboratory burner, with refillable gas tank and thumb-operated electric ignition. It provides an adjustable flame, similar to a Bunsen burner.
Code: BU190200 £45.20 Pack of 1
Code: BU190200/10 £399.00 Pack of 10
| 43 Visit: shop.wf-education.com/science customer.support@wf-education.com 01743 812 200
Use AUTUMN10 to save 10% online orders only*.
CD hovercraft

Hovercrafts are amphibious craft which use an air pressure difference between the hull and the surface to provide lift. Invented in Britain in the 1950s, they can travel on water, land, ice, mud, and other surfaces. Air is forced into the ‘skirt’ surrounding the underside of the craft and, being at a slightly lower pressure than the air under the vessel, it forces the craft to rise. With the vessel slightly above ground/water level huge fans can propel it along.
Here you can make a mini version of a hovercraft, using the same principle of using a cushion of air to travel on.
Equipment:

• CD or DVD


• Balloon
• Plastic bottle lid with push up ‘locking’ ability
• Blu Tack® or glue gun. (Glue guns get hot and should be used with supervision)







. Before open evening, make a hole in the centre of each plastic lid. This is easily done by heating a long nail in a Bunsen burner (blue) flame and driving it through the lid. Make sure you wear heatproof gloves and goggles. Allow the lids to cool before trimming any excess plastic from around the hole.
Method:


1. Place the CD/DVD on the table, shiny side down.

2. Using the Blu Tack® or glue gun (beware this will be hot, younger children must be supervised if you are planning to use a glue gun), attach the bottle lid, right way up, to the middle of the CD so that the hole in the lid lines up with the hole in the CD.
3. Push the outer part of the lid to ‘lock’ it in the closed position.

4. Blow up a balloon and hold it tightly so that the air isn’t lost.




5. Attach the balloon over the plastic lid.
6. Place the hovercraft onto a smooth surface and pull open the lid (take care not to pull the lid/CD assembly apart).





7. Watch as the hovercraft glides around the surface on its own cushion of air.




lid with push up locking design balloon CD/DVD





44 |
Open evening inspiration
fix lid to non-shiny side of CD, covering the hole
completed hovercraft assembly
Find lots more physics content here.
Making a ‘Steady Eddie’ buzzer game
Demonstrating the ideas of open and closed circuits in simple electronics, the aim of the game is not to make the buzzer sound.
Equipment:
• Copper wire (thin enough to bend into shape). Two lengths will be needed: one long enough to make your desired shape and a second shorter piece to make the ‘wand’
• Wire wool
• Battery holder and batteries (Zn/C or Zn/Cl). A D cell holder and battery will be sufficient
• Buzzer (check if you need to connect it only one way round)
• Connecting wires and crocodile clips (optional)
• Drinking straw or insulating tape
Method:
1. Clean the copper wire with wire wool to make it shiny. (This will help it to conduct better).
2. Make a loop at the end of the shorter wire, big enough to go over the longer piece of copper wire, without touching it (this is the wand you will use to follow the wire pattern).
3. Place the straight part of the wand into the straw and secure it. This will be your insulated handle. Connect the bottom of the wand to a connecting lead.
4. Attach the other end of the lead to one terminal of the battery holder.
5. Bend the longer piece of copper wire into a continuous shape.
6. Connect one end of this wire to the battery holder, and the other to a (2nd) connecting lead.
7. Attach the other end of the connecting lead to the other side of the battery holder.
8. Add the loop to the wire shape.
9. You can attach the free end of the copper shape to a stand to keep it upright and secure.
10. Add the battery into the battery holder and touch the loop of the wand to the shape to check the buzzer sounds. If it doesn’t try connecting the buzzer the other way around (you can swap out the buzzer for a bulb if you prefer).
The completed ‘Steady Eddie’ game: How to play:
• Holding the copper wand by the insulating handle, start at one end of the wire shape and carefully move the loop all the way to the other end. The science bit...
This is a simple circuit with a ‘switch.’ The ‘switch’ is the copper loop contacting (or not) the copper shape.
If the copper loop touches the copper shape, the circuit is closed and is complete via the touching copper wires. This means that charge can flow, and the buzzer will sound.
If the copper loop never touches the wire shape, the circuit will never be completed (the ‘switch’ will never close) and charge won’t be able to flow around the circuit.
This activity can be pre-prepared for younger children at open evening, or you can have older children make their own ‘steady eddies’ to take home with them.
• Children should be supervised throughout this activity Hands should be dry Wire ends will be sharp
| 45 Visit: shop.wf-education.com/science customer.support@wf-education.com 01743 812 200
Open evening inspiration
Making fungal spore prints
Spore colour when seen en-masse is a good way of determining the family and sometimes the species to which the particular fungus belongs. Although we would not encourage foraging for wild mushrooms for this activity (as there are many species of fungi that are deadly poisonous) you can now obtain a range of different fungi from your local supermarket which will make good spore prints.
This activity can be used in the wider context of species identification, along with how to use identification keys etc. It can also enhance any forest school activities that you might be able to do.


How to take a spore print



Equipment
• Mushroom of choice: field (flat) mushrooms, button, shit’ake, chestnut, all are readily available from supermarkets


• Sharp knife

• White tile
• White paper (or black paper if you know you will get white spores)
• Beaker
• Damp paper towel


• Artists clear spray fixative (optional)





A monocular educational microscope for school environments. Simple to handle, the separate coarse and fine focus facilitates teaching, while the rechargeable battery pack allows cordless usage without mains supply.


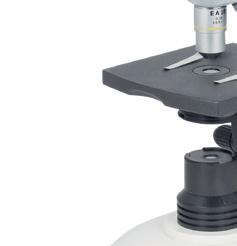
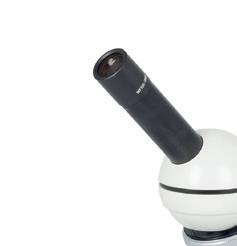
Code: MI230100 £199.00
A value monocular microscope with simple optical glass objectives mounted on a revolving nosepiece.
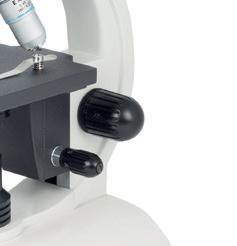
Code: MI200900 £65.00
cap


scales
gills
annulus (ring)


stipe (stem)




volva
46 |
The fungal world is richly diverse, and it is in the autumn that most of our weird and wonderful mushrooms are in full ‘bloom’. Sometimes it can be hard to identify mushroom species and one of the ways this is done by fungi experts, is via spore prints.
Mature mushroom
Motic 1801 LED cordless microscope
Motic Funscope
See our full range of Microscopes and cameras here!
Making fungal spore prints
Method;


1. Prepare the mushroom by removing the stalk (stipe) as close to the base as possible – this will allow maximum contact between the gills and the paper.
2. Place the mushroom cap face down so that the gills are in contact with the paper.

3. Place some damp paper towel on the top of the mushroom cap to prevent it drying out.
4. Cover the whole arrangement with an upturned beaker and leave for a few hours/overnight (the beaker and damp paper towel will create a humid environment to stop the cap drying out).
5. When you are ready carefully remove the beaker, towel, and mushroom cap from the paper.
6. You should have a nice ‘print’ left on the paper, made up of mushroom spores.


7. If you want to keep the prints you can spray the paper with an artist varnish/fixative.
Examples of spore prints:

Images from microscope spore prints:

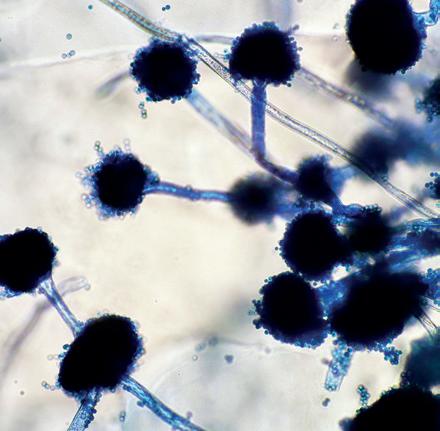

Alternative method for microscope work:
1. Prepare the mushroom as before but allow a piece of the gills (underside of the cap) to come into close contact with a microscope slide.
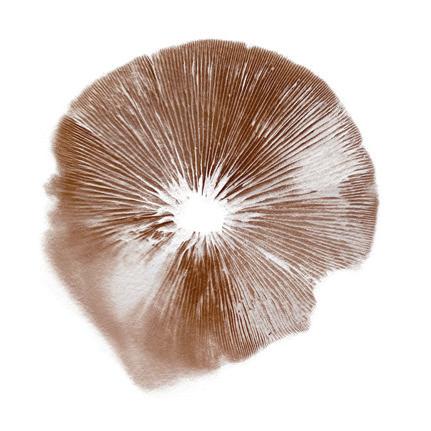

2. Leave for a few hours/overnight (as before).


3. When ready, remove the piece of mushroom cap and carefully place a coverslip over the ‘print’.






4. View under the microscope, initially on low power to locate the spore print, then increasing the magnification as required.
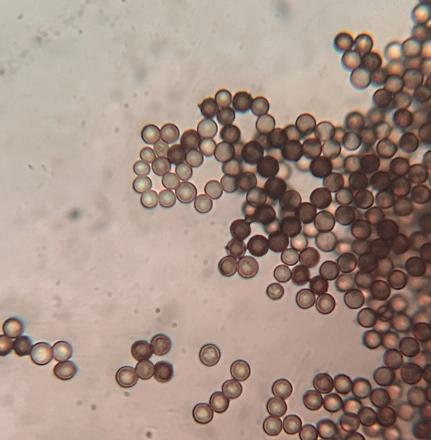

The spores are the reproductive cells of the mushroom and are released when the mushroom has fully matured (for most mushrooms this is autumn in the UK), these then fall to the ground and germinate into new mushrooms the following year.


| 47 shop.wf-education.com/science customer.support@wf-education.com 01743 812 200 Visit: shop.wf-education.com/science 01743 812 200
Gas preparation
Throughout the year you will be required to supply jars of various gases to the laboratory for demonstrations by the teacher, notably how metals react with gases or (in the case of carbon dioxide, the smothering effect on a flame).

You may be fortunate enough to have gas cylinders for the commonly requested gases on site, although a lot of technicians now have to make the gas themselves as the cost of hiring gas cylinders and the additional storage security is proving costly.
Whichever way you produce the gas, you will need to collect and store it until it is required. Most gases will be able to be collected over water in an upturned gas jar (by displacing water from the jar). For gases heavier than air like chlorine you collect the gas in an upright gas jar.
Collecting gas over water: oxygen, hydrogen, carbon dioxide*
Collecting gas by downward delivery: chlorine, carbon dioxide*
Chlorine gas
*Carbon dioxide is denser than air but can be collected both ways. Collecting over water means you know for certain that you have CO2 gas in the jar, but since it is a clear gas, you cannot be sure that the gas jar is full with downward delivery collection.
Preparation of oxygen (in the prep room):
Equipment:
• Side arm conical flask

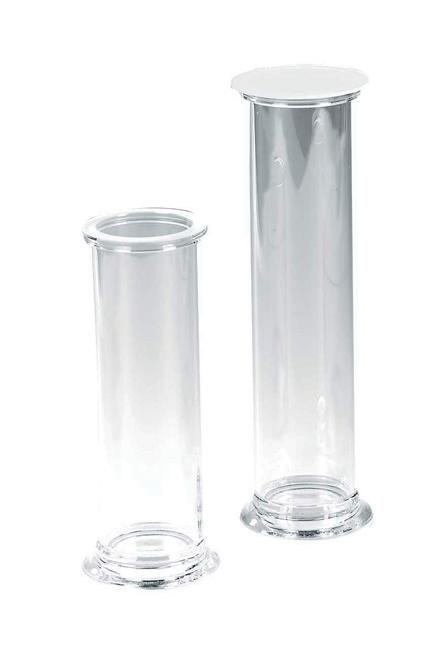
• Holed bung with thistle (or dropping) funnel inserted
• Delivery tube (long enough to reach from the side arm to the bottom of gas jar)
• Gas jars and lids (or bungs to give a tight fit)
• Container of water
• Beehive shelf
• Manganese IV oxide (approx. 1 g)
• Hydrogen peroxide 100 vol (approx. 5 mL or more)
Hydrogen peroxide decomposes over time to form water and oxygen. Here we use a catalyst (manganese oxide) to speed up this process and collect the gas that comes off.
Best Seller!
Gas preparation kit

All you need for producing gases in the classroom.
Code: GA08772 £43.95
Gas jars and covers
Code: GA08510 Jar, 150 x 50 mm £5.90
Code: GA08515 Jar, 200 x 50 mm £7.00
Code: GA08520 Jar, 250 x 50 mm £9.80

Code: GA08522 Jar, 200 x 60 mm £21.50


Code: GA08525 Jar, 300 x 60 mm £23.60

Code: GA08530 Cover, 65 mm £3.10
Code: GA08535 Cover, 75 mm £3.50
48 |
Use AUTUMN10 to save 10% online orders only*.
Method:
1. Work in a fume cupboard and set the equipment up as detailed here:
2. Fill several gas jars with water and upturn the first one to sit in the bowl of water, on top of a beehive shelf (over the hole in the beehive shelf).
3. Arrange the delivery tube so that the end pokes through the beehive shelf and into the gas jar (a flexible tube is easier to manipulate than a fixed shape delivery tube).
4. Once you have set up the equipment add the manganese oxide to the bottom of the flask, followed by enough water to cover the end of the funnel tube (25 mL at least).
5. Attach the bung and funnel to the flask.
6. Pour hydrogen peroxide down the funnel. The peroxide will react vigorously in the presence of the manganese oxide, oxygen gas will be produced and will fill the gas jar, displacing the water.

7. Once the gas jar is empty of water discard it (this will contain residual air from the side arm flask as well as oxygen) and replace it with a second one (full of water).
8. Once this jar is full, carefully remove it from the beehive shelf keeping it under the level of the water, carefully slide a prepared gas jar lid (smear Vaseline over the lid for a good seal) over the top and remove the jar from the water, standing it the right way up.
9. Dry and label the outside of the jar and set aside.
10. You can continue to collect gas as the peroxide is used up. Add more hydrogen peroxide if the reaction slows before you have collected what you need.
To prepare carbon dioxide gas:
1. Use the same glassware set up as above but add warm water rather than cold to the gas jars and trough (CO2 is less soluble in warm water so you will lose less during collection).
2. Replace the manganese dioxide with marble chips.
3. Replace the hydrogen peroxide with 5 M hydrochloric acid (5 mL).
4. Follow the rest of the procedure as above.
Many teachers prefer to use soda water (saturated carbon dioxide solution) as a guaranteed source of CO2 in the lesson.
Smaller scale gas collection can be carried out by the students in the lab using marble chips and hydrochloric acid (although a lower concentration of HCl should be used)
For more information on gas preparation see https://www.cleapss.org.uk or https://www.sserc.org.uk
| 49 Visit: shop.wf-education.com/science customer.support@wf-education.com 01743 812 200
A mathematical constant that links photon energy with its frequency for all electromagnetic radiation (including light).
Light exists to our eyes as a wave, and it acts as such. If you pass light through a diffraction grating it will leave like a ripple on the water, spreading out in a wave pattern as seen here in Young’s experiment:
Young’s Double Split Experiment
As the light wave passes through the opening it spreads out. In the double slit experiment light then passes through 2 slits with each wave spreading out and then interfering with each other, causing a spike in wave amplitude.
• However, in Germany in 1900, Max Planck postulated that e-m radiation was actually emitted as ‘packets’ of energy and not a continuous wave. This energy was ‘all or nothing,’ the packet was delivered in its entirety or not at all (discrete).
• We now call these packets of energy quanta, and one such packet of light energy is a photon.
• Professor Planck went on to win the 1918 Nobel prize for physics for his work on quantum mechanics and is known as the father of quantum physics.

• Quantum physics (quantum mechanics) is the branch of physics studying the tiny particles of matter and the forces and interactions surrounding them.
The energy of a single photon is given by the following formula:
E = hf (also written as E = hv)
Where E = energy (of 1 photon), Joules (J)
h = Plancks constant (6.626x10⁻³⁴), Joule.seconds (Js)


f (or v) = frequency of photon (‘wave’), Hertz (Hz) or second-1 (s-1)
A level practical: Working out a value for Planck’s constant, h
Photon Energy
Photon amounts of energy are tiny (in the orders of 10-19 joules), but the fact that there are so many of them at once makes them appear to be continuous, hence why light has waveparticle ‘duality’ (acting like both), with the symbol:
Using a potentiometer (variable resistor), voltmeter and some LED bulbs students can find a value for h (within about 20% accuracy).
Theory: The energy lost by 1 electron = energy of 1 photon, and hence light is emitted.
The circuit is set as in the circuit diagram, (the resistor before the LED will prevent it from breaking down). Make sure the LED is positioned the correct way around or it won’t allow current through, and have on hand several different LEDs with different wavelengths to switch out during the experiment.
50 Planck’s constant |
The aim of the experiment is to obtain a range of threshold voltages. These are the voltages at which the LED just lights (you may need to shield the LED from the room lights).
• The ammeter will read 0 until the voltage is high enough to light the LED (so you should see a light and a voltage registering).
• The threshold voltage will be different for the range of different wavelength LEDs and so you will get a good range of values to graph out.
• Once all the values have been obtained, the students will need to plot a graph of threshold voltage, V, against 1/wavelength, m-1 and draw a line of best fit.
Maths:
For 1 photon: E = hf
For the practical we assume that the energy given to the electron by the power supply = energy of the photon (i.e., 100% efficiency), so eV = hf where e is the charge on the electron and V is the energy given to the electron by the power supply. Also c = fλ where c = speed of light, f = frequency and λ = wavelength
So...
eV = hf becomes eV = h c λ
Where e, h and c are all constants, λ is the wavelength of the LED(s) and V is the threshold voltage(s).
We can rearrange equation thus: h c e λ V = which is the same as: h c e 1 λ V = x
Comparing the equation of a straight line: y = m x + c where y is V, x is 1 λ and c is not relevant, it gives the gradient, m as hc e . Since c and e are constants, we can rearrange and use the gradient to solve for h and thus get an answer for Planck's constant.
Planck’s Constant Apparatus
This apparatus is designed to determine the approximate value of Planck’s constant, using a range of LEDs of known wavelength, to allow the electron/ photon energy to be calculated.

Code: RA140105 £49.95
Because of the link between Planck’s constant and mass, the KG was recently (2019) redefined based on Planck’s constant:


E = h f, and E = mc2, so h = m c2 f
where m = mass, c = speed of light, f = frequency, E = energy and h= Planck’s constant)
Ref: F-J’s physics corona busters: determining the Planck constant with LEDs PAG 6.1


| 51 •
Visit: shop.wf-education.com/science customer.support@wf-education.com 01743 812 200 Use AUTUMN10 to save 10% online orders only*.
Turning red wine into... everything!
For all of our chemicals, search online!
Equipment:
• Red wine bottle (empty)

chemicals
• 5 empty wine glasses (or similar)
Chemicals:
• Acidified potassium manganate, KMnO4 (0.0025 moldm-3, in 0.2 moldm-3 sulfuric acid)
• Sodium thiosulfate solution, Na2S2O3, 1 moldm-3
• Barium chloride solution, BaCl2, 1 moldm-3


• Sodium carbonate solution, Na2CO3, 2 moldm-3
Method:
1. Make up all the solutions, adding the acidified potassium manganate to the empty wine bottle (remember to label the bottle appropriately, perhaps on the opposite side from the wine label so as not to spoil the illusion).
2. Label the glasses 1 - 5.
Prepare the glasses before the demonstration:
1. Glass 1: leave empty.

2. Glass 2: add 1 mL sodium thiosulfate solution.
3. Glass 3: add 1 mL sodium thiosulfate solution and 3 mL barium chloride solution.
4. Glass 4: add 3 mL barium chloride solution.
5. Glass 5: add 1 mL sodium thiosulfate and 3 mL sodium carbonate solution. For the demonstration:

1. Add ‘red wine‘ to glass 1 – the solution stays red/deep pink: ‘red wine’.



2. Add ‘red wine’ to glass 2 – the solution will go clear: ‘white wine’.
3. Add ‘red wine’ to glass 3 – the solution will turn white: ‘milk’.
4. Add ‘red wine’ to glass 4 – the solution will turn pink: ‘pink milkshake’.
5. Add ‘red wine’ to glass 5 – the solution will turn clear and fizz: ‘lemonade’

52 | Chemistry demonstration
Great for open evenings or transition days, you can create some liquid magic using simple chemical reactions.
The science bit...


The reactions rely a lot on the reduction of the manganate ions from Mn7+ (pink) to Mn2+ (almost colourless) in the potassium permanganate solution, and the sulfate ions which are also present in the solution.
• In glass 2 the Mn7+ is reduced to Mn2+ by the thiosulfate and the colour changes from purple to (almost) clear.























• In glass 3 the thiosulfate reduces the manganate as above, and the sulfate ions in the acid (from the acidified KMnO4 solution) react with the barium ions to form a white precipitate (Ba2+(aq) + SO42-(aq) → BaSO4(s)).







• In glass 4 the Mn7+ ions of the manganate solution remain (no thiosulfate is present to reduce them) so there is no colour change, the solution stays purple, but the addition of the barium ions reacting with the sulfate ions (as above) gives the precipitate, this time looking pink.


• In glass 5 thiosulfate reduces manganate ions from +7 to +2 and thus clear, whilst the carbonate ions from the sodium carbonate in the glass react with the acid hydrogen ions (from the acidified solution) and the solution becomes clear with fizzing: CO32-(aq) + H⁺(aq)→ CO2(g)+ H2O(l).





01743 812 200 customer.support@wf-education.com | 53
Glass number Name Contents, aqueous solutions of: Resulting colour/effect 1 Red wine KMnO4 in H2SO4 Deep pink/red 2 Water Na2S2O3 Clear 3 Milk Na2S2O3 and BaCl2 Milky white 4 Milkshake BaCl2 Milky pink 5 Lemonade Na2S2O3 and Na2CO3 Clear with fizzing
Visit: shop.wf-education.com/science
Stock up for the new term!
Bulk packs of 40 alkaline batteries


Code: BA210642 AAA £18.50
Code: BA210644 AA £18.50
Stackable 4 mm plugs leads
Code: EL120585 250 mm red £5.50
Code: EL120590 250 mm black £5.50
Code: EL120610 500 mm red £6.20
Code: EL120615 500 mm black £6.20
Code: EL120635 1000 mm red £7.75
Code: EL120640 1000 mm black £7.75
Stackable plugs
Packs of 5.
Code: EL06590 4 mm black £4.40
Code: EL06591 4 mm red £4.40
Alkaline batteries
Code: BA01970 PP3, Pack 2 £3.70
Code: BA01975 D Type, Pack 2 £4.75
Code: BA01983 AA, Pack 2 £1.80
Code: BA01984 AAA, Pack 2 £1.60
Code: BA01985 C Type, Each £3.75
Code: BA01987 23A (A23), Each £1.25
MES bulbs, Pack 10
Code: EL06650 2.5 V, 200 mA £1.95
Code: EL06655 3.5 V, 300 mA £1.95
Code: EL06661 6.0 V, 60 mA £2.30
Code: EL06662 6.5 V, 300 mA £2.30
Code: EL06663 12 V, 200 mA £2.30
Code: EL180900 12 V, 0.1 A £1.95
Alkaline button cells

Code: BA110618 LR41, Pack 10 £4.90
Code: BA01989 LR43, Each £0.70
Code: BA110620 LR44, Pack 10 £4.90
Code: BA110622 LR54, Pack 10 £4.90
Code: EL210000 1.5 V, 200 mA £2.10
SBC bulb holder
A brass SBC bulb holder mounted on plastic base, with two 4 mm sockets for electrical connection. Includes 12 V 24 W SBC bulb.
Code: EL180564 £6.10
Crocodile clips
Nickel plated steel. Takes a 4 mm plug. 10A max current. Supplied in a pack of 100.

Code: EL06556 £10.50
SBC bulbs
Code: EL06676 Radial filament, 5 W £1.50
Code: EL06677 Axial filament, 24 W £2.25
Code: EL06678 Axial filament, 36 W £2.25
54 |
Use AUTUMN10 to save 10% online orders only*.






Want to know why our customers have used Timstar for over 50 years? 8 reasons to choose Timstar! | 55
science partner… We pride ourselves on our friendly and accessible customer service, product specialist and technical support teams. Our teams work together to build enduring value and relationships by providing timely solutions for our customers. If you need help or support, we are always happy to help. You can contact us in a number of ways… By phone 01743 812 200 By email customer.support@wf-education.com By live web chat Open a chat online
Your















CONTACT US EVERYTHING YOU NEED TO TEACH BIOLOGY, CHEMISTRY AND PHYSICS! FIND ALL YOUR SCIENCE ESSENTIALS ON OUR WEBSITE! CHECK OUT THE RESOURCE HUB! Return Address WF Education Group Phoenix House Stafford Drive, Battlefield Enterprise Park Shrewsbury SY1 3FE STAYED CONNECTED AND FOLLOW US! These mailers are 100% recyclable shop.wf-education.com/science customer.support@wf-education.com +44 (0) 1743 812 200 Phoenix House Stafford Drive Battlefield Enterprise Park Shrewsbury SY1 3FE To unsubscribe from these mailers, please simply email: customer.support@wf-education.com with your full address.


 Wendy Thorburn, Lead Science Technician, Kingdown School


