3 minute read
Pathfinders’ progress against the NMDC – 5. Coding


5. Coding
This section summarises learnings from the Pathfinders on writing the code and how best to format it, including the type of language which should be used and visual components to ensure its accessibility and useability. It also covers how to ensure the code accurately reflects the design vision, setting a clear and enforceable minimum standard.
$ Writing the code took time and expertise to do well and, as with previous stages, it took many Pathfinders longer than anticipated to refine language and avoid repetition. Pathfinders also found themselves having to cut content and code requirements, to ensure that the document was accessible and useable.
“Don’t underestimate the amount of time needed to churn through everything and come out with a workable code”
$ The prescriptive and metric-based nature of a code is a departure from the writing style commonly employed in planning policy, local plan supporting text or SPD guidance. The process of writing and refining the code to become an accessible document therefore took Pathfinders longer than expected. Graphic design and illustrations were used to develop a visually consistent document that increased legibility.
“The actual development of the code content is taking longer than expected, but we are keen that a thorough process is followed and corners are not cut.”
“It’s quite a logical, structured document. Each coding element is broken down into page spreads. With a consistent format from a graphic design perspective, we’ve used the colours from the NMDC. It was something that I felt quite strongly about in terms of usability.”
$ Some Pathfinders used a compliance checklist showing applicants which elements they should comply with and which elements have a level of flexibility, to help create a more legible and enforceable code. Additionally, viability testing can help to demonstrate that requirements in the code are going to be viable to deliver, which will help make the code a more practical and useful tool.

Take-aways for future design coders
Ensure the code is enforceable
$ Explain in the code how it is proportionate to what it is trying to achieve.
$ Be transparent about reasoning behind musts and how they relate to the vision.
$ Be clear where there is flexibility in the code.
$ Provide compliance checklists to aid users (applicants and DM officers).
Language should be unambiguous about definitive code requirements.
$ Be concise and use straightforward language, avoiding non-committal language, such as ‘must aspire to’ or ‘must consider’; keep musts tangible and measurable.
$ Set definitive figures for definitive requirements, for example, ‘must increase by 50%’
Use graphics and illustrations precisely
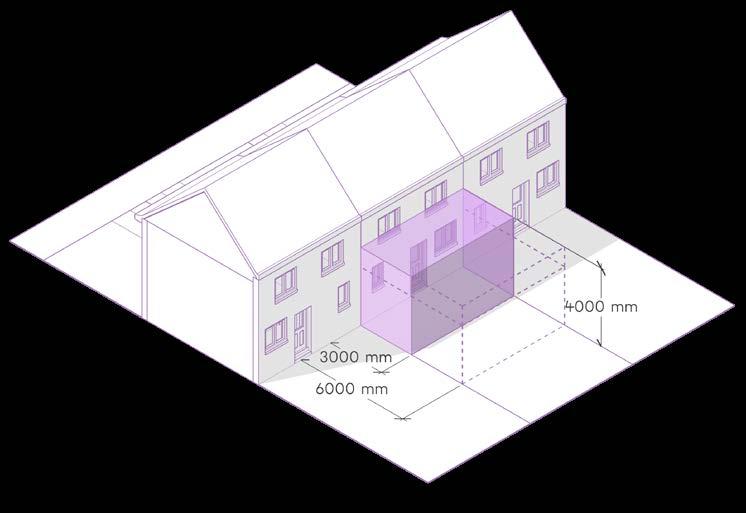
$ Use graphic design to create a strong visual hierarchy through elements such as text size and colour-coding reduce text: use diagrams and images to communicate important ideas quickly, annotate graphics and photographs to make their intent explicit when using axonometric, use the same drawing repeatedly to show different considerations of design; for example, sustainable drainage in one and economics in another.
Use photographs or sketches that represent place well
$ When choosing imagery, ensure that these completely align with your design code requirements to avoid any misinterpretation. Remove the elements that you consider inappropriate or use an alternative illustration instead.
$ Where landscape is key to local character, use imagery that highlights this, such as views of distinctive landmarks.
$ Use images that reflect the diversity of topography and character areas in the code
$ If using images from outside the code area, use annotations to explain the relevance of the images within the local context,
$ Photographs of local developments accompanied by tick/cross-boxes and explanations are helpful when using illustrations to communicate an aspirational vision.