

2 Contents 3 Introduction 6 Long Life Collard Greens 8 Healthy and Hearty Black-Eyed Peas 10 Anti-Inflammatory Dal Recipe - featuring Lentils 12 Soothing Chicken Soup 14 Simple Leafy Greens and Protein Breakfast Recipe 15 Chocolate Avocado Pudding 16 3-Ingredient Chia Seed Pudding
Reversing Type 2 Diabetes or Prediabetes requires commitment and a willingness to take action, including imperfect action.
You can do it!
Simply reading through this eBook and making the recipes that appeal to you is a great first step.
Eating fresh, healthy foods that are nutrient-dense and that keep your blood sugar in the healthy range are critical keys to reversing the chronically high blood sugar reactions.
Including healthy protein, healthy fats, high fiber leafy greens, nuts and seeds, slow-burning, resistant starch, complex carbohydrates in meals is sustainable, tasty and can work even when you eat away from home.
Make consistently eating nourishing foods a priority as you focus on improving your health and enjoyment of life.
These recipes are designed for people who want simple, affordable, delicious options for meals.
You can increase or decrease the spiciness of a recipe as you wish.
We are with you every step of the way on your healing journey.
Remember what matters.
Progress, not perfection.
Your future self thanks you.
Best wishes,
Dr. Beverly Yates
3
ND
Here are some recipes for your use and enjoyment. They are designed with healthy blood sugar levels in mind, for people who have diabetes, prediabetes or other blood sugar issues. All of these recipes are designed with health in mind and are friendly for people with a variety of health concerns.
Each recipe is gluten-free.
Each recipe is dairy-free, except where butter is indicated as an option.
NOTE: People have individual reactions to different foods, including their blood sugar response.
As I always say, “test, don’t guess”.
A healthy, blood sugar friendly food for one person might cause another person’s blood sugar to spike and then crash, putting them on the blood sugar roller coaster.
TEST, DON’T GUESS
Test your blood sugar:
• just before each meal,
• 30 minutes after eating,
• 1 hour,
• 90 minutes after eating and
• 2 hours after eating,
so you know how you respond to what you eat, both specific foods and food combinations. This is critical to crafting an eating and nutrition plan that is right for you.
Using a CGM (Continuous Glucose Monitor) will make this testing easier than using a glucometer. The data from the CGM is invaluable in creating a healthy nourishment plan so you know what really works well for your health goals. But whatever blood sugar testing device you are using, please be consistent and test your blood sugar levels so you know, for sure, how your body is responding to specific foods and combinations of foods.
4
MINDSET
Set yourself up to win. Make it easy to be successful in healthy nutrition that focuses on blood sugar stability.
GUIDELINES FOR MEALS
Eat at least 2 servings of leafy green vegetables at every meal. Yes, this includes breakfast. The fiber, water content and nutrient density of leafy green vegetables contributes to healthier blood sugar levels, feeling satisfied with a meal sooner (easier to avoid overeating), healthier cholesterol profile and easier bowel movements. These phytonutrients are an important part of the healthy choices that lead to better levels of energy, mojo and overall health.
Eat leafy greens, lean protein and healthy fats first, then a portion of complex carbohydrates (beans, lentils, chickpeas, etc.) so you feel satisfied with a meal sooner and avoid blood sugar spikes. Being on the blood sugar roller coaster is no fun, the blood sugar crashes are a problem.
NOURISHMENT TIPS
• Prepare your water bottles the night before a busy day so you can “grab and go” the next morning. This saves time and keeps your hydration “top of mind.”
• Prepare herbal tea in batches so you can easily enjoy it throughout the day and the week. This saves time and keeps your hydration “top of mind.”
• Cook in batches, once a week. This saves time and is more environmentally friendly (less use of electricity, gas, etc.).
• Do meal planning so you only have to shop for food once a week. This saves time, money and transportation needs to make multiple trips to the store.
• Use ingredients that can be used for multiple recipes and meals, to avoid food waste. This saves time, money and transportation needs to make multiple trips to the store.
Here are some of my favorite recipes to share with you!
5
Long Life Collard Greens
This is a modified version of the recipe for the wonderful greens that my mother and grandmother made during my childhood, and that my husband refined over time for our family. Time-honored traditional preparation has been modified to eliminate animal fats (particularly pork) and to enhance the flavoring with a wider range of spices. Many ingredients are the same as those used in the black eyed peas recipe, so preparing both of these recipes at the same time will save you time overall.
INGREDIENTS

• 3 bunches of fresh, good-looking collards (about 15 - 20 leaves)
• ½ tsp. sea salt
• 3 cups pure water
• 3 Tbsp. coconut oil (to sauté the onion and spices listed below)
- 1 medium onion, chopped
- 3 garlic cloves, chopped
- 2 bay leaves
- 1 tsp crushed rosemary
- 1 jalapeño pepper, chopped (optional)
- 1 Tbsp fennel seeds (optional)
- ½ tsp. ground cumin (optional)
PREPARING THE COLLARDS
1. Trim approximately one inch from the bottom of the stalks of each leaf.
2. Rinse each leaf in tap water. Shake off excess water and lay flat onto a cutting board.
3. Stack four to five leaves together with stalks in alternating directions.
4. Roll the stack of leaves around their stems (should look sort of like a green cigar).
5. Hold the roll firmly and cross-cut approximately every 1/2 of an inch so that the roll falls into “rounds” of greens.
6. Cross-cut the rounds so that leaves are chopped into about one inch rectangles.
7. Repeat until all greens are cut up. Set aside.
6
STEP 1: SAUTÉ HERBS AND THE GREENS
1. Heat coconut oil at high heat in a large heavy pot (an eight-quart soup pot is ideal). Do not let oil smoke or burn.
2. Add bay leaves, rosemary, garlic, and (if used) the cumin, fennel seeds, and jalapeño. Stir and sauté.
3. After about one minute, add onions. Sauté onion slices until they are limp (about two minutes).
4. With heat still at high, add one handful of chopped greens. Stir. Wait one minute, then add another handful. Continue until a little more than half the greens are in the pot. It may get hard to stir toward the end.
5. Stir in one cup of water and all of the salt. Cover and wait three minutes. You should then be able to easily add the rest of the greens without overflowing the pot.
6. Once all of the greens are in the pot, add the remaining water and stir well.
STEP 2: FINISH AND SIMMER
Bring the pot to a boil. Cover, turn heat down and simmer for one hour, stirring occasionally.
Makes six healthy servings.
Variation: Substitute red kale (is reddish and the leaves have curly edges), kale, mustard greens or beet greens for one or two bunches of collards. These kinds of leafy greens become tender more quickly than collard greens and usually require much less cooking time.
Excerpted from Heart Health for Black Women: A Natural Approach to Healing and Preventing Heart Disease by Dr. Beverly Yates ND
7
Healthy and Hearty Black-Eyed Peas
This variation on the traditional African American dish eliminates the pork, and instead incorporates just a touch of South Asian flavor. The turmeric adds flavor and color, and is an excellent antiinflammatory for those occasional aches and pains. Many ingredients overlap those used to make the collard greens, and preparing both dishes at once will save you some time overall.
INGREDIENTS
• 3 cups dried black-eyed peas
• 2 quarts pure water
• 1 medium onion, chopped
• 3 garlic cloves, chopped
• 1 cup chopped celery (2 to 3 stalks)
• 1 jalapeno pepper, chopped (optional)

• 3 Tbsp. Organic EVOO - Organic cold-pressed Extra Virgin Olive Oil
• 2 bay leaves
• 2 tsp. fennel seeds
• 1 tsp. rosemary
• 2 cinnamon sticks (optional)
• 4 cups pure water
• 1 1/2 tsp. sea salt
• 2 tsp. ground turmeric
THE NIGHT BEFORE
Rinse the black eyed peas in water. Place into a large (one gallon) bowl and add two quarts of pure water. The black eyed peas will need to soak for at least six hours. If you don’t get to cook them before 12 hours have passed, change the water and refrigerate the soaking black eyed peas (this will prevent fermentation). In any case, cook within 48 hours.
NOTE: If you have a hard time digesting black eyed peas, beans, and legumes, do 2 cycles of soaking the black eyed peas and changing out the water. This should help dilute the things that are likely causing the gassiness, embarrassment and digestive discomfort.
8
PREPARATION
1. Drain the black eyed peas. Rinse them in water and allow them to drain again.
STEP 1: SAUTÉ HERBS
1. Briefly heat Organic EVOO - Organic cold-pressed Extra Virgin Olive Oil at high heat in a large heavy pot (a six-quart soup pot is ideal). Do not let the oil smoke or burn.
2. Add bay leaves, fennel, rosemary, and garlic. Stir and sauté.
3. After about one minute, add onion, celery, and jalapeno (if using). Sauté onion slices until they are limp (about four minutes). Stir to prevent burning.
4. With heat still at high, add the black eyed peas. Stir thoroughly, then quickly add all of the pure water until the black eyed peas are just covered.
STEP 2: FINISH AND SIMMER
Bring the pot to a boil. Add salt, turmeric, and cinnamon sticks. Stir, cover, turn heat down, and simmer for 45 minutes (until tender), stirring occasionally.
Makes six meal-sized servings.
Variation: Add one cup chopped green or red bell pepper to the sauté.
Excerpted from Heart Health for Black Women: A Natural Approach to Healing and Preventing Heart Disease by Dr. Beverly Yates ND
9
Anti-Inflammatory Dal Recipe -
featuring Lentils
HEALTH BENEFITS
Anti-Inflammatory
Protein
Fiber
Healthy carbohydrates
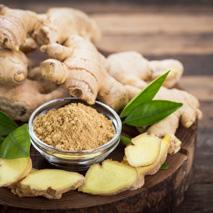
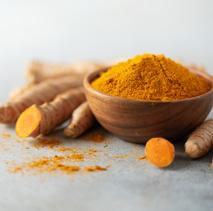
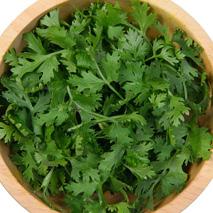
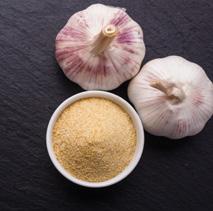
Herbs as both Medicine and Spice (Let your Food be your Medicine, and let your Medicine be your Food - Hippocrates)—ginger, turmeric, parsley, cayenne pepper, garlic


BEGIN WITH
• 1 ½ cup lentils (dal)
• 4 cloves of garlic, peeled
• 6 slices of fresh ginger, rinsed
• ¼ cup chopped fresh parsley
• 2 teaspoons ground turmeric
• ½ teaspoon cayenne pepper
ADD LATER
• 1 ½ teaspoons salt
• 1 ½ tablespoons lemon juice
• 3 tablespoons ghee (use butter if you can’t find ghee, which is clarified butter)
• 1 pinch ground asafoetida* - or - a tiny lump of asafoetida*
• 1 teaspoon whole cumin seeds
• 5 lemon slices
PREPARATION
1. Rinse the lentils well.
2. Put the lentils in a heavy-bottomed 3-4 quart pot.
3. Add 5 cups of water.
10
4. Bring this to a boil.
- Remove any froth or scum that collects at the top of the pot.
5. Next, add the ginger, turmeric, parsley, garlic, and cayenne.
6. Cover, leaving the pot lid slightly ajar.
7. Lower the heat to simmer, and cook for 20 minutes to 1 hour, depending on the type of lentils used.
8. Stir occasionally.
Orange and small green lentils cook the fastest. Other lentils cook more slowly, so after the first 20 minutes, check every 10 minutes to find out when the lentils you are cooking are tender.
Once the lentils are cooked, add salt and lemon juice. The consistency of the dish should be thicker than pea soup, but thinner than cooked cereal.
FINISHING TOUCHES
In a 4 - 6 inch skillet or small pan, heat the ghee (or butter) over a medium-high flame. Once this oil has melted (do not let the oil burn), add the cumin seeds and the asafetida. As soon as the asafetida sizzles and the cumin seeds turn dark brown (this takes just a few seconds), pour the oil and spices right away over the lentil dish, stir it into the dish, and serve immediately. The aroma is so tantalizing!
This dish can be served by itself and is delicious on its own. You can eat it with rice, potatoes, yam, or bread. Please be aware that adding rice, potatoes, yams or bread may raise your blood sugar level above a healthy range after eating. Test, don’t guess, so you know how your blood sugar reacts to this meal. This lentils dish can be eaten on its own without adding other starches or grains like rice, potatoes, yams or bread.
To find out how your body responds to this meal, “test, don’t guess”, check your blood sugar levels before eating, 30 minutes after eating, 1 hour after eating, 90 minutes after eating, and 2 hours after eating.
All of the spice amounts can be increased as you prefer, for a spicier dish. If you’re unsure, start by increasing the amount of ginger and turmeric in this dish, then garlic, cayenne pepper, and parsley. Taste as you go so you get the level of spice you enjoy.
* If you are unfamiliar with a spice like asafoetida, it can usually be bought in a store that sells South Asian/Indian foods and spices, or found in the ethnic spices aisle of a supermarket, or online. The distinctive, pungent flavor brings the flavor profiles of the rest of the spices together in this meal.
11
Soothing Chicken Soup
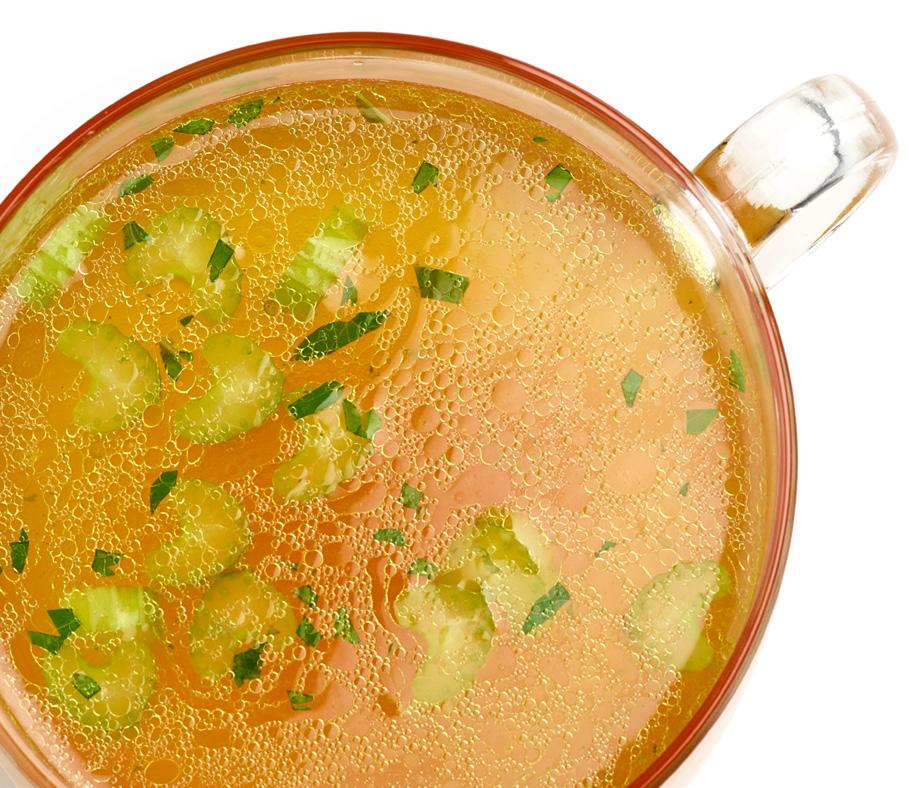
This flavorful soup recipe is warming, soothing and can be used lots of ways. It can be the base for other meals as well, or a “catch all” where you add whatever leftovers you have in your refrigerator to avoid wasted food and make a quick meal.
INGREDIENTS
• 4 cups organic chicken broth or stock
• 2 cups water
• 1 teaspoon salt
• 2 bay leaves
• 1/8 teaspoon cayenne pepper (or use black pepper)
• 2 tablespoons Organic EVOO - Organic cold-pressed Extra Virgin Olive Oil
• 1 large onion, diced (or substitute 2 fat shallots, or two leeks)
• 1 cup celery, chopped
• 1 cup of other leafy greens (bok choi, spinach, mustard greens, kale, etc.)
• 2 tablespoons fresh ginger, chopped or 2 cubes of frozen chopped ginger
• 4–8 garlic cloves, rough chopped or 4 cubes of frozen chopped garlic
• 1 1/2 lbs chicken thighs (or use breasts- if very large, cut in half so it cooks faster)
• squeeze lemon juice to taste (start with ½ lemon)
• 1 pinch of chili flakes or 1 tsp. of organic, MSG-free sriracha sauce to boost the spice level (optional)
• scallions, cilantro or parsley
INSTRUCTIONS
1. Gently heat oil in a big pot over medium heat, do not let the oil burn. Add onion, celery, garlic and ginger and sauté until fragrant, about 3-4 minutes. Lower heat to medium-low and continue sautéeing until golden, 3-4 more minutes.
2. Add the chicken stock, water, sea salt, pepper, bay leaves, other leafy greens, and chicken to the big pot. Bring to a boil. Cover with a lid, and lower heat so it’s gently simmering, covered for 20 minutes. If using breasts, check at 15.
3. Test a piece of chicken for doneness by pulling the meat apart with two forks. It should come apart easily and look opaque. If it is done, shred the rest of the chicken by pulling it apart with the forks, then return to the pot and simmer gently for 5 more minutes.
4. Squeeze the ½ lemon into the broth, taste and adjust broth. You can add more salt if needed, or if too salty for your taste, water it down with a little
12
water. Adding a starch like rice, noodles or beans will decrease the salt flavor quite a bit, so go easy on the salt until you have the flavor you prefer.
5. Drizzle toasted sesame oil onto each bowl just before eating (optionaladds a tasty bit of smokiness)
NOTE: As always, “test, don’t guess”. Check your blood sugar if you add a starch like rice, noodles or beans to this soup so you know how you body responds to this meal and the food combinations.
It’s fine to enjoy this soup on its own, without added starches like rice, noodles or beans.
If you really want noodles and want to avoid blood sugar spikes, buy or make “zucchini noodles”. You can use a Spiralizer attachment on a Kitchen Aid mixer or a similar device to make noodles from fresh zucchini. These zucchini noodles are delicious and avoid the blood sugar impact that might come with using wheat or rice noodles. Test, don’t guess, and find what works for you.
Garnish with scallions, cilantro, and a drizzle of sesame oil if you like and sriracha or chili flakes.
13
Simple Leafy Greens and Protein Breakfast Recipe
Here’s a breakfast that includes leafy greens, and no grains.
INGREDIENTS
• 4 ounces of salmon (cooked or smoked)
• 4 - 6 leaves or more of chopped chard
• ¼ chopped onion (or leeks, scallions or chives)
• ¼ tsp granulated garlic (granulated garlic has a stronger flavor than powdered garlic)
• ¼ tsp ground cumin

• 1 tablespoon Organic EVOO - Organic cold-pressed Extra Virgin Olive Oil
Substitute: you can use 1 can of sardines, or 7 - 8 medium shrimp, tails off instead of salmon
Steam together: 4 - 6 leaves or more of chopped chard, ¼ chopped onion, add sprinkled ¼ tsp garlic and ¼ tsp ground cumin
Stir together the salmon (or sardines or shrimp) with the steamed chard mix.
Drizzle the organic EVOO -over the food after you are done with any cooking or applied heat. Eat. Yum!!
14
Chocolate Avocado Pudding
This recipe for a tasty, no added sugar dessert is delicious and a simple way to feel satisfied after eating. If you struggle with satiety or portion control, this recipe is a help.
Prep time: 10 mins
Cook time: 30 mins
Total time: 40 mins
Serves: 6
INGREDIENTS
• ¼ cup semi-sweet chocolate chips
• 1 ripe avocado

• ¼ cup cacao powder (or cocoa powder with no added sugar)
• ¼ cup unsweetened almond milk, divided in half
• 1 tsp. vanilla extract
INSTRUCTIONS
1. Slice and peel the avocado and put into fruit processor or blender.
2. Melt the chocolate chips in the microwave with a microwave safe bowl in 15 second intervals, adding splashes of water as needed to keep the consistency smooth
3. In the blender, add the melted chocolate chips, cacao powder, half of the almond milk and vanilla extract to the avocado.
4. Blend ingredients together until smooth, adding in more almond milk if needed.
5. Pour the creamy rich mousse evenly into 6 small dessert cups for you and your friends to enjoy now, or store in fridge for a cold but sweet treat later! Feel free to add some sliced strawberries, pecans or sunflower seeds on top.
15
3-Ingredient Chia Seed Pudding
This 3-Ingredient Chia Pudding takes 5 minutes to make. It is quick, easy and tasty. This recipe is made with nut, seed or oat “milk” (non-dairy beverages that are alternatives to cow’s milk), chia seeds & added fruit, seeds or nuts of choice. It’s a healthy dessert or snack loaded with protein, fiber and healthy fats.
Prep Time: 5 minutes
1 serving
HOW TO MAKE CHIA PUDDING
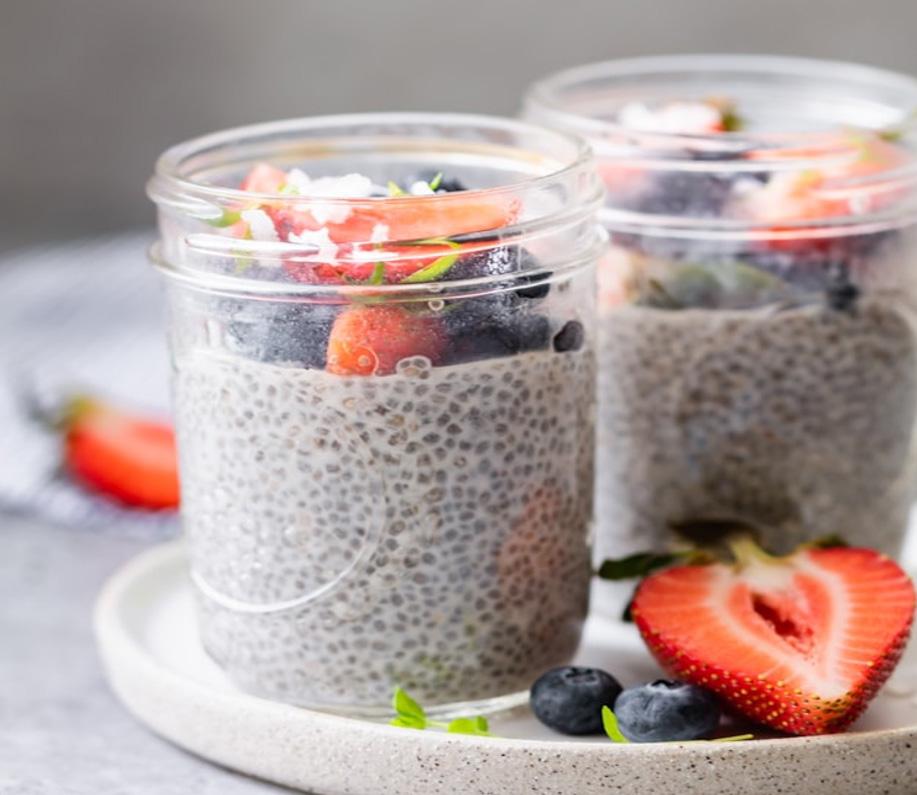
Start with two mason jars of almond milk (or any non-dairy milk-like beverage you’d like), and some chia seeds, and either nuts or other kinds of seeds, like pumpkin seeds, sunflower seeds, etc. There is no need for added sugar. If you prefer to sweeten it, you can add toppings like fresh fruit, dried fruit or chocolate chips (or leave out the toppings, your choice).
The ratio is everything! There are different recommendations for the best chia pudding ratio out there. My family has made this lots of times and in the end, the ratio I found that works best is 1 tablespoon chia seeds to 1/4 cup of non-dairy milk-like beverage. To make it into a complete serving though, I like to measure 2 tablespoons of chia seeds for every half cup of non-dairy milk-like beverage. You can play around with the measurements to find the consistency you like best.
When it’s time to mix in the chia seeds, I recommend mixing very well until all the chia seeds are incorporated into the milk. Then wait a few minutes for the chia pudding to settle and mix again. This will ensure it doesn’t separate in the fridge. Check to make sure there are no clumps and don’t refrigerate it until it’s clumpfree. If clumps don’t bother you, then it’s OK to refrigerate right after mixing it up.
The consistency will look like this when it’s well-mixed. (see image at the top of page)
It will still be liquidy, but you won’t see any clumps of chia seeds anywhere around the jar. It helps if you use a clear mason jar so you can easily check all around for any clumps.
Finally, put the lids on the mason jars, place them in the fridge for at least 2 hours or up to 7 days. The chia seeds will absorb all the liquid and be ready to eat.
16
WHY IS CHIA PUDDING HEALTHY?
One of the biggest questions I get is what to eat for a snack. While I am not a fan of snacking in general, I do want to offer a healthy option. So when it comes to snacking, here are 3 things to consider to boost its health benefits:
High in fiber – good for blood sugar control, cholesterol levels and gut health
High in protein – good for building lean muscle
Contains healthy fats – good for helping you feel satisfied
This is essentially what’s going to satisfy your in-between meal cravings and mute your appetite until your next meal.
You can grab one when you’re hungry, especially to keep you away from things like chips of some kind as a snack.
I like topping mine with fresh fruit or dried fruit, nuts, shredded coconut, sunflower seeds, granola and so many more toppings.
INGREDIENTS (per 8-ounce mason jar)
• 2 tablespoon chia seeds
• 1/2 cup almond milk or non-dairy milk-like beverage of choice - read the label to be sure there are no added sugars or sweeteners in the beverage
• Strawberries or other fruits for topping; nuts or other seeds for topping
INSTRUCTIONS
1. Pour ingredients into a jar and mix well. Let settle for 2-3 minutes then mix again very well until you see no clumping.
2. Cover the jar and store in fridge overnight or for at least 2 hours.
3. When you’re ready to eat it, top with your favorite fruit, or nuts or seeds, and enjoy cold!
Substitutes: You can use any non-dairy milk-like beverage you’d like. The reason I do not recommend cow’s milk is because so many people do not digest this type of milk, and it is a source of inflammation for many people. For diabetes, we never want to do anything that increases inflammation.
Storage: Store the chia pudding in a covered glass mason jar for up to 1 week in the fridge.
Sourcing: You can find chia seeds at all major grocery stores and health food stores. It’s usually in the bulk section or with the cereal or superfoods.
17
Product Reference: I use 8-ounce mason jars when I make chia pudding. The chia pudding fills up about half the jar, leaving room for toppings like fresh fruit, nuts or seeds, if you’d like to add them.
I hope you find these recipes helpful.
Be kind to yourself.
Best wishes,
Dr. Beverly Yates ND
naturalhealthcare.com
drbeverlyyates.com
18


