6 minute read
REPORT
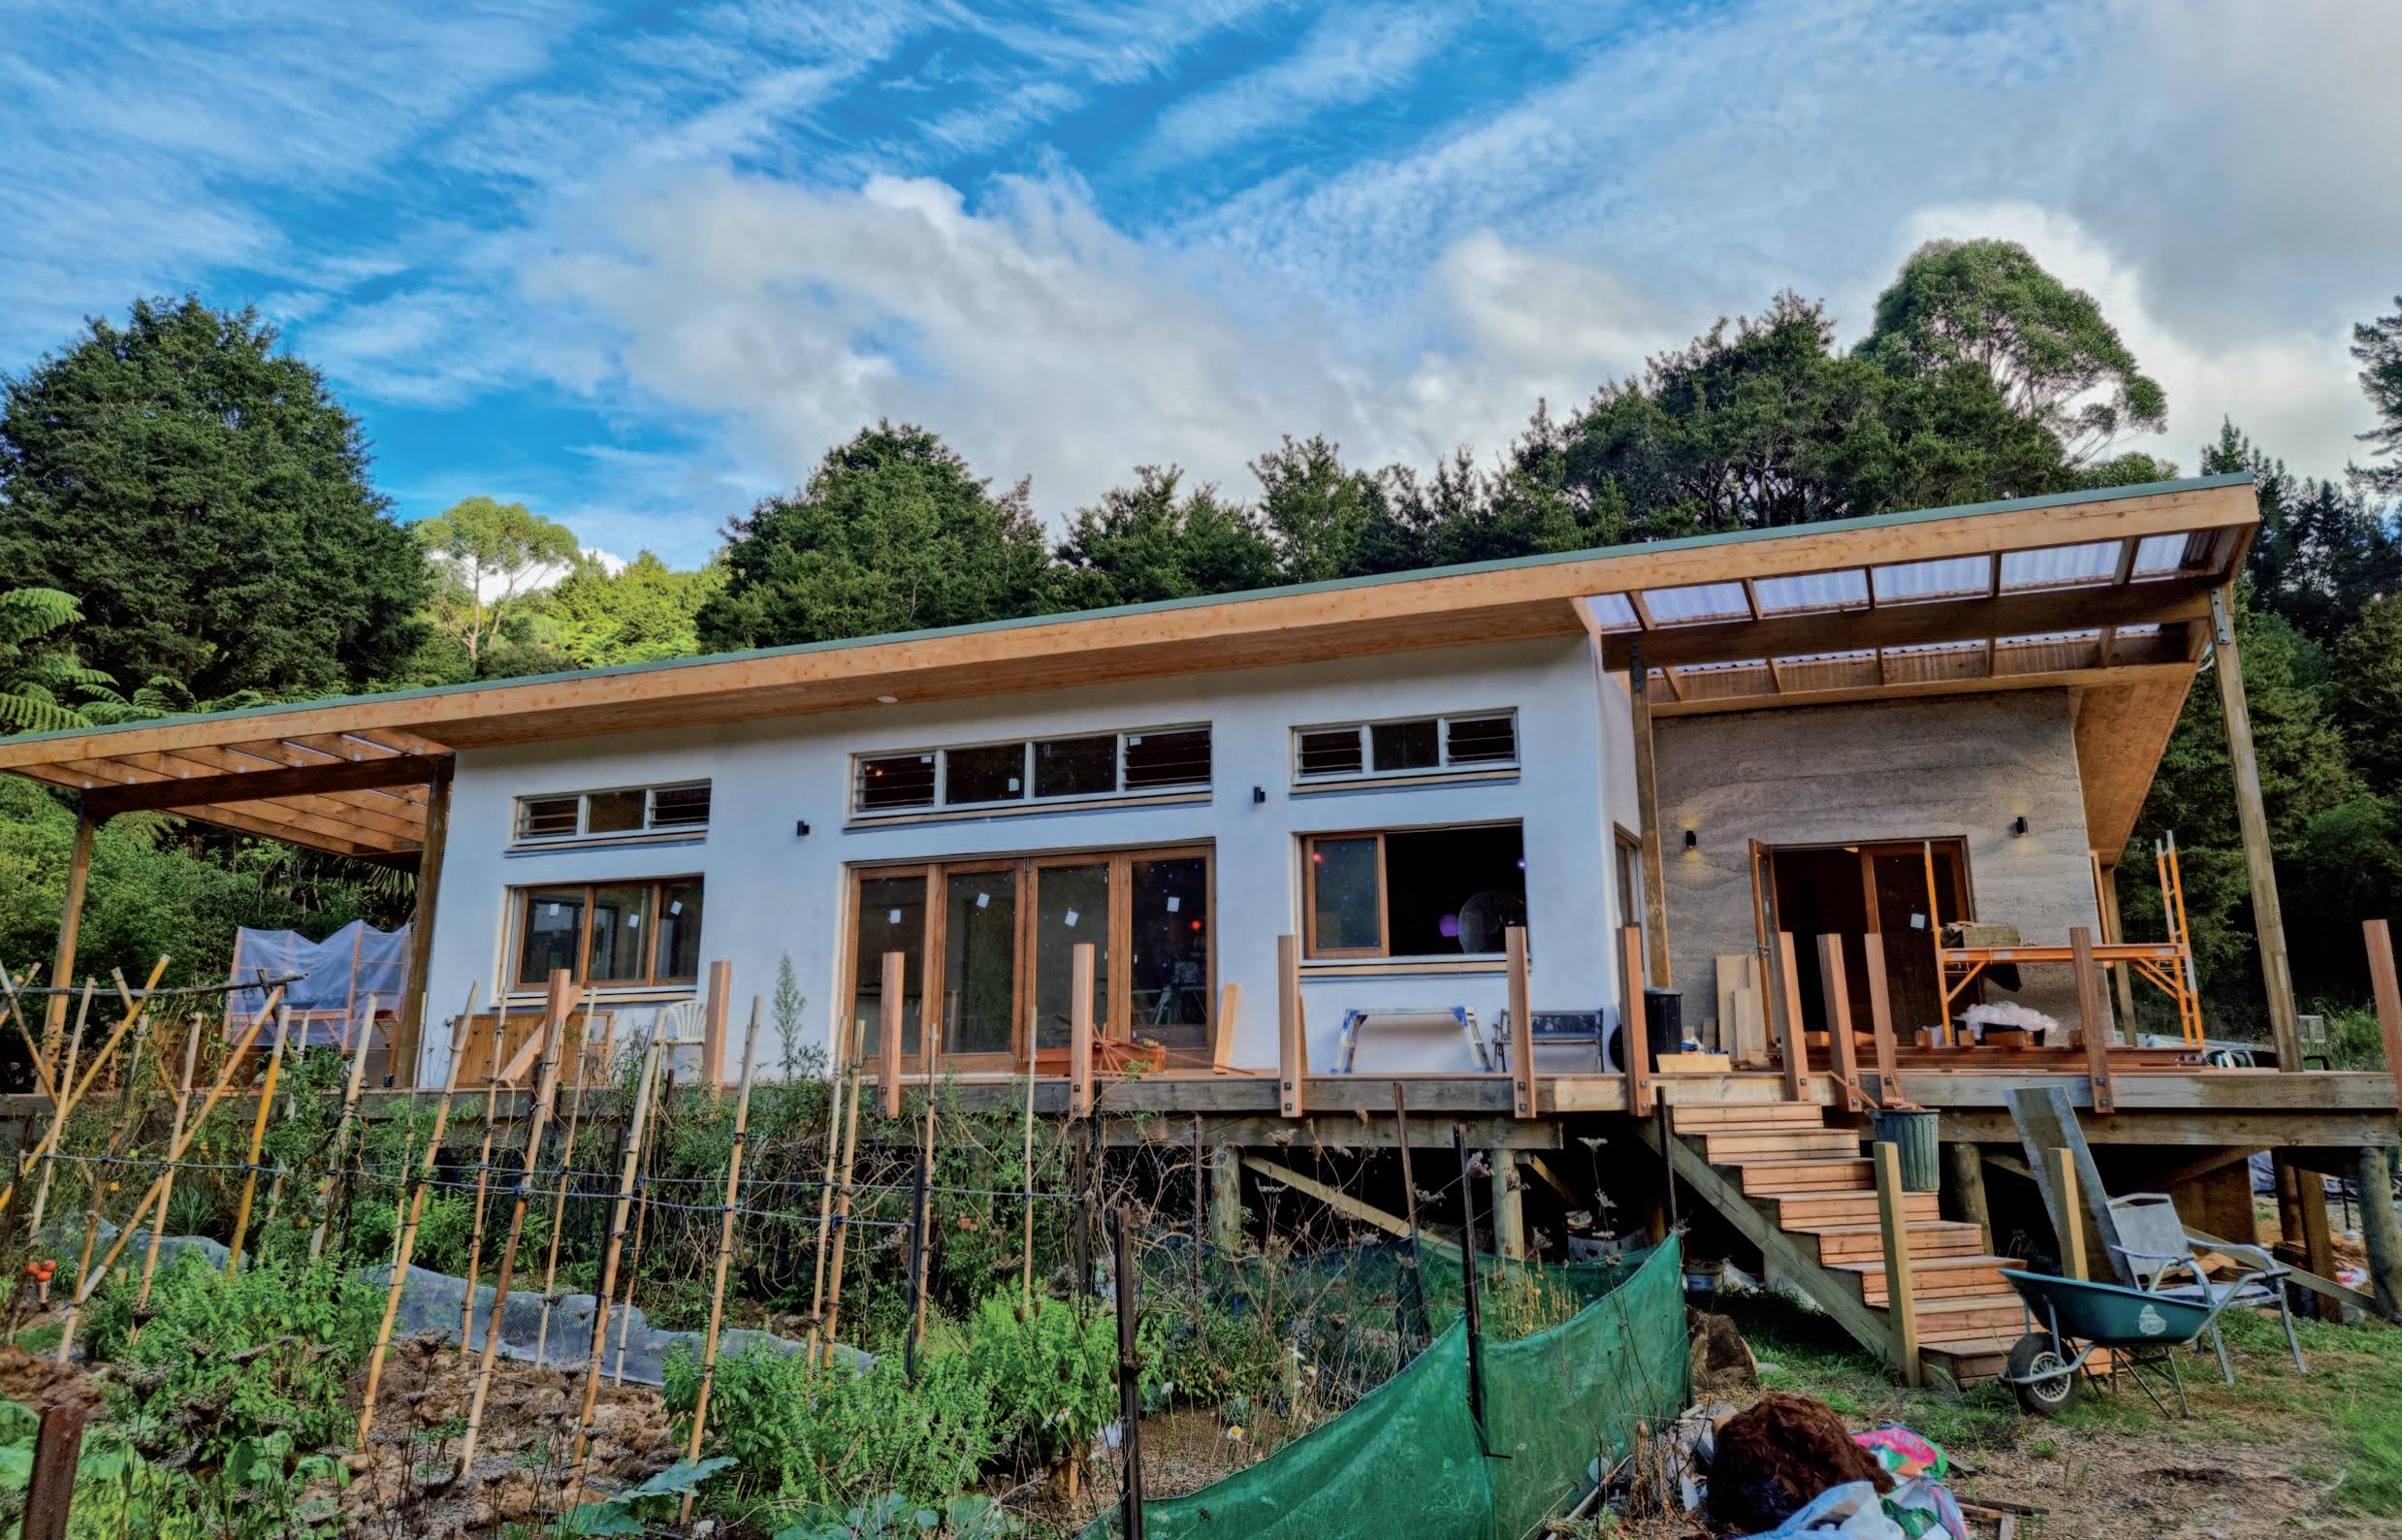
PHOTO, TOP - Vege gardens in front of the house provide nutrition for the humans within!
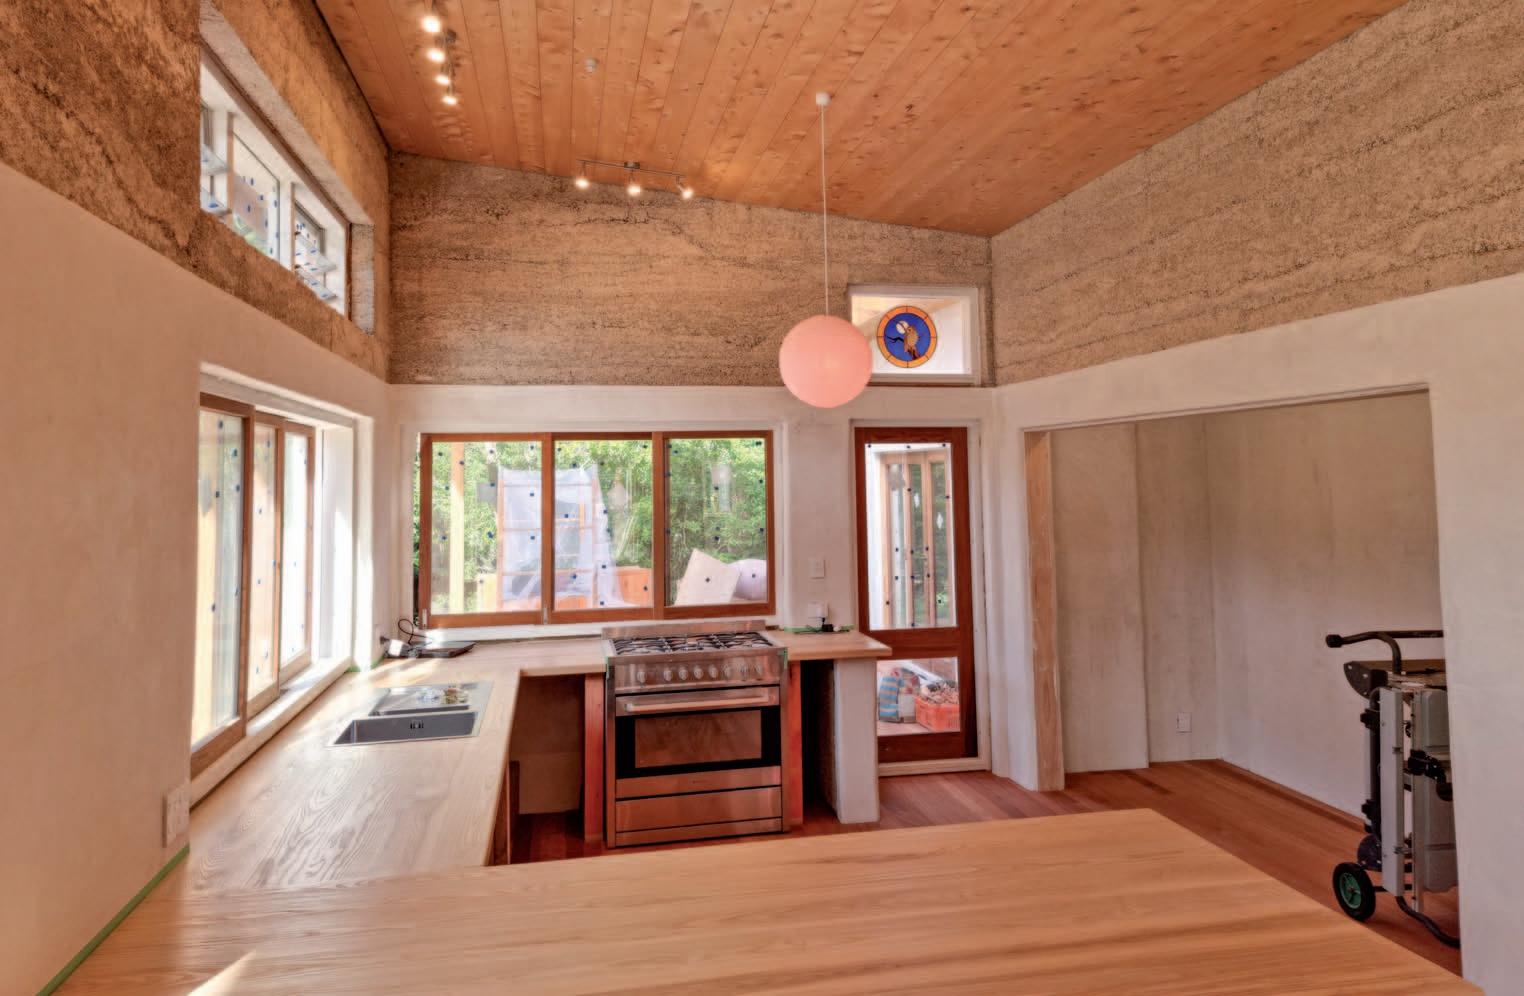
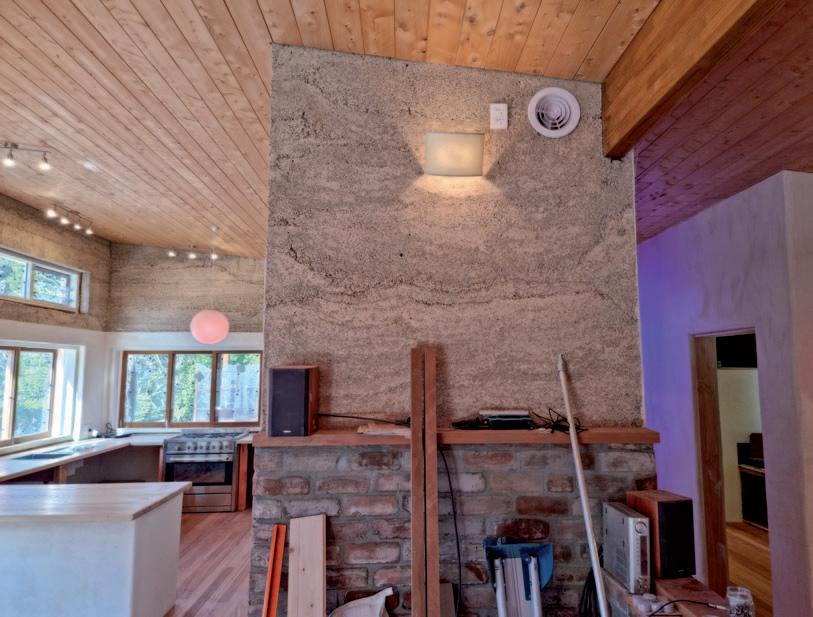
BOTTOM, LEFT In the kitchen the hemp walls have been lime plastered up to above door height, and above left raw for aesthetics and acoustic control.
Advertisement
REPORT Kohumaru Hemp House
After nearly two years, and in time for winter, these owner builders enjoy their move into their hempcrete home.
BY TOBY RICKETTS
In the 23 months since we first turned sod on the Hempcrete house project here in Northland, we have gone from a bare site to a 6-metre-tall structure, from freezing winters to baking summers, and from being an absolute DIY novice to knowing a great deal about how to successfully build a house out of hempcrete! We are now living in our 3 bedroom, 150 sqM dwelling just in time for the cold days to set in – and the decision to use hempcrete has really paid off. We currently have no heating in the house at all and rely exclusively on solar gain through our large north facing windows and elevated clerestory windows to catch the winter sun as it dips and shines in below our wide eaves to reach the back of the house, warming the floor and the thermal mass of our internal hempcrete walls. The internal house temperature currently varies between 18 and 21 degrees, while outside the mercury currently fluctuates between high twenties and has been down to 5 degrees overnight. We originally sought hempcrete as not only a high-performance, non-toxic, eco-friendly building material, but because it would keep the house cool in summer. Being off-grid, we have limited options for cooling the house without using electricity, so opted to insulate and increase our building’s thermal inertia as a way of keeping cool. This past summer the house performed very well in this regard. Whilst the internal finishing work was still underway we left all the windows open overnight to let out all of the hot air and the house cooled down to around 12 degrees C. We then shut all the openings and enjoyed an internal temperature between 13 – 20, with the internal walls cool to the touch, as the outside air soared to over 30 degrees most days. It made for a very refreshing work site! Now the seasons have shifted we reverse the process, shutting openings overnight to keep the heat in and opening them when the outside temperature exceeds internal during the day. When the sun sets, having warmed our internal and external walls, the heat is released and the insulation keeps that heat in for most of the night, only dropping about 3 degrees over the 10 hours of nightfall and maintaining a comfortable environment – all with no heating. Once we get the flue for our Homewood Heritage woodstove installed, we plan to walk around inside in bathing suits for most of the winter! The other decision we came to was to only partially lime-render the interior and exterior of the building. Lime plaster is traditionally applied to the hempcrete surfaces to protect them from weather and damage, but this is not the only means of finishing the walls. We were helped in the lime plastering mission by Stephen Moller from Limewave in Auckland, who spent 3 weeks on site with us and advising us on the best method to get the plaster on the walls.
Having completely plastered the master bedroom as an experiment we found that the hard plaster finish coupled with the hardwood floors made for a very unpleasant acoustically resonant environment. As a sound engineer by trade, I was not comfortable with this and preferred the acoustic quality of the unrendered hempcrete which has an incredible capacity to absorb sound. While it wouldn’t be appropriate to leave all of the hempcrete exposed (due to the risk of wear and tear on
PHOTOS, THIS PAGE:
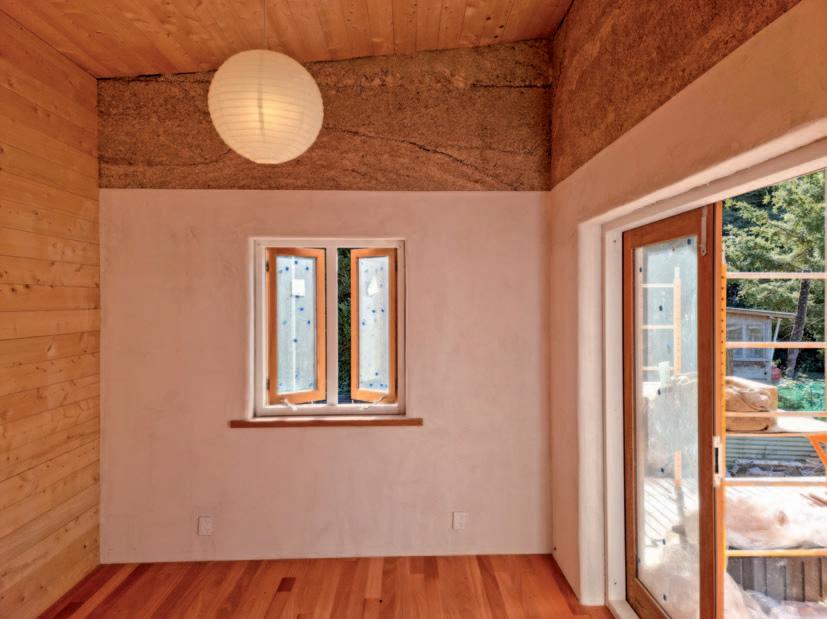
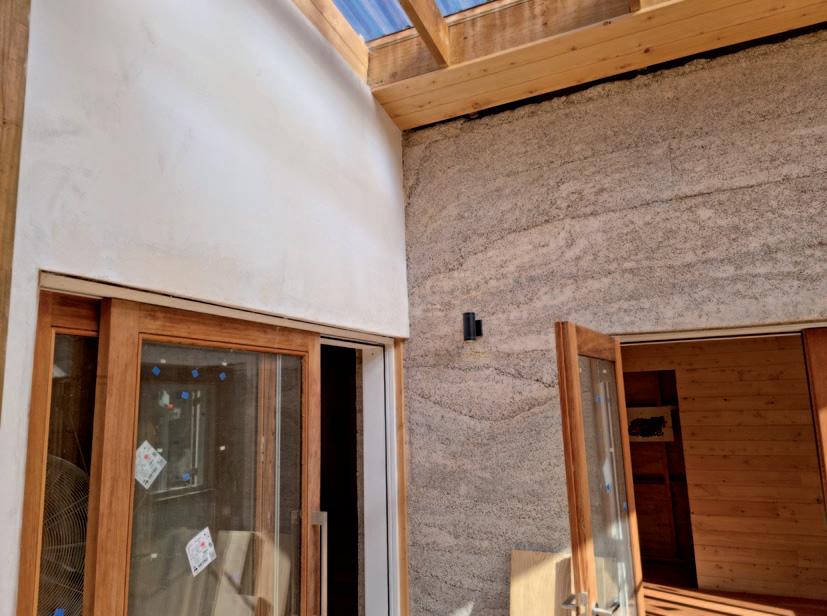
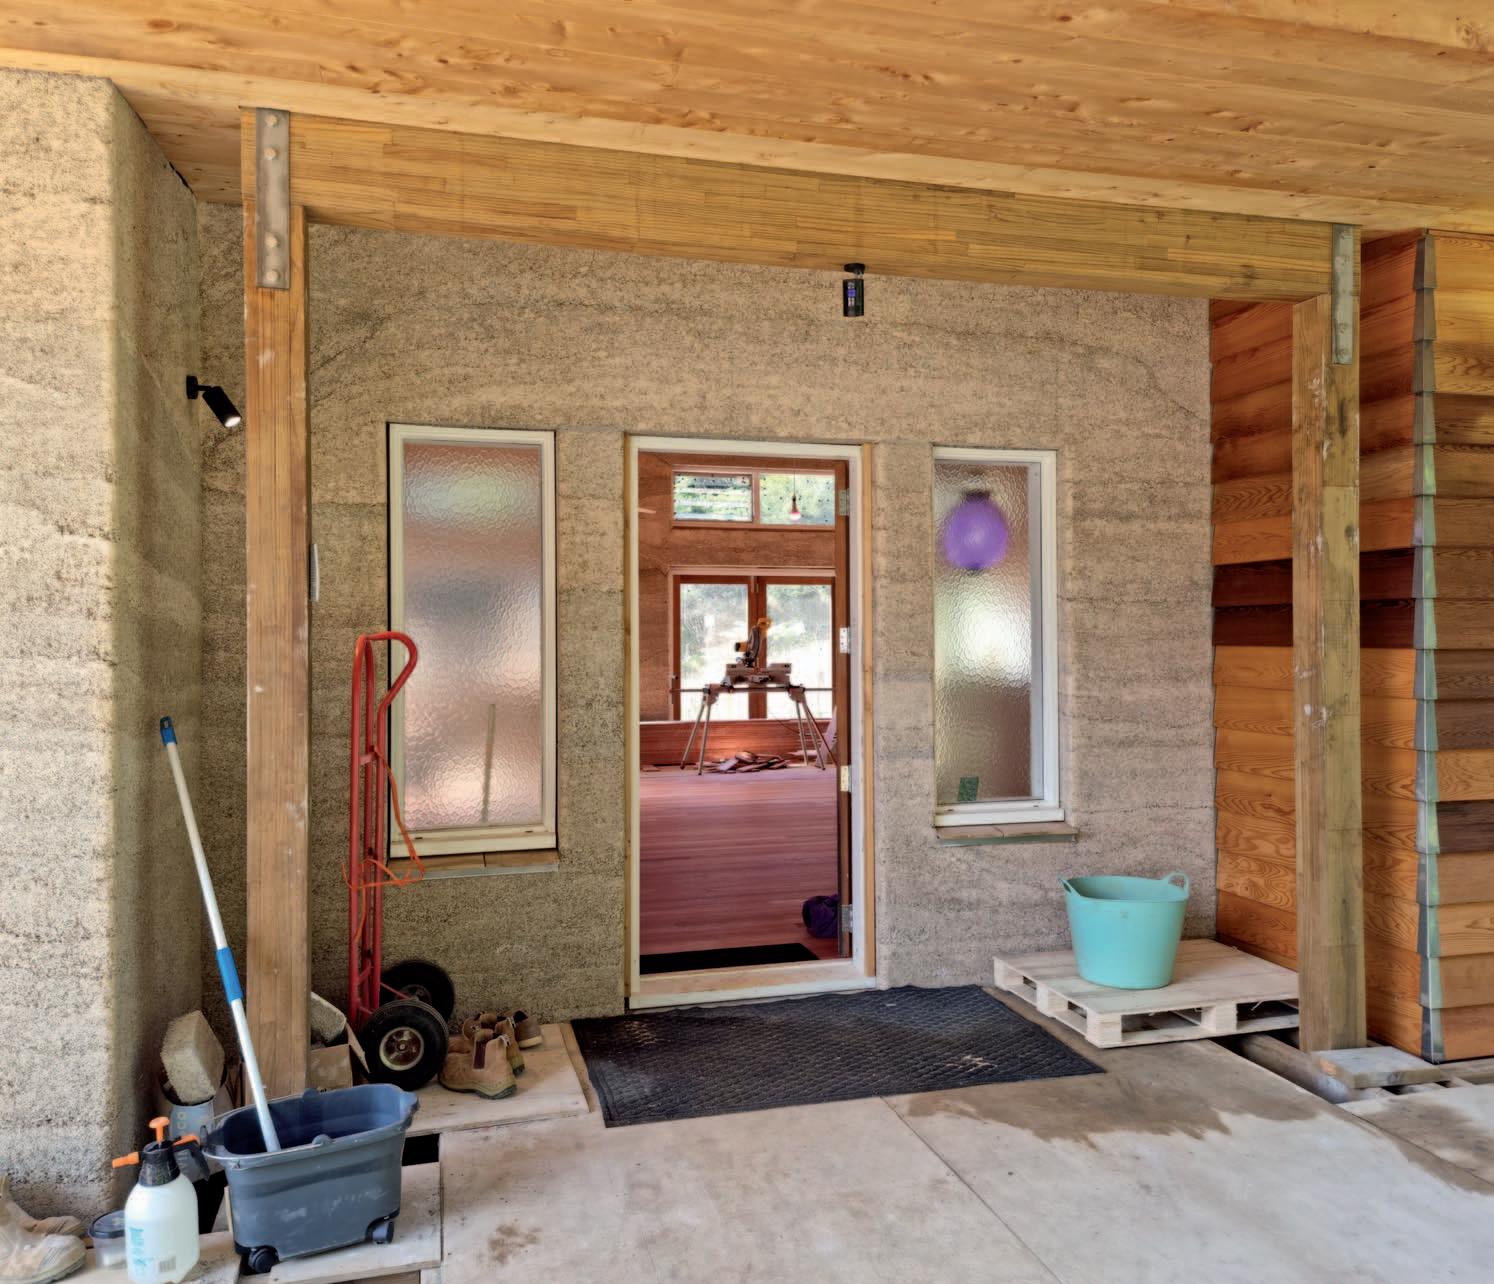
TOP LEFT - The kids bedrooms also leave the upper part of the hempcrete wall exposed to absorb sound BOTTOM, LEFT - The contrast between the rendered and unrendered hempcrete is an interesting feature RIGHT - Looking at the front entrance showing the exposed exterior hempcrete alongside the Western Red Cedar weatherboards
PHOTOS, OPPOSITE PAGE:
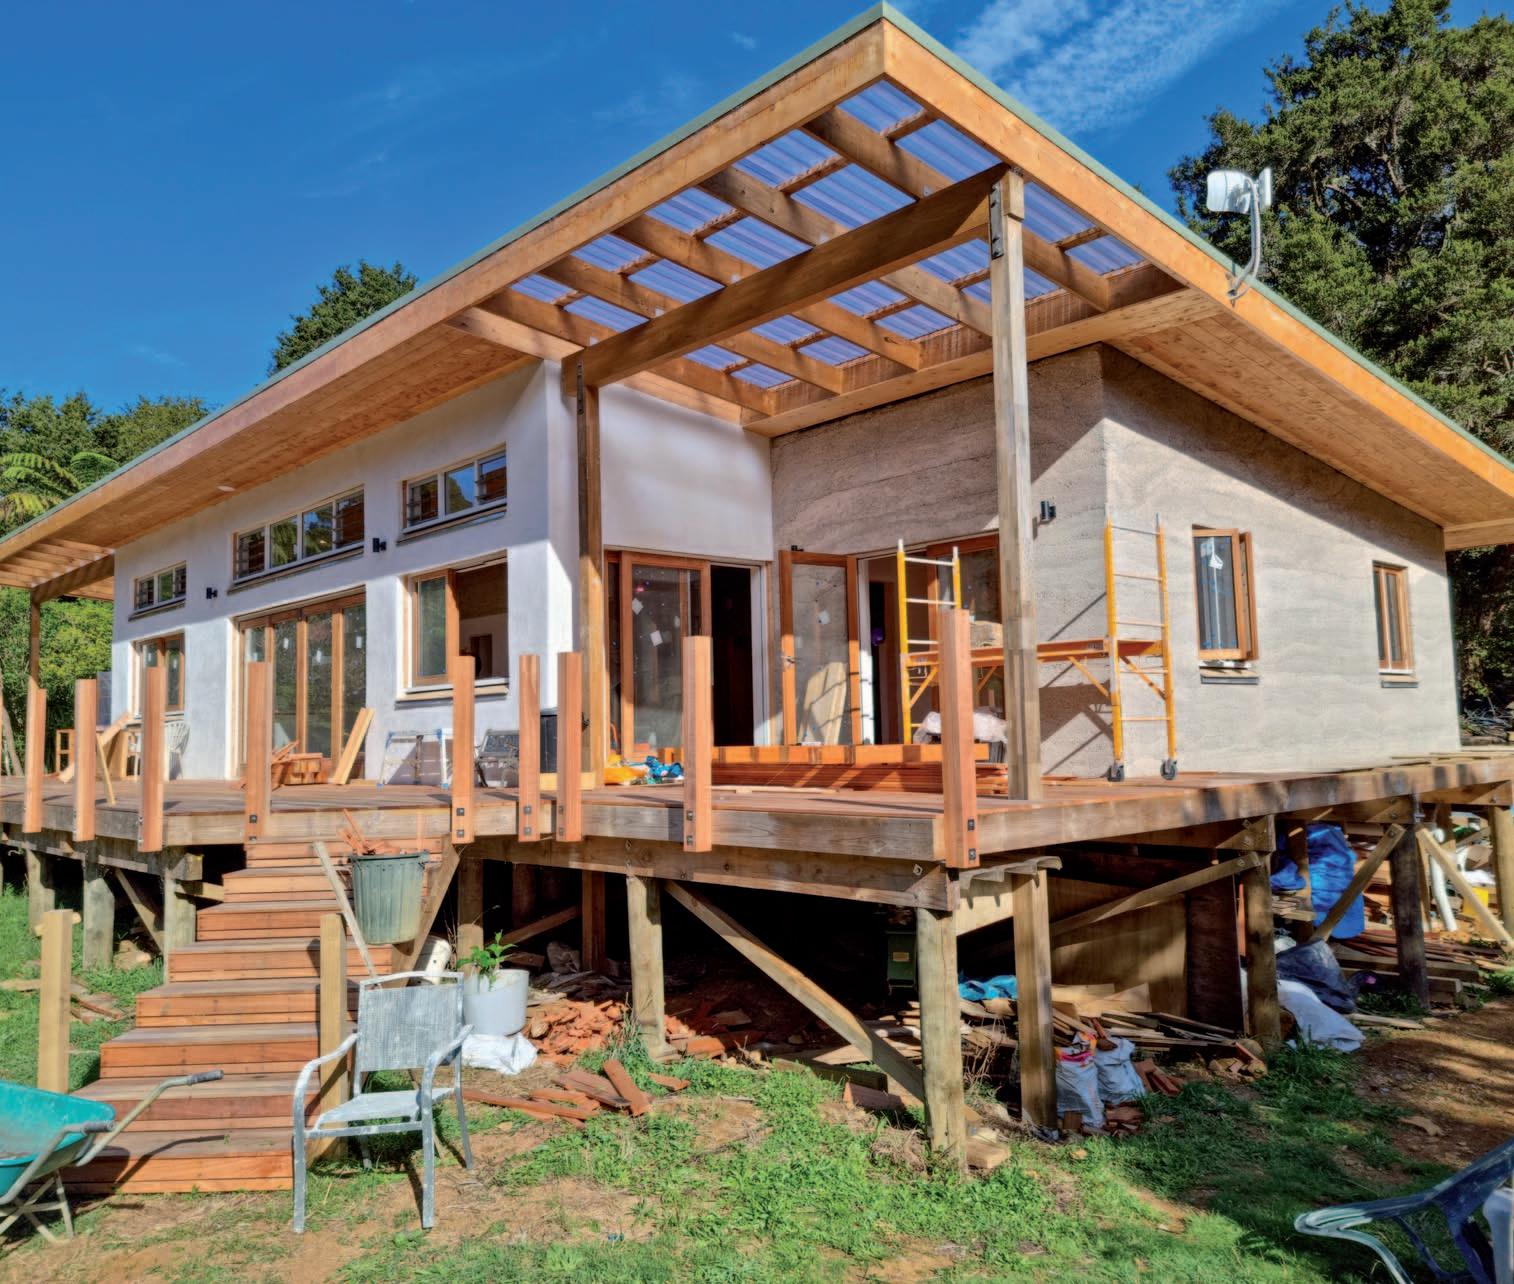
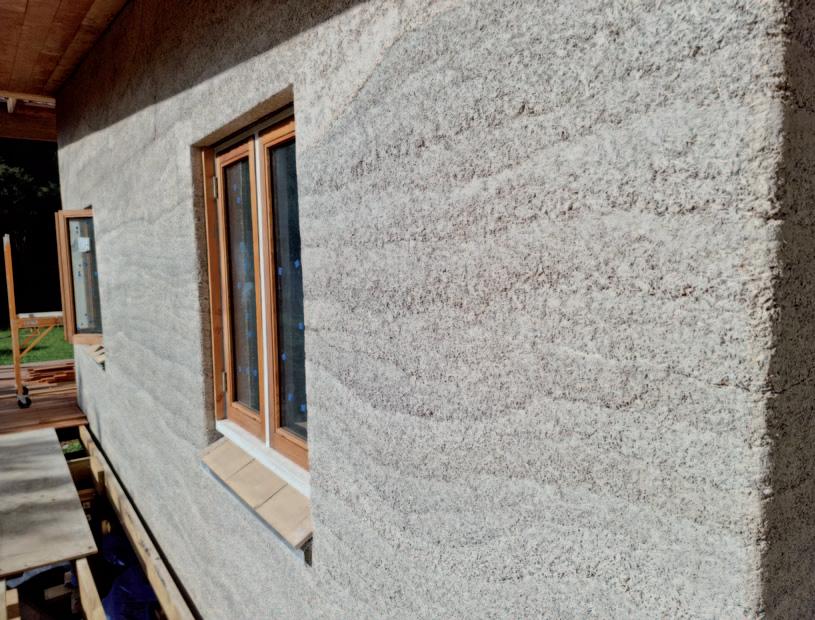
LEFT - Nearing completion, the house faces North to take advantage of the warmth of the sun. BOTTOM, RIGHT - With it’s striking stratification, we’ve left the Western exterior wall exposed but with Sodium Silicate applied. This will be a true test of the durability of hempcrete. TOP, RIGHT - Three natural materials working together; lime, hemp and timber
this somewhat fragile surface) we opted to render up to just above door height in all living areas and leave above this as unrendered hempcrete. We did need to spray the unrendered hempcrete with a sodium silicate product (water glass) as this bound the loose surface particles together to prevent dust and flaking over time. The Sodium Silicate still allows the walls to breathe and not lose any thermal performance and is also relatively non-toxic. We applied it with a paint sprayer which made fast work of the task. Some areas we opted to leave entire feature walls as raw hempcrete to break up the open plan space and highlight feature walls in the lounge. In these areas we used three coats of Sodium Silicate which produced an attractive and very hard-wearing surface.
The acoustics in our cavernous living space are very pleasing, with no resonances or reverb as you might expect within Gib-lined, or hard plastered rooms. In our place the sound is reflected upwards and then absorbed by the strip of hempcrete that encircles the room. Very useful when your three-yearold is running through the house booming and shrieking! In short, our bold experiment to build the first Hempcrete house in Northland/Auckland, do it on stilts, and do it pretty much all ourselves has paid off. It was an audacious experiment but a decision we are very happy with. You can find out more about how the house was built by subscribing to my YouTube channel at www. youtube.com/tobyricketts where I am posting weekly detailed videos about how everything was designed and executed over the two years.
Anyone interested in building a hempcrete house is welcome to come and visit to experience the nice feeling it gives.
PROJECT INFO:
DESIGNED BY:Owner
DRAFTSMAN: Danny Hancox @ Coppermine CAD ENGINEER: Haigh Workman BUILDER: Bruce Jackson and Owner YEAR STARTED/FINISHED: 2019 / 2021
FLOOR AREA: internal 145 sqM, footprint 150 sqM SITE ZONE: Rural
PRIMARY BUILDING SYSTEM/METHOD: Hempcrete, insitu infill TIMBER STRUCTURE AND FRAMING: Finished in Gum / lawson Cyprus / WR cedar / Japanese Cedar PERCENT SALVAGED/RECYCLED: 10% AUTHOR BIO Toby Ricketts has lived in the Far North of New Zealand for eight years, and resides near Mangonui with his wife Marianna and two children on six acres of old growth NZ jungle. Professionally, he works in the creative industries as a voiceover artist and audio engineer, as well as being a documentary filmmaker. For the past four years he has embarked on an ambitious project to build the first consented, suspended floor Hemcrete house in New Zealand. Despite having never conceived, designed, or built a significant structure before, Toby and his wife have designed, project managed and mostly built this structure themselves.


