
2 minute read
■ Adding and Formatting Pictures

from Microsoft Office 365
by EckoTango

Tip This is a small idea, but it can add up to a big benefit—the posts you add, and add consistently, can really set the overall tone for your team site. If your notes are always reminding people about upcoming deadlines, folks might dread your notes after a while. But if you mix up your notes with reminders, news, and celebrations, remembering to give team members props when they accomplished a goal or finished a task, people will enjoy logging in and seeing the latest posts—especially if they are being recognized for something!
Note If you want to edit the post you’ve just added, you can do so easily. Click the post, and the List Tools List tab appears on the ribbon. Click Edit Item in the Manage group. The Post appears in the View tab. Click Edit Item once again, make your changes, and click Save.
Advertisement
And, of course, even if you’re working on a ho-hum project with lots of ho-hum data and not-very-exciting personalities, you can always spruce up your space by sharing images—of products, people, buildings, flowers, or other fun or interesting images related to your team or project. Adding pictures to a page gives the page energy and life, even if the pictures aren’t the most exciting in the world. Statistics show that people read and retain information better when they have images on the page to help rest their eyes (and reinforce the content). So think through ways to include some visuals on your page—even if they are just product pictures or the company logo. So whether you have a functional reason to include photos—such as showing the latest product images you’ll use in your catalog, or adding corporate head shots so that people can see each other in the site—or you simply want to decorate a little bit, the actual process for adding pictures is simple: 1. Display the page of the team site you want to change, and click to position the cursor where you want to add the picture. 2. Click Edit to the left of the Browse tab.
3. Click the region on the displayed page where you want to insert the picture. 4. Click the Editing Tools Insert tab.
5. Click Picture. (See Figure 5-8.)
FIGURE 5-8 Click the Editing Tools Insert tab, and choose Picture to begin the process of adding art to the site.
6. Choose From Computer if you want to place an image that you have saved on your hard drive. Choose From Address if you want to use a picture from another website.
7. In the Select Picture dialog box (shown in Figure 5-9), click Browse and navigate to the folder containing the file you want to use. Click the file, and click Open.
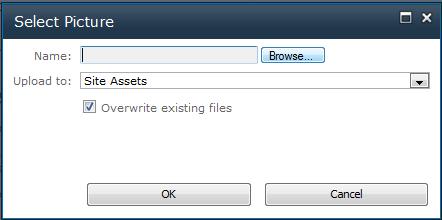
FIGURE 5-9 Click Browse, and navigate to the folder on your computer where the picture you want to use is stored.
8. Choose the folder you want the picture to be uploaded into, and click OK.


