2 minute read
Specifying Task Details

from Microsoft Office 365
by EckoTango

Tip If you want to customize the values available in the workflow choice field, you must first change the values in the field itself before you begin working on the workflow. You can change the field values for a multiple choice field by adding a custom column and selecting the Choice type. You’ll find the Create Column tool in the Manage Views group of the List Tools List tab.
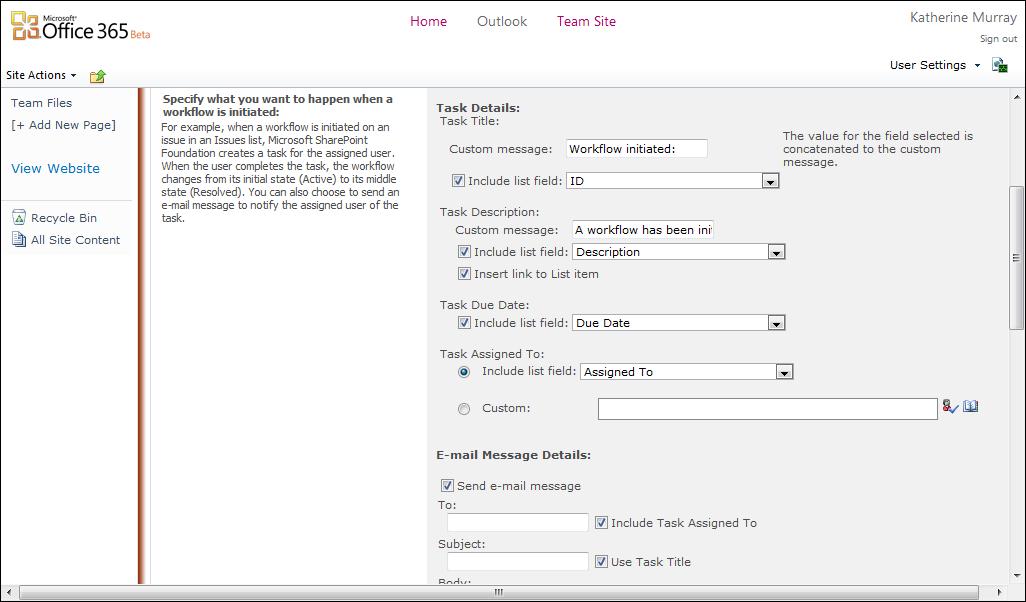
Your next step involves telling the workflow what you want to be generated when the workflow is created. In this section, you specify which fields you want the custom message to include; enter a task description; choose whether you want to include the date the task was modified, created, or assigned; and determine who to include in the details of the task. To complete this section, follow these steps: 1. Click in the Custom Message text box, and type the title text you want to be generated when the workflow is created. (See Figure 7-4.) 2. In the Include List Field selection, click the arrow and select the name of the field you want to be added to the Custom Message entry.
Advertisement
Tip Depending on the type of information you’re tracking with your workflow, you might want to create the ID field to show a specific request number or choose Title to give recipients a quick overview of the triggered task.
3. Next type the text you want to be displayed that describes the task, and click the
Insert Link To List Item if you want recipients to be able to click directly through to the task.
4. Choose whether you want to include the due date, the date the item was created, or the date the item was modified in the notification message. 5. If you want those receiving the list to see who the task is assigned to or who created or modified the task, click the Task Assigned To arrow and click your selection. If you want to assign the task to a specific person, click in the text box and type the name of the team member to whom you want to assign the task; then click Check Names to have SharePoint Online add the person’s full email address to the box.
FIGURE 7-4 Enter the details for the workflow to determine what happens when specific tasks are completed.
Note If you want to locate a specific user but don’t remember the user name the team member uses in Office 365, click Browse to the right of the Custom field in the Task Assigned To area. In the Find box of the Select People dialog box, type the first few characters of the person’s name and press Enter. SharePoint Online searches the user list and displays the found user in the preview box on the right. To select the user, click the person’s name and click OK.


