PDF Avr workshop: a hands-on introduction with 60 projects (not genuine pdf) 1st edition john boxall
Visit to download the full and correct content document: https://ebookmass.com/product/avr-workshop-a-hands-on-introduction-with-60-project s-not-genuine-pdf-1st-edition-john-boxall/
More products digital (pdf, epub, mobi) instant download maybe you interests ...
Programming for Game Design: A Hands-On Guide with Godot 1st Edition Wang
John Boxall has been an electronics enthusiast for over 30 years, spending much of that time in the electronics retail, wholesale, and consulting fields. He also spent several years writing Arduino tutorials, projects, and reviews of kits and accessories at https://tronixstuff.com. Arduino Workshop (No StarchPress,2013)washisfirstbook.
AbouttheTechnicalReviewer
Xander Soldaat is a former Mindstorms Community Partner for LEGO® MINDSTORMS. He has a deep background in IT infrastructure architecture, aswellasembeddedsystems,compiler,andSTEMcurriculum development. He is currently an OpenShift Cloud Success Architect at Red Hat. In his spare time he likes to tinker with robots, electronics, retro computers,andtable-topgames.
Thank you to Brian S. Dean for starting the AVRDUDE project, followed by Jörg Wunsch and the various contributors. Kudos and thanks to the KiCad team for their open source electronics design automation suite, whichI’veusedthroughoutthisbookforcircuitschematics.
Many thanks to my technical reviewer, Xander Soldaat, for his contributions and for once again having the tenacity to follow through with suchalargeproject.
Thanks also to the following people (in no particular order) from whom I’ve received encouragement, inspiration, and support: Elizabeth Pryce, Mr. Richard Smith AC, the late Sir Clive Sinclair, and my wife, Kathleen, forherendlesspatience.
Finally, thank you to everyone at No Starch Press for their efforts, including Abigail Schott-Rosenfield for her editorial input; Rachel Monaghan for guiding the book through the production process; Rachel Head for copyediting; Scribe Inc. for composition, proofreading, and indexing; and of course Bill Pollock for his support and guidance and for convincingmethatsometimesthereisabetterwaytoexplainsomething.
INTRODUCTION
A microcontroller (or MCU for short) is a small, complete computer that fits on a single integrated circuit. Just like your desktop computer, a microcontrollercontainsaprocessor,memory,devicestoreceiveinputfrom various sources, and outputs that can be used to control or communicate withexternaldevices.
Thanks to the success of development platforms like Arduino and PICAXE, microcontrollers are being used increasingly often in the electronics field and among hobbyists and hackers. Such platforms simplify projects for beginners, but they can be costly; they also put a layer of abstraction between the user and the microcontroller, which decreases the microcontroller’s performance and often prevents the user from accessing its full set of features. More experienced users may want to control the microcontroller directly or use less expensive parts in their projects. Or, if you’re a beginner, you may want to start your microcontroller journey withoutanyartificiallyimposedoverheads.
That’swherethisbookcomesin.Whether you’reanabsolute beginneror a longtime electronics enthusiast, AVR Workshop shows you how to take advantage of two chips from the inexpensive range of Microchip AVR 8-bit microcontrollers made famous in the Arduino and compatible boards. Once you master these chips, you’ll be able to maximize their performance to create powerful projects with cheaper hardware. Along the way you’ll learn aboutelectronics,Cprogramming,andmuchmore.
I’ll walk you through over 55 projects of increasing difficulty based around the ATtiny85 and ATmega328P-PU microcontrollers from Microchip, and I’ll explain and demonstrate everything you need to know
for each project. You’ll start off blinking a small light, then move on to keepingtime,capturingandanalyzingreal-worlddatasuchastemperatures, and even controlling small motorized devices. This book doesn’t cover AVR for IoT, as that’s a more advanced topic, but after completing the projects here, you’ll be able to harness a wide variety of devices, sensors, motors, displays, and more with your AVR microcontroller to bring your dreamsandideastolife.
I’ve written this book for a wide variety of people. You might be a student wanting to get a head start with microcontrollers, an electronics hobbyist with no prior experience in digital or microcontroller circuitry, an employee who wants to increase their knowledge base for work, or just someone who enjoys making things. This book is for anyone interested in learning more about AVR technology and harnessing it to create their own projects.
My goal is that you’ll leave this book with lasting knowledge and the confidence to keep learning and making. Chapter 1 will get you started by introducing a few cool real-world projects that use AVR microcontrollers, thenshowingyouhowtosetupyourownworkstation.
1
GETTINGSTARTED
Welcome to the beginning of your AVR microcontroller journey! In this chapter I’ll introduce you to the microcontrollers used in this book, as well as a few exciting examples of real-world AVR-based projects, then teach yousomefundamentalsaboutelectronics.
A quick scan through this book will show you that you can use AVR microcontrollers as the heart of an incredibly wide range of devices. You’ll go from blinking LEDs to creating a thermostat, a GPS logger, and more— butdon’tlimityourselftotherangeofprojectscoveredhere!Afterworking through this book, you’ll be well prepared to explore more advanced projectslikethoseI’lldescribeinthissection.
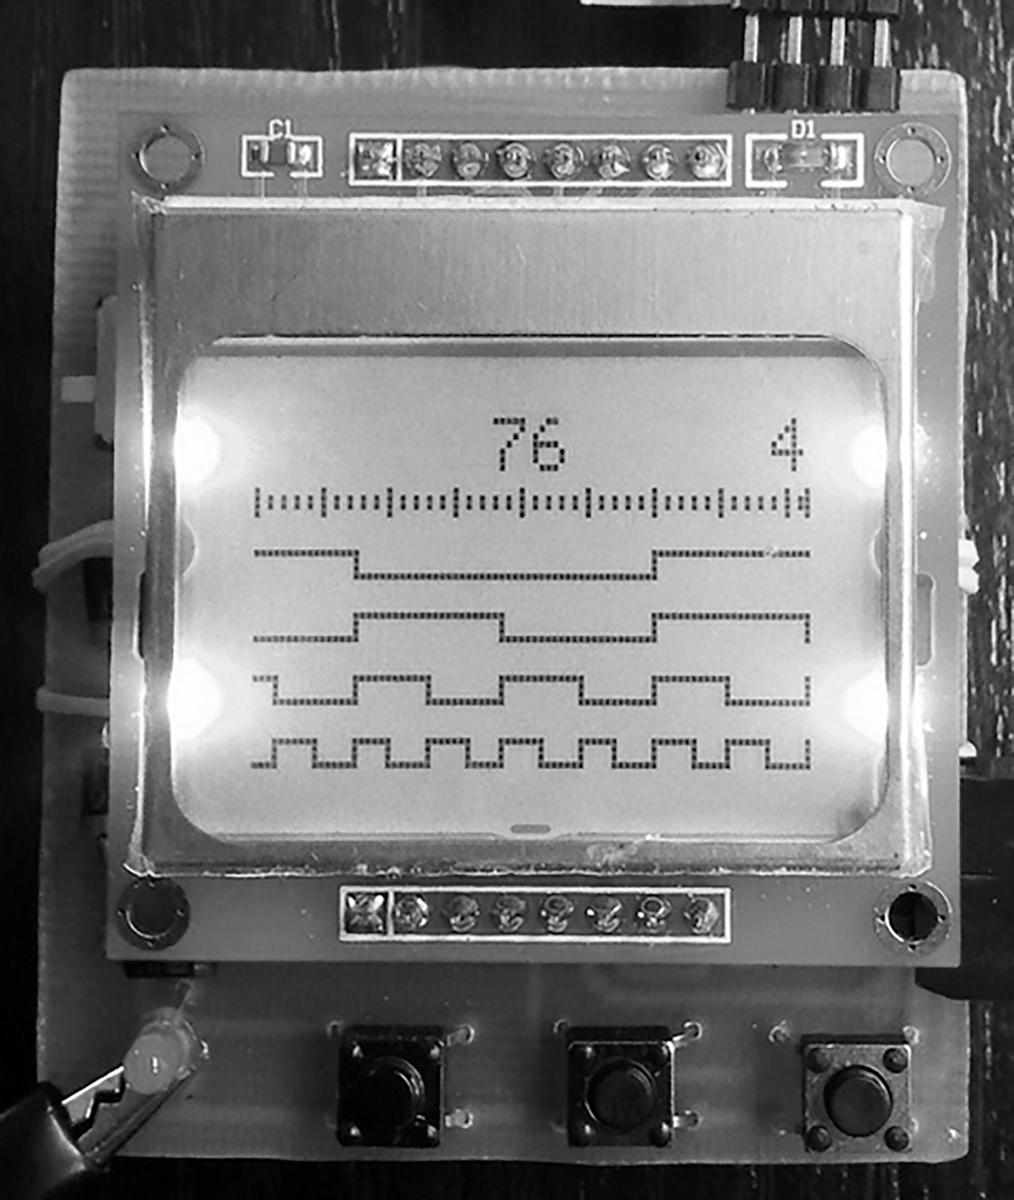
For example, computer scientist Vassilis Serasidis built a piece of electronics test equipment called a logic analyzer, which can measure the values of four electrical currents at the same time and display the results. His design uses an inexpensive LCD typically found in cheap cellular phonestoshowthesignalsinagraphicalform,asshowninFigure1-1.
Figure 1-1: An inexpensive logic analyzer
You can use logic analyzers to run a huge variety of displays with an AVR microcontroller, from inexpensive black and white versions like the one in Figure 1-1 to realistic color displays. For more information on the project, visit
https://www.serasidis.gr/circuits/mini_logic_analyzer/miniLogicAnalyzer.ht m.
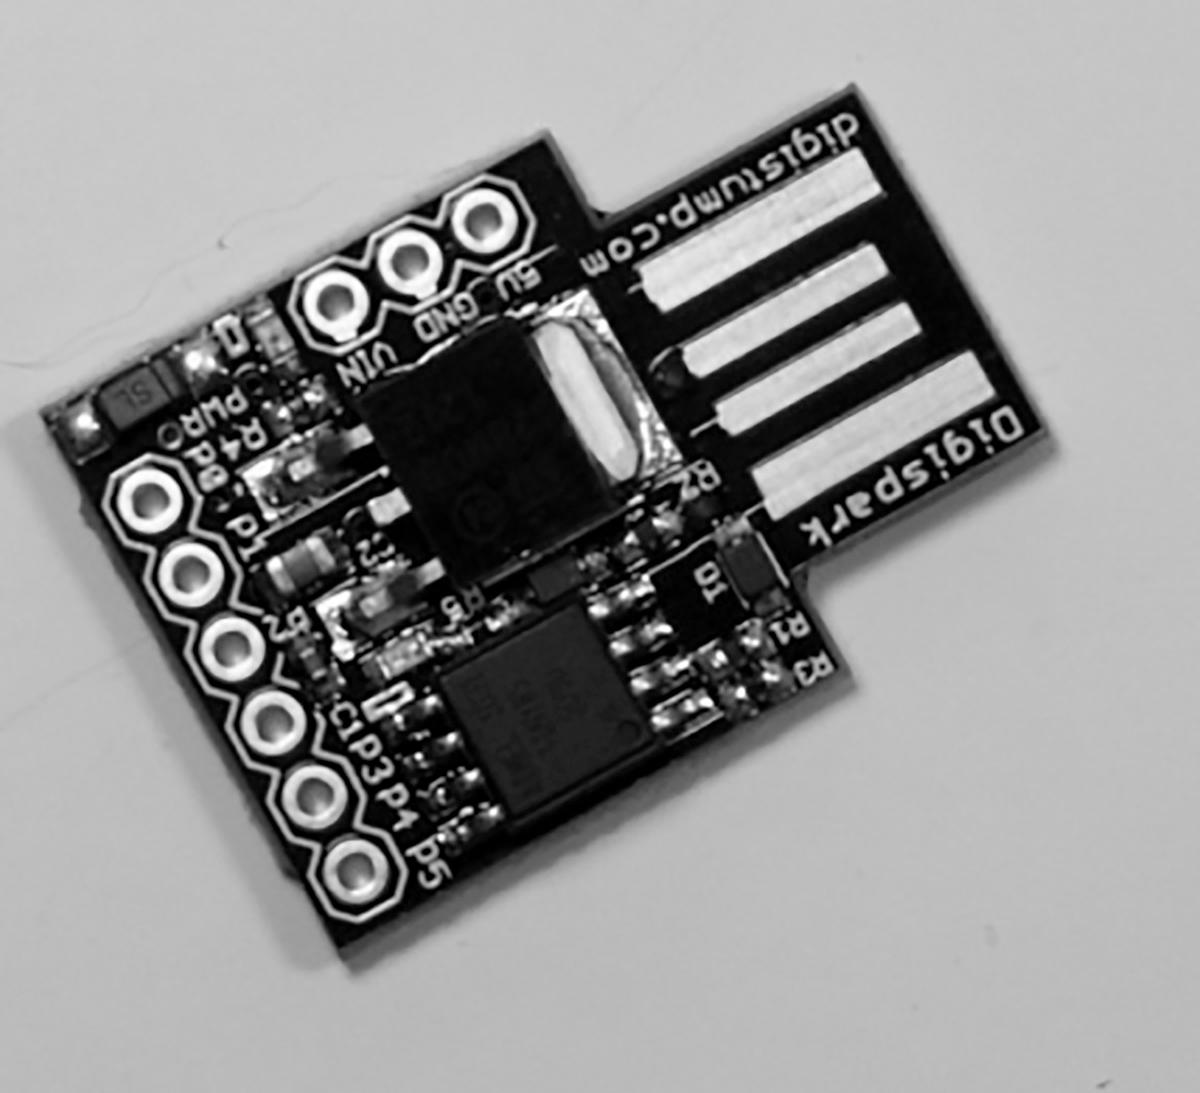
You can also use AVRs to build tiny projects like wearable electronics, but you need an incredibly small development board to do so. Electronics enthusiast Erik Kettenburg dreamed of such a board based on the smallest AVRinexistence.HetranslatedthisideaintotheDigisparkboard,shownin Figure 1-2, which measures only 17.5 × 19 mm, and built a thriving businessviaasuccessfulKickstarterpromotionin2017.
Figure 1-2: An example of the Digispark board
The size of the Digispark board means the AVR microcontroller it uses doesn’t have quite as many features as some larger chips—for example, it has less program memory space. However, the Digispark allows you to
program the microcontroller directly via USB, whereas you’d normally have to purchase a separate programming device. For more information on theDigisparkboard,visit http://digistump.com/.
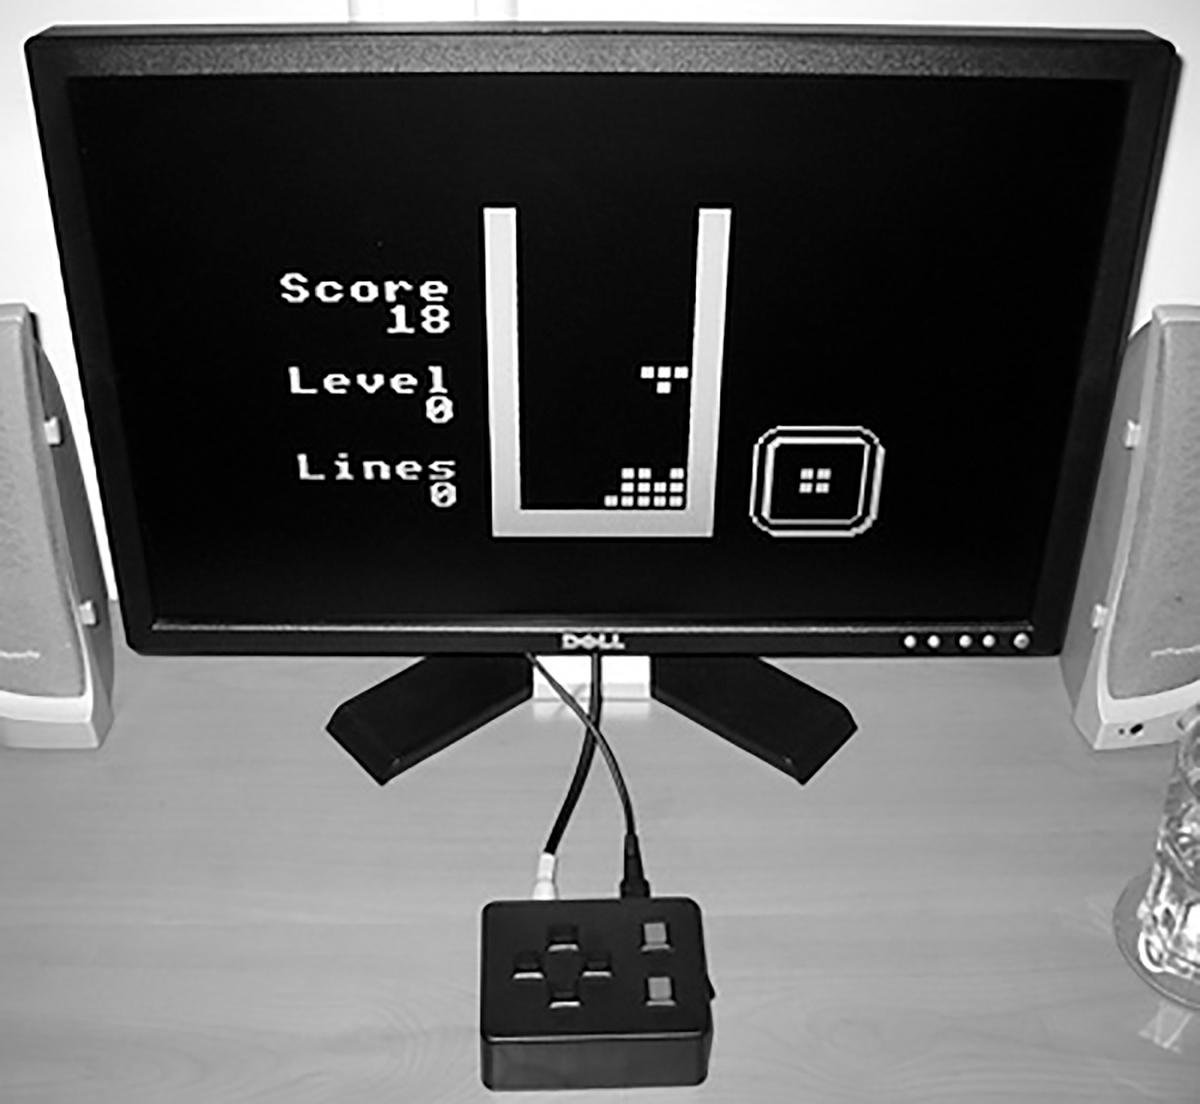
In addition to using AVRs professionally, plenty of people build AVRbased projects purely for fun! One example is the AVR TV Game software engineerBenRyvesbuiltin2009,showninFigure1-3.Benusedverybasic electronics and an AVR to make a device that plugs into a television and letsyouplaytheclassicgames Snake and Tetris.
The AVR can generate the video signals to communicate with a television without any extra hardware, and with some imagination, you can
Figure 1-3: Playing Tetris on the AVR TV Game
program your own games into the microcontroller. For more information, visit http://benryves.com/products/avrtvgame/.
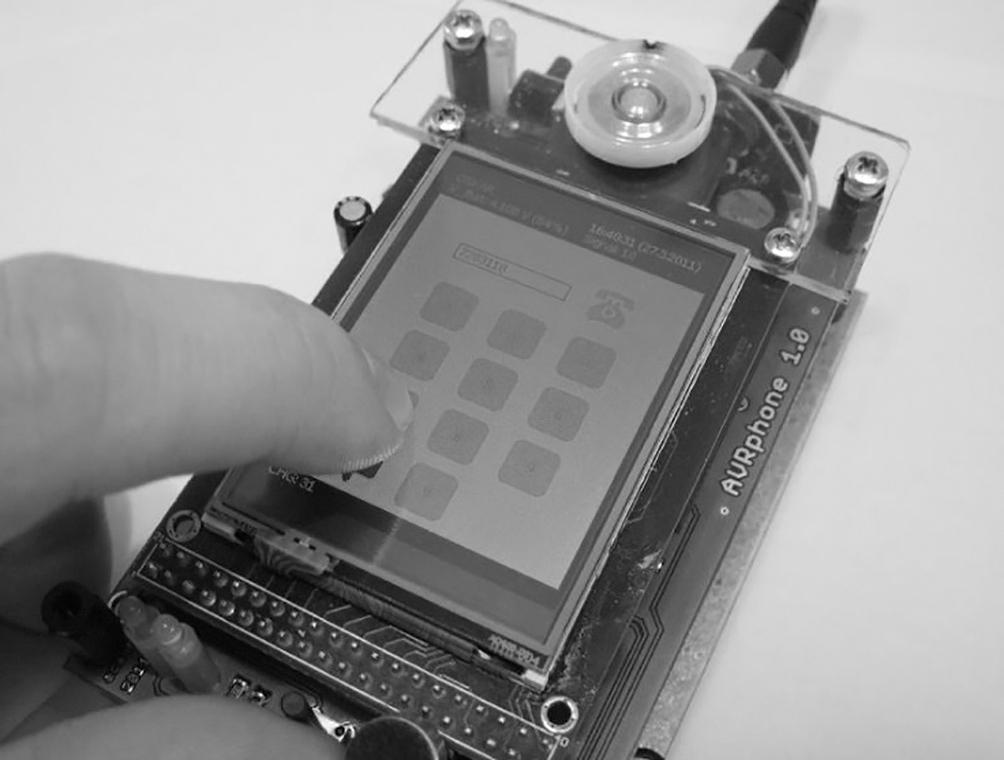
Engineer Adam Heinrich even built his own cellular telephone in 2017 based on an AVR, complete with a color touchscreen interface. Adam’s “AvrPhone,” which is portable for mobile use, is shown in Figure 1-4. For moreinformation,visit http://projects.adamh.cz/avrphone/.
Just like these makers, with some effort, you can bridge the gap between hobbyist tinkering and full product development! But for now, let’s start withamoredetaileddiscussionofthepartsyou’lluseinthisbook.
TheMicrochipAVRMicrocontrollers
Figure 1-4: The AvrPhone
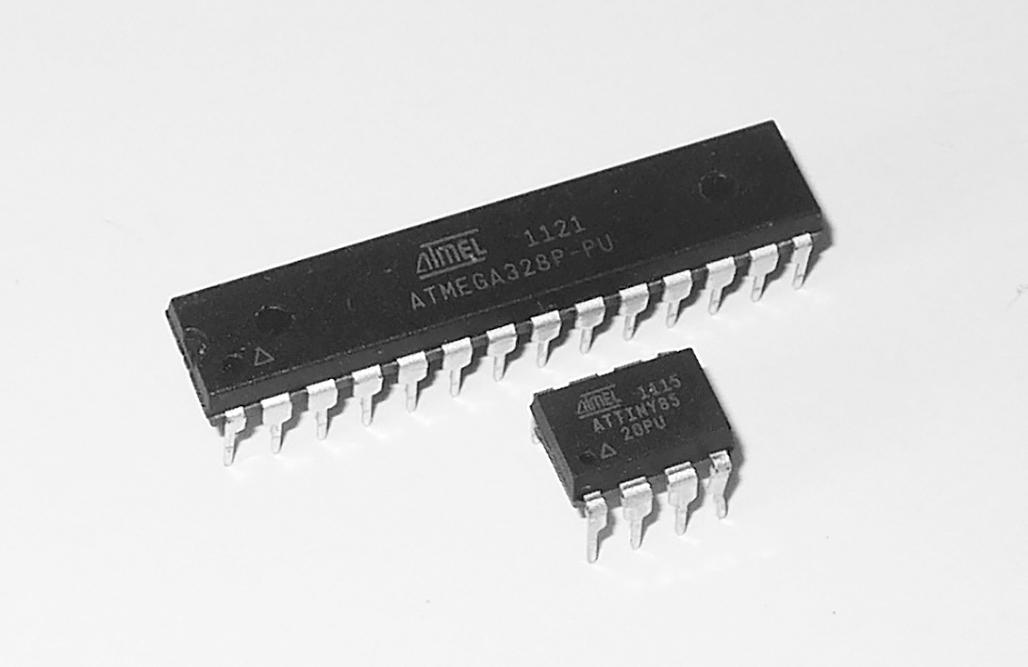
Throughout this book, you’ll use the two microcontrollers shown in Figure 1-5, which Microchip Technology produces as part of its AVR product line. The smaller one, called an ATtiny85, has 8 pins, which are the pieces ofmetal sticking outonthesidesoftheblackchipsthatallowyouto sendandreceivedataandpowerfromandtothemicrocontroller.Thelarger AVRisanATmega328P-PU,whichhas28pins.
NOTE In this book and when purchasing your own parts, you may see microcontrollers labeled “Atmel.” Microchip acquired Atmel in 2016, but at the time of writing some suppliers still have Atmel-branded units; either label is fine.
Apart from size, there are several important differences between the ATtiny85andATmega328P-PUmicrocontrollers,aslistedinTable1-1.
Figure 1-5: Our AVR microcontrollers, the ATtiny85 and ATmega328P-PU
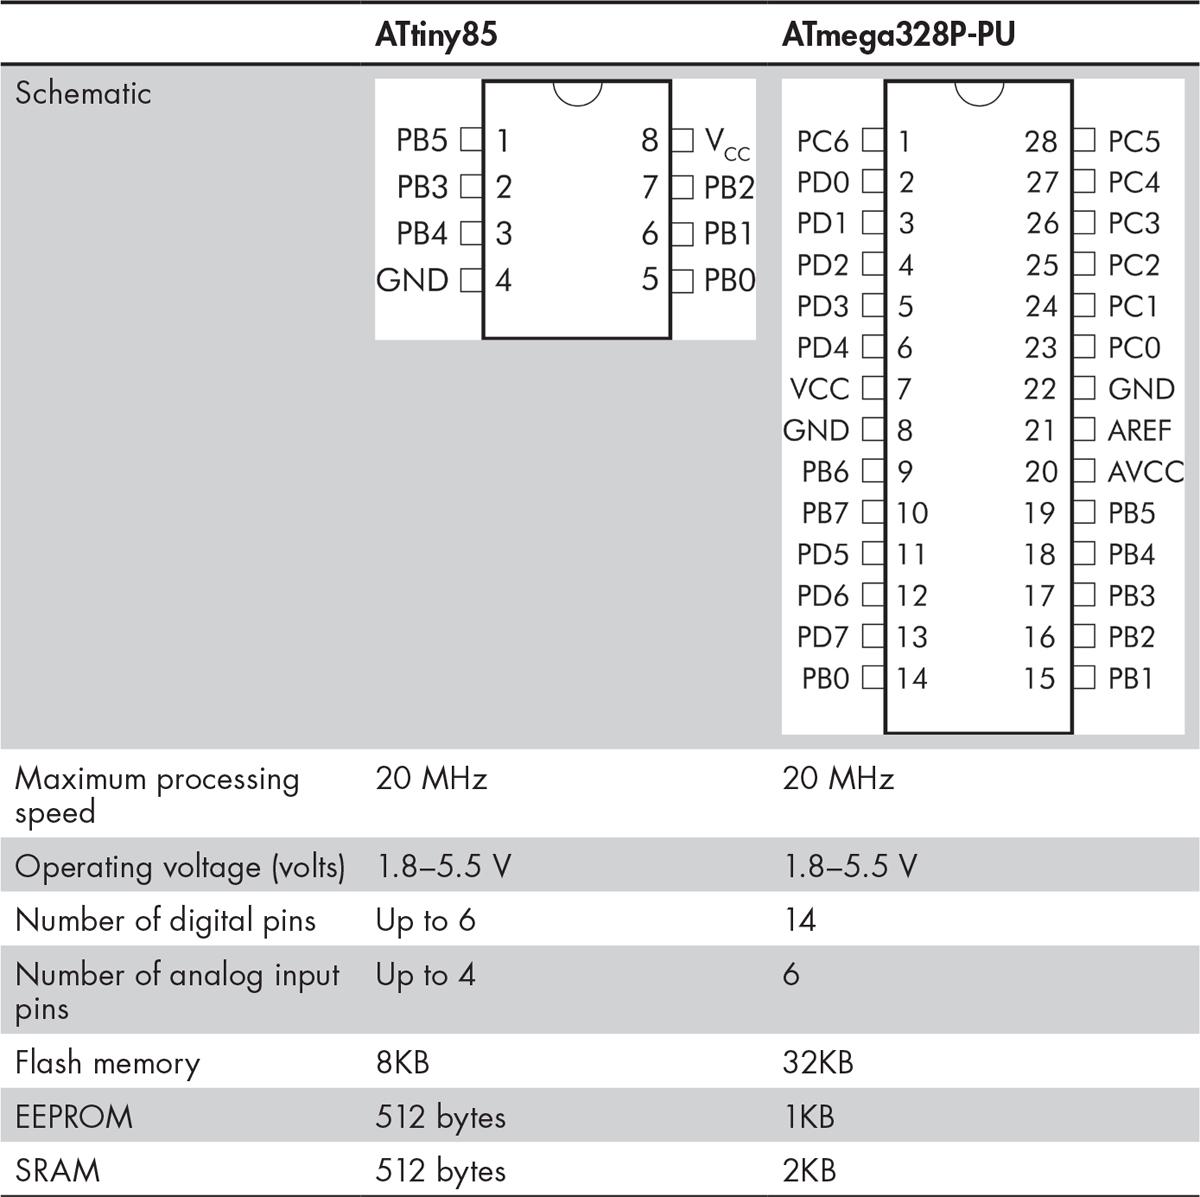
Table 1-1: Specifications for the ATtiny85 and ATmega328P-PU Microcontrollers
The specifications in Table 1-1 describe each chip’s physical limitations, and they will help you determine which other electronic components you can realistically use with your microcontroller. Anytime you start a new project, you need to consider this information carefully, so here’s an overviewofwhateachspecificationmeans:
Schematic This is a drawing that represents the connections to an electronic component, such as the microcontrollers in this table. You’ll learnmoreaboutschematicsymbolsinChapter2.
Maximum processing speed This row tells you how fast the microcontroller can process data, measured in cycles per second. Note that the clock speed isn’t always equal to processing speed, as some instructionscantakemultiplecyclestocomplete.
Operating voltage This row shows the range of voltages that you can safelyusetopowerthemicrocontroller.Ifyoudon’tsupplyatleast1.8V, the chip won’t turn on, but if you try to supply more than 5.5 V, it may melt!
Digitalpins This row shows the number of pins that can send or receive digital data. Digital data is represented by voltage signals; the numbers one and zero, respectively, represent an “on” or “off” voltage. These voltage signals are then combined to represent various forms of data. All microcontrollers have pins that you can set up as digital inputs or outputs andusetocontrolexternaldevices.
Analog input pins This row shows the number of physical inputs that are available to measure voltage levels. Analog input pins let you read information from devices like sensors, which output different voltages basedonwhat’shappeningintheirsurroundings.
Flash memory This row shows how much flash memory is available on the chip. To tell your microcontroller what to do, you’ll have to write programs, which are stored in flash memory and retained even after you turn off power. If your program’s file size exceeds your AVR’s memory capacity,itwon’tfitonthemicrocontroller!
EEPROM This row tells you how much electrically erasable programmable read-only memory (EEPROM) is available on the chip. EEPROM can hold data your program creates even when the microcontroller is turned off. For example, if you want to display a certain image on an LCD whenever you power on your project, you can storethatimageinEEPROMforfutureuse.
SRAM This row tells you how much Static Random Access Memory (SRAM) is available on the chip. This is the amount of memory available to store temporary data created by your programs. Just like the RAMinyourdesktopcomputer,SRAMiswherealltheinformationyour programgeneratesasitrunsisstoreduntilitgetsdeletedwhenthepower is turned off. This could include sensor data, the results of calculations, andsoon.
I’ll cover these and other important features in detail in later chapters. Fornow,let’sstartsettingupyourAVRmicrocontrollerlab.
RequiredPartsandAccessories
You won’t need to buy a ton of expensive parts to get started with the projects in this book; assuming you already have a modern personal computer, you can have a lot of fun with microcontrollers for around $50. Each project I’ll walk you through includes a list of the parts you need to complete it, and you can download a list of all the parts used in this book from https://nostarch.com/avr-workshop/. I’d recommend you order the parts you’ll need for the projects in the first few chapters now so you don’t havetowaittoolongfordelivery.
Electronic Components
AVR microcontrollers and electronic components are available from many retailers that offer a range of products and accessories. When you’re shopping, be sure to purchase the original parts I’ve listed and not knockoffs, or you run the risk of receiving faulty or poorly performing goods. Don’t take chances buying an inferior product, as it could end up costing youmoreinthelongrun!
Always read the hardware list at the beginning of every project and be sure to buy the correct components before you start. Here are some recommended suppliers for AVR-related parts and accessories. The first fivesupplyworldwide,whilethelastfourarecountry-specific,asnoted:
I can vouch for these suppliers from personal experience, but there are many more across the globe. As a general rule, try to deal with organizations that offer technical and sales support and are more than just simplesalesagentsorlistingsonmegaretailsites.
Choosing an AVR Programmer
You need to connect a programmer like the ones shown in Figure 1-6 from yourcomputertoyourmicrocontrollercircuitsothatyoucanloadprograms and data onto the chip. Finding a good programmer is crucial for success in the AVR world, and a quick web search for “AVR programmer” will present you with many options. The projects in this book use a USBasp programmer, a device that interfaces between your PC and your AVR projecttosendyourcodetoyourproject’smicrocontroller.Youcanbuyone from any of the stores listed in the previous section for (at the time of printing)lessthan$20.