On Safari On Safari
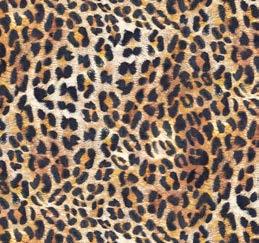
Fabric A OSAF 5473 PA 1 PANEL
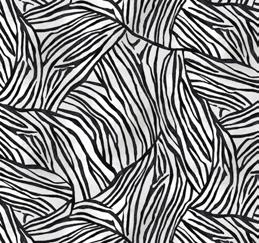
Fabric B OSAF 5474 NE ......................... 5/8 yard
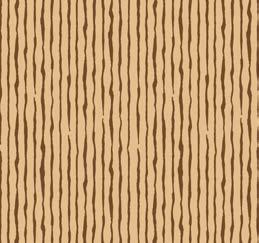
Fabric C OSAF 5475 WK 5/8 yard
Fabric D OSAF 5476 NE 1/4 yard
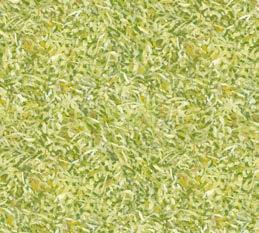
Fabric E OSAF 5477 G ........................... 1/3 yard
Fabric F OSAF 5477 LG 1/4 yard
Fabric G OSAF 5478 LB 7/8 yard
Fabric H OSAF 5479 GNE ...................... 5/8 yard
Fabric I OSAF 5478 S 1/2 yard
Backing 3 yards
Cutting Instructions:
Please read all instructions carefully before beginning. Strips are cut across the width of fabric WOF (perpendicular to selvedges) unless otherwise stated. All seams are sewn with 1/4" seam unless otherwise stated. Label all pieces.
Fabric A:
• Cut quilt center (1) 22" x 42" rectangle, centering design.
Fabric B:
• Pieced Block Border and Bottom Border B1: Cut (3) 2 1/2" x WOF strips. Subcut (6) 2 1/2" x 8 1/2" rectangles from (2) WOF strips. Use leftover to piece with remaining WOF strip and subcut (1) 2 1/2" x 44 1/2" strip.
• Bottom Border B4: Cut (2) 4" x WOF strips. Piece strips and subcut (1) 4" x 44 1/2" strip.
Fabric C:
• Pieced Block Border and Top Border T1: Cut (3) 2 1/2" x WOF strips. Subcut (8) 2 1/2" x 6 1/2" rectangles from (2) WOF strips. Use leftover to piece with remaining WOF strip (1) 2 1/2" x 44 1/2" strip.
• Top border T4: (2) 4" x WOF strips. Piece strips and subcut (1) 4" x 44 1/2" strip.
Fabric D:
• Inner Pieced Border: Cut (2) 1 3/4" x WOF strips. Subcut from EACH strip (1) 1 3/4" x 11 1/4" and (1) 1 3/4" x 22 1/2" rectangles.
• Pieced Block Border: Cut (1) 2 1/2" x WOF strips. Subcut (6) 2 1/2" x 6 1/2" rectangles.
Fabric E:
• Pieced Block Border: Cut (3) 2 1/2" x WOF strip. Subcut (12) 2 1/2" x 5 1/2" rectangles and (4) 2 1/2" x 7 1/2" rectangles.
Fabric F:
• Pieced Block Border: Cut (2) 2 1/2" x WOF strips. Subcut (4) 2 1/2" x 5 1/2" rectangles and (4) 2 1/2" x 7 1/2" rectangles.
Fabric G:
• Pieced Block Border: Cut (4) 2 1/2" x WOF strips. Subcut (58) 2 1/2" x 2 1/2" squares and (8) 2 1/2" x 1 1/2" rectangles.
• Pieced Block Border: Cut (1) 3 1/2" x WOF strip. Subcut (16) 3 1/2" x 2 1/2" rectangles.
• Top and Bottom Borders T3 and B3: Cut (3) 2 1/2" x WOF strips. Piece strips and subcut (2) 2 1/2" x 44 1/2"strips.
Fabric H:
• Top and Bottom Borders T2 and B2: Measure the width of the fabric. If you can cut two complete 3 1/2" x 44 1/2" strips then do so. If you can’t cut the strips, cut two additional 3 1/2" strips. Cut the strips in half and remove the selvages from both ends (no more than necessary). Sew one trimmed 1/2-strip to both ends of each full 3 1/2" strip matching the ombre print. From these pieced strips, cut two 3 1/2" x 44 1/2" strips.
• Inner Pieced Border: Cut (2) 1 3/4" x WOF strips. Subcut from EACH strip (1) 1 3/4" x 11 1/4" and (1) 1 3/4" x 22 1/2" rectangles.
Fabric I
• Binding: Cut (6) 2 1/4" x WOF strips. Piece strips together to make binding strips.
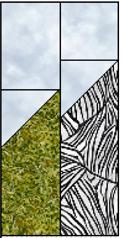
Block A
1. Draw a diagonal line on the wrong side of (1) 2 1/2" x 2 1/2" Fabric G square. Place square, right sides together, at a corner of (1) 2 1/2" x 5 1/2" Fabric E rectangle. Sew on drawn line. Trim 1/4" away from sewn line. Open and press to reveal corner triangle.
2. Repeat with (1) 2 1/2" x 2 1/2" Fabric G square and (1) 2 1/2" x 6 1/2"
3. Sew (1) 2 1/2" x 3 1/2" rectangle to the top of unit, and (1) 2 1/2" x 2 1/2" G square to top of the unit.
4. Sew together both units along the long sides to complete (1) block.
Make a total of (8) blocks. Diagram 1
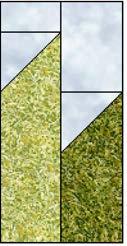
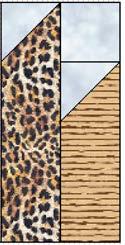
Block B
1. Draw a diagonal line on the wrong side of (1) 2 1/2" x 2 1/2" Fabric G right sides together, at a corner of (1) 2 1/2" x 7 1/2" Fabric E rectangle. Sew on drawn line. Trim 1/4" away from sewn line. Open and press to reveal corner triangle.
2. Repeat with (1) 2 1/2" x 2 1/2" and (1) 2 1/2" x 5 1/2"
3. Sew (1) 1 1/2" x 2 1/2" rectangle to the top of E unit, and (1) 2 1/2" x 3 1/2" Fabric G Fabric F
4. Sew together both units along the long sides to complete (1) block.
Make a total of (4) blocks. Diagram 2
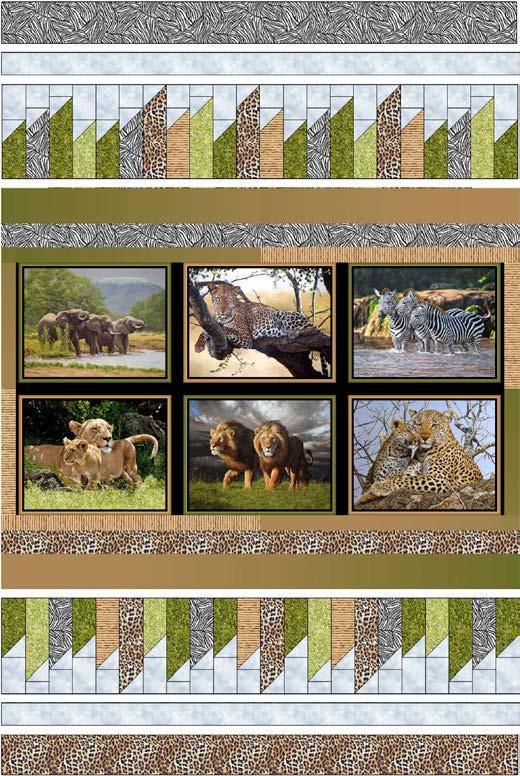
4. Top and Bottom Border T3 and B3. Sew (2) 2 1/2" x 44 1/2" Fabric G strips to the top and bottom of quilt center.
3. Pieced Block Border. Refer to quilt image for block placement guide, sew together (11) pieced blocks to make a pieced row. Make (2) rows and sew to the opposite long sides of quilt center as shown on quilt diagram.
5. Top and Bottom Borders T4 and B4. Sew (1) 4" x 44 1/2" Fabric C strip to the top, and (1) 4" x 44 1/2" Fabric B strip to the bottom of quilt center to complete quilt top.
Finishing:
Prepare backing using two widths of fabric with horizontal seams to measure 52" x 69".
Layer quilt, batting and backing. Baste layers together and quilt as desired.
Trim layers even with quilt top squaring corners.
Fold the Fabric I binding strip wrong sides together; press. Sew binding to the quilt using your preferred method.
Quilt Diagram T4
T3
T2
T1
B1
B2
Pieced blocks
Pieced blocks
B3
B4