

OTHER TOOLS & SUPPLIES
- sewing machine
-needle & coordinating thread
-iron and pressing surface
-rotary cutter and mat
-straight pins
-ruler
NOTES
1. Please wash, dry & iron your fabrics before beginning, and trim selvages.
2. For best results, read all directions before beginning.
3.Unless otherwise noted, use a 1/4” seam allowance (SA)
4. Unless otherwise noted, press all seams open.
WOF = Width of Fabric
CUTTING
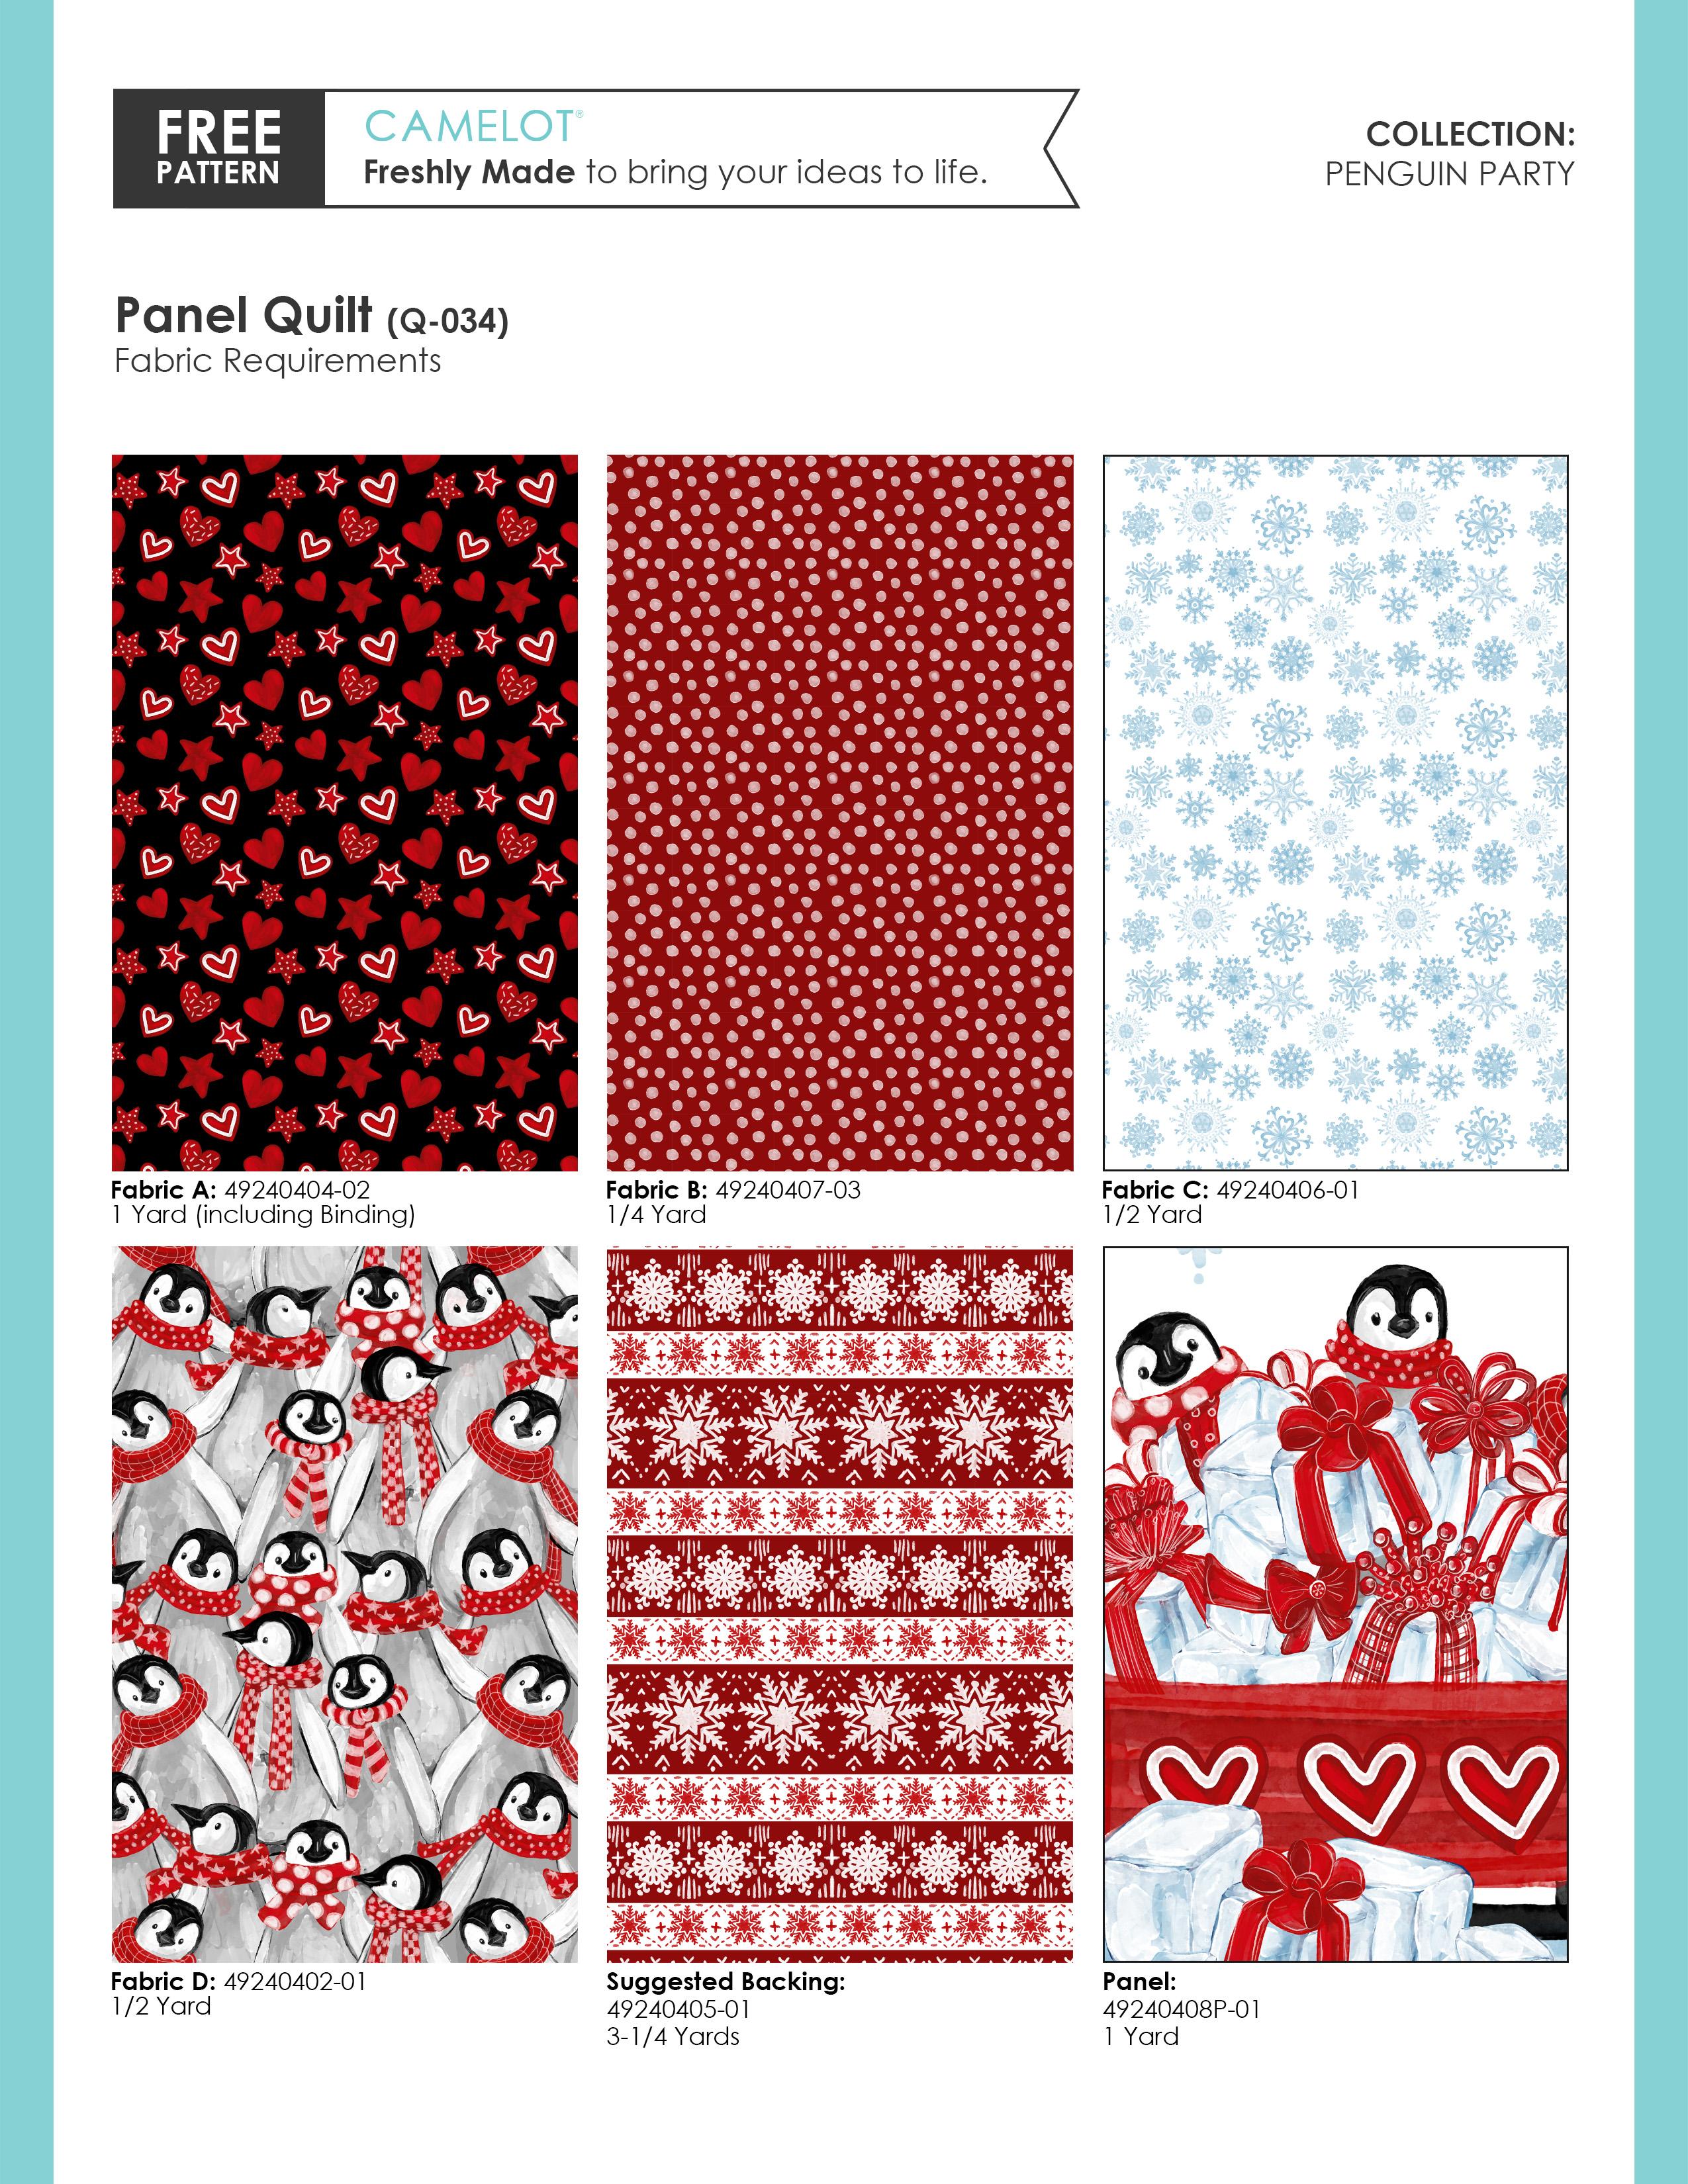
Panel: Trim to 34-1/2” x 41”
Fabric A:
Cut twelve 2-1/2” x WOF strips. Set 6 strips aside for binding. -trim 2 strips to 2-1/2“ x 34-1/2”
-join 2 strips end-to-end and trim to 2-1/2“ x 57”. Repeat with two more strips to make another 2-1/2“ x 57” strip. -from remaining strips, cut four 2-1/2“ x 6-1/2” strips
Fabric B:
Cut one 6-1/2” x WOF strip
-sub-cut four 6-1/2” x 6-1/2” squares
Fabric C:
Cut one 6-1/2” x WOF strip
-sub-cut four 8-1/2” x 6-1/2” rectangles
Cut one 9-1/2” x WOF strip
-sub-cut six 6-1/2” x 9-1/2” rectangles
Fabric D:
Cut one 6-1/2” x WOF strip
-sub-cut two 18-1/2” x 6-1/2” rectangles
Cut one 7-1/4” x WOF strip
-sub-cut four 6-1/2“ x 7-1/4” rectangles
1. Referring to the assembly layout on the right, sew the following pieces together from top to bottom:
Fabric B Square, to Fabric A (2-1/2” x 6-1/2”) rectangle, to Fabric C (6-1/2” x 9-1/2”) rectangle, to Fabric D (6-1/2” x 7-1/4”) rectangle, to Fabric C (6-1/2” x 9-1/2”) rectangle, to Fabric D (6-1/2” x 7-1/4”) rectangle, to Fabric C (6-1/2” x 9-1/2”) rectangle, to Fabric A (2-1/2” x 6-1/2”) rectangle, to Fabric B Square.
Make two.
2. Referring to the assembly layout below, sew the following pieces together from left to right:
Fabric C (8-1/2” x 6-1/2”) rectangle, to Fabric D (18-1/2” x 6-1/2”) rectangle, to Fabric C (8-1/2” x 6-1/2”) rectangle.
Make two.
3. Referring to the assembly layout below, sew the following pieces together from top to bottom:
One row created in Step 2, to Fabric A (2-1/2“ x 34-1/2” ) strip, to Panel, to Fabric A (2-1/2“ x 34-1/2” ) strip, to row created in Step 2.
ASSEMBLY
Referring to the assembly layout below, sew all columns together from left to right as follows:
-One column created in Step 1, to one (2-1/2” x 57”) Fabric A strip, to column created in Step 3, to one (2-1/2” x 57”) Fabric A strip, to a second column created in Step 1.
This completes the quilt top.
FINIISHING
1. Layer quilt top, batting and backing to make the quilt sandwich. Baste and quilt as desired.
2. Join Fabric A binding strips end-to-end to make one continuous binding. Fold in half lengthwise, Right Sides Together, and press. Bind the quilt using your preferred method.