

OTHER TOOLS &SUPPLIES
-needle and coordinating thread
-sewing machine
-iron & pressing surface
-rotary cutter and mat
-fabric shears
-straight pins
NOTES
-For best results, read through all instructions before starting.
-Please wash, dry & iron your fabrics before beginning, and trim selvedges.
-Unless otherwise indicated, sew all seams with a 1/4” seam allowance.
-Press your seams open as you go.
-WOF = width of fabric
-as you cut your pieces, be sure to stack them and label them with the corresponding letter (a-w). This will help you stay organinzed and will make it simple to follow the instructions.
CUTTING
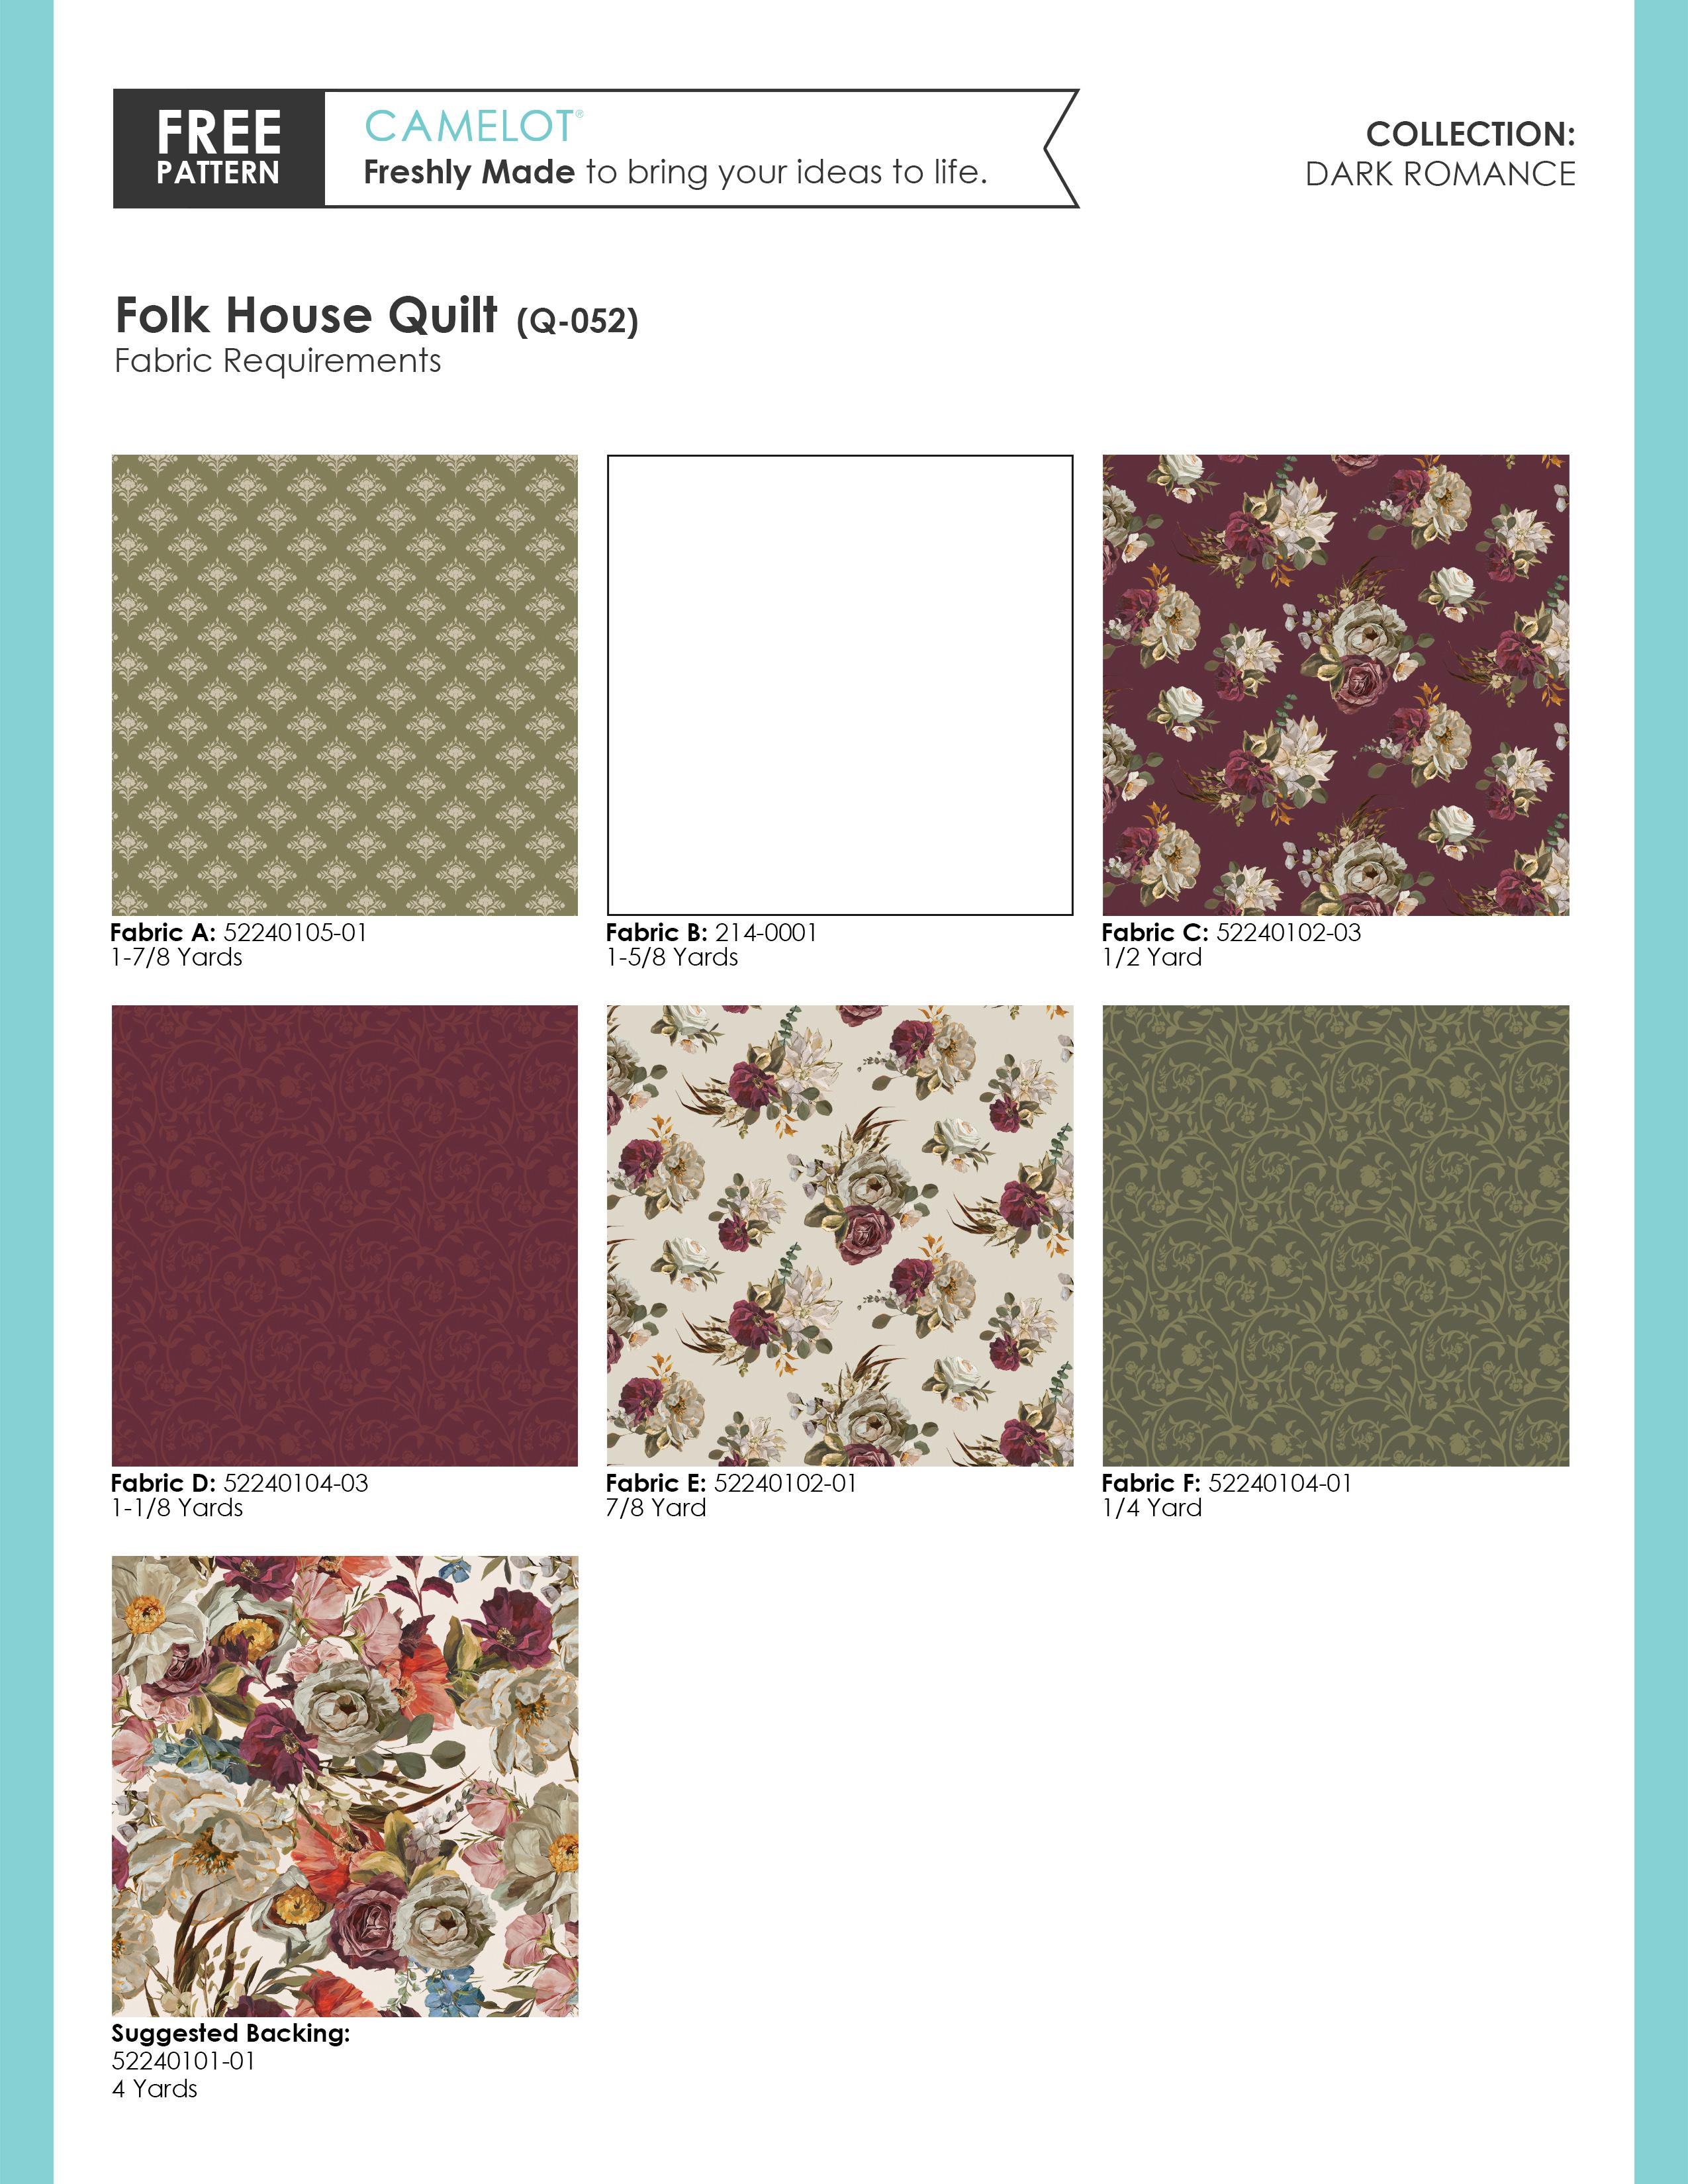
Fabric A
Cut (8) 4-1/2” x WOF strips. Sub-cut:
-(60) 4-1/2” x 4-1/2” squares. These will be referred to as piece (a).
-(6) 4-1/2” x 1-1/2” rectangles. These will be referred to as piece (b).
Cut (2) 5” x WOF strips. Sub-cut:
-(12) 5” x5” squares. These will be referred to as piece (c).
Cut (2) 2-3/4” x WOF strips. Sub-cut:
-(24) 2-3/4” x 2-3/4” squares. These will be referred to as piece (d).
Cut (1) 6” x WOF strip. Sub-cut:
-(1) 18” x 6” rectangle. This will be referred to as piece (e).
-(2) 2” x 3” rectanlges. These will be referred to as piece (f). -(2) 3-1/2” x 2-1/2” rectangles. These will be referred to as piece (g).
Cut (1) 2” x WOF strip. Sub-cut: -(2) 17-1/2” x 2” rectangle. These will be referred to as piece (h).
Cut (2) 1-1/2” x WOF strips. Sub-cut:
-(2) 15-1/2” x 1-1/2” rectangles. These will be referred to as piece (i).
Cut (1) 3” x WOF strip. Sub-cut: -(2) 6-1/2” x 3” rectangles. These will be referred to as piece (j).
Fabric B
Cut (19) 2-1/2” x WOF strips. Set (7) strips aside for binding.
From the remaining strips:
-sew two together end-to-end. Trim to 60-1/2” long. Repeat to make (4) 60-1/2” strips in total. These will be referred to as piece (k). Note: reserve the ‘leftover’ pieces.
-take (1) of the ‘leftover’ pieces and sew it end-to-end to one of the remaining WOF strips. Trim to make (1) 31-1/2“ long strip. Repeat to make a second 31-1/2” strip. These will be referred to as piece (l).
-sew (1) of the remaining WOF strips to a ‘leftover’ strip, end-to-end. Trim to 54-1/2” long. Repeat to make a second 54-1/2” strip. These will be referred to as piece (m).
-from your leftover pieces, cut (4) 2-1/2” x 9-1/2” rectangles. These will be referred to as piece(n).
From the remaining Fabric B, cut (1) 4” x WOF strip. Sub-cut:
-(10) 3” x 4” rectangles. These will be referred to as piece (o).
-(1) 4” x 6” rectangle. This will be referred to as piece (p).
Fabric C
Cut (3) 5” x WOF strips. Sub-cut: -(9) 5” x 9-1/2” rectangles. These will be referred to as piece (q).
Fabric D
Cut (6) 4-1/2” x WOF strips. Sub-cut: -(30) 8” x 4-1/2” rectangles. These will be referred to as piece (r).
Fabric E
Cut (1) 5-1/2” x WOF strip. Trim to 31-1/2” x 5-1/2”. This will be referred to as piece (s).
Cut (1) 6” x WOF strip. Sub-cut: -(2) 6” x 6” squares. These will be referred to as piece (t).
-Sub-cut remaining strip to (2) 3” strips. Sub-cut: -(2) 12-1/2” x 3” rectangles. These will be referred to as piece (u).
-(1) 5-1/2” x 3” rectangle. This will be referred to as piece (v).
Cut (2) 7” x WOF strips. Sub-cut: -(2) 7” x 23” rectangles. These will be referred to as piece (w).
Fabric F
Cut (1) 4-1/2” x WOF strip. Sub-cut: (1) 31-1/2” x 4-1/2” rectangle. this will be referred to as piece (x).
PIECING (NOTE: refer to the Assembly Layout on p.12, and on the cover page, for fabric placement)
MAKING THE CENTER PANEL
1. Sew the following pieces together from left to right, as shown. Repeat to make a second unit.
Repeat to make a second row of windows.
2. Sew one (o) piece and one (g) piece together from top to bottom, as shown. Repeat to make a second unit.
3. Sew the following pieces together from left to right:
4. Sew the following pieces together from to to bottom:
5. Sew (1) piece (h) on either side of the unit created in Step 4:
6. Mark a diagonal line corner-to-corner on the Wrong Side of each of your (t) pieces.
7. Place one (t) piece on the left side of one (e) piece , Right Sides Facing. Sew the (2) pieces together along the marked line.
8. Trim the excess fabric 1/4” outside of the stitch line and press the seam open.
9. Repeat Steps 7-8 with a second (t) piece, this time sewing it to the right side of the (e) piece.
10. Sew the unit created in Step 9 to the top of the unit created in Step 5, . This completes the “House” block.
11. Sew one (w) piece on either side of the house block :
12. Sew the following pieces together from left to right:
13. Sew the unit created in Step 12 to the top of the unit created in Step 11:
14. Sew piece (s) to the top of the unit created in Step 13 and piece (x) to the bottom. This completes the center panel.
MAKING THE FLYING GEESE
15. Mark a diagonal line corner-to-corner on the Wrong Side of each of your (a) pieces.
16. Place one (a) piece on the left side of one (r) piece , Right Sides Facing. Sew the (2) pieces together along the marked line.
17. Trim the excess fabric 1/4” outside of the stitch line and press the seam open.
18. Repeat Steps 16-17 with a second (a) piece, this time sewing it to the right side of the (r) piece.
19. Repeat Steps 16-18 to make a total of (30) Flying Geese.
20. Sew (15) flying geese together from top to bottom. Repeat with a second set of flying geese.
Make 2
MAKING THE HEARTS
21. Mark a diagonal line corner-to-corner on the Wrong Side of each of your (d) and (c) pieces.
22. Place one (d) piece on the upper left hand corner of one (q) piece , Right Sides Facing. Sew the (2) pieces together along the marked line.
23. Trim the excess fabric 1/4” outside of the stitch line and press the seam open.
24. Repeat Steps 22-23 with a second (d) piece, this time sewing it to the top right-hand corner of the (q) piece.
Make 12
25. Repeat Steps 22-24 with the remaining (q) and (d) pieces to make a total of 12 units.
26. Place one (c) piece to the bottom left-hand corner of one of the units created in Step 24, Right Sides Facing. Sew the two pieces together along the marked line.
27. Trim the excess fabric 1/4” outside of the stitch line and press the seam open.
Make 6
28. Repeat Steps 26-27 to make a total of (6) units.
29. Repeat Steps 26-27 with the (6) remaining units and (c) pieces, this time sewing the (c) piece to the bottom right hand corner.
6
30. Sew one of the units created in Step 27 to one of the units created in Step 29. Repeat to make a total of 6 heart blocks.
Make 6
31. Sew three heart blocks together from left to right while inserting one piece (n) in between each block. Repeat to make a second one.
Make 2
32. Sew one piece (l) to the bottom of one of the units created in Step 31 and one to the top of the other unit. These will be referred to as Heart Unit 1 and Heart Unit 2 respectively.
Unit 1
Unit 2
ASSEMBLY
33. Sew Heart Unit 1 to the top of the Center Panel and Heart Unit 2 to the bottom.
34. Sew one piece (K) on either side of the Flying Geese Units.
35. Sew one of the units created in Step 34 to the left side of the unit created in Step 33 and one to the right side. Make 2
36. Sew one piece (m) to the top of the unit created in Step 35 and one to the bottom. This completes the quilt top. (m) (m)
FINISHING
37. Layer the quilt top with batting and backing. Baste and quilt as desired.
38. Sew the Fabric B binding strips together end-to-end and press seams open. Bind the quilt using your favorite method.
(a) (a) (r)
(a) (a) (r)
(a) (a) (r)
(a) (a) (r)
(a) (a) (r)
(a) (a) (r)
(a) (a) (r)
(a) (a) (r)
(a) (a) (r)
(a) (a) (r)
(a) (a) (r)
(a) (a) (r)
(a) (a) (r)
(a) (a) (r)
(a) (a) (r)
(d) (d) (d) (d) (c) (c) (q) (q)
(d) (d) (c) (c) (q) (q) (n) (n)
(d) (d) (d) (c) (c) (q) (q)
(d) (d) (d) (c) (c) (q) (q) (d) (d) (d) (d) (c) (c) (q) (q) (d) (d) (d) (c) (c) (q) (q) (n) (n) (d) (s) (v) (f) (f) (u) (u) (e) (t) (t) (w) (w) (X) (h) (h) (i) (i) (i) (o) (o) (o) (o) (o) (o) (o) (o) (o) (o) (p) (j) (j) (g) (g) (b) (b) (b) (b) (b) (b)
(a) (a) (r)
(a) (a) (r)
(a) (a) (r)
(a) (a) (r) (k) (k) (k) (k) (l) (l) (m)
(a) (a) (r)
(a) (a) (r)
(a) (a) (r)
(a) (a) (r)
(a) (a) (r)
(a) (a) (r)
(a) (a) (r)
(a) (a) (r)
(a) (a) (r)
(a) (a) (r)
(a) (a) (r)