RIBBON BOX QUILT PROJECT
Featuring BUTTERCREAM | Emily Taylor
RIBBON BOX QUILT PROJECT
SIZE: 45 " x 59 "
DESIGNER: Michelle Engel
TECHNICAL EDITOR: Linda Spiridon
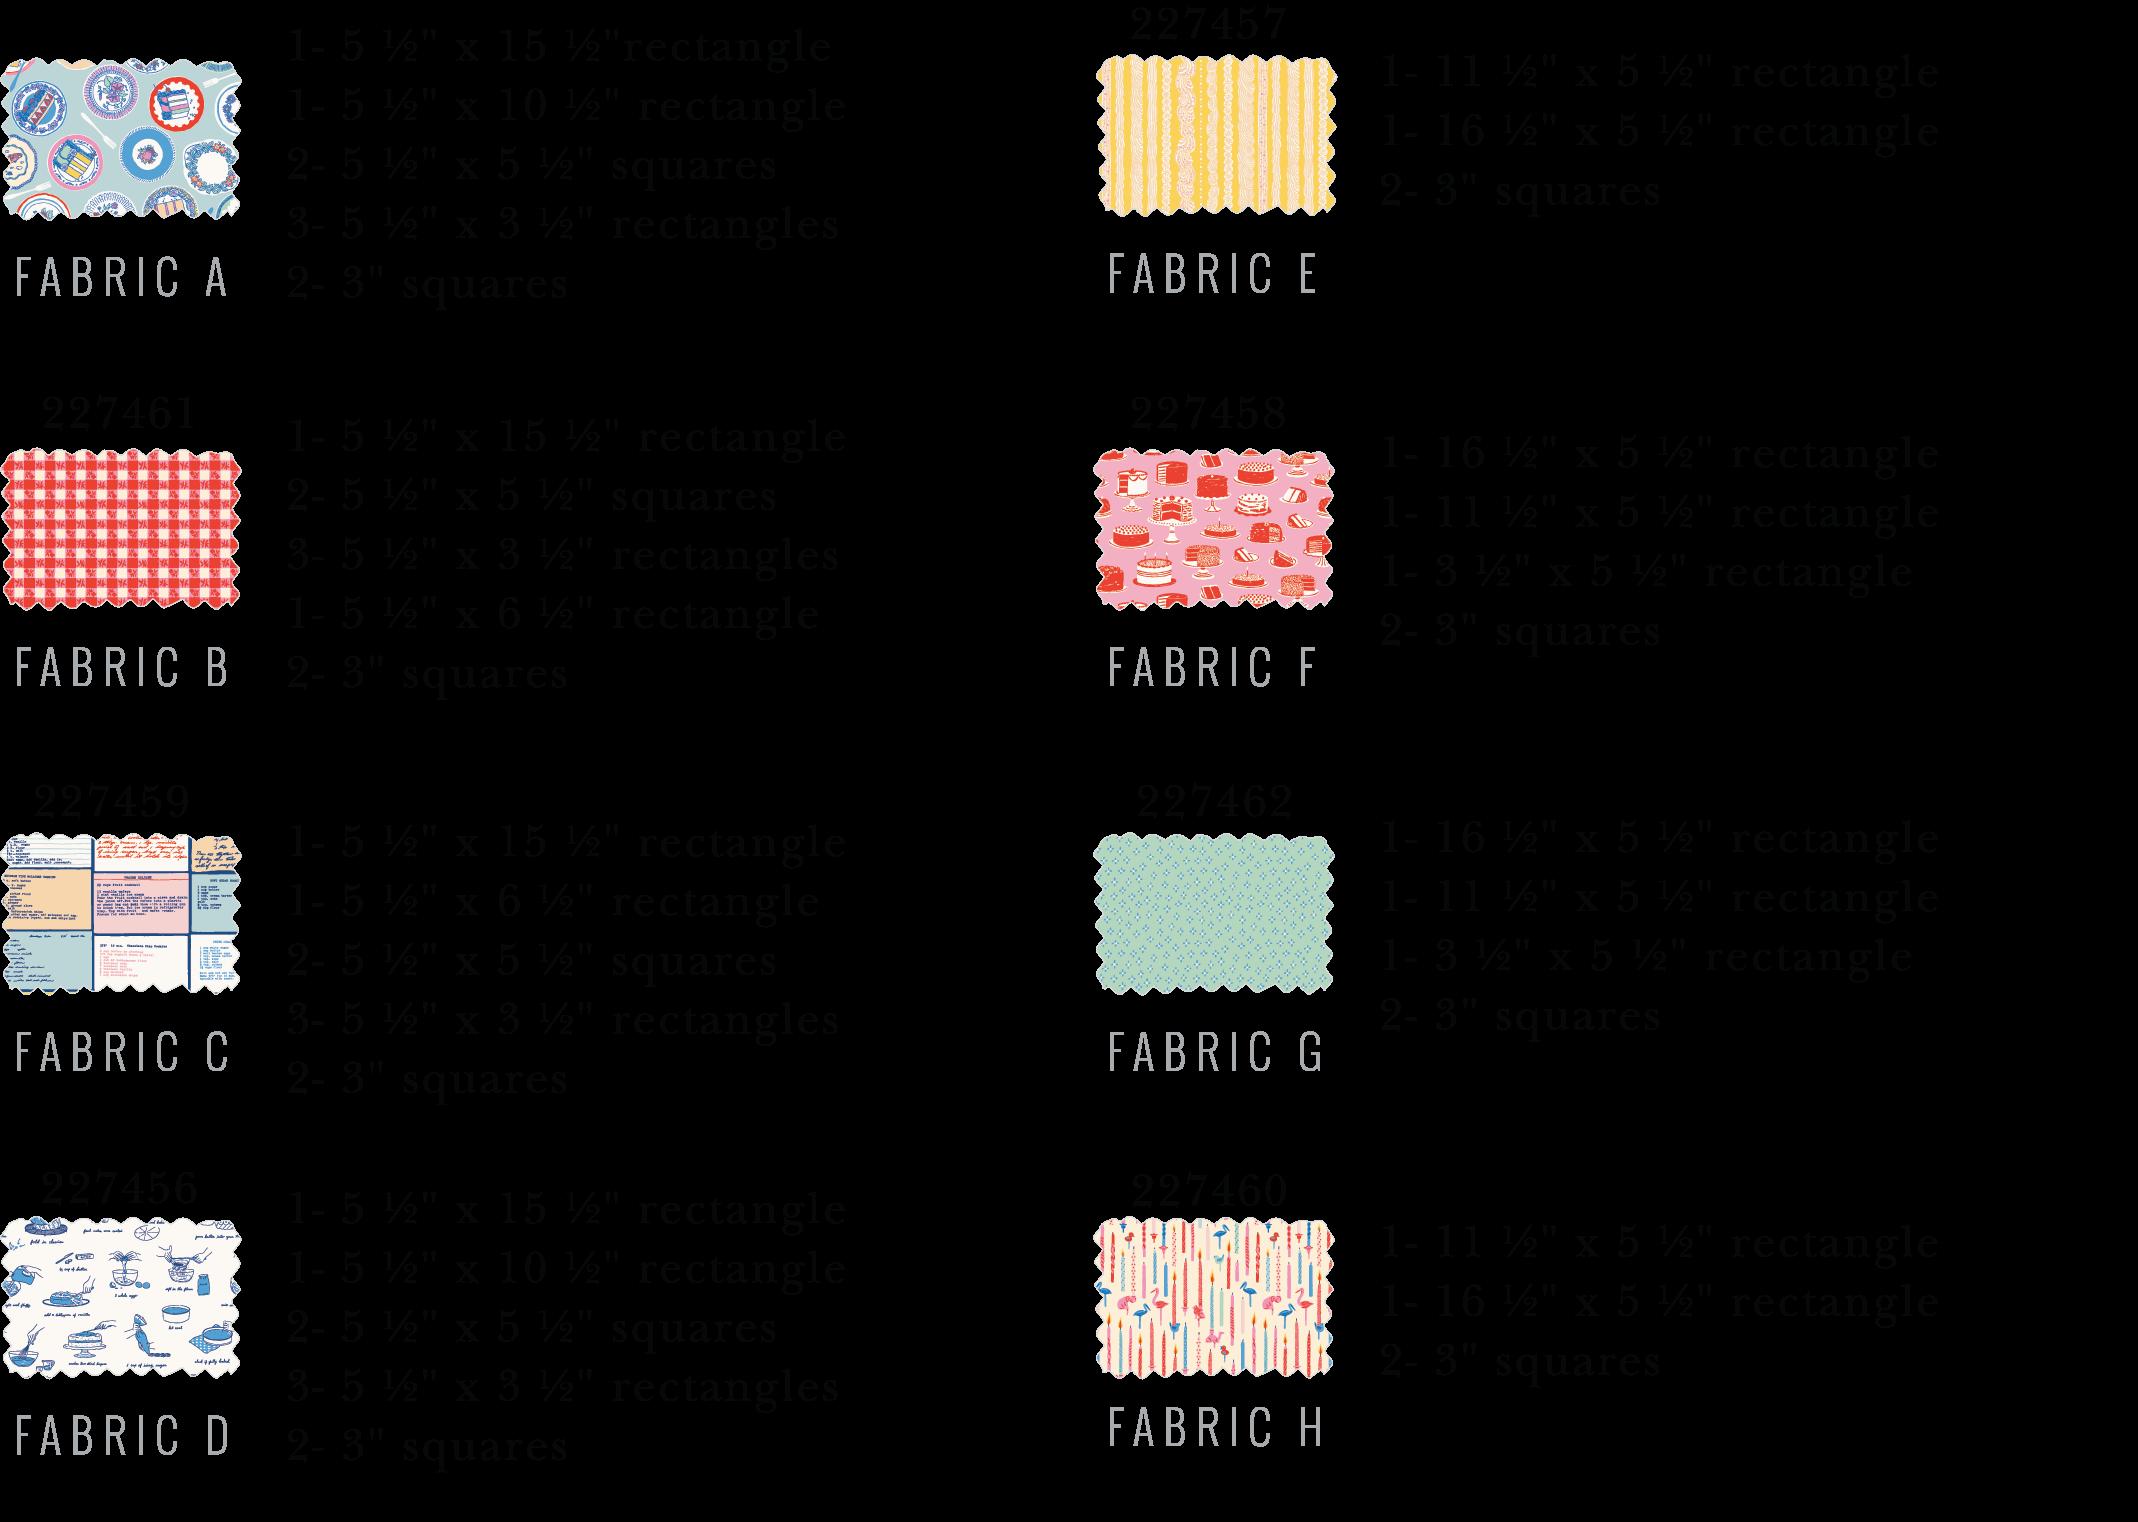
This project uses 8 different fabrics
See chart below for fabric quantities
1 ½ yd background fabric
½ yd binding
3 ¼ yards backing
Note: All possible care has been taken to assure the accuracy of this pattern. We are not responsible for printing errors or the manner in which individual work varies. Please read instructions carefully before starting the construction of this quilt. If desired, wash and iron your fabrics before starting to cut.
QUILT FACE MATERIALS
Cutting dimensions include ¼ " seam allowances.
yds each of 8 different printed fabrics (see chart below)
Note: To get consistent patterning across the ribbon, cut the pieces horizontally across fabric
VERTICAL RIBBONS (V)
HORIZONTAL RIBBONS (H)
2- 9 ½" x 5 ½" rectangles 4- 8 ½" x 15 ½" rectangles
2- 8 ½" x 5 ½" rectangles
6- 8 ½" x 3 ½" rectangles
BACKGROUND FABRIC
4- 5 ½" x 5 ½" squares
6- 3 ½" x 15 ½" rectangles
9- 3 ½" x 3 ½" squares
ASSEMBLY DIRECTIONS DIAGRAMS
¼ " seam allowance unless otherwise noted.
MAKING THE RIBBON TAILS
1. Mark a diagonal line on the wrong side of all 3" printed squares. [fig 1]
2. Take 4 of the 5 ½ " x 5 ½ " squares of BACKGROUND FABRIC and the 3” squares of FABRICS A, D, F, G . Lay a 3" square right sides together to one corner of the 5 ½ " end of BACKGROUND piece and sew on the diagonal line. Trim excess. Press towards print. [fig 2a] Repeat with the 2nd square at the other corner of the 5 ½ " end. Trim excess. Press towards print.Make 4 ribbon tails. [fig 2b]
3. Repeat step 2 with 2 5½ " x 8½ " BACKGROUND FABRIC with FABRICS E AND H 3" squares. [fig 3]
4. Again, repeat step 2 using the 2 5½ " x 9 ½ " BACKGROUND FABRICS with FABRICS B AND C 3" squares. [fig 4]
5. Sew FABRICS B AND C ribbon tails to a matching fabric 5½ " x 6 ½ " rectangle. [fig 4]
6. Sew FABRICS A AND D ribbon tails to a matching fabric 5½ " x 10 ½ " rectangle. [fig 5]
7. Sew FABRIC F AND G ribbon tails to a matching fabric 5½ " x 3 ½ " rectangle. [fig 6]
ASSEMBLING THE QUILT
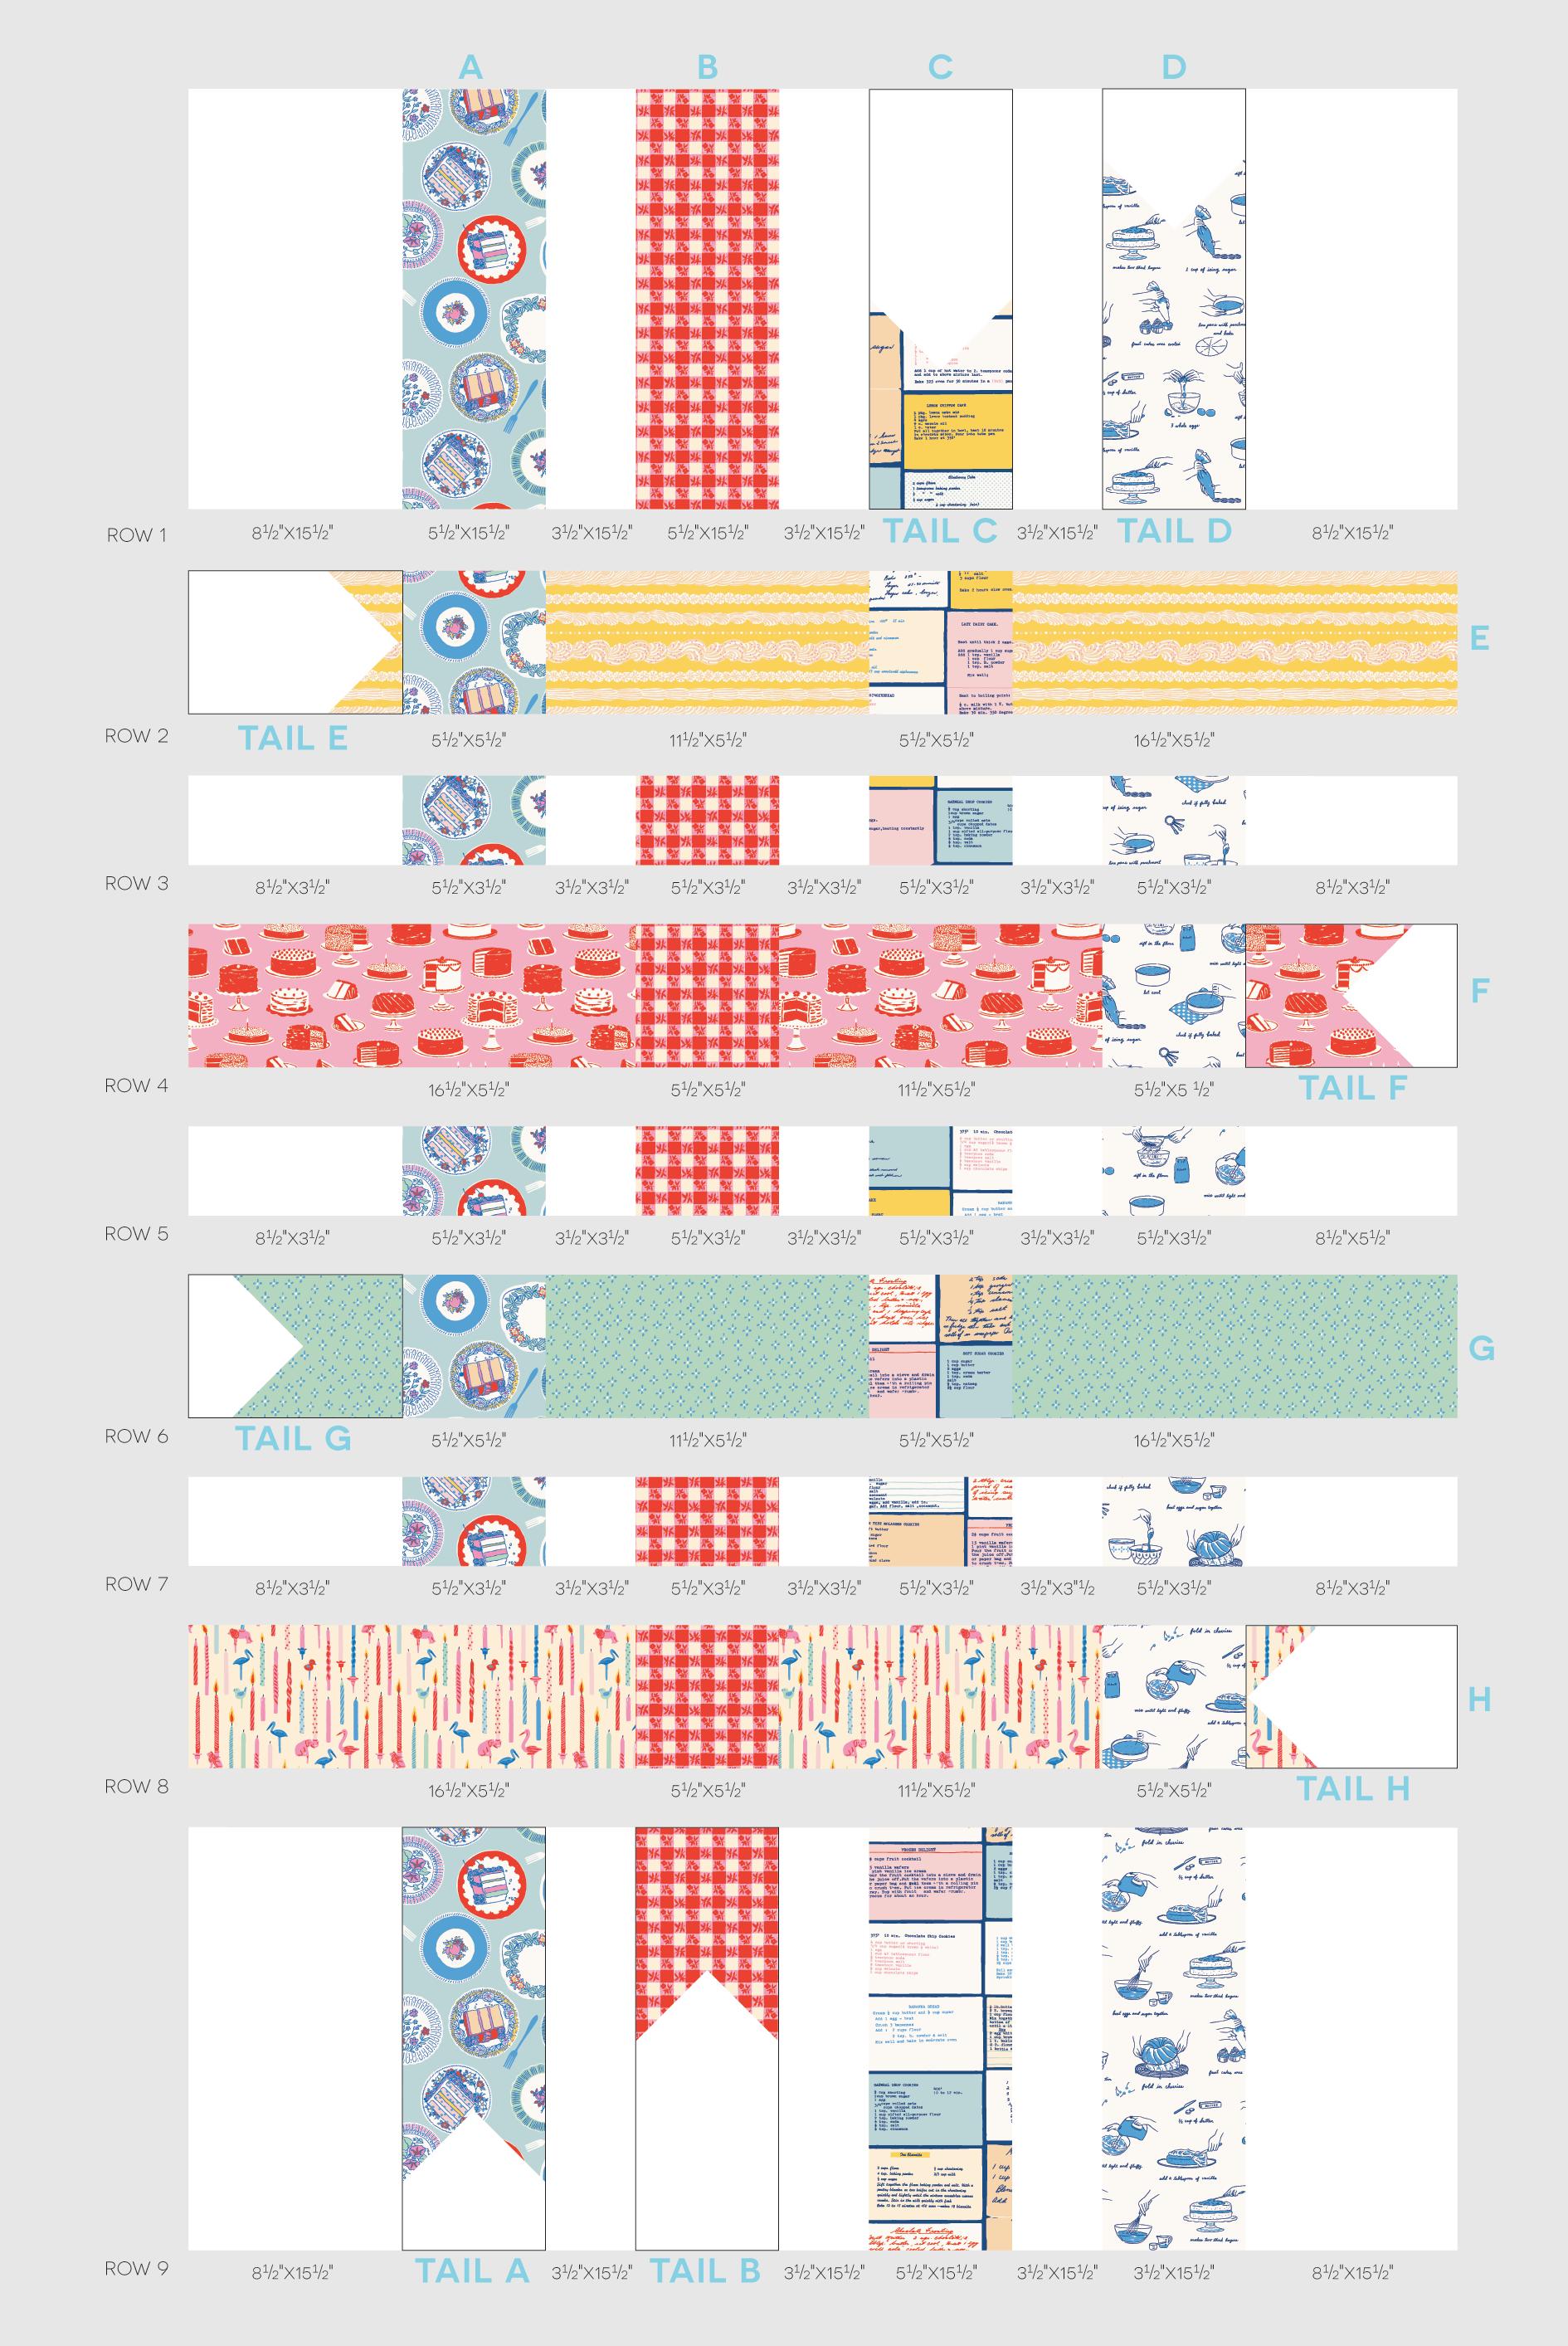
8. Arrange fabric pieces according to quilt diagram working in rows across.
Row 1: begin with a BACKGROUND 8 ½ " x 15½ " piece, sew to the FABRIC A 5 ½ " x 15½ " piece, and sew to a BACKGROUND 3 ½ " x 15½ " piece. Continue following the QUILT DIAGRAM noting correct order and size of fabric - be mindful of direction of prints. Press to one direction.
Row 2: begin with FABRIC E ribbon tail ends to the FABRIC A 5½ " x 5½ " piece. Continue following the diagram across the row. Press rows in alternate directions from row to row.
9. Continue following the QUILT DIAGRAM until all 9 rows are complete.
10. Sew horizontal rows together and press in one direction.
11. Layer the backing, batting and quilt top. Baste, quilt and bind.
fig 3
fig 4
fig 5
fig 2b
fig 1 (each piece)
fig 2a


