Winter Waddles - Table Set


Table Topper size: approximately 32” x 32”
Place

Featuring fabrics from Winter Waddles fabric collection by Sally Darby


Table Topper size: approximately 32” x 32”
Place

Featuring fabrics from Winter Waddles fabric collection by Sally Darby
Fabric collection by Sally Darby
Quilt designed by Matthew Pridemore of The Whimsical Workshop
Finished Table Topper Size: approx. 32” x 32”
Finished Place Mat Size: approx. 17” x 12”
Fabric A:
Fabric B:
Fabric C:
Fabric D:
Fabric E:
Fabric F:
Fabric G:
Fabric H:
Fabric I:
Fabric J:
Fabric K:
Backing:
Batting
WWAD 5422 PA 1 panel
WWAD 5428 R .......................... 1/4 yard
WWAD 5426 W ......................... 5/8 yard
WWAD 5429 G .......................... 3/8 yard
WWAD 5429 B .......................... 5/8 yard
WWAD 5429 R 1/3 yard
WWAD 5429 W 1/4 yard
WWAD 5423 MU ....................... 1/4 yard
WWAD 5424 W ………….......... 1/4 yard
WWAD 5425 W ......................... 1/4 yard
WWAD 5428 W ......................... 1/4 yard
WWAD 5427 DG ................... 1 1/4 yards ................................................. 40” x 40”
Please read all instructions carefully before beginning. Strips are cut across the width of fabric (perpendicular to selvedges) unless otherwise stated. All seams are sewn with 1/4” seam unless otherwise stated. Label all pieces.
From Fabric A:
1. Fussy cut one 17” x 17” square. (Center Block)
From Fabric B:
1. Cut one 1 3/4” strip; sub-cut two 1 3/4” x 17” strips. (Center Block)
2. Cut one 1 3/4” strip; sub-cut two 1 3/4” x 19 1/2” strips. (Center Block)
From Fabric C:
1. Cut two 3 1/2” x 18 1/2” length of fabric strips. (Border)
2. Cut two 3 1/2” x 24 1/2” WOF strips from the remaining fabric. (Border)
From Fabric D:
1. Cut one 4 7/8” strip; sub-cut two 4 7/8” squares. (Unit)
2. Cut two 2 1/2” strips; sub-cut twenty-four 2 1/2” squares. (Unit)
From Fabric E:
1. Cut two 2 1/2” strips; sub-cut twenty-four 2 1/2” squares. (Unit)
2. Cut four 2 1/2" strips. (Binding)
From Fabric F:
1. Cut three 2 1/2” strips; sub-cut forty-eight 2 1/2” squares. (Unit)
From Fabric G:
1. Cut one 4 7/8” strip; sub-cut two 4 7/8” squares.
From Fabric H:
1. Cut two 2 1/2” strips; sub-cut twelve 2 1/2” x 4 1/2” strips. (Unit)
From Fabric I:
1. Cut two 2 1/2” strips; sub-cut twelve 2 1/2” x 4 1/2” strips. (Unit)
From Fabric J:
1. Cut two 2 1/2” strips; sub-cut twelve 2 1/2” x 4 1/2” strips. (Unit)
From Fabric K:
1. Cut two 2 1/2” strips; sub-cut twelve 2 1/2” x 4 1/2” strips. (Unit)
The arrows in figures represent the fabric print direction. Pay attention to the fabric and unit orientations while assembling the various components.
Sew one 1 3/4” x 17” B strip to each side of the 17” x 17” A square. Sew one 1 3/4” x 19 1/2” B strip to the top and to the bottom of the A square to make the Center Block (Fig. 1). Trim the block to measure 18 1/2” x 18 1/2” square.
Center Block A
Trim block to measure 18 ½” x 18 ½” AFTER adding Fabric B borders B B
Place one 4 7/8” G square on top of one 4 7/8” D square right sides together. Draw a line across the diagonal of the top square (Fig. 2). Sew 1/4” away from each side of the drawn diagonal line (Fig. 2). Cut the two squares apart on the drawn diagonal line (Fig. 3) to make two half-square triangles. Trim the half-square triangles to measure 4 1/2" square to make two Unit 1 squares (Fig. 4). Repeat to make four Unit 1 squares total.
Place one 2 1/2” F square on the left side of one 2 1/2” x 4 1/2” K strip, right sides together (Fig. 5). Sew across the diagonal of the square from the upper right corner to the lower left corner (Fig. 5). Flip open the triangle formed and press. Trim away the excess fabric from behind the triangle, leaving a 1/4” seam allowance (Fig. 6).
Refer to Figure 12 and sew together twelve assorted unit strips lengthwise to make one Block One strip. Repeat to make four Block One strips total.
Place another 2 1/2” F square on the right side of the 2 1/2” x 4 1/2” K strip, right sides together (Fig. 7). Sew across the diagonal of the square from the upper left corner to the lower right corner (Fig. 7). Flip open the triangle formed and press. Trim away the excess fabric from behind the triangle, leaving a 1/4” seam allowance to make one Unit 2 strip (Fig. 8).
Repeat Steps 3-4 to make twelve Unit 2 strips total.
12 Make 4 blocks
Repeat Steps 3-4 and refer to Figures 9-11 for fabric identification, placement seam direction and orientation to make twelve of each unit strip for Unit 3 through Unit 5.
Refer to the Table Topper Layout in Figure 13
Sew one 3 1/2” x 18 1/2” C strip to each side of the Center Block. Sew one 3 1/2 x 24 1/2 C strip to the top and to the bottom of the Center Block.
9. Sew one Block One strip to each side of the Center Block noting the direction of the Block one’s.
10. Sew one Unit 1 square to each end of one Block One strip. Repeat to make a second strip. Sew the strips to the top and to the bottom of the Center Block to make the Table Topper top.
Press backing well and trim to 40” x 40”.
Layer quilt, batting and backing. Baste layers together.
Quilt as desired.
Trim layers even with quilt top squaring corners.
Join four 2 1/2” E binding strips with diagonal seams. Press seams open. Attach binding using your favorite method.
Make a label and sew to the back of the quilt.
Fabric A:
Fabric B:
Fabric C:
Fabric D:
Fabric E:
Fabric F:
Fabric G:
Fabric H:
Fabric I:
Fabric J:
Fabric K:
Backing:
Batting
WWAD 5422 PA 1 panel
WWAD 5428 R .......................... 1/2 yard
WWAD 5426 W .......................... 1/2 yard
WWAD 5429 G .......................... 1/2 yard
WWAD 5429 B .......................... 5/8 yard
WWAD 5429 R 5/8 yard
WWAD 5429 W 1/4 yard
WWAD 5423 MU ....................... 1/4 yard
WWAD 5424 W ………….......... 1/8 yard
WWAD 5425 W ......................... 1/2 yard
WWAD 5428 W ......................... 1/4 yard
WWAD 5427 DG ................... 1 1/2 yards ............................................. (6) 21” x 16”
Please read all instructions carefully before beginning. Strips are cut across the width of fabric (perpendicular to selvedges) unless otherwise stated. All seams are sewn with 1/4” seam unless otherwise stated. Label all pieces.
From Fabric A:
1. Fussy cut six 7 1/2” squares. (Blocks)
From Fabric B:
1. Cut three 1 3/4” strips; sub-cut twelve 1 3/4” x 7 1/2” strips. (Blocks)
2. Cut three 1 3/4” strips; sub-cut twelve 1 3/4” x 10” strips. (Blocks)
From Fabric C:
1. Cut one 9” strip; sub-cut six 2 1/4” x 9” length of the strips. (Blocks)
2. Cut six 2 1/4” x 12 1/2” strips from the remaining fabric. (Blocks)
From Fabric D:
1. Cut one 2 1/2” strip; sub-cut twelve 2 1/2” squares. (Blocks)
2. Cut four 2 1/2” strips. (Binding)
From Fabric E:
1. Cut two 2 1/2” strips; sub-cut twenty-four 2 1/2” squares. (Blocks)
2. Cut four 2 1/2” strips. (Binding)
From Fabric F:
1. Cut three 2 1/2” strips; sub-cut thirty-six 2 1/2” squares. (Blocks)
2. Cut four 2 1/2” strips. (Binding)
From Fabric G:
1. Cut two 2 1/2” strips; sub-cut eighteen 2 1/2” x 4 1/2” strips. (Blocks)
From Fabric H:
1. Cut two 2 1/2” strips; sub-cut twelve 2 1/2” x 4 1/2” strips. (Blocks)
From Fabric I:
1. Cut one 2 1/2” strip; sub-cut six 2 1/2” x 4 1/2” strips. (Blocks)
From Fabric J:
1. Cut one 9” strip; sub-cut six 2 1/4” x 9” length of the strips. (Blocks)
2. Cut two 2 1/4” strips; sub-cut six 2 1/4” x 12 1/2” strips from the remaining fabric. (Blocks)
From Fabric K:
1. Cut two 1 1/2” strips; sub-cut six 1 1/2” x 12 1/2” strips. (Border)
The arrows in figures represent the fabric print direction. Pay attention to the fabric and unit orientations while assembling the various components. Sew one 1 3/4” x 7 1/2” B strip to each side of one 7 1/2” A square. Sew one 1 3/4” x 10” B strip to the top and to the bottom of the A square. Trim the block to measure 9” x 9” square to make one Unit 6 square (Fig. 14). Repeat to make six Unit 6 squares total.
Figure 14
Make 6 units
Sew one 2 1/4” x 9” J strip to each side of one Unit 6 square. Sew one 2 1/4” x 12 1/2” J strip to the top and to the bottom of the Unit 6 square to make one Block Two square (Fig. 15). Repeat to make three Block Two squares total.
Sew one 2 1/4” x 9” C strip to each side of one Unit 6 square. Sew one 2 1/4” x 12 1/2” C strip to the top and to the bottom of the Unit 6 square to make one Block Three square (Fig. 16). Repeat to make three Block Three squares total.
16
3 units
Place one 2 1/2” F square on the left side of one 2 1/2” x 4 1/2” G strip, right sides together (Fig. 17). Sew across the diagonal of the square from the upper right corner to the lower left corner (Fig. 17). Flip open the triangle formed and press. Trim away the excess fabric from behind the triangle, leaving a 1/4” seam allowance (Fig. 18).
Place another 2 1/2” F square on the right side of the 2 1/2” x 4 1/2” G strip, right sides together (Fig. 19). Sew across the diagonal of the square from the upper left corner to the lower right corner (Fig. 19). Flip open the triangle formed and press. Trim away the excess fabric from behind the triangle, leaving a 1/4” seam allowance to make one Unit 7 strip (Fig. 20).
Repeat Steps 14-15 to make eighteen Unit 7 strips total.
20 Make 18 units
Repeat Steps 14-15 and refer to Figures 21-22 for fabric identification, placement, seam direction and orientation to make twelve Unit 8 strips and six Unit 9 strips.
21 Make 12 units
22 Make 6 units
Follow Figure 23 and sew together six assorted unit strips lengthwise to make one Block Four strip. Repeat to make six Block Four strips total.
23
Make 6 blocks
Sew one Block Four strip to the right side of one Block Two square.
Sew one 1 1/2” x 12 1/2” K strip to the right side of the Block Four strip to make one Place Mat #1 (Fig. 24).
Repeat Steps 19-20 to make three Place Mat #1’s total.
Figure 24 Make 3 units
Sew one Block Four strip to the right side of one Block Three square.
Sew one 1 1/2” x 12 1/2” K strip to the right side of the Block Four strip to make one Place Mat #2 (Fig. 25).
Repeat Steps 22-23 to make three Place Mat #2’s total.
3 Place Mat Layout #2 K
Prepare backings using three 16” x width with fabric pieces. Press backings well and trim the six backings to 20” x 16”.
Layer place mat tops, battings and backings. Baste layers together.
Quilt as desired.
Trim layers even with place mat tops squaring corners.
Join four 2 1/2” D binding strips with diagonal seams. Press seams open. Cut the strip into two equal pieces. Attach binding to one Place Mat #1 and one Place Mat #2 using your favorite method.
Join four 2 1/2” E binding strips with diagonal seams. Press seams open. Cut the strip into two equal pieces. Attach binding to one Place Mat #1 and one Place Mat #2 using your favorite method.
Join four 2 1/2” F binding strips with diagonal seams. Press seams open. Cut the strip into two equal pieces. Attach binding to one Place Mat #1 and one Place Mat #2 using your favorite method.
Make a label and sew to the back of each place mat.




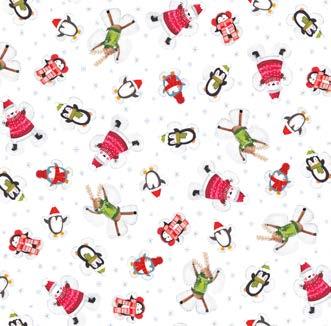


Fabric Collection by Sally Darby for P&B Textiles
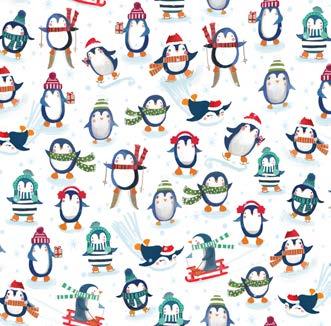



used in both projects †Backing