3 minute read
Work In Progress


PART 2 OF A 3 PART SERIES
Karen’s kitchen reno is well underway. The space looks chaotic right now, but behind the scenes was plenty of careful planning.
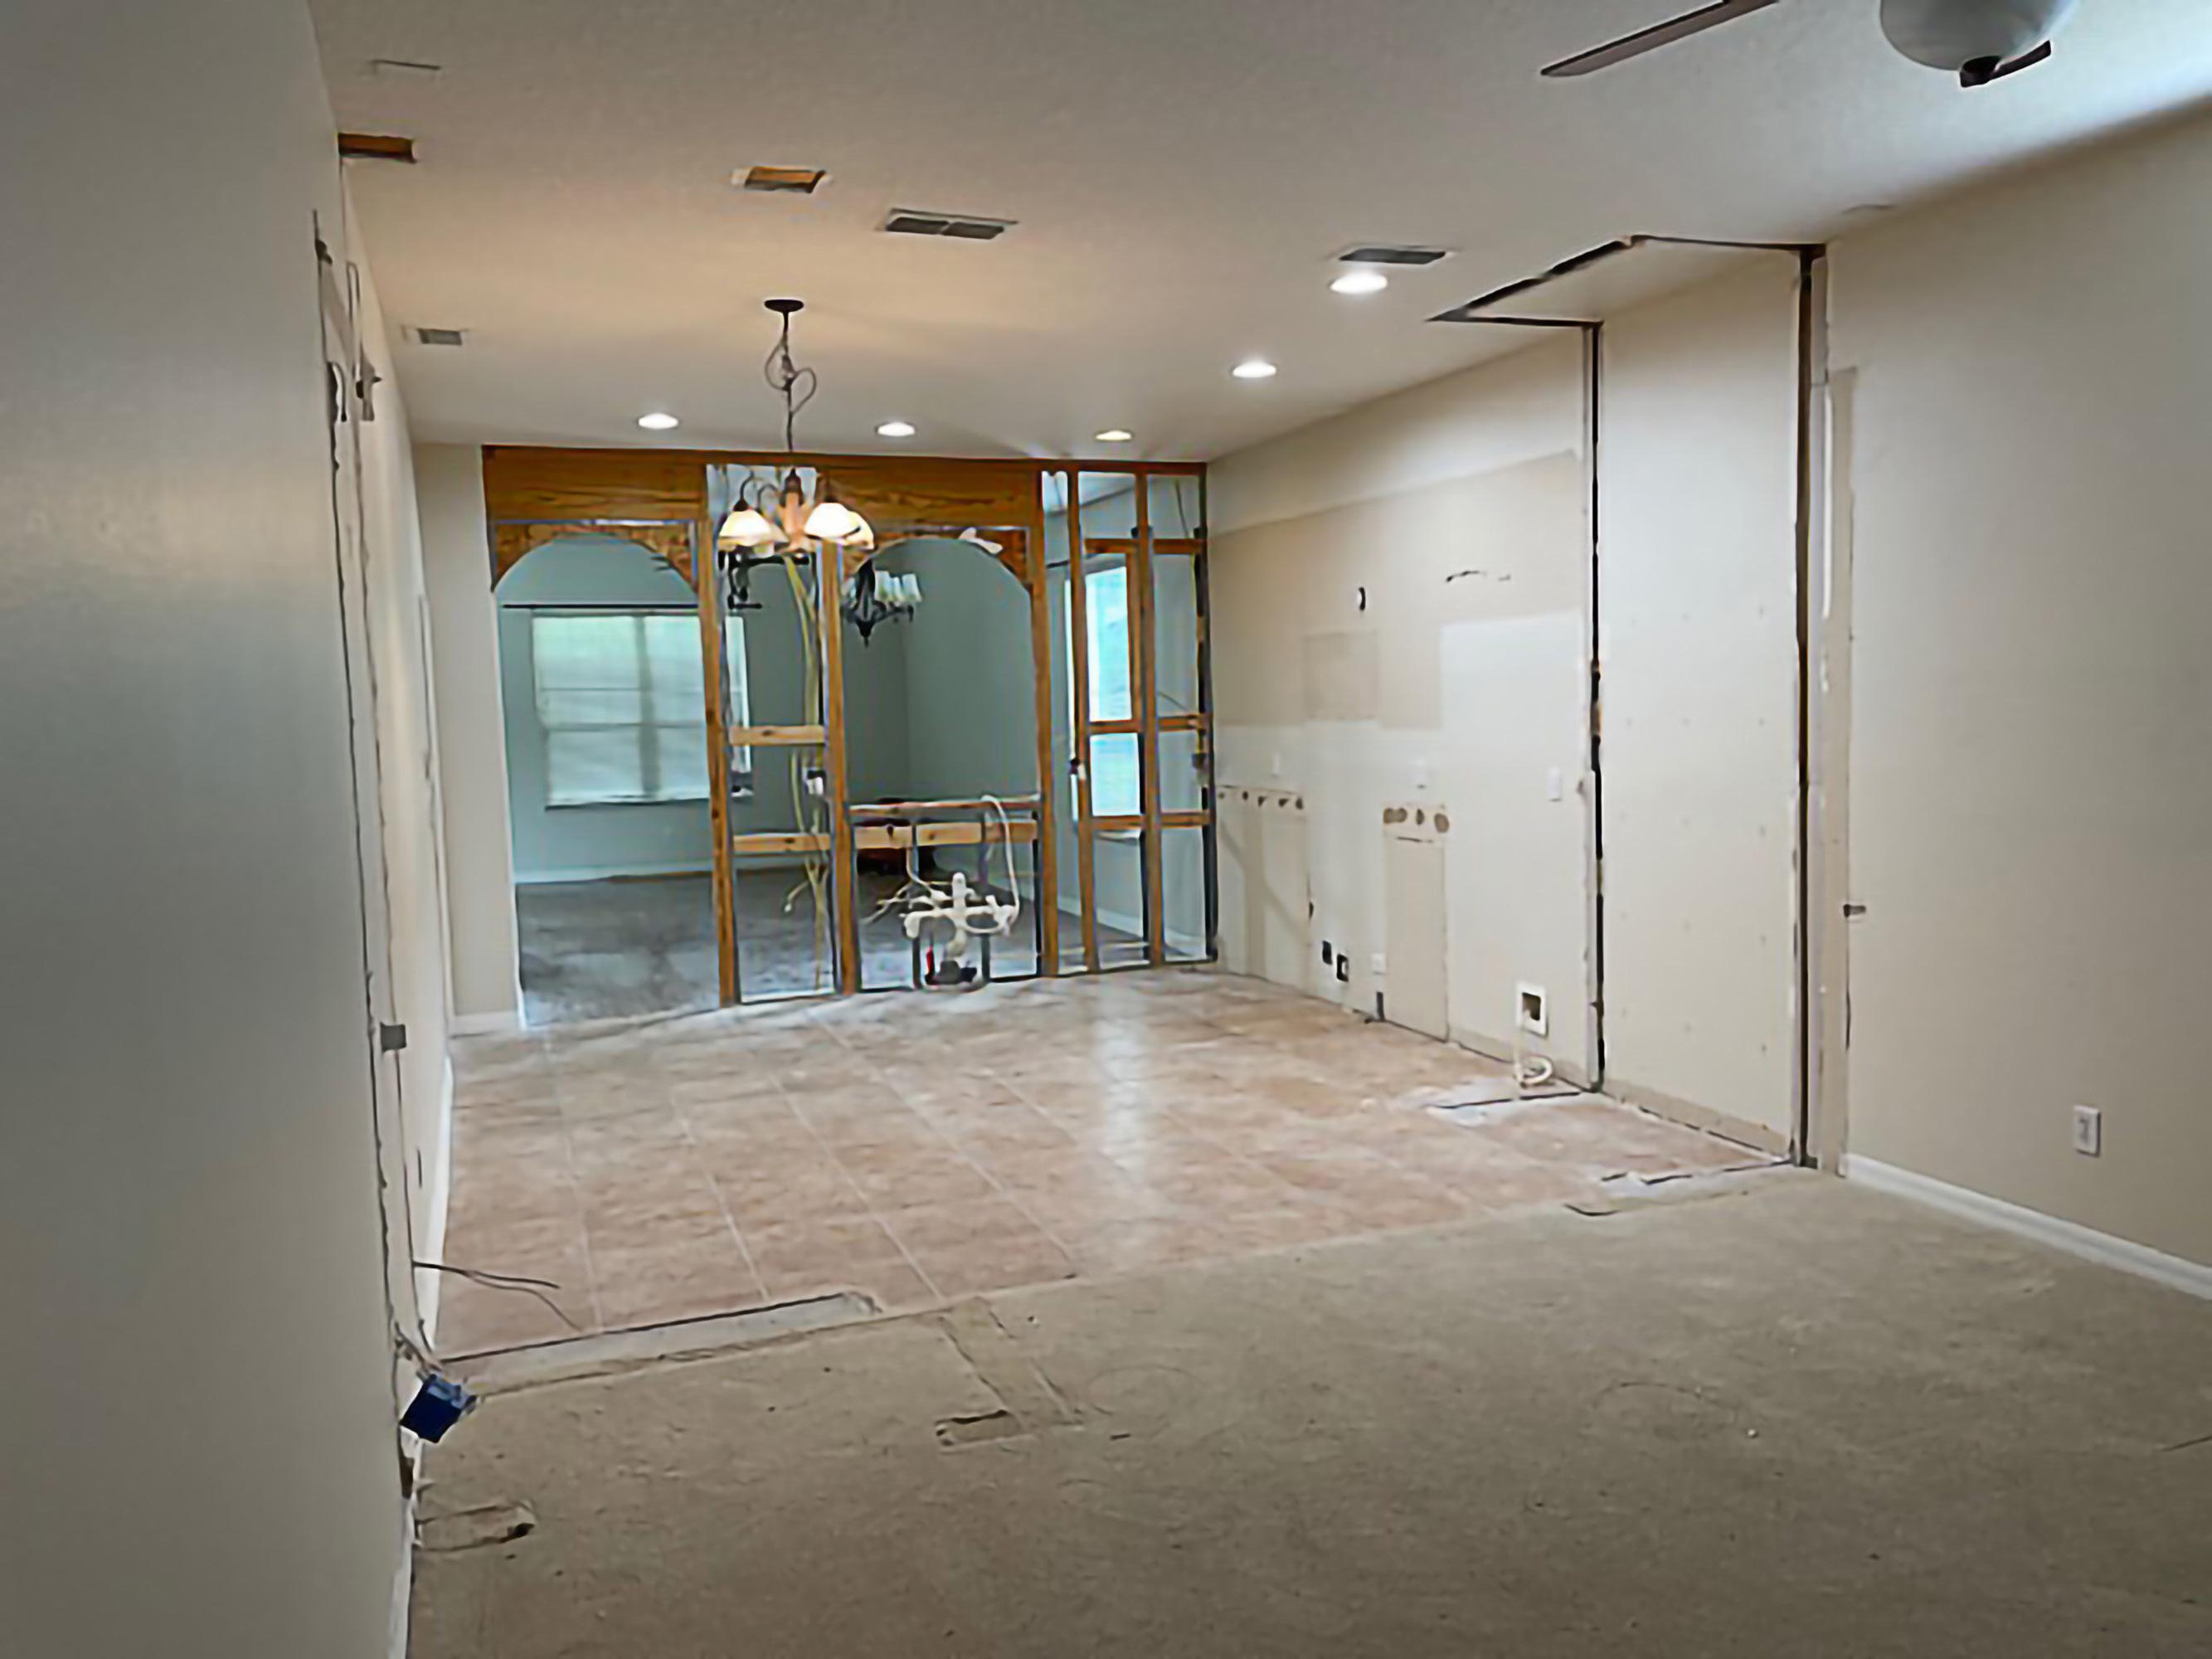
Demolition! Time to get dirty and dusty. Luckily, Karen hasn’t offcially moved into the house yet, so we have the house to ourselves to make as much of mess as we need.
We begin by removing the cabinets and the appliances. The two closets that separate the ex space in the back from the kitchen are now completely gone, opening the space to accommodate the new enlarged kitchen and dining space. The wall that separates the kitchen from the family room will be evaluated to see if we can tear part of it out, further opening up the space.
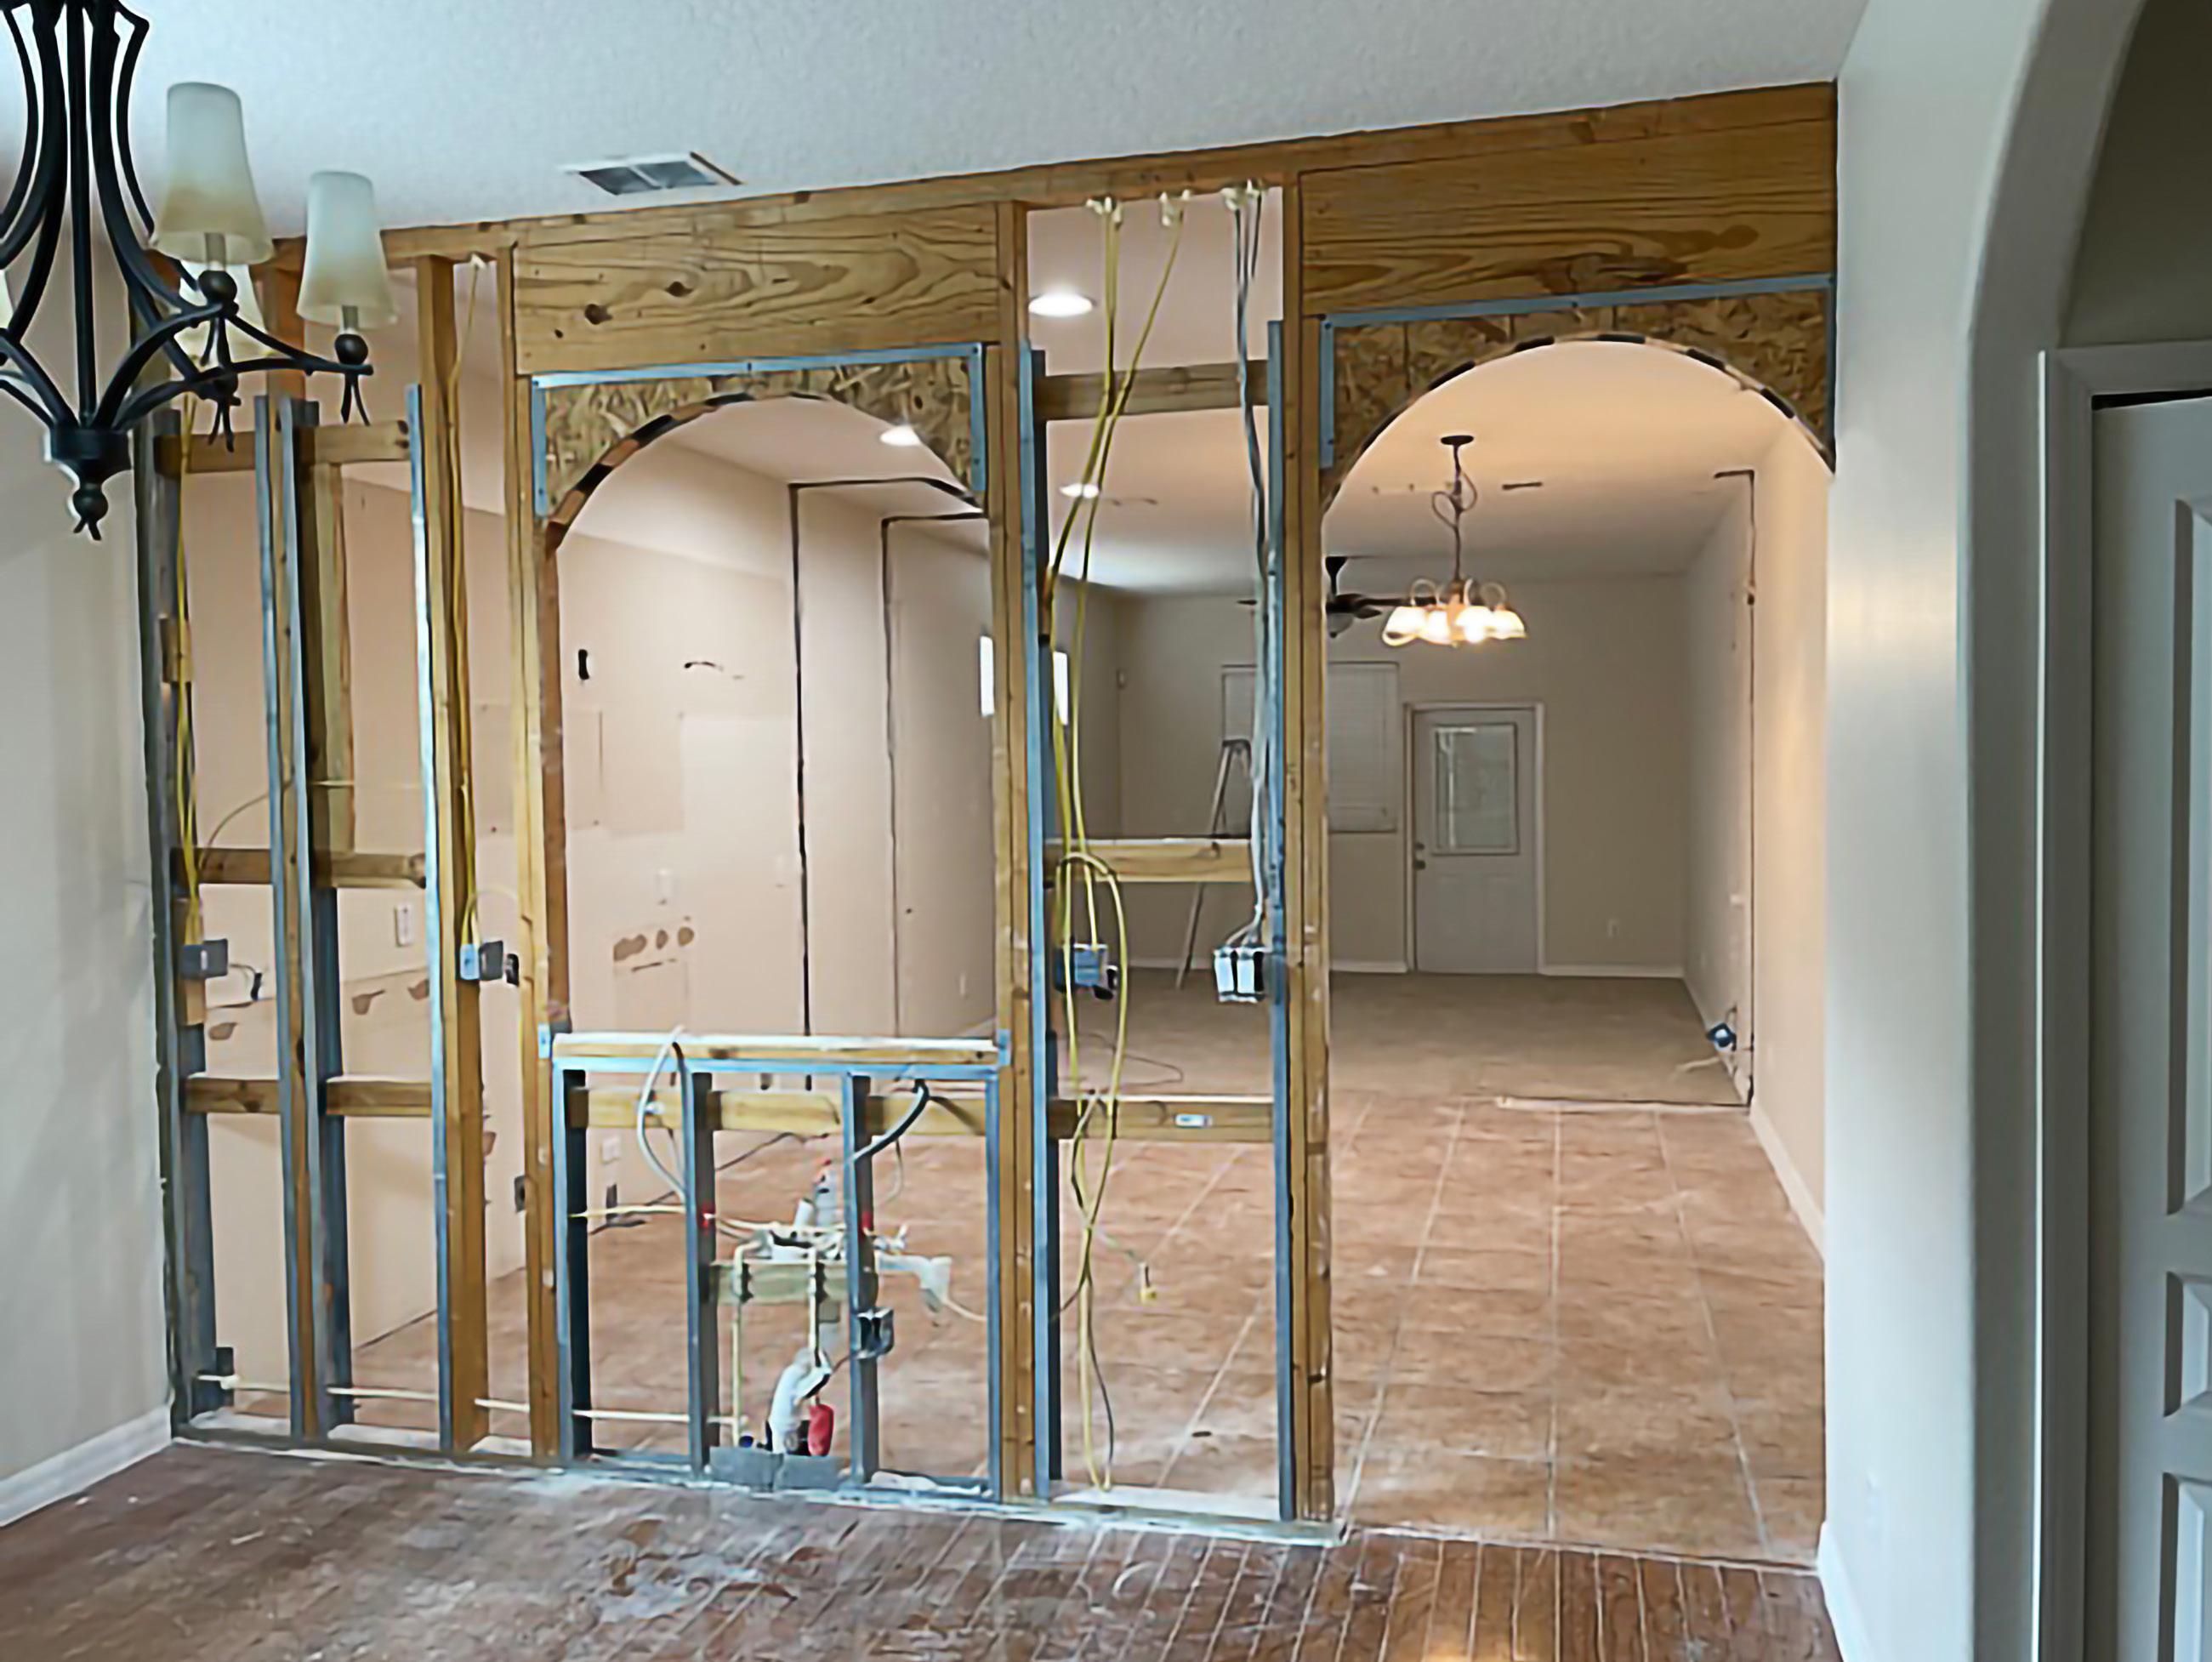
The down-to-the-studs demolition of Karen's kitchen
So, how did we get from paper plans to demolition? With a lot of questions and thinking ahead: How much and how often to you use the kitchen? Which parts do you use most? How do you want the kitchen to flow? Island in the center or not? Seating options in the kitchen, or only in the dining
area? How much storage do you need? Any lighting preferences? Special appliances or items that aren’t typically found in a kitchen? From these answers, we design several floor plans to explore different ways the space can work.
Karen is downsizing from a larger home to this smaller home—but downsizing is never as simple as it seems. We all have a lot of stu , even when we purge! So, one of Karen’s criteria was to have plenty of storage. We were able to implement nine feet of wall storage and a large pantry.
Karen also anticipates that her kitchen will be where her friends and family tend to hang out, since that’s common in many kitchens. This particular kitchen area is not very wide, but we were still able to provide some seating around the island for informal dining and gathering space. In using the additional room in the back, we were able to create a much larger kitchen and dining space for friends and family to gather but still be a part of the “kitchen gang.”
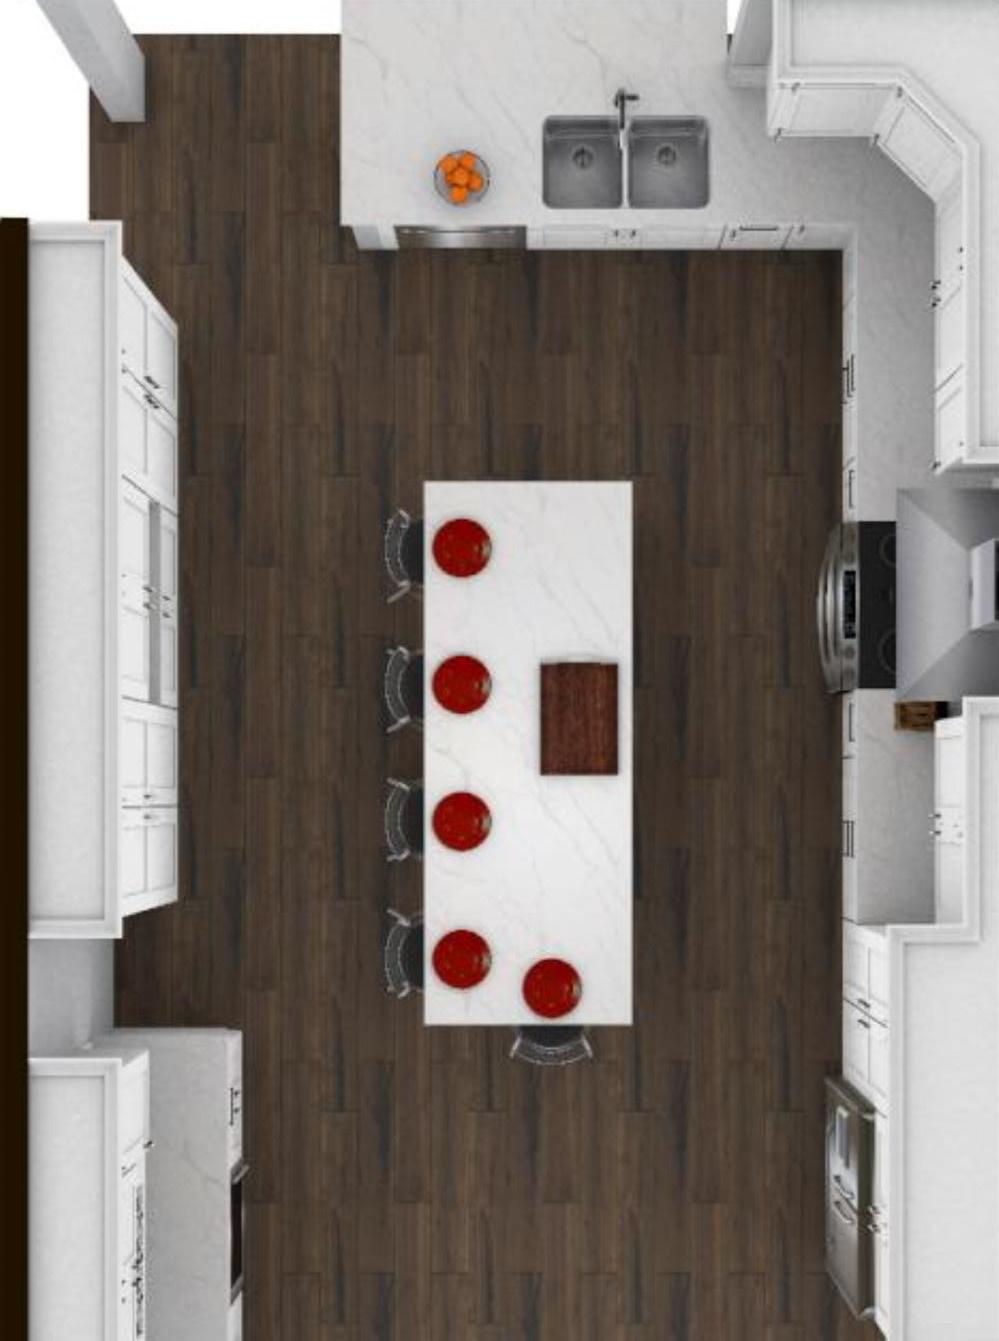
The computerized floor plan mockups of the renovation.
Once we have our final plan in place, we start shopping around for appliances that fit our needs, and we have a kitchen cabinet company draft several elevations. When we have the elevations, we can still tweak the plans to better suit the client’s individual needs. One of Karen’s wishlist items for the cabinetry was a bar cabinet added next to the dining area to accommodate two beverage coolers and bar storage.
From there, we home in on the final selections for flooring and cabinet colors and finishes. The countertops, paint colors, and lighting will be selected shortly thereafter. And of course, we finish our selection process off with finding the perfect furniture!
I am the type of the designer who takes the extra time to walk my clients through every step of the process. Selections are only made after careful consideration and weighing all their options, because I want my clients to truly love what they have selected. Even if they aren’t quite able to visualize the finished project in their mind, I want them to feel comfortable and excited in the process, and to trust that I am keeping their personal taste at the forefront of the design.
We look forward to showing you the finished project! Stay tuned!
Marilou Stones, ASID, Owner of Stones Design. She has been a licensed interior designer for 35 years, with 8 of those years spent working in and around Winter Garden.
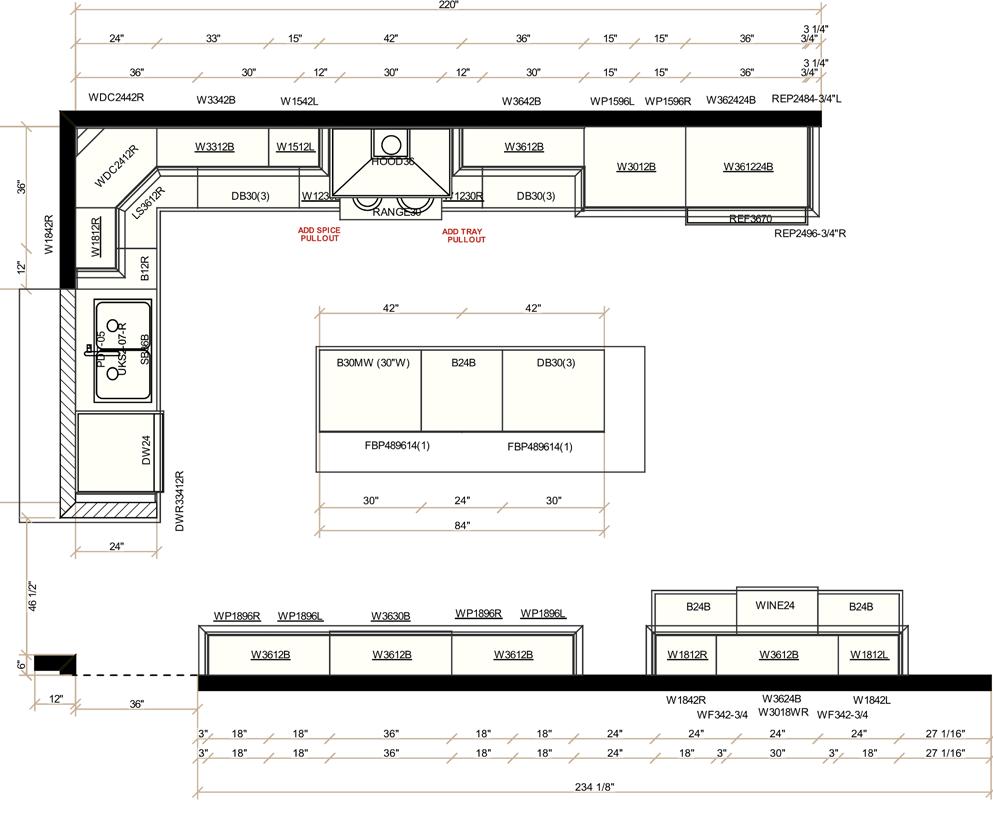
Blueprint measurements of Karen's kitchen reno