
2 minute read
Start printing example


Printing G-code objects
Now that your 3D printer has been adjusted and the filament is loaded, we begin the first print. In “3D Print Control”, open the tab “Open” and select the print example “chip-ft.gcode” from the directory c:\Programme\3D-Print-Control\ Samples.
Then the print object is opened and is displayed in the print preview. You can use the program functions on the left edge of the window to place the object on the printing bed, move it or change the display in the print view. You will also find the “Printing Statistics” for the object on the right side of the window. The estimated printing time or filament consumption, for example, are displayed here.

Now you only have to click “Print” and the fischertechnik 3D printer starts printing the example file.
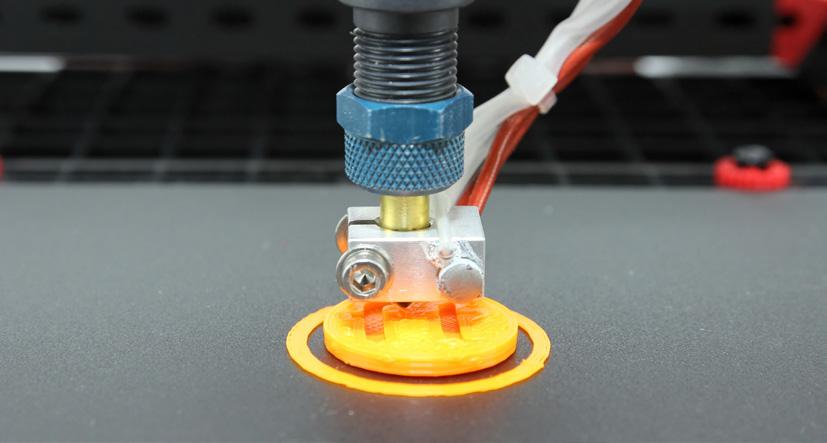
First a ring around the actual object is printed. This ensures that the filament is flowing properly when the actual object is printed. If the filament does not adhere to the printing plate, the needle tip is set too high above the printing plate. If the filament is pressed completely flat or it cannot be discharged from the nozzle at all, the printing head needle tip is set too low. In both cases, you can manually readjust the height during printing by slightly raising or lowering the Z-axis at one of the drive chain gears to correct the distance (without removing the chain). Ideally, the filament will be pressed lightly to the printing plate (see illustration).
Note:
If the printing does not function as expected or the print result is flawed, possible errors and how to remedy them are presented in the section “Troubleshooting”!
Removing printed object
To remove your object after printing, first let it cool down and then try to carefully loosen it by hand. If it is too difficult to move the object, please use a spatula to carefully loosen it from the printing bed.
Printing STL objects
To open an STL file, go to the tab “Open” in “3D Print Control” and select the print example “chip-ft.stl” from the delivered CD. Before you can print the STL file, first it has to be prepared with a “slicer”.

This slicer divides the object into thin slices and saves them as G-code. To start the slicing process, click the tab “Slicer” and then the item “Slice with Slic3r” at the right of the program window.

Then the “3D Print Control” begins to convert the STL file and displays it in the preview window shortly thereafter. As with the G-code, now you only have to click “Print” and the fischertechnik 3D printer starts printing.

Now you can see the current progress of the printing process in the “Print Preview” and can follow the printing head in the preview window.


