Quality Control with AI 9V

Documentation
Art.-No. 568416
Documentation Quality Control with AI 9V 10.02.2023 1 Contents Introduction .............................................................................................................................................2 Quick start................................................................................................................................................2 Controller interface...................................................................................................................................3 Web interface...........................................................................................................................................3 Set-up and circuit diagram ........................................................................................................................4 Accessories...............................................................................................................................................5 Workpieces ..............................................................................................................................................6 Components.............................................................................................................................................7 Program sequence ....................................................................................................................................8 Programming – example program with ROBO Pro Coding...........................................................................9 Own AI models .......................................................................................................................................11 Installation 11 Training models 12 Uploading models 13 Exercises, experiments and tasks.............................................................................................................14
Documentation Quality Control with AI 9V
Introduction
The training model quality control with AI is used for the automated sorting of differently coloured workpieces with different processing steps. Components with identical geometry but a different appearance are fed to a camera via a conveyor belt and then separated according to their appearance. The image taken is analysed with the aid of artificial intelligence. The conveyor belt is moved by an encoder motor. The workpieces are ejected using pneumatic cylinders that are assigned to the relevant storage positions and activated using solenoid valves. Multiple light barriers check the flow of workpieces, and whether the workpieces are in the storage positions.
In this case, the term artificial intelligence (AI for short) is understood to be a complex algorithm which can solve a special task e.g. which features can be seen on a component. The special feature is that the algorithm has learned the solution path independently beforehand, i.e. so-called machine learning (ML). This makes it possible for the artificial intelligence to analyse images it is not familiar with.
Quick start
Supply voltage to the model using a 9V 2.5A power supply, art. no. 505287.
Then start the TXT 4.0 Controller by pressing and holding the ON/OFF button. After the controller has started, the program Sorting_Line_AI is automatically loaded.
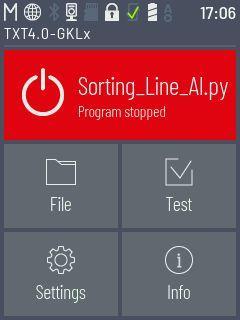
If no program is loaded, select Sorting_Line_AI from “File” and load it via “Load”.
Start the program by briefly pressing the program start button.
Now you can place a workpiece in the workpiece receptacle on the left. The sorting line now sorts this workpiece into the corresponding sorting bay on the basis of colour and detected properties. A distinction is made between 3 OK (OK) bays and one NOK (NotOK) bay.
10.02.2023 2
Documentation Quality Control with AI 9V
Controller interface
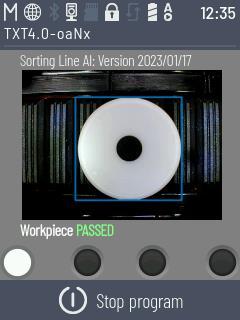
The program of the training model quality control with AI provides a controller interface via which the program is started and the operate state can be viewed.
Start program button
Camera image Result
Zustand
Storage bay
Stop program button
Web interface


In addition, there is a web interface available where the system results can be viewed.
Connect your PC to the same network as the TXT controller of the model. Connection of the TXT 4.0 Controller to WiFi is described in the controller’s operating manual, see https://www.fischertechnik.de/txt40controller. Start your web browser and open the following link:
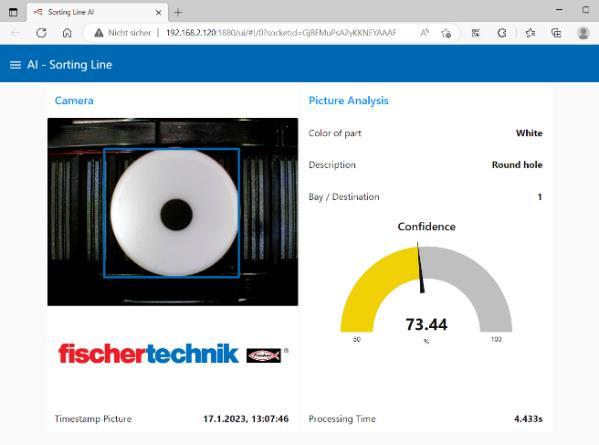
http://txt40.local:1880/ui
If this does not work or you are operating several TXT 4.0 Controllers, navigate to the IP address of your controller with port 1880 plus “/ui” in your web browser. Thus for example:
http://192.168.178.123:1880/ui .
You can view the underlying Node-RED programming interface by leaving “/ui” off. If the Node-RED flow is not installed, the flow can be imported via the burger menu on the top right under the import tab “Select file for import”. For this, open the file “flows.json” which was supplied in the ROBO Pro Coding example.
10.02.2023 3


Documentation Quality Control with AI 9V 10.02.2023 4
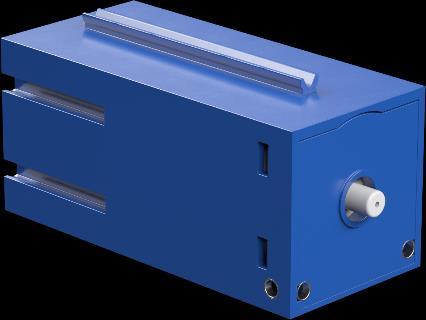
3 1 10 11 12 13 9 8 7 6 4 2 5
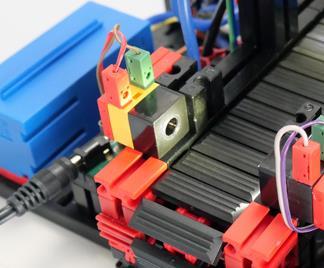
Set-up and circuit diagram
Documentation Quality Control with AI 9V
Accessories
The training model quality control with AI contains the following accessories:
10.02.2023 5
Name Article number Quantity USB cable 134867 1 Workpiece white 174622 / 174623 8 Workpiece red 174624 / 174625 8 Workpiece blue 174626 / 174627 8 Sticker sheets for workpieces 197417 for 24 workpieces (workpieces are already delivered with stickers) 1 Nr. Id. Funktion Function Eingang/Input Ausgang/Output 1 Fototransistor Eingang Phototransistor Input I4 2 Kamera Camera USB1 3 Encodermotor Encoder motor M1 | C1 4 Kompressor Compressor O3 5 LED-Fotolicht LED-Photolight O4 6 Ventil Auswurf Weiß Valve Discharge White O5 7 Ventil Auswurf Rot Valve Discharge Red O6 8 Ventil Auswurf Blau Valve Discharge Blue O7 9 Ventil Auswurf NIO Valve Discharge NOK O8 10 Fototransistor Weiß Phototransistor White I8 11 Fototransistor Rot Phototransistor Red I7 12 Fototransistor Blau Phototransistor Blue I6 13 Fototransistor NIO Phototransistor NOK I5
Documentation Quality Control with AI 9V
Workpieces
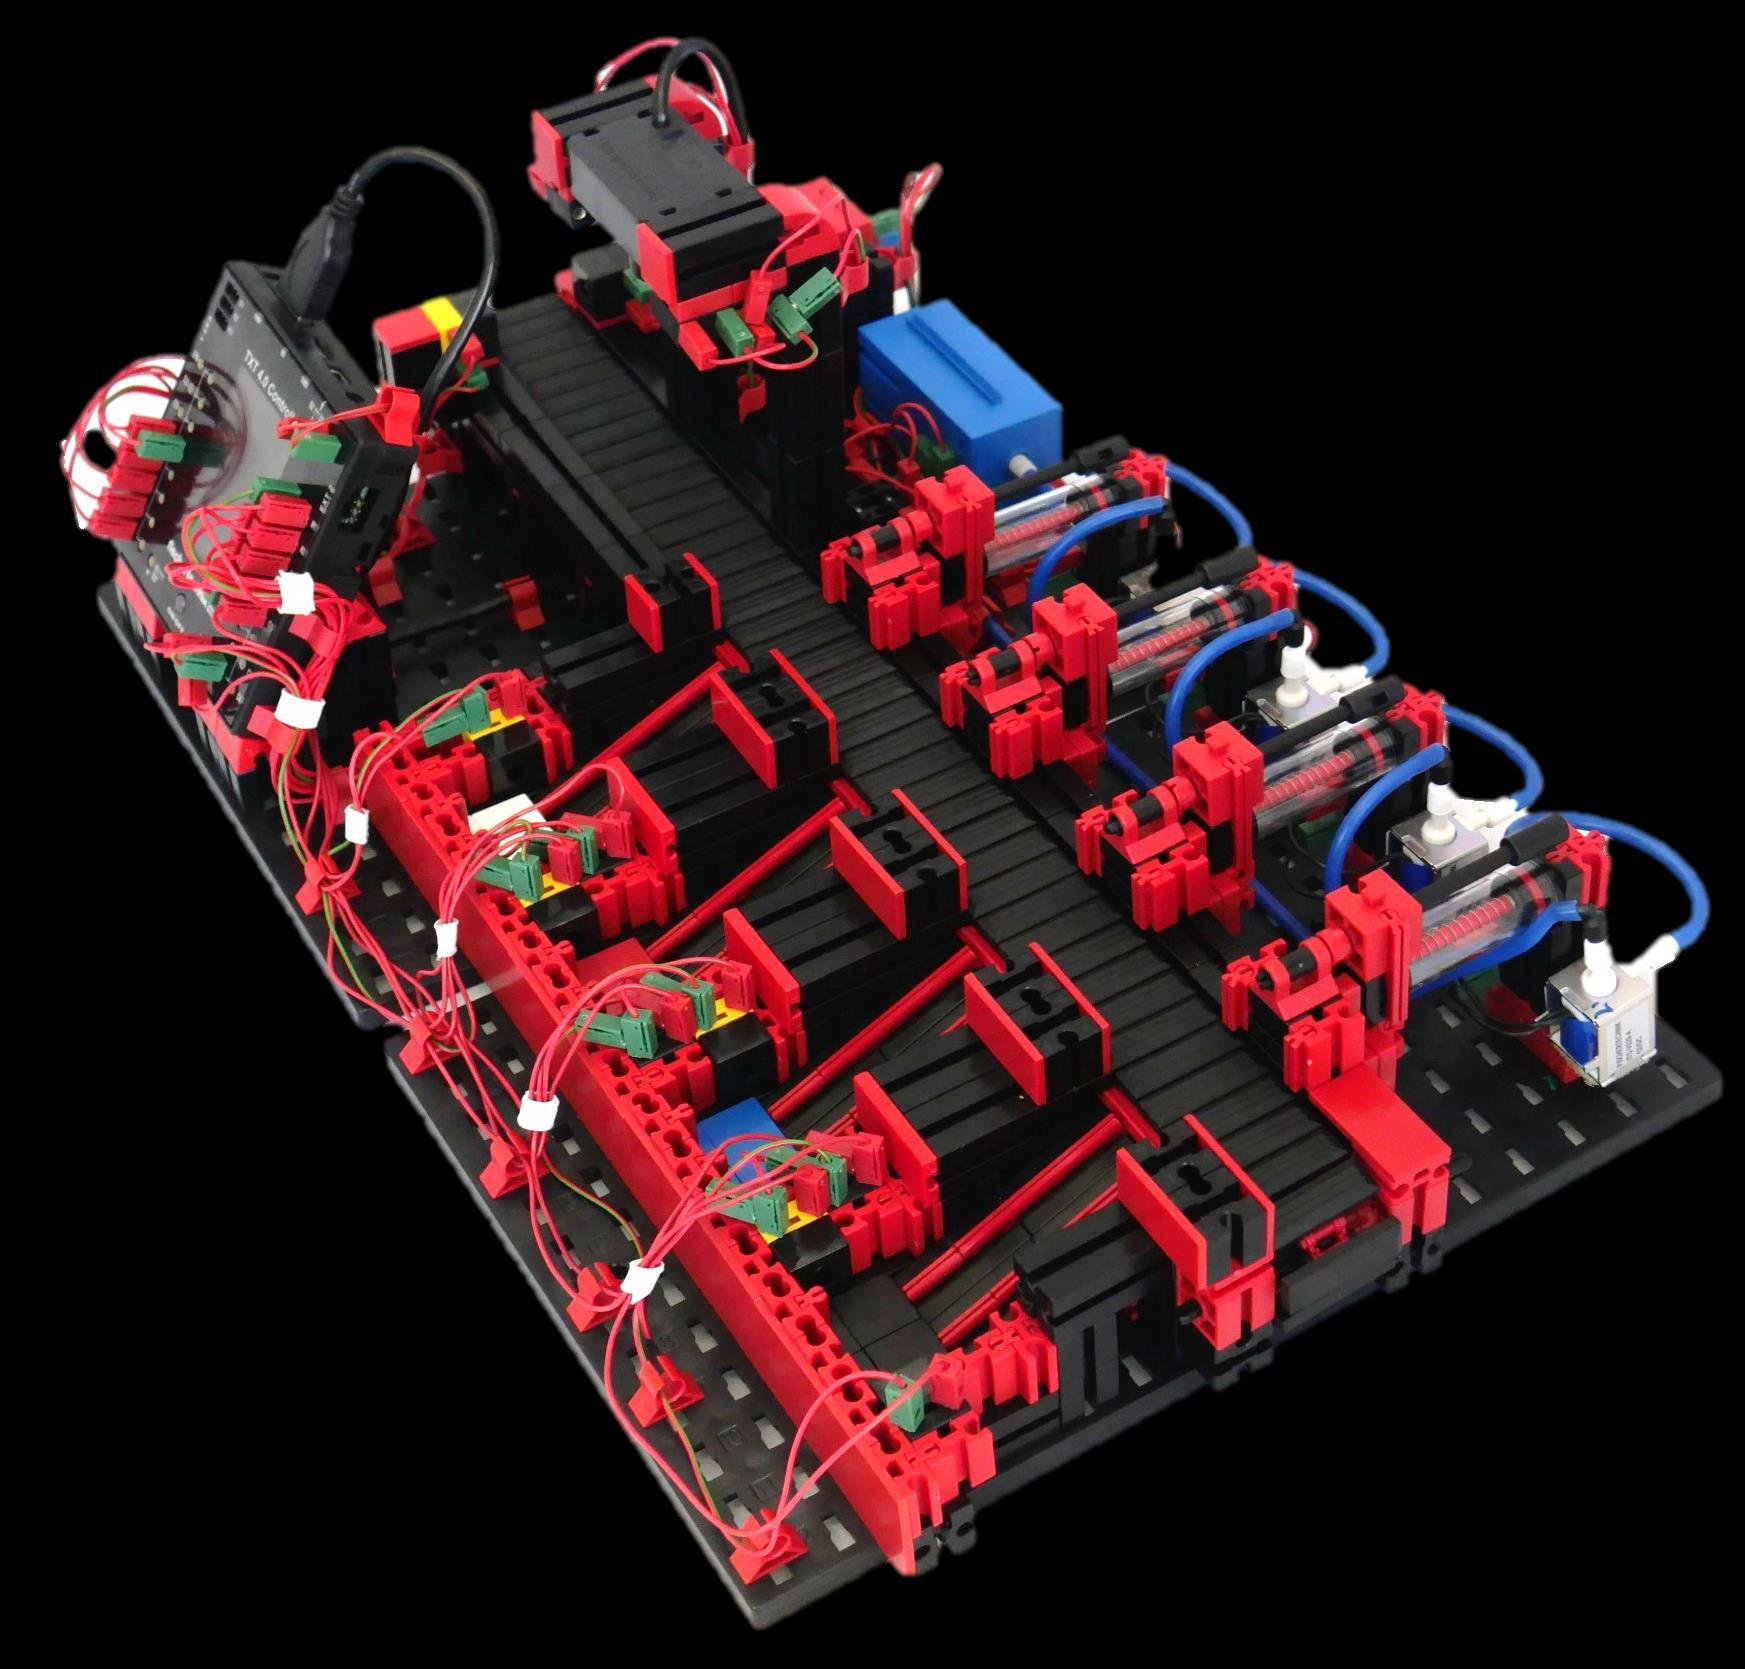
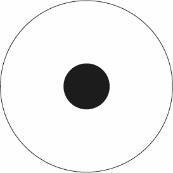
There are 3 OK components provided:
White with bore hole
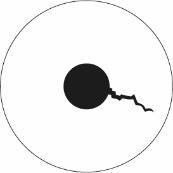
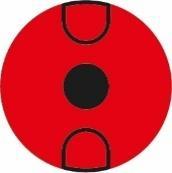
Red with two milled pockets
Blue with two milled pockets and bore hole
OK or PASSED means that the component is “OK”.
NOK or FAILED means that the component is “not OK”.

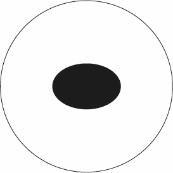
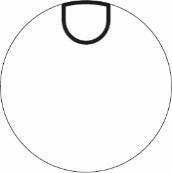
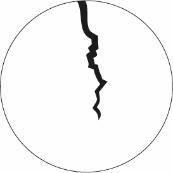
There are 5 NOK components provided per colour:
White:
With oval bore hole
With bore hole and one milled pocket
With crack
With one milled pocket
With bore hole and crack
Red:


With bore hole and two milled pockets
With bore hole and one milled pocket
With crack
With one milled pocket
With two milled pockets and crack
Blue:


With two milled pockets
With bore hole and one milled pocket
With crack
With one milled pocket
With two milled pockets, bore hole and crack
10.02.2023 6
Documentation Quality Control with AI 9V
Components
9V encoder motor
The sorting line conveyor belt is moved by a 9V encoder motor. This is a compact permanent magnet motor with an operating voltage of 9V. The encoder installed provides direct feedback about the rotor movements in order to carry out movements precisely and detect faults early.

Phototransistor
The phototransistor is used in connection with a LED as a light barrier. The two elements are assembled opposite one another for this. The light from the LED impinges on the phototransister so that a measurable voltage is applied to it depending on the brightness. The influence of ambient light can be avoided by using an ambient light protection cap.
Compressor
The compressor generates an air pressure of 0.7bar at the output. Pneumatic components such as cylinders are operated using the generated air pressure. At 9V, this compressor requires a current of 200mA.
3/2-way solenoid valve
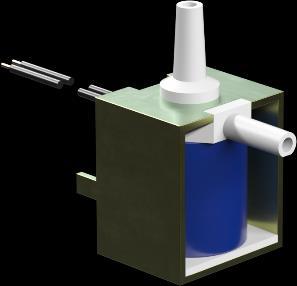
3/2-way solenoid valves are used to control the pneumatic cylinders. These switching valves have three connections and two switching states. The switching processes are carried out by a coil that works against a spring. When voltage is applied to the coil, the sliding core of the coil moves against the spring due to the Lorentz force, opening the valve. In this case, opening means that the compressed air connection is connected to the cylinder connection. If the voltage drops, the spring presses the core back again and closes the valve. In this position, the cylinder connection is connected with the ventilation.
Pneumatic cylinders
The workpieces are discharged along the sorting line with colour detection by three pneumatic cylinders which are controlled using 3/2-way solenoid valves. In pneumatic cylinders, a piston divides the volume of the cylinder into two chambers. A pressure differential between these two chambers results in a force acting on the pistons and causing them to move. The movement corresponds to a change in the volumes of both chambers.
10.02.2023 7
Program sequence


Workpiece receptacle
If there is no workpiece in the receptacle, the light barrier is not interrupted. When a workpiece is inserted, the light barrier is interrupted and then the conveyor belt is moved forward slowly. When the workpiece leaves the light barrier, the conveyor belt is stopped. Then the conveyor belt is only moved with defined distances. Since the precise position of the workpiece on the conveyor belt is now known, the workpiece is moved under the camera.
Image analysis
The camera takes an image of the workpiece for image analysis.
For this to be able to be analysed with the machine learning model, this model is initialised and then analysed. The result is a list of the properties detected. This list contains:
1. Confidence 0-1 (0-100%)
2. Position [TopX, TopY, BottomX, BottomY]
3. Type e.g. [CRACK,BOHO]
The first element in the list is the element detected with the greatest probability. Therefore, only this is considered in this application. Then the colour of the workpiece is detected. Now colour and property are compared and classified according to the OK and NOK specifications.
Sorting
Based on the detected properties, the workpiece is classified into one of the 4 bays. White OK, Red OK, Blue OK and NOK.
Based on predefined values, the workpiece is moved by the conveyor belt to the corresponding bay and its pneumatic cylinder is extended.
Documentation Quality Control with
9V 10.02.2023 8
AI
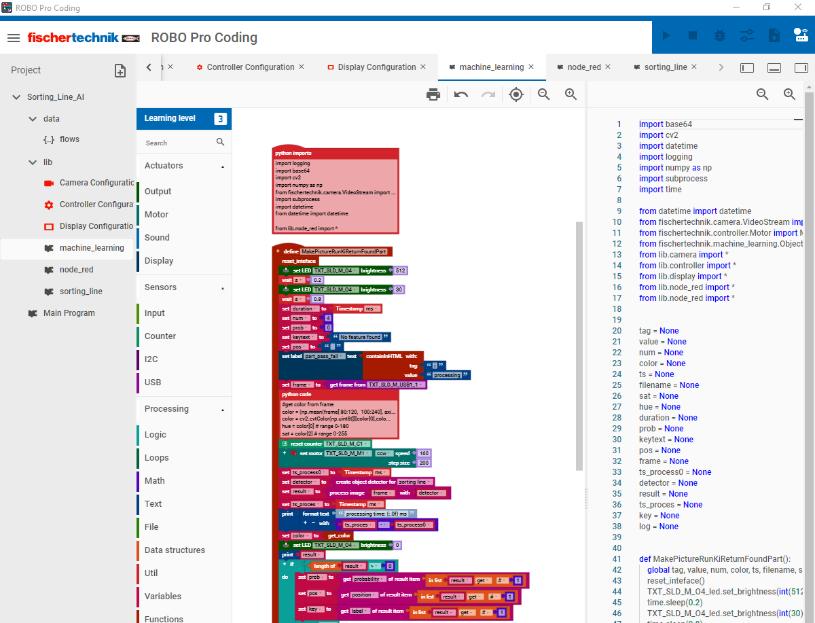
Programming – example program with ROBO Pro Coding
The operating manual for the fischertechnik TXT 4.0 Controller and the ROBO Pro Coding programming environment are described on this page: https://www.fischertechnik.de/txt40controller
During production of the model, a program “Sorting_Line_AI” is copied to the TXT 4.0 Controller and only needs to be started. Since the example program is subject to ongoing development, we recommend always copying the current version of the programs to the TXT 4.0 Controller. This section describes how to update the program. The ROBO Pro Coding app and an internet connection are required for the update.
Proceed as follows:
1. Start ROBO Pro Coding and import the relevant program, e.g. “Sorting_Line_AI” from the fischertechnik Gitlab:
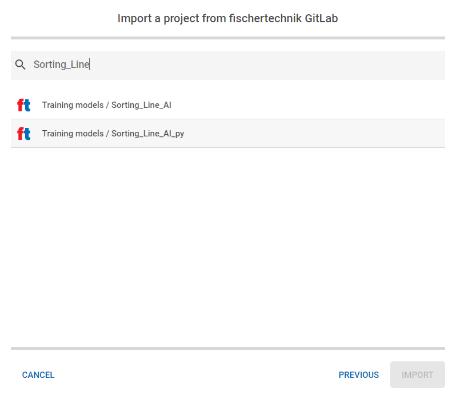
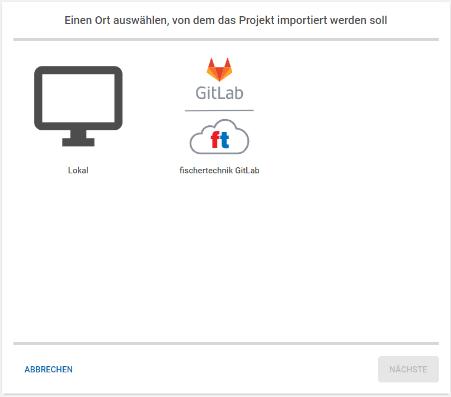
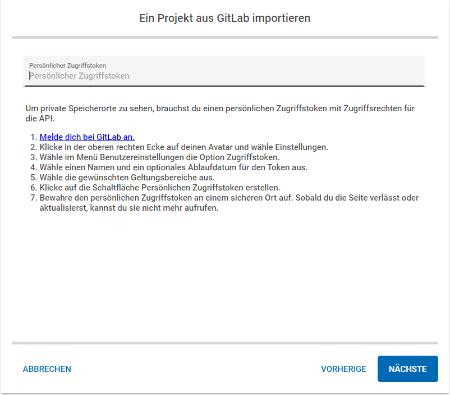
Documentation Quality Control with AI 9V 10.02.2023 9
Documentation Quality Control with AI 9V


Python example program Sorting_Line_AI.ft

10.02.2023 10
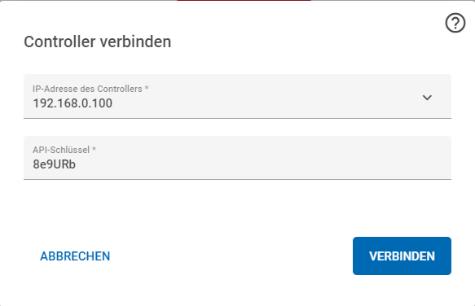
2. Connect the ROBO Pro Coding app and TXT 4.0 Controller. The API-key is unique per TXT 4.0 Controller and can be found under Settings -> API-key.
3. Copy the program to the TXT 4.0 Controller
Documentation Quality Control with AI 9V
Own AI models
The current AI project which can be used to prepare your own AI models can be found here: https://git.fischertechnik-cloud.com/ml/machine-learning
Installation
The basis of the algorithm used is Python 3.9.13 with tensorflow 2.5.0. Installation requires a Windows10 64bit system. Next, all dependencies and programs are installed.
First copy the AI project (see link above) to your PC. Note the path to this work folder so that you can use it later.
- Download Python 3.9.13 and install it.
- Download Microsoft Build Tools for C++ and install it. To do this, open the installer and select “Desktop development with C++”.
Open a terminal and enter:
python -m pip install upgrade pip
Some commands require somewhat longer to be executed. Commands have always been completely executed when “C:path-of-user>” appears.
After the command has been completed, close the terminal and open it again. Enter the following command.
cd “path to work folder“ pip install -r “requirements.txt“ Now all dependences should have been installed.
To test this, enter the following commands:
cd test
python create-model.py -d “test-dataset“
python test-image.py -d “build/test-dataset“ -i “test-dataset/triangle/triangle01.png
If the installation was successful, an image of a triangle should appear. The test can be ended by pressing Ctrl+C. Now enter: cd ../ to change to the higher-order directory.
10.02.2023 11
Documentation Quality Control with AI 9V
Training models
After installation, you can train your own model. A dataset of images must be created for this. We recommend creating 100-200 images per class to be distinguished. Subsequently, labelimg is entered to start LabelImage in PowerShell. The images are classified manually in this program. To do this, open a directory with the dataset from “jpeg” images.
The images in the dataset should have the same resolution as the images to be analysed later. The fischertechnik USB camera creates images in the format: 240px / 320px.
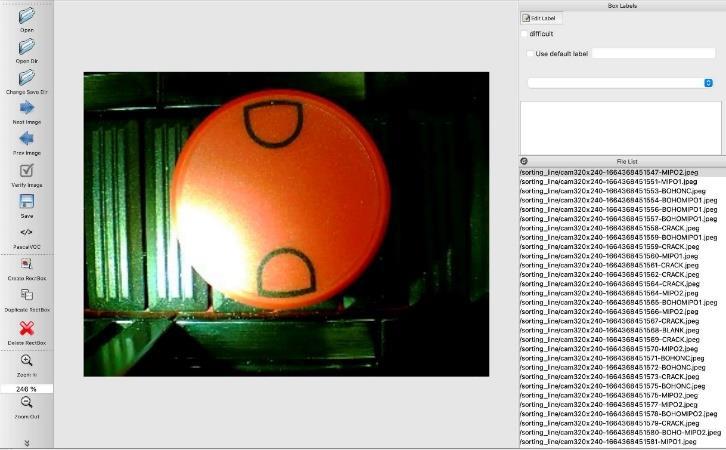
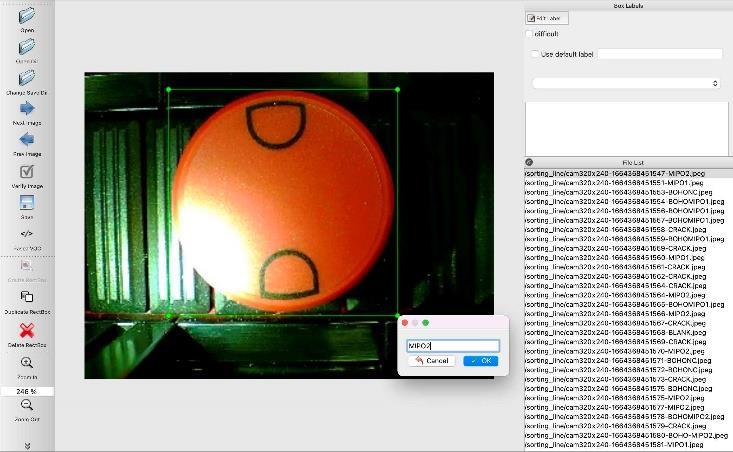
Mark an object and save the labelling file as Pascal/VOC.
Classify all images according to this principle.
To combine the labelling files, carry out the following command in the terminal.
python pascal-to-csv.py -d “Directory of the dataset”
After this has been executed, a “dataset.csv” file should exist. The data can now be trained in a model.
To do this, carry out the following commands in the terminal: python create-model.py -d “Directory of the dataset”
Training this model can take between 1 and 6 hours.
After the model has been trained, it can be applied to any image by using the following command: python test-image.py -d “Directory of the model“ -i “Path to the image“ or:
python test-camera.py -d “Directory of the model“
10.02.2023 12
Documentation Quality Control with AI 9V
Uploading models
In order for it to be used, your own model must be copied to the TXT 4.0 Controller. There are two possibilities here:
Via the WEB server of the TXT 4.0 Controller:
Make sure that the PC and controller are in the same network. Open your WEB browser (Chrome is recommended) and enter txt40.local or the IP address of the TXT 4.0 controller. You will find this on the controller under “Info” -> “WiFi”.
Navigate to “machine-learning”, then to “object-detection” and create a new folder by clicking the plus icon (+). Open this and upload your model.tflite and your labels.txt files to this folder using the plus icon (+).
Via SSH:
- Download WinSCP and install it.
Start WinSCP. Make sure that the PC and controller are in the same network. Under the server address, enter the IP address of your controller. You will find this on the controller under “Info” -> “WiFi”. The user name is “ft” and the password is “fischertechnik”. Navigate in the left-hand window to the model you have created and in the right-hand window to this path:
/opt/ft/workspaces/machine-learning/object-detection
Create a new folder by pressing “f7” and open this.
Then mark model.tflite and labels.txt in the left-hand window and select “Upload” via right-click. Confirm the upload request. You can now close WinSCP.
10.02.2023 13
Exercises, experiments and tasks
Documentation Quality Control with AI 9V 10.02.2023 14
Documentation Quality Control with AI 9V
Classifying workpieces (45min)
The training model quality control with AI is equipped with a pre-trained AI model. This distinguishes workpieces on the basis of colour, properties and faults.
Material:
• All workpieces
Implementation:
All workpieces are gradually sorted by the sorting line. Log in a suitable way which workpieces are detected, how these are sorted and which are detected as faults.
10.02.2023 15
OK-RED OK-BLUE OK-WHITE NOK
Documentation Quality Control with AI 9V
Adaption capabilities of machine learning models (30min)
Visual image detection is a highly complex task in IT. In the conventional method, a programmer analyses the objects to be detected and sets up rules and features which he implements in very elaborate algorithms. Only the cases expected by the programmer can be detected. With machine learning, an artificial intelligence can be created that also detects new and unexpected situations.
Material:
• Workpiece without properties (rear of one of the workpieces delivered)
• Water-soluble black pen
Implementation:
A black pen is used to draw a crack on a workpiece. The workpiece is then analysed in the sorting line.
Record what you can observe and prepare a theory as to why the artificial intelligence can detect a completely unique crack.
10.02.2023 16
Documentation Quality Control with AI 9V
Understanding the example program (2h)
Artificial intelligence is very effective in analysing complex situations that are difficult to quantify. Simple features such as the colour can be analysed more quickly and reliably using conventional “rational” methods. The pre-trained artificial intelligence only outputs detectable properties, not the colour. Both properties are combined using conventional logical operators.


Material:
• PC with Robo Pro Coding
Implementation:
Work with the Robo Pro Coding program “Sorting_Line_AI” and find the place where the colour is analysed in the sub-program machine_learning. Find the places where colour and property are compared. The colour is represented as a number and the property as a string. Draw a simplified flow chart.
10.02.2023 17
Start End Draw
Apply AI Sort to OK apply Sort to NOK apply Take photo NOK OK
in component
Documentation Quality Control with AI 9V
Creating own rules (1h)
Artificial intelligence is very effective in analysing complex situations that are difficult to quantify. Simple features such as the colour can be analysed more quickly and reliably using conventional “rational” methods. The pre-trained artificial intelligence only outputs detectable properties, the colour is determined using in the conventional way.
Material:
• Workpieces
• Sorting line
• PC with Robo Pro Coding
Implementation:
Work with the Robo Pro Coding program “Sorting_Line_AI” and find the place where the colour and property are combined in the sub-program machine_learning. The colour is represented as a number and the property as a string. Experiment with different combinations. Change the program so that these workpieces are detected as OK:
• Red(2) and BOHO
• Blue(3) and BOHOMIPO1
• White(1) and BLANK
10.02.2023 18
Documentation Quality Control with AI 9V
Creating your own AI model (3-4h)
Artificial intelligence is not “programmed” in the conventional sense, rather it is trained. A program learns the correlations independently. A large dataset containing examples is required for training. These are classified by hand and then supplied to the program. Part of the dataset is used for training, the other part to check how successful the training is. The training of AI models is very calculation-intensive and therefore needs a very long time even on modern computers.
Material:
• Workpieces
• Sorting line
• PC with Robo Pro Coding, Python and OpenCV
Implementation:
Follow the instructions described in the documentation for training your own models. Test the models using your own components. Either use the dataset provided, if you already have some experience with machine learning, or create your own dataset. You can detect traffic signs, fruits or shapes, for example.
You can work directly in the Python environment at your PC.
Randomly changed variations of the model


Test model
Select best variation
10.02.2023 19
Training data Test data
Machine learning algorithm Dataset
AI
model
Documentation Quality Control with AI 9V
Using your own model (1h)
To be able to use a self-trained AI model in the training model quality control AI, this must be loaded to the TXT 4.0 Controller.

Material:
• Workpieces
• Sorting line
• PC with Robo Pro Coding
Implementation:
Follow the instructions described in the documentation for uploading your own models. Test the models using your own components.Adapt the program if you have used your own dataset and own labels.
Creating your own KI models is quite difficult, it’s easier if done in a team
10.02.2023 20
