


TABLE OF CONTENTS MonkMakesSupportMicroPythonBlocksConnectingIntroductionWARNING................................................................................................................2...............................................................................................................3yourmicro:bit.........................................................................................4Example.........................................................................................................5Example...............................................................................................6.......................................................................................................................7...............................................................................................................8Page2
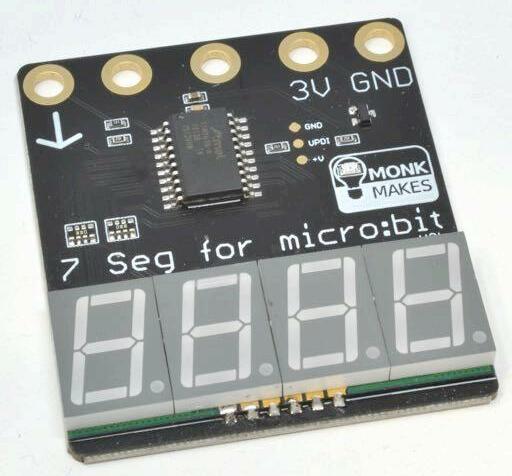
INTRODUCTION The 7-segment for micro:bit is a four digit 7-segment display for micro:bit. You can use it to display numbers, but it can also display letters and other characters, albeit with the limits imposed by the 7 segments of each digit. • Easy to connect (just needs one micro:bit pin plus power) • Powered directly from micro:bit pins • Send messages to the display using the micro:bit’s Serial blocks • Useful for displaying readings from sensors, making clocks etc Page 3
CONNECTING
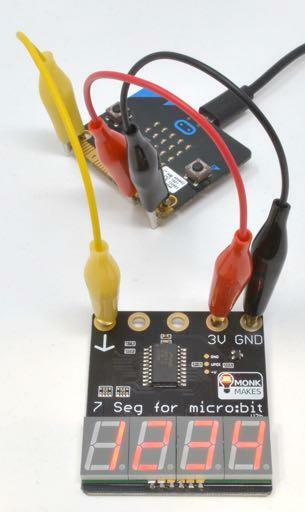
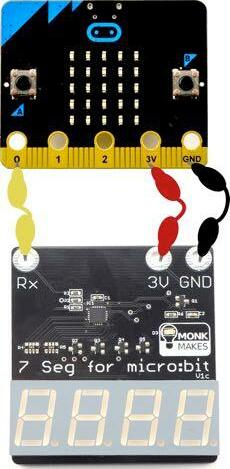
Connect the power pins GND and 3V between the micro:bit and the 7-Segment for micro:bit. Connect the Rx (marked as an arrow on newer versions) pin of the 7Segment for micro:bit to P0. Note you can also use other micro:bit pins to control the display. If you prefer, you can bolt your display to the micro:bit.
Page 4
YOUR MICRO:BIT
COUNTER EXAMPLE
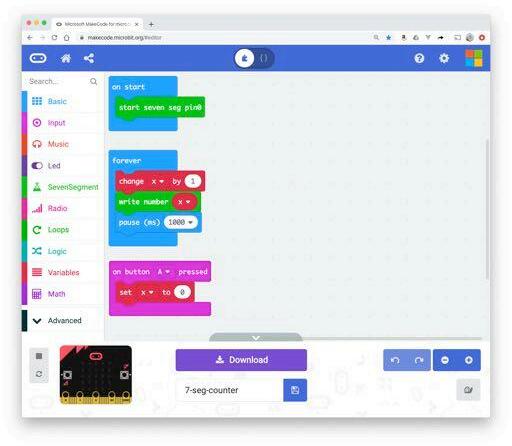
Click on Edit, and your browser window should look like this:
Notice how there is a new blocks category called SevenSegment. This is where you will find the blocks you need to use the display. The easiest way to make your own project using these blocks is to simple enter a new name for your project in the bottom center are of the window and click the save icon. The on start block must contain a start seven seg pinX block. That redirects the micro:bit's serial port to the pin number specified. The forever loop will add 1 to x every second and then display the new value of x. Pressing button A will set x back to 0. Page 5
Custome blocks are available to make it super easy to use this display. To get started, paste the following URL into your browser: https://makecode.microbit.org/_Kj362WFJyYoc
THERMOMETER EXAMPLE
Page 6
You can display the temperature of the micro:bit's CPU using this example: https://makecode.microbit.org/_fX669RbwjTfU In this example, rather than using the write number block, the code constructs a string by adding a space and the C after the temperature value. This is the way to deal with displaying a mixture of numbers and text.

SCROLLING TEXT EXAMPLE
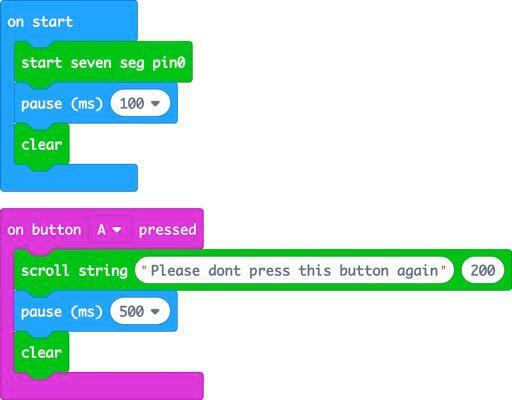
7-segment displays are not great at displaying text, but this display will do its best for whatever string of letters, digits and punctuation you choose to throw at it. This example shows how you can scroll a text message across the display: https://makecode.microbit.org/_C6WEpJhi0JCc
Page 7
The 100 millisecond pause after the start seven seg pin0 block is needed to give the serial port time to start working before you start sending messages. If you don't include it, you might find spurious segments display. The second parameter to scroll string sets the display in milliseconds between each character being displayed.
Page 8
CLOCK EXAMPLE
This example shows how you can make a traditional LED clock displaying the hours and minutes in 24 hour format, with a blinking decimal point between the hour and minutes part of the display. Pressing button A will advance the hours by 1 and button B the minutes. https://makecode.microbit.org/_3U18cPCsW26X

Printable character: '0..9, a-z, A-Z, most punctuation. Scroll existing characters left one position and display this char in leftmost position. In non-buffered mode the display updates immediately. In buffered mode the display is not updated until the ',' character is received. Page 9
MICROPYTHON EXAMPLE
The uart.init function redirects the micro:bit's serial communication through pin0 to talk to the display.
You can use the 7-segment for micro:bit with MicroPython, but this is a lot more complicated than using the custom blocks. The following example will repeatedly count from 0 to 9999. from microbit import * whileuart.init(tx=pin0)True:foriinrange(0, 9999): uart.write(' uart.write(str(i)') + ',') sleep(1000)
The display is updated by first writing four blank spaces (to clear anything already on the display) writing the value of i as a string to the display and the writing the ',' character. The comma character has the special function of telling the display to update with the new character that have been sent to it. This prevents flickering. Protocol Summary Strings of ASCII text are received through the 9600 baud serial interface. Printable characters will cause the existing displayed characters to scroll one position to the left and then the new character will be displayed in the rightmost character, unless the display has been put into buffered mode using the ',' command.
Character Action / Clear the display and put the display in non-buffered mode , Put the display into buffered mode. The display will not change until another ',' character is received.
MONKMAKES
For more information on this kit, the product's home page is here: Ashttps://monkmakes.com/mb_chargerwellasthiskit,MonkMakesmakes
Page 10
all sorts of kits and gadgets to help with your micro:bit and Raspberry Pi projects. Find out more, as well as where to buy here: https://monkmakes.com you can also follow MonkMakes on Twitter @monkmakes.


