31 minute read
And local brews
Falling over ourselves to test out these local brews this season
Story and photos By John Daum
Advertisement
There is no better time than autumn to soak in the beauty of Virginia while enjoying a delicious beer from the countless breweries in every corner of the Old Dominion.
With summer yardwork winding down, and business regulations on social distancing reaching a delicate balance, now is the time to get out an explore some of the Virginia Piedmont’s fantastic breweries that offer an amazing variety of beers on tap and some of the best outdoor seating options anywhere in the world.
Pick a designated driver, and hit the road for a tasty tour.
For a north-to-south brewery crawl, a natural first stop would be the beautiful patio at Hillsborough Farm Brewery located in the small town of Hillsboro in northern Loudoun. Beers are poured in the Fox Den tap room and reflect a classic approach to brewing with many familiar styles available.
“Ol’ Bessie” is a traditional American Brown Ale brewed with Wilamette hops with hints of chocolate, figs and caramel. “Stone Cold Fox” is a smooth IPA with tropical fruit notes and refreshingly dry finish. If you brought along some wine lovers on your day trip they will pleased with the selection of wine produced at the adjacent vineyard.
Next, take a break from sweeping Blue Ridge and Piedmont farmland views and catch a distinctly industrial vibe at Escutcheon Brewing in Winchester. Their “Plimsoll Session IPA” is a lowalcohol, easy-drinking session beer made with Calypso, Centennial and Cascade hops. It clocks in at an approachable 4.5 percent alcohol.
Try a pint of “Habermehl’s Oktoberfest Lager,” a traditional Fest Beer that sets up for a stroll on Winchester’s downtown pedestrian promenade which has an abundance of food offerings to explore.
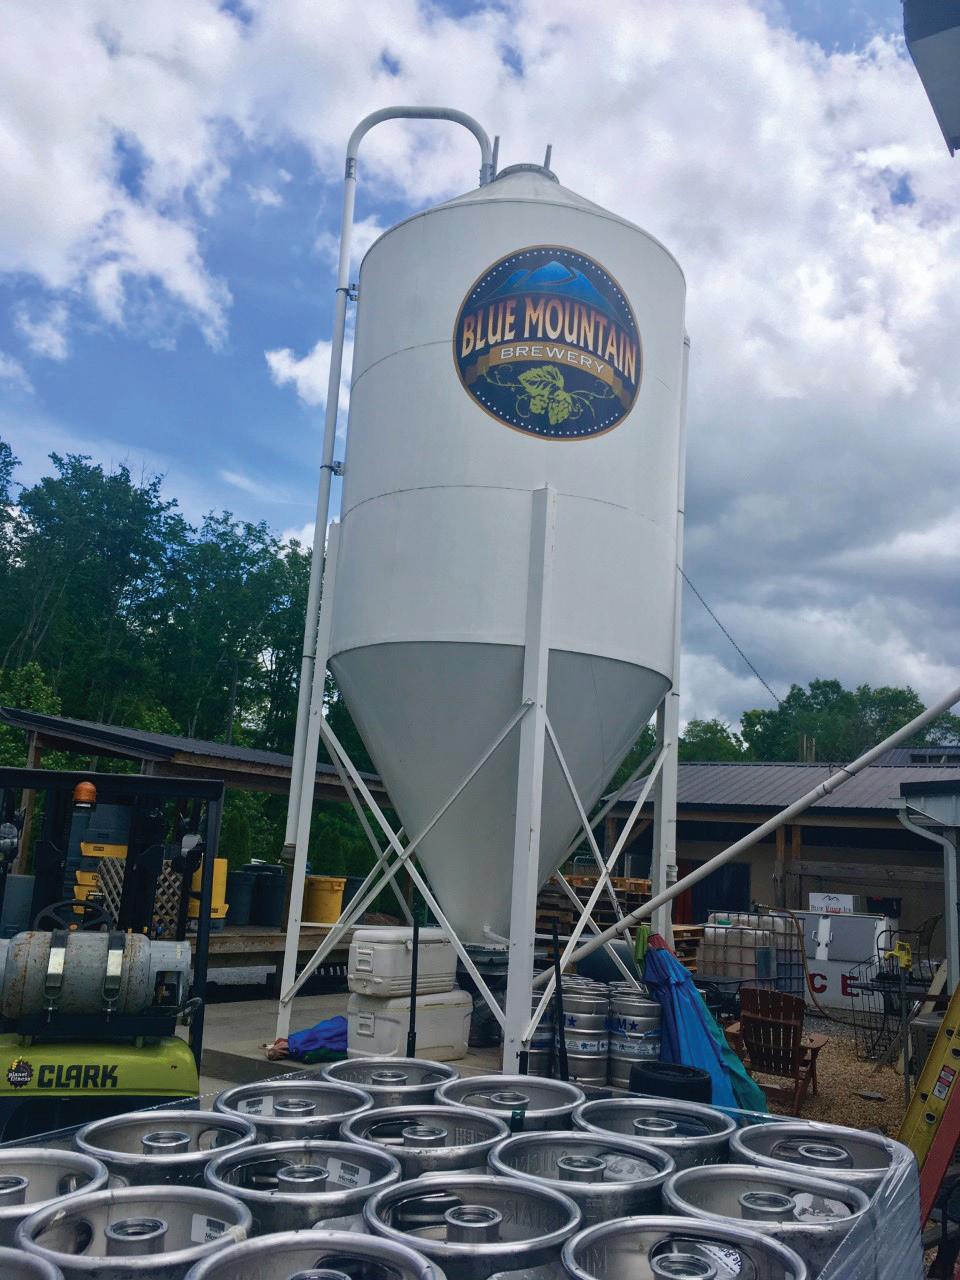
Cross back across the Blue Ridge to check in at Dirt Farm Brewery in Bluemont. Climb their high hill to one of the most amazing views anywhere in Virginia. The production facility at Blue Mountain Brewery is impressive in scope.
Dirt Farm’s large, expansive patio and lawn are perfect for enjoying their “Shelter in Place” New England-style IPA. At 5.4 percent alcohol, it won’t knock you for a loop like many in this category but it still delivers the juicy hop bomb that IPA fans expect. For something completely different, check out their “Tart 31 Cherry Ale,” a fruit beer with hints of sour aging which gives it a pleasant, tart finish. As an added bonus for some, it is gluten reduced. Take a scenic byway past farms, vineyards, battlefields and numerous small towns – windows down, music blasting, if you wish, until you reach a great under the radar spot. Pro Re Nata Brewery – Latin for “take as needed,” offers a variety of styles and seasonal offerings throughout Patrons say outdoor seating with a view, plus excellent ales, are part of the attraction to supporting the local Hillsborough Brewery.

the year. Try “Bagpipes of Pan,” a Scottish Ale with a balanced roasted malt profile and an aftertaste of sweetness that comes from the addition of local Bubba’s Buckwheat Honey. Also worth seeking out is “Hazing to Remember,” a hazy IPA made with English ale yeast and oats which lend a smoother and more balanced finish to the beer with minimal bitterness.
Just down the road from Pro Re Nata is Blue Mountain Brewery which is sold throughout the state. Rather than sampling one of their betterknown offerings, try their outstanding variation of “Dark Hollow” made with Trager Brothers coffee beans and chocolate nibs. This is a 10 percent alcohol Imperial Stout, fair warning.
Not to be missed is their “Spooky,” a barrelaged pumpkin ale that is perfect for the season. It clocks in at an impressive 8.2 percent after being brewed with 200 pounds of pumpkin puree, cocoa nibs and aged in Bourbon barrels.
End the day back in Fauquier County at the outstanding Old Bust Head Brewery in Vint Hill. An entire day could be spent enjoying their tap list, listening to local live music and ordering snacks from their food truck. Be sure to sample “Nitro Oatmeal,” a silky smooth stout with hints of honey, cream and chocolate. Not always on tap but definitely worth ordering if available is their unusual “S’more Latte Stout,” as decadent as you would imagine.
For something more conventional, try “Vixen,” an easy-going traditional Irish red ale with deep amber color, medium body and satisfying finish, the perfect nightcap to wrap up a fall brew tour.
The expansive view from the Dirt Farm brewery patio is part of the local libation experience.

A sweet cap to the perfect meal: Homemade fudge
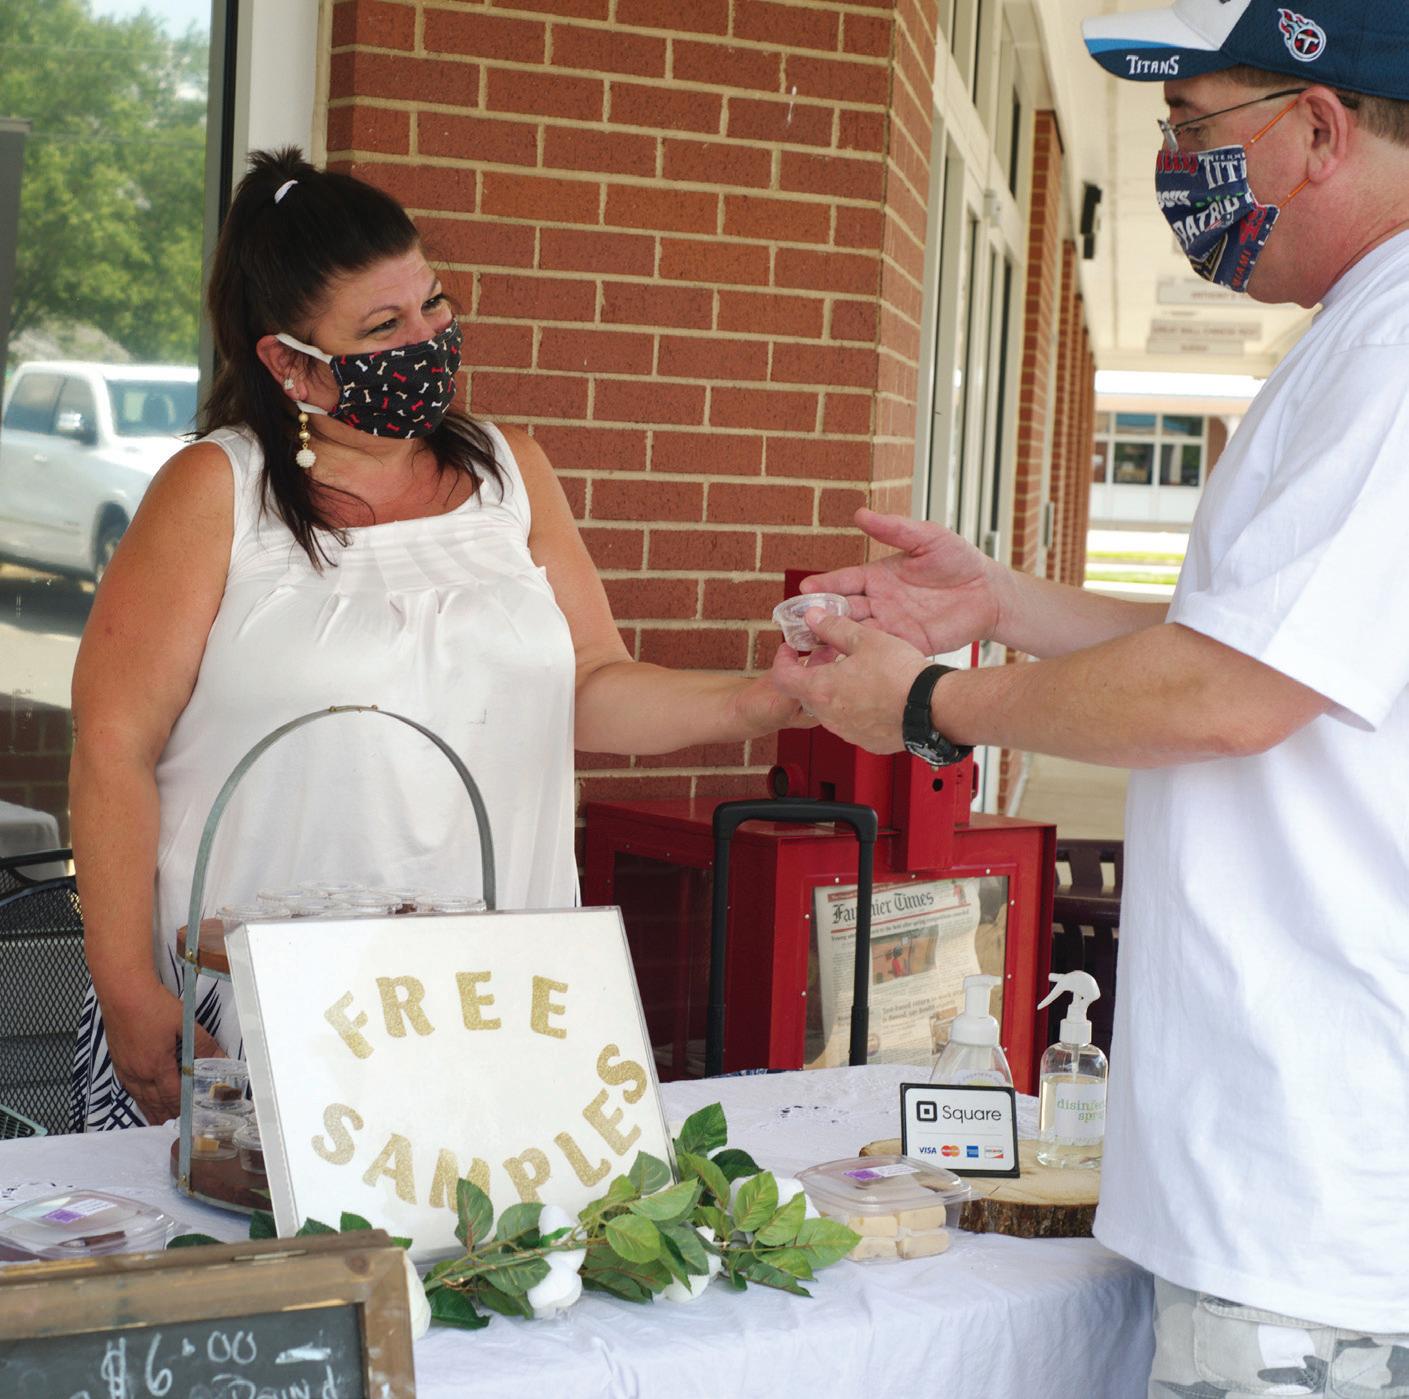
Mother Fudge, also known as Kim Sayermarsh, offers a taste at a recent pop-up sale outside the Salem Cafe in Marshall.
HONORING PRESIDENT JOHN F. KENNEDY HONORING PRESIDENT JOHN F. KENNEDY Warrenton Lions Club HONORING PRESIDENT JOHN F. KENNEDY

Mother Fudger business is built on the universal love for dessert
A pop-up shop selling just one item?
Preposterous.
Just selling homemade fudge?
Sweet.
Confectioner Kim Sayermarsh calls the creamy confection a perfect finale for a perfect meal, whether a sandwich on the fly or a formal, sitdown affair for a crowd.
“My mom, now she wasn’t much of a cook, bless her, but my grandma, now she was amazing,” Sayermarsh explains how she started Mother Fudger four years ago. She’s deeply rooted in Fauquier, and centers much of her business here: grandmother Mae Pearson was postmistress at the Hume Post Office for 47 years.
Sayermarsh loved making desserts and experimenting in the kitchen. Those traits served her well when her grown children told her she needed to turn her hobby into a business.
“When my husband died five years ago, it left me in a bad place,” she recalls. “My kids lived with it for a while, but finally they said, ‘mom, you need to start your own business.’
“And that’s how Mother Fudgery was born.”
She researched and studied home cooking business models, and landed on fudge. The ingredients are simple, she says, and readily available, and the success depends on the skill and patience of the fudgemaker.
“There’s a lot of technique to it,” she says. “Fudge needs to be smooth, not grainy. It should be soft, and melt in your mouth, but hold its shape.
“There’s a lot to it.”
Now that she’s perfected her fudge recipe – she declines to share her trade secret, Sayermarsh is working on a business degree from Liberty University; she hopes to be able to create and manage her own website; for now, she uses her Facebook page and Instagram to promote sales, and offers online coupons. Orders are via text, phone or email. Most of her business is driven by the kind of impulse purchase that assists church bake sales. “People love something sweet,” she says. “That’s what makes it work.”
“It’s a combination of things that makes fudge so perfect,” says Sam Tower, sampling Mother’s wares outside the Salem Cafe after lunch one afternoon. “It’s creamy, smooth goodness, delicious, but it’s also about memories. People remember getting fudge, or making fudge, with their parents or grandparents. There’s an emotional attachment.”
Sayermarsh can custom-design any flavor requested. “Right now I’m working on a raspberry truffle flavor that a lady asked me to make, just like her own mama used to make.” motherfudgeryva@gmail.com
The 2020 Official White House Historical Association Ornament honors the thirty-fifth president of the United States, John F. Kennedy (1961-1963) The 2020 Official White House Historical Association Ornament honors the Kennedy's brief administration was tragically cut short by an assassins thirty-fifth president of the United States, John F. Kennedy (1961-1963) bullet on November 22, 1963 in Dallas, Texas. Kennedy's brief administration was tragically cut short by an assassins bullet on November 22, 1963 in Dallas, Texas.
Chosen for the image on the ornament is a replica of JFK's official portrait, by Aaron Shikler, that hangs in the White House today. Mrs. Kennedy requested a unique pose for the late president. Shikler chose to portray a man in deep thought with his arms folded across his chest rather than a frontal expression of his face. Chosen for the image on the ornament is a replica of JFK's official portrait, by Aaron Shikler, that hangs in the White House today. Mrs. Kennedy requested a unique pose for the late president. Shikler chose to portray a man in deep thought with his arms folded across his chest rather than a The artwork is enhanced with a wide gold frame, adorned with JFK's initials frontal expression of his face. and an American eagle. The White House, Christmas 2020. On the back of the ornament are the words, President John F. Kennedy 1961-1963 and a The artwork is enhanced with a wide gold frame, adorned with JFK's initials quote by First Lady Jacqueline Kennedy, " The White House belongs to the and an American eagle. The White House, Christmas 2020. On the back of American People." Made in America. the ornament are the words, President John F. Kennedy 1961-1963 and a quote by First Lady Jacqueline Kennedy, " The White House belongs to the $22 each American People." Made in America.
Available at Rankin’s Furniture and Hardware Stores $22 each Available at Rankin’s Furniture and Hardware Stores
FALL 2020

Kim Sayermarsh’s homemade fudge sells out when she sets up her beloved pop-up shops at area farmers markets, community events and shopping centers. Her personal favorite flavor? Orange Dreamsicle layered with smooth vanilla.
For vampires or for dinner, inviting garlic in is easy
Follow our step-by-step to plan now for spring crop
By Tim Ohlwiler
Plan ahead this season: Your taste buds will thank you next spring.
Fall is the time to plant garlic. A fairly simple plant to grow, garlic grows much like its relative the onion, and prefers similar conditions.
September and October are the perfect months to plant garlic, since it grows best in this area if you plant in fall for harvest next spring. If you’re unable to find garlic sets in the local nurseries, you can actually just plant the garlic that you buy in the grocery store.
Loosen your planting bed soil with a tiller or by hand-digging. Garlic prefers a moist well-drained loam soil, which is what most gardeners have in Fauquier. Just be sure that water will not sit in your garlic plot over the winter.
A layer of compost or a little 10-10-10 fertilizer should be added at the time of planting.
Plant garlic cloves about 4 inches apart, with the top of each clove about an inch underground. The part of the clove that was the roots should point down, and the part that was the stem should point up, towards the soil surface.
If planted right, garlic plants are hardy through winter, however they will benefit from a light layer of leaves or straw just to make sure they are not damaged by the coldest temperatures.
Keep weeds pulled out of your garlic patch so the growing plants don’t have to compete for nutrients or water.
The homegrown treats will be ready to harvest next June. As with onions, when it’s ready to pull, the leaves will start to turn brown.
After harvest, let your bulbs dry and cure to extend storage life, or use it right away.
Oftentimes, in the early spring a garlic plant will send up a green stalk will a light green flower bud on it. This will look like a witch’s hat that is light green sitting on the dark green stalk.
Don’t pull it like a weed – treat it like a delicacy. The flower bud, called a garlic scape, is a real gourmet treat. Scapes can be used to make pesto sauce or use them the same way you’d cook with garlic cloves.
If you don’t harvest your scapes for culinary use, they should be removed so that the plant can direct all of its energy into making a larger garlic bulb.
There are few pests with garlic. Once in a while a bulb will be infested with a root maggot just as onions can be. The biggest problems come from rot if the soil is too wet.
Another time to plant garlic is in early spring, no later than March. The growing season will be shortened; you’ll harvest in August. If you do plan to plant garlic in the early spring, do your soil and bed preparations in the fall as it is often wet and difficult to get into the garden to work the soil in spring.
Sticking your neck out
Soft-neck garlic is what’s usually sold in gro

cery stores. It has a long storage life – a year or more. Soft-neck garlic has a mild flavor, with stems so soft they can be made into braids. This is the variety of garlic used for braided garlic sometimes given as a holiday gift.
Hard-neck garlic literally has a hard, stiff stem. It has a strong flavor and does not store as long. Still, hard-neck garlic has several months of storage.
Though it has the word “garlic” in its name, elephant garlic isn’t actually garlic. Elephant garlic is technically a leek, though it does taste like a mild garlic. It has a shelf life of a few months.
Garlic mashed potatoes
Make this hyper-local by using homegrown potatoes (an easy crop to grow in spring, and, correctly handled, potatoes store well for use months after harvest) and by using your own, homegrown garlic (dry it and braid into ropes for hanging storage for months of preservation.) • 1 head of garlic • 1 tablespoon olive oil • 2 pounds potatoes (Yukon
Gold or another yellow, waxy potato, is best) • Salt • 1/3 cup cream • 3 tablespoons butter
Roast the garlic: Preheat the oven to 400°F. Remove the outer layer of papery skin of the whole garlic head, leaving the head intact.
Trim off the top of the garlic head. Drizzle olive oil over the top, salt lightly and wrap in aluminum foil.
Bake 40 minutes or until cloves feel soft to the touch and are beginning to brown.
Remove from the oven and let cool.
Boil the potatoes: While the garlic is roasting, peel and chop potatoes into 1-inch chunks. Place Don’t be put off by the time involved with the two-season growing period for fresh garlic. It is an easy crop to start, not fussy about active care, and it pays off with delicious results a few months later.
potatoes in a medium saucepan, add salt, cover with water.
Bring to a boil, reduce to a simmer about 15 minutes ‘til fork-tender.
Warm cream and butter together, on the stovetop or in the microwave.
Drain the potatoes, then place back in the pot on the stovetop over low heat.
Squeeze the roasted garlic into the potatoes and mash with a potato masher or a large fork.
Add the cream and butter and mash until the potatoes are the consistency you want. Do not over-beat them, or the potatoes will become gummy.
Garlic pesto – master recipe
Fresh garlic makes a great addition to any pesto recipe. Learn the ratios here then make your own signature pesto by varying herbs, cheese and nuts for your base. Start with the classic basil pesto, then branch out, but note that most herbs are used in smaller quantities than basil. • 3 cups chopped fresh basil • 1 cup olive oil • ½ cup pine nuts • ⅔ cup grated Parmesan cheese • 2 tablespoons minced garlic
Place the basil in a blender. Pour in about 1 tablespoon of the oil, and blend basil into a paste. Gradually add pine nuts, cheese, garlic, and remaining oil. Blend until smooth.
Other herbs to use include parsley – pair with pistachios as your nut and Italian grana pedano as your cheese), cilantro (quesa fresco and toasted pumpkin seeds), mint (feta and almonds), sage (tame it with half parsley, and use parm-reggiano blend plus toasted walnuts) or tarragon (Gruyere and toasted hazelnuts.) FALL 2020 33

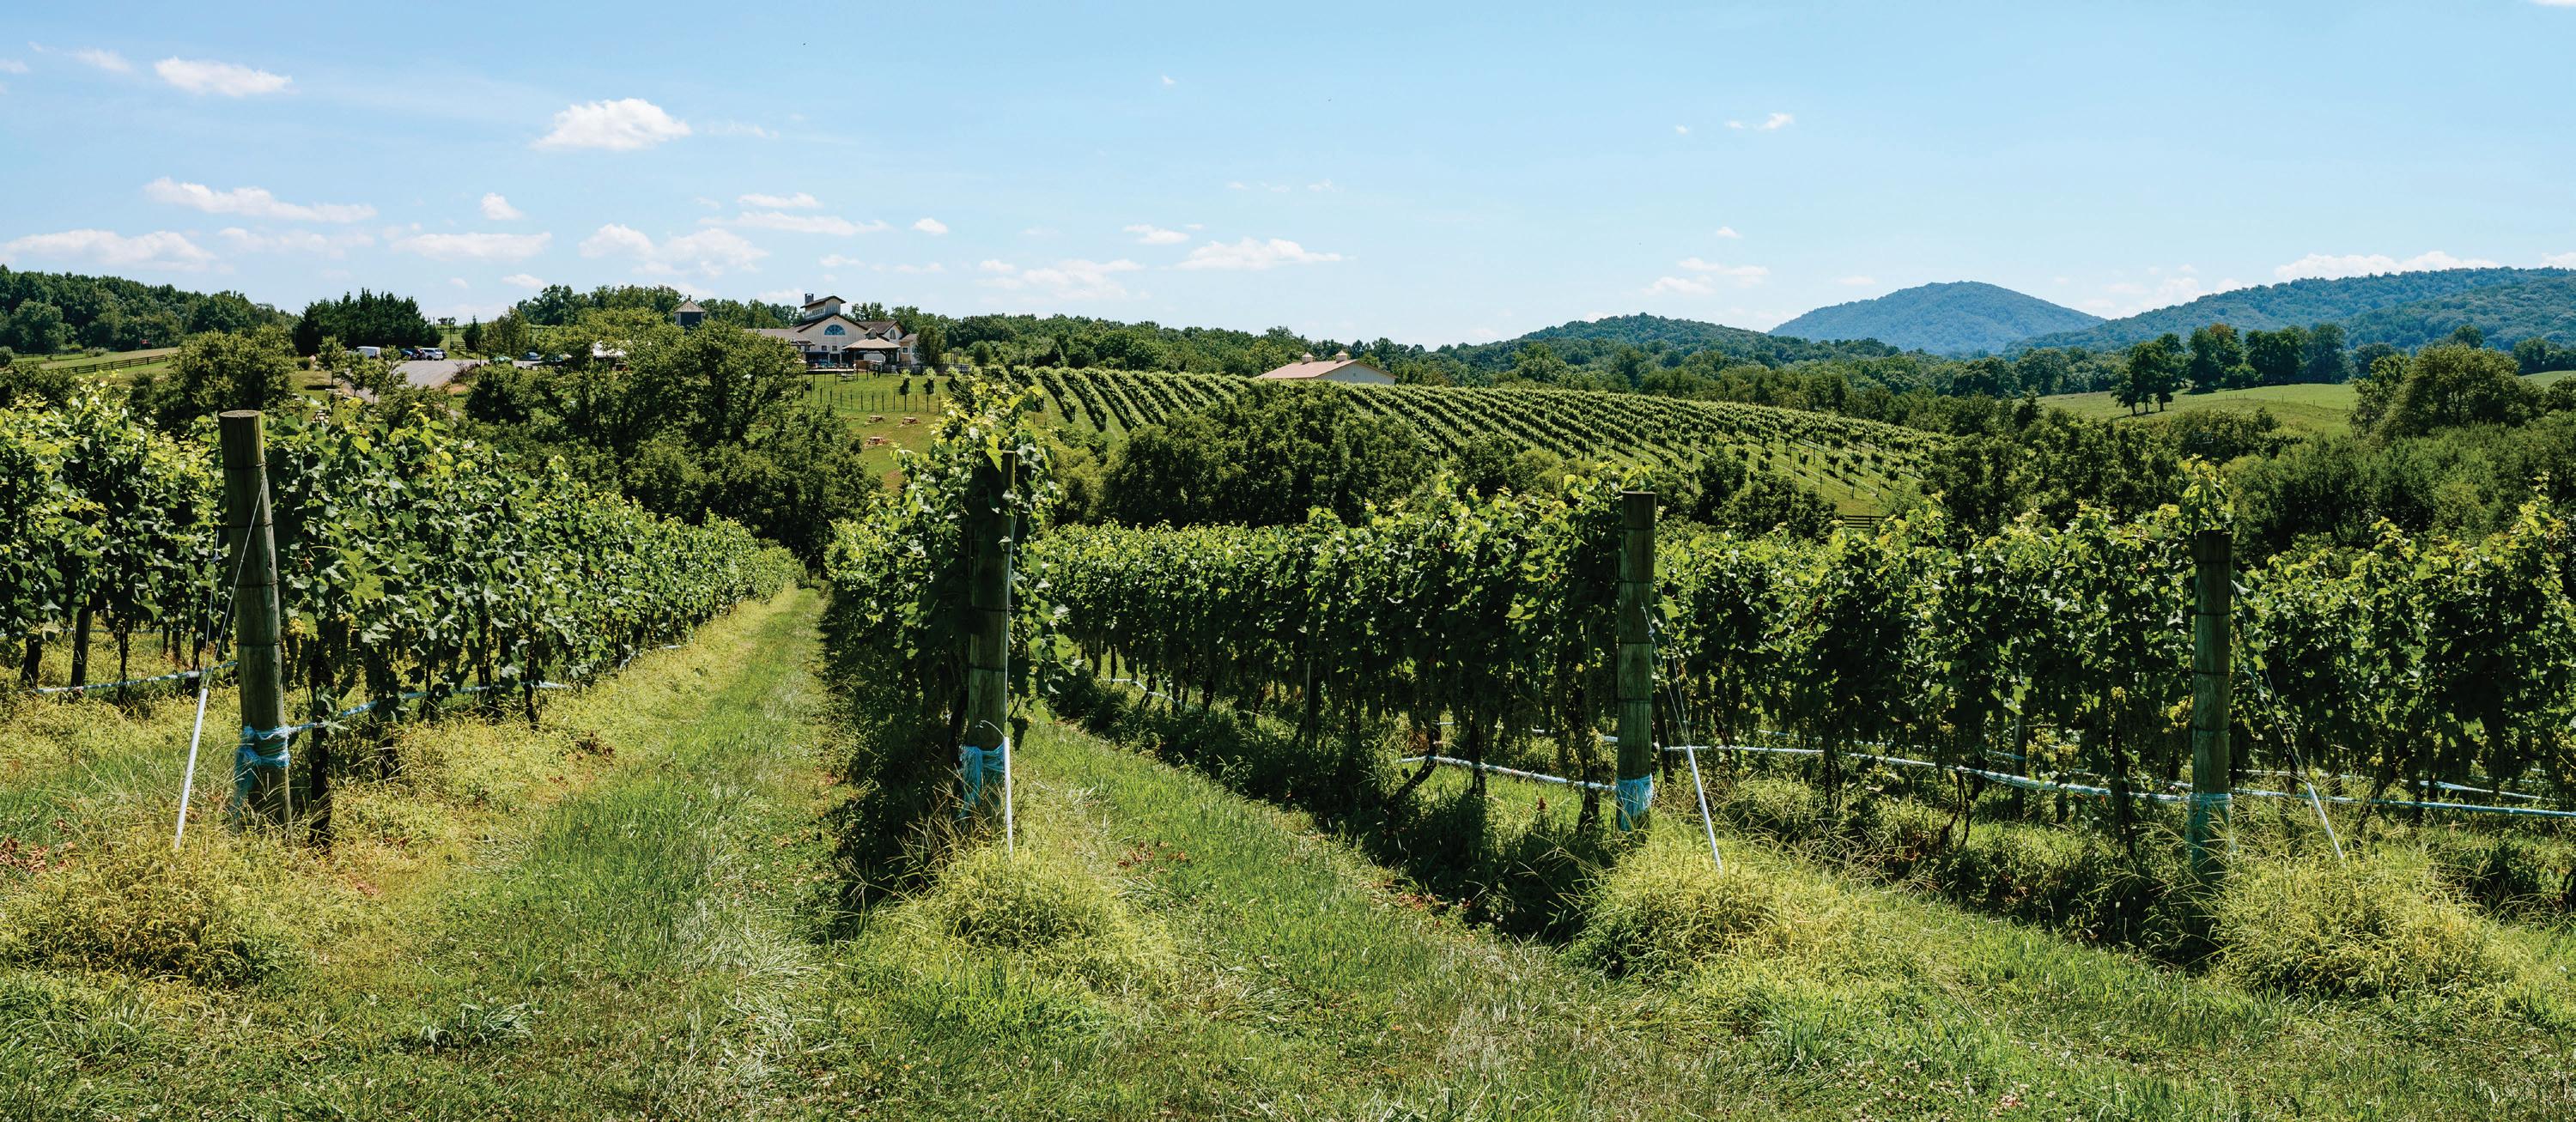
A view of the vineyards at Barrel Oak Winery
Wine-making at Barrel Oak, from field to glass
Story and photos By Coy Ferrell
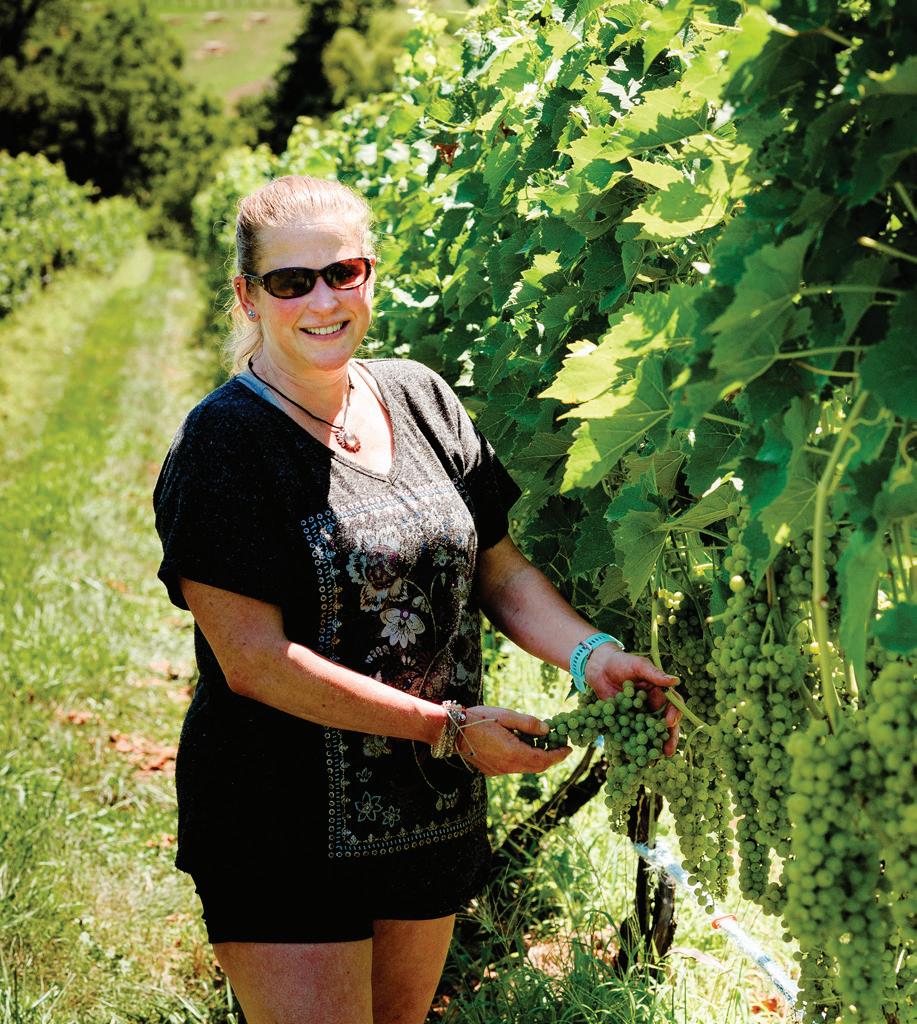
“A good wine is made in the vineyard,” says winemaker Sharon Roeder, of Barrel Oak Winery in Delaplane. For Virginia vineyards, the approach of autumn means grapes are almost ready for picking. Harvest, which usually starts in late August and lasts through November, isn’t the first step in the winemaking process, and it’s far from the last step in the journey from vine to bottle.
Grapevines begin producing useable wine grapes a few years after being planted; with great care and not a little luck, the vines can produce quality wine grapes for decades - at Barrel Oak, some vines date back to the mid-2000s. The yearly process for ensuring the best-possible product, though, is extensive. Frankly, it sounds exhausting.
“The vines must be tended to constantly from the minute the shoots begin to grow until the last cluster is harvested. You don’t dare turn your back on them,” Roeder says. “Problems can crop up literally overnight, most often in the form of mildews or pest damage. The vines grow incredibly quickly, so we are also constantly battling to control the jungle.”
That’s just in the run-up to harvest, when the grapes are nearing peak ripeness. The work for this year’s harvest began late this winter, when each vine in the winery’s approximately 28 acres of plantings was carefully pruned before they wake up from their winter dormancy. When to prune is tricky, says Roeder. “You want to wait as long as possible to begin, because if there is a cold event, the damage will be at the tips,” she says. On the other hand, if you wait too long, new shoots – these are the growths that will eventually produce grapes – don’t have a chance to grow properly.
About the middle of April, sap begins to flow through the vines and seep out of the pruned shoots. “The vines look like they are crying. It’s a beautiful sight, and it tells the winemaker that the vines have survived the winter,” she says. As fragile, nascent buds begin to grow from the pruned branches, frost becomes the concern. There were three frosts this spring, including consecutive nights on Mother’s Day weekend, but Barrel Oak’s 34 FALL 2020
vines were mostly spared. “Many of our friends and colleagues were not so lucky,” Roeder says.
As the spring turns into summer, Roeder hopes for high temperatures and little rain; these conditions help prevent mold forming on the vines. “Rain is hands-down the biggest problem in Virginia,” she explains. “A hard rain will actually bounce mold spores around from leaf to leaf and spread the disease, and hot humid weather is a perfect breeding ground.”
Lots of rainfall later in the season, when the grapes are nearly ripe, can slow the ripening process and dilute the sugar present in the grape, pushing back the harvest date and subsequently increasing the threat that a year’s labor will be for nothing. “In 2018 we had so much rain and overcast skies,” Roeder says, “that our Norton and Petit Verdot grapes were still half green when the first frost took all the leaves. We were not able to harvest those blocks.”
About the beginning of August – depending on a multitude of factors including that summer’s weather and the varietal – the grapes begin transforming from hard, tart, sour fruit into the soft, sweet and aromatic fruit that makes for the perfect wine grape. When does Roeder know this is happening? “The birds tell us,” she explains. “I don’t really even start thinking about picking a varietal until the wildlife start to show an interest. Nature is an amazingly clever thing.”
The grapes’ sourness for most of the growing season, she says, is a natural defense against wildlife eating the fruit before the seeds inside each grape are able to reproduce, a process aided in the wild by animals – much in the same way squirrels distribute acorns and aid the creation of new oak groves.
Measuring when the grapes have reached the perfect balance of acidity and sweetness – both elements are essential for a high-quality wine – is in itself both a high scientific process and a natural art. “We can measure the pH and the sugars and chart them on a graph, but ultimately we taste the grapes. It’s the winemaker’s call, and it’s more art than science,” Roeder explains.
What that ideal balance between acidity and sugar is depends on the type of wine that will ultimately be produced from those grapes. “Grapes that will be used for sparkling wine or for Rosé are picked much earlier than if those grapes were destined for a still wine or a dry red. White wines that want bright, flirty acidity will be picked a bit early. Big bold reds that need color and a tannin backbone will be encouraged to hang on a little bit longer. It’s also something to take into consideration if the grapes are destined for a blend, to help them better complement one another.”
As with everything else in the winemaking process, though, there are many factors at play. “If the decision has been reached that the grapes are ripe, no better time than the present,” Roeder says, but quickly adds there are many logistical questions she must answer before sending crews into the vines to bring in the grapes. “What is the weather forecast? What other grapes need to come in more urgently or may be coming from another vineyard? Is there room in the refrigerator for all of it?
“The minute a cluster is cut from the vine,” she elaborates, “it begins to rot and the clock starts ticking. Sometimes, it’s better to leave it hang until you can fit it into the production pipeline. Other times it’s better to get it safely into the cellar.”
Once Roeder pulls the trigger, crews go out into the fields to pick each grape cluster, and the fruit is then chilled overnight in a drive-in refrigerator. Then, Roeder explains, “We arrive early in the morning the day after a pick, clean all of our equipment, and get to work.”
For white wines, the juice is pressed from the grapes and before fermentation begins – depending on the style of wine, sometimes stems are removed before pressing, sometimes the whole clusters are pressed. If the clusters are destemmed, “The destemmer delivers a juicy stew of skins and flesh. The outside of the skins will impart a meatiness to the juice,” she says, and the skins can either be left to seep in the juice or removed immediately.
Red wines are a different matter entirely. The grape clusters are destemmed and fermented with the skins and the seeds. After fermentation is completed – this usually takes about two weeks – the juice is finally pressed. Like so many other aspects of winemaking, the process is meticulous. “All of our red grapes are carefully sorted after destemming to make certain that only ripe healthy berries end up in the fermentation bins,” Roeder explains. “We don’t want to ferment rotten berries, green berries, bugs, leaves, or in one case a few years ago, a cell phone!”
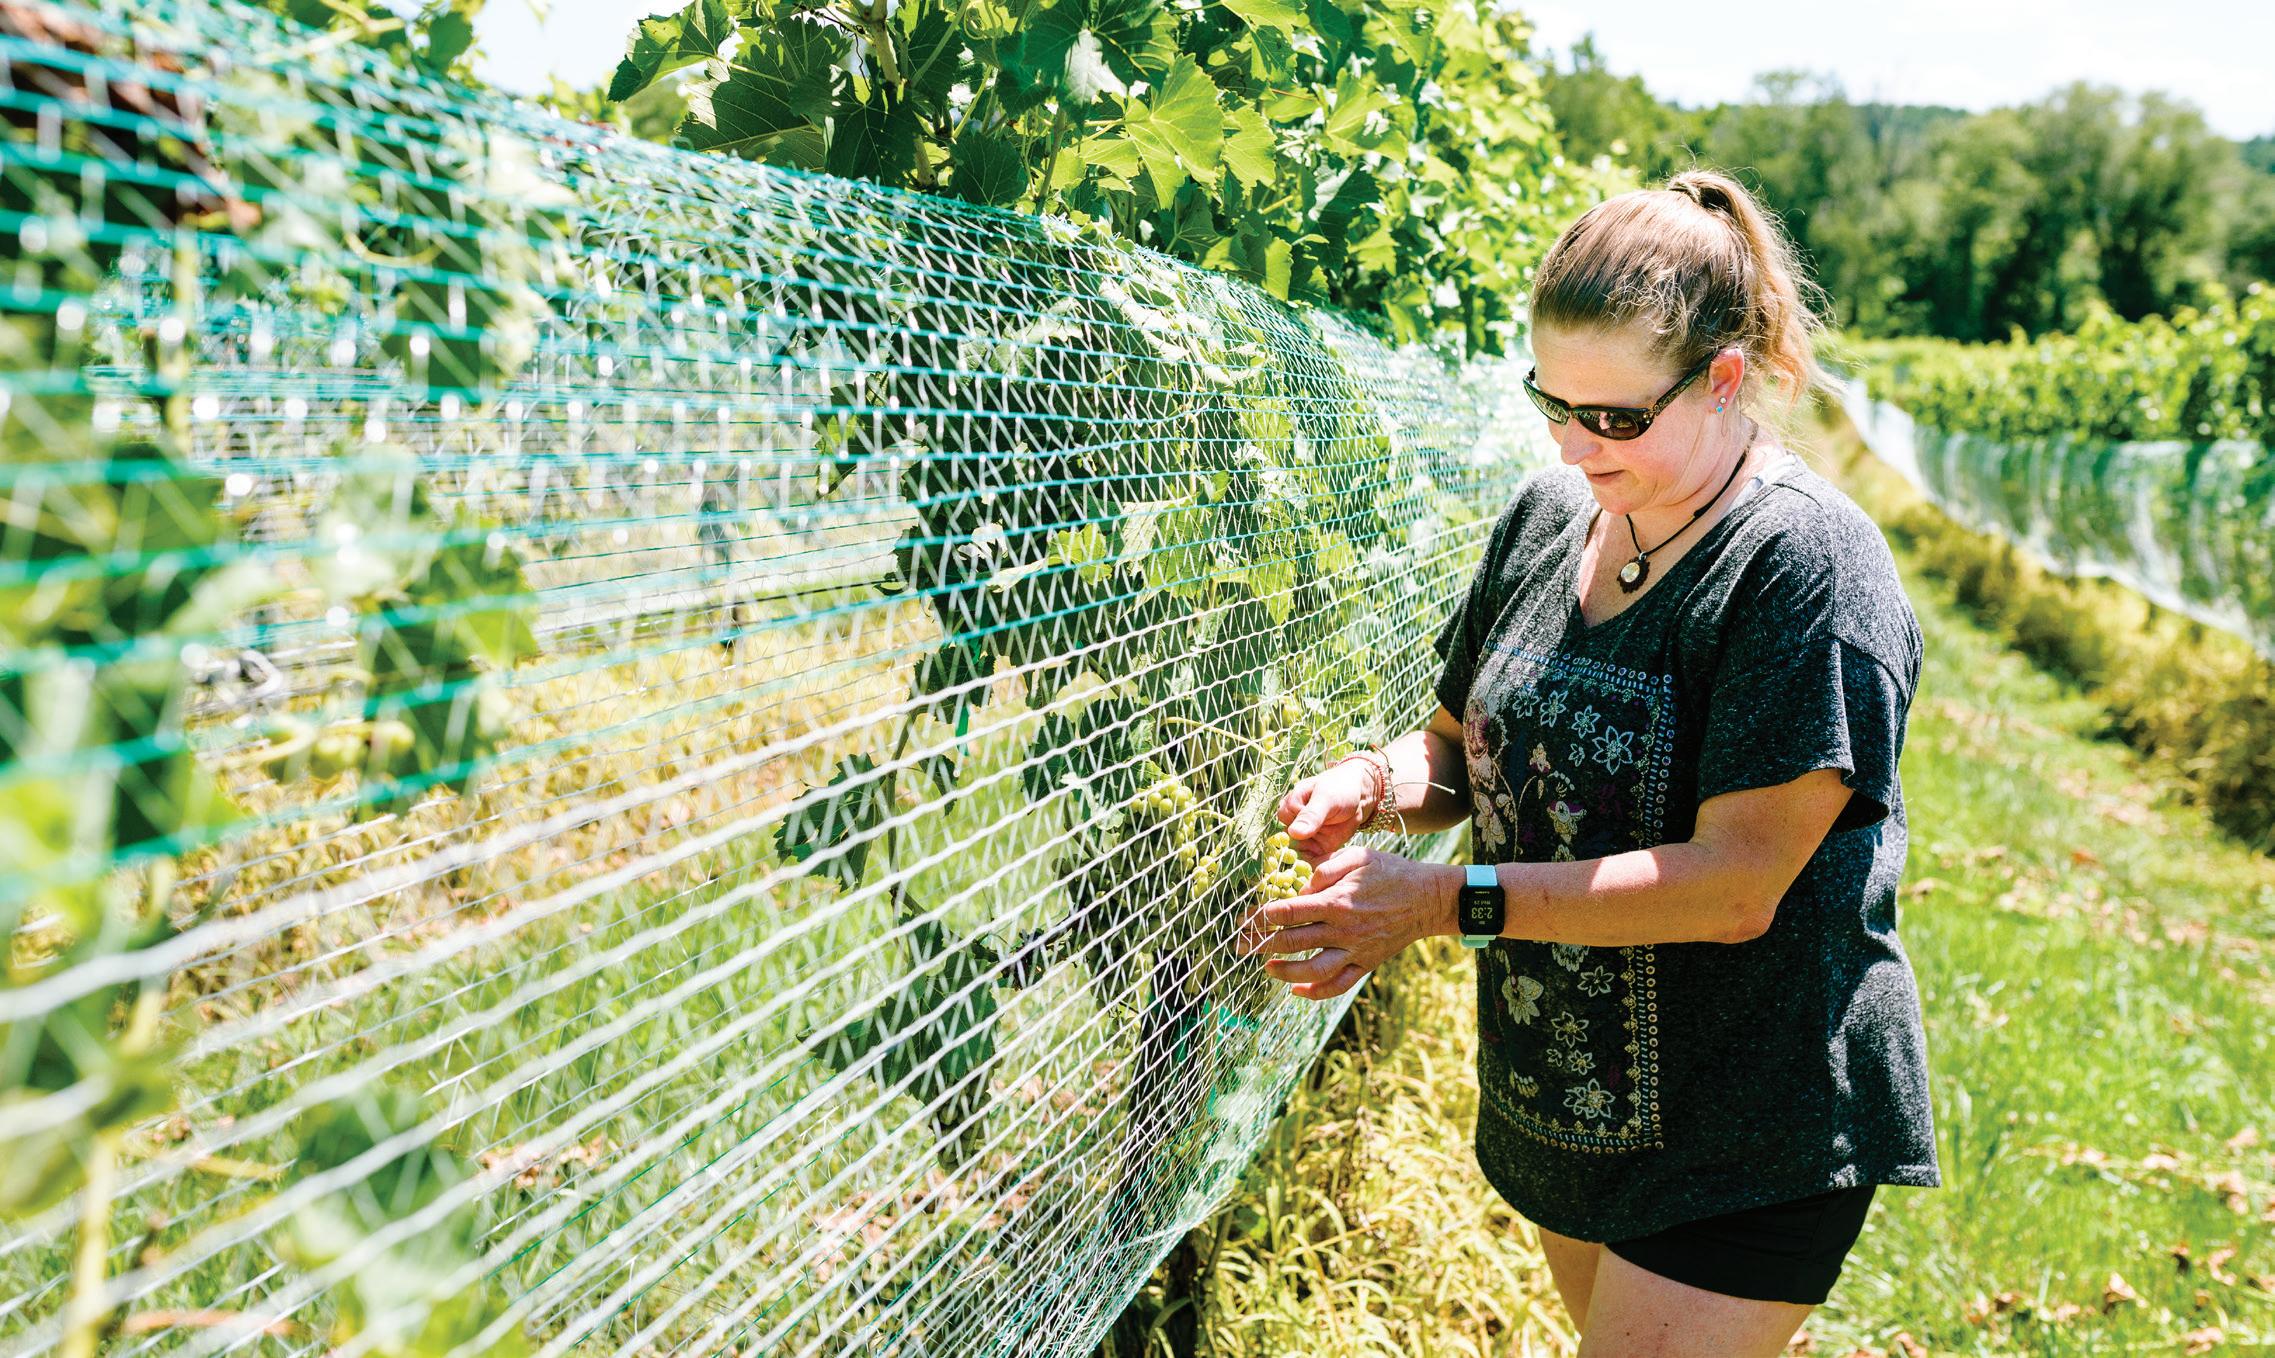
Then come all sorts of decisions. Sharon Roeder inspects a cluster of grapes in the vineyards at Barrel Oak Winery. As the ripening process nears its conclusion in late summer, protective netting is place along the vines to discourage birds from eating the sweetening grapes.
Will the wine be aged in a stainlesssteel tank? In an oak barrel? Some of both? Each choice affects the final product. “From that point,” she says, “the winemaker’s job is just to monitor and let nature do its job.”
For crisp, tank-aged white wines, nature is usually finished by January of the following year, and those crisp whites are the first to be bottled. Of course, there are all sorts of con

siderations there, too. For instance, Roeder explains, “They will be cold stabilized to ensure that they will not precipitate tartaric acid when the consumer chills it down, we also confirm protein stability so that they will not become cloudy when chilled.”
By July, barrel-aged white wines and lighter red wines have been bottled. Bolder red wines, like Merlot or Cabernet Sauvignon, need another six months or so in the barrel, so in midsummer they are moved into fresh barrels and set aside. Of course, by July, Roeder is already thinking about the next harvest, when the winemaking cycle will start all over again.
Is it all a bit overwhelming? Not to Roeder. “You’ve reminded me of what a wonderful, fun, challenging job it is to be a winemaking,” she said at the end of this interview.
We are a family owned business offering quality workmanship and superior customer service at a great price! At Colvin Floors we believe it should be all about customer satisfaction, our courteous staff is always available and ready to serve you. We carry a complete line of products from the world leading manufacturers in:
• Area Rugs • Laminate Flooring • Specialty Floors • Carpeting • LVT/LVP • Vinyl/Resilient • Ceramic/Porcelain • Mats/Runners • Waterproof Flooring • Flooring Accessories • Natural Stone Floors • Wood Flooring • Installation Materials • Sealers/Finishes
540-347-8508 • 254 Broadview Ave, Warrenton • colvinfloors.com
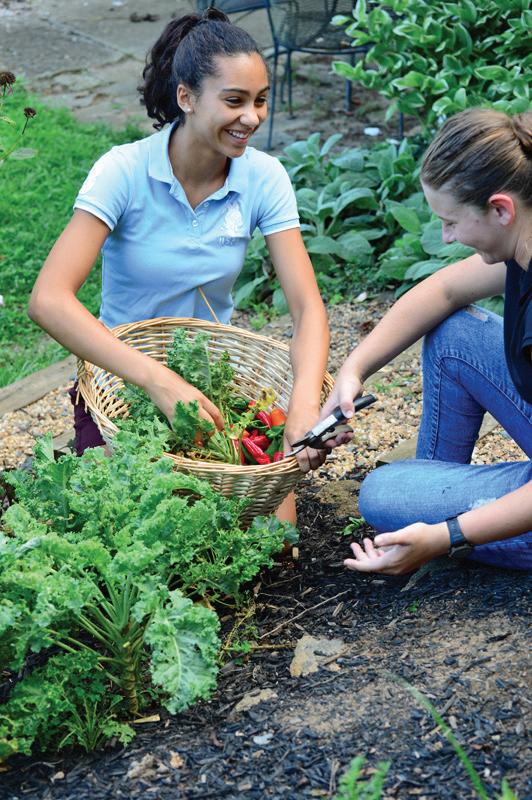
Fauquier’s usually moderate fall weather and highly productive garden soil are a perfect pair for an autumn planting of kale, chard or other salad greens.
Sew seeds direct into beds vacated by spring peas or summer corn, or you can even fill a ceramic planter with soil and grow greens on your patio. Bring plants inside when the weather cools to extend the freshgrown season for weeks.
Spring greens: They’re not just for spring – all varieties of lettuce love the autumn growing conditions here in Zone 6/7. Pick them young to use as baby greens, or let them grow for a later harvest.
Kale: Use young kale leaves as you pick them – the ribs are soft and edible when young, but if you’re harvesting from mature plants sewn earlier this year, strip kale from the fibrous ribs. You can tenderize large kale leaves by massaging them with oil and salt-dipped fingers as you tear them into bite-sized pieces. Use them raw or flash-cook in a saute pan.
Swiss chard: Tear chard into bitesized pieces and use raw or lightly cook to tenderize. You can snip chard ribs into pea-sized bits and flash-stirfry them in a dash of oil to use as a colorful, flavorful fall salad topper. Sprinkle with salt or minced herbs of your choice, or add a diced garlic clove.
Get creative with fall salad
greens: Use beet greens, young spinach, pea shoots if you made a fall planting, snipped collard greens, tender parsnip tops or any young green, to add dimension to texture and flavor.
Remember, if you are using your A fall-planted garden filled with greens extends your home-grown produce season nearly through November.
Savory salad to suit the season
What’s better than home-grown autumn greens to start your plot to plate meal?
salad as a first course, keep it simple. Colorful greens tossed with dressing with a single topper (like homemade croutons) is enough as a starter for a full meal. You can easily add other ingredients to make the fall salad into a full meal.
Add walnuts (locally harvested or store-bought), roasted peanuts (local are best), pinenuts or pecans. Lightly toss with olive oil and toast briefly in a 350-degree oven to heighten flavor.
Add a sweet touch with dried cranberries, raisins, snipped grapes or cherries, or whole fresh berries saved from the garden or from the farmers market (or store-bought.)
Add any vegetables you have on hand, homegrown or store-bought. Marinated, canned artichoke hearts, olives or pickled beans or cucumbers add a new flavor dimension.
Other fall crops like broccoli, cauliflower or late-season tomatoes can be chopped and added to your salad for color and flavor.
Local goat cheese or chevre can be diced or shredded on top, or shred your favorite homemade or store-bought topper.
Homegrown, oven-dried pumpkin or sunflower seeds add a salty crunch, and both summer crops are easy to grow.
To make it into a supper dish, add cooked quinoa or brown rice.
Local or store-bought bacon makes another tasty topper, or dice any cooked meat that suits your palate.
Home-toasted croutons (go all the way homemade and bake your own bread for dicing into twice-baked salad toppers) dress up any dish.
Homemade creamy balsamic dressing makes an excellent topping – make it super-local and use homemade yogurt and mayo with homegrown dried herbs if you can: Mix 1/4 cup balsamic vinegar, 1/4 cup olive oil, 1/4 cup plain yogurt, ¼ cup mayo, 1 tablespoon Dijon mustard, 1 teaspoon honey (local), 1 garlic clove, minced, 1/2 teaspoon dried garden herbs (oregano, basil, thyme, etc.), 1/2 teaspoon salt.
The latest dietary recommendations
With government involved intimately in the American diet, recommendations change regularly as new research proves, or disproves, conventional wisdom. A few decades ago, eggs were called bad; today, they’re the darling of the moment.
As always, the plan to never eat anything that won’t rot is pretty much perfect (meaning, nothing artificial, no preservatives). Here are the latest USDA guidelines for building a healthy meal. 1. Try to include all the food groups throughout the day. Make fruits, vegetables, grains, dairy and proteins primary, with limited added sugar and sodium. 2.Aim for a half-plate of vegetables and fruits to get the full range of vitamins, minerals and nutrients from real food rather than synthetic supplements.
Choose richly colored foods – vine-ripened, locally grown tomatoes, dark green locally (or per
sonally) grown fall chard or kale, sweet potatoes and broccoli can all be grown in the Piedmont. 3. Growing your own grains might be taking it too far, but at least try for whole grain or whole wheat when choosing bread products. Homebaked is best; locally baked is second-best. 4.Remember when no-fat milk – and other foods – was suggested? Now, nutritionists recognize that it’s fat that satisfies the human body’s need to
“feel full” and energized, and they’ve gone back to saying full-fat, or low-fat, milk is best. If you don’t like cow’s milk, almond or other nut milk provides a near percentage of fat and protein. 5.Protein requirements are best fulfilled with homeraised or locally produced livestock. Beef, pork, chicken and turkey are widely available from area farms, with plenty of private fishing holes and state and county parks offering fishing if that’s more to your taste. Nuts and some beans provide a good source of protein if you don’t eat meat. 5.Sandwich to stir-fry, getting creative in the kitchen brings up your game. Even a novice gardener can grow basil or oregano in a pot on the kitchen counter – or farmers markets are open through
November. Adding spices, or unexpected items like roasted beets on a ham-and-cheese, or snipped basil and shaved fresh parmesean on tomato soup – give your meals dimension. 6 It hasn’t been hard this year, but eating at home is the only way to truly control your diet. Even a “high quality” restaurant or prepared food market is using preservatives, additives and synthetics to guarantee uniformity. Grow your own or buy local. Cook it yourself. It’s easy. 7. Keep it interesting by picking out new foods you’ve never tried before; a great rule of thumb is to buy one item at the store that you’ve never tried before. The internet is your friend – search “recipe, ____” for thousands of hits. 8.Satisfy, don’t deny, your sweet tooth. Try naturally sweet fruit – whole is best, of course, but sliced and made into a parfait with layers of whole-milk yogurt (homemade is best, few-ingredient store bought is okay) and a crumble of granola or toasted nuts on top. Add a dash of cinnamon or nutmeg if you want.
A must-have in horse country -- horse cookies
Young rider shares her tasty, molasses-laced recipe The Last for caring (even sharing) Word

I knew the minute I saw one for the first time that I’d spend my life dedicated to horses. They’re the most beautiful and majestic animals I had ever seen.
I remember the first time: I was in kindergarten, and we’d gone on a field trip to a nearby petting zoo. We were petting all the goats, sheep, cows and other animals when I saw a little pony sticking his head out of a stall at the end of the barn.
The pony stared at us with big, curious dark brown eyes.
I was so excited – I’d never seen an equine of any size in real life. Everyone else was petting the bunnies and the other animals, but I stayed with that pony the entire time.
Neither of my parents grew up riding, so getting into horses was all on me. But seeing that adorable little gray pony created an obsession. I read books about horses. I dreamed of horses – in my sleep and in my daydreams. Once I started looking, I saw horses everywhere.
Finally, I got to take riding lessons at a barn a few minutes from my house. I loved it so much. I loved the smell, I loved the sounds, I loved the feel of the horses’ and ponies’ thick fur/
Along the way, each horse I’ve met has taught me something, whether it has to do with riding skills, humility, courage or learning how to care for others.
My favorite book when I first started riding, “For Horse Crazy Girls Only,” has a great recipe for homemade horse cookies – at last, a way I could pay back my debt to the horses and ponies in my life.
In the years since, I’ve added some extra ingredients to customize my version of horse treats. I’ve gone through many trials of these cookies, and I feel like I’ve been able to perfect them.
The horses and ponies in my life seem to agree.
My favorite part of making these cookies in the reactions of the horses. Some raise their upper lips
BY OLIVIA HATCHER
Mixing and baking horse (or dog) treats provides a great way to bond with your animals, and, at the same time, gives you another way to show your appreciation for their roles in your life.

in a kind of horse smile; others bob their heads in enjoyment. Some horses get the molasses in the cookies stuck in their teeth and continue tasting their treats for hours after.
Some lick the container after the cookies are all fed.
I admit I’ve eaten plenty of these before, during
Making homemade horse treats is an easy way to share the love with all your animals. Horses adore them and so do people (they’re perfectly edible). We even taste-tested them on a cow (yes), two pigs (yes), a goat (yes) and a farm dog (yes.) The only pet that said “no” was a house cat.

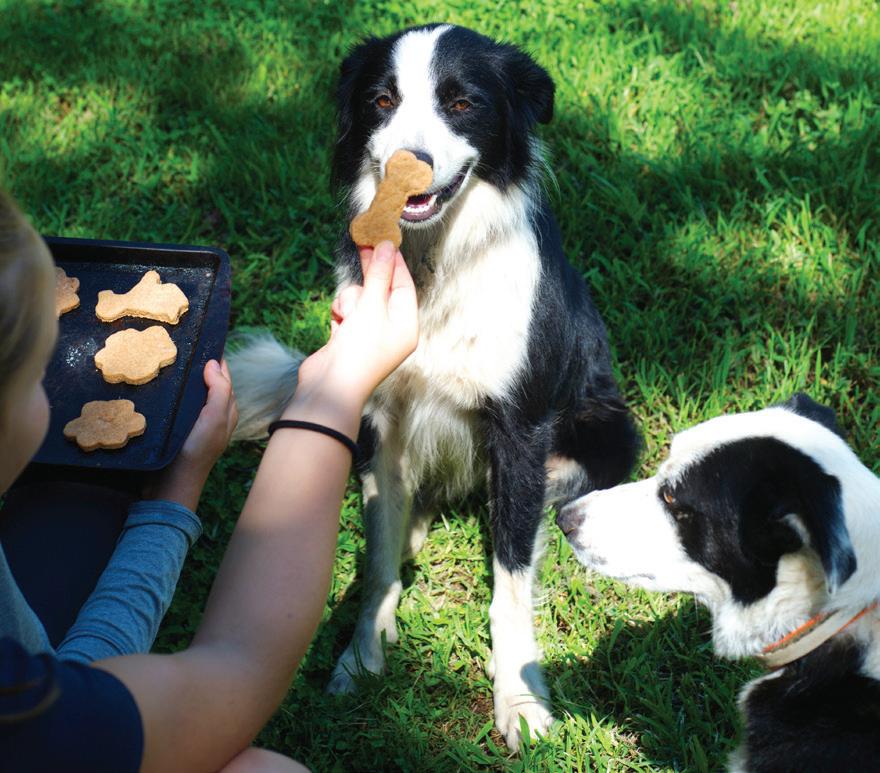
Going to the dogs with these homemade training treats
• 2/3 cup pumpkin puree (or use applesauce, mashed bananas or more peanut butter if you don't have pumpkin) • 1/4 cup peanut butter (creamy best) • 2 eggs • 2 1/2-3 cups whole wheat flour (all-purpose is fine, too)
Preheat oven to 350 degrees. Line a baking sheet wtih parchment paper or a silicone baking mat.
Mix first three ingredients with an electric mixer or by hand. Add flour little by little until the dough is no longer sticky.
Knead dough on a lightly floured surface then roll to 1/4-inch thickness.
Cut into shapes with cookie cutters or by hand, or use a knife to make squares.
Cook on baking sheet 20-25 minutes.
and after taking them to the barn, and, in reality, they’re very tasty and, actually, sort of healthy as a human snack.
Just be prepared when you to to make these – mixing almost requires using your hands, and you’ll get sticky and messy, so plan ahead.
Recipe
• 1 cup rolled oats • 1 cup flour • 1 teaspoon salt • 2 teaspoons sugar • 2 teaspoons corn oil • 1/4 cup molasses • 1 cup shredded carrots • 1 cup diced apples
Preheat oven to 350.
Mix oats, flour, salt, sugar, oil and molasses in a bowl. Stir in carrots and apples.
Add more molasses as needed to make a dough that binds together when you shape it.
Shape into golfball sized cookies.
Place on greased cookie sheet.
Cook 10-13 minutes until golden brown.
Note: You can alter this recipe many ways according to your personal horse’s personal tastes. Add raisins or other fruit if you know he likes that. You can also use horse oats instead of rolled (human) oats if it helps keep you from snacking on your horse’s treats.
6


