18 minute read
Best Practices Polishing Over Glass Aggregate
HOW TO » BY BY BOB HARRIS, RYAN KLACKING, SCOTT METZGER, CLARK BRANUM
Best Practices:
Polishing Over Glass Aggregate
A field study evaluated installation techniques, how to deal with adverse conditions, and the troubleshooting of and repair of common issues regarding the surface broadcast of glass aggregate.
Many commercial and residential owners looking to make a striking visual impact on guests often work with designers and innovative contractors alike to create an impressive moment for their home or business. A common request gaining popularity over the years has been the exposedaggregate polished concrete floor. One of the emerging trends in this segment has been the use of glass.
The American Society of Concrete
Contractors and Concrete Polishing
Council identified the need for a “best practices standard” for the surface broadcast of glass aggregate on concrete flatwork. A field study, performed in late
October 2021, was meant to evaluate: various installation techniques; how to deal with adverse conditions, and; the troubleshooting of and repair of common issues found on polished concrete projects utilizing broadcast glass aggregate. While evaluation and testing confirmed many best practice techniques, the study revealed key considerations regarding the practice.
MIX DESIGN
The main difference between a mix design specific to embedding glass into the surface, as compared to a standard mix design used to produce a power troweled Class 7 or 9 industrial floor slab, is the consideration of Alkali-Silica Reactivity (ASR). When using crushed glass, ultimately polishing the surface and when exposed to moisture, a reaction can occur forming a gel that is expansive and thereby potentially creating pop-outs.
Unfortunately, there is no way of predicting how fast or slow ASR will occur. The industry has had good success using pozzolanic materials such as Type F fly ash, metakaolin, and granulated blast furnace slag to help mitigate this reaction in several ways. The amount of a pozzolanic material is often debated and to get the true benefits of mitigating ASR some industry experts have claimed less than 20% pozzolanic replacement will provide little if any benefit. In one honed exterior glass project in 2018, a cement replacement of 50% granulated blast furnace slag was specified considering the amount of moisture the surface was subject to. After four years, there were no visible signs of ASR.
Other considerations include having the proper proportions of aggregate and cementitious material and creating enough paste to fully encapsulate the glass aggregate. A mix design that does not have sufficient fines and paste can be difficult to fully embed glass aggregate into. With regard to the slump, it is crucial to have a workable mix, considering you are adding a very time-consuming step with the broadcasting of the glass aggregate.
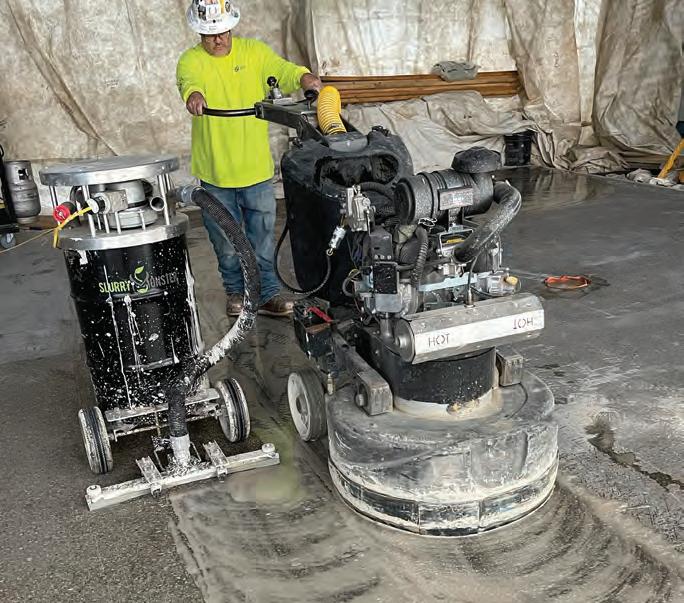
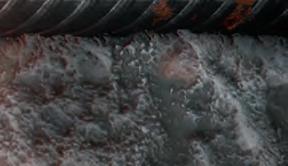
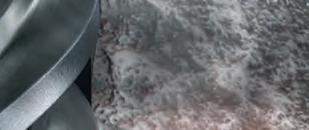
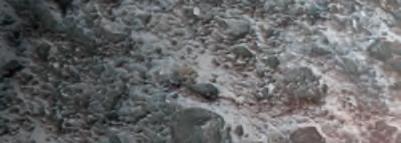
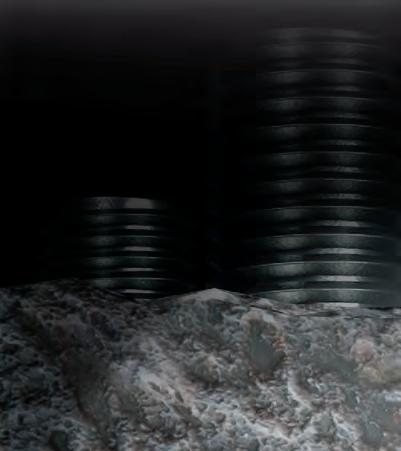
Multiple passes cutting wet with 16 grit double segment metal bond tooling to get down to glass aggregate.
Courtesy of Syncon, Inc.
26 CONCRETE CONTRACTOR DECEMBER 2022
















HOW TO CONTINUED


There are four main considerations when placing and finishing a glass aggregate slab.
1. Placing of the concrete and getting the slab ready for the application of the glass.
2. Applying the glass aggregate.
3. Bull floating the glass aggregate completely encapsulating the glass.
4. Finishing the slab via panning, combo and finishing blades and saw cutting.

FF/FL TOLERANCES
The industry is still evolving as to the specifics of what would be considered an acceptable FF/FL with the addition of glass aggregate that will ultimately be ground, honed, and polished. Depending on the size of the glass being broadcast (which can range from 1/16 to 3/4-in. in size), it is crucial to have a flat floor. If the slab has low FF numbers, the floor may end up with a wavy surface. It would also be easy to grind through the glass, especially on the smaller-sized glass aggregate.
On a traditional industrial interior power troweled slab, a laser screed is often used to obtain the specified floor flatness and levelness. Most interior polished concrete surfaces specify an FF50 and an FL30 to obtain a uniform class A or B finish, and we have seen specified polished glass projects use these same measurables.
Plan high-profile projects and tackle manageable-sized pours that you can hand screed off of each side of the form, assuring the slab is flat and also making it easier for consistent glass distribution.
FINISHING
Many of the same finishing steps are used as a traditional floor slab such as screeding, jitterbug rolling, bull floating, panning, and ultimately finishing.
After strike-off, some contractors prefer jitterbug rolling the concrete prior to bull-floating, with the logic being pushing larger aggregate down while bringing the fines or paste to the surface will make it easier to fully encapsulate glass aggregate. On a commercial project, this can be very challenging considering the workers broadcasting glass have to be working simultaneously with the laser screed and the person bull-floating, while at the same time not interrupting the slab placement.
If site conditions permit, we have successfully used equipment staged outside of the pour area that extended out over the surface and applying the glass aggregate while working out of a bucket. Once the appropriate amount of glass has been applied to the surface, it needs to be floated in. Contractors can use a vibratory bull float for more expeditious embedment of the glass.
Kneeboards or premature walking on the slab surface should be AVOIDED, as the glass can become depressed and the void filled with paste. Once ground, you can see the outline of the depressed area in the finished polished surface.
If panning the surface, timing is crucial. Consider that if you pan too early you can embed the glass deeper, bringing more paste to the surface and making it difficult to grind down to the glass. If panning too late, you will not have enough paste to encapsulate the aggregate and you can expect to pull out some of the glass once ground.
Using combo blades, a tightly troweled surface is desirable as the final finish.
Like any slab, timing is crucial for sawing contraction joints. But, it is especially critical here, considering the glass aggregate is close to the surface and if saw cutting occurs too soon, you can expect some raveling. Like any
Courtesy of Syncon, Inc.
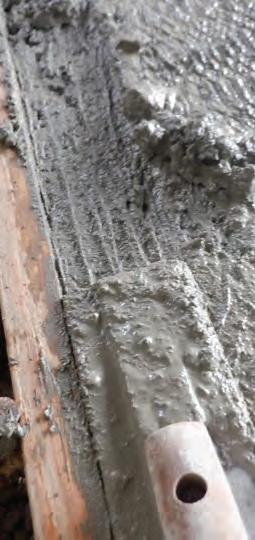
Various broadcast techniques were used with hand seeding and applying with shovel with favorable results.
Courtesy of Syncon, Inc.
28 CONCRETE CONTRACTOR DECEMBER 2022
HOW TO CONTINUED
slab, curing is an important part of a successful glass aggregate installation. Whether using a chemical cure or, wet blanket curing, the concerns that would normally apply to traditional floor slabs are true here as well. If using a chemical cure, uniform application is important. If curing with blankets, ensure they are lying flat on the surface to eliminate differential curing.
BROADCASTING GLASS AGGREGATE
Uniform glass distribution is important to avoid “stacking” the glass. If the paste does not completely encapsulate the glass aggregate, it can easily become dislodged during the grinding phase of the process and can leave voids that will require patching. Although conveyer belt systems are typically used for dry shake hardeners and trap rock applications, it is difficult to obtain a uniform application and not stack the glass using a conveyer with this type of system. For this reason, broadcasting by hand or using a shovel are the most common ways to apply glass. Note that inconsistent broadcasting will likely not place glass in all areas of the floor and may leave blank spots.
Since there are many effects that can be achieved with a light, medium, or heavy glass broadcast, perform a test mockup, not only to dial in technique but to make sure you get a sign-off from the client on the final appearance. Also, keep a record of how many pounds of glass was used on the given square footage of the mockup so you can calculate how many pounds of glass per square foot will be required for the actual project. This mockup will then become the benchmark for the rest of the project and can be used for comparison purposes.
When applying a slab adjacent to a previously installed slab, precautions need to be taken to slightly recess that day’s pour slightly, as volume change of the concrete will occur when glass aggregate is added. The amount of glass will
Courtesy of Structural Services, Inc.
NOT T ALL L TRENCH H DRAINS S ARE E CREATED D EQUALLY PRO-PLUS®
Trench Drain System

When comparing PRO-PLUS® to polymer concrete its strength, weight and thermal expansion are unmatched.
PRO-PLUS® Strength 1.5 times Stronger 35% greater Compressive Strength 80% greater Flexural Strength 78% greater Tensile Strength P PRO-PLUS® Weight 70% Lighter P PRO-PLUS® Thermal l Expansion 1.7 times less
L Labor-Saving g SMC/GRP P Channels s made e from m glass-fiber r reinforced d composite. .
800.36.JOSAM | www.josam.com Lightweight Extremely Strong Shatterproof Easy to handle and install Requires less manpower
Visit Booth #S12018
30 CONCRETE CONTRACTOR DECEMBER 2022
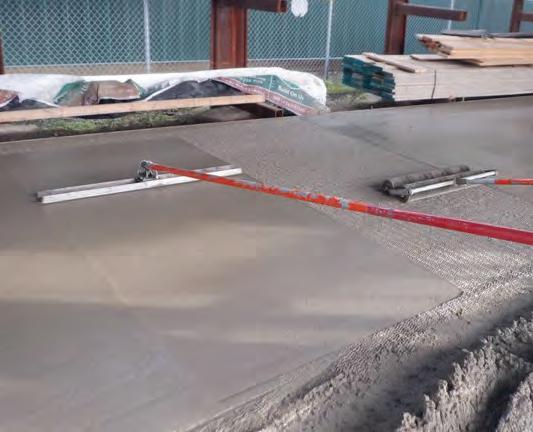
determine how far to recess the slab. In one instance, a contractor screeded the concrete flush with the existing slab surfaces and then applied 1 lb./ft.2 of glass. The resulting elevation difference of the glass aggregate slab was nearly 1/2-in. higher than the existing slabs. When the slab was ground flush, a high percentage of the glass was ground out.
GRINDING, HONING & POLISHING
All of the previously discussed considerations affect how much grinding will be required to get uniform glass exposure, as well as how the slab was cured and for how long. If a slab finishing process started prematurely—embedding the glass deeper—and the concrete has cured for an extended period, more aggressive grinding will be required. A lower grit metal bonded diamond tool would be required to start to cut through the paste and reach the glass.
Usually, wet grinding is the preferred method for deeper grinding, as the water keeps the diamond tooling cool for more productive cutting, and the slurry acts as a lubricant, resulting in less aggregate pullout. It is important not to shatter the glass during the grinding and polishing process. To reduce damage to the glass, it is recommended to use an 8 or 10-segment metal bond tool that has beveled edges during and after the glass exposure until you have reached a hybrid or resinbonded tooling sequence. When edging, the same principles must be adopted.
When performing a mockup, it is highly recommended to complete the mock-up in a true mock-up sample that will be removed and replaced, or in an inconspicuous area selected by the owner.
When grinding to expose glass, it is important to run a pass /cut in equal overlapping passes across the floor. Review and inspect the results after each pass to see if an adequate exposure has been achieved. It is extremely important that the operator does not grind through the glass—this will result in the need timely and costly repairs.
On traditional polished concrete, generally concrete cures a minimum of 21 days prior to the polishing process to prevent aggregate pullout and to have sufficient moisture cure out of the slab to avoid compromising the joint filler’s adhesion. We have heard scenarios of contractors performing the first grinding step within a week to get down to the tips of the glass, however, you can expect the joints to ravel since, and this is too
Above, roller bug and channel/bull floating should immediately follow laser screed. Left, Concrete being floated slightly lower than form to account for the volume change from broadcast aggregates. Courtesy of Structural Services, Inc.


CONCRETE CONTRACTOR DECEMBER 2022
www.ForConstructionPros.com/Concrete 31
HOW TO CONTINUED
soon for the application of the joint filler.
Expect sand and in some cases glass aggregate pullout because of the aggressive nature of course grinding. Once the appropriate amount of glass has been exposed and the surface is cleaned and dry, apply a grout coat. Some floors may need multiple applications of grout coat to obtain a void-free surface. Cementitious or polymer resin grout coats can be used.
But cementitious grout coats require longer dry times prior to the next grinding steps, while polymer resin systems usually can be ground off in a few hours depending on temperatures and humidity levels. In either case, it is important to choose a grouting color close to the color of the concrete matrix or sand particles to help mask the voids. Use the representative sample mockup to help determine color selection.
Once there is a void-free surface and uniform glass has been exposed, many of the same steps used on traditional polished concrete can be used, including the application of densifiers and ultimately polishing up to the desired sheen level.
REPAIR CONSIDERATIONS
For best results, try and obtain the ingredients that were used in the original mix design of the concrete consisting of the sand, cement and whatever pozzolanic material was used. Break the weights down from pounds to grams or ounces to make smaller-sized batches.
If you cannot obtain the ready-mix ingredients, there are bagged products you can use to formulate your own mix design. When mixing your powdered ingredients into a resinous material, typically the resin will darken the ingredients. White cement or white pigment can be used to lighten up the mix to the desired color. Expect to have to make several samples to obtain a close color match.
A true representation of the repair is after the repair has been ground, densified, and polished. The color will likely change during each of these steps.
Depending on the depth and width of the repair, it is important to embed the same glass that was originally used into the repair. If the repair is small, it may require crushing the glass into smaller pieces to be able to embed it into the repair material. On larger repairs, glass can be mixed into the repair material and then poured into the recessed area. On smaller repairs, it is better to hand-seed the glass, making sure to get as much glass embedded as possible.
Once the repair formulation has been completed and prior to the application, the next consideration is to prepare the area properly. You must have squared edges with vertical walls. You cannot feather edge glass. An angle grinder can be used to create a cut but some installers prefer to use a chisel or chipping hammer to fracture the edges, claiming that a raveled edge hides the repair better.
The next step is to use a Nyalox wheel (nylon bristles impregnated with abrasives) to thoroughly clean any residual dust from the repair area followed by vacuuming considering. The use of wire brushes or wire wheels is not recommended as they tend to leave a residual film, potentially compromising the bond of the repair. Once the repair material has had sufficient cure time, a handheld grinder should be used to grind the repair down to the surface prior to passing over the area with walk-behind or ride-on polishing equipment.
SEALING POLISHED GLASS
The type of sealer used is generally a function of the type of traffic the floor will be subject to and the amount of maintenance the consumer is willing to agree on. Generally, topical guards will darken the surface, bringing out more color. Also, when burnished, guards will dramatically increase the overall gloss.
Penetrating sealers are less topical than guards and do not darken the surface to the extent guards do. In some scenarios a combination of the two types


32 CONCRETE CONTRACTOR DECEMBER 2022
of sealers can simultaneously be used, with the first application being guard followed by the second application of penetrating sealer. The benefit of using both sealers is enhanced darkening of the polished surface from the guard and increased stain resistance resulting from a solvent-based penetrating sealer.
In all three scenarios, check with the sealer manufacturer for the best daily, monthly, and yearly maintenance methods to preserve the sealers.
MAINTENANCE
Polished glass aggregate projects are no different than traditional polished concrete in that they require some form of maintenance. Having door mats both inside and outside the facility to collect particulate is a starting consideration, as dust or abrasives on a polished surface can negatively impact the sheen on the floor. The type of sealer used will be the first consideration of how the floor should be maintained.
It is important to create a maintenance program to ensure that proper refinement and stain protection remains in tack. The type of cleaning solution used is crucial to preserve the polished surface as well, as floor cleaners that are too acidic or too high in alkalinity can have adverse effects and can quickly degloss a floor.
Be cautious in introducing standard diamond-impregnated pads used for high-speed burnishing in daily maintenance due to the ratio of glass to cement paste exposure. Using flexible abrasives such as diamond-impregnated pads can cause orange peel due to the hardness variation between glass and cement paste, and the paste can become slightly lower than the glass. Typically, incorporating extremely high grit diamond abrasives (above 10,000 grit) into a weekly maintenance program, combined with auto scrubbing with an appropriate cleaning pad, can reduce orange peel, as these methods are truly polishing and not cutting.
It is important to ensure the floor is protected from stains throughout its life cycle, and equally important to schedule the reapplication of stain protection treatments as often as required based on the traffic and use of the facility.
There are no shortcuts for work done well when it comes to the surface broadcast of glass aggregate on concrete flatwork. With these best practices, contractors should greatly increase the chance of success in their next glass-polished concrete job.
Bob Harris is the DCI President and Founder, Senior Director of Decorative Concrete Consulting, and a Principal for the SSI Team. Scott Metzger is the owner of Metzger/ McGuire, an industrial floor joint protection and repair products firm. Ryan Klacking is the President of Syncon Inc. Clark Branum is the decorative and polished concrete specialist for the American Society of Concrete Contractors.
For more information visit https://CONC.me/5r4ucu


CONCRETE CONTRACTOR DECEMBER 2022
MORE JOBS. MORE MILES. MORE DEADLINES MET.



Every job comes with a unique set of circumstances. But the two things all jobs have in common are concrete and deadlines. Which is why we’ve designed our drills to be the fastest, most accurate, operator-friendly machines on the market, keeping your crew safe and on pace for more jobs. No matter the deadline.
©2022 E-Z Drill, Inc.
Designed to Beat Deadlines. ezdrill.com
www.ForConstructionPros.com/Concrete 33


